In what proportions should plaster be diluted for pouring molds?
Gypsum is often used to create various crafts. And in this case, it is usually poured into molds, where the solution hardens and takes on the desired shape. When talking about a mixture of mortar for a similar fill, we can call the proportions of gypsum and water 7:10. The solution of this mixture is quite liquid and penetrates perfectly into all places of the form, which is what we need. But with all this, the finished product can turn out to be very brittle, so it is best to add a couple of spoons of PVA glue to the resulting solution before pouring.
If we are talking about gypsum for topiary, then the solution mixture should be similar to thick sour cream, because the watery solution will take longer to harden. By the way, it is best to use alabaster to make such a solution, because it hardens especially quickly.
Kneading process
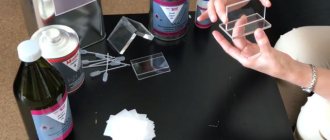
So, how to dilute plaster for crafts from a multi-colored solution? The process is actually quite simple. To begin with, pour the gouache and the amount of water required to prepare the solution into the jar. To ensure that the paint dissolves completely, it is recommended to close the jar with a lid and shake a little.
The colored water should be poured into the container where the solution will be prepared. Here, observing all proportions, it is necessary to gradually add gypsum. Pour the powder into the liquid in a thin stream, constantly stirring the components. This will allow you to achieve a uniform consistency of the solution. The mixture should resemble thick sour cream. The solution should be mixed thoroughly during preparation so that there are no lumps or air bubbles. Otherwise, holes will form in the finished product.
Read also: Intersectional furniture tie, how to fasten it
The correct ratio of gypsum and water is the key to success
If we want to get a strong gypsum solution, then it is best to use a ratio of two parts powder to one part water. In general, in the vast majority of cases, gypsum dough is required to be softer. And in order to get an average gypsum solution, one and a half kilograms of powder will require a liter of water. Often the work requires something thinner, and in this case a kilogram of gypsum per liter of water will be a good option. By the way, when preparing honey gypsum , water and powder are taken in approximately equal quantities.
life hacks. How to make plaster castings. Gypsum G16.
Review|Which plaster is better
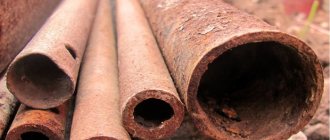
Gypsum and alabaster powder - what are the differences?
Often, novice builders are faced with a situation when a store consultant asks to clarify what exactly is required for the work - alabaster or gypsum powder. Many people believe that both of these terms have the same meaning, although in fact this is not the case. There are several factors in which both of these materials differ from each other.
Firstly, alabaster is one of the types of construction gypsum powder. The first can be used exclusively in construction, while the second has found application in medicine.
The second difference is that the alabaster “dough” is harder than the gypsum mixture. Therefore, the first material is often not used where the second is used.
The applied and dried gypsum mixture is much safer for humans. It does not emit vapors that alabaster can produce. In addition, gypsum coatings are less likely to develop fungus.
If you have started renovations in your home and decided to do it yourself, then you will not be able to do without such an important building material as alabaster. What it is, for what purposes it is used, its advantages and disadvantages, as well as recommendations for preparing a solution based on alabaster - we will tell you about this today.
Some rules for diluting gypsum mortar
First, we will need containers, and it is best to take a disposable one. The reason is ordinary - in the case of reusable installation, when washing such containers, we risk clogging the drain pipes. Of course, the container must be clean. Gypsum should be poured into water sparingly. In all this, it is best with a stainless steel spatula, or something made from hard wood. As for water, it can be tap water. Try not to stir the solution for too long, because in the end the finished product or layer of plaster may turn out weak.
Regarding mixing, it is important to follow a certain technique. The main thing is to prevent the formation of lumps. To do this, you need to moderately distribute the gypsum powder over the surface of the water, then wait a couple of minutes until the powder is saturated with the liquid. This is followed by a period of intensive stirring for 2-3 minutes. The goal is to make the solution very homogeneous and also to remove most of the air bubbles from it.
Application of a protective composition
Even before varnishing or painting the stone, you need to impregnate it with a special hydrophobic agent. It is required to reduce hygroscopicity, prevent moisture saturation, and reduce the risk of mold growth. Stores sell ready-made liquid formulations or concentrates that you need to dilute with your own hands. The following are considered good impregnations for decorative stone:
- "Optimist S405"
- White Hill,
- "Tiprom" and others.
Application of the solution does not lead to the appearance of a film that could interfere with the vapor permeability of the surface. The product penetrates 10–15 mm into the plaster, which prevents its damage when applying paint. It is usually recommended to apply 2-3 layers of protective agent one after another, without waiting for the previous one to dry completely. The easiest way to work is with a spray gun, but you can use a regular roller.
How to dilute plaster for crafts?
Often, those who want to take up a similar hobby do not know how to mix plaster for crafts and the proportions that must be observed. Let's look at some tips
An easier way is to simply dilute gypsum with water in a ratio of 7:10. Such a solution will allow you to make crafts that are easy to process. But such products will not be strong enough and will simply break. Therefore, to ensure greater strength, 2 tablespoons of PVA glue should be added to the purchased solution.
Tip: when making a solution, gypsum should be added to water, and not the other way around. This sequence eliminates the occurrence, and, consequently, the inhalation of gypsum dust.
The second method of creating gypsum mortar is more difficult, but makes it possible to produce more durable products that will not lose their original appearance over time. When using this method, gypsum is diluted with water and slaked lime in proportions of 6: 10: 1, respectively.
How to dilute plaster and later make beautiful crafts from it. Photo
How to calculate the amount of decorative stone on the walls?
If you have to buy a ready-made stone, it is important to calculate the required amount of material in advance - this will help to avoid unnecessary expenses. For any group of elements, you should add 5–10% for breakage, incorrect cutting, and other flaws in the work. Most craftsmen lay stone without leaving seams. When cladding walls, taking into account the gaps, you don’t have to make an allowance for errors.
Calculation of the amount of decorative and artificial stone for cladding an arch in a room
Order of counting elements:
- Flat parts. You should multiply the length of the wall by the width to get its area. Next, in the same way, calculate the area of all openings (windows, doors, niches, arches) and subtract them from the total, because they are not subject to cladding.
- External corner details. The range of most companies includes special elements made of decorative stone. They are used to decorate only the outer corners of windows, doors, and niches. Having measured all the lengths of the angles, they need to be added together to obtain a number in linear meters.
- Internal corner details. For arrangement you will have to cut flat stone. It is necessary to calculate the length of the internal corners in linear meters, multiply it by the overlap coefficient (0.25). The result will be the area covered by the wall with corner elements in square meters (it is already included in the main one and is calculated for reference).
Gypsum and alabaster: similarities and differences, areas of application
Gypsum and alabaster are varieties of the same mineral and have a general chemical formula (CaSO₄·2H₂O). This natural mineral belongs to the group of sedimentary rocks. The difference lies in the arrangement of crystals, with the help of which gypsum has a fibrous structure, and alabaster has a grainy structure. Simply put, gypsum powder has a finer grind than alabaster powder, which is why its scope of application is wider.
Everyone saw the snow-white fixing bandages that are applied for fractures. They contain gypsum. Dental technicians also cannot do without this material: they need it to cast models of jaws from impressions. For these purposes, both ordinary honey gypsum and durable α-gypsum or supergypsum are used. This variety is obtained by calcining gypsum powder in an airless environment. Supergypsum contains special additives, allows you to make stone-hard, clear castings, and for this it is valued by dental technicians and jewelers.
According to the degree of grinding, this material is divided into three groups:
- hard – I;
- medium – II;
- narrow – III.
Another parameter for assessing gypsum is strength. Different brands may have different compressive strengths, which are indicated by a number (G-2, G-13 or G-25). There are 12 such numbers in total. The price of the material depends on its strength, degree of cleaning, and the presence of special additives.
Construction gypsum for plaster or putty grade G-5 costs 12 rubles/kg, and the cost of dental or jewelry can reach 500 rubles/kg. Sculptural plaster for creativity occupies a middle position between these two types and will cost the buyer approximately 110 rubles/kg.
For topiary
Topiary is the name given to artificial potted trees made using various methods. Instead of soil, plaster is poured into the pot, in which the trunk or branches are fixed. How to dilute plaster for a topiary base? There are two ways to mix gypsum mortar for topiary:
So what is alabaster?
This is really a “subspecies” of gypsum.
Like building gypsum, it is obtained from a natural mineral - gypsum stone, both of them are calcium sulfate, only the first is dihydrous (CaSO4•2H2O), and alabaster is semi-hydrous (CaSO4•0.5H2O). The mineral is crushed and then fired at a temperature of about 180C.The grind of alabaster is finer than that of building gypsum, and therefore this material has less ductility, but greater hardness.
Also, its unique feature is its drying time - alabaster mortar sets on average in 5 minutes, that is, much faster than other building mixtures.
These properties narrow the range of applications of alabaster to construction and finishing works, while gypsum can be used in many industries, including medicine, jewelry, casting, art, etc.
Preparing for work
When working with alabaster, half of the success depends on the quality of preparation, and specifically on the selection of containers and tools. To make the process easier, consider the following principles.
READ The best way to insulate a foam block house from the outside
It is convenient to seal small portions of AlebAstra in nylon buckets or small rubber containers
Often, builders use halves of ordinary children's balls of suitable diameter.
A spatula is optimal for mixing “small doses” of alabaster consistency.
line with a solid piece of cellophane, dense and without holes, pin the “tails” to the edges of the container so that the cellophane does not move while stirring; After use, the film is simply removed from the bucket and thrown away.
It is convenient to mix the solution with a construction mixer, or, if it is not available, with a drill with an attachment.
How long does it take for products made of plaster and alabaster to dry, why do they crumble?
Gypsum and alabaster are fast-hardening materials. Hardening begins soon after the powder comes into contact with water. This is not very comfortable because it greatly limits the time frame for work. Depending on the purpose, you can choose a brand with a certain hardening speed.
According to the setting time, gypsum can be divided into three groups:
- quick-setting (the process begins at 2 minutes and ends at 15 minutes);
- medium setting (from 6 to 30 minutes);
- slow-setting (more than 20 minutes).
Regardless of the type of material, three factors influence the speed of its hardening:
- water temperature;
- kneading technique;
- presence of additives.
If during the work you need to extend the time during which the mixed solution will remain plastic, you can add washing powder at the rate of 1 tablespoon per 1.5 kg of dry plaster. Another available option is Bustilat wallpaper glue, which is added during mixing.
The hardening time is also influenced by the speed and intensity of the kneading: the more actively and longer you stir the gypsum slurry, the faster it will set. A balanced option, in which plasticity is better preserved, is to quickly stir the powder with water until the lumps completely disappear. Those who work with gypsum say that when mixed by hand, it hardens more slowly than when mixed with a construction mixer.
The development of mixing also affects strength. In order for the purchased casting to crumble less, it is not recommended to stir the solution very actively. First, the powder is poured in a thick, even layer on the surface of the water, allowed to absorb the water, then gently mixed with a spatula in several movements until the lumps disappear.
Thick filling in a pot
Thick gypsum fill is perfect for large, wide or shallow containers and is appropriate if you need to continue working on the tree of happiness as quickly as possible: the solution hardens in 3-4 hours.
Pour dry gypsum into the pot, slightly below the required level. Slowly add warm water, knead the solution until a thick, creamy mass is obtained. We insert the topiary trunk in a suitable position. It is very important not to overdo it with water: in a watery fill the trunk will collapse and the drying time will increase.
Carefully how to fix topiary in a pot: secrets of filling and fixing without alebAstra - with photos and video master classes!
We would like to paint the façade of the house with relief bas-reliefs. How to properly pour gypsum into relief forms so that there are no voids?
Casting different figures from plaster is actually much easier than it might seem. If you get the hang of it, it will be the most mundane process for you. After you have obtained or cast a mold for plaster without the help of others, you have learned how to dilute plaster in the required proportions. The following must be emphasized:
- It is not necessary to lubricate the silicone mold for plaster, because, in theory, it should not stick to it. To be on the safe side, it is naturally better to lubricate the mold with a special release agent. If there is no special lubricant, you can use ordinary vegetable oil, the product is the most affordable. Take a brush and apply a thin layer (decide for yourself whether this is necessary for you or not),
- It is necessary to pour the plaster into the mold slowly to avoid creating bubbles. If the mold is very large, to speed up the procedure, gypsum can be poured onto some kind of board, flowing down it should not create bubbles (naturally, you need to get used to it),
- pour only part of the plaster, after which you need to go over the entire form with a brush, as if smearing the plaster. In this way, we seem to be removing possible bubbles on the bottom of the form (and therefore on the front part of the future molded element),
- After the bubbles have been removed with a brush, the form must be subjected to vibrations, in other words, shake the form. In factories and people who do this work more skillfully, there are special machines that vibrate when turned on. If you wish, such a machine can be made without the help of others. Then fill in the remaining plaster.
Read also: What is a granny wrench for?
All the steps listed above must be done quickly enough so that the plaster does not have time to set, especially if you prepared a thick composition.
If the stucco elements are of enormous size, they must be additionally reinforced with mesh and then covered with water-repellent compounds so that in humid weather the gypsum does not begin to crumble over time.
I advise you to visually see the function of pouring plaster into silicone molds:
Not everyone knows how to dilute plaster for beadwork or for the production of small sculptures. The development of making the solution is quite ordinary. The main thing is to know in what ratio the components are mixed. It should be noted that gypsum is the main material for the production of crafts.
Using plaster varnish
Standard plaster products are grayish or white, and painting them or tinting them with a colored varnish will help give the wall the desired look. With its help, you can design the surface in an original way and stylize it in accordance with the chosen direction in the interior. Varnishing helps increase moisture resistance, because gypsum products deteriorate when in contact with moisture. After varnishing in several layers, the decorative stone will be suitable even for finishing wet rooms. Also, applying varnish reduces the susceptibility of the tiles to impact.
Varnish for gypsum decorative stone: types
There are varnishes of different types, compositions, with different characteristics and properties on sale.
Shellac varnish
This type is usually used in decoupage, but it is often used in finishing work. Shellac is alcohol-based, so it works well with plaster. It can be applied as a stand-alone coating or over any paint. Shellac creates a thin polishing layer that looks stylish and very attractive.
The composition can be transparent and colored. There are even special varnishes with an aging effect that are used to give the base a vintage look. If you combine the product with rosin in a 1:1 ratio, a protective film will be created on the surface of the plaster, eliminating the appearance of dirt and giving the wall a marble look.
Acrylic varnishes
Acrylic-based varnishes perform a decorative and protective function. They are moisture resistant, do not deteriorate from household chemicals, ultraviolet radiation, temperature changes, dry quickly, and do not have a pungent odor. When thickening, acrylic varnish can simply be diluted with water.
In appearance, acrylic coatings can be matte, semi-matte, or glossy. Matte ones help give the stone the appearance of a natural, rough material. Semi-matte varnishes work in a similar way, only their transparent varieties may leave a slight light coating after drying. Glossy products shine and lead to glare, which must be taken into account when planning the decor in the room.
Oil varnishes
Oil varnishes contain artificial resins and plant extracts. After application to the gypsum stone, a thin film is formed, protecting the material from any external factors and extending its service life. Oil-based varnishes can be transparent or colored, glossy or matte. After this product has dried, the surface of the decorative stone will look a little darker than initially.
Yacht varnishes
The most durable, long-lasting and reliable varnish for stone is considered to be yacht varnish. It has a high degree of water resistance, making it suitable even for handling yachts. Contains solvents, has an unpleasant odor and is more suitable for outdoor use, although after complete drying it ceases to be toxic. For maximum surface protection, yacht varnish is applied in 2 layers.
Varnishing rules
Before applying the coating, you need to make sure that all elements have dried well after priming or protective hydrophobization. The adhesive to which the decorative stone was attached must also dry out, otherwise the integrity of the cladding may be compromised.
Tips for varnishing stone:
- rough parts should be sanded before spraying varnish; fine-grain sandpaper is well suited for this purpose,
- if impregnation has been applied to the stone, you need to read the instructions for it and clarify the possibility of subsequent varnishing and compatibility with a particular varnish,
- shiny compositions reduce the effect of the naturalness of the stone, so for country styles, Provence and other trends striving for naturalness, it is better to choose matte products,
- Before varnishing, be sure to wipe off all dust from the stone,
- During work, do not wet the wall or elements - they quickly absorb moisture,
- The most convenient method of varnishing is spraying from a spray gun or airbrush.
By using your imagination, you can use decorative stone to find very interesting solutions even in a small apartment. This material looks unusual, fresh and gives the house a special flavor, fills it with warmth and comfort.
Application area of gypsum casting
Gypsum casting is used both at industrial enterprises for the production of interior decoration parts, and in designer workshops. Craftsmen cast a very wide range of plaster
- Author's interior decor elements
- Figurines and even huge sculptures, right up to models for the next metal casting
- Small scenery
- Toys
- Parts for scale models of equipment
The scope of implementation is not limited to this list. Craftsmen are inventing more and more new areas for the use of gypsum casting - wherever it is necessary to make parts with complex surfaces and relief, and the requirements for strength and wear resistance are not critically necessary.
If you find an error, please select a piece of text and press CtrlEnter.
Production of a matrix for creating molds from polyurethane or silicone, formoplast, liquid plastic
The completed model must be glued to some base in order to make a matrix from it. A good option would be to use chipboard as a stand. The finished model must be glued to the chipboard using silicone sealant. But this can only be done on the glossy side of the stand.
For gluing, silicone sealant is taken and applied to the back side of the prepared model. All edges and corners are covered well. When turning the stone over, press it firmly onto the chipboard tray. Next, use a spatula to carefully go over the joints, making sure that all air bubbles disappear. There is no need for excess air when filling with polyurethane or silicone. After covering, the workpiece should be left until completely dry. After which, it was time to build the sides for the matrix. The height of the walls should exceed the height of the glued stone. The material for this can be plastic, iron or aluminum corners. At a distance of approximately 1.5 cm from the finished model, the corners must be screwed using self-tapping screws to the chipboard around the entire perimeter.
READ Which mop is best for cleaning floors
It is important, after screwing, to carefully go through all joints and corners with silicone sealant, again double-checking the reliability and tightness of the structure. Otherwise, flowing polyurethane or silicone, which has the ability to seep into even the most compact cracks, will flow out of the matrix. To ensure that all the material dries well, it is better to leave the matrix to dry (about 12 hours). It is recommended to use silicone sealant for aquariums. Its main feature is the elimination of shrinkage or cracks that often appear after drying. A matrix treated with such a sealant will last for many years without problems.
Mixing and working with the solution
Here it is important to answer three questions: in what proportion to mix, how exactly to mix and what nuances should be taken into account when mixing?
Actually, the proportions depend on the purposes for which the solution is planned to be used. SNiP recommends the following ratios:
| Amount of dry mixture | Amount of water | |
| For mixing alabaster plaster and putty mortar | 1 kg | 0.65 l. |
| For installation and repair mortar | 1 kg | 0.5 l. |
| For liquid putty mortar | 1 kg | 1 l. |
In order not to ruin the material and get a high-quality solution, strictly adhere to the technology
.
- Remember that the mixture is added to water, but in no case vice versa
! - The powder should be poured gradually
like flour in pancake dough, andmix thoroughly
until the mass is homogeneous.
- The correct putty solution has the consistency of mousse or yogurt.
- If the solution begins to harden and you haven’t had time to use it up
or do what you plannedjust throw it away
, without trying to “reanimate” by adding water. With alabaster, the principle “it died like that” is 200% correct; the set solution is no longer suitable for anything.
- When applying the solution, keep in mind that when it dries, the material increases slightly in volume.
Tips from the experts:
- Theory and SNiPs
are, of course, good, but in practice, alas, the dry mixture can behave differently, it all depends on the brand and even the batch. Therefore, before closing the entire required volume, conduct a test with 100 grams of material. - Use cold water to mix
. - When mixing the solution, of course, you should strive for homogeneity
. However, overdoing it is also fraught: there is an opinion that mixing too long and thoroughly, especially with a mixer, disrupts the structure of alabaster, as a result of which it loses strength.
Mold making
The simplest small mold for plaster crafts is prepared as follows. A gypsum solution is poured into a small box (cardboard box) in a layer of about 1 cm. The box is needed so that the plaster does not spread. When it hardens, a model pre-lubricated with oil or petroleum jelly is placed on this layer.
Then the box with the model is filled to the middle of the model with plaster - you get the lower part of the mold. To make it easier to combine the halves of the molds later, special “locks” are made, for which the corners are cut to a shallow depth on the semi-hardened lower half of the mold. The frozen half of the mold along with the model should be thoroughly greased with oil or Vaseline. Now, finally fill the model with fresh plaster mortar approximately 2 cm above the model level.
When the form has hardened, but has not yet completely dried, the halves should be separated using a thin knife (blade). In the mold, you need to use a knife to cut out the foundry in the form of a funnel, reaching all the way to the model itself. The model is removed. The mold halves are ready.
If you take good care of the mold, you can make up to 60 castings in it. These molds are also convenient because, unlike plaster molds, they do not allow you to clean the seams on the casting, except for the side seam.
Plastering with gypsum, description of the process
Gypsum plaster is good because it can be applied in a thick layer. This allows you to eliminate even significant unevenness in walls and ceilings. To apply a thick layer (more than 2 cm), the solution must be thicker.
Before starting work, you should prepare the walls. For plaster, it is important that there are no greasy stains, traces of grease or dirt left on the walls. If metal or reinforced concrete surfaces are plastered, then it is necessary to carry out anti-corrosion treatment on them, since gypsum mortar causes corrosion of metal products. Next, all surfaces are primed.
The solution is prepared in small portions, since the time of its use is limited. Work is carried out only at positive indoor temperatures. How to plaster with plaster?
Plastering begins from the ceiling. It is advisable to apply plaster in a layer of no more than 15 mm. It is better to work with two spatulas. Using a short spatula, the solution is applied to a long spatula, and with its help the plaster is applied to the surface. The applied solution is leveled with a rule and finally smoothed with a spatula.
The walls are plastered in a similar way, but it is permissible to use a thicker layer of mortar. In addition, if the walls are crooked, it is recommended to install perforated slats-beacons on them, and then plaster them.
The slats are installed vertically on the walls using putty. The distance between adjacent slats should not exceed the length of the rule. The mortar is poured between the slats and pulled from the bottom up. Irregularities are smoothed out with a spatula.
If it is necessary to apply a second layer of gypsum plaster, then it is applied immediately after applying the first layer. If the first layer has already dried, then it must be primed before applying the second layer.
DIY silicone molds
In construction, molds are often used to produce various products and products. The most basic of them are polyurethane and silicone. gypsum into them , they are also used to make artificial stone. All this can be done with your own hands. Even if it seems that you need to have some knowledge, this is a misconception. This article will tell you in detail how to make a polyurethane mold, a mold for pouring plaster, silicone, a mold for pouring plaster, concrete. He will also teach you how to make your own matrix for producing molds from silicone or polyurethane. The most important thing is to understand how to build, according to the rules, a practical template for a matrix that is suitable for materials such as polyurethane, molded plastic and silicone.
Creation of artificial decorative stone from gypsum or concrete using polyurethane molds
Unnatural stone, at the present time, is a good, profitable business. To open your own business, with the prospect of further growth, you do not need a lot of cash investment. Unnatural stone can be easily made with your own hands using all technologies. But first, it is important to have a room with a suitable temperature so that work can be carried out year-round.
The production of unnatural stone requires good, high-quality forms, which cannot be obtained without a matrix. The manufacture of a matrix sample must be approached very responsibly, because the strength of the final product depends on it.
Some people consider the process of making artificial decorative stone at home impossible. But thanks to desire and desire, everything becomes possible. It is better materials and combine them with some additives. For example, the setting time of silicone and its fluidity can be adjusted using catalysts.
Is alabaster a different material or the same?
Because of the confusion that sometimes arises, you need to know how building gypsum differs from alabaster. Recently, even according to GOST, they were considered one material, but now it is customary to distinguish them.
Firstly, alabaster is called calcium carbonate (calcite). This is a fairly hard mineral, which is easy to process. It was from it that the masters of Ancient Egypt and Greece created their alabaster-white creations - sculptures and vessels, and medieval builders used thin plates of alabaster instead of window glass. Alabaster-onyx is used as a finishing and ornamental stone - a type of natural alabaster with a beautiful marble pattern. Now it is mined in North Africa, Mexico and the USA.
The second substance, called alabaster, is gypsum alabaster, also known as calcium diacquasulfate, that is, dihydrate β-gypsum. It is used in construction as an independent material, a binder additive and as a raw material for the production of building boards and blocks. The main difference between alabaster and building gypsum is its limited scope of use. It is not suitable for medical work and molding production.
Packaged bags of alabaster and gypsum
How to make a plaster mold for making similar products.
Today I will tell you how to make a plaster mold for making similar products. With its help, you can easily fashion a set of original buttons, beads for a necklace or various elements for jewelry. Fridge magnets work very well.
What you need to make the mold:
A model of a product sculpted from plasticine (or raw clay) on a flat platform. A piece of plastic or thick cardboard is suitable as a platform. The photo shows the finished model and the tool with which it was made.
Please note that there should be no places with negative angles on the model. The figure shows a schematic cross-section of the model. Circled in red are places that will prevent the mold from separating from the model, and during the manufacture of products they will be torn at the moment of removal from the mold.
Cups for measuring plaster and water, as well as for stirring the mixture. A spoon or stick (for example, the handle of a brush) can be used as a stirrer.
Brush. Preferably with long soft pile (pony).
Plasticine. It is quite possible to use a child's one. Although model plasticine is better - it is more elastic and stable. Instead of plasticine, you can use raw clay prepared for modeling.
So, you have made a model of a button and now the question is about making a small edition. Let's say you need 5-10 identical buttons. Let's start making a form that will help you solve this issue.
From plasticine on a substrate around the model we sculpt a side, which is called formwork. This edge will keep the liquid plaster from spreading across the table and spilling onto the floor. You should have a sealed bath. The formwork must be significantly higher than the highest point of the model so that the form is solid and has sufficient strength. The difference in height is determined by the size of the model; the more space the model occupies, the higher the side should be. For the cross in the photo, a side height of 2 cm is sufficient.
For our model, we had to take a large piece of white plastic and, using plasticine, also level the floor in the bathtub with a black backing so that there were no steps on the form. A wooden stack was used in the work, but you can do without it.
Using a measuring cup, pour into the container in which we will mix the plaster the amount of water that can fill approximately half of the bath with the mold.
We used a yogurt cup as a measurement. You need to remember the amount of water, it will come in handy in step 3.
Gypsum is diluted with water in a 1:1 ratio. Using a measuring stick, the same amount of plaster is measured as water. You can take a little more gypsum, this will have a good effect on the strength of the form. The measure must be dry so that drops of water do not get into the bulk of the plaster (otherwise you may end up with frozen lumps, which will then interfere when pouring other forms). Carefully pour the gypsum, lightly tapping the measure, into a mixing container. There is no need to rush or fuss especially, since we have time to mix the plaster well.
READ Liquid rubber in a can for waterproofing
Thoroughly mix the plaster with water for 2-3 minutes until a homogeneous mass is formed.
We take the brush in our working hand and begin to pour the plaster into the bath with the model. At the same time, using a brush, we actively disperse the plaster over the surface of the bath and the model. It is best to take a few drops of plaster with a brush and “paint” the surface of the model with them. The more actively you work with the brush, the fewer air bubbles will form on the surface of the mold.
When the level of the poured plaster is level with the upper plane of the model, you can use a brush to push more plaster onto the model and carefully “paint” its surface. And then pour in the remaining plaster.
After the bath is completely filled with plaster, it is worth once again carefully “painting” the surface of the model by dipping the brush directly into the plaster in the bath.
It is also recommended to shake the mold slightly. You can tap your fingers from below the plate. This removes air bubbles from the plaster, which can lead to the formation of cavities and large pores on the working surface of the mold.
And leave the filled form for a while. GVVS-16 gypsum hardens (sometimes they also say “stands up”) after 30 minutes. Construction mixtures may take longer to harden. You can determine the hardness of the surface by simply feeling it. Usually the form is ready for further work after it warms up - a sign of a chemical reaction of water binding. While the mold is hardening, you need to thoroughly rinse the brush of plaster, otherwise the hardened plaster will damage it.
After the form has hardened, you can remove the formwork (side). Carefully and decisively separate the side and put it in a bag for further use.
Now let's start separating the model from the form. If you plan to cast several molds, then you need to act carefully in order to save the model for further work. At this stage, it will be possible to determine how easily the finished products will be removed from the mold. If the model was made correctly and taking into account the recommendations, then the removal process will be easy (this is what happened to us, the model literally fell out of the mold itself - when the plaster hardens, it heats up and makes the plasticine pliable).
It may happen that the model separates from the substrate and gets stuck in the mold, and you planned to use it again. In this case, you can use a piece of plasticine, sticking it to the model and using it as a handle.
After removing the model, it needs to be inspected. Damage and deformation on the surface of the model indicate areas of the mold that can lead to defects in the finished product. You can correct such problematic issues at this stage (the plaster has not yet acquired its final hardness and brittleness) by smoothing the surface of the mold with light movements using a hard tool (for example, a wooden stick).
Now we will process the edges of the form so that it is convenient to work with it. It is necessary to chamfer the corners and trim the side planes. You can use a regular knife for this.
To clean the mold from gypsum residues that may fall on the work surface, harden and then spoil the product, and model plasticine residues, the mold must be washed. Carefully! The plaster is still quite soft and you can accidentally damage the mold.
After washing, the finished mold is laid out to dry. You need to dry the mold in a warm, dry place for 24 hours (it may take longer if the mold is large).
In the next master class I will tell you how to replicate products using a mold.
Benefits of alabaster
- Fast and smooth!
Thanks to the speed of setting, the surface can be leveled literally in minutes, and after an hour, and even then if taken with a reserve, it is already ready for further processing. - Alabaster solution has high adhesion and fits perfectly
on almost any prepared surface - When frozen, alabaster has good strength characteristics
and. To this day, elements of palaces and temples that are more than 5 thousand years old have been preserved, and they are in excellent condition. When dry, the material does not shrink and is resistant to cracking - Hardened alabaster absorbs noise
, therefore it can be used as an auxiliary material for sound insulation.6 hours exposure to open fire
- this is exactly how much alabaster can withstand without significant deformation. It does not burn itself and prevents the spread of flame.
- The material contains no chemical additives
, it is environmentally friendly and can be safely used in bedrooms, children's rooms, etc. - Affordable
price compared to similar dry construction mixtures.
Adhesive forms
Adhesive molds are made from gelatin or wood glue using an open or closed method. First prepare the glue. Gelatin (7 kg) is poured with warm water (0.5 l) and left for 20-30 minutes until it swells. A slab of wood glue is broken into small pieces with a hammer and soaked in water for 24 hours, changing it 2-3 times, then, adding 1.5 liters of hot water, cook in a water bath until ready. The glue maker must be tightly closed with a lid. At the end of cooking, add 300 ml of water and 500 g of technical glycerin.
The adhesive form is prepared using the open method as follows. The model is attached to a gypsum slab with a gypsum solution, and wooden edges are installed around it with a slight inclination inward. The model, plate and sides are varnished 1-2 times. When the varnish dries, apply grease and leave for 12 hours. Then the model is doused with glue (the container with it is held 10 mm above the model).
After a day, the sides are removed and the adhesive form is removed from the model. A gypsum solution is applied to the mold with a layer of no more than 3 cm - you get a casing, the top of which is made flat so that it can be placed on the table when making castings.
After an hour, the casing is removed from the mold. There will be two “locks” left on it in the form of bulges where the indentations-marks on the form were previously cut out (as in the manufacture of a plaster mold). Then the inside of the casing is varnished 2-3 times so that the mold lies tightly in it. The form itself is degreased with talc, alum or formaldehyde.
adhesive form . First, the model is prepared. A model made of marble, bone, wood, or bronze should first be covered with thick soap suds; a fragile product, for example, made of terracotta, should be wrapped in foil; a regular model should be covered with pieces of damp paper.
The prepared model is covered with a 1 cm layer of clay, its surface is well leveled, covered with stearin lubricant and markings are made in the clay to fix the casing. Then the model is filled with gypsum mortar on top - this will be the casing. After an hour, the casing can be removed and the inside should be coated with shellac varnish.
In the highest places of the casing, one hole (narrowed outward) with a diameter of 4-5 mm is drilled for a funnel, and a second with a diameter of 3-4 mm for air outlet. Then the model (without clay) is covered with a casing and glue is poured into the space between the casing and the model through a funnel (at a temperature of 55°C).
This layer of glue forms the shape. After a day, the casing is removed, and the mold is cut with a special knife (at the end of the knife blade there is a bend at an angle of 120°), a depression is formed on one side of the mold, and a bulge on the other, which protects parts of the mold from shifting when making a copy of the model itself.
In order not to spoil the mold from exposure to air and moisture, it should be tanned with a 10% solution of potassium alum (you can use a strong decoction of oak nuts or willow bark). Before casting, the model must be coated inside with lubricant.
Sources:
https://thestroika.com/other/kak-razvesti-gips-dlya-topiariya-proportsii.html https://stroy-invest52.ru/beton/formy-pod-zalivku-gipsom.html
Painting the stone
Silicone, silicate, acrylic, and latex products are used to color stone. Most of them are water based. If the paint is used for exterior use, it must be resistant to external influences. Usually they process decorative stone, into which no dye was added during manufacture.
To ensure that the paint adheres better and does not fade longer, the glued stone is first primed with protective compounds with a hydrophobic effect, which reduce water absorption by 20–25 times. To get a glossy effect, you should use a special varnish instead of paint.