When there are many types of ready-made lining made of plastic and wood on sale, does it make sense to manufacture panels yourself? The fact is that if there is a large number of inexpensive straight boards, then setting up your own production will be justified. All you need is a milling machine and cutters for the lining.
Moreover, it is not at all necessary to buy a machine; you can rent it daily along with the cutters. If you want to constantly do this kind of work, then it will be cheaper to purchase equipment.
And, do not forget that the lining is not sold from all types of wood, but if you have any high-quality boards, you can make original slats from them, which are definitely not in the store.
Making lining with a milling cutter - how to make lamellas yourself
One of the most popular types of finishing materials is lining made from natural wood, and this is understandable, because the slats have excellent sound and heat insulation, look aesthetically pleasing and are easy to maintain. But prices for this type of raw material sometimes reach unattainable heights.
What to do if you really want to please yourself and your family with a beautiful, natural finish, but at the same time try to save money. Is it possible to make lining with a router for personal use with your own hands? It is this issue that we will deal with in this article.
Ideas for using the tool
It should be noted here that independent production of finishing materials will require a lot of time, effort and money. After producing the lining from the board, it is necessary to properly dry it and treat it with protective agents.
However, you can use a cutter to change the pattern on the lining. This method is often used by designers to visually expand the space of a room - the torn asymmetry in the alternation of grooves between the lamellas of the lining is an interesting technique from an interior point of view.
It is possible to “run” already finished lining through a milling machine. But at the same time it is worth observing the dimensions of the spike and the lock. The new cutter should not change the fastening - only remove the larger stop on the front side of the trim.
Materials for making your own lining
Making the lining yourself is quite possible. In this case, the necessary materials are reduced to a minimum. If you plan to make overlapping dies, then in addition to high-quality boards, you will need to purchase a circular saw and a jointer. And in order to be able to experiment with grooves, simulating different profiles, you will need a milling table with a cutter and a set of additional attachments. It is also possible to make lining with a manual milling machine, but it should be noted that working while holding the router in your hands is more difficult than doing the same work on a milling machine.
When going to the store to purchase the minimum necessary for woodworking to make lining with a manual milling cutter or machine, it is important to find out in advance the diameter of the cutter shank. Available in 6.8 and 12 mm, as well as ½ and ¼ inch. Inch and millimeter cutters cannot be replaced with each other, despite the fact that the difference seems negligible.
According to their design features, cutters are distinguished: monolithic (all elements form one whole), prefabricated (with soldered parts), soft- and hard-alloy for various types of wood (HM and HSS, respectively).
They are also distinguished by shape, but to make lining with a manual router, you need tongue-and-groove cutters, which are supplied in a set in pairs. They are convenient because you do not have to additionally calculate the dimensions of the connections; all parameters are adjusted automatically.
If you intend to sheathe a room with a block house, then you will need specialized equipment to produce it yourself. Namely: a band sawmill, a drying chamber and a special machine. Making a block house at home is troublesome and unjustified.
Types of wood cutters
In most cases, not all cutters will be needed, but only slotted ones. But others can also be useful for applying decorative notches. When purchasing a wood cutter for making lining, you need to consider the diameter of the shank. To do this, you should find out what collets are equipped with your existing manual router or machine. The most common cutters with shank diameters are 6.8 and 12 mm.
Inch cutters and regular cutters (with shanks measured in mm) are not interchangeable. That is, they cannot be inserted into a “millimeter” collet, although it seems that the difference is only tenths of a millimeter.
According to the design features of the cutters there are:
- Monolithic - cutting edges and shank are one piece. This is the cheapest and most common type. When the working edges become dull, the cutters are thrown away.
- With replaceable cutting edges, the double-sided knives are removable and can be flipped to the other side.
- Prefabricated - cutting elements are welded (soldered) to the main rod.
- For soft woods, high-speed alloys are used, designated by the letters HM.
- If the surface being treated is hard, then carbide steels - HSS - are used.
- Slotted straight cutters - with their help you can get a rectangular groove; the working part of the cutter itself has the form of a cylinder with cutting lower edges.
- Grooved fillets are similar to straight grooved ones with a rounded working edge, resulting in the shape of the groove in the form of the letter “U”.
- Groove fillet V-shaped - the tool is used to produce various V-shaped grooves; they differ in the size of the groove and the size of the angles.
- Groove structural - after milling, the groove has the shape of the letter “T”, turned upside down. Or “dovetail” - a groove in the form of an isosceles trapezoid that tapers towards the top.
- Groove shaped - needed for creating figured carvings, working with edges; the groove resembles a funnel and other symmetrical elements.
- Edge machines - differ in that they are designed for processing ends and edges; often the design includes a bearing for working according to a template.
- Edge straight lines - needed to obtain a right angle between the upper plane of the workpiece and the end part.
- Edge molding - to obtain a semicircular edge in the form of a wave, and of different shapes (depending on which part of the cutting plane is used), double cutters may have adjustment of the gaps between the cutter blades.
- Seam edges - allow you to choose a rectangular groove, a quarter on a flat or curved workpiece. The processing depth is adjusted using the position of the router or the diameter of the thrust bearing.
- Edge conical - needed for creating various kinds of decorative chamfers, for working with edges before joining them with other products, and so on.
- Edge fillets - with their help, semicircular grooves are obtained. To ensure that there are no distortions during operation, 2 bearings are provided in the design of the tool.
- Curved edge cutters (multi-profile) - to create complex-profile side edges, the length of such cutters is longer than conventional cutters; a powerful cutter is required for normal operation.
- Edge semi-rod - needed to obtain a semicircular protrusion at the end.
- Combination cutters are used to create tenon joints between several boards, both for corner and panel structures.
Most of all, the work will require tongue-and-groove cutters for lining. It is with the help of this tool that a tongue-and-groove system is created to connect the panels during assembly. They come in a set of two pieces. And for work you no longer have to calculate the dimensions of the groove and tenon.
There are varieties of tongue-and-groove regular paired cutters and those that are designed specifically for creating lining panels. The latter are distinguished by the fact that they allow you to simultaneously grind a groove/lock and round the edges on the front side. Using ordinary cutters, you can make flat panels from boards, for example, for a garage, where decorative chamfers are not needed.
Combined frame sets are kits; the blades can be positioned on the main axis, depending on what kind of work is supposed to be done. They contain: one or more thrust bearings, a lock washer and a clamping nut.
Figurine - needed for decorative processing of edges when creating panels. Since there is a bearing, both straight and semicircular surfaces can be processed. The diameter of the working edge of such tools is quite large, so powerful electrical equipment is needed to operate.
The subtleties of working with a router at home
Having examined the technology that is used in production, we will understand the intricacies of making lining with a router at home.
At the initial stage, you need to stock up on boards planed on a circular saw and jointer (you can immediately buy ready-sawn material or make the necessary blanks yourself). All subsequent operations are performed with rigid fixation of the cutting tool and lumber.
All actions can be reduced to the following sequence:
Making lining with a hand router is not difficult if you stock up on special tools and strictly follow the suggested recommendations.
Source
Preparation of wood in production
The production of lining with a milling cutter in production is carried out in several stages:
- Sawing logs lengthwise into boards of the required thickness. All logs are previously examined and sorted. Only the best logs with the fewest defects are sent for sawing.
- Drying lumber. In this case, the raw materials are dried in autoclaves or using infrared radiation to a final moisture level of no more than 12%. At the same stage, the wood is treated with antiseptics to protect against pests and microorganisms.
- Profiling and cutting boards. After running the lumber through special machines, the lamellas acquire the required profile of the appropriate length and width.
- Sorting of finished raw materials. In this case, the panels are carefully inspected for defects and divided into four classes.
After all operations, the lumber goes on sale.
How to make a lining with your own hands
Among the finishing materials, wooden lining stands out. It is easy to install, creates a smooth surface, and has all the qualities of natural wood.
The main disadvantage of this finishing material is the high price on the building materials market. However, there are ways to make lining yourself, which not everyone knows about.
The article discusses three options for how you can make lining with your own hands, using the experience of video bloggers as an example.
Read more…
CUTTER. Even one cutter, as can be seen from (photo on the left), can give good results by simply moving the stop. So, when you have made a pass, there will be burrs at the bottom of the groove, remove them by using a sharp sanding block (below photo on the right). Keep in mind that some types of wood, such as cherry and pine, tend to burn. (photo center) shows a simple way to remove burn marks.
Grinding grooves. Sand the grooves with sandpaper wrapped around a pointed sanding block.
Removal of burns. To remove burn marks, use the same cutter to clean both sides of the groove.
CONNECTION WITH ROBBER. Although our entire clapboard board will look great, we need one more step (photo on the left) that will make the product look even better. To see what I'm talking about, take a look at the photo below. In the top photo, the panel is hidden behind the trim and doesn't appear to have a clean, crisp look. But if you look at the bottom photo, you can see how one simple step, routing the tongue along the edge of the board, will create a finished, attractive look.
Simple Connection. When the board is hidden behind the trim, deep shadows and a “fuzzy” (photo on the left) connection are created. Tongue connection. Adding shoulders to the edges of the clapboards creates clean joint lines and a more finished look (photo at right).
How to make a lining from an edged board
Master class from the YouTube channel “ Samodelkin ”.
Choosing edged boards
In a home workshop, it is not possible to make lining from every edged board. For this, as a rule, 1st or 2nd grade lumber with dimensions of 100x25x6000 mm is used. This is a standard board size that is in demand at all stages of home construction.
There are certain requirements for edged boards for lining. The lumber must have natural humidity, but not more than 16%. The boards should not have mechanical damage, signs of rot or wormholes.
The type of wood for the lining is selected depending on what will be sheathed: the outside of the house, the interior, the bathhouse. For homemade lining, inexpensive types of wood are usually used, which are often found in the retail chain:
Making lining with a milling cutter
First of all, the edged board, processed on a jointer, is planed with a thicknesser. With its help, the geometric dimensions of the future lining are formed.
The edged board can be processed in another way. For example, it is enough to go through it with a plane and then sand the surface.
Before milling, the ribs of the workpieces are planed, and the wane is removed with a sharp knife.
Since the surface of the boards is rough after the thicknesser, they have to be sanded.
For milling, a manual milling machine with a power of 2100 W is used.
The profile is milled using combined cutters included in a set of two cutters. If you use separate cutters, the work will take much longer.
The set of cutters is suitable for processing wood of all types. The set contains one large-diameter cutter, which forms a joining tenon, as well as an edging on the front part of the workpiece. A smaller diameter cutter forms the joint groove and edge on the other side of the board.
The cutter for the docking tenon is clamped in the router spindle and the milling depth is selected.
Install the parallel stop included in the router kit.
To facilitate the processing of edged material, the boards are laid on racks with the wane down. A special rail holds the board and prevents it from moving during milling.
The first cut is made using a milling cutter to create a joint tenon. This cutter is used to process all the boards one by one. The back and front sides of the treated boards have different appearances.
On the router, they change the cutter to a docking groove, and make cuts on one board that has a docking tenon.
Check the correct installation height of the cutter for the joining groove by checking the presence of a gap between the two joined linings.
If the cutter is installed incorrectly, there will be a gap after joining. It is enough to recess the cutter and the gap will disappear.
After adjusting the installation height of the cutter, all remaining boards with tenons are milled into the joint groove.
The quality of the lining made by a milling machine is assessed by the assembled panel.
Before installation, the lining is stored indoors. If you leave the material outside, it will move and the slats will be unsuitable for cladding.
The lining, made by a milling cutter, is distinguished by a reliable lock.
Making lining on a circular saw - All about timber and woodworking
You can make lining in several ways using different machines and tools. First, let's figure out what operations will have to be performed during the lining production process.
The lining is made on machines - manual processing is possible, but only in very limited quantities
General principles
We will describe the entire lining manufacturing process step by step. This will make it clearer what equipment will be needed.
First, the material is selected - this is an unedged, dried board. In order for the quality of the lining to be at the proper level, the wood moisture content should not be higher than 12-16%.
In high-quality lining, all surfaces are processed cleanly
Then blanks are cut from the board - uneven edges and wanes are cut off, the board is calibrated, aligned in size: thickness and width. Then the plate is polished. Typically, only the front surface is finished to perfection, but for improved quality, all four surfaces are processed to perfection.
In the prepared blanks, a groove and tenon are formed using cutters, and also, if necessary, a chamfer is removed and a ventilation duct (one or more) is milled on the back surface of the board. That's it, the lining is ready.
You can read about some types of lining in the article “Linden linden bathhouse lining: features, types, use”
Choosing a machine for making lining
As you can see, a lot of operations and different tools are required:
- saw blade for forming smooth edges;
- thicknesser for calibration;
- milling to form grooves and ridges.
If all this equipment is put together and configured, you will get a machine for making lining. He actually exists. This is a four sided machine. Using this equipment you can make lining (and not only) of different sections.
Four-sided machine
It is called so because of the presence of at least four spindles, which allow processing all four sides of the workpiece at once in one pass. The number of spindles is from 4 to 7.
This is a four-sided machine with a low degree of automation. This and similar equipment is produced in Russia and the CIS countries
If you have four spindles, you can make any boards, parquet, timber, lining. If there is a fifth, the possibility of additional processing of the front or back side with relief formation is added. Using such equipment, you can make eurolining and produce furniture blanks of complex shapes.
When selecting boards, you need to take into account that the thickness of the layer being removed is 4-8 mm. This means that calibrated workpieces need to be fed into the machine. Moreover, their dimensions must correspond with an accuracy of 4-8 mm to the dimensions of the lining.
Is this equipment convenient? Very. If the quality of the machine is good, all that is needed is to ensure an even feed of the workpieces. All that remains is to adjust the cutters correctly to obtain the appropriate product. And the lining too. Reconfiguration occurs most often from the control panel. By setting the cutters, we obtain any required profile.
This is a four-sided machine with full automation
Due to the high price, purchasing a four-sided machine for building one house or bathhouse is an unwise idea. It costs from 600 thousand rubles.
The cheapest models have four, the most expensive ones have seven spindles. The price also depends very much on the manufacturer.
As usual, the cheapest come from China or Korea, there is Russian-made equipment in approximately the same range, and the most expensive are European.
If you are going to make a living by making lining or other moldings, then a four-sided machine is a justified investment. If you are going to make the lining with your own hands only for finishing a house or a bathhouse, consider other options.
Universal woodworking machine
It is not for nothing that this equipment is called universal or combined. By reconfiguring and changing the tool, you can perform all the necessary operations on it: cut boards to a given size, install cutters to form a tenon and groove. If desired, you can also remove the chamfer.
Multifunctional machines will be useful for those who like to craft or who are going to earn money by processing wood, but do not yet have the funds to purchase a four-sided machine
But here’s the thing: since each new operation requires readjustment of equipment, they perform one operation with a large number of workpieces. For example, first one edge of all workpieces is cut off. Then install the block according to the required width of the lining and cut off the second edge. And also on all blanks. Afterwards, they are reconfigured again for the next parameter.
This way it takes less time. But the monotony of work during such work has a soporific effect, so you need to be careful and work carefully.
A more modest universal woodworking machine. You can also make lining with your own hands
A little about the prices of combined machines: the more operations it can do, the higher the price. For example, machines that can perform five operations - sawing, milling, planing, cutting grooves and drilling - cost from 25-35 thousand rubles.
These operations are more than enough to make lining with your own hands. There are probably cheaper options, but their quality is very questionable. In this case, look for as many reviews as possible to get an idea about the equipment.
Lining using a milling cutter
You can make lining with your own hands using only a router. It is important that your boards are calibrated. They can either be purchased or processed using appropriate equipment. Next, all that remains is to use cutters to select the tenon and groove, and, if desired, remove the edge.
Another combination of equipment with which you can make lining with your own hands: a circular saw with the ability to install cutters and a thickness planer for calibrating the workpieces. All operations can also be done by reconfiguring the machine.
Milling cutters for lining
When making lining with your own hands, it is important to choose the right wood and install cutters. It is the cutters that are responsible for shaping the geometry of the lining and how easy it will be to work with the material. When the tenon and groove match perfectly, the lining boards are connected without problems or gaps. That’s why it’s so important to choose the right cutting tool.
For the manufacture of lining there are special sets of cutters that form one or another profile. Please ensure that they are compatible with the equipment you have. They usually have a universal form, but there are exceptions.
For greater strength, carbide inserts are soldered onto the cutting edges. Cutters with such soldering are more expensive, but last many times longer. So you can not only make your own lining, but also have it made to order.
You may be interested in the article “How to line a bathhouse from the inside with clapboard and which clapboard is best to use + VIDEO”
Wood selection
The most common finishing material in our country is pine and spruce wood. They are easy to process, contain a large amount of resin, which slows down their decay, and also have the lowest price.
Depending on what equipment you have, buy either edged or unedged boards. Unedged boards are sold mainly with natural moisture content.
It will not be suitable for making lining right away: it needs to be dried to normal humidity (optimally - no more than 12-16%). That is, it needs to be stacked in a well-ventilated area.
In this condition, they should last at least six months, or better yet, a year. After which you can make blanks from them.
Do-it-yourself lining. We use a circular saw and router
Master class from the YouTube channel “ AlfFisher ”.
Prepared edged boards are passed through a thickness planer before processing with a circular saw. If there is no such machine, then it will be replaced by an electric plane, which is fixed between two bars. The distance between the bars is set according to the width of the lining.
After the slats are calibrated for thickness, the circular saw is set up. To set up a circular saw, make a template according to the following dimensions:
A cut is made with a circular saw set up according to the template, and the front part of the workpiece is marked with a red line. It is inconvenient to hold a 6-meter-long board when cutting, so they use clamps mounted to the size of the material.
A circular saw is used to cut out a ridge and groove on the workpiece.
When working with a circular saw, adjustments are constantly made using a template.
The quality of the resulting cladding material is checked based on the results of joining two blanks. On the front side, the tenon should fit completely into the groove, and on the back side of the joined slats there should be a gap of up to 1 mm.
To prevent the rail from warping when humidity changes, compensation grooves are cut. For a narrow board, one groove is enough.
Workpiece with compensation grooves.
On the front side, remove the edges at an angle.
The slats assembled into a shield have a reliable key, so the sheathed surfaces are not afraid of mechanical stress and look very attractive.
Lining using a circular saw
A situation often arises when it is not the aesthetics of the material that comes to the fore, but only its practicality, for example, it is necessary to decorate the walls or ceiling of a utility room, cellar, or workshop. For these purposes, a simple and reliable lining made with your own hands using a circular saw is perfect.
The first step is to prepare the lumber. You will need boards 15-20 mm thick and 8-10 cm wide. It is reasonable to assume that the wider the board, the less it will be needed, the faster the work will be completed. This is true, but only partly. A large width plus a primitive connection, the grooves for which can be made with a circular saw, are guaranteed to lead to warping of the board, thereby making the coating fragility.
The workpieces must be aligned in width. To do this, the side stop of the circular saw is set using a ruler and fixed. Each board is processed in turn, bringing the width to a single value.
After the planks are leveled, they are scraped. A jointer is best suited for this, but factory-made circular saws can also perform this function. Of course, you can process the board with a hand or electric planer.
Next, you need to create a groove and tenon for attaching the lining. The easiest way is to make mirror samples at opposite ends of the board. Their accuracy and symmetry is achieved by adjusting the height of the blade exit and the distance from the saw to the stop.
With a board thickness of 20 mm, the disk output should be 10 mm, the distance to the ruler should also be 10 mm. The first pass is made flat. Pressing the board against the side stop, make a groove in it half the thickness. Next, the board is placed on its edge and the operation is repeated. The same actions, but in mirror image, are performed from the other end.
As a result of the described actions, a rough version of the lining is obtained, which is easy to install and creates an attractive, flat surface.
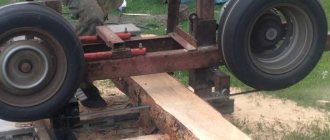
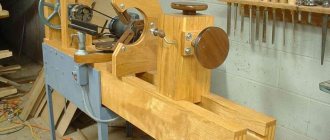
How to make lining with your own hands on a milling machine
Master class from Ivan Baev .
Milling machines of various designs are used to process wooden blanks. Many craftsmen make such machines on their own.
To make lining, you can use a homemade machine with a bed of 900x900 mm.
Before milling, the machine is prepared for work and the cutter is installed.
To create a docking groove and a docking tenon, two homemade cutters with four knives are used. They are installed one by one. The lining pattern is selected by installing cutters at different heights.
To make it convenient to process slats, use clamps for a milling machine. This clamp ensures that the workpiece is positioned on the desired side, free access of the cutting part of the cutter to the workpiece, and safe operation of the machine.
The edged board is passed through a thickness planer before milling. The calibrated rail is milled for the groove.
When all the slats have a groove, change the cutter to a tenon on the machine, and then run all the slats with the reverse side.
The lining, made on a milling machine, has a reliable lock and an attractive appearance. They are used for covering any surfaces.
Making a lining from an edged board is not very difficult. However, this will require accuracy and patience, as the work will take a lot of time.
Author: Victor Prokhorov
Using materials from YouTube channels: Samodelkin, AlfFisher, Ivan Baev
Source
Block house machine
One of the varieties of lining (by the way, in enormous demand) is a block house. The material imitates rounded logs and is widely used for external and internal decoration of premises. It makes sense to cover houses with a block house, because such lining has a solid appearance, is durable and environmentally friendly, as it is made of natural wood. The panels are characterized by a complex shape, so the elements are connected using the “groove-tenon” principle. Making them manually is difficult and is fraught with “inconsistency” of individual “logs” in the future, so it is advisable to use specialized equipment:
- band sawmill;
- drying chamber;
- lining manufacturing machine.
When processing workpieces on machines, you can perform a number of operations:
- cutting prepared raw materials to the required size;
- surface milling;
- formation of recesses (grooves and tenons).
What determines the quality of homemade lining
Working with lumber is much more difficult than working with metal. In nature, no two boards are completely identical, not to mention the different properties of soft and hard woods. Metal does not have knots, does not absorb moisture, does not have developmental defects, etc. And these indicators influence the processing technology. Industrial equipment makes it possible to greatly simplify the process due to the large mass of machines, precision adjustments, stable mechanical feed and strong pressing.
At home, all cutting parameters must be observed independently and quickly changed depending on the characteristics of the board and the capabilities of the machine. What should you keep in mind?
Pay attention to the location of the grain; never process lumber against the grain. Monitor the condition of the bearings. The slightest beating will certainly affect the roughness of the surfaces. As soon as it is discovered that the machine shaft is a little wobbly, the bearing must be urgently changed or, if possible, adjusted. Tenths of a millimeter of vibration significantly degrade the final quality. The serviceability of cutting tools is one of the important components of surface cleanliness. Saws and cutters must be sharp. If you make cutters yourself, then use only durable grades of tool steel. The geometry of all cutters must be the same. Otherwise, some of them will not work, and this is a very undesirable phenomenon. Position the cutters accurately, do not rush. It is very difficult for an inexperienced master to set all the cutters at once, do not be discouraged. Lose more time, but achieve the desired result. The lost time will be more than repaid in the future.
The more cutters, the better. If the head allows you to install four, then do so, do not work with two. Four cutters slightly increase the installation time, but then the machine works longer – they become less dull.
Always use exactly the same wedges to secure the knives. Even small differences in mass cause head vibration. Vibration not only degrades the quality of processing, but also causes rapid wear of bearings and increases the risk of injury. Observe cutting conditions for lumber
This is a very important condition. Cutting modes include the number of shaft revolutions, the number of cutting planes, feed speed and sharpening angle
We can talk about this topic for a very long time; cutting modes have a huge number of options. Beginning craftsmen need to become at least a little familiar with the theory, and in the future everything depends on the ability to learn practically and the desire to work with woodworking machines. Before feeding the board to the machine, inspect it, select the optimal cutting direction, taking into account the characteristics of the surfaces, the presence and type of knots and other defects. Place the finished lining in even stacks, do not place it vertically, and do not scatter it throughout the workshop. Cleanliness and order are evidence of the professionalism of the master.
If you have little experience, then the input/output of the board may be defective due to a slight change in the direction of movement and non-parallelism with the ruler. Keep this in mind when determining the length of the lining, make a reserve in length.
If you follow the above recommendations, there is no need to use sandpaper for final adjustment of surfaces. Remember that only amateurs make lining in such a way that it then has to be sanded by hand for a long time and tediously.
General requirements
On what machines and no matter what complexity you try to make lining, you must comply with the following requirements.
- Quality of lumber . Boards should only be edged, with the same thickness and width. Wide planes must be passed through a surface planer on at least one, and preferably on both, sides. For these purposes, it is better to have a double-sided surface planer at home, and if you don’t have one, then at least a basic jointer.
If there are no such machines, then you can work with a manual electric plane. This work is quite difficult and long, and the quality will always be much lower than when processing lumber on machines.
- Drying. You can only work with lumber that has no more than 24% relative humidity. If the indicators are higher, then dry the boards under a canopy or in a ventilated area. The larger the gap between the stacks, the faster the lumber will get rid of excess moisture. Fold them carefully, do not allow any distortions to appear, place the spacers correctly, and be sure to press the top tier with a weight.
Machine for making lining
We will tell you what machines and equipment you need to make lining with your own hands as the article progresses. The fact is that there are a large number of technologies, taking into account existing machines, it is impossible to describe everything in one article. Let's start with making the simplest lining - such work is accessible to most inexperienced craftsmen.
Milling cutters for lining and their application
In my spare time I would always like to do something useful for myself, and some spend this time decorating their house or apartment, because creativity always brings joy. One of the options is to independently produce the facing material, for which you will need cutters for lining on a manual router.
Making wooden panels yourself to cover a room with them is very interesting and exciting.
Finger cutters for making lining with a manual router
Making lining by hand
Milling cutters for a manual router for the manufacture of lining and other products. Big set
Hand cutters for wood can be divided into bearing (or edge) and bearingless. The former are used for the manufacture of lining, and the latter are used for one-time processing of any part, but they require auxiliary equipment.
Groove fillet cutters
Cutters for making lining for a manual router can have a ratio of the diameter (D) to the radius (R) of the groove on the panel: 9.5-4.8 mm, 12.7-6.35 mm, 15.8-7.9 mm and 199.5 mm. The diameter of the shank will remain 8 mm. Such cutters can be used for lining, but they are inconvenient.
CMT Company
Italian brand. The manufacturer states that Swiss steel is used, various high-tech coatings are used, and the tool is created in American, Spanish and Italian factories.
In large cities there are service centers where you can carry out professional sharpening.
But cutters for CMT lining are several times more expensive than Enkor and Bosh.
Perhaps such a tool is necessary in professional activities, but for one-time work it hardly makes sense to buy such products.
Tools for stone work
Tools for hand milling, intended for working on stone, are distinguished by the variety of their design. The choice depends not only on what kind of stone needs to be processed, but also on the nature of the upcoming technological operation. Thus, depending on the design, there are radius, profile and overrunning cutters for working on stone, as well as for performing inlay work.
Depending on the material used to make the cutting part, cutters for stone work can be:
The most effective for stone processing are cutters made using diamond chips. They can be produced by sintering such crumbs or by galvanizing them onto the working surface. More wear-resistant are tools obtained by sintering, the working part of which consists of several layers of diamond chips. The wear resistance of such cutters is explained by the fact that when grinding off the top layer of their working part, the next layer is exposed, the diamond grains of which have not yet been worn out.
Types of tools for equipping a hand router
When choosing a tool to equip your hand router with, you must first decide what tasks you are going to solve with its help. In addition, you should take into account the characteristics of the material that will be processed (wood cutters, for example, are made of a softer material than stone cutters).
Working heads of cutters can have different profiles
On the modern market, as mentioned above, there are many different cutters designed to equip hand-held power tools. If we talk about the most popular types, we should highlight:
- cutters for lining;
- cutters for panels;
- tools for performing stone work;
- spiral cutters designed for woodworking.
Figurine cutters
Using cutters for paneling (or figurine), thin planks of a certain configuration are made, which are used to frame various decorative elements. Panels are most often used for the manufacture of decorative frames, as well as for the design of furniture facades. A paneled element used exclusively for decorative purposes can be cut along the contour of the product. Using milling cutters for panels, it is possible to produce products that simultaneously perform two functions: they act as a decorative element and fix the connected elements together using the “tenon and groove” principle.
On the modern market, various cutters for infill are offered, which involve the production of such a decorative element in one or several passes. When making a panel in several passes, at each stage of the technological process, a layer of material is removed for which the tool used is designed. As a rule, in such cases, not one paneling tool is used, but a whole set of them.
Panel cutters can work in vertical and horizontal planes. Vertical cutters for infill are used to process baseboards and the edges of cornices, which involves processing to a greater depth. Horizontal cutters for infill are distinguished by a larger diameter of the cutting part. They are used to process furniture facades, shelves and door panels. Although cutters of this type can improve processing productivity, they are significantly inferior to vertical cutters in terms of cutting depth. It should be noted that almost no production can do without panel-type cutters.
What are cutters needed for?
In order to cover the walls, special boards alone will not be enough for you; in addition to them, you will need to purchase a hand router, as well as attachments for it - cutters. A milling cutter is a special attachment for a tool, having any shape, on which teeth are applied, which, when rotated, exert a mechanical effect on the object. With the help of these teeth you can cut various objects, process them, polish them, and so on.
There is a huge selection of different attachments on the modern market, the main ones are:
- end;
- edge;
- cylindrical;
- disk.
End
Wood end mills in many cases have a one-piece design; composite types are rare. Such attachments work mainly on the principle of the load exerted on the wood by the side edge. In addition to forming joints in boards, end mills can be used for end milling as well as for creating complex patterns in wood.
Edge
This type of cutter is the most popular among craftsmen; these attachments are designed to form the edge of a board. Due to the peculiarities of their structure, edge cutters can create edges of various intricacies without going deep into the wood.
Cylindrical
This type is divided into several types:
- conical - used to create carvings on wood;
- spiral - needed for making the edge of the board;
- grooved - designed to create grooves of different shapes and types.
Disk
They are the most convenient for creating and processing facing boards (lining).
Disc cutters are used for different purposes:
- for processing lining;
- for processing panels;
- for processing and polishing stone;
- for metal;
- specialized attachments for various wooden products.
Mills for manual work with lining, in turn, are divided into 3 types:
- bearingless;
- bearing;
- edge
When making the board itself, you will need bearing or edge cutters; for detailed processing, bearingless attachments are suitable, for which you will need to purchase specialized equipment.
The lining is a special board with a groove on one side and a tongue on the other. Therefore, you will need two types of cutters, the function of each of them will be intended specifically for processing the board on one side. The difference between cutters can be the diameter of the shank, the size of which determines the power required for their use.
Each disk cutter has a standard design, it consists of:
- the basis of the nozzle is the axis on which the entire main part is fixed;
- two disks are attached to the top of the axis, on which cutting knives are located;
- The discs contain a bearing.
The cutting teeth of the attachment can be sharpened by yourself 3-4 times for reuse.
This is interesting: Hammer drills: drilling concrete and metal correctly
Milling cutters suitable for making lining using a hand router
Regardless of the class of the tool, that is, professional or amateur hand tools, it uses exclusively end-face cutters. At one of its ends there is a collet (shank) with a diameter of 8 or 12 mm for rigid grip by the chuck, and at the other there is a directly profile cutter up to 50 mm wide. The manufacturing quality of the cutters themselves and the service life of the cutting tool depend primarily on the grade of cutter steel and the manufacturer. Models from well-known brands are always equipped with only durable grades of tool steel.
All cutters for sampling wood are usually divided into two main groups: edge and groove. They are sold both individually and as part of sets. Edge cutters can be easily distinguished from others by a characteristic feature - the presence of a bearing in front of the cutter. There are universal cutters - this is useful to keep in mind for similar operations - for example, in the case of making lining. They cost a little more than single models, but will allow you to save more time on production by reducing the number of passes.
Milling cutter - appearance, application, features
It is difficult to come up with a more perfect tool for wood shaping. A milling cutter is a fairly easy-to-use tool, which is a washer (with several blades of a certain shape) with a shank that is clamped into a machine chuck. The number of blades varies from 2 to 6, depending on the area of application of the tool, the material it processes, and the power of the power plant.
A standard cutter washer has 2 knives that remove material from the board. A durable shank with a diameter of 8-12 mm ensures transmission of torque to the knives. The board processing process is quite simple, but seriously penalizes for mistakes. It is quite easy to spoil a board, not only at the stage of removing the material, but also after it: improper drying, insufficient impregnation with chemicals can put an end to the finished sheet.
Edge cutters
Designed for processing the edges of the product. All edge cutters are characterized by the presence of a bearing, which during operation rolls around the edge of the part. In this case, the working (cutting) part is located above or below the bearing.
Straight edge cutters
Straight edge cutters are most in demand when working with templates, and they have an upper or lower bearing. The latter are cheaper, but when they are used, the workpiece is located between the template and the router, which does not allow processing in two passes in depth (with an upper bearing this is possible).
Techniques for working with edge cutters - video
Such cutters are characterized by a working length, a working diameter, and also a bearing diameter (it is not always equal to the working one). For most cases, it is more convenient to choose cutters in which these diameters coincide, which makes it easier to manufacture and attach the template to the workpiece.
Shaped, or molding, edge cutters
They have a great variety.
The choice of such cutters is dictated only by the desired edge profile, which is chosen based on the appearance of the product. Their size, as a rule, is determined by the height of the working part, as well as the largest diameter and radius of curvature that they make. If there are several curves in a profile, then the profile of the largest of them is usually indicated. It is extremely rare, but there are adjustable molding edge cutters. They can adjust the distance between working parts.
Disc edge cutters
They are intended for making a rebate, but unlike straight groove ones, they are based on the edge with a bearing, which is why the groove they select is more accurately located relative to the edge of the workpiece. True, they are also more expensive than straight grooved ones. Often, such cutters are made adjustable to select grooves of different depths or widths. In this case, the set includes bearings of different diameters or a stack of thin cutters on an axis, so that the height is changed by disassembling the cutter and removing excess disks.
How to choose the right cutter. Tips for beginner millers in this video
Shaped edge cutters
They may have a bearing at the end, but the shape of their edges is much more complex than that of shaped edges, and the height is greater. Suitable for making baguettes and processing the edges of panels, skirting boards, and façade frames. Such cutters are also produced without bearings. In this case, they must be worked using a rip fence or a copying sleeve and a template.
Combined frame, or counter-profile, cutters. They are used when processing adjacent edges to create frame joining parts. Such cutters can also be assembled.
Horizontal figurine cutters
Designed for decorative milling of panel edges. Due to their large diameter, weight and cutting force, they are produced exclusively with a 12 mm shank and can only be used on a table, that is, with a stationary mounting of the router. Sometimes such equipment consists of two cutting discs and is capable of processing both sides of the panel in one pass. Such cutters have the largest diameter of all, so when choosing a milling machine you should immediately think about whether you will be making panels. This consideration directly affects the choice of tool based on the diameter of the hole in its base.
Quality of cutters
Lining cutters, like any cutting tools, are made from various steel alloys. How long these cutters will work and how long they can be used without sharpening, if provided, depends on compliance with the technologies for their smelting and on the processing methods (after creating the products).
But the peculiarities of supplying imported tools are such that products of normal and good quality from European countries will cost several times more than their Chinese counterparts. In China you can buy a more or less decent instrument, but its quality can only be judged once you start working with them. This is due to the fact that unscrupulous Chinese manufacturers counterfeit products from serious Chinese factories.
If you buy cutters for mass production of lining, then it would be wiser to purchase products from German or American factories, since the costs of working with low-quality tools will be higher than the costs of more expensive but proven material. All stops associated with tool sharpening and equipment readjustment will cause loss of working time.
Spiral cutters
Spiral cutters are also actively used in furniture production. In appearance and design they are very similar to drills. Like spiral drills, their working part contains grooves, with the help of which chips of waste material are removed from the processing zone. Spiral cutters are divided into the following categories:
The main areas of application of spiral-type cutters, which are presented in a wide range on the modern market, are:
Among the advantages of using spiral cutters for wood processing are the following:
Thus, the variety of cutters that can be equipped with both stationary and manual electrical equipment allows you to successfully perform various technological operations. With the help of such tools, you can not only make lining with your own hands, but also perform many other technological operations to improve your home interior.
Choosing cutters for wood
When choosing cutters, you need to take into account all their features, firstly, it is desirable that the cutters are made with high quality, quality is guaranteed in most cases by the brand, so it is best to buy tools that have already been tested by time, such brands include tools. Secondly, it is necessary to be guided by the strength of the material from which the cutter is made; it must be selected based on what material this tool will need to work with. And thirdly, it is necessary to choose the right type and type of tool that is suitable specifically for your type of work, for example, as stated above, a disk cutter is more suitable for working with lining.
Industrial production technology
You will need this knowledge in order to independently make the best decisions when making lining at home. The process of industrial production of lining consists of several stages.
That’s all the technology is, there is nothing complicated, modern equipment allows you to automate production to the maximum. It is impossible to achieve this at home; you will have to waste much more time making the forcing.
Table. Classes of lining and their description.
Tips for use
Working with a milling cutter can be hazardous, so you must clearly know and follow the rules for operating the equipment. And then the manufacturing process will not bring unpleasant surprises, but will be a joy.
Manufacturers give simple tips to extend the life of the cutter.
- When working with wood, resinous deposits accumulate, which leads to premature wear. Therefore, it is necessary to clean the instrument from deposits every day.
- Do not start working with a blunt instrument. Lack of sharpening can provoke burning of the cutting edge and the occurrence of an irreparable defect on the working surface.
- Follow sharpening rules. For backed models, it is performed along the front edge of the cutting tool with stones SM1, SM2, with grit A25 or A35. Sharpening knives made of carbide materials is done with diamond wheels. Do not forget to ensure that the edge does not burn.
To learn how to choose high-quality cutters and what their differences are, see the following video.
Manufacturing eurolining on a milling machine
This is more complex work; you will need solid experience working with woodworking machines. We will tell you about the technology, and select the dimensions of the lining and the profiles of the front surfaces yourself, taking into account the availability of tools and personal preferences.
How does eurolining differ from regular lining?
As the initial data, we assume that the boards of the required sizes have already been prepared, the material is sorted and folded in the proper place.
Step 1. Install a cutter on the machine to make a groove and a side decorative chamfer, adjust the depth. To do this, release the ruler, place the end of the board against the knife and, moving the ruler closer or further, find the desired position. Fasten the milling head and ruler with great force.
Step 2. Attach the top and side clamps, set the desired distance. Such stops greatly facilitate the milling process, improve quality and increase labor safety. Pass all the boards on one side.
Step 3. Replace the cutter with a new one; it should cut the groove and remove the decorative chamfer. There is no need to re-adjust the clamps; the width of all boards is the same and did not change during the first pass.
Step 4. Remove the side cutter and release the ruler and clamps. Install a cutter to make recesses on the inside of the lining. The size and number of grooves do not matter; select them at your discretion.
Do-it-yourself production of eurolining using a manual milling machine
Before starting work, you need to stock up on the required number of blanks. Depending on the selected thickness of the workpiece, a groove and rebate cutter is selected or the required size is set between the cutters in a combined cutter. All processed edges of the workpieces must be even in plane so that the groove and ridge fit clearly together.
Advice. The correct choice of speed mode will help ensure optimal and comfortable working conditions on a manual milling machine. The greater the depth of the tenon (groove) and the diameter of the cutter, according to the plan and possibility, the lower the speed should be. They are easy to adjust on the tool during a test run
You should also pay attention to the density of the material. There are instructions in this regard on the packaging and documentation for the operation of milling equipment.
All manual milling machines provide for surface processing of the material with the cutting tool downwards. Unlike a machine, the workpiece remains motionless, and the cutter is fed for processing, manually taking into account the nature of the profile of the milling work.
The manufacture of lining is best done using a router guide, which eliminates possible deviations along the planes of the processed edge (end of the board). Usually the groove is made first and then the tenon is selected. The sequence of operations when milling lining blanks should be as follows:
- We secure the workpiece on the workbench using clamps or self-tapping screws along the edges.
- We install the desired cutter in the router and adjust the height of its penetration.
- We turn on the router and do a test run.
The specified operations are the same for both types of operations. If you have a universal bit, you won't need to readjust the bit on your hand router. It’s another matter if the width of the planned groove cannot be made in one pass of the cutter. Combined cutters for making lining are usually sold in pairs, for grooves and tenons, respectively.
The tenon (protruding part) on the other side of the workpiece is made in one pass using a combination cutter. However, to give your lining a stylized look, for example, with an imitation of timber or some special profile, it is better to use separate seam cutters with a shaped profile. Often the edges of the tongues and grooves of the lining have a rounded shape or a figured cutout.
Important! Try to guide the router in one direction when in contact with wood, otherwise you risk burning the cutter before the warranty period. The groove must exceed in depth the working length of the lining tenon
This gap carries a compensatory load when humidity increases, especially when the exterior is finished with clapboard.
Machine
Milling is used primarily for the production of wood products, but if you purchase additional special knives, you can even process plastic and metal.
The good thing about this tool is that, despite its compact size, you can use it to perform numerous jobs.
The machine is used for making panels and for milling small holes for door handles and hinges. It can be used on door edges, window frames, chairs and other wooden objects.
Manual is available in three main types:
The cutters for the lining are installed under the casing of a powerful engine equipped with handles. The struts, fixed to the base plate and support plate, allow the motor to move up and down.
Manufacturing on a machine
Video - production line:
Expenses
Don’t be afraid to experiment, because what you make with your own hands is much more expensive and better than what you buy at the best prices in the store.
Panels made by yourself will not only decorate the house, but will also “nourish” it with the energy of a person who strives to turn his home into a cozy hearth. You just need to prepare the necessary materials and tools - and the new business will definitely be mastered.
Source
How to choose
Any purchase on the market may lead to different results. When cutters for the home are purchased outside of a tool store, the quality of a hand cutter for lining will be difficult to determine.
But there is a way to avoid buying a very “raw” alloy. If the seller does not object, you need to run a file along the side of the cutter, when marks remain on the surface, this means that the hardness of the material is low. It should be 58-62 HRC (Rockwell method for determining the hardness of materials). This value may be indicated on the shank; if it is not there, then suspicions should already arise.
A product that is made at a serious factory will have a good appearance, without burrs on the surface, pleasant packaging, information about the features of the product should be present, and so on.