From compressed air | 05/24/2017
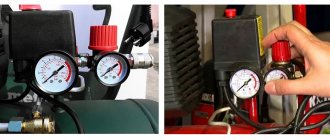
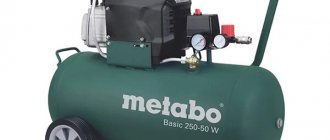
Budget models of air compressors are not always equipped with a pressure switch, since similar devices are installed on the receiver. Therefore, manufacturers of this equipment believe that visual monitoring of the pressure developed by the compressor based on pressure gauge readings is quite sufficient. At the same time, during long-term work, in order to avoid engine overheating, it is advisable to install a pressure switch on the compressor. Then the drive will turn on and off automatically.
Design and principle of operation of the automation unit
To maintain the pressure in the receiver at a certain level, most air compressors have an automation unit, a pressure switch.
This piece of equipment turns the engine on and off at the right time, preventing the compression level in the storage tank from being exceeded or too low.
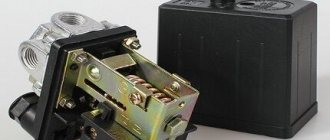
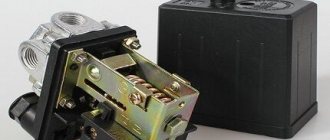
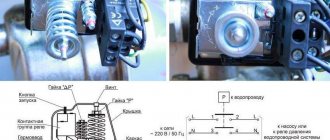
The pressure switch for the compressor is a unit containing the following elements.
- Terminals. Designed for connecting electrical cables to relays.
- Springs. Installed on adjusting screws. The pressure level in the receiver depends on the force of their compression.
- Membrane. It is installed under the spring and compresses it under the action of compressed air.
- Power button. Designed to start and force stop the unit.
- Connection flanges. Their number can be from 1 to 3. The flanges are designed for connecting the compressor start relay to the receiver, as well as for connecting a safety valve with a pressure gauge to them.
In addition, automation for the compressor may have additions.
- Unloading valve. Designed to relieve pressure after a forced stop of the engine, which makes it easier to restart.
- Thermal relay. This sensor protects the motor windings from overheating by limiting the current.
- Time relay. Installed on compressors with a three-phase motor. The relay turns off the starting capacitor a few seconds after the engine starts.
- Safety valve. If the relay malfunctions and the compression level in the receiver rises to critical values, then in order to avoid an accident, the safety valve will operate, releasing the air.
- Gearbox. Pressure gauges are installed on this element to measure air pressure. The reducer allows you to set the required level of compression of the air entering the hose.
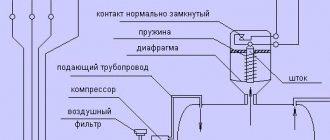
The operating principle of the pressure switch is as follows. After the compressor engine starts, the pressure in the receiver begins to increase. Since the air pressure regulator is connected to the receiver, the compressed air from it enters the membrane relay unit. The membrane bends upward under the influence of air and compresses the spring. The spring, compressing, activates the switch, which opens the contacts, after which the engine of the unit stops. When the compression level in the receiver decreases, the membrane installed in the pressure regulator bends down. At the same time, the spring opens, and the switch closes the contacts, after which the engine starts.
Diagrams for connecting the pressure switch to the compressor
The connection of the relay that controls the degree of air compression can be divided into 2 parts: the electrical connection of the relay to the unit and the connection of the relay to the compressor through the connecting flanges. Depending on which motor is installed in the compressor, 220 V or 380 V, there are different connection diagrams for the pressure switch. I am guided by these diagrams, provided that you have certain knowledge in electrical engineering, you can connect this relay with your own hands.
Connecting the relay to a 380 V network
To connect the automation to a compressor operating from a 380 V network, use a magnetic starter. Below is a diagram of connecting automation to three phases.
In the diagram, the circuit breaker is indicated by the letters “AB”, and the magnetic starter by “KM”. From this diagram it can be understood that the relay is set to a switch-on pressure of 3 atm. and shutdown - 10 atm.
Connecting the pressure switch to a 220 V network
The relay is connected to a single-phase network according to the diagrams given below.
These diagrams indicate various models of pressure switches of the RDK series, which can be connected in this way to the electrical part of the compressor.
Connecting the pressure switch to the unit
Connecting a pressure switch to a compressor is quite simple.
- Screw the pressure switch onto the receiver pipe using its central threaded hole. For better thread sealing, it is recommended to use fum tape or liquid sealant. The relay can also be connected to the receiver through a reducer.
- Connect a relief valve to the smallest output from the relay, if present.
- The remaining outputs from the relay can be connected to either a pressure gauge or a safety relief valve. The latter is installed without fail. If a pressure gauge is not required, then the free output of the pressure switch must be plugged with a metal plug.
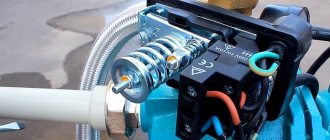
- Next, wires from the electrical network and from the engine are connected to the sensor contacts.
After the complete connection of the pressure switch is completed, it is necessary to configure it for proper operation.
You might be interested
code: 8091
368RUBCompare In stock In stock
Connecting thread: 1/4″ Operating pressure, bar: 0.5-9.5 Operating temperature, °C: 5-60 Weight, kg: 0.3
code: 17726
673RUBCompare 1,490RUBCompare
Maximum pressure, bar: 10 Operating temperature, °C: +5…+60 Throughput, l/min: 6000 Dimensions, mm: 205 x 80 x 80 Weight, kg: 0.84
code: 418
1,435RUBCompare
Throughput, l/min: 1000 (at 6 bar) Pressure, bar: 16 Weight, kg: 0.37 Thread, inch: 1/8
code: 421
1,435RUBCompare
Throughput, l/min: 1600 (at 6 bar) Pressure, bar: 16 Weight, kg: 0.37 Thread, inch: 1/4
code: 422
1,435RUBCompare
Throughput, l/min: 1800 (at 6 bar) Pressure, bar: 16 Weight, kg: 0.37 Thread, inch: 3/8
code: 7641
1,621RUBCompare
Size: 4 Series: MS Actuator lock: Rotary handle with locking with accessories, lockable Controller function: Constant output pressure with secondary relief with reverse flow Assembly position: Any
code: 15438 Pressure regulator AMT R‑1/2 MIDI 2 260RUB with VAT Add to cart Buy in 1 clickCompare
Flow capacity (l/min): 4000 Connecting thread (inch): 1/2″ Maximum operating pressure (bar): 16 Adjustment range: 0-12 bar
code: 17447 Pressure regulator Festo MS6‑LRB‑1/2‑D7‑AS 2,508RUB with VAT Add to cart Buy in 1 clickCompare
Size: 6 Series: MS Actuator Lock: Rotary Handle Locking with Accessories, Lockable Controller Function: Constant Output Pressure with Initial Pressure Compensation with Secondary Reset Assembly Position: Any
code: 7643 Pressure regulator Festo LR‑1/4‑DB‑7‑MINI 2,995RUB with VAT Add to cart Buy in 1 clickCompare
Size: Mini Series: DB Actuator lock: Locking rotary handle Controller function: With secondary reset with reverse flow Assembly position: Any
code: 13681 Pressure regulator RD‑001 with pressure gauge 0‑12 bar (internal thread 1/4″) Fubag 4 290RUB with VAT Add to cart Buy in 1 click Compare code: 16080 Pressure regulator Festo LR‑1/4‑D‑7‑I ‑MINI 5,027RUB with VAT Add to cart Buy in 1 clickCompare
Size: Mini Series: D Actuator lock: Rotary handle with locking Controller function: With secondary reset with reverse flow, with initial pressure compensation Assembly position: Any
code: 7645 Pressure regulator Festo LR‑1/2‑D‑MIDI 5,848RUB with VAT Add to cart Buy in 1 clickCompare
Size: Midi Series: D Actuator lock: Rotary handle with locking Controller function: Constant output pressure with initial pressure compensation with secondary reset Assembly position: Any
code: 434 Pressure switch FBANG 800RUB with VAT Add to cart Buy in 1 clickCompare
Pressure adjustment: 4 - 11 Network: 220 V Motor power, kW: 2.2 Current, A: 20 Connection: 4 x 1/4″
code: 435 Pressure switch VDE 1,100RUB with VAT Add to cart Buy in 1 clickCompare
Pressure adjustment: 4 - 40 Network: 380 V Motor power, kW: 7.5 Current, A: 20 Connection: 1 x 1/2″, 3 x ¼"
code: 431 Pressure switch MDR 3/11, 10A (3‑4 kW) 4,500RUB with VAT Add to cart Buy in 1 clickCompare
Article: MDR 3/11 R3/10 GDA AAAA 090A110 CHI IXX Pressure adjustment: 4 - 11 Network: 380 V Motor power, kW: 4 Current, A: 6.0-10.0
The use of an air pneumatic relay allows you to automate the filling of the compressor receiver with compressed gas. The operator of equipment with a pressure switch does not need to monitor the process, trying to fix the limit parameters. As a result, engine damage is prevented. Significant results, right?
If you are planning to purchase a pressure switch for your compressor, then you have come to the right place. Here you will find a vast amount of extremely useful information about the principles of operation of the device, its configuration and connection methods.
We have described in detail the existing types of pneumatic relays. They provided options for connecting to a household and industrial network with extremely clear diagrams. We looked at typical breakdowns and ways to prevent them. The information and useful tips we provide are supplemented with graphic, photo and video applications.
Adjusting the compressor pressure
As mentioned above, after creating a certain level of air compression in the receiver, the pressure switch turns off the unit’s engine. Conversely, when the pressure drops to the switching limit, the relay starts the engine again.
Important! By default, relays, both single-phase devices and units operating from a 380 V network, already have factory settings. The difference between the lower and upper engine start threshold does not exceed 2 bar. It is not recommended for the user to change this value.
But often situations that arise force you to change the factory settings of the pressure switch and adjust the pressure in the compressor at your discretion. You can only change the lower switching threshold, since after changing the upper switching threshold upward, the air will be released by the safety valve.
Pressure adjustment in the compressor is carried out as follows.
- Turn on the unit and record the pressure gauge readings at which the engine turns on and off.
- Be sure to disconnect the device from the power supply and remove the cover from the pressure switch.
- After removing the cover, you will see 2 bolts with springs. The large bolt is often designated by the letter “P” with the signs “-” and “+” and is responsible for the upper pressure, upon reaching which the device will be turned off. To increase the level of air compression, turn the regulator towards the “+” sign, and to decrease it, turn towards the “-” sign. First, it is recommended to make half a turn with the screw in the desired direction, then turn on the compressor and check the degree of pressure increase or decrease using a pressure gauge. Record at what indicators of the device the engine will turn off.
- Using a small screw you can adjust the difference between the on and off thresholds. As mentioned above, it is not recommended that this interval exceed 2 bars. The longer the interval, the less often the device’s engine will start. In addition, the pressure drop in the system will be significant. Setting the on-off threshold difference is done in the same way as setting the upper on-off threshold.
Preparing for work - first start-up of an air piston compressor
Instructions - always start with this. Even if you have extensive experience in handling compressor equipment, information about a specific model will not be superfluous. Beginners will benefit from a visual guide to the main processes, as implemented in the FUBAG instructions, and experienced users will benefit from recommendations on maintenance, selection of oil for a piston compressor, and operating nuances.
Let's move on to preparing the device:
1. If you have transport wheels, start by installing them after unpacking.
2. Check the oil level using a dipstick or eyelet.
3. There is not enough oil - add more. Enough - skip the point and move on to the next one.
4. Now you need to install the compressor correctly. Make sure that it stands on a flat surface to prevent uneven lubrication of the working elements. Will you be working indoors? Then it is worth maintaining a distance of half a meter from the device for free air flow to the compressor engine.
5. Install the air filter.
6. Install the breather (this is where the instructions for your compressor come in handy). 7. That's it, the device is ready for use.
Where would we be without precautions? Do you have to work outside? Then be sure to take care of protection from moisture
So, the device is assembled, you can connect it to the mains and start:
1. Turn the pressure switch to the OFF position. 2. Check and close the air valve. 3. Connect power supply. 4. Turn the pressure switch to the RUN position.
The compressor will start working and maintain pressure, alternately reaching the upper and lower limits. The actual value is shown on the pressure gauge. To disable the automatic mode of alternating start and pause, simply turn off the pressure switch.
What is a pressure switch?
Pressostat is a pressure switch for a compressor, the main component of compressor automation. He is responsible for starting and stopping the system if it reaches the specified air mass supply parameters. As the required values are obtained, the following operations occur:
- the engine turns on when the pressure is critically high;
- The system shuts down if the pressure is unacceptably low.
That is, the compressor pressure switch regulates the operating process of the system from the moment it is turned on until it is completely turned off. It does not allow the compressor to operate under increased loads and prevents its premature wear. In many ways, the success of the system depends on the coherence of all its components: the air reducer, pressure gauges, supply-type communications (fittings, tubes), the relay itself.
About the switch
The pressure switch for the compressor has a hole closed by a special valve. It opens in order to provide conditions for the removal of air from the compressor after the equipment is turned off. During subsequent starts, there will be no residual air in the tubes, this will prevent the permissible pressure parameters from increasing above the maximum levels.
The pressure switch is responsible for closing or opening contacts, starting or stopping the engine. You can purchase a relay at any online store or regular point of sale that distributes equipment, tools for work and home. Be sure to read reviews first; if you have questions about the choice or operation of equipment, ask them to specialists and consultants.
Adjustment and commissioning process
The device is configured and adjusted at the manufacturer's factory. Typical values are 2.8 atm. for the upper limit and 1.4 for the lower limit. However, sometimes situations arise in which it is necessary to adjust the device yourself:
- Setting up after partial or complete repair.
- Specific requirements of consumer devices.
- Installing a relay that was not originally designed to work with this compressor.
Before you begin adjustment, you should carefully study the parameters of all mating devices according to their data sheets. Passport data must correspond to the numbers embossed or engraved on a plate attached to the body of the unit.
The main indicator is the maximum pressure for which the compressor is designed. The value at which the pressure switch will operate should be 0.4-0.5 atm less than this maximum. In real operating conditions of the device, taking into account voltage instability, losses in seals, and the degree of wear of the piston group, this pressure may not be achieved. Then the pressure switch will not turn off the motor, the compressor will work continuously, overheat and wear out.
Having decided on the parameter values, you can begin making adjustments. To do this you need:
- Remove the casing.
- Two nuts will become available - a larger one and a smaller one. These are the regulatory bodies. Arrows are engraved on the body nearby, showing the direction of rotation to increase and decrease the parameter, respectively.
- The large nut sets the value at which the electric motor turns off. When rotated clockwise, the value increases, in the opposite direction it decreases. It is indicated by the P (Pressure) icon.
- The smaller nut sets the difference in engine start pressure compared to the shutdown value. It is designated ΔР.
Why do you need a control and distribution block?
The control and distribution block, as is clear from its name, solves two problems:
- controls the volume of air supplied to the system;
- regulates the parameters for turning on the compressor unit engine and its stable operation.
Visually, the block with the regulator is similar to a valve that opens or closes the inlet to the pipe to specified levels. This allows you to regulate the volume of air entering the system and pressure parameters. The valve is rotated to the left and right, thus changing the supply of air masses.
The weight of the block ranges from 250 to 350 g, taking into account the equipment model. The device is inexpensive, and its role in the operation of the compressor is invaluable. Therefore, special attention must be paid to the quality and condition of the block.
Operating principle
The pressure switch for the compressor controls the piston unit and maintains optimal pressure inside the receiver. Sometimes you can find such a unit on screw devices - it will be responsible for performing compression of air masses and their correct supply.
Taking into account the force of the pneumatic automation press, the device acts on the live line. Lack of pressure starts the motor, and when the specified parameters are reached, it turns it off. We are talking about a standard operating scheme, which involves connecting to a closed circuit network.
The role of the air pressure switch
The design of the ejector includes an air-filled cylinder with a given pressure. A decrease in performance requires turning on the engine and restoring the level. In the reverse situation described above, an excess will be recorded. The air supply will stop, otherwise the container will burst. The pressure switch is responsible for controlling these processes.
How do stiffener springs work?
There are modifications with a different working algorithm. By achieving minimum values in the compression circuit, the pressure switch turns off the electric motor, and at maximum values, it activates it. That is, the system operates only in an open circuit of the device.
The main working unit is springs with different stiffnesses. They reproduce the standard reaction to oscillatory movements inside the node. During the operation of the system, the indicators that are obtained when compressing and stretching the springs, that is, changing their sizes and shapes, will be measured. The changes are monitored by a spiral equipped with a relay unit. It disconnects or connects power lines if necessary.
There is no regulatory influence in the spring blocks; the main effect is on the motor. The user can set the peak values that are optimal for themselves; as the maximum is reached, the spring mechanism is activated.
Purpose
The function of air compressors is to produce a stream of air with a certain pressure; it must be stable and uniform. It should also be possible to change the parameters of this jet. Each compressor has a reservoir (cylinder) for air. It must have the required pressure. When it drops, turn on the engine to replenish the air supply. If there is excessive pressure, the air supply should be stopped to prevent the container from bursting. This process is controlled by a pressure switch.
Pressure switch device RDM-5
When it functions correctly, the engine is preserved, it is protected from frequent switching on and off, and the operation of the system is uniform and stable. The container membrane is connected to the pressure switch. By moving, she can turn the relay on and off.
Principle of operation
Taking into account the amount of pressure in the system, the relay serves to open and close the voltage circuit; if the pressure is insufficient, it starts the compressor and turns it off when the parameter rises to a predetermined level. This is a normally closed loop operating principle for motor control.
The opposite principle of operation is also encountered, when the relay turns off the electric motor at minimum pressure in the circuit, and turns it on at maximum. This is a normally open loop circuit.
The working system consists of springs of different levels of rigidity that respond to changes in pressure. During operation, the deformation forces of springs and compressed air pressure are compared. When the pressure changes, the spring mechanism is activated and the relay closes or opens the electrical circuit.
Accessories
The air compressor relay may contain the following components:
- Unloading valve. It is located between the compression chamber and the compressor check valve. When the engine stops, this component is activated and removes excess pressure from the piston block. When the engine starts, the pressure generated closes the valve, making it easier to start the unit. Some unloader valves have delayed activation. When starting the engine, it assists the engine by remaining open until the system reaches a predetermined value. During this time, the engine reaches maximum speed.
- Mechanical switch.
Serves to enable and disable automation. The switch usually has two positions. When the mode is turned on, the automation is activated, the compressor is connected to the network and turned off, taking into account the specified pressure parameters in the system. In the OFF position, no power is supplied to the drive. Pressure switch for air compressor - Thermal relay. It protects the electric motor by limiting the current so that the motor windings do not burn out. The required current strength is set using a regulator. If the set value is exceeded, the engine will be disconnected from the network.
- Safety valve. Protects the system in case of improper functioning of the pressure switch. When the pressure is exceeded, if the relay does not operate, the safety valve is activated, which relieves the pressure. This allows you to avoid accidents when the control breaks down.
Complete set of automatic units and safety issues
Structurally, the pressure switch for a compressor has the form of a compact block with inlet pipes, a membrane, and sensing spring elements. There are also mandatory subassemblies - switch (mechanics), unloading valve. The pressure switch assembly, which operates on perception, contains a spring block; a screw is used to compress it. Factory settings are pressure in the range of 4–6 atmospheres. Relevant information is provided in the instruction manual.
Budget differential air pressure switches are rarely equipped with automatic equipment; premium solutions have it. Installation location: receiver. For long-term operation, a pressure switch is needed; it will prevent overheating of the working units. The rigidity, flexibility, and elasticity of spring elements depend on the temperature parameters of the environment. Industrial devices are designed in such a way that they provide stable and stable operating values in the temperature range -5–+80 ºC.
The membrane is connected to the switch. When moving, it will adjust the operation of the pressure switch.
Why do you need an unload valve?
The unloading unit is connected to the air supply line. This allows excess pressure to be released from the piston compartments. At the same time, the retractable compressor units are relieved from the application of excessive force.
The unloading element is located between the check ejector valve and the compression block. When the drive stops, the unloading section will be activated. Excess pressure is released through it from the piston compartment. Further, during the start, acceleration of the electric motor, an onslaught will be created that blocks the valve mechanism. This prevents drive overload and facilitates the process of starting the device in off mode.
Technical specifications
The technical parameters of the control device are designed to visualize the maximum and minimum gas pressure, as well as the flow rate of the working medium.
The highest value at the inlet/outlet for a liquefied medium is 250 atm, for liquefied fuel - 25 atm. At the output, the indicator varies between 1−16 atm. In the design, the 220 V electric gas pressure regulator contains a sensitive mechanism that can compare the signal from the set pointer with the current value and converts the command pulse into mechanical work to move the movable plate to the neutral position. If the switching force is exceeded, the sensing element, or pilot, transmits a command to switch off to the sensors.
The pilot regulator can be astatic, static, isodromic.
Astatic
During operation, an astatic type relay experiences two types of load: active (acting) and passive (reacting). It is recommended to connect the device with a sensitive membrane to the equipment for sampling gas from the central pipeline. A device of this type adjusts the pressure of the system medium according to specified parameters, regardless of the degree of workload on the control element.
Static
The static pressure switch design kit includes process stabilizers that counteract friction and play at the system joints. Static devices form equilibrium indicators that differ from the permissible values of the rated load. The control process is activated by an acting force along a damped amplitude.
Izodromny
The isodromic industrial relay is automatically switched on when the pressure deviates from the set value. The 380 V pilot element reacts to real pressure gauge readings that differ from the permissible norm. To relieve the pressure, the regulating element independently reduces the indicators to the optimal operating parameter.
Types of pressure switches
There are two types of unit design for compressor automation:
- The mechanism turns off the electric motor when the specified pressure level in the pneumatic network is exceeded. These are normally open modifications.
- In reverse models, the mechanism turns on the motor device when the pressure drops below the minimum permissible value. We are talking about normally closed devices.
The air pressure switch for the compressor always has a difference between the thresholds specified by the manufacturer. If desired, perform manual adjustment.
System installation procedure
It is possible to install the sensor and adjust the pressure with your own hands. The work is carried out according to the scheme; beginners should carefully study the system maintenance manual. If you are not sure that you can adjust the pressure and set up the equipment, then contact a specialist. Specialized services are provided by private craftsmen and companies in Moscow and other cities.
Sequence of installation actions:
- The device is connected to the compressor unit through the main hole.
- Then a pressure gauge is attached to the device equipped with flanges. You can use other auxiliary elements that require a separate connection (unload valve, safety sensor).
- Channels not used for connection are closed using plugs.
- The relays according to the diagrams are connected to the internal contacts of the circuit.
- Low-power motors are connected directly to the systems; for powerful ones, an electromagnetic starter of a given power is installed.
The connection of the pressure switch to the compressor should be carried out according to the diagrams - we will talk about them later. Also immediately take into account the operating conditions of the device. All adjustments are carried out under pressure; the electricity supply to the motor must first be turned off.
Air relay connection diagrams
The compressor pressure switch is connected to electrical circuits that are different in terms of rated load indicators. Taking into account the rating of the power line, the optimal model of the relay unit will be selected.
Possible ways to connect the relay:
- For standard 220 V networks, the motor (drive) has the form of a single-phase device. A couple of groups of working contacts are required.
- For three-phase electrical networks at 380V, relays are taken at 380 or 220 V, the main thing is that there are three lines for simultaneous connection of all phases.
Pressure switches that can be used when implementing schemes: RDK-xT18P-x, xT10R-x, xT10K-x, xT19P-x. It is imperative to understand all the additional functions of the ejector units. Before starting, make sure that all elements are connected correctly, otherwise the sensors will not operate and the system will begin to function incorrectly.
Regulation rules
Setting up the compressor pressure switch will allow you to set the optimal operating parameters specifically for you, since the factory values do not always correspond to the needs of a particular consumer. Most often changed:
- parse point compression;
- automatic response range of the pressure switch.
To start setting the compression parameters, carefully study the engraved table, which presents the parameters of specific models of the compressor and electric motor. You need to select the highest values generated by the device. The parameter shows the maximum pressure force set on the relay and necessary for the correct functioning of the pneumatic system.
If you set a value of 4.2 atmospheres, then, taking into account the depletion of the service life of parts, differences in the network and other factors, the compressor will still not reach the optimal pressure values and, as a result, will not turn off. The functioning of components in this mode leads to overheating, deformation, and melting of parts.
How to adjust maximum values
The maximum values of the ejectors must be taken into account to determine the maximum operating parameters of the relay. They must be below the nominal pressure levels of the compressor unit. If these requirements are met, the operation will be uninterrupted.
To ensure reliable operation of the system without shutdowns, the pressure limits at the outlet of the relay are adjusted. It does not reach the nominal values engraved on the compressor, that is, it will be at around 0.4–0.5 atmospheres.
Compressor adjustments
Regulating the pressure on the compressor allows you to set the limit values, upon reaching which the compressor unit will turn on and off. There is only one bolt, so that the user does not make a mistake during the settings; arrows are provided for adjusting the values.
Principle of operation
The operating principle of the automation unit is simple. The device is mounted on a pipe communicating with the receiver. The spring-diaphragm pressure switch sensor for the compressor continuously measures the pressure.
As soon as it drops below the set value, the sensor rod, under the action of a spring, closes the contacts of the compressor relay and the electric motor is connected, pumping air into the tank. After reaching the set pressure, it presses the rod and opens the contacts, turning off the engine. Adjustment of these values is available to the user.
In addition, when the operating pressure limit is reached, the safety valve included in the device is activated, releasing excess air from the compressor into the atmosphere.
Device
All components of the compressor pressure switch are assembled in a compact unit, covered with a plastic or metal case. The product includes:
- Inlet and outlet pipes.
- The sensitive element is a spring and a membrane.
- Stock. Connected to the membrane and placed inside the spring coils.
- Contact Group.
- Adjustment screws.
- Unloading and safety valve.
- Mechanical switch.
- The elasticity of the spring, and, consequently, the sensitivity of the sensor, depends on the ambient temperature; most devices are designed to operate in the temperature range from -5 to +70 °C.
- The unloading unit is designed to release air from the compressor cylinders after it stops. Thereby:
- its subsequent launch is facilitated;
- wear of piston group parts is reduced;
- the service life of the entire unit is extended.
When the unloading valve is activated in the silence that follows after the compressor stops, a sharp characteristic sound is clearly audible.
The mechanical switch serves for the initial start and final stop of the compressor. It has two positions: “On” and “Off”. “On” activates automatic operation systems. It transfers further control of the compressor to the pressure switch. The “Disabled” position prevents spontaneous starting of the motor when the pressure in the receiver drops below the set value.
The safety valve allows you to release excess pressure into the atmosphere in the event of a relay failure and avoid compressor breakdown in this case.
A thermal relay can serve as additional protection for the compressor motor. It is included in the automation unit; it disconnects the motor windings from the supply voltage in the event of an increase in current strength, indicating an overload of the motor.
Setting up an air compressor comes down to setting the operating pressure with an adjusting screw. The pressure regulator has values marked on it. Pressure can be controlled more accurately using a pressure gauge.
Types of pressure switch devices
There are two main versions of the device available. The pneumatic-mechanical part is identical; the difference is determined by the method of closing the contacts when the rod moves:
- Normally closed (NC). used for direct control of low and medium power motor circuits.
- Normally open (NO). The movement of the rod closes the contacts when the maximum pressure is reached. The reverse movement opens them as it decreases. The contacts are used to control a more powerful relay that starts and stops the electric motor. The circuit turns out to be more complex, but the load on the pressure switch contacts is reduced and the service life increases.
When replacing a relay, you must carefully check that its type matches the electrical circuit of the compressor. his type.
Installation of relays and auxiliary elements
- In addition to basic components, devices are often equipped with additional devices that increase ease of use or expand the functionality of the device.
- They are installed on flange connections, most often 1/4”
- The pressure switch is connected to the compressor as follows:
- Screw the inlet pipe to the tank pipe.
- Connect a pressure gauge, unloading and safety valves to the flanges of the device.
- Close unused holes with plugs.
- Connect the electrical connector of the relay to the electric motor.
Low-power electric motors are connected directly; more powerful ones will require the use of a starter. The design of the pressure switch must match the engine power.
Adjustment and commissioning process
The device is configured and adjusted at the manufacturer's factory. Typical values are 2.8 atm. for the upper limit and 1.4 for the lower limit. However, sometimes situations arise in which it is necessary to adjust the device yourself:
- Setting up after partial or complete repair.
- Specific requirements of consumer devices.
- Installing a relay that was not originally designed to work with this compressor.
Before you begin adjustment, you should carefully study the parameters of all mating devices according to their data sheets. Passport data must correspond to the numbers embossed or engraved on a plate attached to the body of the unit.
The main indicator is the maximum pressure for which the compressor is designed. The value at which the pressure switch will operate should be 0.4-0.5 atm less than this maximum.
In real operating conditions of the device, taking into account voltage instability, losses in seals, and the degree of wear of the piston group, this pressure may not be achieved.
Then the pressure switch will not turn off the motor, the compressor will work continuously, overheat and wear out.
Having decided on the parameter values, you can begin making adjustments. To do this you need:
- Remove the casing.
- Two nuts will become available - a larger one and a smaller one. These are the regulatory bodies. Arrows are engraved on the body nearby, showing the direction of rotation to increase and decrease the parameter, respectively.
- The large nut sets the value at which the electric motor turns off. When rotated clockwise, the value increases, in the opposite direction it decreases. It is indicated by the P (Pressure) icon.
- The smaller nut sets the difference in engine start pressure compared to the shutdown value. It is designated ΔР.
Before you start setting up, you should fill the tank at least 2/3 full. The sequence of actions is as follows:
- Disconnect the unit from the network.
- Adjust the P and ΔP values by rotating the adjusting nuts.
- The set values should be monitored using a pressure gauge.
A number of manufacturers place adjustment controls on the outside of the device. This increases the convenience of adjustment, but at the same time increases the risk of changing the settings by accidental touch.
Possible malfunctions of the device
The device is characterized by its simple design and high reliability. However, they are also subject to malfunctions and breakdowns. A number of minor difficulties can be easily corrected with your own hands:
- Air leakage from the device when the pump is turned on. Identified by a characteristic whistle and the feeling of a sharp cold draft near the body. Most often the cause is a broken start valve. To repair, the gasket must be replaced.
- Frequent starting of the motor. The cause may be loose adjustment screws. It is necessary to carry out the procedure for adjusting the on and off threshold values using the pressure gauge and, if necessary, restore the passport values.
In case of serious problems, experienced technicians recommend not to bother with repairs and subsequent adjustments, but to immediately replace the entire device.
Troubleshooting methods
More complex work will be required if the compressor does not turn on. This can happen if the relay contacts wear out and melt from sparks that occur when the electric current is interrupted. Two methods are possible:
- In case of slight wear of the contact groups, clean the areas with a file or sandpaper. Care must be taken not to bend the slats. This will extend the service life by several weeks.
- Replace the contact groups with new ones from the repair kit for this model.
To repair contact groups, the following operations should be performed:
- Bleed the air from the tank and disconnect the unit from the network.
- Remove the relay from the compressor.
- Remove the casing.
- Disconnect the wires going to the contacts.
- Using a screwdriver, pry the contact terminal out of the mount and carefully drill out the melted areas.
- The wire is replaced with copper wire of the appropriate cross-section. It should fit into the hole with minimal clearance. The wire is passed into the hole and pressed tightly with pliers.
- After repairing all melted contacts, reassemble the device in the reverse order.
Relay breakdowns: types and solutions
Pressure switches, like other devices, can fail. Repair in most cases is impractical; worn out, faulty working parts are immediately replaced with new ones. In any case, you must first inspect the system yourself, try to understand the cause of the malfunction, and, if possible, take action.
If malfunctions in the functioning of the system are caused by the pressure switch itself, then the only way to solve the problem is to replace the device. You can clean and change contacts, but these expensive manipulations will not give the desired results.
Air leaks from the relay when the receiver is turned on occur due to the fault of the start valve. In this case, restoration will be simple, quick and cheap - just install a new gasket instead of the worn out old one.
When the compressor is turned on frequently, you should check the adjusting bolts - they may have become loose and/or misaligned. Separately, double-check the on-off threshold of the pressure switch, make the settings according to the diagram described in the previous section.
What to do to restore the system
The list of measures depends on the type and complexity of the breakdown. The most difficult case is when the compressor does not work at all. The first thing you need to do is check the contacts for melting and make sure there is no erosion that occurs as a result of electrical sparks.
A group of contacts burns out as a result of electrical spark erosion and contact opening. If you find items on sale that can be installed instead of old ones, the repair will be relatively simple and inexpensive. But this is not always possible, since many modifications have been discontinued.
- clean problem surfaces (the effect will last for 3 months or more);
- install new contacts in the terminal clamps.
To install new terminals, bleed the air masses from the receiver, turn off the ejector power, and remove the relay. The protective housing is also dismantled, the wire that is connected to the contact group is disconnected. Using a screwdriver, remove the terminal with all the contacts, drill out the burnt and simply questionable lines. The wire is replaced with copper wire or another convenient method. It is optimal to select the wire according to the diameter of the hole. It should fit into the landing nest as tightly as possible. After inserting the element into the hole, crimping is done on both sides.
The same steps are repeated with the remaining burnt areas. When the assembly of the contact group is completed, it is installed in its old place and the pressure switch cover is screwed on.
Related Posts
It must have the required pressure. However, it is not always possible to replace elements - some modifications are no longer available for sale. To eliminate this type of malfunction, you can use one of the following methods: clean the surface, which extends the service life by at least 3 months, or repair it by replacing the contacts in the terminal clamps . For a single-phase motor, a volt relay is used, with two groups of connections.
Frequent starting of the motor.
During operation, the indicators formed as a result of the elastic force of tension or compression of the springs and the pressure of the atmosphere pressed by the device are compared. The container membrane is connected to the pressure switch. The contact of this relay supplies power to the computer solenoid valve, which allows cooling water to enter the compressor compartment. The author of the article describes in detail the existing types of pneumatic relays.
Below is a diagram of connecting automation to three phases. In accordance with the rating of the power supply line, the appropriate model of the relay unit is selected. Remember that the compressor should be depressurized no earlier than 5 minutes before soldering. Share your own experience in operating a compressor with a pressure switch, ask questions, post photos on the topic. Working and starting capacitors for teapots.
How to make a relay yourself
A new relay costs from 300 rubles (the price depends on the manufacturer, quality, operating parameters). If you wish, you can make the element yourself. Typically, a working relay removed from a regular household refrigerator is used as a basis. The optimal choice is devices with a reverse firing sequence. The relay turns on as the temperature inside the refrigerator rises, and turns off when the values drop.
You can construct a relay with your own hands according to the following scheme:
- Set the location of the contacts using the chain ring.
- Modify the area where the relay connects to the compressor by connecting the pipe with a pressure gauge to the valve mechanism, and the contacts to the terminal elements inside the engine circuit.
- Find the adjustment screw under the cover. Turn on the compressor, observing the correct sequence of rotations and at the same time monitoring the numbers on the pressure gauge.
- Set to the bottom position, start moving the button rod from the front part.
- Put the cover back and make a blind adjustment.
In order to increase the overall safety of the device during operation, pressure adjustment intervals are set at 1–6 atmospheres. When using devices with reinforced bellows, the limit values increase to 10 atmospheres, and this is sufficient in most cases.
Additional checks
When the homemade relay is ready, you need to check its functionality. To do this, cut off the capillary tube and remove the accumulated refrigerant. The end of the tube is inserted and soldered into the loading valve.
Reconnect the self-made pressure switch to the compressor control circuit. The nut connecting the relay to the board is cut into the rod thread, the lock nut is tightened, setting the optimal pressure adjustment limits. Since the contact group of a standard refrigerator relay is designed for significant currents, you will be able to connect a high-power circuit.
If you do everything correctly, you will get a reliable, durable device for adjusting the operation of the electric motor drive. A self-designed pressure switch is not as versatile and practical as a purchased one, but it is suitable for solving simple problems.
When it is necessary to increase the power and functionality of the device, a reinforced siphon is used.
