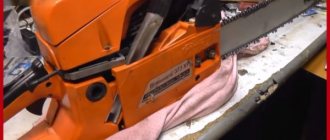
How to use?
Before you start using the saw, there are several tasks you need to complete:
- Read the operating instructions.
- Assemble the saw part in accordance with the manufacturer's recommendations.
- Fill the automatic lubrication compartment with oil.
- Run in the engine.
When using a chainsaw, the manufacturer recommends wearing protective clothing and hearing protection. Also, you should not use the saw if you are feeling unwell, or after consuming medications or alcohol. Do not work in conditions of high humidity.
The note! During engine operation, noise above 100 dB occurs, which is dangerous to the human ear. Long-term use may result in loss of coordination, white spots and hearing impairment. To avoid these consequences, it is recommended to use special headphones.
When refueling or refueling, the chainsaw engine must be stopped. Handle fuel with care; it is highly flammable.
Chainsaw Champion 241
Specifications
The engine capacity of this chainsaw is about 55 cubic cm, which is quite a lot. Saws with this volume can produce power up to 3 kW. This model produces 2.4 kW or 3.24 hp. The indicator is decent, the Champion 55 saw is powerful and can show good performance.
The volumes of the fuel and oil tanks are 0.52 and 0.26 liters. These are average figures, approximately the same as those of TAIGA or Huter chainsaws, which are its main competitors.
Most likely, the volumes of the tanks are designed so that one filling of the oil tank is enough for one filling of fuel, since both oil and gasoline should run out approximately at the same time. This is not bad, you don’t have to constantly check the presence of oil in the oil tank during operation.
The weight of the Champion 55 saw without 5 grams is 5 kg. The saw is not light, but not heavy either. It is quite comfortable for a man to work with a chainsaw with such a weight, but for a woman it is better to find a chainsaw that is less heavy.
Saw set 45 cm, with a pitch of 0.325 inches. Chain length 72 links.
In terms of characteristics, the Champion 55 is very similar to a purely Chinese chainsaw. Volume, power, weight, everything is the same. Now let's look at the appearance.
How to remove the clutch on a trimmer / how to remove the clutch on a lawn mower
- To remove the clutch on a trimmer (removing the clutch on a lawn mower is similar), you must first remove the muffler cover, metal stand, starter cover and cylinder cover so that they do not interfere with removing the trimmer clutch cover.
- Remove the shock absorber cover (by unscrewing the two side screws), loosen the bolt holding the shock absorber together and remove the pipe from the shock absorber.
- Unscrew 3 or 4 bolts and remove the clutch cover.
- We evaluate the wear of the pads and clutch drum, see if the spring is broken, and inspect the condition of the bearing.
- To replace, for example, the trimmer clutch pads (weights), you need to remove the clutch spring, and then unscrew the axle bolts on the pads (if necessary, first lock the crankshaft by pushing a rope into the spark plug hole when the piston is at BDC).
Category: Adjusting brush cutters
Repair and adjustment of lawn mowers, trimmers, gas mowers and electric mowers.
Caring for your trimmer in winter and preparing your trimmer for spring
- Post author
Preparing the trimmer and preparing the chainsaw for winter storage:
- Mow/finish everything that needs to be mowed/finished (at the same time, use the fuel so that it is not left for winter storage in the trimmer or for storage in the chainsaw).
- Remove the tank cap, turn the trimmer (chainsaw) over and drain all the fuel from the tank into a container for technical maintenance.
- Tags
Design and principle of operation of the chainsaw clutch mechanism
Most sawmills do not understand how the chainsaw clutch operates. It is not necessary to know the operating principle at work, but in case of malfunctions, you will need to know the design and features of the chainsaw clutch.
Modern chainsaws are equipped with centrifugal clutch mechanisms. Centrifugal clutch. This means that its performance depends on the torque of the engine. The main purpose of the clutch on a chainsaw is to ensure the transmission of torque from the engine crankshaft to the headset (chain) of the saw. The device operates automatically, and we will find out in detail how this happens.
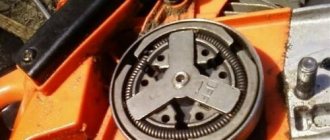
The clutch mechanism consists of the following structural elements:
- A drum with a removable or non-removable sprocket is a gear train
- Friction pads. Under the influence of centrifugal force they move, engaging with the drum
- Spring. Provides crankshaft pressure
Now about the principle of operation of the clutch chainsaw.
When the tool's two-stroke engine starts, the crankshaft begins to rotate. The clutch is attached to a shaft to which the chain is connected by a sprocket. When the chainsaw is idling (shaft speed up to 2700 rpm), that is, the accelerator trigger does not stretch, the spring presses the friction pads, so that torque is not transmitted to the drum.
As soon as the saw selects a tool and begins to increase speed (maximum 14,000 rpm), the chain begins to move on the bar. This is due to the fact that the crankshaft rotation speed increases. Due to inertia, the friction pads (also called counterweights) move and engage the inner walls of the drum. As a result, the drum moves, which is connected by an asterisk. The rotating sprocket drives the chain.
The operating principle of the mechanism is simple due to its simple design. If this part fails, the chainsaw will not work properly. A detailed description of the operation of the chainsaw clutch mechanism is described in this material.
What does it mean to regulate chainsaw draft and how to do it
If you have heard that the clutch on a chainsaw needs to be adjusted, then the question probably arises, how to do this? The clutch does not need to be adjusted on the chainsaw, as it operates automatically, unlike devices from older brands of tools. It is not possible to adjust the compression force of the spring or spring, and if this part is damaged, it must be replaced.
When installing the chainsaw clutch in place, it also does not require adjustment. The clutch is tightened all the way using a special wrench and a locked piston in the cylinder. Some chainsaw models have a washer or spacer. This could be between the shaft and the sprocket or the drum and the sprocket. This washer adjusts the alignment of the sprocket on the tire. If the chainsaw has such a washer, it must be replaced when repairing or replacing the mechanism.
How to remove and adjust the clutch mechanism on chainsaws of the Ural and Druzhba brands is shown in detail in the video.
In conclusion, grip on a chainsaw plays an important role. This mechanism not only transfers torque from the motor to the chain, but also protects the motor from premature failure. Imagine a situation where the sprocket is rigidly connected to the crankshaft. When the chain catches the cut material, the engine parts, sprockets and chain wear together. Understanding the purpose and principle of operation of the mechanism, you should always monitor its serviceability and at the first sign of failure, remove it, repair it, or even replace it.
Source
Chainsaw engine does not start
If the mechanism does not start, it stalls immediately, check sequentially:
- is there fuel in the tank;
- serviceability of the spark plug;
- cleanliness of the air and fuel filter;
- cleanliness of the breather and exhaust channel.
You need to make sure that the spark plug is working and produces a spark when it comes into contact with the body. In this case, it is necessary to dry the spark plug channel, clean and dry the part itself. You can change the candle, but the channel still needs to be dried for 40 minutes. Check the serviceability of the high-voltage wire; there may not always be contact. A malfunction in the ignition unit when repairing a lawn mower cannot be repaired with your own hands.
If the engine does not stall when the air filter is removed, this is the reason - replacement or cleaning is required.
The fuel filter is replaced with great care. After checking the cleanliness of the breather, remove the muffler mesh and clean the exhaust channel
Purpose of Champion 137
The chainsaw is intended for household use only. It can be used in the country house, used for trimming branches or preparing firewood for the barbecue. The Champion 137 is suitable for outdoor enthusiasts as it is the lightest saw in the Champion line of household chainsaws.
Repair brushcutters replacement clutch.
The manufacturer's recommendations for the use of this chainsaw are rarely followed in our country, and therefore the Champion 137 can be found at sawmills where it is used to cut slabs. Private offices that collect and sell firewood to the public also often use this chainsaw.
Video: Replacing the Clutch of a Petrol Mower
First you need to prepare the necessary tools:
- The special key is called a stripper. This often comes with a chainsaw.
- Screwdriver for unscrewing the screws securing the protective cover
- Wrench. Used to unscrew the cap and secure the tire (supplied with the tool)
- Rope. Shut off the crankshaft. It is better to use asbestos, but any will do. A rope is used if the tool does not have a special piston locking key.
If disassembly is performed for replacement, then you need to prepare a new mechanism in advance. When purchasing a new coupling, you only need to know the exact brand of chainsaw, since the devices differ in outer diameter, thread and design of the working mechanism. The instructions for removing the clutch on a chainsaw are as follows:
- First you need to unscrew the nuts securing the casing and tires
- Remove the cover from the handbrake, chain and bar.
- Then proceed to remove the plastic cover to get to the spark plug. To do this, unscrew the screwdriver and remove the cover along with the air filter.
- The chainsaw spark plug is unscrewed with a spark plug key
- Insert the cable into the spark plug hole in the cylinder (install a special key, if available). This is done in order to dampen the crankshaft. If the diameter of the rope is several times smaller than the size of the hole for the candle, knots can be made on it
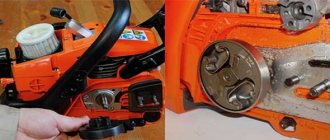
- Next, move on to the clutch screwdriver. To do this, take a special key that must be turned on. If you don't have a wrench, you can use a tool from an angle grinder or make your own puller, which is also not difficult
- The key veneers must be installed in the coupling holes and then continue to rotate the part. You need to rotate clockwise. Manufacturers usually indicate unscrewing instructions in the form of an arrow.
- As the clutch rotates, the piston reaches top dead center and the crankshaft locks. Then, applying a little force, the clutch will come off with further unscrewing of the mechanism
- The twisted coupling is removed from the chainsaw. If necessary, the drum with the sprocket is also removed.
The procedure is not complicated and does not take much time. Assembly is carried out in the reverse order of removal. To avoid any malfunctions, it is recommended to install exactly the same clutch on the corresponding tool model.
Owner reviews
For more than a year and a half I have been the owner of a Champion 137. I really like the saw, although I rarely use it, only when I need to prepare firewood for the barbecue and sauna. In all the time that I have owned this saw, it has failed only once. As it turned out later, I myself violated the launch algorithm and filled the candle. After reading the instructions, I found out how to ventilate the engine after an unsuccessful start-up attempt and started the saw myself, although it smoked heavily for some time, but then the exhaust returned to normal. I'm happy with the saw and recommend it.
I bought a Champion 137 after my STIHL 180 broke, and the cost of repairs turned out to be equivalent to buying a Champion 137. Now I regret it a little. As soon as you pick up the Champion, you immediately feel the difference from the Shtil. The saw starts worse when hot, it cuts worse, but I reassure myself that I paid for it almost half what the new STIHL 180 costs. Most likely, this saw will suit those who have not previously dealt with chainsaws.
My string trimmer keeps spinning when idle | Home Guides
The string trimmer uses the same clutch mechanism as a chainsaw to prevent rotation of the working part of the tool when the engine is idling. If the clutch does not work properly and the string does not stop turning, the instrument may not be safe. it can destroy something or even cause injury. The engine can idle very quickly. which is easy to fix. or clutch service may be required.
Trimmer clutch operation
The drive shaft of the string trimmer is connected to the flywheel of the motor using a centrifugal clutch, usually located in the front part of the motor housing. coupling
consists of two parts: a body or drum connected to the trimmer shaft, and a block connected to the engine. The springs hold the boots together and hold them in a compressed state until the engine spins up quite quickly to separate them and they come into contact with the drum. When this contact is made, the drum also rotates. It stops when the engine slows and the springs push the boots back.
Clutch faults
Clutch
can fail in 2 different ways.
In one scenario, the friction coating on the pads wears out, they slip on the drum, and the string head turns intermittently or not at all. This can also happen if oil gets into the clutch and contaminates the shoes. In the 2nd scenario, the shoes are never removed and are always in contact with the drum. A broken spring is usually a prerequisite for this type of problem, but can also be the result of corrosion. If a spring is broken, it can be replaced from time to time, but it is usually easier to replace the entire clutch
.
Clutch access
To get to the clutch, you need to remove the drive shaft, which is bolted to the engine housing. You may also have to remove the throttle cable and ignition wires. Before work, be sure to drain the fuel from the trimmer. To remove the single screw holding the clutch drum in place, you must prevent the engine piston from moving; Not a bad way to do this. insert a nylon rope into the spark plug hole. By unscrewing and removing the drum, you can unscrew the boot and repair or replace it as needed. If you decide to change it, it is recommended to change the drum immediately.
How to remove the clutch on a brushcutter / how to remove the clutch on a trimmer
- To remove the clutch on a brushcutter (removing the clutch on a trimmer is similar), you must first remove the muffler cover, the iron stand, the starter cover and the cylinder cover so that they do not interfere with removing
the clutch cover of the brushcutter. - Remove the shock absorber cover (by unscrewing the two side screws), loosen the bolt holding the shock absorber together and remove the pipe from the shock absorber.
- Unscrew 3 or 4 bolts and remove the clutch cover.
- We evaluate the wear of the pads and clutch drum, see if the spring is broken, and inspect the condition of the bearing.
- To change, for example, the clutch pads (weights) of a brush cutter, you need to remove the clutch spring, and then unscrew the axle bolts on the pads (if necessary, having previously locked the crankshaft, pushing a rope into the spark plug hole when the piston is at BDC).
Adjusting the carburetor of the Champion 137 chainsaw
Adjustment can correct the situation only when there is no air leak in the saw and the fuel system is clogged, and the chainsaw continues to gain speed at idle or does not develop speed and full power.
READ How to Break in a Trimmer
The Champion 137 carburetor is a diaphragm carburetor and has three standard adjustment screws (H), (T) and (L). Correct setup is carried out according to the following algorithm:
- with the engine turned off, all screws except (T) are set to a position of 1.5-2 turns from the fully tightened state;
- start the saw and let it warm up for several minutes;
- by tightening the screw (L), find the maximum number of revolutions at idle, then loosen the screw by ¼ turn;
- screw (T) is used to adjust the idle speed to 3000; if the adjustment is made without a tachometer, then the screw (T) is unscrewed until the chain on the saw stops spinning;
- by tightening the screw (H), set 12,500 rpm; if there is no tachometer, then by ear the maximum rpm is found with the throttle fully open, after which the screw is unscrewed by one quarter of a turn.
A properly adjusted carburetor ensures stable engine idling and makes it responsive.
How to disassemble Champion 137
In order to disassemble the Champion 137 yourself, you need to know only two basic rules:
- The flywheel and clutch are unscrewed as the chainsaw moves.
- In order to block the crankshaft from turning, you need to use a special corkscrew or cord with knots tied to it, which is installed through the spark plug hole and blocks the piston stroke.
The chainsaw parts are removed in the following order;
- top cover;
- starter and chain brake cover;
- flywheel and clutch ;
- carburetor and muffler;
- engine.
When assembling, the reverse sequence must be observed.
The Champion 137 chainsaw crankcase must be installed with red sealant; the sealant cannot be used anywhere else.
If during disassembly of the Champion 137 chainsaw the carburetor gaskets and spacers were damaged, then they must be replaced during reassembly, otherwise the saw will suck in air and all repairs will be in vain.
In order to check the crankshaft seals for air leaks in the absence of a special tool, you can use the following method.
Remove the flywheel, clutch and carburetor from the chainsaw, then use a syringe to pour kerosene into the engine crankcase (if there is no kerosene, then you can use the fuel mixture), while visually checking the seals for leaks. If there are leaks, then the seals are defective and need to be replaced.
Examples of designs of standardized couplings
Rigid flange and sleeve couplings
A rigid flange coupling uses a bolted connection of flanges. A sleeve coupling uses a rigid sleeve to connect two shafts to each other.
Elasto-torsional jaw couplings
The coupling consists of two hubs and an elastic element - a “gear”. Torque transmission is carried out by geometric closure. Break resistant. Vibrations and shocks that occur during operation are effectively damped and reduced. Due to the use of an elastic element, it does not tolerate temperature loads well.
Hydraulic coupling
A hydraulic coupling is a device in which the shafts do not have a rigid mechanical
connections and transfer of mechanical energy occurs under the action of the flow of working fluid (oil) from the pump wheel to the turbine wheel. The peculiarity of the hydraulic coupling is that it limits the maximum torque, smoothes out pulsations, and eliminates engine overload during startup and acceleration.
Electromagnetic and magnetic coupling
Electromagnetic and magnetic coupling - the shafts also do not have a rigid mechanical
connection and, in addition, it allows the transfer of mechanical energy due to magnetic forces. When voltage is applied to the magnetic body, the clutch armature attracts the drive and driven disks. The following types of electromagnetic couplings are distinguished:
Contact - voltage is supplied to the magnetic body by the brush holder EMShch, type ETM ... 2
Non-contact - voltage supply through a current conductor, ETM coupling type ... 4
Brake - ETM... 6
Viscous coupling
Main article: Viscous coupling
A mechanical device that transmits torque through a viscous fluid.
Champion 237 16'' - characteristics and purpose
This model is used for regular cutting of small and medium-sized trees. It consumes a small amount of fuel and a minimum of oil to lubricate the chain. Among the main features of the tool, it is necessary to highlight the lateral location of the device for tensioning the chain. Thus, replacing the saw element will be much faster than in other models. Other features of the saw include:
- Engine volume – 37 cm3;
- Engine power is 2 liters. With. or 1.5 kW;
- Tank capacity for fuel mixture – 325 ml;
- The capacity of the tank for oil lubricating the chain is 250 ml;
- Assembled weight – 4.6 kg.
A fairly powerful motor and the light weight of the tool make it possible to successfully use it at heights without having a level support underneath.
The saw is quite easy to start thanks to the lightweight starter system
Another important advantage is the modified clutch, which has an increased working life.
How to remove the clutch on a trimmer. How to remove trimmer clutch: eReplacementParts.com
This article explains how to remove the sleeve from most line and string trimmers. Tips are provided for removing difficult clutch drum screws.
Here at eReplacementParts.com is one of the more common questions we receive about lawn trimmers. this is how to remove the trimmer clutch. The trimmer clutches must be removed when replacing the clutch drum, replacing other clutch parts, and also when it is necessary to access the trimmer starter for repair, maintenance or replacement. Removing the clutch drum is not difficult, since when you turn the clutch drum screw, the piston will rotate only in this case, if the piston is somehow blocked. This article includes detailed annotations and pictures that explain how to remove the trimmer clutch and how to prevent the trimmer piston from rotating. For more information about line trimmers: Click here to read Line Trimmers 101. Tools needed to remove the trimmer clutch:
For this demonstration we are removing the coupler from the Ryobi SS30 String trimmer, but most trimmer couplers are removed in the same way.
Drain the trimmer
To safely remove the clutch drum and perform other repairs, all trimmer fuel must be drained before use.
Open the fuel tank and carefully drain the gas. Pump the primer a couple of times to remove excess fuel from the system. Close the tank cap and try to start the trimmer. If it starts, let it run until the remaining fuel is used up. After removing the fuel, the trimmer is ready for disassembly
Steps to Removing a Trimmer Clutch The first task when removing the clutch drum is to separate the trimmer shaft from its motor. 1.Remove the screws securing the shaft to the engine
After removing the fuel, the trimmer is ready for disassembly. Steps to Removing a Trimmer Clutch The first task when removing the clutch drum is to separate the trimmer shaft from its motor. 1.Remove the screws securing the shaft to the engine.
The screws and other fasteners that secure the motor to the trimmer shaft must be removed.
For the Ryobi SS30, this means removing 4 #25 Torx screws from the motor assembly.
2. Disconnect the motor wires leading to the switch.
It is necessary to disconnect the motor wires in order to completely separate the engine from the shaft.
This is best done with a pair of pliers.
3. Disconnect the throttle cable from the carburetor.
The throttle cable is usually held in place by a screw and pin that connects it to the carburetor.
( TIP: Now that the engine is completely removed from the trimmer shaft, the next step is to remove the clutch drum screw that holds the clutch drum to the engine. This is the only difficult part involved in removing the clutch. To remove the clutch, you need to unscrew the screw from the hole in the clutch drum, which connects the drum to the engine. To remove the clutch drum screw, you first need to secure the trimmer piston. Otherwise, rotating the drum screw will only turn the piston, and the screw will not come out. To lock the piston, you first need to gain access to it by removing the trimmer spark plug. ) 4. Remove the trimmer spark plug to gain access to the piston cylinder.
- Remove the spark plug cap.
- Using a 3/4" socket wrench and a ratchet wrench, unscrew the spark plug and remove it.
Now you must create the piston cylinder. 5. Tie a piece of nylon rope around the piston.
The trimmer piston must be secured, otherwise turning the clutch drum screw to remove the clutch drum will only turn the piston.
When you feel resistance in the starter cord, you will know that the piston is tightened enough to remove the clutch drum screw.
Now the propeller drum is ready to go. 6.Remove the clutch drum screw and remove the clutch drum.
- Remove the clutch drum screw located in the hole in the base of the clutch drum.
- Clutch drum screws:. ordinary thread. And. turn counterclockwise. to weaken.
- Remove the clutch drum.
For the Ryobi SS30, this screw again requires a #25 Torx screwdriver.
7.Remove the clutch discs.
The clutch and clutch drum should now be removed and the trimmer starter should also be accessible. Conclusion The key to removing the trimmer clutch. This is to tie the piston with nylon rope. To start repairing your trimmer, visit our trimmer parts page to search for trimmers by manufacturer. Alternatively, enter your trimmer model number in the search field at the top of this page. See. See our article “Search for tool model and type numbers” for more information on clearly searching for parts. Thanks for including this and other eReplacementParts.com resources and machine information. What are we talking about?
To watch online, click on the video ⤵
ECHO GT-22GES a couple of soresRead more
Repair trimmer ECHO SRM-22GESMore
How to properly replace the clutch on a trimmerRead more
Repair of trimmer Echo SRM-22GESRead more
Echo GT-22 ges seems to be mowing, but apparently notRead more
Replacing the clutch disc on a Hammer MTK 28 brushcutterMore details
Repair of brush cutters (ringing and grinding noise when starting) disassembly down to the crankshaft and diagnostics. Repair brushcuttersRead more
Crankshaft play ruins the oil seals, HOW TO FIX THE BREAKDOWN, repairing gas trimmersRead more
Do-it-yourself trimmer repair Stihl FS 38Read more
Repair of trimmer Echo SRM-22 GES, replacement of carburetor. Read more
Generator bearing replacementRead more
Spare parts for brush cutters ECHO SRM-22GES, GT-22GESMore
Lubricating the shaft and gearbox on a lawn mower.Read more
Lawn mower clutch Operating principle Varieties MaintenanceRead more
How to lubricate the gearbox of a brush cutterRead more
Petrol mower Echo GT22GES, repair, part 2, replacement of oil seals and cylinder headMore details
Petrol mower ECHO SRM 22GES - chokes under loadRead more
How to remove the magneto rotor (clutch flywheel) of a lawn mower without brute forceRead more
Source
Repair and lubrication of the lawn mower gearbox
The role of the gearbox is to transmit torque from the motor shaft to the cutting tool through 2 toothed gears with different numbers of teeth. Torque is transmitted at an angle of 300. The speed of the lower cutting disk is 1.4 times less than the engine speed. Gears must be clean and lubricated. There is a hole under the screw on top to supply oil to the teeth.
First, you should clear the area where the plug covers the hole from soil and grass. Unscrew the plug with the appropriate tool, it is included with the saw. We use grease from a tube. You choose either a native lubricant from the manufacturer, or well-known high-quality compounds, such as Oleo-Mas, Litol-24, Azmol 158. Open the protective layer of the tube and lay the instrument on its side. Slowly rotating the knife, squeeze the lubricant into the gear housing. The gears, turning, spread the composition with teeth over the entire surface. You can also add lubricant using a special syringe.
Too little or too much lubrication can cause the gearbox to heat up. An audible knock and play indicate the destruction of the bearing or the ingress of dirt due to damage to the anthers. Bearings must be replaced using a puller, without using the heating method.
If the gearbox wobbles and moves along the rod, it is necessary to replace the housing, or temporarily tighten the assembly with a clamp to secure it to the pipe. If the knife stops rotating, it means that the gears are not engaging - the teeth have become worn out or chipped. The pair will need to be replaced with complete disassembly of the unit.
When replacing a gearbox, it is necessary to select a new unit, guided by:
- pipe diameter;
- drive shaft diameter;
- drive shaft cross section;
- method of securing protection
What types of fishing lines are there?
The most common type of fishing line, which is suitable for almost all types of reels, is round cord.
This is an ordinary fishing line suitable for mowing succulent grass, but it will be much more difficult to mow dead wood, and even more so it will not cope with bushes. As a rule, the diameter with which young grass can be mowed does not exceed 1.6 mm. The thicker the thread, the coarser the grass it can overcome.
Important! When choosing a line for a trimmer, you must follow the instructions for your tool, since a thin thread will lead to increased wear on the rotating mechanism, and a thick thread will lead to overload of the engine. There are fishing lines with sharp edges in the form of an asterisk or square; this option is more suitable for mowing dry grass due to the existing sharp edges, but its disadvantage is greater wear and is inferior in strength to round cord
There are fishing lines with sharp edges in the form of an asterisk or a square; this option is more suitable for mowing dry grass due to the existing sharp edges, but its disadvantage is greater wear and is inferior in strength to round cord.
There are fishing lines with improved aerodynamics with characteristic dents, scales and notches; such a product makes less noise, but it is used only on lawn mowers, since it is difficult for such thread to come out of the spool; it is most often used with disks into which segments are inserted. The disadvantage of this product is its fragility.
Most often in gasoline trimmers with an engine power of more than 1.5 hp. cords with a metal cable inside are used.
This thread is ideal for mowing dry grass and small shrubs. The presence of a core has a positive effect on the wear resistance of this material.
The disadvantage of such a cord is its price, which is significantly higher than the above listed opponents.
How does the clutch on a pit bike work?
The main operating principle of this unit is to create friction force to transmit torque to the wheels. The clutch consists of:
- Discs that create friction due to their friction surface.
- The discs are in contact with steel plates located between them.
- All this is placed between the driven and pressure plate.
- They are held together by three spring bolts. They pass through the clutch discs and are screwed on the reverse side with special nuts. This design aligns the clutch elements and allows the friction elements to rotate easily.
- Clutch springs press all elements against each other.
When the mechanism begins to move, it initiates friction between the friction and steel discs. This force is then transmitted to the transmission. The entire structure fits in the clutch basket. On its inner side there are grooves that coincide with the “keys” on the outer sides of the friction discs. With their help, the plates are fixed in the basket. At the same time, they allow the disks to move up and down.
All this is mounted on the input shaft of the gearbox. The engine turns the clutch basket, which in turn drives the clutch plates, which rotate the main shaft on the transmission.
For the clutch to stop working, the discs must separate from each other. Once the driven disc stops rotating, the main shaft also stops and the flow of engine power to the transmission stops.
We will answer the question of how to adjust the clutch on a pit bike using the example of a standard Chinese-made bike with a 125 cc engine. To adjust the clutch we will need: a Phillips screwdriver and a ten key.
Review of the Champion 137 household chainsaw
One of the high-quality chainsaws made in China is the Champion 137 saw. We will consider it in this review. Let's consider the use of this model, design features and self-repair.
Sources:
https://armatool.ru/lucsie-benzopily-cempion-obzor-otzyvy-polzovatelej-i-remont/ https://benzopilok.ru/brend/Champion/benzopila-137.html
Basic rules for using Champion 251
After unpacking the new Champion 251 saw, the user will need to attach the saw section to the frame following the manufacturer's instructions. After assembly, you can begin the first start and run-in of the engine. Before starting, you should familiarize yourself with the safety rules, which include:
The chainsaw can only be operated with two hands
Working with one hand can cause soft tissue injuries
Pay attention to the symbols located on the device body. The work surface must be prepared
Do not work in high humidity, poor lighting or in poorly ventilated areas. Before operating the Champion 251 chainsaw, you must wear protective clothing and hearing protection. No strangers or animals should be within a radius of several meters from the place of work. The manufacturer draws attention to the fact that making changes to the design of the product is strictly prohibited. This may result in personal injury, wear and tear on the chainsaw, breakdowns, and void the warranty.
You can read the operating instructions for the Champion 251 saw in more detail here. Download instruction manual
Materials:
- metal perforated plate (100 mm x 240 mm)
- 2 hacksaw blades for metal
- 4 screws and 4 nuts M5
- 4 washers and 4 enlarged washers
From the point of view, hacksaw blades should not be completely hardened.
Everything you need to make a nozzle
First you need to make the base of the nozzle. To do this from a metal plate
cut out a square with a side of 100 mm. You need to mark it in such a way that there is a hole exactly in the center (at the intersection of the diagonals). To do this, measure a distance of 50 mm from the center of the selected hole perpendicular to the short side of the plate and mark the cutting lines.
We cut off the excess and get a square of 100 mm x 100 mm. Now you need to slightly round the corners and drill out the central hole for the trimmer shaft.
Round the corners and drill the central hole for the trimmer shaft
We cut the metal sheets, measuring 8 cm from each end. We get 4 blanks with ready-made holes.
We cut sheets for metal
We cut knives from blanks
As a result, we get knives of the same weight and size; they can be sharpened a little on one side. Now all the parts of the homemade trimmer attachment are prepared, you can start assembling.
Everything is ready for assembly
Fastening the knives
The end of the screw must be riveted so that the nut does not fly off.
The end of the screw needs to be riveted
The nozzle is ready. It is installed with nuts to the ground and secured in the same way as the three-bladed knife that comes with the trimmer. When colliding with a stone, the knives fold and go inward a little.
When working with a trimmer, it is important not to forget about safety precautions when using any attachments, especially homemade ones. We invite you to familiarize yourself with typical mistakes when building a house from rounded logs
We invite you to familiarize yourself with typical mistakes when building a house from rounded logs
16.40. Scooter repair. Centrifugal clutch - removal and installation, replacement of pads
16.40. Scooter repair. Centrifugal clutch - removal and installation, replacement of pads
An assistant will be required to complete the work.
The variator cover is removed, the V-belt is removed (see Variator belt - replacement).
1. Unscrew the driven pulley nut. This nut is tightened with a fairly large torque, so in order to unscrew it, you need to fix the pulley. It is best to use a special stopper, which is easy to make yourself, or simply insert a metal rod of suitable length between the clutch drum hole and the surface on which the scooter is installed. We put the spanner on the nut, lightly use a hammer to loosen the nut and unscrew it.
2. Remove the clutch drum from the shaft.
3. Remove the driven pulley assembly with the clutch block.
4. Inspect the clutch pads for wear and mechanical damage. It is necessary to make sure that the friction material of the pads has no mechanical damage, chips, deep scratches, and that the adhesive connection between the friction material and the pads is not damaged. If such damage is present, the pads must be replaced.
5. Measure the thickness of the friction layer on the pads. If the thickness is less than the minimum allowable specified by the scooter manufacturer (usually about 1 mm), the pads must be replaced
It is also important that the thickness of the friction layer on all pads is the same, and wear is uniform over the entire area of the lining
DIY repair
You can repair the Champion 137 either at a service center or yourself. Typical malfunctions of this model are as follows:
- lack of spark;
- stopping the fuel supply;
- carburetor malfunctions (clogs, defects in the injector valve, defects in the main chamber membranes and fuel pump);
- air leakage into the crankcase through the gasket or seals;
- carburetor depressurization.
If you have some experience, you can diagnose and fix faults yourself.
If for some reason the chainsaw does not hold or picks up speed at idle, this is the first sign of air leaking into the crankcase or carburetor. It is impossible to operate a saw with such a malfunction, since overheating and jamming of the engine will follow.
What contributes to accelerated clutch wear?
When starting off, do not press hard on the gas. The higher the engine speed when the clutch pedal is not fully released, the more the clutch disc wears out. Ideally, it is better to start with one clutch. In this case, you need to press the pedal sharply and release it smoothly.
Some drivers have the habit of holding the clutch depressed at a red traffic light. This reduces the life of the release bearing and compression spring. In this case, it makes more sense to release the pedal and put the gearbox in neutral.
Prolonged driving with the clutch depressed also contributes to rapid wear of the release bearing. More often this happens to inexperienced drivers who simply forget to release the pedal.
Another bad habit is to keep your foot on the pedal, pressing it lightly. In this case, the driven disk is not pressed tightly enough against the flywheel and can wear out due to slipping.
Incomplete shutdown. In this case, it is difficult to change gears, grinding, crackling and other extraneous sounds are heard.
Slipping (incomplete engagement). Often accompanied by an unpleasant burnt odor. Occurs due to loose fit of the discs and flywheel to each other. The most common reason is that the driven disc is oily or has become very worn and thin. The problem may also be wear on the flywheel working surface, weakening of the diaphragm spring, or sticking of the clutch drive.
Jerks when turned on. This can be caused by damage to the friction linings of the driven disk, its oiling, deformation of the pressure spring, and wear of the damper springs.
Strong hum or squealing sound when the pedal is pressed. This indicates the imminent failure of the release bearing.
Pedal jamming. May be caused by a stuck or broken cable or a faulty lever. The hydraulic drive may leak fluid.
Pedal travel is too long. The car starts to move only when the pedal is almost completely released.
The appearance of at least one of these signs is a reason to urgently contact a car service center. If you ignore them, then very soon the moment will come when your car simply refuses to move, and problems with the gearbox may be added to clutch malfunctions.
What is the best way to change it - entirely or separately?
Replacing clutch elements in itself is not too difficult. But in this case you have to remove and then put the gearbox back in place. This is the most time-consuming and expensive part of the work.
Clutch parts have approximately the same service life. If your disk is worn out, then there is a high probability that the release bearing will soon fly off, the spring will weaken, or the clutch fork will break.
If you change each part separately, then each time you will need to pay a lot of money for installing / dismantling the gearbox.
Therefore, the conclusion is obvious - if you have a problem with the clutch, replace it as a whole, and not every part as it fails. In the long run, you will save money and avoid unnecessary headaches.
Features and best models
The mower deserves special mention, notable for its versatility, reliability and ease of operation. The company's specialists have developed many types of braids, with different characteristics and applications.
For example, the range of lawn mowers is designed for mowing grass over large spaces. For this purpose, a self-propelled wheeled system was developed, with the help of which it became possible to care for a large area without spending a lot of time and effort. A brush cutter is perfect for decorating shrubs, giving them some artistic image and texture. And if you need a lawn mower for tall grass and uneven areas, then follow this link and get complete information on selecting this type of equipment.
If you need a more subtle approach to grass cleaning, for example, around flower beds or between trees, then a gasoline trimmer, designed for accuracy and precision, will do the job perfectly. The company's specialists took into account all the nuances and possible difficulties when working with scythes, so they equipped them with nylon strings, which prevent mechanical damage to trees.
A special AutoCut trimmer head is also used, which ensures the normal functionality of the gas trimmer string knives. This article will tell you about the prices for gasoline manual lawn mowers and trimmers, and it will also help you make the right purchase, which you will not regret.
Professional trimmers include Stihl FS 130 and FS 250. Let's look at the characteristics and properties using the example of several mowers, in particular FS 38, FS 70 and FS 130.
Watch the features of the device in the video.
Petrol lawn mower FS 38
The model is distinguished primarily by its simplicity and compactness, which is quite enough for proper care of the local area. The main control keys are located on the handle of the device, which greatly facilitates and speeds up work.
Characteristics:
- engine power – 0.9 hp;
- engine capacity – 27.2 cm3;
- tank volume – 0.33 l;
- engine type – two-stroke;
- bar – straight;
- handle – D-shaped;
- equipment - 2-tooth grass trimmer blade, protective glasses, belt;
- weight – 4.1 kg.
This model is one of the most popular on the market! You will learn about all the units that are included in the rating of the best gas mowers here.
Price mower Shtil FS 70
It is a more advanced model, characterized by higher power and multitasking. An anti-vibration system is provided to significantly reduce the impact of a running engine on the handle.
Characteristics of FS 70:
- engine power – 1.2 hp;
- engine volume – 27.2 cm3;
- tank volume – 0.34 l;
- engine type – two-stroke;
- bar – straight;
- handle – T-shaped;
- complete set - belt, reel with fishing line;
- line diameter – 2.4 mm;
- weight – 5.4 kg.
Model FS 70
FS 130
The model is a professional model, so the goals set for him will be a little higher. It is designed for mowing coarse grass, cleaning tough bushes and young trees.
It features the latest high-power engine that does not emit large amounts of harmful emissions.
Characteristics:
- engine power – 1.9 hp;
- engine volume – 36.3 cm3;
- tank volume – 0.53 l;
- bar – straight;
- handle – T-shaped;
- equipment - shoulder strap, two-blade knife;
- line diameter – 2.4 mm;
- weight – 5.9 kg.
The range of prices for these models does not indicate any difference in quality; first of all, each Shtil mower is designed for a specific type of work.
It is clear that there is no point in purchasing a more expensive and powerful model if you have a small plot or front lawn. Simpler models will cope with this task perfectly, but the word “simplicity” is not used here in a derogatory manner. More powerful mowers are designed to handle larger areas with overgrown and dense surfaces, hence the price difference. If you are confused by such a variety of tools, then do not be upset, but feel free to click here and we will tell you how to choose a lawn mower for your dacha.
Characteristics of the model in the video.
However, no matter what model you choose, you must follow certain operating rules recommended by the manufacturer in order to avoid possible breakdowns.
About grooves
Grooves on the surface of the linings are a foreign invention. It is believed that they serve to remove heat and remove wear products to the periphery. The groove lines are located, as a rule, along chords, at a certain angle to the radius of the ring. They have the shape of a straight segment or an arc of slight curvature. This groove design somewhat compensates for the loss of strength of the lining.
The grooves are produced directly in the mold. If you look closely at the groove, you will notice an overlapping shoulder near the edge of the lining - this is the trace of the cutter exit during the manufacture of the mold.
This collar can interfere with the removal of abrasive, that is, play the opposite role to the required one, and it should be removed. But in practice no one does this.
And the debate on the topic “do we need grooves” is still not over. Judge for yourself - the depth of the groove is much less than the depth of the rivet head. The groove is completely worn out when the lining has reached 30–50% of its service life, after which the clutch operates with a solid disc. But it is impossible to increase the depth of the groove - this will sharply reduce the strength of the lining.
Therefore, linings are produced both with and without grooves. The latter option reduces the cost of both the molds and the products themselves.
The semi-finished lining is put under a press, where it is maintained at a strictly defined temperature and pressure
This is how the pads come out from under the press
Overlays after sanding. But now we’ll check them - is there any warping or thickness differences?
Modern elliptical friction lining of the clutch. The characteristic thread pattern indicates the correct manufacturing technology. There will be no runaway at high speeds
Electric trimmer vibrates
Many users of mowers have noticed that after some time after the device starts operating, it begins to vibrate strongly. Some trimmers, mainly more expensive models, have an anti-vibration system in the form of shock absorbers located between the engine and the rod. But in some cases, even this cannot save you from strong vibration. The reason that strong vibration appears in the trimmer may be a small amount or complete absence of lubricant on the rigid or flexible shaft located inside the device’s rod.
Replacing the lubricant of the rigid shaft is as follows:
- unscrew the gearbox located at the bottom of the rod;
- after removing the gearbox, you will see the end of the shaft, which you need to pull to remove the part;
- after removing the shaft, it must be generously lubricated with special grease “Shrus-4” or regular grease “Litol-24”;
- Apply a small amount of lubricant to the shaft and spread it evenly along the entire length of the part, including the splines at the ends of the rod (if they are worn out, the shaft will have to be replaced);
- After lubrication, insert the shaft back into the rod and put the gearbox in its original place.
The structure of a lawn mower and common malfunctions
The easiest way is to have your lawn mower repaired by allocating a certain amount of money from the family budget; prompt and high-quality repairs with your own hands are no less simple and convenient if you want to understand the design of the lawn mower and fix all the problems.
Mass and piece production of trimmers is based on the use of generally accepted technology; a typical design diagram consists of certain elements and parts, it is important to know them when carrying out independent repair work:
- top part. The basis of the entire structure, where all the important elements are assembled, such as the starter, carburetor and lawnmower engine;
- middle part. A hollow rod, inside it there is a cable connecting the motor and the gearbox, which drives the cutting line. This part contains fastenings for distributing the weight of the entire structure and a belt for fixing the trimmer on the belt of the person using the trimmer for its intended purpose;
- Bottom part. It houses the gearbox and cutting elements, which are hidden under a practical cover that protects the user. The casing provides an increased level of safety, preventing large fractions of debris, stones and glass from entering a person while working with a lawn mower.
The most common and common unit breakdowns that can be self-corrected include the following problems:
- engine malfunction, due to which the lawn mower does not start and does not work;
- increased vibration of the mower bar, which complicates its intended use;
- increased overheating of the gearbox, its accelerated heating during operation;
- slow and weak functioning of the cutting line at insufficient speed;
- clogging of the starter grill, causing the engine to overheat and fail to operate;
- rapid and frequent carburetor clogging due to the use of low-quality fuel;
- clogging of the air filter due to failure to take care of the device.
All these problems can lead to the device losing its functionality; before ordering the necessary spare parts for the mowing machine, a visual inspection and diagnostics of the device should be carried out.
Individual spare parts and assemblies of the device require special attention; to check them, you do not have to contact a professional technician; a set of diagnostic measures will help you to identify the consequences of loss of performance with your own hands.
Basic coil malfunctions
Users of electric trimmers and lawn mowers often encounter problems with the semi-automatic mowing head. Coil malfunctions can be the following:
- the line does not extend automatically;
- the cord spontaneously comes out of the reel.
If, when you lightly hit the trimmer coil button on the ground, the line does not lengthen, then the reasons for this may be the following.
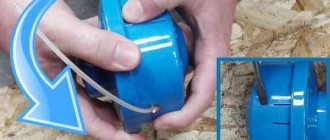
Option 1 - biting occurred, i.e. clamping the cord between the turns. This problem usually appears if the user winds the line onto the reel unevenly, with intersecting turns, or winds it with insufficient tension. In the latter case, when the mowing head rotates at high speeds under the influence of centrifugal force, the cord begins to tighten, resulting in possible inter-turn clamping of the fishing line. To fix the problem, you will have to disassemble the reel on a trimmer and rewind the cord correctly, that is, in even turns with good tension.
Option 3 - the fishing line is soldered inside the mowing head. This causes the reel to lock and not spin when the button is pressed. Basically, this happens for several reasons: poor quality of the cord, overheating of the reel during prolonged operation of the unit, impact of the fishing line on hard objects.
- In the first case, the cord from third-party manufacturers may be made of low-quality and fusible materials that cannot withstand mechanical and temperature loads. Therefore, preference should be given to “branded” fishing lines.
- But, if you nevertheless purchased a fishing line of unknown quality, and it often gets soldered during operation, then you can follow the example of some users who, after threading the cord into the reel, moisten it with either silicone grease (from a can) or mineral oil. This procedure greatly reduces the likelihood of soldering turns of fishing line together.
- Also, the fishing line can become soldered if, during mowing, it hits a hard object (stone, fence, dry branch, etc.). As a result of this, it stretches a little and is pulled back into the head at high speed. The cord heats up due to friction, and its turns stick together. The only thing that can be done to eliminate this problem is to open the trimmer reel and rewind the line.
There are situations when a trimmer user notices a very rapid consumption of fishing line. At the same time, he never hit the button on the ground to lengthen the fishing line. The reason that the line spontaneously lengthens, being cut off by a special knife on the casing of the device, may be the absence of a spring in the mowing head.
We invite you to familiarize yourself with the Greenhouse for seedlings (58 photos): a mini greenhouse for a summer residence, a portable greenhouse with your own hands, a greenhouse and a microgreenhouse with your own hands
When does a clutch need to be replaced?
The chainsaw clutch is removed and replaced if a mechanism malfunction is detected. These disadvantages include:
- Spring damage.
Depending on the model of the tool, the spring can be available in two types. Coil (tape or single) or steel sheet. The spring is damaged by tension, rupture or mechanical defect. To determine the cause of failure of the entire mechanism, you will need to remove the protective cover and drum - Drum damage and manufacturing.
The rupture of this part is often associated with fragments. If such a malfunction occurs, you will need to replace the drum. The inner part also wears out on the drum and needs to be replaced as well. If the drum is blue, it has overheated and should no longer be used. - Development of the mechanism.
This is primarily due to the spring extension, which can be replaced. The threaded connection also wears out. In the event of such a breakdown, the entire coupling will need to be replaced. - Star wear.
Depending on the type of sprocket (folding or non-folding), it is replaced by a drum and, if necessary, a clutch
The service life of the clutch mechanism depends not only on the quality of the parts, but also on the correct operation of the tool
To extend the life of your chainsaw clutch, you need to pay attention to signs that reduce the resource. Such features include:
- Frequent chain jamming or biting in the forest. In such situations, the clutch takes on the entire load, protecting the engine from jamming.
- It is forbidden to increase the speed when using the handbrake, which also leads to wear of the mechanism due to overheating.
- The use of low-quality oil, the wrong choice of tires, chains, etc. All this also affects traction, increasing the load and, therefore, reducing service life.
Detecting a device malfunction is quite simple. To do this you need to cut the workpiece. If the chain speed decreases during cutting or stops when the load increases, then it is time to check the grip. We will discuss in detail how to remove and replace the clutch on a chainsaw in the next section.
Specifications
The range of Champion products supplied to the domestic market includes more than a dozen models. According to the description, they all have the same configuration, differing in engine size and equipment. Despite the budget class, they contain the most advanced technologies. Equipped with a 2-stroke powerful engine with a long service life, they have reinforced internal surfaces of the cylinders, increasing their reliability.
- A vibration suppression system that improves product performance.
- Load reduction system at start-up.
- Additional oil pump for lubrication of the blade and chain. This reduces the heating of the tool during operation.
- Emergency brake and accidental starting prevention mechanism.
- Semi-professional models have a reinforced case and a cooling system.
All Champion are adapted to the conditions of the Russian climate and are easy to use. One of its weak points is the use of a large number of plastic parts, which quickly wear out and require replacement.
Design features
To transfer force from the pedal to the release bearing, in most cases a mechanical cable, electric drive or hydraulics is used.
The driven clutch disc is made of a special friction composite material with a high coefficient of friction. Thanks to heat-resistant components, this material can withstand temperatures up to several hundred degrees.
The disc has spring plates and friction linings that are attached to it using rivets or glue. Most often there is one slave disk, but some systems may have two or more.
Depending on the type of friction, the clutch can be dry or wet. In dry, air is used as the working medium, and in wet, an oil bath is used.
In passenger cars, a diaphragm-type pressure spring is usually used to retract the driven disk from the engine flywheel. It can be flat or cone-shaped. In the central part there are about twenty petals, on which the release bearing presses when the pedal is pressed.
Rules for choosing a lubricant
Many garden tool companies, such as Stihl and Husqvarna, produce their own grease for their products. In this case, it is recommended to use such a product. It best reduces equipment wear. If the original oil is not available for the trimmer, you must consider several factors when choosing a composition:
- The quality of products of the brand that produces lubricants;
- Viscosity of the composition. Shaft torque affects this parameter;
- Adhesion to the surface of site components;
- Lubricant consumption. It is necessary to take into account the air temperature, type and volume of work performed.
The consistency of fats can be liquid or semi-liquid, contain various additives and additives, as well as plastic and solid . Plastic. The most common and hard one. The initial state. The most popular ones included:
- Graphite lubricants that reduce friction and improve gear movement;
- Lithium compounds with high anti-corrosion properties and additives that reduce metal wear;
- Universal substances containing mineral oils and additives that increase gearbox performance.
The most common lubricants include: Litol-24, Champion EP-0, Azmol 158, as well as stock produced by Stihl.