How to replace fishing line in any trimmer
Technological progress provides us with many opportunities to get rid of manual labor. Among other things, this includes mowing the grass, which, when using a conventional scythe, required a lot of physical energy. In modern conditions, this process is greatly facilitated, because The technology used minimizes all costs. Devices such as electric and gas trimmers have firmly taken their place as indispensable assistants in gardening. With their help, mowing grass became more fun than hard and exhausting work.
Structurally, the trimmer consists of an engine, a rod and a working element, which, depending on the vegetation being cut, is either a mowing head or a disc cutter. And if everything is more or less clear with the cutter, then with the nozzle sometimes questions arise. As a rule, they appear when the fishing line runs out.
What knives to put on electric and lawn mowers
Before buying and installing a knife on a lawn mower, let’s find out what they are and in what cases they are used. Today, manufacturers offer consumers a large number of types of these consumables. In general, all cutting tools intended for mowing grass can be classified:
- By the type of material from which it is made;
- According to the shape of its cutting blades.
The main material for making trimmer knives can be plastic or metal. The use of such consumables largely depends on two parameters:
- Type of brush cutter;
- Mowing area.
READ What kind of oil can be poured into the trimmer
For safety reasons, manufacturers do not recommend using steel blades on electric trimmers. Almost all brush cutters powered by electricity and a battery are equipped with plastic blades. Depending on the manufacturer, they can be of a solid disk-shaped design, with several blades, or in the form of a special mowing head that includes the installation of removable plastic blades.
A straight shaft for a gasoline trimmer and a curved one for an electric trimmer
Its design features do not allow placing a metal knife on an electric trimmer.
- The curved rod of the unit reduces the distance from its working part to the mower’s feet. If the blades collide with a stone or other hard object, the scythe is thrown towards the feet.
- The high torque that we mentioned above, in the event of a collision between a metal blade and a hard object, transfers a large load to the flexible shaft of the trimmer and its motor. What causes their premature failure.
- The handle of an electric scythe most often does not have a limiting bar that acts as a stop. This does not exclude leg injury.
It is these features that allow the use of exclusively plastic knives on trimmers with electric motors. When colliding with an obstacle, the blades are destroyed, thereby protecting the mower’s legs from possible injury.
Plastic knives work well with overgrown and dry grass. They can mow down nettles and burdock stems.
The use of metal knives only on gasoline trimmers is also due to design features.
- The straight design of the boom increases the distance to the legs, which ensures complete safety for the mower.
- Comfortable U-shaped and J-shaped handles allow you to hold the tool firmly. The D-shaped handles of the lawn mowers are equipped with a limiter that rests against the leg of the mower, which does not allow the head to be allowed to approach the legs when the cutting disc encounters a solid obstacle.
- The clutch of a gasoline engine allows you to smoothly gain speed to the optimal level. And when the blade collides with a hard surface, it is able to absorb part of the impact.
Thus, gasoline trimmers with a metal blade installed are best used in large areas. They will successfully cope not only with tall, coarse grass, weeds, burdocks and nettles, but also shrubs and young trees.
The shape of the blades of the disk placed on the trimmer does not in any way affect the quality of the work performed. Speed does not depend on them either. Triangular, trapezoidal, rectangular shapes are all a marketing ploy by manufacturers.
If you plan to make hay, it is best to use knives with a large number of blades on your brush cutter. Look for discs with eight teeth or discs with four large blades and four additional ones. Two and three bladed knives will chop up the grass greatly.
How to properly wind fishing line onto a reel? Let's figure it out.
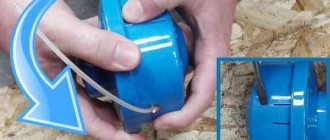
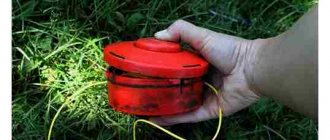
So, first unscrew the nozzle. This must be done by rotating the drum to the right. Here we have a drum in our hands with the remains of an old fishing line. Let's open it. Most often, the lid is closed with latches, which can be opened using a screwdriver by inserting it into the holes and pressing lightly. Or you need to release the lock and turn the cover in the direction of the arrow. In this case, the lid itself must be held, because in drums with automatic line feed there is a spring, which, when straightened, can throw out all the internal parts of the drum. Carefully taking out the reel, we remove the pieces of fishing line from it.
Now you need to take 5 meters of new fishing line and fold it in half (to find the middle). In the middle part of the reel there is a recess (in some designs - a hole) into which you need to hook our fishing line. There is also an arrow on the reel indicating the direction of winding. An important detail - if the reel has two compartments, then one half of the fishing line should be wound in one direction, and the second in the other. When finishing winding, you need to leave 15-20 cm of fishing line free. There are also two notches on the top ring of the reel through which you need to pass these risers. We dealt with the winding itself.
The last step in the line replacement process is to assemble the reel. First you need to install the spring and washers in place. Then, holding the reel with one hand, with the other you need to thread the ends of the fishing line into the corresponding holes on the sides of the nozzle. After this, install the reel in its place, tensioning the line and trying not to displace the spring. When all the internal elements of the nozzle are in place, you can close the drum with a lid. You just need to put some effort into getting the latches into place. Voila! The mowing attachment is ready to go!
Determining the amount of winding
When it comes to the question of how to wind fishing line onto a reel, for beginners it is difficult to determine the amount of winding. It can only be installed experimentally. Experienced fishermen advise proceeding in the reverse order.
If there is a second similar reel, you need to wind the fishing line onto it first, and then the reel tied to it. In this case, you should remember the basic rule: you can wind the fishing line correctly on a spinning reel only if the level of its top layer does not exceed 3 mm from the side of the spool. After this, you should rewind the thread to the main shul, starting with the backing, which, as expected, will be at the bottom.
If there is no second reel of the same type, the measurement is made on the main reel. Then the fishing line is unwound and re-wound on it, starting with reeling.
How to wind line on the reel of a Patriot trimmer?
Almost every beginner when using a trimmer is faced with the problem of changing fishing line. Even though changing the fishing line is very simple, you need to learn how to do it correctly. Replacing fishing line with proper skill will take no more than five minutes - you just need to constantly practice this. This article will look at replacing fishing line using Patriot trimmers as an example.
Which fishing line to choose to refuel a lawn mower
The thickness of the polyethylene thread depends on the model of equipment and varies from 1.2 to 4 mm. She may be:
- with a round cross-section - this is the most durable material for mowing herbaceous plants;
- with a figured section - used for mowing soft plants;
- twisted - used for thin grass;
- professional type, not suitable for all equipment models.
To change the line on a lawn mower, you need to purchase a cutting thread that will be ideal for a particular type of mower.
Criterias of choice
You can soak the thread in a bowl of water for a few minutes to increase elasticity and strength.
Instructions
In order to change the fishing line, you need to remove the old one (if there was one).
The reel is part of the trimmer structure, which is located inside the head of the brush cutter, drum or reel. Depending on the manufacturer, the heads may vary. But this article only covers Patriot, although their mechanism is used by many other companies.
Now you need to understand how to properly remove the head from the trimmer and how to remove the drum from it.
Instructions on how to unscrew the manual head on a trimmer are described below.
- First of all, you need to clean the head of dirt and adhering grass if it is dirty. To do this, you need to lift the lawn mower head up and, holding the casing, remove the special protective cover placed on the drum.
- The next step is to remove the coil from the drum. The reel can be easily removed even with one hand, because it is not secured inside the drum in any way.
- The drum itself is secured in the trimmer with a bolt. This bolt must be unscrewed, after which the drum can be easily pulled out. To do this carefully, you should support the drum with the spool while unscrewing the screw counterclockwise.
- Now you can pull the coil out. As mentioned above, it is not secured by anything except a hook with a metal shaft, so it does not need to be pulled out with force. Carefully, in a circular motion, pull the spool out of the drum.
- Now all that remains is to remove the old fishing line and follow the following instructions.
Installing the coil and drum in their original place is performed using the reverse algorithm.
Before threading the fishing line, you should make sure that you have purchased a thread suitable for the trimmer. If the thread does not fit, fuel or energy consumption increases, as well as the load on the lawn mower engine.
In order to replace the thread itself, you need to prepare a piece of thread of the required size. Most often this requires about 4 m of fishing line. The specific figure will depend on the parameters of the thread, for example, its thickness, as well as on the parameters of the spool itself. If you can’t accurately determine the length, you can do the following: insert and wind the thread until the reel is fully charged (the line level is comparable to the protrusions on the sides of the reel). It is necessary to ensure that the fishing line sits evenly in the reel.
Do not forget that a thick thread will be shorter than a thin one.
Instructions for threading fishing line into the reel are described below.
- You need to take the prepared thread and fold it in half. You should ensure that one edge is 0.1-0.15 m longer than the other.
- Now you need to take the ends in different hands. The smaller one needs to be pulled up to the larger one so that it becomes 2 times shorter. When bending, maintain a distance of 0.15 m.
- Locate the slot inside the coil baffle. Carefully thread the loop you made earlier into this slot.
- To continue working, you need to determine the direction of winding the thread in the spool. To do this, just inspect the coil - there should be an arrow on it.
- If the indicator arrow could not be found, then it is quite possible that there is a written designation. An example is shown in the photo below. The coil head needs to be inspected. There is a direction indicator on it. However, this is the direction of movement of the coil. To get the winding direction, you need to wind in the opposite direction.
- Now you need to fill the reel with fishing line. It is worth noting that there are special guide grooves inside the coil. When winding the thread, you must follow these grooves, otherwise you may damage the trimmer. At this stage, you need to charge the coil very carefully.
- When the user has wound almost the entire thread, he should take the short end (do not forget about the 0.15 m protrusion) and pull it into the hole located in the wall of the spool. Now you need to repeat this action in the same way with the other end (on the other side).
- Place the reel itself in the reel head, first threading the fishing line through the holes inside the reel.
- Now is the time to return the drum to its place. After this, you need to take the ends of the fishing line with both hands and pull them to the sides. Then you need to put the lid back in place (here you can safely apply force until a characteristic click is heard).
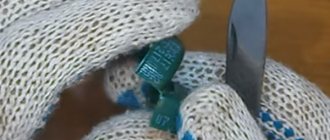
- All that remains is to do some “cosmetic work”. You need to see if the thread is too long. You can start the trimmer and check in practice whether everything is comfortable. If the thread is a little long, you can trim it with scissors.
Peculiarities
The company's range of mowers is varied. The company is constantly improving the efficiency of using its products. Let's consider the main features of the popular variants of mowers from the presented company.
The cord spontaneously elongates
There are situations when a trimmer user notices a very rapid consumption of fishing line. At the same time, he never hit the button on the ground to lengthen the fishing line. The reason that the line spontaneously lengthens, being cut off by a special knife on the casing of the device, may be the absence of a spring in the mowing head. Often, novice users of mowers, trying to load fishing line into the reel, forget to install the pressure spring in the head, or completely lose it when opening the lid, and in the future, do not even suspect its existence.
Also, the line can be extended without using a button if the spring is weakened. If checking the spring has confirmed this fact, then it is necessary to place several washers under it to strengthen its clamping properties.
Common mistakes
Although winding line is a very simple task, many beginners may wind the line incorrectly. Below are the most common mistakes.
- Many people, when measuring thread, think that 4 m is a lot. Because of this, people often measure out less and therefore end up running out of line. Don't be afraid to measure out too much, because you can always cut off the excess.
- In a hurry, some people do not follow the threading grooves inside the spool and wind the thread at random. This leads to the line flying out of the reel and can even cause injury.
- For winding, you should use only the appropriate fishing line. This error is the most common. You need to monitor not only the thickness and volume of the fishing line, but also its type. You should not use the first line you come across for winding, which will not meet your goals. For example, you do not need to use a thread on young grass if you need to mow dead wood.
- Do not turn on the device until it is completely wound and assembled. Although this is obvious, some people do this to check if everything is done correctly.
- In no case should you confuse the direction of refueling, as this will overload the engine, and it will soon fail.
READ How to properly refuel a brush cutter
It is common for beginners to make mistakes, so you must follow the tips given in this article.
To learn how to replace the line on your Patriot trimmer, see below.
Preparing to wind the fishing line
Before the winding process, you must first remove the reel with fishing line from the housing. Depending on the manufacturer, power and type (electric or gasoline), there are three design types of trimmers:
- Compact trimmers with electric drive. Electric trimmer spool This type of tool has a bottom-mounted motor and head, which in turn has two side buttons for removing the bobbin. When they are pressed simultaneously, the upper part of the reel with fishing line is disconnected, and the lower part remains rigidly attached to the braid. Experts recommend disassembling on a level surface to prevent the spring from jumping out.
- Motor- and electric scythes with a curved duralumin rod, not intended for working with a knife. As a rule, reels of such models are equipped with a special wing nut. Removing the spool should be done by holding the reel body with one hand and unscrewing the wing counterclockwise with the other.
- Powerful gas trimmers and electric scythes with a straight bar. Trimmer with a straight bar This model provides the ability to install a knife. Removing the coil in such models is done using two keys recessed into the coil body. To install the trimmer knife, you need to align the hole of the reel and the rod, and then insert a device in the form of a steel pin (screwdriver, iron rod). After fixing the coil, the housing can be easily unscrewed clockwise by hand.
Removing and disassembling the coil
The mowing trimmer head consists of a casing, a spring (not available in every model), a bobbin with cord, and a cover. Before you begin disassembling the coil of the electric unit, be sure to unplug the trimmer from the mains. The method of disassembly depends on the mounting of the mowing head. First option:
- To remove the cover covering the inside of the head, press the latches (latches) located on both sides of the head.
- Remove the cover, under which you will see the bobbin - remove it from the housing. Some trimmer reels have a spring under the bobbin, which should also be carefully pulled out.
- After removing the bobbin, you will see a screw in the center of the case. Unscrew it using a screwdriver.
- After removing the fasteners, take the body of the part and, rocking it in different directions, remove the gearbox from the shaft.
In the second option, the trimmer head is screwed onto the gearbox shaft. To remove it, you need to fix the shaft. To do this, such devices have a hole through which a thin screwdriver or metal rod is inserted. Brief instructions:
- Insert a screwdriver into the special hole, then lock the shaft.
- Grasp the body of your head and begin to twist it. This should be done clockwise, since the thread on the shaft is left-handed.
Winding fishing line onto a reel
Correct winding of fishing line on the trimmer reel
When threading a fishing line for the first time, this process may seem quite labor-intensive, but with time and skill the task is solved much faster.
In order to thread the fishing line, you need to:
- Take the coil and unscrew its cap. Some reels are threaded to the left, so the cap must be unscrewed in the required direction.
- Measure out five meters of fishing line;
- Fold this segment in half, that is, determine where the middle is;
- Next, place this middle of the fishing line in a special hole on the reel;
- Wind the fishing line in the direction the arrow points;
- If there are two places for winding, then the first part of the fishing line should be wound on one half of the reel, and the second part on the other half;
- Insert both ends of the fishing line into the holes of the reel;
- Screw on the lid.
Connecting the backing to the spool
Another important point in the question of how to properly wind the fishing line on a reel is its connection to the spool. Some fishermen do not secure the line at all, believing that it is long enough and will never completely unwind. This is the wrong approach. By securing the reel or fishing line in the spool, you don’t have to worry about the loss of large prey or the idle scrolling of the fishing line when fishing for fish.
Among the many different binding methods, the most common are the following:
- A special knot that resembles a clinch. It is very reliable and practically does not stretch.
- A self-tightening knot is a special kind of loop that has some stretch. However, as a result of the tension of the fishing line, such a knot is tightened all the way and holds perfectly.
The choice depends on the preferences of the fisherman. Both options are quite reliable. They will provide comfort while fishing.
How to properly wind the fishing line onto the trimmer reel?
Despite the fact that gardening equipment has been used for quite a long time, for some owners of private houses it is still new. That’s why questions often arise about how to properly wind fishing line on an electric or gasoline trimmer.
This is essentially a simple operation, but all its stages must be performed correctly in order to achieve the desired result. Moreover, only a few manufacturers provide an answer to this pressing question in their operating instructions. Study the article and find out how the line is wound on the trimmer reel.
How to wind fishing line onto the mowing head of a brush cutter (trimmer)
Find out more on our website: Subscribe to our YouTube channel! We are always happy to cooperate!
In this article, we figured out how to wind fishing line onto a trimmer reel. And if you did everything correctly, then when you press and hold the bobbin, it should stretch again.
When buying a new fishing line, be sure to compare it with a piece of an old used cutting element.
Reel with one working antenna
The most common option and easy sequence of actions:
- The dimensions of the reel and the length of the unique factory winding determine the recommended length of fishing line for winding - 2...5 m.
- One end of the fishing line is inserted into the fixing technological hole located inside the spool.
- The fishing line is wound onto the drum in the reverse direction of rotation of the spool in the direction of the trimmer product - usually, on the inside of the reel, an arrow indicates which direction the winding is being carried out.
- A small section of the fishing line is left free to be taken out - it is fixed in a special groove on the inside of the bobbin, designed to hold the winding when assembling the spool into working condition.
- The remaining end of the fishing line is passed through the hole in the outer part of the reel.
- The reel halves are assembled and put on the trimmer rod.
Threading spools of different types of bobbins
It should be noted that there are several types of reels for fishing tackle:
- Inertial;
- Inertia-free;
- Multiplier.
Each type of inertia-free reel has its own fishing thread diameter. If the thread is thicker, it will not be able to be threaded into the spool. Difficulties will also arise if, for example, a monofilament that is too thin and not intended for threading a particular spool is used.
In the case of threading an inertia-free spool, one of two well-known methods is used: - “cross-on-cross”; - parallel winding, that is, thread after thread lies parallel to each other.
It is worth remembering that not a single reel should be overfilled with fishing line, that is, to the very top of the limiting sides. There should always be some reserve left.
Now about multiplier bobbins.
Multiplier spools are a subtype of inertial spools. Many fishermen make the same mistake; they tie the end of the string to the farthest hole of this element.
It’s wrong to do this; you should tie only at closely spaced holes.
How to wind line on a stihl trimmer. THE FASTEST WAY!
Threading a multiplier reel with fishing thread occurs according to the following scheme:
- First, the monofilament is fixed to the body of the spool.
- Next, you need to attach the reel to the spinning rod and pass the free end of the line through the right ring.
- Tighten the device that protects the tackle from jerking fish.
- Apply the axial brake.
- Now you can wind, guiding the line and thereby controlling it.
Reel with one working antenna
The simplest option and simple sequence of actions:
- The dimensions of the reel and the length of the original factory winding determine the recommended length of fishing line for winding - 2...5 m.
- One end of the fishing line is inserted into the fixing technological hole located inside the spool.
- The fishing line is wound onto the drum in the opposite direction to the rotation of the spool on the trimmer product - as a rule, on the inside of the reel an arrow indicates which direction the winding is going.
- A small section of the fishing line is left free to be brought out - it is fixed in a specialized groove on the inside of the bobbin, designed to hold the winding when assembling the spool into working condition.
- The remaining end of the line is passed through the hole in the outer part of the reel.
- The reel halves are assembled and put on the trimmer rod.
Reel with two working antennae
In this type of spool, you should find the number of grooves for winding line lying on the inside of the reel:
- one groove - both tendrils are wound together along one groove;
- two grooves - each tendril is wound along a personal groove.
For both cases, a fishing line 2-3 m long is taken. In single-groove reels, the fishing line is pulled into a through hole, its ends (tendrils) are folded together and aligned, after which they are wound in the direction opposite to the direction of rotation of the reel on the rod - the inside arrow usually indicates the correct winding direction. If there are locking grooves, the ends of the fishing line are threaded into them or held with the fingers of your free hand, threaded into the through hole of the outer half of the reel, the spool is locked and attached to the trimmer rod.
The difference between winding line in two-groove reels is that initially a piece of line 2-5 m long is folded in half (to determine the middle fold), and the fold loop is inserted into a special groove between the grooves. Both antennae of the fishing line are wound each along their own groove; fixing the antennae and assembling the reel is similar to the option discussed above with one groove.
The first implementation of this procedure may seem long and quite labor-intensive, but with the passage of time and experience this problem will be solved much faster and easier.
The video below will clearly show how to thread the fishing line into the trimmer reel and wind it correctly - this operation is not difficult and, with some patience, will definitely be successful:
Preliminary preparation
First of all, to wind the fishing line, you need to remove the reel (spool, spool) from the trimmer - specific actions will depend on the complexity of the configuration and the type of the product itself:
- small electric trimmers with a working arrangement of the motor and coil in the lower part, as a rule, have side keys on both sides of the reel. By pressing them simultaneously, the upper part of the reel, along with the internal contents for winding the fishing line, is disconnected, while the lower part remains on the trimmer. It is advisable to disassemble the bobbin on a flat, smooth place so that the spring included in the structure does not jump out and get lost;
- electric and gasoline trimmers with a curved rod without the ability to install a knife, as a rule, have reels with a special wing: in such designs, you should hold the spool in a stationary position with one hand, and with the other, rotate the wing nut that secures the reel on the rod counterclockwise. After disconnecting the nut, the entire reel is removed.
- electric and gasoline trimmers with the ability to install a knife on a straight rod (for example, STIHL ) have a hole under the reel. To keep the rod stationary, a screwdriver or other suitable object is inserted into this hole and, with slow rotation, such a relative position is achieved when the screwdriver enters the hole and the reel is fixed. After this, the coil body is rotated clockwise (with a left-hand thread) and removed from the trimmer.
READ How to Put Line on a Trimmer
For the second and third cases, the coils, depending on the design, are disassembled in different ways. In bobbins with a wing, the wing is unscrewed; in bobbins with latches, the latches are pressed and one part of the bobbin is released from the other. If the halves of the spool are connected by thread, then it is enough to turn them by hand in opposite directions until they are completely unscrewed.
Want to see? Rating of the best lawn mowers!
Preparation - remove and disassemble the spool
In most models of electric and gas trimmers, you will need to remove the spool to change the fishing line. The FUBAG tool allows you to skip this step. To make the instructions universal, we will still look at it in detail:
1.
Lock the shaft. Insert the locking element into the corresponding hole. It can be a thin screwdriver or a metal rod.
2.
Unscrew the spool housing. In our example - strictly in a clockwise direction.
3.
Unscrew the cap in accordance with the direction indicated on the housing.
4.
Take out the winding spool.
The preparatory stage has been completed. You can proceed to winding the fishing line.
How to wind line on the reel of a STIHL trimmer
A trimmer is one of the most common tools that can be used to quickly and easily cut grass, small bushes, lawn grass and other weeds. It's no secret that in order for grass mowing to be successful, you need to use the tool correctly and handle the individual cutting elements correctly.
In trimmers, it does not matter what fuel they operate on; special cutting attachments (knives, discs) are used, and some trimmers are supplied to the market with heads in which a cutting element such as fishing line is installed, and therefore many people wonder how to thread fishing line into the reel of a STIHL , if there are no skills as such at all.
- Cutting attachments in the form of knives can be sharpened, but the fishing line (also a cutting element) tends to be consumed. Below we will talk about how to correctly thread the cutting element - fishing line - into the STIHL .
Winding profiles (taper)
For different reel models, the turns of line on the spool are applied differently. In high-quality products, cylindrical and conical winding methods are used. The line laid in profile forms an even line. With cylindrical winding, this line is straight, parallel to the spool; with conical winding, it is inclined.
The straight cone shape tapers towards the front edge of the spool, the reverse cone shape widens. The straight taper reduces line friction. The reverse type of laying reduces the likelihood of spontaneous line release.
There is a third type of winding - chaotic. Typically used in cheap Chinese fishing rods. And if such winding can still be tolerated using regular fishing line, then you should refuse to use a cord in such a reel. Poor casts, beards, overlaps and tangles are guaranteed. This leads to failures in fishing and can also ruin the mood of every fisherman.
READ Gasoline Trimmer Which is Better to Choose
We wind the fishing line
Slowly completed disassembly of the spool reel without losing its spare parts allows you to move on to the main task - winding fishing line into the reel. The technological features of the spool design and the number of working antennae determine the sequence of actions.
The process of winding fishing line onto a reel
- After all the preparatory steps, we need to correctly determine how exactly the fishing line will be wound onto your device, by turning the lid or in the opposite direction.
- We measure approximately 7 mm of cutting material and insert one end into the bobbin hole. It is worth noting that the fishing line is wound specifically on the style mower models on both sides. The direction of winding the line in such models is indicated on the bobbin itself.
- The line is extended up to about 17 cm freely so that the ends can be cut off weeds. Let us add that it is not worth winding a fishing line onto a reel of enormous length. Leave a distance of approximately 5 mm from the fishing line to the edge of the bobbin.
- The two ends of the fishing line are inserted into the bobbin holes. Both of these ends must be securely attached to the device body.
- We insert the springs removed from the coil (if any) in the same way as they were removed, i.e. into the bobbin and the head body itself.
- To determine whether you have correctly inserted the fishing line into the trimmer, you need to ensure that the element itself (spool) is easily inserted into the head housing of your device. If necessary, remove the free ends of the fishing line further out. To achieve this, you need to sharply pull the fishing line out of the groove through the holes in the bobbin.
So, let's say you figured out how to quickly, and most importantly, correctly wind the fishing line onto the reel of the STIHL trimmer. All you have to do is insert everything correctly into the grooves and secure the main cover to the device. Then you can press on the bobbin itself and make movements counterclockwise until you feel a stop. If you don’t feel the pressure, then most likely you have not threaded the line correctly and you will have to start all over again from scratch.
What can be used instead of fishing line
how to put fishing line in the mower Shtil.FS-38
- If instead of a special cutting element, say a fishing line, you install a metal cable, then your trimmer can “turn” into a real dangerous weapon not only for you and your eyes, but also for all the people around you. This is explained by the fact that while the trimmer is operating, the steel cable will constantly operate, which will lead to tangling, and its small pieces can fly off in all directions at great speed.
- The same thing can happen if you use copper wire instead of a steel cable, but in this case, the pieces coming off the copper wire will be slightly larger and can cause you even greater injury. And if, God forbid, you accidentally catch such a cutting element on your leg, then after this it is 100% guaranteed that there will be a deep cut in the soft tissues, and in some cases, all this can lead to the amputation of small limbs (fingers), legs and even arms. Therefore, our advice to you is not to use any other cutting elements other than fishing line, for your own safety and those around you.
Warranty production of the trimmer's factory refill will inevitably require replacement of the fishing line. Having a very rough idea of how to thread the line into the trimmer reel on their own, beginners are reluctant to take on this task. However, with some skills, mastering this simple science does not present any difficulties, and the similar instructions presented below will make this process as easy as possible.
This part should not be confused with an extension cord for a lawn mower on a reel, since despite the similar name these are two completely different elements.
The small excavator chainsaw equipment is designed for light work and people who prefer to hold the device with one hand.
This article will tell you what, how much the ZIL 130 dump truck weighs, what this vehicle is capable of.
Read here //machinspec.com/lesozagotovitelnaya/benzopila/stanok-dlya-zatochki.html how to assemble a machine for sharpening chainsaw chains yourself quickly and easily.
In the first option, winding the cutting element is very easy:
- There is a locking eyelet on the inside of the spool element.
- One tendril of thread is inserted there.
- The nylon thread must be threaded in the direction opposite to the rotation of the spool element.
- Only 2 to 4 meters of fishing line will be useful. When the winding process is completed, put the small end of this cutting element out and fix it in the groove that is needed to fix the fishing line so that it does not unwind during operation of the mower.
- If there is no special groove, then the end should be held with your hand so that the cutting element does not unwind during the upcoming collection of the element.
- At the final step, you need to thread the outer end of the thread into a special hole located on the outside of the element. Subsequently, of course, insert the reel into the mower.
A couple of tips
If you have wound the fishing line correctly, then when you press the bobbin button, the cutting element should automatically be pulled out. The line for your mowing device is one of the most important elements, without which the trimmer may lose all its functionality. We can say that the line (cutting element) is the heart of your mower. Therefore, when buying fishing line, pay attention first to its quality. When purchasing fishing line from one company or another, be sure to compare it with the quality of the old fishing line.
First way
The prepared segment (in this case it is 4 meters) is bent approximately in half - one segment should be 15-20 cm longer, and is inserted into a special slot located on the dividing partition.
The fishing line is wound in the previously determined direction. This is done under tension, the line is carefully distributed. In this case, you need to wind the segment that is longer into the section that is closer to the button.
There are designs that do not provide for dividing the coil into two sections. This does not change anything, the fishing line is wound in a similar way. You just need to make sure that the segments do not overlap each other.
The segment that is located at the bottom of the coil should end first, i.e. the one closest to the fixing holes.
This tip is placed in a hole of the corresponding diameter. The line is securely fastened.
The long piece is wound another half turn. There it is similarly fixed. In this case, the segment intersects another section of the coil.
The long piece is wound another half turn.
The fixed ends of the wound fishing line are inserted into the holes in the trimmer spool body.
The fixed ends of the wound fishing line are inserted into the holes in the trimmer spool body
The coil is attached to the body. The ends of the fishing line are pulled up with force so that the fishing line previously fixed in the holes of the reel of the fishing line jumps out. This is easily determined by the characteristic sound (click).
How to correctly replace the fishing line in the mowing head and reel of the STIHL FS 55 brush cutter
The reel with the button is snapped into the trimmer spool body.
The reel with the button is snapped into the trimmer spool body
The line replacement was completed successfully. In this case, you need to install it back on the trimmer and you can start cutting the grass.
It should be repeated that there is no need to remove the spool from the trimmer - this was done to illustrate the process of replacing the fishing line. You can disassemble the spool in place, wind it onto the reel and put it back.
The ends can and should be trimmed so that they do not hit the trimmer casing.
What can be used instead of fishing line
Many trimmer users are wondering: what can replace the default cord used in this type of device? They begin to conduct unsafe experiments by installing metal or copper wire, metal cables or strings, as well as regular fishing line into the mowing head.
If you install a metal cable instead of a fishing line, the trimmer turns into a dangerous device not only for the user, but also for others. This fact is explained by the fact that during operation of the unit, the steel cable will gradually work out, its ends will unravel, and small pieces of wire will fly in different directions at high speed.
A similar thing happens when using steel or copper wire, the only difference is that the torn pieces will be larger and can cause significant injury.
And if you accidentally snag your own or someone else’s leg while working with a unit with a steel cable (wire), then you are guaranteed a strong and deep tissue incision, and in some cases, amputation of the toes. It is not in vain that the manufacturer uses nylon for these purposes, since it is quite light and durable, and when torn off it does not fly far and cannot cause injury.
Of course, you can use fishing line in a trimmer instead of a standard one, but this will add extra hassle to you, since it wears out quickly, breaks, mows slowly and is not suitable for cutting tough grass. In addition, during work, a lot of time is lost in order to replace broken tools more than once.
In practice, installing a regular fishing line is justified if the user is going to mow the grass near the fence, especially if it is made of chain-link mesh. In this case, in order to protect the standard and sometimes expensive cord from wear, it is replaced with fishing line, which you don’t mind. Usually, in order to change the cord to a fishing line, it needs to be selected as thick as 2-3 mm.
The fishing line flies out
The reason that the cord unwinds after starting the unit can also be a weakening of the spring inside the head. In addition, there are cases when, when the unit is turned on, the mowing head flies apart and the spring installed in it is lost. Inexperienced users do not notice the absence of a spring and assemble this unit without it. Therefore, the cord does not hold and flies out under the influence of centrifugal force.
Preparing for replacement
For clarity, the mowing head (spool) was removed from the brush cutter. There is no need to remove the fishing line to replace it; everything is done locally. It doesn't take much time.
READ How to Wind Line on the Echo Trimmer Reel
We disassemble the trimmer spool - it is held on by latches. Remove the cover by pressing the latches. If there is not enough effort to do this with your hands, then use a screwdriver.
The spool consists of the following:
- Housing with spring
- Cover with locking latches
- Reel with button
The operating principle is as follows. By pressing the button, the reel presses on the spring and comes out of the fixing grooves in the spool cover. By holding the reel in this state, you can twist it, thereby adjusting the length of the fishing line. When the button is released, the housing spring returns the coil to its original fixed state.
There are several holes on the bottom of the reel for different diameters of lines. These may differ between trimmer manufacturers. In some cases (like here) they are signed, in others they are not.
These holes are needed to fix the fishing line when replacing it. After winding the fishing line around the bobbin, the ends of the latter are inserted into them. This is necessary so that the line does not unwind when the reel is installed in the trimmer body. In other words, it makes line changes easier.
There are models without indicating the diameter of the consumables. Then, in order to find out what maximum diameter of the line can be used, it is tried on using the holes for the line exit from the trimmer spool body (see the figure below).
The reel has two sections for fishing line, separated by a partition. They may not exist. They are needed only to differentiate and facilitate winding of consumables.
First, the required length of the loess is determined. The latter is wound into one of the sections of the coil so that it does not extend beyond its limits. In this case, 3 mm was wound, the length turned out to be about 2 meters. Those. for two sections you will need a 4 meter piece - this is for the 1st method. For the second method, you need two pieces of 2 meters each.
Now you need to figure out which way you need to wind it. To do this, many manufacturers of trimmers put special markings on the reels, such as in the figure below.
If no such markings were found, then you need to pay attention to the spool body. There must be an arrow there that indicates the movement of the mowing head. The line is wound in the opposite direction.
Winding thread by hand
You will also need to consider how to wind the line onto the reel by hand. If a fisherman has a telescopic spinning rod, it needs to be unfolded into working condition. This is not necessary for a plug rod; you can work with its lower part.
The reel should be secured in the reel holder. There is a hole in the reel on which the fishing line is wound. A rod is inserted into it, which can be used as a pencil, pen, knitting needle, etc. If the fisherman has an assistant, he will hold the axis on which the bobbin will unwind. If you don’t have an assistant, you can hold the rod between your knees yourself.
There are special devices on sale for unwinding fishing line from a reel. Their advantage is that they regulate the force when winding the fishing line and make it uniform.
The fishing line is threaded through the rings, from the smallest top element to the reel. The thread is then secured in the spool with the line guide open. After this, it is lowered into the working position. You can start winding the line by rotating the reel.
Replacing fishing line in a trimmer: 2 simple ways
A trimmer is a necessary and useful tool for a summer cottage and a private home. Many people own and actively use it, but not everyone knows how to replace the line in a trimmer, especially at first.
In this instruction we will walk you through the entire replacement process step by step. Looking ahead, there are two ways to thread a trimmer spool with line. There is no fundamental difference - the difference is that in the first case there will be one line folded in half, and in the second there will be two sections of such lines.
Method 2 – two segments
is fundamentally no different from the method. The only difference is two wound pieces of fishing line, instead of one.
There are two special fixing sockets on the reel (see picture above).
They hook the hook formed earlier on the fishing line to it, and begin to wind the fishing line.
Winding is carried out in a special order
Winding must be carried out in the following order: first, the lower line, i.e. the one that is closer to the fixing holes on the bottom of the coil, and only then the top one, i.e. the one that will overlap the lower section.
The tips are made into the holes in the trimmer spool body. They are pulled until they click, which indicates that the line has come out of the clamps.
The tips are threaded into the holes in the trimmer spool body
The coil is fastened into the housing. The line in the spool has been replaced.
How to wind fishing line onto the mowing head of a trimmer or brush cutter
Replacing fishing line in a trimmer: 2 simple ways
Feedback from our readers is very important to us. Leave your rating in the comments with reasons for your choice. Your opinion will be useful to other users.
ATTENTION! Typical problems with fishing line
No wonder they say: “Forewarned is forearmed.”
" Knowing about possible problems and the causes of their occurrence, you can prevent them in a timely manner. We recommend that you remember or leave a reminder.
| Problem | Cause | Solution |
| Line break | Stones, branches and hard objects in the grass | Avoid collision |
| Poor cord quality | Replace with a high-quality analogue | |
| Wear of the outlet holes in the head | Complete part replacement required | |
| The fishing line unwinds | The spring in the coil is weakened | Check the spring and replace if damaged |
| The line sticks together | Low quality fishing line, due to which it can melt under the influence of temperature from the heating head | Reel in less fishing line or replace with better quality consumables |
To better understand the mechanism of the process of replacing the line in the spool with a video guide prepared by FUBAG specialists:
Fishing line, reel and brush cutter. How to wind line on a Stihl trimmer reel
Winding algorithm
Fold the line in half. Leave one end 10-15 cm longer than the other.
Insert the resulting loop into the groove.
Lay the line in accordance with the direction indicated on the element body.
Insert the short end into the groove on the side of the reel.
Secure the long end into the opposite groove.
Place the reel with the line wound into the spool body.
Pull the line out of the locking slots.
Put on the cover and secure it.
Trim the ends of the fishing line, leaving 10 to 15 centimeters.
The replacement of the fishing line is completed and now all that remains is to screw the spool onto the trimmer and you can work.
Recharging the lawn mower. How to wind line onto a trimmer reel
Every owner of a personal plot or local lawn sooner or later thinks about the problem of cleaning the grass. A hand-held lawn mower or trimmer helps today's summer residents cope with this task. The working part of such a tool is a rotating coil, which cuts off unnecessary grass using a fishing line. Everything seems simple, but not every amateur gardener knows how to wind fishing line onto a trimmer reel. Oddly enough, manufacturers often forget to address this issue in the instruction manual.
Rules for storing on a spool
In order for the fishing line to last longer, you need to properly care for it. When sending gear for long-term storage, the fishing line should be completely unwound and thoroughly dried, otherwise it will lose its elasticity. This is fraught with ruptures at the most inopportune moment. You can use a hairdryer to dry. When the fishing line is completely dry, you need to wind it onto the spool.
How to wind line on a trimmer reel
In general, you need to dry the thread after every fishing. Only this should not be done along the entire length, but only in an area slightly larger than the length of the long cast.
Trimmers are different
To understand how to wind fishing line onto a trimmer reel, you first need to understand the tool itself: what kind of company it is, how it is designed, how it works, and what spare parts will be needed for repairs. Let's start with the fact that trimmers are divided into gasoline and electric, and their cutting elements can be a knife and fishing line . There are 3 modifications of trimmers:
- with fishing line and knives with 2–4 blades;
- only with knives;
- only with fishing line.
Of course, craftsmen can improve anything and sometimes insert, for example, metal wire or fishing line into trimmers. But you should absolutely not do this - you can seriously injure yourself or others.
Safety precautions
To quickly and safely replace the fishing line on the mower reel, you must follow safety precautions. Before removing the reel to wind the line onto the lawn mower, you must disconnect the equipment from the power supply (if the mower
runs on electricity). Here I would like to mention the reliability rating of electric lawn mowers, which will help you choose a safe assistant.
Another important safety rule that must be followed is pressing the lock button. You can find out its location on the equipment body using the instruction manual. For example, you will find operating instructions for a manual gasoline lawn mower here.
Do not forget that the cutting element needs to be adjusted. There is an adjustment button on the body of the unit. If the process does not start automatically and the thread tension has weakened, then the button is pressed and the line is pulled out of the spool with force.
Watch the video instructions.
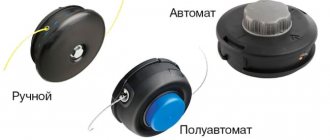
Types of trimmer heads
The heads of the scythe can also have different devices: with automatic line feed, semi-automatic or manual. In the first case, in order to lengthen the working ends of the thread, it is necessary to slightly reduce the speed. And when you add them again, the line will extend automatically. For semi-automatic devices, you need to press the special button located below. It is not necessary to turn off the trimmer. It is enough to simply hit the scythe on the ground. The most inconvenient to use are trimmers with manual string feed. To lengthen its working ends, the tool must be turned off and the operation performed manually.
There is also a spool of line for a trimmer:
- single-string - suitable only for cosmetic trimming of the local area;
- two-string - used for more serious work on clearing the area of grass.
- A ring needs to be cut out of thin but durable plastic, and its inner diameter should be equal to the thickness of the core on which the fishing line is wound, and its outer diameter should be equal to the diameter of the reel.
- On the inside of the ring you need to make a small notch through which the thread will be threaded.
- Next, the ring is cut and put on the reel. And the incision site is glued with tape or soldered using a hot knife. That's all - now each end of the fishing line can be wound onto its own part of the reel.
What is backing?
It is usually difficult to determine how much line to put on the reel. It is believed that a standard bobbin holds one hundred meters of fishing line with a diameter of 0.3 mm. However, progress has stepped far forward, and modern fishing lines are becoming thinner and thinner without losing their strength.
Each angler decides for himself how many meters of fishing line to wind on a reel, depending on the fishing conditions. Therefore, it increasingly happens that the selected fishing line is significantly less than the spool can accommodate. The resulting free space needs to be filled with something. Some people use electrical tape or nylon thread for these purposes, but this is not the best option. The adhesive on the insulating tape that holds the bottom turns of the fishing line together quickly peels off. And nylon thread takes a very long time to dry when wet.
Therefore, more and more fishermen are leaning towards the American method - reeling a simpler and cheaper fishing line into the lower layer, and tying the main, higher quality line to it. This round of inexpensive thread is called backing, or in our opinion, winding. It is connected to the main tape using a self-tightening double loop, clinch or similar knot options.
Fishing line - varieties and the possibility of replacement with other material
The cord for the trimmer can be of different diameters (from 1.2 to 4 mm), and you need to choose it depending on what kind of vegetation needs to be mowed - the thicker the line, the coarser the grass it will cope with. Experienced users recommend using a fishing line with a thickness of 2 mm, which is universal.
The shape of the fishing line can be round (for lush grass) or with sharp edges in the form of a square or star (for mowing dry grass). The second type is less durable and wears out faster compared to round cord.
One of the popular questions regarding the operation of trimmers is whether it is possible to replace the special cord for mowers with other materials, for example, metal or steel cables and strings, wire, etc. You need to know that installing such items is not recommended, because with them the trimmer turns into a dangerous technique. During mowing, pieces of wire or metal will constantly break off and fly in different directions, risking injury to the worker. And if you accidentally touch your limbs while working, serious injury is guaranteed.
For trimmer owners wondering whether it is possible to use fishing line, the answer is that this is allowed, but it will tear and wear out much faster, and therefore require frequent replacement.
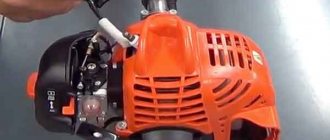
How to clean a carburetor?
You should start by checking that there are no open sources of fire nearby. Repairs cannot be carried out indoors. This is fraught with gasoline leakage.
We recommend:
- Unusual skateboards that move themselves
- Washing machine motor connection diagrams
- Connection diagram for solar panels of a country house
Use a flathead screwdriver to unscrew the screws to remove the plastic air filter housing from the engine. The removed filter is checked for clogging, cleaned with a vacuum cleaner or replaced with a new one (if the condition is unsatisfactory).
You also need to remove the inner filter cover, which is located under the casing. It is easier to do this by unscrewing the bolts with a spanner. An air hose is attached to its inside, which will also have to be removed.
Finally, we got to the carburetor of a device that can be dismantled. By disconnecting the fuel hose going to it from the tank, i.e. Having removed the clamp, turn the hose, trying to remove it from the pipe. The work must be done carefully. After all, if there is fuel in the tank, it will definitely spill.
The carburetor is attached to the engine with two bolts, which require a socket to unscrew. When unscrewing the second bolt, try not to drop the carburetor so as not to damage the spring suspension.
The next step is to remove the return spring. It is more convenient to carry out the operation from the side where it is attached to the motor. Now you can remove the cable responsible for the throttle position by carefully turning the carburetor counterclockwise.
After removing the carburetor, unscrew the bolt securing the fuel chamber cover.
Cleaning is carried out with a special liquid or WD-40 and a copper wire from which the insulation has been removed.
Finally, you can remove the plastic float located under the chamber cover, which regulates the gasoline level, for which you first remove the pin.
The camera must be cleaned of deposits. The insides of the carburetor are generously moistened with WD-40 (or an analogue) and wiped dry. After repeating the operations several times, clean the fuel channels with copper conductor and blow them out, since their contamination is the main reason why the engine stalls or does not start.
After completing all the steps described, reassemble the carburetor in the reverse order.
Having installed it in place and connected the hose, air is expelled from the fuel chamber. This completes the renovation.
After the described manipulations, the equipment will start easily and work stably.
Do-it-yourself eternal line for a trimmer. The solution has been found!
I continue to experiment with trimmer line. Today on tests: 1. Wire for knitting reinforcement in one layer 2. Wire for knitting reinforcement in two layers 3. Soft hacksaw blades 4. Chain The solution has been found. Doesn't bend, doesn't break. works.
Did you like the article? Subscribe to the channel to stay up to date with the most interesting materials
Sources:
https://trubymaster.ru/kak-zapravit-lesku-v-katushku-trimmera-shtil/https://womanadvice.ru/kak-pravilno-namotat-lesku-na-katushku-trimmerahttps://san-lider. ru/leska/pochemu-vyletaet-leska-iz-katushki-trimmera-shtil.html
Recommendations related to repairs
Mechanical problems are associated with damage to the trimmer head. This component is most often subject to wear and tear, and this element is often in contact with the environment. There are several options for failure, which is mechanical in nature.
FSA 65
The length of the device is 154 cm. The current is 5.5 A. The lightest of the other mowers. This tool can be used in large spaces.
FSE 31
Lightweight and cheap unit. Ideal for processing small areas. It is better for them to collect and mow the grass after the lawn mower.
Sources:
https://san-lider.ru/leska/skolko-leski-namatyvat-na-katushku-trimmera-shtil.html https://stroy-podskazka.ru/trimmery/STIHL/