How to replace fishing line in any trimmer
Technological progress provides us with many opportunities to get rid of manual labor. Among other things, this includes mowing the grass, which, when using a conventional scythe, required a lot of physical energy. In modern conditions, this process is greatly facilitated, because The technology used minimizes all costs. Devices such as electric and gas trimmers have firmly taken their place as indispensable assistants in gardening. With their help, mowing grass became more fun than hard and exhausting work.
Structurally, the trimmer consists of an engine, a rod and a working element, which, depending on the vegetation being cut, is either a mowing head or a disc cutter. And if everything is more or less clear with the cutter, then with the nozzle sometimes questions arise. As a rule, they appear when the fishing line .
Which fishing line to choose
Before stocking up on this material for refilling the trimmer, you need to make a choice. After all, the usual so-called round fishing line
- This is far from the only existing species. How to choose the most suitable one? First you need to determine the working conditions.
Select by type. Round fishing line is the most common. It will fit any reel with rare exceptions. This type of consumable is suitable for mowing fresh, juicy grass. But this type may no longer cope with mowing the so-called dead wood. There is no point in even mentioning attempts to mow shrubs with this thread.
In addition to the usual type, there are others that have sharp edges. Usually they are made with an “asterisk” or “square”. The presence of sharp edges is the main feature and key difference between these threads.
It is thanks to this feature that threads of these types are able to mow dry weeds. But sharp-edged threads are not without their drawbacks, the main ones being rapid wear and strength, which is noticeably inferior to the round type.
In addition to the types of fishing lines already mentioned, there are also interesting and frequently encountered varieties. Particularly noteworthy among them are fishing lines, inside of which a metal wire is stretched. Threads of this type are often used in tools that run on gasoline and have an engine more powerful than one and a half horsepower.
Threads with a metal core come with both a round cross-section and sharp edges. Regardless of the type of section, such threads are ideally suited for overcoming difficult-to-mow plants. Threads of this type easily mow not only dry grass, but even small shrubs.
Threads with wire inside compare favorably with other types of consumables due to their incredible wear resistance. But unfortunately, this feature has a more than noticeable impact on the price of this type. The cost of threads with a core significantly exceeds the cost of other types of threads.
The cord spontaneously elongates
There are situations when a trimmer user notices a very rapid consumption of fishing line. At the same time, he never hit the button on the ground to lengthen the fishing line. The reason that the line spontaneously lengthens, being cut off by a special knife on the casing of the device, may be the absence of a spring in the mowing head. Often, novice users of mowers, trying to load fishing line into the reel, forget to install the pressure spring in the head, or completely lose it when opening the lid, and in the future, do not even suspect its existence.
Also, the line can be extended without using a button if the spring is weakened. If checking the spring has confirmed this fact, then it is necessary to place several washers under it to strengthen its clamping properties.
How to properly wind fishing line onto a reel? Let's figure it out.
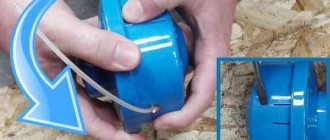
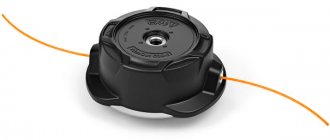
So, first unscrew the nozzle. This must be done by rotating the drum to the right. Here we have a drum in our hands with the remains of an old fishing line. Let's open it. Most often, the lid is closed with latches, which can be opened using a screwdriver by inserting it into the holes and pressing lightly. Or you need to release the lock and turn the cover in the direction of the arrow. In this case, the lid itself must be held, because in drums with automatic line feed there is a spring, which, when straightened, can throw out all the internal parts of the drum. Carefully taking out the reel, we remove the pieces of fishing line from it.
Now you need to take 5 meters of new fishing line and fold it in half (to find the middle). In the middle part of the reel there is a recess (in some designs - a hole) into which you need to hook our fishing line. There is also an arrow on the reel indicating the direction of winding. An important detail - if the reel has two compartments, then one half of the fishing line should be wound in one direction, and the second in the other. When finishing winding, you need to leave 15-20 cm of fishing line free. There are also two notches on the top ring of the reel through which you need to pass these risers. We dealt with the winding itself.
The last step in the line replacement process is to assemble the reel. First you need to install the spring and washers in place. Then, holding the reel with one hand, with the other you need to thread the ends of the fishing line into the corresponding holes on the sides of the nozzle. After this, install the reel in its place, tensioning the line and trying not to displace the spring. When all the internal elements of the nozzle are in place, you can close the drum with a lid. You just need to put some effort into getting the latches into place. Voila! The mowing attachment is ready to go!
Removing and disassembling the coil
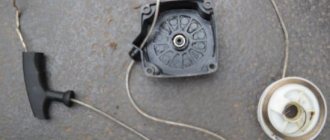
The mowing trimmer head consists of a casing, a spring (not available in every model), a bobbin with cord, and a cover. Before you begin disassembling the coil of the electric unit, be sure to unplug the trimmer from the mains. The method of disassembly depends on the mounting of the mowing head. First option:
- To remove the cover covering the inside of the head, press the latches (latches) located on both sides of the head.
- Remove the cover, under which you will see the bobbin - remove it from the housing. Some trimmer reels have a spring under the bobbin, which should also be carefully pulled out.
- After removing the bobbin, you will see a screw in the center of the case. Unscrew it using a screwdriver.
- After removing the fasteners, take the body of the part and, rocking it in different directions, remove the gearbox from the shaft.
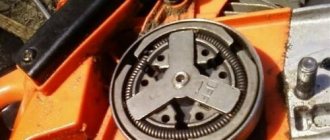
In the second option, the trimmer head is screwed onto the gearbox shaft. To remove it, you need to fix the shaft. To do this, such devices have a hole through which a thin screwdriver or metal rod is inserted. Brief instructions:
- Insert a screwdriver into the special hole, then lock the shaft.
- Grasp the body of your head and begin to twist it. This should be done clockwise, since the thread on the shaft is left-handed.
Winding fishing line onto a reel
How to wind fishing line on a trimmer correctly
A garden trimmer is a useful tool that makes life much easier for any gardener or private home owner. The grass just rushes in the summer, especially after the rains, so you can’t live without it. But over time, sooner or later, the line in it will run out, and it will be necessary to insert a replacement skein of new line. Some summer residents find themselves at a dead end - how to do it themselves? So our article will help them.
Changing the line on the trimmer
This article can tell you how to change the fishing line on a trimmer. For some people, this work may not be easy. But the step-by-step instructions that are available here will help you in this matter.
So, the first thing to do is remove the gearbox cover. We combine the hole on the side of the shaped bottom washer and the axial recess, insert a screwdriver to secure the shaft from twisting. Now unscrew the nozzle. The thread on the shaft, as a rule, has a reverse cut, keep this in mind when unscrewing.
Next comes disassembling the nozzle. There the cover is secured with clamps through the holes. So you just need to press these clips into the holes and the cover will come off. If the nozzle has automatic/semi-automatic line feeding modes, it means there is a spring inside that can simply fly out when you open the lid, be prepared for this. We lay out all the removed parts carefully in order.
Now it’s time to take the fishing line and unwind 5 meters from it, cut off this piece. Pay attention to its thickness; you should not wind a fishing line thicker than that specified in the manual for the tool around the unit. Otherwise, you will get an increased load on the engine and greater fuel consumption during operation. We bend the measured fishing line in half to find the middle and get a loop.
In the middle of the coil there are a couple of notches, sometimes these are not notches, but holes located opposite each other. We cling to one of the notches with a loop and wind the fishing line counterclockwise. If the reel has 2 compartments, then we wind each end of the fishing line onto them separately. We leave the last 15-20 cm free and clamp them while in the recesses of the coil.
READ How to Change the Ignition on a Trimmer
We reassemble the device, pulling the free ends of the fishing line into the holes on the body. We put on the lid by snapping the latches into their grooves. Now you can pull out these loose ends of the fishing line.
All that remains is to attach the working unit in place, as in the first point. Don't forget about reverse rotation when screwing.
Now you can learn how to wind fishing line on a trimmer . Actually, the whole process was described in detail above. No labor-intensive operations requiring the presence of specialists. Your brushcutter is ready to go again.
Instructions
In order to change the fishing line, you need to remove the old one (if there was one).
The reel is part of the trimmer structure, which is located inside the head of the brush cutter, drum or reel. Depending on the manufacturer, the heads may vary. But this article only covers Patriot, although their mechanism is used by many other companies.
Now you need to understand how to properly remove the head from the trimmer and how to remove the drum from it.
Instructions on how to unscrew the manual head on a trimmer are described below.
- First of all, you need to clean the head of dirt and adhering grass if it is dirty. To do this, you need to lift the lawn mower head up and, holding the casing, remove the special protective cover placed on the drum.
- The next step is to remove the coil from the drum. The reel can be easily removed even with one hand, because it is not secured inside the drum in any way.
- The drum itself is secured in the trimmer with a bolt. This bolt must be unscrewed, after which the drum can be easily pulled out. To do this carefully, you should support the drum with the spool while unscrewing the screw counterclockwise.
- Now you can pull the coil out. As mentioned above, it is not secured by anything except a hook with a metal shaft, so it does not need to be pulled out with force. Carefully, in a circular motion, pull the spool out of the drum.
- Now all that remains is to remove the old fishing line and follow the following instructions.
Installing the coil and drum in their original place is performed using the reverse algorithm.
Before threading the fishing line, you should make sure that you have purchased a thread suitable for the trimmer. If the thread does not fit, fuel or energy consumption increases, as well as the load on the lawn mower engine.
In order to replace the thread itself, you need to prepare a piece of thread of the required size . Most often this requires about 4 m of fishing line. The specific figure will depend on the parameters of the thread, for example, its thickness, as well as on the parameters of the spool itself. If you can’t accurately determine the length, you can do the following: insert and wind the thread until the reel is fully charged (the line level is comparable to the protrusions on the sides of the reel). It is necessary to ensure that the fishing line sits evenly in the reel.
Do not forget that a thick thread will be shorter than a thin one.
Instructions for threading fishing line into the reel are described below.
- You need to take the prepared thread and fold it in half. You should ensure that one edge is 0.1-0.15 m longer than the other.
- Now you need to take the ends in different hands. The smaller one needs to be pulled up to the larger one so that it becomes 2 times shorter. When bending, maintain a distance of 0.15 m.
- Locate the slot inside the coil baffle. Carefully thread the loop you made earlier into this slot.
- To continue working, you need to determine the direction of winding the thread in the spool. To do this, just inspect the coil - there should be an arrow on it.
- If the indicator arrow could not be found, then it is quite possible that there is a written designation. An example is shown in the photo below. The coil head needs to be inspected. There is a direction indicator on it. However, this is the direction of movement of the coil. To get the winding direction, you need to wind in the opposite direction.
- Now you need to fill the reel with fishing line. It is worth noting that there are special guide grooves inside the coil. When winding the thread, you must follow these grooves, otherwise you may damage the trimmer. At this stage, you need to charge the coil very carefully.
- When the user has wound almost the entire thread, he should take the short end (do not forget about the 0.15 m protrusion) and pull it into the hole located in the wall of the spool. Now you need to repeat this action in the same way with the other end (on the other side).
- Place the reel itself in the reel head, first threading the fishing line through the holes inside the reel.
- Now is the time to return the drum to its place. After this, you need to take the ends of the fishing line with both hands and pull them to the sides. Then you need to put the lid back in place (here you can safely apply force until a characteristic click is heard).
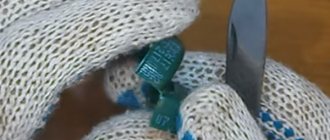
- All that remains is to do some “cosmetic work”. You need to see if the thread is too long. You can start the trimmer and check in practice whether everything is comfortable. If the thread is a little long, you can trim it with scissors.
What is needed to replace the cord
With regular use of the trimmer to cut grass, the discs become dull, but they can be sharpened and continue to be used. The line in the reel tends to run out, so it becomes necessary to refill a new one, for which you need to determine the type of head and prepare a cord of the required thickness and length.
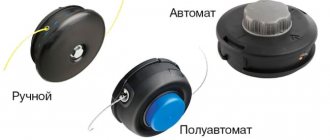
So, the mowing head is a cylindrical body in which a spool with fishing line is located. This detail is present on both electric trimmers and gasoline scythes of any brand, be it Bosch, Makita, STIHL or another brand. There are three types of heads depending on the method of threading and feeding the line.
- The operating principle of the automatic group heads is that they independently feed the line when the mower reduces the engine speed. Such designs are convenient when working on large areas, but have the disadvantage of high cord consumption.
- The heads of the semi-automatic group are easy to operate - automatic line feeding is performed at maximum engine speed. To unblock the cord, you need to gently tap the tool on the ground, after which the unlocked thread moves out of the spool. Trimming to the required length is done with a knife mounted on a protective casing.
- Trimmers with manual line feed must first be turned off, and then pull out the line yourself.
On a note! The most convenient and best priced are semi-automatic cord reels.
Reels for electric and gasoline streamers can be with one or two tendrils of fishing line. The former are used for trimming low grass growth, the latter - for mowing tall grass and small shrubs.
On a trimmer head with automatic refilling
For heads with automatic threading, you just need to wind and clamp the edges of the fishing line, and the tool will perform further winding on its own when turned on. It is impossible to make a mistake here, because the coil itself recognizes how the antennae should be positioned.
On a note! The advantages of trimmers with such a head include the convenience of laying the cord, but the disadvantages are high cost and difficult repairs.
The fishing line flies out
If the string flies out when mowing, this is another indication that the spring in the bobbin has weakened or was completely lost due to careless disassembly of the head. As a result, the cord does not hold and jumps out when rotated.
Common mistakes
Although winding line is a very simple task, many beginners may wind the line incorrectly. Below are the most common mistakes.
- Many people, when measuring thread, think that 4 m is a lot. Because of this, people often measure out less and therefore end up running out of line. Don't be afraid to measure out too much, because you can always cut off the excess.
- In a hurry, some people do not follow the threading grooves inside the spool and wind the thread at random. This leads to the line flying out of the reel and can even cause injury.
- For winding, you should use only the appropriate fishing line. This error is the most common. You need to monitor not only the thickness and volume of the fishing line, but also its type. You should not use the first line you come across for winding, which will not meet your goals. For example, you do not need to use a thread on young grass if you need to mow dead wood.
- Do not turn on the device until it is completely wound and assembled. Although this is obvious, some people do this to check if everything is done correctly.
- In no case should you confuse the direction of refueling, as this will overload the engine, and it will soon fail.
It is common for beginners to make mistakes, so you must follow the tips given in this article.
To learn how to replace the line on your Patriot trimmer, see below.
Line winding algorithm
The order of winding the fishing line depends on the type of reel - with one or two antennae, as well as with automatic charging of the cord.
On a reel with two antennae
In spools of this type, you need to inspect the inside of the reel and determine the number of grooves for winding the cord provided in it.
Important! If there is only one groove in the reel, then both antennae must be wound along a common groove; if there are two, then along separate tracks.
To wind it, you need to take a piece of fishing line from two to three meters long. For spools with one groove, thread the line into the through hole, align the whiskers, align and wind it onto the reel in the direction opposite to its rotation during operation. If fixing grooves are provided, you need to thread the ends of the cord into them, then pull them out into the outlet hole, then close the reel and put it back in its original place.
For two-groove spools, the difference is that the piece of string must be folded in half. Next, you need to load the middle of the bend into the groove between the grooves, then wind each piece of fishing line along its own track, fix the antennae and assemble the reel in the same way as a spool with one track.
Materials:
- metal perforated plate (100 mm x 240 mm)
- 2 hacksaw blades for metal
- 4 screws and 4 nuts M5
- 4 washers and 4 enlarged washers
From the point of view, hacksaw blades should not be completely hardened.
Everything you need to make a nozzle
The most difficult thing in making a nozzle is to symmetrically mark and make holes for the knives and trimmer shaft. That is why a ready-made perforated plate is selected.
First you need to make the base of the nozzle. To do this from a metal plate
cut out a square with a side of 100 mm. You need to mark it in such a way that there is a hole exactly in the center (at the intersection of the diagonals). To do this, measure a distance of 50 mm from the center of the selected hole perpendicular to the short side of the plate and mark the cutting lines.
We cut off the excess and get a square of 100 mm x 100 mm. Now you need to slightly round the corners and drill out the central hole for the trimmer shaft.
Round the corners and drill the central hole for the trimmer shaft
We cut the metal sheets, measuring 8 cm from each end. We get 4 blanks with ready-made holes.
We cut sheets for metal
These blanks must be shaped into knives. To do this, we mark the cut line by eye (special precision is not required), fasten all 4 blanks together and grind off the excess.
We cut knives from blanks
As a result, we get knives of the same weight and size; they can be sharpened a little on one side. Now all the parts of the homemade trimmer attachment are prepared, you can start assembling.
Everything is ready for assembly
We put a small washer on the screw and insert it into the corner hole. We put the knife on top, placing the sharpened side in the direction of rotation of the trimmer shaft. Next comes a large washer and a nut, which is not tightened so that the knife rotates freely. We attach the other 3 knives in the same way.
Fastening the knives
The end of the screw must be riveted so that the nut does not fly off.
The end of the screw needs to be riveted
The nozzle is ready. It is installed with nuts to the ground and secured in the same way as the three-bladed knife that comes with the trimmer. When colliding with a stone, the knives fold and go inward a little.
This idea was proposed by our regular video author Tatyana (Tula region). You can see in more detail the entire process of making such a trimmer attachment and learn some of the nuances by watching the video she prepared.
How to change a disk to a fishing line. Brushcutter HUSQVARNA 128R.
When working with a trimmer, it is important not to forget about safety precautions when using any attachments, especially homemade ones.
We invite you to familiarize yourself with Dried flowers: names and photos, descriptions of species and varieties
We invite you to discuss this idea in the comments to the publication. Share your thoughts with us and also tell us about your successful decisions.
Reel with two working antennae
In this type of spool, you should determine the number of grooves for winding line lying on the inside of the reel:
- one groove - both tendrils are wound together along one groove;
- two grooves - each tendril is wound along an individual groove.
For both cases, take a fishing line 2-3 m long. In single-groove reels, the fishing line
is pulled into the through hole, its ends (tendrils) are folded together and aligned, after which they are wound in the opposite direction to the direction of rotation of the bobbin on the rod - an arrow inside usually indicates the correct winding direction. If there are locking grooves, the ends of the fishing line are threaded into them or held with the fingers of your free hand, threaded through the through hole of the outer half of the reel, the spool is closed and attached to the trimmer rod.
The difference between winding line in two-groove reels is that initially a piece of line 2-5 m long is folded in half (to determine the middle fold), and the fold loop is inserted into a special groove between the grooves. Both antennae of the fishing line are wound each along their own groove; fixing the antennae and assembling the reel is similar to the option discussed above with one groove.
The first implementation of this procedure may seem lengthy and quite labor-intensive, but with time and experience this task will be solved much faster and easier.
The video below will clearly show how to thread the fishing line into the trimmer reel and wind it correctly - this operation is not difficult and, with some patience, will definitely be successful:
READ Installing a cutting blade on a Patriot trimmer
After the cutting thread wears out as a result of work, turn off the mower and remove the cover on the mowing head. Pull the line out of the slot, stretching it to the desired length, and reinsert it into the slots. The amount of material wound on the reel is enough for 5-10 cycles of operation, depending on the model of the device. When you put the cover back in place, carefully look to see if the grooves where the latches are inserted are clogged; if they are clogged, clean them thoroughly.
When the line wears out, you need to disassemble the mowing head again, pull out the reel and re-wind the working line onto it.
The trimmer is the most common unit used for cutting grass and cutting small bushes. This device is distinguished by its ease of maintenance, simple operation during operation, and thanks to its low weight, even women can handle it. It is no secret that in order to perform high-quality grass mowing work, the correct selection of cutting tools is required. As a last resort, trimmers use special cutting attachments (discs, knives) or trimmer heads with fishing line inside. Attachments and fishing line are consumable tools, but if the knives can be sharpened, then when the fishing line is used up, it needs to be replaced. In this article we will tell you in as much detail as possible how to properly replace the fishing line.
Reel with one working antenna
The simplest option and simple sequence of actions:
- The dimensions of the reel and the length of the original factory winding determine the recommended length of fishing line for winding - 2...5 m.
- One end of the fishing line is inserted into the fixing technological hole located inside the spool.
- The fishing line
is wound onto the drum in the opposite direction to the rotation of the spool on the trimmer product - as a rule, on the inside of the reel an arrow indicates which direction the winding is going. - A small section of the fishing line is left free to be brought out - it is fixed in a specialized groove on the inside of the bobbin, designed to hold the winding when assembling the spool into working condition.
- The remaining end of the line is passed through the hole in the outer part of the reel.
- The reel halves are assembled and put on the trimmer rod.
My own master
First way
The prepared segment (in this case it is 4 meters) is bent approximately in half - one segment should be 15-20 cm longer, and is inserted into a special slot located on the dividing partition.
The fishing line is wound in the previously determined direction . This is done under tension, the line is carefully distributed. In this case, you need to wind the segment that is longer into the section that is closer to the button.
There are designs that do not provide for dividing the coil into two sections. This does not change anything, the fishing line is wound in a similar way. You just need to make sure that the segments do not overlap each other.
The segment that is located at the bottom of the coil should end first, i.e. the one closest to the fixing holes.
This tip is placed in a hole of the corresponding diameter. The line is securely fastened.
The long piece is wound another half turn. There it is similarly fixed. In this case, the segment intersects another section of the coil.
The long piece is wound another half turn.
How to correctly replace the fishing line in the mowing head and reel of a Husqvarna 128R brush cutter
The fixed ends of the wound fishing line are inserted into the holes in the trimmer spool body.
The fixed ends of the wound fishing line are inserted into the holes in the trimmer spool body
READ Trimmer Doesn't Develop Speed When Hot
The coil is attached to the body. The ends of the fishing line are pulled up with force so that the fishing line previously fixed in the holes of the reel of the fishing line jumps out. This is easily determined by the characteristic sound (click).
The reel with the button is snapped into the trimmer spool body.
How to change a disk to a fishing line. Husqvarna 128R brush cutter.
The reel with the button is snapped into the trimmer spool body
The line replacement was completed successfully. In this case, you need to install it back on the trimmer and you can start cutting the grass.
It should be repeated that there is no need to remove the spool from the trimmer - this was done to illustrate the process of replacing the fishing line. You can disassemble the spool in place, wind it onto the reel and put it back.
The ends can and should be trimmed so that they do not hit the trimmer casing.
For work we will need:
The first step is to give our future pendant a circle shape. To do this, simply wrap a thick wire around the jar and bite off the excess material in the right places with wire cutters.
We form the pendant holder as shown in the photo.
Now you need to beat the circle so that it becomes flat and bend the holder, thereby forming an eyelet through which you can pass a chain or lace.
We wind the wire and form the roots of the tree as shown in the photo.
We form the crown of the tree as indicated in the photo, string stone chips. We fasten the branches along the edge of the round base very carefully so that the edges of our pendant look neat and there are no gaps between the winding rings.
Another option for making a pendant. Here there are fewer branches, and instead of stone chips, beads are used, which are distributed closer to the rim of the pendant.
Did you like the article? Subscribe to the channel to stay up to date with the most interesting materials
What can be used instead of fishing line
Many trimmer users are wondering: what can replace the default cord used in this type of device? They begin to conduct unsafe experiments by installing metal or copper wire, metal cables or strings, as well as regular fishing line into the mowing head.
Read also: Machine for making beer at home
If you install a metal cable instead of a fishing line, the trimmer turns into a dangerous device not only for the user, but also for others. This fact is explained by the fact that during operation of the unit, the steel cable will gradually work out, its ends will unravel, and small pieces of wire will fly in different directions at high speed.
A similar thing happens when using steel or copper wire, the only difference is that the torn pieces will be larger and can cause significant injury.
And if you accidentally snag your own or someone else’s leg while working with a unit with a steel cable (wire), then you are guaranteed a strong and deep tissue incision, and in some cases, amputation of the toes. It is not in vain that the manufacturer uses nylon for these purposes, since it is quite light and durable, and when torn off it does not fly far and cannot cause injury.
Of course, you can use fishing line in a trimmer instead of a standard one, but this will add extra hassle to you, since it wears out quickly, breaks, mows slowly and is not suitable for cutting tough grass. In addition, during work, a lot of time is lost in order to replace broken tools more than once.
In practice, installing a regular fishing line is justified if the user is going to mow the grass near the fence, especially if it is made of chain-link mesh. In this case, in order to protect the standard and sometimes expensive cord from wear, it is replaced with fishing line, which you don’t mind. Usually, in order to change the cord to a fishing line, it needs to be selected as thick as 2-3 mm.
Preparing for replacement
For clarity, the mowing head (spool) was removed from the brush cutter. There is no need to remove the fishing line to replace it; everything is done locally. It doesn't take much time.
We disassemble the trimmer spool - it is held on by latches. Remove the cover by pressing the latches. If there is not enough effort to do this with your hands, then use a screwdriver.
The spool consists of the following:
- Housing with spring
- Cover with locking latches
- Reel with button
The operating principle is as follows. By pressing the button, the reel presses on the spring and comes out of the fixing grooves in the spool cover. By holding the reel in this state, you can twist it, thereby adjusting the length of the fishing line. When the button is released, the housing spring returns the coil to its original fixed state.
There are several holes on the bottom of the reel for different diameters of lines. These may differ between trimmer manufacturers. In some cases (like here) they are signed, in others they are not.
These holes are needed to fix the fishing line when replacing it. After winding the fishing line around the bobbin, the ends of the latter are inserted into them. This is necessary so that the line does not unwind when the reel is installed in the trimmer body. In other words, it makes line changes easier.
There are models without indicating the diameter of the consumables. Then, in order to find out what maximum diameter of the line can be used, it is tried on using the holes for the line exit from the trimmer spool body (see the figure below).
The reel has two sections for fishing line, separated by a partition. They may not exist. They are needed only to differentiate and facilitate winding of consumables.
First, the required length of the loess is determined. The latter is wound into one of the sections of the coil so that it does not extend beyond its limits. In this case, 3 mm was wound, the length turned out to be about 2 meters. Those. for two sections you will need a 4 meter piece - this is for the 1st method. For the second method, you need two pieces of 2 meters each.
Now you need to figure out which way you need to wind it. To do this, many manufacturers of trimmers put special markings on the reels, such as in the figure below.
If no such markings were found, then you need to pay attention to the spool body. There must be an arrow there that indicates the movement of the mowing head. The line is wound in the opposite direction.
Alpina TB 420 D brush cutter
Power (hp) 1.5 Power (kW) 1.1 Engine capacity, cc 42.7 Cutting element line /knife Weight, kg 8
Alpina B 28 D brush cutter
Engine 2-stroke Engine volume, cc 25.4 Power, hp 0.95 Weight, kg 6.6
DIY trimmer coil repair
Trimmer
, whether gasoline or electric, is the only true solution for mowing grass in hard-to-reach places that a wheeled lawn mower cannot handle. Trimmers use metal knives or a special fishing line as a cutting tool, which is threaded into the trimmer reel. But, unfortunately, trimmer heads become unusable over time during use. Some problems can be fixed with your own hands, while others will require a complete replacement of the mowing head.
READ Gasoline Hooter Trimmer Won't Start
The cord spontaneously elongates
There are situations when a trimmer user notices a very rapid consumption of fishing line. At the same time, he never hit the button on the ground to lengthen the fishing line. The reason that the line spontaneously lengthens, being cut off by a special knife on the casing of the device, may be the absence of a spring in the mowing head. Often, novice users of mowers, trying to load fishing line into the reel, forget to install the pressure spring in the head, or completely lose it when opening the lid, and in the future, do not even suspect its existence.
Also, the line can be extended without using a button if the spring is weakened. If checking the spring has confirmed this fact, then it is necessary to place several washers under it to strengthen its clamping properties.
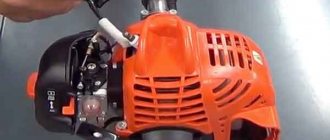
Trimmer Husqvarna 128R
Husqvarna petrol trimmer is due to its highest quality, reliability, ease of operation and, of course, reasonable price. This is an excellent tool for working in the garden. With its help you can take care of local parks and courtyards.
One of the main advantages of the Husqvarna 128 R brush cutter is its powerful engine. It allows you to quickly cut grass on a fairly large area. At the same time, the lawn mower practically does not vibrate, since the manufacturer used a modern, highly efficient shock absorption system. The operating noise of this model is minimal.
All gas trimmers manufactured by Husqvarna (including the Husqvarna 128 C) are equipped with a Smart Start system, which makes starting the engine easy, soft and fast. One of the main advantages of the 128 R model over others is its flexible shaft.
Trimmer coil structure
Mowing heads for trimmers come in a variety of designs, some simple and some complex. The figure below shows an disassembled Husqvarna
This type of head is present in most gas mowers and electric trimmers, such as Stihl, Patriot, Champion, Bosch, Huter and others. The design of the mowing head is quite simple. It includes the following parts:
- mowing head base;
- button for semi-automatic cord feeding;
- bobbin (reel) into which the fishing line is threaded;
- spring;
- eyes - through them the fishing line comes out;
- trimmer head cover;
- fishing line (cord).
There are also simpler trimmer heads, shown in the following photo.
All these attachments do not allow you to change the length of the fishing line in semi-automatic mode (after pressing a button). If the cord breaks, you have to stop the mower and change it manually.
Customer Reviews
The model does not make noise, starts up the first time - two pluses. practically does not vibrate, the belt is comfortable, the disc is high quality and durable.
this trimmer for 4 years now. There is an easy start system, so you don’t need to put all your strength into the jerk. As soon as you feel the resistance of the cord, give a smooth jerk and it will start. In order for the mower to work for a long time, you need to maintain the proportions of the fuel mixture. I use 20g of Husqvarna per liter of 92 petrol. The diluted mixture can be stored for no more than two weeks. When storing for a long period of time, you need to drain all the oil and run it on an empty tank to burn out the remaining fuel. I recommend working at full power, then the mixture burns completely without forming carbon deposits in the exhaust pipe and inside the engine.
READ How to Adjust a Husqvarna 137 Chainsaw
easy start-up, minimal vibration level
I have little experience using the trimmer - only one day. But there are already impressions. I started it like this - gently pulled it a couple of times with the valve closed, which is what the instructions recommend. With one full tank I mowed a ten-meter path 2 meters wide and a square clearing 5 by 5. I consider the consumption to be normal. I filled it with 92 gasoline and branded oil for two-stroke engines. I liked the suspension system, even in space! The straps are durable. I set it up for myself in three minutes. So far I’ve only tried fishing line, but it worked well with grass. I hope that further use will provide new experience that I will share.
I was given a trimmer, so I use what I have. The area for processing is 13 acres. The first time I mowed down weeds with a disc, now I use a fishing line because I can’t get enough of it. I don’t use it often – 3-4 times a season, but I’m very glad that I have this thing, because it saves enormous time. Now I would buy such a trimmer myself.
Light in weight and in operation. Everything is very clearly described in the instructions. You can work all day. The cutting equipment is changed within five minutes.
The flexible shaft is unusual at first, but then you realize how convenient it is.
Basic coil malfunctions
Users of electric trimmers and lawn mowers often encounter problems with the semi-automatic mowing head. Coil malfunctions can be the following:
- the line does not extend automatically;
- the cord spontaneously comes out of the reel.
Line does not automatically extend
If, when you lightly hit the trimmer coil button on the ground, the line
does not lengthen, then the reasons for this may be the following.
Option 1 - biting occurred, i.e. clamping the cord between the turns. This problem usually appears if the user winds the line onto the reel unevenly, with intersecting turns, or winds it with insufficient tension. In the latter case, when the mowing head rotates at high speeds under the influence of centrifugal force, the cord begins to tighten, resulting in possible inter-turn clamping of the fishing line. To fix the problem, you will have to disassemble the reel on a trimmer and rewind the cord correctly, that is, in even turns with good tension.
Option 2 - the ends are too short and protrude from the head. The line may not come out when it hits the ground if its ends protruding from the head are not long enough (short). In this case, the centrifugal force is not enough for the fishing line
stretched out. Therefore, you need to stop the unit (turn off the engine or unplug the electric trimmer) and pull out the line manually, after pressing the button.
Option 3 - the fishing line is soldered inside the mowing head. This causes the reel to lock and not spin when the button is pressed. Basically, this happens for several reasons: poor quality of the cord, overheating of the reel during prolonged operation of the unit, impact of the fishing line on hard objects.
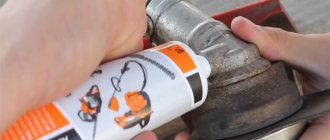
- In the first case, the cord from third-party manufacturers may be made of low-quality and fusible materials that cannot withstand mechanical and temperature loads. Therefore, preference should be given to “branded” fishing lines.
- But, if you nevertheless purchased a fishing line of unknown quality, and it often gets soldered during operation, then you can follow the example of some users who, after threading the cord into the reel, moisten it with either silicone grease (from a can) or mineral oil. This procedure greatly reduces the likelihood of soldering turns of fishing line together.
- Also, the fishing line
can become soldered if, during mowing, it hits a hard object (stone, fence, dry branch, etc.). As a result of this, it stretches a little and is pulled back into the head at high speed. The cord heats up due to friction, and its turns stick together. The only thing that can be done to eliminate this problem is to open the trimmer reel and rewind the line.
Husqvarna 125R trimmer - features and benefits
This Husqvarna gas mower is distinguished by its adaptability to work in difficult weather conditions, low noise and vibration levels, as well as an increased torque reserve. The model successfully copes with intensive mowing of dense growth, clearing young bushes and cutting thick weeds.
The main characteristics of the braid include:
- built-in motor power – 1.1 l. With.;
- capacity of the standard fuel tank – 400 ml;
- the maximum permissible cutting width with fishing line is 40 cm;
- knife cutting diameter – 25.5 cm;
- generated sound pressure – 100 dB;
- working weight – 4.9 kg.
The model differs from market analogues in its simplicity of design, which greatly simplifies self-repair of the lawn mower.
ATTENTION! Typical problems with fishing line
It’s not for nothing that they say: “ Forewarned is forearmed.”
" Knowing about possible problems and the causes of their occurrence, you can prevent them in a timely manner. We recommend that you remember or leave a reminder.
| Problem | Cause | Solution |
| Line break | Stones, branches and hard objects in the grass | Avoid collision |
| Poor cord quality | Replace with a high-quality analogue | |
| Wear of the outlet holes in the head | Complete part replacement required | |
| The fishing line unwinds | The spring in the coil is weakened | Check the spring and replace if damaged |
| The line sticks together | Low quality fishing line, due to which it can melt under the influence of temperature from the heating head | Reel in less fishing line or replace with better quality consumables |
To better understand the mechanism of the process of replacing the line in the spool with a video guide prepared by FUBAG specialists:
Sources:
https://salda.ws/video.php?ID=sQSXwkTkJ-k https://eco-podarki.ru/post/kak-zamenit-lesku-v-trimmere.html https://www.ivd.ru/ stroitelstvo-i-remont/instrumenty/kak-pomenyat-lesku-na-gazonokosilke-podrobnaya-instrukciya-52011 https://fubag.ru/tips/kak-pravilno-namotat-lesku-na-katushku-trimmera-poshagovoe-rukovodstvo -video/
Petrol mower Husqvarna 224L – model characteristics
The main advantages of this lawn mower include compactness, ease of operation and low maintenance. The high power reserve of the standard internal combustion engine gives the model the ability to easily and quickly cope with mowing young dense growth, cutting off bushes and weeds.
Key features of the Husqvarna brush cutter include:
- built-in motor power – 1.1 l. With.;
- capacity of the standard fuel tank – 900 ml;
- the maximum permissible cutting width with fishing line is 40 cm;
- knife cutting diameter – 25.5 cm;
- generated sound pressure – 95 dB;
- working weight – 5.2 kg.
The trimmer successfully combines impact resistance and durability. This makes it possible to use the model to work in the most difficult operating conditions.
Choosing a line for a trimmer head
There are many types of heads that are designed for different types of fishing line. The latter is also available in several diameters: from 1.0 mm to 3.2 mm. Moreover, its cross-section can be round (including with a special groove to reduce noise), square, twisted and star-shaped.
There are no clear preferences, which explains the wide variety of shapes and diameters on the market. The round shape is usually stronger, but has poorer cutting ability, and also produces a characteristic sound when rotated. Therefore, sometimes an acoustic groove is made on it, however, the use of this fishing line makes sense only on battery-powered trimmers; in machines with a gasoline engine and mains drive, the sound level of the drive itself practically drowns out the sound from the fishing line. A square has good cutting ability, and despite the fact that such a fishing line is less durable than a round one, on average it is consumed less. A square fishing line quite easily cuts off shoots of the same willow up to 1 cm in diameter. The star has the maximum number of cutting edges, cuts the best and is consumed the fastest.
The next nuance when choosing is rigidity. The fact is that when producing nylon, a modifier (often maleic anhydride) is added to it, which improves its strength and prevents tearing. However, modifiers are not the cheapest component; they are trying to save money on them. Therefore, a seemingly good fishing line that was left over for the winter suddenly behaves completely differently in the spring - it breaks and stops coming out of the reel normally. There is a recommendation to soak the fishing line in water before work, but I don’t see much point in this; maleic anhydride interacts with water, but if there is not enough of it in the nylon, then there will be nothing to interact with. Therefore, there is no point in stocking up on fishing line for a long period of time; breaking or constantly tearing fishing line, which also does not want to come out of the reel itself, can significantly complicate the work.
Trimmer Husqvarna 122C – model equipment
Among the features of this lawn mower, it is necessary to highlight the curved bar, which makes it possible to carefully trim the lawn, trim the grass on footpaths, as well as in decorative flower beds. The comfortable handle increases the maneuverability of the model, making it a reliable assistant when working in very confined spaces.
The main characteristics of the scythe include:
- built-in motor power – 0.8 l. With.;
- capacity of the standard fuel tank – 360 ml;
- the maximum permissible cutting width with fishing line is 35 cm;
- knife cutting diameter – 25.5 cm;
- generated sound pressure – 88 dB;
- working weight – 4.5 kg.
The brush cutter is equipped with a plastic casing that reliably protects the operator from dust and flying stones.
Winding process
If your reel is designed to work with only one antenna, then everything is very simple. It is necessary to unwind 2-4 m of fishing line (depending on the size of the reel), find a hole on the inside of the reel that secures the fishing line, insert one end of the fishing line into it and begin to wind the fishing line in the direction opposite to the direction of rotation of the reel on the trimmer
. On the inside of the reel there is usually an arrow indicating which direction to wind the line. Having wound the fishing line, we leave a small piece of it unwound in order to expose it outside. We fix this piece in a special groove located on the inside of the reel and created so that the line does not unwind when the reel is assembled. If there is no such groove, then you will have to hold the line with your finger to prevent it from unwinding during the upcoming assembly of the reel. Next, take the outer part of the reel and thread the outer piece of fishing line into the existing hole, assemble and put the reel back on the trimmer.
If the coil is designed to work with 2 antennae, then do the following. On the inside of the reel we look at how many grooves there are for winding fishing line. There may be one or two. If there is only one groove, then both tendrils are wound along this one groove. If there are two grooves, then each tendril is wound along its own groove. A reel with one groove must have a through hole through which the line
.
We unwind 2-4 m of fishing line, thread it through this hole so that the fishing line sticks out identically on each side. And we wind both tendrils of the fishing line at once in one direction, the opposite direction of rotation of the reel on the trimmer
and coinciding with the direction shown by the arrow on the inside of the reel. We leave a little of the fishing line unwound, secure the resulting ends in special grooves, and if there are none, hold them with our fingers. We thread both ends into the existing holes on the outer body of the coil. We assemble the coil and attach it to the trimmer.
If there are 2 grooves, fold a piece of fishing line 2-4 m long in half, insert the resulting loop at the bend into the groove between the 2 grooves, and immediately wind both ends of the fishing line, each along its own groove. Subsequent actions are similar to the previous version.
There are also reels in which the line is threaded through a through hole on the inside. After that, the ends of the fishing line, without winding, are threaded one hundred percent through the holes on the outer body of the reel, assemble the reel and begin to twist the button, which is usually pressed, so that during operation the fishing line is released as it wears out. You turn the button and the fishing line winds itself inside. With all this, you won’t be able to spin it in the “wrong” direction, because it can only spin in one direction. If you get used to it, you can wind it
line, without even disassembling it - you just need to combine the through hole of the inner drum with the holes on the outer body of the reel, and then thread the line into them.
That's all on this issue. Happy winding!
String breaking
Constant line breaks are caused by:
- the presence of hard objects in the mowed grass: branches, pebbles, etc., contact with which breaks the string;
- mowing the grass close to the fence, and if it is mesh, then the fishing line
breaks even faster; - low-quality cord - needs to be replaced with a new, reliable consumable;
- wear of the outlet holes in the mowing head, as a result of which the fishing line breaks due to friction against the sharp edges of the bushings - the part needs to be replaced with a new one.
Husqvarna trimmer 135R – parameters and applications
This Husqvarna offers high power, low noise and vibration levels, and is easy to use and maintain. The trimmer is designed for caring for small and medium-sized gardens and local areas. The long-lasting rotary mechanism of the lawn mower successfully copes with mowing tall dry grass, cutting thick weeds and large shrubs.
The main characteristics of the braid include:
- built-in motor power – 1.9 liters. With.;
- capacity of the standard fuel tank – 600 ml;
- the maximum permissible cutting width with fishing line is 40 cm;
- knife cutting diameter – 25.5 cm;
- generated sound pressure – 98 dB;
- working weight – 6.9 kg.
The drive shaft of the model is protected by a reliable, non-separable metal rod, coated with an alloy that protects it from corrosion.
Sources:
https://www.vse-dachi.com/kak-namotat-lesku-na-trimmer-pravilno.html https://hitech-online.ru/tehnika-dlya-sada/trimmer/kak-menyat-lesku.html https://san-lider.ru/leska/pochemu-vyletaet-leska-iz-katushki-trimmera-shtil.html https://www.tool-store.ru/trimmer/Husqvarna-128-r/ https:/ /tehnika4sad.ru/trimmery-motokosy/Husqvarna.html
Handle shape
Manufacturers offer 2 handle options:
- T-shaped (in the form of a bicycle handlebar);
- D-shaped;
- in a "J" shape.
The handle in the shape of the letter “T” is installed on models with automatic line winding. The work is carried out with 2 hands located on both sides of the bar. This position is convenient for mowing large areas of vegetation. The cut is carried out according to the scythe principle - from one side to the other. This option is not maneuverable and does not work well on difficult terrain. The bicycle handlebar can be equipped with control buttons. In household types of trimmer, the start buttons are installed on the rod.
Classic trimmer model with a double-sided handle with control buttons
A gasoline trimmer with a D-shaped handle is more maneuverable; it is convenient for cutting grass in areas with difficult terrain. In such an instrument, the hands are located one above the other. The disadvantage of the handle is that it is difficult to hold; control of such a device is more complex.
Trimmer handle in the shape of the letter "D"
The handle in the form of the English letter “J” is the most inconvenient, so it is rare.