The current rating of burning equipment should start with the device Uzor-10K, which is average in price and capabilities. Among its differences are a shock-resistant plastic body, two heating modes for painting on wood and the main image, and shadows or gradient.
The burner tip heats up in just 1 minute, allowing you to start working almost immediately. And the simple switching of buttons and convenient design make the device suitable even for 6-year-old pyrographs. Another plus is good strength and long service life - on average, devices operate for at least 3 years.
A small disadvantage of the domestic device is the need to separately purchase a burning board and a minimum number of attachments. You will also have to turn off the device every 15 minutes - otherwise its handle may get too hot.
The cord is quite long, but does not spin easily, there is no holder, and the needle is relatively thick. However, the device still burns out well, without requiring strong pressure and cooling quickly after being turned off.
Main characteristics
As elsewhere, in this field it is difficult for beginners to immediately choose a really good burning tool without knowing about its advantages and disadvantages. If you are looking for a budget option for burners, we recommend taking a closer look at devices from the Ogonyok, Ornament, and Orbit brands. We will try to briefly introduce you to the main characteristics of wood burning machines, based on which you can make the right decision.
Electric burner with hard pen
These models have several significant advantages, the main ones of which are:
- durable body;
- ease of operation;
- affordable price.
The burning machine, equipped with a hard pen, does an excellent job of applying medium and large-sized designs. They are most often purchased for a child or a beginner because of their ease of use, and in this case it makes no sense to overpay for a professional set for wood burning.
Unfortunately, there are some drawbacks here. Thus, this electrical appliance requires a long time to warm up and cool down; moreover, the working element integrated into the handle can transfer heat to the handle, which the master will inevitably feel. Another disadvantage of such a burner is the large handle, so the needle is located at a great distance from it, which complicates delicate work; moreover, with prolonged continuous use, the device can overheat and fail.
Wire pen apparatus
Wire samples have a number of advantages, and first of all this concerns the ability to burn out any pattern, even if a hardwood board is used. It only takes a few seconds for the burner to heat up and cool down. Most wire models are equipped with a temperature regulator, and you can barely heat up or, on the contrary, heat up the working nozzle to the maximum, depending on the desired result and the hardness parameters of the wood.
A master working with such a burner does not need to exert extra effort to complete the process. If the wire burns out, it can be easily replaced with a spare one. Most European manufacturers make heating elements from nichrome, adapted to temperature changes. Nichrome metal guarantees the product a long service life, which is important . By choosing a burner with a wire pen, you will provide yourself with the opportunity to create the finest lines on wood, intertwined into marvelous patterns. In this case, the disadvantages include the high cost of the instrument and the difficulty of repairing it. Burners with a wire pen are quite capricious; their working attachment requires frequent changes, which can cause the handle with a lock to break.
If you are looking for a children's tool, we still recommend purchasing a simpler burning device with a hard pen. On it, your child will learn to burn simple designs, and along with the acquisition of skills, he will be able to choose a tool that will meet his requirements and personal wishes. Next, we invite you to familiarize yourself with the most popular models of burners, which have firmly taken their place among similar tools.
Pattern 1
The Russian-made Pattern 1 burner belongs to the category of amateur tools and is suitable for burning patterns on wooden and textile synthetic surfaces. This device is suitable for both beginning artists and professionals. Wood and fabric burner Pattern 1 is often used in schools during labor lessons or in thematic circles . The burner is equipped with a heating regulator and a guilloche attachment.
Rexant 12-0142
The Rexant 12-0142 burner is equipped with a thermostat and a comfortable plastic handle that is resistant to thermal influences. The Rexant device is also equipped with a special ring that prevents accidental contact of the soldering pen with third-party objects. The heating range here varies from 450 to 750°C, which allows you to completely control the work process.
Elm
Vyaz burners are specially designed for applying patterns on surfaces made of soft and hard wood. The device is equipped with a thermostat that allows you to select the desired level of needle heating. Burning devices of the Elm brand operate from the mains and are equipped with a spare pen.
Smoke
The Dymok wood burner does an excellent job of applying all kinds of patterns to wood, fabric and leather. The body of the device consists of durable plastic. Devices for artistic burning of Smoke are equipped with a step-down transformer, a thermostat and a pencil with a pen.
How to work correctly?
First of all, it is necessary to ensure good and proper lighting. If the work will be done on the street, then properly installed street light poles will help with this.
The working tool resembles a simple pencil with a wide working part. Therefore, the work carried out is practically no different from drawing on paper, except that the working part is heated before use. The whole process is divided into several main stages:
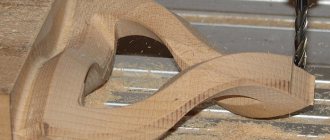
- Preparation. It involves choosing the wood on which the design will be applied. The surface should be smooth and even. It is possible to make the board smooth by sanding it.
- Drawing. For those who create pencil drawings, the task will be simple. In the absence of appropriate skills, a suitable design is printed and then applied to a board using stencil paper.
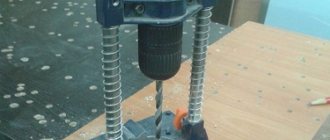
- Burning out. After warming up the working part of the tool, you can begin burning. The handle of the tool, if it has a small thickness, is taken like a pencil. Simple drawings begin with drawing contours, straight lines are created with quick movements without applying strong pressure. If several lines are located in close proximity, they should be applied with some delay, which is required for cooling. The hue changes by setting the appropriate power. Also, to obtain complex patterns, the nozzles are changed.
Many people leave the product after applying the design without carrying out final processing. This may lead to a reduction in the service life of the product.
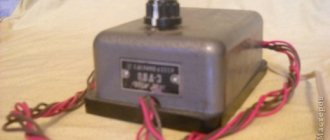
What is a burning device?
From the point of view of radio electronics, the circuit of an electrical device for drawing on a wooden surface is quite primitive. The basis is a step-down transformer that generates a voltage of 6–12 V. The burning device also consists of an ergonomic handle with a pin and an electrical cord. Depending on the design, the transformer is located in the handle or a separate block. In the latter case, this is a professional drawing apparatus. For children under 10–12 years old, such a device may be difficult to master.
There are models of wood burners with replaceable nozzles and tips. They differ in operating features and other nuances, which will be discussed below. Depending on the wood, the burning tool will behave differently. For experimental work, experts in the field of pyrography recommend using a piece of ordinary sanded plywood. For a child learning to burn, this is an ideal preparation. If you plan to create patterns or three-dimensional paintings, light boards made of birch and linden are suitable. But it is better not to use pine blanks.
Related tools and accessories
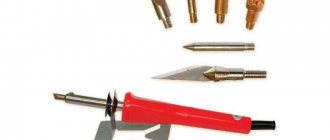
The burning device is the basis of pyrography, but without special tools it will not be possible to master this art perfectly. In addition to the burner itself, the set includes interchangeable brass tips that allow you to create original patterns. The more attachments, the more opportunities there will be for implementing different drawing techniques. It is also important that the kit includes a spare needle. Little fans of pyrography will do well to buy a music stand board that is convenient to work on. If desired, you can make a soldering iron or lavalier type device for wood burning with your own hands using an old transformer or power supply.
Scorcher
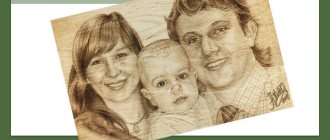
#1 Choosing a pattern for burning and how to transfer it to a wooden surface
Doing pyrography is quite simple and interesting. This hobby is ideal for children and adults. You just need to master the basic techniques and skills of “drawing with fire” and choose the right designs for wood burning. Professional pyrographers rarely copy the works of other authors, but draw on their own. But what about beginners in this business? Original and easy drawing patterns can be easily found on the Internet on various thematic sites dedicated to wood burning. (Further…)
submitted by Anton 12/22/2017, 20:05
#2 What you need to know for your first pyrography, step-by-step instructions
Wood burning is incredibly interesting - it is a popular home hobby for people of all ages. Experienced pyrographers paint exclusive paintings and create incredible masterpieces. Children enjoy learning how to burn geometric shapes and various animals on wood. The burning technology itself has been known for a long time and is quite simple, but beginners in this business will have to show a little patience and perseverance to understand the basic principles of working with an electric burner, as well as study the available methods of applying an ornament or image to a wooden workpiece.
Wood burning for beginners begins with mastering basic practical skills and theory, which also includes safety rules when working with a pyrograph (especially for children). Before you start creating, you need to properly prepare your workplace and stock up on additional materials. Let's look at the most important points in the burning process that every pyrographer must know. (Further…)
submitted by Anton 12/26/2017, 21:29
#3 Complex pyrographic works, different techniques
The art of “painting with fire” or simply wood burning appeared long before the invention of the first gas burners and the advent of electricity. Various tools and techniques were used to decorate wooden products. The most primitive method is a metal pin with a pointed end, which is heated red-hot in hot coals.
Over time, burning devices improved and became more practical. And today, fans of this type of creativity can use professional tools for drawing on wood - electric pyrographs with replaceable brass nozzles or a loop made of nichrome wire. However, in order to learn how to burn complex designs, you will need to study the theoretical foundations of pyrography. (Further…)
submitted by Anton 12/30/2017, 11:33
#4 How to make a simple burner yourself from scrap materials
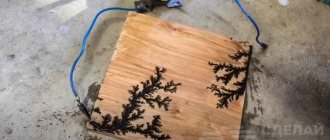
Today, pyrography (the art of wood burning) is gaining increasing popularity among fans of non-standard ideas for home creativity. And there is a simple explanation for this - with the help of a compact electrical device you can burn not only patterns and primitive drawings, but entire paintings that are fully worthy of becoming masterpieces of art.
A portable household electric pyrograph with replaceable brass nozzles or a “loop” made of nichrome wire allows you to burn on different materials: wood, plywood, leather and cardboard. There are many models of burners on the market, but many of them are not satisfactory either in price or in quality. Therefore, more and more people prefer to make wood burners with their own hands. There is nothing complicated here, the main thing is to remember the main points and approach this issue correctly. (Further…)
submitted by Anton 12/31/2017, 17:36
#5 Different stencils for burning, from simple to complex
To learn how to burn beautiful paintings on wood that are worthy of becoming masterpieces of home creativity, you will need not only a professional tool (electric pyrograph), but also perseverance and a little imagination. The basis of any burnt pattern is sketches, diagrams or templates, according to which further work is carried out. You can make sketches in different ways.
Experienced pyrographers prefer to draw blanks themselves - they have a good eye for this matter. However, it is easier for beginners to use special stencils for wood burning for practical exercises. You can find them on the Internet. All that remains is to download and print on a printer. In addition to the stencil itself, you will also need carbon paper and a pencil (or pen). (Further…)
submitted by Anton 01/07/2018, 00:00