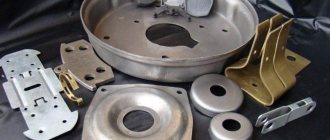
During operation or processing, parts made of metal often lose their original configuration. The same phenomenon can be observed if they are not stored carefully. But in order for the parameters of the finished product to meet the requirements of the technical specifications, for the correct implementation of all further stages of processing, it is very important that the dimensions of the workpiece and its shape match the values specified by the project. To do this, an intermediate preparatory technological operation is performed, called “metal straightening”.
Types of editing
A cylindrical workpiece may bend under the influence of an external load, and one with a sheet configuration may become wrinkled. Products in the form of axes that do not even transmit torque, as well as shafts, can bend. The technological operation of straightening metal is understood as a series of actions, upon completion of which the workpiece made of metal returns to its original shape. Defects/flaws come in a variety of forms. The most common ones are:
- convex. It appears on flat products in the form of an increase in thickness - the size of the cross-section of the sheet - from the edges towards the center;
- dent. A recess on the surface of a metal plate, framed by flat edges;
- wave. This is a deviation of the shape of the sheet surface from straightness.
There are two types of editing:
- manual. It is carried out when home craftsmen produce uniquely shaped products. Although the set of tools used is quite simple, high demands are placed on the worker’s skill level;
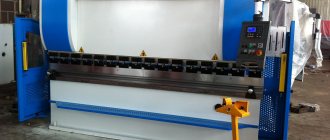
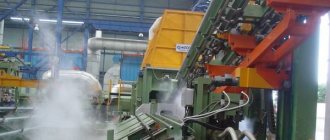
- mechanical. Used in industrial production conditions. The equipment is very complex, large-sized and heavy. But it is characterized by a high level of productivity, and its design makes it possible to automate the straightening process.
It is not allowed to perform such an operation at subzero temperatures. In this case, the level of ductility of the material decreases and it becomes brittle. Moreover! Sometimes it is necessary to heat the workpiece to a temperature of 140°C to 400°C. After this, its plasticity increases
Sheet and other types of blanks
Billets produced by rolling have increased plastic properties , since they experience large degrees of deformation during production. This allows you to apply methods to them that give a positive result when performing the technological operation of editing. Rolled products of any shape : rod, coiled wire, round and profile pipes, sheets, strips, tapes, angles, beams, channels and others can be used as blanks for proper operations.
This is interesting: Tools for straightening metal
Editing metal sheets
The complexity of this operation depends on the type of defect detected. But special difficulties arise when their combination is revealed. For example, a convexity in the center of the plate and at the same time a wavy edge.
Convex
When straightening a convexity, blows should be applied around the circumference. You need to start with the line framing the defect. As work progresses, the radius of the circle must be gradually reduced, moving from the edge of the convexity to its center. As you progress, the frequency of strikes increases, and their strength, on the contrary, becomes less.
A special approach is used when there are several such defects on the sheet. In this case, by striking with a hammer, you need to ensure that the convexities are combined into one common one, after which the editing is carried out according to the method described above.
Waviness
Editing a metal sheet with wavy edges is carried out starting from its edges and then moving towards the center. The waviness of the edges is smoothed out after the plate is stretched in the middle.
Thin sheets
Processing of workpieces with a small thickness in order to return them to a flat configuration using strikers is not carried out. The reason is that metal creases may occur as a result of unforging. A thin sheet is straightened with long, even planes of smoothing bars made of wood or steel. Smoothing is done in different directions with gradually increasing pressure.
Straightening of hardened metal products
In this case, hammers equipped with soft strikers are not used for straightening. For this purpose, a tool with similar elements made of steel with high strength characteristics is used. In this case, the sharp part of the striker - the nose - is rounded, that is, it is given a rounded configuration.
Straightening of hardened metal is carried out by applying pulsed point effects on a concave fragment of the workpiece. As a result of impacts in this area of the workpiece, a stretching of the material structure is observed, due to which the surface becomes more and more flat. This operation is carried out:
- on a straightening/straightening headstock, characterized by a hemispherical surface;
- with alternating movement of the workpiece from bottom to top and top to bottom. Straightening a hardened square whose right angle is broken is carried out in one of the following two ways (see figure):
- if the angle has become acute, the direction of the blows is the internal section of the surface of this part closest to the point of intersection of the rays/sides;
- when the angle has transformed into an obtuse one, the place of striking is the zone close to the top of the outer angle.
The metal in the affected area is subject to tension, as a result of which the 90° angle is restored.
1.5. Filing
Filing –
- Metal filing. manual metal processing. plumbing
is a method of processing workpieces with a file to obtain the required shape, size, and surface roughness.
Filing
metal is produced with a file, in a vice and is based on the destruction of the surface layer of the workpiece material by the cutting elements of the tool (file).
Files
(GOST 1465-93) are a multi-blade cutting tool whose teeth are located on the surface of hardened steel bars having different cross-sectional profiles and lengths. Files are divided according to the cross-sectional shape into flat, square, triangular, hacksaw, rhombic, semicircular and round, and according to the number of notches per unit length - into bastard files, which have from 4 to 12 notches, personal files - 13 - 24 notches and velvet files, which have 30 -80 notches per 10 mm length.
File length from 100 to 450 mm (every 50 mm).
Brushed files are used to remove a layer of metal up to 0.7-1 mm from a part; personal files are used after bastard files.
Files are made from steel grades U12, U12A, U13, U13A, 14ХФ and 13Х, as well as from high-speed steel.
Mechanization of the filing operation is achieved by using filing machines, grinders, and special devices.
A plumbing lesson on the topic “straightening metal.” metalworking metal straightening
Straightening rounded metal parts
The method for performing editing in this case is practically the same as when processing a strip. Irregularities must be marked with chalk, and the workpiece must be placed so that the bulge is on top. Impacts should be applied in the direction from the peripheral areas of the defect to the central ones.
After correcting the main flaw:
- the part turns around its axis;
- the force of the blows decreases.
This is done in order to prevent deformation of the workpiece in the opposite direction.
A similar approach is also relevant when working with rectangular or square rolled metal.
Spotter
The spotter is used for body repair and helps, like a reverse hammer, to tap small deformed parts. This is one of the methods of machine straightening, which is performed point by point using similar equipment. In this regard, this miniature device has many advantages over a conventional device:
- The straightening work is carried out efficiently.
- The working time with the spotter is short.
- There is no need to disassemble the car to perform auto repairs.
- The unique operating principle allows the spotter to eliminate mechanical damage and defects of the body, including the hood, fenders, and sills.
Straightening with a spotter will allow a car owner who wants to repair the car themselves to save on costs. To choose the right spotter, you should take into account the nature of the damage to the car.
Equipment for straightening/straightening
Manual straightening/straightening of metal sheets and structural elements made from them is carried out using hammers on special equipment - straightening headstocks, as well as straightening plates.
Straightening headstocks
For the manufacture of these devices, heat-treated steel alloys are used. The working surface of the straightening head can be:
- in the form of a flat circle on a cylindrical base, the radius of which (designation R) ranges from 150 mm≤R≤200 mm:
- spherical. This is the lateral surface of a cylinder truncated along the plane of symmetry and along the edges.
Also, in home workshops, a railway rail, cut to a length of 0.5 m to 1 m, is often used as a straightening headstock. It is convenient to move it along the slab. In addition, the rail is not subject to deformation and remains practically motionless when the workpiece is struck with a hammer.
Correct slabs
Straightening slabs are available in two modifications.
- Manufacturing material – cast iron. Execution – design with side ribs or solid.
- Manufacturing material – steel.
The slab must be heavy and sufficiently stable so that hammer blows do not cause it to shake. As for the requirements for the condition of its surface, they are standard: it must be perfectly smooth, and without the presence of foreign particles in the form of dirt and remnants of metal fragments that interfere with obtaining a high-quality result of straightening work.
The slabs must be installed on supports. They can be either metal or wood. But the most important thing is that these stands provide, in addition to stability, the required horizontal position. To make straightening easier, you need to have enough space around the slab.
There is another interesting option for such equipment. The material used to make the correct slab is dense rubber with many small protrusions, or rather, even tubercles with the same height. Under the influence of impacts, the metal itself determines its place. As a result, there is a significant increase in the productivity of the straightening process when compared with the use of a conventional leveling plate made of steel.
Hammers
The following key requirement is imposed on hammers used for straightening: they must be softer than the material of the workpiece being processed. In view of this, for straightening sheet steel, an impact tool with lead or copper strikers is usually used. Moreover, these elements should be characterized by a rounded shape. A square-shaped firing pin will leave nicks on the metal plate upon impact. When it comes to processing soft metals or non-ferrous alloys, it is necessary to use hammers equipped with rubber or wood strikers.
Convenience of work will be ensured if the ratio of the weight of the impact tool and the same parameter of the correct plate is equal to 1:100.
The essence of technology
The purpose of the operation is to bring the surfaces of parts to the optimal characteristics necessary to work together with other structural elements. Often, during operation, mechanism components operate under mutual friction, for example, a piston and a cylinder. The tolerance in this case is about 0.001 mm, which ensures the necessary tightness and free movement without jamming. Such precision can be achieved by finishing and lapping operations. But during its implementation, the metal layer is partially removed, therefore, when producing blanks, an allowance of 0.01-0.02 mm is left in order to obtain a part with an accuracy of 0.001-0.002 mm in the final result.
The terms should not be considered synonymous; grinding differs from finishing in accordance with the current standards of GOST 23505-79. The working documentation should accurately indicate the name of the operation.
The main task during finishing is to obtain a smooth surface and maintain the geometric accuracy of the part according to the drawing. At the same time, the characteristics of processing cleanliness and tolerances can be completely identical in both types of work. Therefore, the register of working specialties has approved the professional standard for the specialty - “closer-lapper”. Both operations are finishing and if the part manufacturing technology requires heat treatment of the part, then it is done before metalwork.
The technology of finishing and lapping consists of applying abrasive mixtures in the form of pastes, gels, liquids to the surface of a part made of steel, aluminum and other metals and subsequent mechanical processing with special devices. The tools required for the job and the consumables used are indicated in the engineering documentation. By finishing, the surface is smoothed to the required values, removing excess metal with abrasive particles located on the surface of the processing tool. A distinction is made between direct and indirect coating of the lapping compound. In the first case, the abrasive is pressed into the surface of the device before the operation begins, and in the second, it is evenly placed over the entire area of the part.
Most often, a cast iron block is used as a lap, which holds the abrasive well on the surface. While often inferior in strength, it effectively processes hardened metal. In practice, lead and wood lapping are used. For cold grinding of complex surfaces, additional devices are used, for example, a tightening nut when finishing the thread. Preliminary operations are also possible according to the technology. In the machine tool industry, for example, surfaces are often scraped before being treated with abrasive mixtures. This improves the surface geometry and speeds up the process.
