In carpentry, there are quite a large number of connections between parts. One of them is the dovetail. This type of connection can be seen on drawers, chairs and other structures. It is one of the reliable connections. The grooves are made in such a way that if you try to break the connection, they will rest against each other. In order to make a dovetail with your own hands, you will need a minimum of tools and a little experience in carpentry.
Application of dovetail joint
As a rule, this method of fastening is used if there is a need to obtain securely interlocked parts or a solid product at the output.
Here are the most common applications:
- Mechanical engineering production. Dovetails are used to connect elements of compressor devices together. It can also be found in metal cutting equipment and optical instruments.
- Construction works. This method is used to join timber during the construction of wooden cottages. It is also used in carpentry to create window and door blocks, arched structures, partitions and niches.
- Furniture industry. This type of tenon joint is often chosen for fastening frame parts, doors, and drawers. For greater reliability, the joints are additionally glued.
When installing various wooden containers, dovetails are also often used.
Longitudinal material connection
Figure 4. Butt and overlay joint.
One of the main disadvantages of timber is its length limitation. The standard dimensions of manufactured products range from 4 to 6 m. For long walls or when using scraps, it is necessary to make a longitudinal connection. Such connections are undesirable in the construction of capital walls due to possible deformation. If it is necessary to install longitudinal joints in several rims, they cannot be placed in adjacent rims along the same vertical line. For internal walls, there are no restrictions on splicing timber due to a more stable temperature regime.
When splicing timber along the length, use a central tenon or various joints with a lock. The straight lock is most often used due to the simple manufacturing process. Samplings are made in the timber to the extent of half the thickness of the timber. The resulting surfaces are available for processing and can be carefully adjusted.
A beam connection that is reliable against displacement can be obtained by using a central tenon. The nest must be made slightly longer than the length of the spike. The length of the tenon should be twice the width of the beam. To connect more firmly, you can install two spikes.
Extension of the beam can also be done with an overlay. The overlay connection can be oblique or straight. Types of connections can be seen in Fig. 4. The ends of the products must be given the selected shape and placed in place. Subsequent crowns will compress and secure the connection with their weight. When extending beams in main walls, it is advisable to use a combination of various fasteners. Products fitted to the overlay connection must be additionally secured with one or two wedges. A view of a wall with spliced timber can be seen in Fig. 1d. All connections must be sealed with sealing material.
Types of dovetail joints
Today, many different types of fastenings have been developed. To determine the variety of swallowtail, a view from above is necessary. Possible options will be discussed below.
- A rough connection is distinguished by good visibility of the connecting parts. In the hidden version, the body of one part masks the teeth of the second. The through type of fastening involves the tenon covering the entire width of the second element. When choosing a one-sided tenon, only part of it is removed, and the other side is not touched.
- Dovetails can vary not only in appearance, but also in the size of the grooves and teeth. The technical documentation contains information on a scale that combines key dimensions of individual coupling parts.
For the rough variety, a scale of 1 to 5 is used. It is recommended for soft wood and allows you to reliably connect even large parts. If hard wood is used, then it is better to choose the 1 to 8 option. In this case, the joints will look more attractive.
Butt joint of timber
Butt fastenings are the simplest type of connection; the workpieces are fastened at right angles using construction staples or standardized fasteners; the building material is not processed. The technology is used in the construction of temporary buildings, field storage facilities and sheds, and arrangement of work sites. The structures are easy to disassemble, and the lumber can be reused many times.
With the advent of new generation woodworking equipment and laminated lumber, the technology has received innovative development. To strengthen the fastening, a hidden tongue-and-groove lock and a trapezoidal key are used. The castle was called the root thorn; the shape and dimensions of the castle were standardized. The groove and tenon are made on modern milling machines, the reliability of fastening is ensured by high precision processing of workpieces. In such a lock, the tenon is securely fixed inside the workpiece.
Special requirements are imposed on the quality of the material; this method of installing timber is used when working with kiln-dried laminated wood. The corners of cottages and luxury housing are fastened to a secret tenon; the technology is used in the design of facades, interiors, furniture manufacturing, the main advantages of fastening:
- The structures are easy to assemble and disassemble; you can purchase an industrial house disassembled and assemble it yourself;
- The corners of buildings are durable and airtight; this method of assembling corners is called a “warm corner”;
- The front side is not processed, the uniformity of the wood texture and the absence of cuts make the façade of the building attractive;
- The fastening can be strengthened with construction adhesive.
For beginners, the easiest option is to connect profiled timber using the butt method. The ends of the beams are cut evenly and fixed at the corners using steel brackets or plates with spikes.
Butt connection of beams
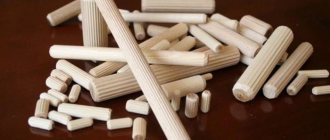
To strengthen corners assembled end-to-end, dowels are often used - vertical rods made of hard wood (oak, birch, hornbeam).
Joining timber on a straight flat key (dowel)
The optimal joining option is the “warm corner” method, also called the “root tenon” connection. At the end of the beam, an internal protrusion-spike is cut out, which protects the seam from blowing and increases the strength of the corner.
A common corner joint method is the dovetail. It differs from the root tenon in its trapezoidal shape, which makes the contact area of the beams denser and more rigid.
Algorithm for making a connection
A dovetail is quite easy to create if you do all the necessary preparatory work in advance. Mechanical experience will also not be superfluous, because the product must be strong and beautiful.
Connecting logs in a log house
The construction of log houses using logs is carried out more often than using timber. The connection of logs has technological differences. The requirements for connections are the same - strength and tightness. Let's look at the main ways to make connections along the length and in the corner.
Method of corner connection with the remainder “in the area”
You can connect the remaining logs in the log house using any of the following methods:
- in the region;
- to the clap;
- in a huff.
The first method (“into the cloud”) or “into the bowl” is the simplest. At the same time, a bowl-shaped hole is prepared in the log. Its dimensions must be such that the attached log fits tightly into it. Accordingly, the transverse log must have a bowl or “burl”. Corner connections “in the area” are divided according to the type of execution into options:
- half a tree;
- oval comb;
- in the fat tail.
The most affordable version is a wooden floor bowl. When laying logs, the following must be considered.
- The logs will be stacked more densely if, in addition to cutting out the “obla,” a longitudinal groove is cut along the upper part.
- The groove is filled with flax wool: it will serve as insulation.
- Laying the logs of each subsequent crown is carried out after fixing the transverse logs.
- The strength of the structure is achieved through dowels connecting the upper and lower logs. A dowel is a long wooden dowel with a round or rectangular cross-section.
Connecting logs “in a fat tail”
The fat tail connection is a complex version of the fat tail method. The comb in this case is oval-shaped, and an additional protrusion is placed at the bottom of the bowl, which should be oriented along the log. At the bottom of the recess there is a special recess for the fat tail.
Connecting logs “in a clap”
This connection option is performed similarly to the methods described above. The difference is this. The bowl is cut down at the bottom of the log (with the “in the boulder” method - at the top). To do this, prepare a corner for laying the logs. The end of the previously laid log needs to be slammed down (this is the essence of the method).
Connection "in the okhryap"
With this method, straight recesses are prepared in the upper and lower parts of the log (at the junction), each with a depth of ¼ of the diameter. The method is convenient for use if it is impossible to use other methods of joining logs.
Joining logs in corners without leaving any residue
With this connection method, there is no part of the log protruding beyond the outer perimeter of the wall. For a reliable connection, a “cut” is required: the ends of the logs are fixed with spikes. To prevent the cut from being blown by the wind, the horizontal planes of the cut are made inclined. This connection is called a “dovetail”: the wedge-shaped part of one log is wedged between two inclined planes. If it is necessary to attach a partition to the wall, a T-shaped connection is made. The end of the partition log is given the shape of a truncated cone, at the base of which is a square. The outer part of the cone is expanded. A similar recess is cut out in the corresponding part of the wall. The connection will be reliable due to the jamming of the parts.
Tools
To make a corner connection, you should prepare:
- board;
- Beam;
- Wood glue.
If you need to join the outer corners of the house, then experts advise purchasing also a sealant for additional processing of the gaps.
To make tenons and grooves, you need:
- Square;
- Knife;
- Set of chisels;
- Crafting table;
- A saw suitable for the desired type of fastening;
- Hammer;
- Sander.
If you plan to use a connection on large elements, for example, when constructing a building, then it is recommended to make a series of calculations, select the appropriate type, determine the number of tenons, the angle of inclination, etc.
Methods for fixing materials together
The construction of structures from wood material has been successful for thousands of years. During this time, several optimal and ingenious options for fastening raw materials in the corners and longitudinally (that is, lengthwise) were developed and implemented, which are relevant for both profiled timber and regular timber.
As was said, when constructing an object, the beams can be fixed to each other along the length and at the corners. What's the difference? The fact is that corner fastening is used in the construction of solid walls and attractive internal partitions in the room. A lengthwise fixer is used when the material needs to be built up. Like this? Well, look: there is a log 4 m long, and the size of the wall indicated in the project is 6 m, in this case, you need to lengthen the raw materials.
Work progress (step by step)
Before you begin, you need to mark all the blanks with a pencil.
The order of steps to create a dovetail is:
- Mark the tenons using a square. It is recommended to mark the parts that will need to be removed with a saw in color.
- Carefully cut out the thorns.
- Remove waste. You can use a jigsaw or a chisel.
- Mark the dovetails. It is recommended to place the element with tenons on a prepared piece of wood so that its end part coincides with the line of the shoulders. Only then can you begin to apply markings.
- Carry out sawing work. Remove waste, trim allowances and clean up.
- Join the parts to check the tightness of the fit. If necessary, remove excess with a chisel.
- Glue the connected elements together and clamp them with a clamp, having previously placed wooden strips so that the load is distributed evenly.
It is more convenient to make a dovetail using a manually driven framer. In this case, the quality of the finished product will be much higher, and it will take much less time to manufacture.
Do-it-yourself half-tree corner joints
Half-timber corner notch (overlapping) is the most common type of frame connection. Its logic is extremely simple: at the ends of both parts, recesses (folds) are cut out along the width of the counter part. The fold forms an edge and a shoulder - they must be perfectly smooth and strictly perpendicular to each other. In a high-quality connection, the surfaces of both parts fit tightly and form a joint without the slightest gap.
You can read about methods for precise fitting of carpentry joints in an article devoted to this topic.
Connection marking
Create markings for the fold selection. To do this, use a carpenter's square, a surface planer and a marking knife.
Measure the length of the edge along the width of the mating part. Draw marking lines on the edges. Set the thicknesser to half the thickness of the part and make side markings.
Advice! When creating carpentry joints yourself, use a sharp marking knife instead of a pencil. It will ensure high marking accuracy and the absence of marks on the finished part. In this case, the deepened line will become a convenient starting position for a chisel or auger saw.
Rebate cutting
Using a back saw, saw off the waste part on each part, carefully following the markings without strong pressure or jerking.
Pros and cons of dovetail joints
pros
This joining method for cladding and thermal insulation of the walls of a wooden building has the following advantages:
- Less wood waste;
- Significant expansion of the interior space of the house;
- The evenness of the corners makes it possible to cover the walls with siding, clapboard or gypsum board;
- Maximum adhesion reliability among all types of connections;
- No need to use hardware products;
- Low cost of construction work.
In addition, the dovetail serves as an excellent protection against moisture penetration into the home. It is also worth noting a number of other advantages:
- Preservation of wood structure;
- No natural deformation of the material;
- Possibility of adjusting the fastening power;
- Increasing the strength properties of the product.
Minuses
The connection has only two disadvantages:
- Closed corners negatively affect resistance to temperature changes, which means there is a high probability that mold will grow on the surface of the wood. The solution is to lay waterproofing or treat it with special compounds.
- Making fastenings requires the master to have skills, which makes it impossible for a beginner to build a house with his own hands.
Dovetail is practically the most effective way of attaching wooden elements to each other. The spikes and teeth cannot be separated from each other even without glue. In addition, such a connection looks very decorative.
Thanks to these advantages, this joining method is used in many areas, from construction to mechanical engineering. It is also used in applied arts.
Types of corners in a log house
Corner joints can be “with remainder” or “without remainder”. The difference is in the ends of the timber, which will either extend beyond the frame or not.
Connecting corner beams with the rest is more expensive (material consumption increases). But the heat capacity and protective functions of such an angle are higher. The most used option for fastening timber with the remainder is “in the fat tail”.
Connection without residue
The splicing of timber without any residue is carried out using several types of knots: “into the bowl”, “into the okhop” or “into the okhryap”. The most common option is in a bowl.
Bowls in timber are made on a special bowl cutter or manually using a saw. The specialists have a mobile cup cutter that they can carry out work right on the construction site. The timber is laid one bowl on top of the other. Felt or jute insulation is laid between them.
The connection of the beam “into the clap” is similar to that “into the bowl”, but differs in the location of the drink. The bowl is cut from the top, not the bottom.
If we compare it with the main types, the connection “in the okhryap” is similar to the “in the paw”. Only in this design the end of the beam is removed, thereby forming an angle without a protrusion. The beam is connected to such a corner using dowels and crosscuts. This type of connection does not have high wind resistance, so often a straight cut is replaced with a trapezoidal one.
Any connection must be discussed with specialists, since the choice must be based on the design features. For profiled timber, connections in length are allowed only according to certain parameters, in accordance with GOST 30974-2002 “Connection of corner wooden and log low-rise structures. Dimensions, design and classification."
Any connection breaks the tightness of the walls, so before installation you need to lay a special insulation and treat the joints with antiseptics, since this will be difficult to do in the future, especially with profiled timber.
There are two main types of log frame corners:
- "without a trace"
- "with the remainder."
When starting construction, you should decide what kind of building it will be, what load the foundation and walls will have to bear, and, accordingly, what kind of timber connection in the corners should be chosen in each specific case.
We invite you to familiarize yourself with: Warm floors in the bathhouse - do-it-yourself options
Considering that correctly set corners are the key to the strength and reliability of the entire structure, corresponding requirements are also imposed on them. This:
- Reliability of fastening. The corner of the house, regardless of how it is constructed, should not be made of lumber with cracks and splits. Wood for construction must be taken with a drying level of up to 20%, which ensures its ability to withstand deformation and environmental changes without damaging the structure.
- Air tightness. The absence of cracks that allow drafts to enter the home is the main requirement for wood corner joints.
Connecting corners to build a house made of timber is divided into:
- Angle with remainder.
- Angle without remainder
The corner connections of the house with the remainder are also called “in oblo”. The design of the unit is key, it can be assembled in several types:
- One-sided.
- Two-way.
- Quadrilateral.
Lap knitting is a universal connection of lumber, used when laying walls made of logs and timber. The workpieces are placed at right angles into cut-out grooves; the size of this groove depends on the size of the material used. Such a lock is used in the construction of log houses and ceilings, the construction of bridges, and the construction of canopies. The main methods of cross fastening:
- Half-tree connection;
- Quarter and third wood joint;
- Notch in one row.
The most widespread cross-shaped connection in half a tree is when cutting corners into a bowl; it is used in the construction of utility structures, residential buildings and baths. The structure is reinforced with building brackets, dowels and dowels.
A variation of the cross-shaped connection is the method of fastening the beams together without any residue; in this case, the two sides of the cross-shaped connection have no continuation. This connection is used when laying corners and is called “no residue in the paw.” Cutting a castle without leaving any residue does not require the use of special tools; the construction of a log house using this method is popular among individual developers.
A more complex method of corner mounting is dovetail installation; a dovetail lock is a reliable but complex fastening. Marking and complex cutting of such a connection requires professional skills; the technology is widely used in the construction of low-rise economy class housing.
Photo of dovetail connection
Overview of the main bracket manufacturers
Domestic brackets
| ECT Tula Research and Production produces a huge range of brackets for domestic shotguns:
More information about the EST model range |
| Rose of Wind Volzhsky produces all-milled side brackets for AK family shotguns and Weaver steel rails for Czech and Italian shotguns. Due to the use of durable materials, the cost of the brackets is not small, but when compared with foreign analogues, it is significantly cheaper. Windrose brackets are professional solutions for installing night and thermal imaging sights with a unique clamping system.
Read more about the “Wind Rose” model range |
| VOMZ The Vologda Optical-Mechanical Plant produces a number of brackets for installing its sights. VOMZ brackets have a budget price, which is why they have gained popularity among hunters. Separately, there is a series of side brackets with a top part for Weaver or rings.
More information about the VOMZ model range |
German brackets
| Kilic Feintechnik (MAK) The Kilic Feintechnik company is one of the leaders in the number of products produced in the field of weapon mounts. German brackets under the MAK brand are distributed throughout the world. The company's products allow you to solve any problems related to the installation of day, night and thermal imaging sights. Many optical manufacturers cooperate with this company and produce specialized kits.
More information about the MAK model range |
| Recknagel The German company Recknagel has a wide range of products from simple rings for hunting rifles to balanced and adjustable monoblocks for tactical applications. The patented ERA TAC series has proven itself to special forces as a durable and reliable fastener.
Read more about the Recknagel range |
| Apel One of the most popular quick-release fastening systems is produced by the German company Apel. The company is considered one of the oldest in the fastening manufacturing market and has gained its fans over the years. Our own system of rotary mounts, high quality workmanship, specialized rails and brackets for certain brands of sights.
Read more about the Apel lineup |
Italian brackets
| Contessa Alessandro When it comes to installing mounts on sophisticated types of weapons, then hunting enthusiasts choose Italian Contessa mounts. The company develops high-strength adapter strips and brackets for all types of foreign guns.
Read more about the Contessa range |
American brackets
| Leapers The Leapers company occupies a high position in America in the sale of weapons tuning products. The model range includes rings, monoblocks, brackets for handguards and quick-release fasteners. Due to the presence of our own factory in China, the cost of products will please every hunter. In our store you will find all Leapers mounts, including the Accushot series quick-release rings and side brackets for the AK family.
Read more about the Leapers lineup |
| Leupold One of the most recognizable American manufacturers of optical sights, Leupold, offers various options for steel and aluminum rings. Leupold has its own designs of quick-release and swivel brackets for foreign shotguns.
Read more about the Leupold lineup |
| NightForce NightForce produces sights for tactical tasks and competitions, and as an addition offers its own brackets that provide high installation strength. Basically, NightForce mounts are seating rings with different mounting heights.
More information about the NightForce lineup |
Czech brackets
| Kozap Kozap is a private company in the Czech Republic that produces mounts primarily for Czech rifles. The assortment includes separate and monoblock rings, quick-release rotary kits and landing strips. Kozap brackets are affordable in price compared to analogues, while being quite durable due to the use of steel as a material.
Read more about the Kozap lineup |
Swedish brackets
| Spuhr Swedish Spuhr brackets are a separate branch in the fastening market. The company specializes in accessories for precision shooting. The brackets have high precision, a certain degree of inclination and levels. If the task is to place a bullet in the center of a target at a long distance, then professionals choose Spuhr quality.
Read more about the Spuhr lineup |
What determines the choice of connection?
If you cannot decide how to connect the timber when building a house, it is important to pay attention to what structures it will be used for.
For the construction of outbuildings and baths, beams can be connected half-timbered or end-to-end. These connections are simple, you can make them yourself, you just need to secure them with dowels, pins or staples. But such methods cannot be used in the construction of a residential building.
Experienced craftsmen will not use longitudinal joints of workpieces to lay out load-bearing walls, but will try to use only solid lumber. As a last resort, they choose a rigid connection, for example, with a key. Only the key in this case must be of high quality.
The oblique lock connection can also be used on load-bearing walls, but for this the structure must be rigid with precise dimensions. And it is almost impossible to do this on your own.
How to make accurate markings?
When making a dovetail with your own hands, the accuracy of the markings is of primary importance. To apply it, they traditionally use a grinder and a square.
A more practical and convenient device for these purposes is a special template. These markers come in different angles and are designed for soft or hard wood.
Making a device for picking out a tenon
Unlike a professional machine, the working tool is not fixed in space. It is fed onto a stationary workpiece with both hands. Therefore, the manufacture of a device for clamping the part at the first stage is a justified necessity. The simplest device for this is a design (Fig. 2) of fixed guides (upper, lower, side) and a movable bar, which adjusts the length of the sample. To assemble it, you need to perform the following steps:
- fasten the side vertical elements of the same height with the central cutouts to a piece of plywood (along its edges);
- cover them with guides along which the router sole will move;
- install side bars, limiting the movement of the power tool along the upper guides;
- install a movable element on the bottom plywood that regulates the overhang of the edge of the workpiece that is being milled.
Figure 3. Scheme of tenon sampling.
To fix the movable bar, use a standard wing screw or special fasteners. The dimensions of all structural elements are selected individually:
- the height of the upper guides is equal to the thickness of the workpiece in which the tenon is made, taking into account a small gap for installing the fixing wedge;
- The width of the cutout in vertical elements depends on the length of the tenon created by a hand router.
Read also: How to sharpen knives for an electric planer
A manual milling cutter of any modification, manufacturer, is suitable for working with this device, since most models provide adjustment of the cutting speed, feed, and reach of the working body.
For a dovetail tenon, a device with the opposite principle is used:
- a power tool is fixedly fixed in a sheet of plywood located horizontally;
- its body is located at the bottom, the cutter comes out from the back side of the sheet into a through hole;
- a block of hard wood (beech, birch, oak) is attached to the desktop;
- A 2.5 cm piece of board is attached to the block, which is a consumable material (used once with a certain cutter diameter).
Structurally, fixing a hand router in a sheet of multi-layer plywood can be solved with several options - clamps, self-tapping screws
It is important that the fasteners do not protrude onto the working side of the plywood. The sheet itself can be attached to a workbench, rest on a couple of chairs, be fixed on several rows of timber, trestles, scaffolding


