You can cut an even circle from a sheet of metal using an angle grinder (grinder). However, for a better quality cut you will need a device that is easy to make with your own hands.
In this review, the author shows two ways to cut an even circle from metal using an angle grinder.
For the first method, you will need to make a simple rotating stand with a magnet for the grinder.
We recommend reading: a homemade angle grinder for cutting metal workpieces.
How to Cut a Circle with a Grinder
How to cut a circle
in metal: best methods and valuable tips
Any design, for example in your home, in production, involves working with metal.
Often, during the operation of this material, the question may arise: how to cut a circle
in metal?
It deserves attention, since the complexity of the process of performing the work and the quality of its result directly depends on the choice of the right tool and technology.
Methods for cutting a circle from thin metal
Metal circles
Metal can be thin, as it is also called thick, but not durable; a variety of tools are used for cutting it.
The choice of materials and cutting technology also depends on how correctly you can choose the studio, what diameter the circle
not how smooth it must be.
Using a jigsaw
If you need a perfectly even circle, use an electric jigsaw to cut it out.
The work is carried out in stages:
- First, the thickness of the metal is determined and the appropriate saw blade for the electric jigsaw is not selected.
- Well before cutting a circle in metal with a jigsaw, the outline of the circle that will be cut is outlined on the working plane.
- Using a drill, not a drill (with a diameter of eight to ten millimeters), a hole is cut out from which work begins.
- A jigsaw saw blade is placed into the resulting gap and cutting continues according to the intended drawing.
Cutting with application does not take a long period of effort. In addition, using a jigsaw you will get a circle with perfect edges. Alas, this tool is used only for metal of minimal or medium thickness (nettle two - three mm).
Using an angle grinder
The grinder is used when working with thin metal. There is an option to create a round hole with this tool by following these step-by-step tips:
- Well before cutting
a circle in the metal
with a grinder
, markings are made so that its contours are clearly visible. - Short sections are cut along the entire length of the intended drawing, which will eventually be connected.
- The figure will be more like a polyhedron than a circle. Therefore, after cutting is completed, the product is processed and not cleaned until the edges are sufficiently even and smooth. For processing there is also the option of using a grinder. If the circle has a wide diameter, of course, grind the contours with a large disk.
How to cut a circle with a grinder part 1
Like a Bulgarian
cut in
a Circle
, without any adaptations Photo in mine: .
When processing a cut circle using a grinder, you should be careful that the disk is inside the hole and, despite this, is located in the same plane with the work sheet.
Cutting a circle in thick metal
Cutting a circle with a grinder
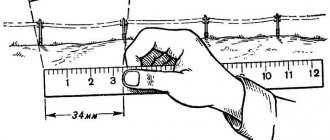
In order to outline the exact contours of the figure that will be cut out of metal, you should use a ruler, a marking compass, or a marker.
First, using a ruler, the required width of the compass connector is set so that it matches the required diameter of the circle.
Then the center point of the circle is determined on the metal plane.
Contours are drawn from it using a compass.
To make them clearly visible in robots, they should be drawn with a marker.
Application of cutting torch
Of course, cut a circle into medium-thick metal using a gas cutter. The work is carried out in stages:
- The outline of the circle is outlined.
- The instrument burner lights up.
- The combustion torch is adjustable.
- The torch is carefully and slowly drawn according to the drawn drawing.
Using this method you can cut
a hole in metal that is about four or five millimeters wide.
Application of welding machine
If you don’t have a gas cutter at home, use a welding machine.
It needs to be adjusted to the current level.
Then the burning arc is placed against the contour and is not held against it until a hole is formed.
Then you just need to slowly move it along the drawing until it is impossible to make an even circle.
However, the most important thing is to correctly adjust the power of the tool.
Nettle, if metal about four millimeters thick is used, you need a device operating at a power of about one ampere. In this case, the metal is thicker - which simply means that the power of the tool will not be enough.
To speed up the work process, it is better to use thin electrodes. However, they burn out quickly and do not need to be replaced. Because of this, there will be a need for frequent heating of the metal, since in time for replacing the electrode it will have time to cool down.
What actually happens, how to cut an even circle from metal with a cutter, is presented in the video:
Noticed a mistake? Select it and don't press CtrlEnter to let us know.
Laser cutting of holes in metal
In this section, we are not going to talk about the advantages of laser cutting, for example, such as minimum material waste or high speed. We will give only important information regarding cutting holes and windows in metal.
- The work is carried out exactly according to the project.
Unlike a drill, the laser beam cannot be directed when cutting; it is directed only in the indicated direction, in a straight line. Compared to a plasma arc, the beam does not move from side to side. The process is controlled by a robot (CNC - numerical control), which cannot be distracted or relax after making a mistake, like a human.
Thanks to CNC, the parts completely correspond to the design, the size of the holes will be the same. With a correctly written program, all manufactured parts correspond to the original design.
- Outlines of almost any complexity.
Let's look at an example. Currently, the fastest and cheapest method is coordinate punching, which allows you to make windows with regular outlines. The edges may not be completely straight, parts of the product are sometimes damaged, but the cost of such production is significantly lower than laser cutting. However, we are talking about windows with standard outlines.
The coordinate machine has a punching element whose shape is predetermined. Like molds for playing in a sandbox. If you have a square shape, it is impossible to make a round Easter cake. You need to order a round mold first. In principle, this is possible. However, what to do if you need an Easter cake in the form of a company logo... You can order a mold for making a logo, however, production will no longer be cheap or fast.
A laser machine is able to cut out a figure of both standard and the most complex configuration. The operator sets a program during which the beam moves in the desired direction. In this case, the intricacy of the drawn form does not matter.
- The minimum hole diameter is more than 1 mm.
Another important point is the accuracy of the cutting. When working with a plasma device, which also makes cutting according to coordinates, the corners are rounded. The problem lies in the cross-sectional thickness of the plasma arc, which is larger than the laser beam. A plasma arc can be used to cut complex shapes, but in fact they may not exactly correspond to those planned.
VT-metall offers services:
The same applies to the minimum hole size. The diameter of the circle cut by a laser beam is equal to the thickness of the material and cannot be less than 1 mm. The diameter of the hole cut by the plasma arc is equal to the thickness of the material multiplied by 1.5, but not less than 4 mm.
- High quality hole edges.
Laser cutting of holes in metal makes the edges of the material as close to perfect as possible. When plasma cutting, the edges are not vertical enough, and when punching, they bend slightly.
Despite being close to ideal, the edges of the metal still do not quite match it. When laser cutting relatively thick metal sheets, the holes also have a slight taper, that is, the entrance diameter is slightly smaller than the exit diameter. But only for fat people. Laser cutting mainly involves sheets of material with a thickness of 1, 2, 4 mm, and the taper on them is quite difficult to distinguish.
- What metal is suitable for cutting holes.
The type of metal affects the maximum possible thickness of the sheet in which a hole can be cut:
- Black steel – < 16 mm.
- Aluminum – < 10 mm.
- Stainless steel – < 10 mm.
- Brass – < 5 mm.
- Titanium – < 5 mm.
- Galvanized steel – < 3 mm.
- Is it possible to cut perforations with a laser?
When producing doors, panels or cabinets, it is sometimes necessary to perforate metal. Perforation is holes scattered on a plane, sometimes made in the form of a pattern, which are necessary for ventilation. Is a laser machine capable of making it?
I guess, yes! But this is not very economically feasible. The reason lies in the fact that it is cheaper and easier to make holes with a punching machine, because one blow will be enough for it. The laser beam must cut each hole. Their close location, a long cut can lead to overheating of the material and the workpiece will lead. In most cases, laser cutting does not cause the metal to overheat and drag, but when performing perforations this can happen. In addition, laser cutting is unnecessarily expensive.
We recommend articles on metalworking
- Steel grades: classification and interpretation
- Aluminum grades and areas of their application
- Defects in metal products: causes and search methods
If it is necessary to provide the product with perforation, you can proceed as follows: take a ready-made perforated sheet and cut a piece of the required size from it. A piece of the same size is cut out on the main part. Then the punch sheet needs to be inserted into this window. Fastening is carried out by resistance welding.
Main stages of work
The first step is to make a mount for the grinder. To do this, the author cuts off two metal plates, drills holes in them and attaches them to the gearbox housing using bolts.
After this, you will need to cut another plate and weld it to the first two plates.
Next, the author welds a steel strip to the resulting fastening, the end of which is fixed to the body of the angle grinder using a clamp.
A bolt will need to be welded to the angle grinder mount (in the center of the top plate).
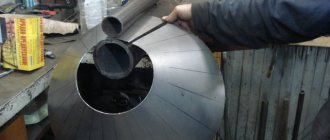
In the next step, the author cuts a piece of a round tube. You need to put a sleeve (from a larger diameter pipe) on the tube with a fixing bolt, and weld nuts to the ends. The author welds two pieces of tube to the bushing.
Next, you need to make another bushing with a lock. It must be welded to a round magnet (can be removed from the old speaker).
Then you can start assembling the device. For convenience, the author screws the handle from the angle grinder into the tube. We install the stand on a sheet of metal, set the desired size and you can cut out a circle.
Turntable manufacturing process
There is also a second way to cut a circle evenly. For this, a previously made rack is used, and it will also be necessary to make a rotating platform.
First, the author cuts a piece of a thick-walled round pipe into which two bearings must be pressed and welded.
After this, a piece of pipe with bearings will need to be welded to a square plate. Four mounting holes must be drilled in the plate.
The author attaches the resulting turntable base to the workbench using bolts.
Next, the author disassembles the second round magnet. A piece of round steel must be welded to the metal plate, the diameter of which is equal to the internal diameter of the bearings in the pipe.
Then the magnet itself needs to be glued back to the plate (the author uses quick-drying glue for this).
The author cuts a circle from a sheet of metal. A magnet with a metal rod is installed in the center. After this, four sections of profile pipe must be welded to the circle.
In each section of the profile you need to drill one hole and then weld the nuts.
The author tightens the bolts into the nuts. Then pieces of a round rod are welded to the bolt heads (you can use square pieces). We insert profile sections of smaller diameter and fix them.
How to cut a round hole in tile or metal with a grinder - Review
How to cut a round hole with a grinder? Quite often, the question of how to make a hole in a tile accurately and quickly can take home craftsmen who have little experience by surprise. But in fact, there are quite a lot of interesting implementation options. Indeed, the need to create a hole in ceramic tiles may appear at any stage of repair work, even long before everything begins.
This, as well as the diameter of the circle being made, will largely determine how to act in each situation and which tool is best to use to make a round hole in the tile.
What to work with?
Using hand tools
If you do not have electric tools and you do not know what to use to make a hole in the tile, then you can use the simplest method - a tile cutter and tongs (or pliers).
The sequence of actions will be as follows:
- Before you start cutting a hole in a tile, you should mark the boundaries of the future hole on its surface.
- To make the material softer, you should soak it in water for a short time beforehand.
- If you use a glass cutter, make sure to follow the markings and do not tear the cutter from the base. To be able to cut a groove, you should apply enough force to the handle, but so that the tile is intact and does not crack (this is especially true if you have a glossy glazed tile).
- Along the cutting line, tap the groove with the back of the tool so that it is as deep as possible.
- Using pliers, break off the material, piece by piece, until you are left with an even cut along the markings.
- If jagged edges remain, the cut circle should be sanded using fine-grain sandpaper.
The method is labor-intensive, but it will be a great help if you don’t have the right tool at hand. Now let's look at how to use an electric jigsaw.
Using an electric jigsaw
A tool such as an electric jigsaw, which has a diamond wire, has proven itself quite successfully on ceramic material. When using it, it is possible to create any end-to-end shape in the tile, both in the central part of the tile and on the edge. The latter is sometimes required to install an outlet. But for the first case, it would be great to have an electric drill and a drill on hand to cut holes in the tile in the place where the outlet will be located.
So, how can you make a round hole with an electric jigsaw?
- Draw a round hole on the outside.
- Immediately after this, you should start cutting it out if the element to be cut is located near the edge.
- In order for the hole to be centrally located, you should first use a drill to drill a small diameter hole on the ceramic in the place where there will be space for installing the socket. A cutting thread should be passed through it and the tool should be brought to the edge of the cutout.
- Slowly insert the device along the marking line. You should gradually retreat inward from the line, while trying not to capture additional areas. You should use the same method to cut the hole with a standard hacksaw, but then do not count on good quality of the cut.
As you can see, the method is quite simple and convenient.
Grinder and its use
The grinder is an absolutely excellent tool. Often, thoughts about how to create a hole in the tiles appear precisely at the moment when laying the tiles is required and it is necessary to place it under the pipes, toilet and faucet. The grinder makes it possible to process ceramics when they are not yet attached to the wall. such a tool will also be appropriate for performing figured cutting on the edge of a tile square.
How to cut a hole in a tile using a grinder:
- Mark a line that will serve as a guide when cutting.
- The grinder should be equipped with a diamond disc, which is used for the dry method.
- You should start cutting from the side where you feel most comfortable. Insert the instrument slowly, moving it slightly away from you to the side.
- If it is inconvenient to work, make a semicircle, and then start moving with the tool in a different direction. But keep in mind that in this case you should make sure that the cutting points coincide.
The grinder is the most convenient for creating round holes.
Scouring tiles
The second option for creating tiled holes assumes that the tile will be fixed to the wall. in this case, you should use the classic method, in which the wall is scored with a drill. When working on cladding material, use either a cone drill or a typical twist drill.
To create holes in a tile using a simple drill, you will need to do the following:
- To reduce the sliding of the cutter, you should cover the ceramic surface to be treated in the drilling area using masking tape. This will make it possible to keep everything in its original position.
- Place a point where you want to drill.
- Drill with a rotary drill at low speed.
- To avoid overheating of the nozzle, you should wet it a little from time to time. You can also spray the trim, but only after you have gone a little deeper into the wall so that the drill does not slip off. If you need to create a large hole, you should do it a little differently. The beginning of the work will be similar, but after that you should replace the drill with another one with a larger diameter. We recommend gradually widening the drill, and this will help reduce the risk of chipping to zero.
Please note that there is another way to create a larger notch. For the border of the future hole, use a thin drill to make many holes. After this, you should carefully knock out the central part and sand the nicks.
Compass on a grinder for cutting a perfect circle: step-by-step instructions
The Homius editors continue the series of publications with the hashtag #betterathome, which means that today we will again talk about how to usefully spend time in self-isolation.
Often a home craftsman is faced with the problem of how to cut a perfectly even circle from thick metal using a grinder. At first glance, this question does seem difficult. However, with some simple tools, the work becomes easier.
And today the author of the channel, Igor, offers his own version of making a compass for a grinder to cut out a perfect circle.
Why you may need to cut a circle from metal with a grinder
In fact, there are many options for why you need to cut an even circle using a grinder. For example, you need to make a flat plug into a steel pipe and place it inside, or you need a base for metal wheels with lugs on a walk-behind tractor.
Of course, it is much easier to use a lathe for this, but:
- It’s unlikely that anyone has such equipment in their garage.
- How to find a turner given the current situation with coronavirus in the country and the world, which has resulted in a regime of self-isolation.
This means that you need to make do on your own. And the only tool that can help in cutting metal is, as always, a grinder.
PHOTO: .com Uneven metal circle 3 mm thick - needs to be corrected
What to make blanks for the compass frame from
Everything here is also extremely simple. The material you will need is a corner (50 mm), from which you need to cut 2 pieces 2.5 cm wide. In order to later make it easier to attach this base to an angle grinder, the ribs will need to be slightly bent.
PHOTO: .com The blanks are done, it’s time to start welding
The grinder has holes for installing the handle. It is on them that the compass will be fixed. The finished corners are tried on, after which the excess is cut off, and the elements themselves are welded together to form a U-shaped part. It is necessary to drill holes in the side ribs through which the base will be attached to the angle grinder with bolts.
PHOTO: .com The base should be attached to the angle grinder using regular bolts
What will you need to do with the metal from which the circle will be cut?
On the sheet metal you need to make a small hole in the center - this will be the middle of the circle. In this case, everything should be calculated so that the entire required circle fits into the area of the sheet used. In today's example, a ready-made, but uneven circle was used that needs to be processed, but the workpiece can have a different shape.
PHOTO: .com You need to make a small hole in the center of the future circle
Continuation of the manufacture of compasses for an angle grinder
Now you need to weld a platform to the base that will hold the pin. It can be made from any steel angle. But the main difficulty here may lie in the hairpin itself.
The fact is that it is necessary to cut a thread on one edge in order to be able to attach it to the base.
This can be done using a tap, but if the master often works with metal, you can find something similar ready-made in the garage.
https://www.youtube.com/watch?v=yNYDu6XSIAw
To begin with, the corner is tried on the base to understand what size the segment needs to be sawed off. After this, a hole is drilled in it, and the platform itself is welded to the base. Care is also required here; all angles when welding must be straight.
PHOTO: .com Fitting the corner and stud to the base - there is very little left until the end of the work
Checking the correct welding and compass geometry
After the platform is welded, a pin is attached to it through a previously drilled hole using a bolt.
And here you should pay special attention to its location, which is checked using a conventional mounting bracket.
The angle between the pin and the cutting wheel of the angle grinder should be perfect and be 90°. If necessary, it can be adjusted a little.
PHOTO: .comChecking the correct position of the stud using a mounting square
Manufacturing the working part of the compass: what is required for this
Now it’s time to make the movable working part of the compass for the grinder. To do this, you will need a small piece of thick steel rod 2-3 cm long.
Its diameter should be significantly larger than the thickness of the stud. You will also need a drill with a drill the diameter of the stud, a tap and a bolt for a similar thread.
And for the main working part, it is necessary to prepare and sharpen a piece of hairpin 5-6 cm long on one side.
Algorithm for manufacturing the working part of a compass for an angle grinder
First, you need to make a hole in a piece of steel rod to fit the size of the pin. This bushing should fit easily onto the stud and “walk” along it. Next, the retainer is made. To do this, you need to drill a hole on the side of the bushing, cut a thread in it and screw in the bolt. Now, if you put the bushing on the stud and tighten the bolt, it will be locked tightly.
The next step is to weld the prepared pin to the bushing. It should be located on the opposite side of the fixing bolt.
It is clear that you need to try to make all the corners straight, however, during the tack process before welding, the elements may move. Therefore, it should be noted that small deviations are allowed in this detail.
Ideally right angles are welcome here, but are not required.
PHOTO: .com The bushing with the lock is ready, all that remains is to weld the working pin to it
Final adjustment before checking the functionality of the compass
Now that all the parts are ready, the compass can be assembled. Pressing the sharpened part of the working pin into the center of the future circle, it is necessary to adjust the overhang of the angle grinder and thoroughly tighten the fixing bolt on the sleeve. It now turns out that the grinder will move in a circle just like a pencil installed in a compass. This is very convenient when working with metal, regardless of its thickness.
Such a device is the simplest, and today more high-tech tools can be found on store shelves, but the task was to independently manufacture a device that would not require financial costs. And what happened completely meets the stated requirements.
Now all that remains is to check the angle grinder attachment in operation.
PHOTO: .com It is necessary to correctly adjust the reach of the angle grinder in relation to the center and tighten the fixing bolt
Checking the functionality of the device, nuances of use
When working with an angle grinder, especially one equipped with various devices, strict adherence to safety regulations is required. Do not ignore the need to use protective clothing, gloves, a respirator and safety glasses or masks. It should be remembered that safety regulations are written for a reason. Their goal is to protect the health, and sometimes even the life of the master.
When you turn on the grinder, you must carefully monitor the center so that the working pin does not jump out of the hole. There is no need to rush; it is better to do the work more slowly, but more carefully. At first it may seem that working with such a compass is inconvenient, but after a couple of minutes the master will get used to it, and cutting metal will be more fun.
PHOTO: .com You need to get used to such a device on an angle grinder
The finished circle, and how perfect it is
If you remember how uneven the circumference of the workpiece was, you can understand how the compass helped correct the shortcomings. For clarity, we suggest taking a look at the final result.
PHOTO: .com This perfectly even circle was achieved thanks to the compass attachment on the grinder
Finally
Such a device will be very useful for many. And even if it will not be used constantly, it is worth making it for a couple of blanks. In addition, such work will allow you to take your mind off boredom, depression or dark thoughts that are increasingly beginning to occur to self-isolated people. And the fact that such a homemade product does not require any expenses can be considered an additional bonus.
Working with special attachments
So, what else can you use to make a round hole? In addition to standard glass and tiled surfaces, there are other alternative attachments for the drill. Diamond-coated bits can be used if you need to cut out a socket outlet, tap out a faucet in a bathroom, or other areas. Drilling is performed by rotating the crown, which is placed on the guide drill. The accuracy of creating an opening will be largely determined by the properties of diamond-type sputtering and the size of the grains. The disadvantage of this method is that the cost of the crown is quite high.
Using a crown, the hole is made as follows:
- Place some masking tape on the ceramic.
- The cutting contours are drawn.
- Attach the tool with a crown, and then begin to smoothly insert it deeper and deeper.
- To prevent overheating, the crown should be periodically moistened.
A tile drill, otherwise called a “ballerina”, makes it possible to create round holes with a large diameter. The principle of operation of such a device is reduced to the following - the electric tool is activated, which is reflected in the drill simultaneously with the cutter, which is movable and mounted on a rod.
Metal marking
Before cutting a circle in metal, you need to apply markings. To do this you will need a mallet, a center punch, a compass and a marker.
Place the workpiece on a flat surface.
Mark the center of the hole using a punch and a mallet.
Using a compass, draw a circle of the desired diameter on the metal.
Trace the outline with a marker.
The result was clear markings.
Photo No. 1: metal marking
Note! The cutting line should be on the outside of the circle. This is necessary in order to obtain a part of the required diameter.
How to cut a circle in metal with a jigsaw
A jigsaw can be used to cut a circle in a sheet of metal of small or medium thickness. The process looks like this.
Considering the thickness of the metal, select a suitable jigsaw blade.
Equip the power tool with the attachment.
Before cutting a circle in a sheet of metal, mark the workpiece.
Using an electric drill, drill a hole to start cutting out the circle.
Turn on the jigsaw and get to work. Cut a circle in the metal strictly along the contour.
Important! Consider the following features of using jigsaws to cut circles in metal.
The fewer teeth on the blades, the better. The cutting line will be more accurate.
Cutting circles in sheets of metal with a jigsaw is carried out in a reciprocating mode.
Carefully control the angle of the blade to avoid errors and inaccuracies.
When cutting a circle in metal, the likelihood of blade breakage increases significantly. Buy some cutting tools just in case.
Photo No. 3: cutting a circle in metal with a jigsaw
One more moment! Do not forget about the need to use coolant.
How to make a hole in 3d max: competently cutting holes in objects
Until recently, our fathers and grandfathers used hand tools. No one even dreamed of an electric planer, an electric drill, or a jigsaw. Nowadays, hand tools are becoming a thing of the past. Electric analogs are taking its place. One of them is a jigsaw.
When you buy a jigsaw, you get a universal tool. They can cut wood, iron, plastic and even. You just need to purchase files that are designed to work with
You will need safety glasses, gloves, machine oil. Instructions on how to cut with a jigsaw
Notes: 1. The movement of the jigsaw blade may cause vibration to your workpiece, so secure the material well before starting work. It is not recommended to cut wood along the grain with a jigsaw because it will be very difficult for you to make an even cut. A circular saw is best suited for such purposes.
If you don’t have such a saw at hand, be sure to use a rip fence. One end of it is attached to the jigsaw, and the other rests against the edge of the workpiece. This way you can achieve a more even cut. 2. If you need to cut a circle inside a workpiece, first drill a hole in the circle.
Insert a jigsaw into the drilled hole and begin to move towards the markings that you made on the workpiece. If you need to cut a square or rectangular hole, do not try to cut right angles right away. First, smoothly go around them, reaching the marking of the next side.
When you cut the desired hole, you can easily adjust the corners of your workpiece on both sides. 3. When working with a jigsaw, do not press it hard. This can lead to heating of the canvas and its breakage. Do not use one file for a very long time, as long-term use will dull it. A dull file can cause nicks on the edges of the material.
When cutting hard materials, lubricate the blade with a few drops of machine oil. This will make the jigsaw easier to work with and will extend the life of the file.
4. When working at low speeds, give the jigsaw a break. When working this way, there is a risk of engine overheating. Don't forget to follow safety precautions. Wear safety glasses and gloves. After work, clean and lubricate.
How to cut a circle in metal: best methods and valuable tips
Any design, whether in your home or in production, involves working with metal.
Often, during the operation of this material, the question may arise: how to cut a circle in metal?
It deserves attention, since the labor intensity of the work process and the quality of its result directly depend on the choice of the right tool and technology.
How to cut a circle in metal with a grinder
Here are the step-by-step instructions.
Before using a grinder to cut a circle in metal, mark the workpiece.
Make numerous cuts around the perimeter of the intended circle.
Carefully cut the part along the contour.
Sand the circle and hole to obtain perfect surfaces.
To cut an even circle from metal with a grinder, take into account the following recommendations from the craftsmen.
If available, use diamond blades for metal or discs with carbide teeth.
To cut out as even a circle as possible from sheet metal with a grinder, work at low speeds.
Treat cut areas with anti-corrosion compounds.
Photo No. 4: cutting a circle in metal with a grinder
Is it possible to accurately cut holes in metal with plasma?
Plasma can make long cuts, this is confirmed by professionals and is not a new thing. Difficulties arise when making holes using plasma cutting in electrically conductive metals to connect parts with bolts. At the same time, quality raises big questions. Let's consider recommendations that can improve the quality of work and make it easier.
- Plasma height control.
During the cutting process, it is very important to maintain a certain distance between the metal surface and the cutter. It affects the quality of the product and the service life of consumables.
The plasma height must be carefully selected. When cutting, the distance between the cutter and the material being processed must be made slightly larger. General advice: when using plasma, the piercing height should be 50-100% higher than recommended. Let's look at an example: the recommended cutting height is 2-2.5 mm, while a professional will work at a distance of 4-5 mm. It must be remembered that an excessively small distance leads to accelerated wear of the equipment.
- Find a place to burn.
Precisely localizing the initial piercing will help prevent arc oscillation, stretching, and other problems. Firstly, the arc will stabilize before it reaches the edge of the hole. Both energy and pressure must be increased gradually. Secondly, vibrations of the plasma arc, which arise due to the presence of scale on the metal, can be almost completely eliminated by determining the place for punching directly near the center. For combined straight line cutting methods, the same rules apply.
- Control of arc height and voltage.
The low cutting speed inherent in automatic systems affects changes in arc height during the production of holes with a diameter of less than 25 mm. To prevent this, the plasma arc voltage controller is turned off before cutting.
How to cut a circle in metal with a welding machine
The technology looks like this.
Before cutting a circle in a sheet of metal with a welding machine, make markings.
Set the current to maximum.
Place the arc on the contour and hold it until you get a hole.
Draw an arc along the markings until you cut out a whole circle in the metal.
Note! A welding machine with a maximum current of 150 amperes can cut sheet metal up to 4 mm thick. To work with thick workpieces, you will need a power tool with increased power.
Welding machines use thin electrodes to cut circles in metal. This reduces time costs. However, thin electrodes have to be changed frequently. This necessitates heating the metal after installing new consumables.
Photo No. 5: powerful household welding machine (maximum current - 400 A)
How to cut a circle in metal with a cutting torch
A cutting torch is the best tool for cutting circles in metal. With this tool you can work with both thin and thick workpieces. This cutting method offers maximum productivity and precision. Let's describe the technology.
Before cutting an even circle of metal using a gas cutter, mark the workpiece.
Slowly and carefully cut a circle in the metal along the outlined outline.
Photo No. 6: cutting metal with a gas cutter
Main types of metal cutting
Metal cutting is the process of separating a material into parts. This method is used to cut metal sheets or sections of long products. The impact of the cutting tool on the metal creates blanks for further processing. Based on the developed drawings, the surface configuration is formed. To process metal by cutting you need equipment. These can be hand tools, mechanical machines, or devices that heat the material.
Oxygen gas cutting
Mechanical metalworking
A highly sharpened blade made from the hardest steel is used. Usually, it first undergoes heat treatment - hardening. After this, its chemical structure and granularity change, and intermolecular bonds become stronger. A press or other indirect impact using force is also required. Examples could be:
- band saw (it can be made at home);
- guillotine - works on the principle of lowering the cutting part with acceleration;
- Circular Saw.
Below we will take a closer look at some of the tools.
Waterjet cutting of metal
The waterjet cutting method is based on the impact of a jet of water mixed with abrasive particles on the workpiece. The pressure of the supplied liquid is 5000 atm. The advantage of this type of metal cutting is the ability to obtain a variety of lines. Alloys of a certain grade with a small sheet thickness are processed.
How to cut an even circle with a regular angle grinder
Sources:
https://chistayrabota.ru/kak-vyrezat-shajbu-iz-listovogo-metalla/ https://fobosworld.ru/rezka-listovogo-metalla-svoimi-rukami-rovno-lyubye-formy/
How to evenly cut a circle from metal with a grinder
To cut an even circle from sheet metal using a grinder, the master recommends using a simple homemade device that can be easily made from a profile pipe and a metal plate.
First of all, cut a piece of square profile pipe of suitable length. Drill two holes in the workpiece.
Insert bolts into the drilled holes. At one end of the profile pipe we attach a metal plate with a groove. We fix it with a nut.
If you need a simple sander that can be quickly removed from the table, then consider a collapsible sander, which can easily be made from an electric drill.
How to make a circle out of iron
MiscellaneousHow to make a circle from a pipe with your own hands
Surely many home craftsmen have repeatedly faced the question: how to bend pipes of small diameter along a certain radius to give them the necessary rounded configuration. On an industrial scale, special equipment is used for these purposes, but in this case the question is different: how to bend a pipe without a pipe bender at home?
Bent elements from profile pipes
DIY pipe bending
In order to help the reader understand this issue, this article will discuss several methods of bending round and rectangular pipes made of various materials. These skills will also come in handy when building a panel house.
There will also be detailed instructions that describe step by step all the stages of performing this operation using a set of common household plumbing tools.
Bench vice equipped with a pipe bender
Method 1: bending steel pipes
Steel itself is a fairly rigid material, but when heated to a high temperature it becomes more plastic, which allows steel products to be given almost any desired shape. In order to bend an arc or circle from a steel round pipe with your own hands, in addition to the usual plumbing tools, you will also need a gas torch.
- Secure the steel pipe in a vice. In order not to crush the walls, you need to first insert a metal rod of a suitable diameter into it at the clamping area.
- Using a gas torch, heat the area of the future bend until the characteristic color of the metal appears bright red.
- Using short, gentle blows of a hammer, give the heated part the required configuration, controlling the bending radius according to a pre-made template.
After cooling, the finished part will retain its shape, and the metal will again acquire its former rigidity and high mechanical strength.
Before heating a ferrous metal pipe, it must be heated red hot.
Note!
The described method cannot be used for bending galvanized steel pipes, since the zinc will burn out when heated to a high temperature, as a result of which its anti-corrosion properties will disappear.
Method 2: bending pipes made of non-ferrous metals
Non-ferrous metals, such as copper or aluminum, have high ductility, however, due to insufficient strength, the opposite walls of the pipe may not withstand multidirectional loads (compression and tension), resulting in their rupture or collapse.
In order to evenly distribute local internal stresses of the material, a simple technology is used for bending thin-walled pipes made of non-ferrous metals.
- Before bending an aluminum pipe, you need to select a suitable steel spring. Its diameter must correspond to the internal diameter of the pipe, and its length should not be shorter than the length of the bent section.
- Having tied a strong long wire to the spring, insert it inside the pipe, placing it approximately in the center of the intended arc.
- Carefully clamp the part in a vice, without applying much force, so as not to crush the thin walls of the soft material.
- Use a gas burner to heat the future fold to the temperature at which the paper begins to smolder.
- Bend the heated part to the required radius, holding the free end of the pipe with a gloved hand.
- Remove the spring from the internal lumen of the pipe after the part has cooled, using the remaining end of the wire.
Spring for bending thin-walled pipes made of soft materials
Note!
Non-ferrous metals have high thermal conductivity, so when working with a heated part, care should be taken to avoid burns.
Method 3: bending metal-plastic pipes
There are special tools for working with metal-plastic water pipes, but its price is not worth buying a plumbing pipe bender for your home tool collection.
Metal-plastic pipes are quite flexible, so they can be given any desired configuration.
You can bend a metal-plastic pipe with a large radius with your hands, performing short smooth movements and gradually giving it the required shape and bending angle.
To make an arc with a small radius or a 180° turn, you can use a more complex, but at the same time effective method.
- Cut thin copper wires in such quantity that they can completely fill the internal lumen of the metal-plastic pipe.
- Insert them inside so that they completely fill the pipe at the bend and at the same time all their ends remain outside the end of the pipe.
- Give the future part the required shape, applying quite a lot of force with your hands, and then remove all the wires one by one from the internal lumen of the pipe.
The photo shows the simplest manual pipe bender
Note!
It is recommended to use copper wires without PVC insulation as a filler, because it can become wrinkled and make it difficult to remove them further after finishing work.
Method 4: bending profiled metal
Many people have thought about how to bend a profile pipe.
https://www.youtube.com/watch?v=yNYDu6XSIAw
Plastic deformation of steel and aluminum profile pipes is complicated by the presence of side edges, which are also stiffening ribs and therefore require additional effort during operation.
In order to maintain the correct profile of the final product, and to prevent creases and tears in the metal, the internal cavity must be filled with dense moving material.
Gas burner with portable cylinder
Bending profile pipes:
- Prepare two plugs for the pipe section. They can be made of wood, rubber or plastic, and must fit tightly into its internal lumen.
- Insert a plug from one end of the pipe, then completely fill the entire internal volume with sand from the second end, then insert a second plug into the other end.
- In winter, water can be used instead of sand. After filling it and installing the plugs, you need to take the part out onto the balcony until the water completely solidifies in the entire internal volume.
- After this, you can begin to form an arc using a hammer or rubber mallet, holding the part in a vice, or placing its edges on stable, strong supports.
This method can also be useful to those home craftsmen who do not know how to bend a pipe made of stainless steel or galvanized ferrous metal.
This vise is convenient for clamping round shaped parts.
Conclusion
After reading this article, it becomes clear that there are quite a lot of ways that can help a home craftsman make a plumbing part or a shaped product from metal pipes at home, even without special equipment.
How to cut a circle in metal: best methods and valuable tips
Any design, whether in your home or in production, involves working with metal.
Often, during the operation of this material, the question may arise: how to cut a circle in metal?
It deserves attention, since the labor intensity of the work process and the quality of its result directly depend on the choice of the right tool and technology.