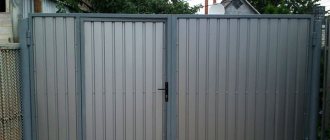
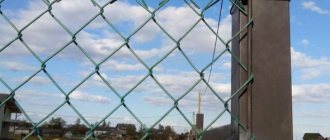
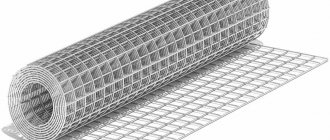
Welded mesh for fence
Unlike chain-link fencing, a fence made of welded mesh is made not only tensioned, but also in the form of sections.
The section consists of intersecting steel rods connected to each other by spot welding. The thickness of the horizontal rods is often made sufficient so that the section does not need additional supports in the form of crossbars or veins between the posts - the maximum diameter can be 10 mm. The cross-sectional diameter of vertical rods is at least 4 mm, and for suspended-strength fences they can be thicker - 5 or 6 mm.
There are different technologies for manufacturing and protective treatment of mesh.
The simplest and most inexpensive option is a mesh made of ordinary low-carbon steel without galvanizing for painting. It is rarely used as a fence for a private area due to its susceptibility to corrosion and short service life. But if you need a temporary fence at minimal cost, then this is the best choice. It is the “tension” type of fence that is made from thin rolled mesh, as a more durable option compared to chain-link.
The simplest fence made of welded mesh Source chelyabmetprom.ru
Mesh with galvanized rods is highly resistant to corrosion, and its service life depends only on the thickness of the zinc layer. If you apply any metal paint for exterior use on top, the durability will be even higher, and in any case, at least 20 years. There are two ways to manufacture a section - welding a mesh from galvanized rod and applying a coating after welding.
The next option is a galvanized fence mesh with a polymer coating (or powder coating based on film-forming polymer resins). This is the most common type of modern sectional fence made of welded mesh with high decorative properties. The metal is almost completely protected from corrosion, and the durability of the coating is determined solely by the properties of the polymer and its color. Typically, fence manufacturers offer several standard color options, but by paying a little more, you can order a different shade from the RAL palette.
Advice! When choosing a fence made of mesh with a polymer coating, you need to pay attention to whether there is a zinc layer under the polymer. There may be low quality products on the market - without this mandatory layer. You should also take into account that light shades fade less in the sun than dark colors.
Sectional fence made of welded mesh with polymer coating Source yaofuli.me
See also: Contacts of companies that build fences and enclosures.
Recommendations for arranging a fence
The use of galvanized mesh does not require coating with paints and varnishes. But if the section is made by hand, the protective coating can be damaged during welding. Then it is necessary to provide additional protection with paints and varnishes.
The use of welded rolled mesh involves two solutions: cutting the material yourself to make sections; installation of the fence sheet using clamps, no need to cut it.
If galvanized mesh is used for the second option, the installation process will take less time, since there is no need to prepare sections. But in this case, the fence will lose strength.
But the thicker the wire used in the production of the material, the stronger the structure will be. The cell sizes of the rolled mesh are also responsible for this quality.
Mesh weaving shape
For sectional fences made of welded mesh, the most common type is rectangular “weaving” with a vertically elongated shape.
"Square" is less common. This is a common format of welded road mesh with a wire diameter of 3 to 8 mm, which is used for the manufacture of inexpensive fences. For the fence, the smallest cell size is 50x50 mm. And these meshes can be not only “black”, but also galvanized. Manufacturers produce them in the form of rolls or cards, and fence manufacturers cut them into blanks for sections, attach them to a supporting “frame” and apply a protective coating.
Note! Weaving in the form of a “diamond” for welded mesh sectional fences does not exist - it is not economically feasible due to the large amount of production waste. This form of character is for sections made of chain-link or expanded metal mesh.
A mesh with square cells is found, but less frequently Source 911stroy.ru
Main settings
The strength of the fabric is determined by two characteristics: the dimensions of the cage and the diameter of the wire. The smaller the cell of the mesh material, the stronger the fence will be. But material with such parameters costs more. Standard cage: 50x50 mm, 100x100 mm (the most common), as well as 150x150 mm, 200x200 mm.
Metal mesh can be light or heavy, which is determined by the thickness of the wire.
In the first case, the diameter varies between 3-6 mm. Heavy fencing is erected using mesh material with a wire thickness of 8 to 40 mm. Section dimensions (standard sizes): 1000x2000 mm, 1500x3000 mm, 2000x3000 mm.
Section structure
The classic type of section has the form of a frame made of a strip, corner or profile, to which a mesh is welded.
If the welded mesh for the fence was made “individually”, then the diameters of the horizontal and vertical elements may be different. In order not to make the supporting frame of the section, the horizontal rod is installed with a larger diameter than the vertical one.
As another option for strengthening fence sections made of welded mesh, a “volumetric” mesh structure is used. It can be of two types:
- In the form of a triangular “wave”, which performs decorative functions and serves as a stiffening rib for the span structure. Such fences are called 3D.
- In the form of double horizontal rows. And if in a conventional welded mesh the rods are oriented in two planes, then in this one they are oriented in three – horizontal/vertical/horizontal.
Wave-like mesh structure Source archiexpo.com
How to properly stretch a chain-link mesh onto a fence and posts with your own hands
Despite the fact that the installation of chain-link is relatively simple, it is still worth familiarizing yourself with the theory and choosing the appropriate method. The choice of one of the options for how to stretch the chain-link mesh onto the fence will depend directly on the location of the site. It is best to break the entire fence into its component parts and do the work in a certain sequence.
Types of chain link
The cost of chain-link fencing is much lower than that of fences made of other materials. This is the main advantage of the grid.
Any owner of a summer house or private house can easily buy it at any hardware store. However, in order to tension the chain-link mesh with your own hands, you will additionally need posts for its fastening, fittings and a cable with a diameter of 5–7 mm.
Today there are 3 types of chain-link, different in fabric material:
- Plasticized. This is a chain-link made of iron wire, which is coated with a protective layer of polymer against the occurrence of corrosive processes. The mesh is not afraid of high humidity and frequent precipitation.
- Galvanized mesh is not subject to corrosion processes. But it is more expensive, unlike black wire chain-link, and therefore less popular.
- Non-galvanized, made of ferrous metal. This material does not last long, no more than 4–6 years. Moreover, corrosion appears on it very quickly. For a temporary fence or enclosure, you can buy such a chain-link, but take into account the fact that another fence will soon be installed instead. Otherwise, the mesh must be painted, this is done once every 3 years.
In addition to the material, the mesh is different in cross-section and cell shape. Cells can be in the form of a rhombus, square or others. But their cross section is very important. The size is in the region of 20–65 mm.
The smaller the cross-section, the less natural light reaches the site through the fence, the greater the strength and solidity, but at the same time the higher the price. For a fence at the dacha, so that small animals (cats, dogs) cannot enter the territory, purchase a chain-link with a cross-section of 45–55 mm.
The cost of the fence will depend on a number of factors: cell cross-section, material of manufacture, fastening method, wire diameter.
Installation methods
There are several ways to install a fence:
- welding separately located sections from the corner, fragments of the chain-link are installed in these frames;
- You can simply stretch the mesh between the posts.
The last option is much simpler and more economical. Hanging a fence mesh is quite possible for one person, but this method is impractical and not aesthetically pleasing enough.
To make separate sections, additional costs are required for the corner. Its price may exceed the cost of the chain-link. But this fence will be more attractive and reliable.
You can hang things on such a fence to dry, and it will not get tangled or droop. One way or another, before hanging the chain-link mesh, you will definitely need poles where it will need to be pulled.
How to stretch chain-link mesh onto poles
Wooden posts are a budget and affordable building material, but these posts will not last long. It is advisable to install beams only when a temporary fence is being installed.
Before stretching the chain-link mesh onto wooden posts, they should be prepared. The bars are cleaned. Next they are cut to the desired size. Usually they are deepened 30 cm below the freezing point of the ground.
Thus, the length of the beams is at least 2.5 m. The underground part of the beam is treated with mastic. The remaining part of the height of the fence is painted, otherwise the boards will quickly rot. The chain-link mesh is stretched between the posts and attached to the beams with nails.
Pillars made of profile pipes are much preferable; they are stronger and more durable. Usually, to stretch the fabric, choose a square or rectangular profile of 50–70 mm. Metal thickness – at least 1.7 mm. To save money when constructing a fence, pipes are purchased at a scrap metal collection point.
In some cases, you can find water pipes here that have lost their integrity, but are not subject to the corrosion process. They are no longer suitable for water supply, and to stretch the fabric over a fence, their tightness does not matter.
Nowadays the market sells poles that are ready for installation of a chain-link fence. The stands themselves are already painted and have hooks installed. These racks will be a little more expensive, but there is no need for related work.
It will be faster to stretch the mesh onto such supports.
Asbestos-cement or concrete pillars are also often chosen. The chain-link is secured to the fence only with clamps or using a cable. It is inserted into the mesh, weaving the post.
Tension option
A characteristic feature of all chain-link fences is their ease of construction. You can do everything with your own hands, even for a person without any construction skills. As an example, we can consider how to properly stretch a chain-link mesh onto a fence made of corrugated pipe.
Territory marking
You need to install stakes at the corners of the perimeter and pull the rope. Its length is the total length of the fence mesh, but the fabric is several meters longer.
Next, you need to mark the areas for attaching the racks. Typically, the distance between the posts is no more than 2.5 m, since the chain-link is a flexible material.
To calculate the required number of supports and then tension the chain-link, the length of all sides of the perimeter must be divided by 2.5. For example, the length is 57 m. This length will definitely not be divided into 2 or 2.5. If you divide by 2.5, you get 22.8. Then there are several options for the development of events.
The first is to place 22 supports with equal spacing between each other, 57 / 22 = 2.59 m. But it is almost impossible to calculate the location of the supports so accurately. Another way to stretch the panel over the fence is to place 22 supports with a distance of 2.5 m, and the last posts will stand a little closer. This way you can determine how many racks are needed to tension the fabric.
It is necessary to drive stakes along the rope at intervals of 2.5 m. You need to control at all times that they are on the same line. Then in the end you will be able to pull the chain-link beautifully.
If the area has a large slope, it will not be possible to tighten the chain link, since the mesh will not be secured well in a tilted state. There is only one way out - to terracing the area.
Where there is a significant transition and difference in ground level, a longer and reinforced stand is installed, where the canvas is fixed on one side at one level, and on the other side - on the other. Why should the material be cut? Another way is to build a fence from free-standing frames.
The photo shows a fence at the dacha.
Installation of supports
Holes need to be drilled in places for installing fence posts. The depth of the well is usually 1.4–1.6 m. To prevent the posts from moving when the earth swells in the spring, they should be deepened below freezing of the soil by 20–25 cm.
The corner posts are installed first; they bear the greatest pressure. A layer of gravel (20 cm) is poured onto the bottom and compacted well. Then sand (20 cm) is added and also compacted.
A professional pipe is inserted, having first coated the underground part with an anti-corrosion compound. Prepare a concrete solution: 2 parts cement (concrete grade not lower than M250) and 1 part sand. Mix, then add 4 parts of crushed stone and mix everything again, add water and mix too. The main thing is to control that the concrete does not turn out to be very liquid. Then we pour it into the hole under the pillar.
It is imperative to look at the level of the pillar. It must be clearly vertical. This can be checked with a plumb line.
We pierce the concrete solution with reinforcement, removing the air. The next corner support is placed on the opposite side of the fence. Then all other racks are mounted using the same technology. The fabric can be stretched only after the solution has hardened, that is, after 10–14 days.
How to stretch a chain-link mesh onto a fence alone
When the concrete solution has hardened, hooks are welded onto the fence posts. The mesh is then stretched on them. What are rods, wires, nails used for, that is, any material that bends into a hook?
Next you need to stretch the fabric. First we straighten the mesh. After this, we place it near the first corner post of the fence. You need to pull the chain-link onto the posts using hooks.
To prevent the fence from sagging in the future, wire or reinforcement with a diameter of 2–3 mm can be threaded into the top row of cells, then it is welded to the corrugated pipe.
This increases the tension of the mesh significantly.
We unwind the chain-link one span to the next fence post. A little further than the area where the mesh is tensioned with the stand, the reinforcement is threaded. By holding it, you can stretch the fabric.
If you just pull with your hands, the tension will be uneven. The procedure is repeated for other pillars using the same technology.
It is not advisable to go around the corner posts with chain link. It is necessary to attach it to the post, cut it, fix the cells of the second part of the canvas and continue to stretch. This will reduce the load on the racks.
One roll is often not enough to stretch all the spans of the fence. There are times when half a meter of mesh remains, and there is still 2 m to the post.
So, we take out the wire from the last row, apply the ending mesh to the new fabric, and insert a rod between them. When the entire area is blocked by a fence, check the tensioned material and bend the hooks on the supports.
The video shows how to stretch the mesh.
Sectional option
This construction of a fence differs from a stretched fence in the presence of a sectional frame into which the mesh is installed.
First you need to correctly mark and mount the pillars. This stage is the same as for the tension fence. Fence posts should be chosen to be a little stronger, as they carry a larger load.
Buy a corner with a section of 30x30x4 or 40x40x5 mm. A frame for future sections is made from it. To do this, subtract 12–17 cm from the distance between the supports; this is the length of the frame. 12–17 cm is also subtracted from the height of the pillar, this is the width. The corners are fixed by welding in the shape of a rectangle.
Then the mesh is unwound. The dimensions are reduced with a grinder, if required. You need to insert reinforcement with a diameter of 5–6 mm into the outer row. It should be welded to the vertical part of the frame.
Next, the rods are inserted into the lower and upper parts of the canvas, tensioned and the reinforcement is also welded to the horizontal part of the frame. The result is a section from a corner, where the mesh is fixed inside to the reinforcement. We insert the frame between the supports and weld it. The fence is ready.
The fence is decorated in different ways. For inspiration, you can look at different design forums.
It is not at all difficult to pull the chain-link onto the fence with your own hands. Difficulties appear only on sloped areas. In this case, it is divided into regular geometric parts. The pillars are dug in taking into account the characteristics of a particular site.
Poles and fittings
The sectional factory fence made of metal mesh is fully equipped for installation in different widths and span heights. Plus, some models can be equipped with additional accessories that increase protection against intrusion into the area.
In addition to the welded mesh section, the standard package includes:
- Pillars . Usually this is a square or rectangular profile pipe that has the same protective coating on the ground part as the mesh. The length of the pipe depends on the height of the pillar and the size of the underground part. There are different height options to choose from - from 1 m to 3 m. Since such a fence is of a lightweight type, and the wind load on it is minimal, the underground part is usually no more than 50% of the above-ground part. Additional stability is provided by concreting or installing a “heel”.
- Stubs . If the pipe does not have a protective strip welded on top, then the hole is closed with a polymer or rubber plug, which protects the inside of the pipe from precipitation. Some models of poles have fixed holes for fastening sections, which sometimes remain unused - they are also closed with plugs.
- Fasteners . Screw connections with clamps or clamps for fastening sections to poles.
Components for installing a fence made of welded mesh Source farpost.ru
Advantages and disadvantages
Installing a 3D fence with your own hands has the following advantages:
- The 3D mesh is made of metal, so it is not susceptible to rotting or insect attacks. There is only one problem - the tendency to corrosion. Therefore, the material is treated with a protective compound.
- High strength, which is achieved thanks to vertical jumpers with wave-shaped bends. The waves themselves can be located both on top of the canvas and below.
- Low price. If we compare this fencing with other structures, then in terms of cost and quality, this is the best option.
- Long operating time. The mesh has a multilayer coating made using a special technology. According to manufacturers, the minimum service life is up to 50 years. But if the correct installation technology is followed, the fence can last much longer.
- Attractive view. The 3D fence is simple, but at the same time it looks elegant and attractive. This fencing can be used for any building.
- It is possible to install a 3D fence yourself. To work, you only need certain tools and step-by-step instructions, which are included with the fence.
- High degree of protection. Despite the fragility, strong rods are used in manufacturing.
- Lightweight fencing. Delivery and installation of a 3D fence will not cause problems. At the same time, the mesh allows both sun rays and air currents to pass through. In addition, the fence can withstand significant wind loads. Another advantage is that the airiness of the fence visually increases the size of the summer cottage.
- Large selection of designs. These are different colors and the ability to install various configurations. Due to this, everyone will be able to choose an option that is ideal for fencing a particular area.
Combination of fencing with green spaces
Despite the large number of advantages, the fence has certain disadvantages. As a rule, they are due to the fact that various mistakes are made when installing it yourself. Therefore, the fence may not look entirely aesthetically pleasing. Some argue that the disadvantages also include a good view of the area.
Fixing the sectional element
Installation procedure
The advantage of a sectional fence made of welded mesh is that welding is not required for its installation.
The installation procedure looks like this:
- Marking the perimeter, choosing a location for gates and wickets. For “frame” sections, it is advisable to calculate that a whole number of standard spans are placed between the gate supports and the corner posts. If this cannot be done, then you need to order the production of an “additional” element. For sections without a frame (for example, a 3D fence), this condition is not necessary - any section can easily be cut without losing the strength of the structure.
- Installation of pillars. The distance between the center lines should be slightly larger than the span, and the specific size depends on the method of fastening the section.
- Installation of sections using standard fasteners for this fence model.
Installation of 3D fencing: step-by-step instructions
You can install the fence yourself. This design is very simple, so installation does not require special knowledge and tools. Installation of a 3D fence is carried out in the following sequence:
- Preparation;
- marking the territory;
- digging holes for supports;
- installation of support pipes and their cementation;
- fastening 3D panels.
3D fence installation diagram
Preparation
The preparation consists of the following:
- The necessary material is purchased. This is the 3D mesh itself, as well as everything that is needed for mixing the cement mortar.
- Required tools. For installation you will need: a garden auger, a sledgehammer, a tape measure, a rope, a shovel, a level, a container for mixing the solution or a concrete mixer, a screwdriver.
- Next, the site needs to be cleared. Along the perimeter it is necessary to remove everything that could interfere with installation, such as bushes, stumps, old fence.
- If there are significant differences in the height of the territory, then it is advisable to level them.
Pillar concreting scheme
After this, proceed to the next stage.
Video description
For the procedure for installing a fence made of welded mesh, see the video:
The difference between a tension fence made of welded mesh is as follows:
- the distance between the supports can be arbitrary (at least two, but not more than three meters);
- Between the supports, veins are installed from a 40x20 mm profile pipe with a wall thickness of 2 mm;
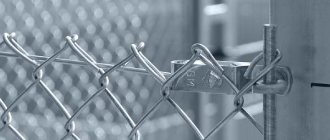
- Rolled welded mesh is used as a fence, which is attached to posts and veins with self-tapping metal screws with a wide head or with a washer.
Methods for attaching the mesh to a pole Source pandia.ru
Preparation
Chain-link is an inexpensive material that is ready to last for quite a long time. An additional advantage is the ability to use it as a support for climbing plants. This mesh was invented at the end of the 19th century, but is still widely used today. Every consumer can purchase it.
To create a fence, in addition to the mesh, you should prepare reinforcing bars, thick wire, support posts and a cable. When choosing a grid, you should pay attention to the size of the cells. The smaller it is, the more expensive the mesh will be, but also stronger. If the mentioned parameter is equal to the limit from 40 to 50 mm, and the width of the roll is 1.5 m, then this material will be an excellent solution for creating a fence for a summer cottage.
Use Cases
A fence is not the only area where welded mesh can be used as a fence. With its help you can zone the internal space:
- allocate a playground or play area;
- fence off the parking lot;
- arrange an enclosure for animals;
- make a high fence for playing team sports (badminton, tennis, volleyball, mini football).
A fence made of 3D mesh with a polymer coating Source hs-zaun-halbartschlager.at
Gabions made of welded mesh can be classified as a separate category - they can also be used as a fencing for an area or for arranging fence spans around a site. And this type of fencing is increasingly gaining popularity as one of the easiest ways to install a natural stone fence.
Also no less popular is the option of using a fence made of welded mesh for arranging a hedge of climbing plants around an area.