Turning is the most common manufacturing technology for various parts and products, in which layers of metal of various sizes are removed from workpieces. This process is performed on special machines.
In this article we will talk about all the features of metal turning. You will learn:
- on what machines metal turning takes place;
- what products are made using this technology;
- what operations are performed;
- what tools are used for this;
- what features does metal turning have?
- how to prevent marriage.
Metal processing on lathes
Lathes are used for single, small-scale, serial and mass production of the following parts and products.
- Bushings.
- Shafts of various configurations.
- Nuts.
- Gears.
- Couplings.
- Rings.
- Pulleys, etc.
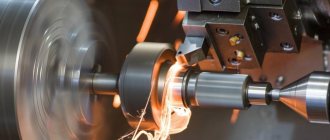
Photo No. 1: metal turning
Types of metal turning
There are the following types of lathes.
- Screw-cutting lathes. This is the most common group of lathes. They are most often used to process bodies of rotation for:
- giving parts a taper;
thread cutting;
- processing of external cylindrical surfaces;
- drilling, countersinking and reaming of holes;
- rolling corrugations;
- processing of ends and ledges;
- turning grooves;
- cutting off parts;
- cutting external and internal threads.
Image No. 1: main types of metal turning
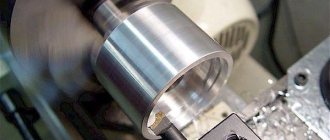
Photo No. 2: screw-cutting lathe
Metal turning technology
The basic principle of metal turning technology is as follows. The fed tool cuts its cutting edge into the surface of the workpiece. The metal layer is removed and converted into chips. Let's talk about its types.
- Stepped. It is formed when processing workpieces made of aluminum alloys and medium-hard steels at medium speeds.
- Broken shavings. It is formed during turning of materials with low ductility.
- Elemental. Such chips are formed during turning of hard and low-viscosity metals.
- Merged. Formed during high-speed turning of workpieces made of soft materials. These include mild steel, lead, tin, copper, alloys based on them, and polymers.
Image No. 2: types of chips formed during metal turning
The main tool for metal processing on lathes
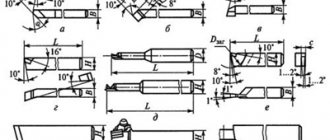
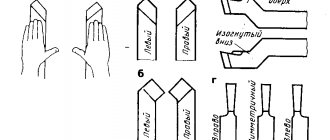
Cutters are most often used to process metal on lathes. Let us briefly describe their most common varieties.
- Straight through turning tools. Used for processing the external surfaces of workpieces. Three sizes of holders are most common.
- 20*20 mm.
25*16 mm.
- 32*20 mm.
Photo No. 3: straight through turning tools
Photo No. 4: thread cutter for cutting external threads.
Cutters designed for cutting internal threads have a curved shape.
Photo No. 5: thread cutters for cutting internal threads
Photo No. 6: parting turning tools
- For cutters designed for processing blind holes, this angle is 95°.
Photo No. 7: boring cutters designed for processing blind holes
Turning boring cutters designed for machining through holes have a 60° angle.
Photo No. 8: boring cutters designed for processing through holes
Photo No. 9: bent scoring cutter
Photo No. 10: thrust cutter
Photo No. 11: bent through turning tools
Pricing Examples
The cost of turning work is 1900 rubles per hour
6.70 rub. for a unit
7.78 rub. for a unit
17.10 rub. for a unit
Prices for the production of one part will differ from the prices for the production of a batch of parts.
Why does the price of manufacturing one part differ from the price of manufacturing a batch of parts?
This is due to the fact that manufacturers who produce batches of parts have had everything in place for a long time in terms of production, and accordingly, costs are minimized. Therefore, it is quite normal that a similar part in a store may cost less than if it were ordered.
How to prevent defects during metal turning and eliminate the consequences of errors
When turning metal, the following types of defects can occur.
- The roughness of the resulting surface does not meet the requirements specified in the drawing.
- The ground surface acquired an oval shape.
- The treated surface turned out to be conical.
- As a result of turning, a part with incorrect dimensions was produced.
- Part of the surface has not been treated.
- Let us consider the above types of marriage in detail.
The roughness of the resulting surface does not meet the requirements specified in the drawing
This happens for the following reasons.
- Feed rate set too high.
- Due to worn spindle bearings or improper mounting of the workpiece, it shakes violently.
- The gap between the individual parts of the caliper has increased.
- The cutter is not secured securely enough.
- The tool has a small radius of curvature.
- The cutter is poorly sharpened.
- The part material is too viscous.
- The cutter has incorrect geometric parameters
The above types of defects are most often eliminated by removing thin layers of metal.
The ground surface has acquired an oval shape
The workpiece may become oval due to spindle runout for three reasons.
- Uneven bearing wear.
- Uneven wear of the spindle journals.
- Small chips or dirt getting into the conical bore of the spindle.
These problems are solved by:
- regular checking of machines;
- timely equipment repairs;
- cleaning front centers and tapered holes.
The treated surface turned out to be conical
Most often this occurs when the rear center is displaced relative to the front. The cause of this problem is most often the entry of small chips or dirt into the rear hole of the quill. To eliminate this cause of marriage you need to:
- set the rear center correctly;
- clean the center and conical hole of the quill;
- move the tailstock housing on its plate (if necessary).
As a result of turning, a part with incorrect dimensions was produced
The dimensions of the received part most often do not correspond to the specified ones due to:
- inaccurate setting of cutting depth;
- incorrect measurement when removing test chips.
If the diameter of the part is smaller than required, then the defect cannot be corrected. In a radically opposite case, layers of metal of the required thickness are removed.
Part of the surface has not been treated
This type of marriage usually occurs for the following reasons.
- Incorrect initial dimensions of workpieces.
- Insufficient processing allowance.
- Poor straightening of the workpiece.
- Its installation is incorrect.
- Bad reconciliation.
- Inaccurate location of center holes.
- Rear center shift.
Usually such a marriage cannot be corrected. To avoid it:
- watch the location of the holes;
- always check that the rear centers are installed correctly;
- make sure that the workpiece is securely installed;
- set the required allowance values;
- measure workpieces before processing;
- straighten them carefully before fixing them in the machines.
Types and principle of operation
Using professional equipment you can perform a variety of operations:
- You can make threads of any diameter from the inside of a hollow container or from the outside.
- Turning cylinders to the required size.
- Cutting or grinding ends.
- Drilling holes.
- Formation of grooves on the outer surface.
- Centering.
Also, with any element, you can carry out a procedure to impart the required degree of roughness or, on the contrary, sharpen it to smoothness. In this case, the operating principle is used - due to friction and the action of the cutter, the top layer of metal is removed. You should handle the device carefully, as this is a traumatic operation due to the heating of the chips.
Labor protection when performing turning work
- Wear safety glasses and earmuffs when working.
- Only use compressed air when tools are in contact with workpieces.
- Do not turn on the compressed air if the drive is not running.
- Before starting work, make sure that the
- casings;
- air hoses;
- compressed air supply systems.
mufflers;
- Before stopping the machine, turn off the feed;
remove the cutter from the part;
- start the spindle;
smoothly move the cutter towards the workpiece;
- cartridge;
faceplates;
Types of tools used
The worker will not be able to perform the intended action if he does not calculate the speed of movement of the drill and the depth of its immersion. Therefore, you should pay attention to the following factors:
- the workpiece must rotate quickly so that there are no delays;
- The fastening of the reamer is checked before starting the activity so that there is no slightest vibration;
- in one pass in one direction you need to remove the maximum possible amount of top metal;
- Every part and component of the machine must be in working readiness, including runners and handles.
The cutters differ depending on the degree of processing - rough or final. The former give a rougher version with roughness and irregularities, the latter - a perfectly smooth surface. The geometry of the tool affects which layer is removed in one pass, and the inclination of the cutting head determines which direction the caliper moves. The blade can be narrower than or equal to the wide fastening part, as well as bent to the side. Another classification affects functionality and purpose:
- scoring - with their help you can process the end part, that is, the one that is located at right angles to the axis of movement;
- walk-through – also designed for the end;
- groove - from the name it is clear that they cut grooves;
- shaped – for the production of profiling pipes;
- boring – for drilling holes, through or small;
- threaded - designed for creating screw axes and nut-type cutting;
- cutting - truncation of one side.
The rule for all turners is that after the end of the shift it is necessary to clean the workplace, check all the tools and distribute them in their places. This will allow you not to lose anything and always have what you need at hand.


