When drilling holes with a hammer drill, the main factor is not the rotation of the drill, but the impact. Both the drilling speed and the ability of the tool to cope with particularly hard building materials (concrete, granite and others) depend on its strength.
Dust and constant loads on the tool negatively affect its performance. During operation, the impact force may noticeably decrease or disappear completely.
How does a hammer drill work and why does it “refuse” to hammer?
Reasons why the hammer drill does not strike
1. The bushing in which the striker is located absorbs part of the impact energy during operation of the hammer and is destroyed over time. The bushing fragments jam the firing pin and the tool stops working normally.
Read also: Pushed aside how to spell it?
2. The hammer drill begins to beat weakly when the compression ring located on the hammer wears out. The more wear, the weaker the impact of the tool. The problem can be solved by replacing the ring.
3. Damage or destruction of the bearing also reduces the impact of the hammer drill. This problem can be solved by replacing the bearing.
4. Mode switch malfunction. This may occur due to wear, deformation, or prolonged use of the hammer drill. The malfunction can be eliminated by installing the switch in its place or replacing it.
5. Another reason for the weak impact of the hammer drill is untimely oil change. When working with a rotary hammer, a large amount of dust is observed, which can clog the cylinder openings for air circulation. This also includes the use of poor quality or thick lubricant, which can slow down the operation of the tool.
A rotary hammer, like any electric tool, requires careful treatment, proper operation and timely preventive maintenance. If these standards are neglected, the device may fail without exhausting its service life. In case of some malfunctions, you can repair a hammer drill yourself, but to eliminate breakdowns associated with the electrical part of the engine, you will need the help of a specialist.
Fixing problems
Once a tool stops working, many users try to fix the problem themselves to save time. This is strongly discouraged as the industry produces several types of rotary hammers:
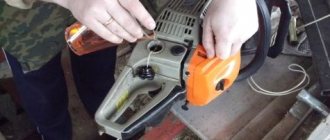
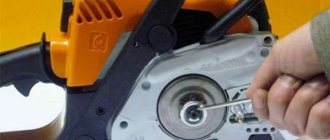
Figure 2. Steps to lubricate a rotary hammer.
- Electromagnetic - the peak in them is obtained due to the reciprocating movement of the core inside the coils;
- Electro-pneumatic - The clutch unit transmits the impact of the airbag to the flying piston through the impact piston.
The impact energy in the second case is five times higher, reaching 1.5 kW. Over time, fatigue disorders begin with breakdowns, therefore, despite the airbag, the pistons must be replaced periodically. Picture 1
There are straight, L-shaped tool bodies. The first are intended for limited space (niches, narrow openings), the second - for the destruction of materials in close proximity to the working fluid. The cooling of engines of L-shaped models is much more efficient, so their service life is one and a half times longer than direct modifications. Professional rotary hammers are equipped with powerful electric motors, often have an L-shaped body, and are much heavier than their household counterparts. They are equipped with compensators that reduce vibration on the tool body, electronic overheating protection systems, speed control (for drilling mode), improved ventilation systems, and push-button locks.
Mechanical problems
Mechanical damage is a little more complicated: a hammer drill consists of many parts, so it may not be possible to immediately determine the cause of the breakdown. The main thing is to carefully visually inspect all the parts , and after identifying a breakdown, carefully fix it. Here are the main possible damages that you can fix yourself.
The device turns on, but does not chime.
- Switch. Most devices are equipped with operating mode switches. This mechanism is prone to breakdowns. If the hammer drill stops hammering, most likely the reason is the worn-out fingers of the switch. During operation, they are constantly in contact with rotating parts and this leads to wear.
- The extension of the latch holding it in the gearbox housing has broken, which facilitates spontaneous switching of modes. You don’t have to change the latch, if this problem doesn’t bother you, the hammer drill will still work.
Replace the switch. But if there is no suitable switch, and the work cannot be stopped, then you can rotate the worn part 180 degrees and you can continue working.
- Cartridge. This part of the mechanism is subject to the greatest load, which can lead to its breakdown. If this happens to the cartridge, it should be replaced. The only thing that can extend its service life is preventive maintenance: washing it off dust with gasoline, cleaning it from dirt, etc.
- Compressor ring and striker. Their breakdown can occur due to heavy loads. When pressed hard, the stroke of the striker decreases, which leads to a malfunction. If it breaks, there is only one way out - to replace it.
- Gearbox. If the gearbox malfunctions, you need to carefully disassemble it and check all the parts one by one. The most vulnerable point of the gearbox is the bearing. First of all, we check its integrity. If necessary, we change it. If it is intact, the reason may be in the seat. It can wear out and hold the bearing poorly. In this case, you will have to change the hammer housing itself. The gears of the gearbox may become unusable. They are easy to identify visually, but they cannot be repaired - they will have to be replaced.
- Oil leak. If there is a leak (it should be noted that this happens extremely rarely), the oil seal should be replaced. It is located in the neck of the case.
- Operation can also be affected by dirt. This is indicated by a crackling or grinding sound. To avoid this problem, regularly clean and lubricate the inside. It is important to use only one type of lubricant, the same one that was used before.
Do-it-yourself electric jackhammer repair
Repairing an electric jackhammer is not an easy task. In order to carry it out, you need to understand: as a rule, hammer repair consists of two main stages:
- Defection is the identification of a problem node that has already failed or its resource is close to zero.
- Replacement of faulty parts.
Of course, it would be more correct to repair the electric hammer that needs it and contains a certain supply of working resources. This needs to be determined so that the repair does not turn into a waste of time, effort, money, and the tool will continue to work for a certain period after repair.
Important! If the jackhammer is in poor condition, then repairing it is extremely unprofitable. Prices for spare parts (spare parts) are quite high, and spending on them will put the profitability of repairs into question
Remember! To ensure that the tool does not break down for as long as possible, its maintenance must be carried out regularly.
This does not require any special equipment. Typically, disassembling a jackhammer is possible with a fairly limited number of tools.
The market provides a limited list of spare parts. As a rule, these are springs, valves, air distribution units, strikers. Therefore, not every breakdown can be fixed without contacting service. Nevertheless, it makes sense to consider some problems that can still be solved with your own hands.
Interesting! On a positive note. Many spare parts for jackhammers that can be found on the market are universal. That is, one spare part is suitable for several models of hammers, which differ from each other not only in power, but even in manufacturer.
It would be correct to note that if you take into account the Chinese electric hammer, then if it breaks you should not count on a successful repair. They are often disposable due to the low quality of the materials used in their manufacture. Consider the classic repair plan:
Consider the classic repair plan:
- Dismantling and removing dirt from a jackhammer.
- Identification of the defect (if it is not obvious).
- Repair or replace damaged parts.
- Tool assembly.
- Functionality check.
As a rule, this plan is used by highly qualified service employees who do this professionally. We are considering the possibility of repairing it ourselves, and, as a rule, this moment comes when the problem is obvious and requires an immediate solution. So, let's look at some of the most common breakdowns of electric jackhammers for models from the giants Makita and Hitachi, which you can do yourself.
Repair of Hitachi jackhammers
One of the most common problems with the Makita chipper is the lance being jammed in the barrel. As a rule, the cause is wear of the locking bodies, but a banal lance defect cannot be ruled out.
In order to fix the problem, you must follow the following algorithm:
- The top cover (protection) is removed.
- The retaining ring is removed.
- Accumulations of dirt are removed.
- The oil seal is removed (at this stage the lance will fall out of the barrel).
Identifying the problem:
- The locking body is inspected. If it shows obvious signs of wear (the edges are rounded), it needs to be replaced.
- Inspection of barrel splines. In normal condition they have a clearly square shape. If they have a sharp shape, then the barrel requires replacement.
- Replacement of worn element and assembly.
- Clogging of the hose. As a rule, it occurs due to a fracture. Fixing the problem won't be a big deal. You just need to find the damaged area and remove it. Unfortunately, if removing a part causes the hose to become too short, the entire hose will have to be replaced. The list of tools to fix this problem is minimal:
- knife;
- clamps of the appropriate size.
Features in the repair of a barrel perforator
All described procedures for assembling and disassembling perforator devices also apply to the type of barrels. But there are several aspects that need to be taken into account when repairing it. Placing the motor vertically at right angles to the impact mechanism makes little difference to the disassembly order. So, to gain access to the gearbox and piston, you need to remove the plastic cover located on the top of the tool housing. This simplifies the repair of the mechanical part of the device if the shock function suddenly disappears.
Reasons for the lack of impact
At first glance, it seems that the impact mechanism has a simple design and there is nothing to break. Load, dust and vibration gradually take their toll. Typically, the impact force decreases as the mechanism wears out and eventually disappears. The sudden disappearance of the impact is explained by the deformation or destruction of some parts.
Striker and striker
These parts are made of high-strength steel. The firing pin rarely fails, but the bushing in which it moves absorbs some of the impact energy and breaks down over time. The fragments jam the firing pin and the hammer stops hitting.
The firing pin (“flying piston”) has a compression ring. When it wears out, part of the air passes into the gap between the cylinder in the barrel and the firing pin. The more wear, the weaker the impact. The problem is solved by replacing the ring with a new one.
Sometimes the striking part of the “flying piston” breaks on the firing pin. This is usually the result of pressure on the hammer when drilling holes. The drilling speed does not increase, but the load on the mechanism increases, which accelerates wear. Repair consists of chamfering on an emery machine or replacing a part.
"Drunk" bearing
It is mounted on the shaft at an angle and drives the piston. If there is wear or damage, the bearing must be replaced.
Mode switch
Mechanism parts may come out of the guide grooves. This may be a consequence of deformation, wear, or frequent use of the tool with the mode not fully engaged. The malfunction is eliminated by installing the parts in their places or replacing them with new ones.
Lubrication
Untimely replacement of lubricant can also be the reason for the lack of shock. Working with a hammer drill involves the presence of dust, which does not have the best effect on the properties of lubricants. Dust can clog the holes in the cylinder that allow air to circulate when the impact mechanism operates. The same effect cannot be ruled out when using too thick a lubricant not intended for hammer drills.
Rotating the gear on the barrel
The loss of drilling during a working impact manifests itself when the gear position 35 is turned on the shaft of the barrel, pos. 36.
The gear is fixed on the barrel with three rollers, pos. 37. And in order to hold it securely, the gear is pressed by a spring, pos. 33, which is secured through the washer, pos. 32, with a retaining ring, pos. 31.
The malfunction occurs due to the weakening of the force of the pressing spring, the rollers falling out, and the destruction of the cam bushing pos. 38.
repair of the Interskol P-26/800ER rotary hammer consists of restoring all parts to the required position or replacing failed ones.
How to extend the life of a hammer drill?
The service life of this tool largely depends on the correctness and timeliness of its maintenance, proper preparation for work, as well as on compliance with all storage and operation rules.
Before turning on the hammer drill, you need to check the reliability of fastening of all housing elements, the insulation of the plug and the power cable.
When operating the equipment, you should pay attention to extraneous noise, burning smell and strong vibrations. If they appear, you should immediately carry out maintenance, identify and eliminate the malfunction.
Continuous operation of the hammer drill should not exceed 15 minutes, after which a break should be taken for at least 5 minutes. Before replacing the working element (drill, drill, chisel), be sure to lubricate the tail. It is allowed to change the operating modes of the hammer drill using the appropriate switch only after the electric motor has completely stopped.
Compliance with all recommendations for using a rotary hammer will protect it from failure, and you from headaches.
Additional accessories
When purchasing a Hitachi hammer drill, the user receives the tool itself with all the assembled components and a case for storing and carrying it. Before purchasing, it is recommended to consult with the store’s specialists about what other additional devices may be needed for its further operation. As a rule, the assortment always includes a variety of attachments, add-ons, and consumables. The following types of nozzles exist:
- construction drill;
- drill bit;
- chisel;
- peak;
- spatula
Replacement of main components
If during diagnostics the technician determines that one of the main components has become unusable, he will replace it to avoid damage to other parts of the device.
Bearings
To remove a damaged bearing, the technician removes the retaining ring (if it holds the part) using a specialized puller. The rotational movement of the thread “unscrews” the old bearing from the shaft. The new part is hammered onto the shaft with a wooden or rubber “soft” hammer, and then lubricated.
Start button
The first thing to do after the device is de-energized is to separate the button from the wiring of the power unit. The wires are then separated and stripped. A new button is purchased at an electrical appliance store.
Brushes
If the design has special grooves that allow you to remove the brushes without spinning the motor itself. In this case, the technician unscrews the pressure springs and fixing screws and disconnects the contact wires. After this, he pulls out the old brushes. Before installing new brushes, it is recommended to clean the channel grooves with alcohol and dry them with a rag.
Cartridge
Repair, cleaning and lubrication of chuck components can be easily done in a home workshop. However, if one or more parts are worn to a dangerous limit, the cartridge is removed as described above and the unusable parts are replaced.
Failure of the screwdriver start button
Start button (reddish) for screwdriver
Getting to the unsuccessful start button is not difficult: you need to unscrew all the screws connecting the two halves of the tool body using a Phillips screwdriver. Next, using an electronic soldering iron, disconnect the button wires from the electric motor, disconnect the terminals connecting the button to the battery or power cable and remove the problem from the case. In its place we insert the new button, carry out the connection process in reverse order and check the operation of the new part by connecting it to the battery or power cable.
Screwdriver button disassembly steps
Disassembly and assembly procedure
Having cleared and freed a place in the workshop for repair work on electrical equipment, and prepared the necessary set of tools, the hammer drill begins to be sequentially disassembled to determine the malfunction, carefully inspecting each component and part. The tool is disassembled according to the following scheme.
Removing the cartridge
After making sure that the hammer drill is de-energized, the installed nozzle is removed from the chuck head, after which the chuck is separated and disassembled. For this:
- Use a flat-head screwdriver to remove the rubber boot.
- Using pliers, open and remove the locking ring.
- Carefully separate the plastic anti-invasive tube-casing, making sure that the bearing balls, washer and spring do not fall out.
- The parts are laid out and cleaned of grease, after which they are inspected for damage.
Reference. In a situation where the installed nozzle is jammed in the cam mechanism of the chuck, it is recommended to tap it around with a rubber hammer, then pour in 5-7 drops of liquid lubricant. The operation is carried out 2-3 times with a break of 3 minutes, after which the attachment (chisel or spatula) is removed with pliers.
How to remove the mode switch
To diagnose internal components, it is necessary to remove the hammer housing and clean the surface of the components from dust. The analysis begins with the compartment of the operating mode regulator.
It is moved all the way - as a rule, this is the extreme right position (below the rebound mode icon), after which, using a flat screwdriver, the regulator is removed from its socket.
How to repair a barrel tool?
The design of electric rotary hammers varies depending on the location of the motor. It happens:
- vertical (or barrel) - in which the engine stands vertically relative to the rotational-shock axis;
- horizontal, that is, the engine is parallel to the axis of rotation.
Disassembling a barrel perforator is easier than its horizontal counterpart - two covers of the device provide separate access to the mechanical and electrodynamic parts. The upper casing exposes the gear unit and pistons. The lower one allows you to check or replace the brushes and diagnose the power unit.
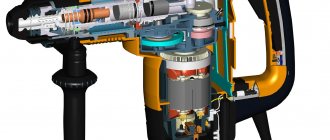
Hammer hammer impact mechanism
Most modern rotary hammers have an electro-pneumatic impact mechanism. “Electric” means that the mechanics are driven by an electric motor, and “pneumatic” means that the striker hitting the drill shank is driven by air.
- Engine rotation transmission gear
- "Drunk" bearing
- Piston
- Drummer (“flying piston”)
- Trunk
- Striker
- SDS cartridge
When you press the button, the engine transmits rotation to a shaft with a “drunk” bearing, which in turn drives the piston inside the barrel. As the piston moves forward, air pressure increases between it and the striker. The striker moves towards the striker and hits it. The striker transfers the impact energy to the drill. Then the piston moves in the opposite direction, creating a vacuum area in the barrel. Due to this, the striker returns to its original position, after which the entire cycle is repeated.
Most rotary hammers have two or three operating modes:
- combined mode: impact and rotation of the drill;
- Rotation lock mode: only the impact mechanism works;
- impact blocking mode: the hammer drill can be used as a drill or a mixer for preparing building mixtures.
Lubrication
Untimely replacement of lubricant can also be the reason for the lack of shock. Working with a hammer drill involves the presence of dust, which does not have the best effect on the properties of lubricants. Dust can clog the holes in the cylinder that allow air to circulate when the impact mechanism operates. The same effect cannot be ruled out when using too thick a lubricant not intended for hammer drills.
Mode switch
Mechanism parts may come out of the guide grooves. This may be a consequence of deformation, wear, or frequent use of the tool with the mode not fully engaged. The malfunction is eliminated by installing the parts in their places or replacing them with new ones.
Striker and striker
These parts are made of high-strength steel. The firing pin rarely fails, but the bushing in which it moves absorbs some of the impact energy and breaks down over time. The fragments jam the firing pin and the hammer stops hitting.
The firing pin (“flying piston”) has a compression ring. When it wears out, part of the air passes into the gap between the cylinder in the barrel and the firing pin. The more wear, the weaker the impact. The problem is solved by replacing the ring with a new one.
Sometimes the striking part of the “flying piston” breaks on the firing pin. This is usually the result of pressure on the hammer when drilling holes. The drilling speed does not increase, but the load on the mechanism increases, which accelerates wear. Repair consists of chamfering on an emery machine or replacing a part.
READ Replacement Oil Pump Stihl 180
We disassemble the gearbox
To get to the mechanical part, you will need to remove the plastic housing.
The procedure for disassembling the mechanical part of a Makita rotary hammer: First, remove the black protective plastic case. The case is removed after you unscrew the four screws securing the case from the end. By pressing on the end of the shaft you will press the gearbox out of the housing.
After removing the housing, you need to separate the rotor from the gearbox. The gearbox is the general mechanical part. The rotor is separated from the mechanical part (gearbox) simply. You need to clamp the gearbox with your right hand, and clamp the rotor with your left hand. While rocking, pull both parts in opposite directions. The rotor is held in the gearbox by friction of helical gears. The main malfunctions of the Makita rotary hammer occur in the mechanical part of the tool.
The most typical malfunction for the mechanical part is the failure of the impact mechanism.
Disassembling the impact mechanism The impact mechanism is assembled on the inner housing and consists of a gearbox shaft and an intermediate shaft. The rotational motion is transmitted through helical gears to the intermediate shaft.
The gearbox shaft is a hollow shaft in which the cylinder moves freely.
A small spur gear mounted on the intermediate shaft transmits rotation to the large spur gear of the gearbox shaft, in which the impact mechanism is mounted. And translational movements are simultaneously transmitted to the gearbox shaft of the impact mechanism due to transmission from the rolling bearing of the intermediate shaft to the cylinder moving in the gearbox barrel.
Let's move on to disassembling the intermediate shaft.
Disassembling the intermediate shaft
Mounted on the shaft pos.40 is a helical gear pos.42, to which rotation is transmitted from the rotor gear, a rolling bearing 608zz pos.41, which transmits translational motion to the hinge pos.34 of the piston pos.32
On the other side of the shaft, a clutch coupling is installed, pos. 39, spur gear 10, pos. 80, compression spring, pos. 38, retaining ring S-7, pos. 37, bearing 606zz, pos. 36. Particular attention should be paid to the condition of the rolling bearings. The hammer drill has imported bearings
Installation of domestic bearings is allowed. Bearing 606zz can be replaced with 80016, bearing 609zz can be replaced with 80019.
Let's move on to disassembling the impact mechanic shaft
Disassembling the impact mechanism shaft Disassembling the barrel of the Makita 2470 hammer drill is a simple process if you use the Makita hammer drill design diagram. The shaft is a barrel, pos. 21, in which the impact mechanism is assembled. A gear, pos. 19, is attached to the barrel, which is pressed by a spring, pos. 18, through a washer, pos. 17, and secured with a retaining ring, pos. 16. The cylinder pos. 32 moves in the barrel, acting on the firing pin pos. 24. On the reverse side of the striker there is a metal ring, position 27, which transmits the blow to the drill. When is it necessary to replace the hammer drill barrel?
Most often the metal ring fails. Striker Cylinder with striker
We've sorted out the disassembly. We replace the parts with serviceable ones and get ready to assemble. Learn more about lubrication and assembly of the hammer drill.
Read if there are problems with the electrical part of the hammer drill.
The hammer drill does not work in a vertical position
I contacted two repair organizations in the city with a similar question, where they asked me to bring a drill for repairs and specified that it was a stator malfunction. Today I disassembled the drill once again, looked at the stator and rang the windings, after which I turned to you. Thank you for straightening your brains out. The power cord is definitely faulty.
As soon as you move the screwdriver (powered Fiolent, 2-3 years of home use) slightly out of the horizontal position, the engine immediately stops working and a very quiet spark is heard.
When the housing is disassembled, good play in the motor stator is felt. in the seat, I tried eleven times in different ways to remove this play - wedged it from different sides, but the effect remained after assembly. Perhaps this is not the reason, I don’t understand. I'll have to take it to the workshop.
There is no impact in the rotary hammer Repair
Is this behavior of the tool familiar to anyone? Where is the dog buried?
Nothing lasts forever. And the most reliable Bosch rotary hammers begin to break over time. But any malfunction can be repaired with your own hands if you have detailed instructions for performing repair work. Below we offer you a guide to troubleshooting Bosch rotary hammers and a method for eliminating them. The main causes of breakdowns are:
- careless work with the tool;
- improper storage of the hammer drill;
- heavy loads when working on working parts when chiseling or drilling;
- tool overheating;
- long work without a break;
- failure to comply with maintenance schedules.
Conventionally, faults can be divided into mechanical and electrical.
Next, we will consider faults according to their affiliation, dividing them into mechanical and electrical faults.
The mechanism for fixing the tool in the drill barrel does not hold the drill
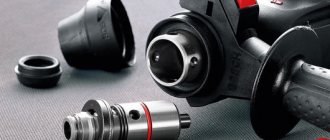
Bosch rotary hammers use two types of chucks: SDS-plus and SDS-max. The difference is in the design of the locking mechanism.
The reason is the wear of the antennae of the chuck raster bushing, which makes it impossible to transmit the shock pulse to the working tool of the hammer drill.
Tool shanks for hammer drill chucks Bosch 2-26
Safety precautions at work
To protect yourself from injury and the tool from damage, you must follow safety rules. Work with a rotary hammer in overalls, transparent glasses, gloves, closed shoes, earplugs or headphones, as the tool is dusty, noisy, and particles of solid material fly away when chiseling. A working rotary hammer will not slow down or make any extraneous noise.
If it is necessary to make a long hole, first drill with a short drill and gradually move on to a long one. If it is not given rest, it will overheat. The technical manual indicates recommended operating times under load and at idle.
You should not touch the nozzle with your bare hands immediately after it has stopped, as you may get burned. The drill also requires timely cooling, otherwise it will lose its hardness and elasticity. To cool the holes and nozzles, a special liquid system is used, the operation of which is based on the supply of cooled water or emulsion to the desired location using tubes or a water coupling.
The tail section of all drills requires periodic lubrication. It is recommended to carry out this procedure before installing the nozzle. Although lubrication is allowed every 150-200 operations. The instructions indicate the frequency of maintenance that must be observed.
Possible malfunctions, causes of their occurrence and solutions
To repair a rotary hammer with your own hands, you must first determine the external manifestations of malfunctions.
The hammer drill does not hit
If the hammer stops hitting when switching to impact mode, but the drill rotates, it is most likely that the floating bearing is damaged. The solution to the problem is to replace it with a new one.
The second possible reason is a malfunction of the striking mechanism. Often, when overloaded in work, the steel striker splits, this leads first to a weakening of the impact, and then to its complete absence. The firing pin needs to be replaced.
The third probable reason is wear or breakage of the piston group of the hammer drill. The liner and piston should be replaced.
The hammer drill does not spin and does not drill
If the chuck does not rotate when you press the start button in drilling mode, the cause can first be determined by the sound. If the electric motor hums but does not turn the chuck, most likely something is preventing the rotor from rotating inside the gearbox. What happened to the engine will have to be found out by disassembling the mechanical part of the tool.
If the engine does not hum when turned on, it is more likely that the motor has failed. Having opened the lid of the device, it is necessary to determine what exactly led to this phenomenon. This could be an open circuit, a broken start button, or a short circuit in the coil windings. Using the tester, the specific cause is determined and appropriate repairs are made.
The drill does not stay in the chuck and flies out
Incontinence of the hammer drill equipment can occur during long-term use. The drill or chisel inserted into the chuck does not hold and flies out during operation. It is not only impossible to continue chiseling with such a tool, it is also very dangerous - a flying chisel can cause injury.
The reason for equipment incontinence lies in wear or breakage of the cartridge. The cartridge needs to be disassembled and determined what the problem is. Perhaps the balls have become deformed, wear has appeared on the restrictor ring, or the retaining spring has sagged. Usually, after replacing the damaged part, the cartridge begins to function normally again.
The brushes sparkle
Sparking brushes is a fairly common phenomenon when working with tools in dusty conditions. As a rule, sparking is a consequence of the deterioration of the material of the brushes themselves. Replacing the latter with new ones will help correct the situation; sparks will no longer fly out.
If not, the reason must be sought in the stator or rotor windings. It is possible that the large amount of dust entering the motor has caused the protective varnish covering the copper conductors to wear away. And this entails a short circuit. The presence of an interturn short circuit is checked using electrical instruments (multimeter).
Preventative maintenance of the tool: replacing brushes, lubrication of the rotor shaft bearings and additional varnishing of the windings on the coils will reduce the likelihood of breakdowns.
In addition, it should be taken into account that dust may adhere to the lubricant of the bearing located next to the commutator. To prevent this, the collector is degreased using a swab soaked in alcohol or solvent.
The hammer drill gets very hot
If the hammer drill gets excessively hot during operation, this is a clear sign of a malfunction of the electric motor. First of all, to prevent overheating, you must observe the operating mode of the device:
- take breaks at certain intervals;
- After loading, give the tool the opportunity to idle.
When drilling, it is recommended to use a periodic mode: apply maximum power for no more than 1 minute, then turn on idle for 3-4 seconds.
If the housing temperature does not decrease, then you need to inspect the electric motor. If you notice a characteristic odor coming from under the tool casing, you must immediately stop working and disconnect the device from the network. You can disassemble it only after it has completely cooled down.
The hammer drill does not hold the chuck
Sometimes there is a situation when the cartridge flies off along with the equipment while the hammer drill is running. This occurs due to wear of the chuck body mount at the end of the raster sleeve, which is a retaining ring. If it breaks, the fixation is broken and during the push the rubber boot flies off, followed by the spring and balls.
You can restore normal operation of the cartridge by installing a new locking ring. This is done quickly and does not require any additional equipment other than a regular screwdriver.
Preventive measures
After we have examined the main causes of hammer drill malfunction, as well as methods for repairing breakdowns, we can highlight several points on how to extend the life of your impact tool.
- In case of frequent repair work, the hammer drill should be cleaned at least once a month.
- Do not forget to lubricate the device parts regularly.
- To prevent malfunctions, you should choose a high-quality hammer drill. Cheap devices are only suitable for use a couple of times a year.
- To prevent the mechanism from overheating and the brushes from wearing out, it is worth taking breaks from work. For example, after using it for 20-30 minutes, give yourself and the hammer drill a rest for 10 minutes.
- And lastly, after you've finished working, don't leave the hammer drill dirty. Be sure to clean it after each use and put it in a special drawer.
By following these little tips, you can extend the life of your hammer drill, which will save you time on repairing it and money on buying a new tool.
Don't be afraid to disassemble it; it may have stopped working due to a small problem that you can solve yourself.
To learn how to repair a rotary hammer with your own hands, see the following video.
If the hammer drill stops hammering, you should evaluate the feasibility of repairs. There is no point in restoring imitations of popular brands, cheap modifications - they are not designed for a long service life, the cost of repair is approaching the purchase of a new power tool. Models of famous brands last longer; their replacement is often caused by the appearance of modifications with additional capabilities and obsolescence.
Figure 1. Construction of a hammer drill.
Lack of preventive maintenance after 100-80 hours of operation will inevitably lead to failure of the hammer drill.