Every farmer has in his arsenal such equipment as a plow.
And every farmer knows how difficult it is to work with such a tool. Walk-behind tractors have appeared on the modern market that can greatly facilitate work on the ground. The Neva walk-behind tractor is one of the most popular and reliable units in our country. The plow for the Neva walk-behind tractor is an attachment with which you can quickly and without wasting effort cultivate the soil before winter, as well as in the spring before planting.
How to properly adjust and configure a plow on a walk-behind tractor: tips and tricks
Tuning a plow is a true art. For more than a thousand years, farmers have begun plowing by adjusting this unit. The purpose of the plow is to turn over the top layer of soil, mix it and create suitable conditions for plant growth. This is the main agricultural task, which prepares the soil for sowing, making it fertile. Plowing is done once a year, and the subsequent cultivation of the land is called harrowing.
Agricultural equipment is used for plowing: cultivators, walk-behind tractors and tractors. A plow is connected to the equipment , which performs plowing. A walk-behind tractor is often used to work in dachas and garden plots.
The most important thing when plowing is to set up the plow correctly. If the adjustment is incorrect, the equipment will begin to slip, sink deeper into the ground, and the biochemical processes in the soil that are necessary for plant growth will be disrupted.
Adjusting the plow on a walk-behind tractor
To work on different types of land, the unit must be configured differently. But the main adjustment occurs in several aspects:
- plowing depth adjustment;
- angle of attack adjustment;
- cutting the first furrow.
Plowing depth. The upcoming process of feeding crops depends on the plowing depth option. If you set the depth to be insufficient, the roots of harmful plants will remain under the soil, and if the depth is very large, the grassy soil will be mixed and the plants will not receive suitable nutritional parts.
Attack angle. Adjustment occurs using a field board. The performance of the unit depends on the angle of attack: if the angle of attack is greater than necessary, the device will get stuck in the ground and the walk-behind tractor will stall; and if the angle of attack is insufficient, the plow will not remove a suitable layer of soil.
1st furrow. After all the options have been completed, it is necessary to plow the first furrow. At this step it becomes clear whether the plow is configured correctly. During subsequent plowing, the machine is lowered with one wheel into the track, and the upcoming adjustment takes place in the furrow.
Preparing the walk-behind tractor for plowing
Tilling the land is a technological process that requires special training for motor vehicles and plows. First you need to transport the car to the field that needs to be processed. If you are using a lightweight walk-behind tractor, it can be transported in the back of a car. Before plowing begins, it is necessary to carry out daily maintenance of the machine and check its functionality.
During plowing, light and medium-class walk-behind tractors are equipped with lugs instead of wheels. They improve traction with the soil and increase the total weight of the equipment. Before installing the lugs, you need to transport the car to a level area, place a stop under the rear hitch and remove the wheels. If you can change the hubs on a walk-behind tractor to longer ones in order to increase the track, then change them. After which the lugs are installed. Make sure that the tread pattern on the lugs is oriented in one direction. The narrowing of the pattern indicates the direction of movement.
After carrying out maintenance and replacing the wheels with lugs, you can begin connecting and adjusting the plow.
Types of plows
Over the thousand-year history of the introduction of the plow, it was often modified. Modern units are usually divided by working parts, their number and purpose.
- Based on their working elements, plows are divided into plowshare and disk.
- By the number of working bodies into one-, two-, three-body, etc.
- By purpose: special and general.
A share plow is a unit whose body is equipped with a coulter (knife). The opener cuts the soil, lifts it, and the blade turns it over. The plowshare unit is used for plowing the land for sowing grain crops. The greatest plowing depth is 30 cm.
Disc plow - instead of a coulter, the device has discs that plow the ground. This unit is used on languid rocky soils and fields that are located on the site of uprooted forests. The advantage of the disc is that if the coulter hits a stone, it will break and the disc will roll over the obstacle. Disc devices are used only by massive tractors on large fields.
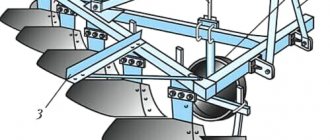
A multi-body plow is a unit on which several bodies with coulters are installed. The stronger the tractor, the more bodies on one frame it can pull. Multi-body devices speed up field processing and increase productivity. Two-body devices are installed on a heavy diesel walk-behind tractor.
Plows for special and general purposes. A general purpose unit is a plowshare device that is designed for plowing a field. Special purpose units are devices for difficult types of soil, for example swampy, rocky, etc.
Plow device
Depending on the device model, its design varies. Main structural elements of the unit:
- Frame. The housing and the adjustment wheel are attached to it. There are two lanyards installed on the frame, which change the position of the body in horizontal and vertical positions.
- Frame. This is the main working element of the plow. The following are attached to it: a coulter (knife), a blade and a field board. The body is height adjustable by moving the stand. The coulter is responsible for cutting the layer of earth, and the blade is responsible for turning the earth over. The field board is a service element on which adjustments are made.
- Support wheel. Depending on the set height of the support wheel, the plowing depth also depends.
READ The walk-behind tractor smokes black smoke reasons
In addition to the main working and service parts, plows are equipped with other parts. This depends on the type of device and its purpose.
Plowing depth adjustment
The plowing depth is set according to two characteristics:
- type of land being cultivated;
- design features.
Before the option, you need to find a very level area. If it is possible to make adjustments on asphalt, then move the car onto it. When the equipment plows the soil, the right wheel moves along the track, and the left wheel is on the uncultivated ground. To recreate this position of the machine, it is necessary to install stands under the left wheel of the walk-behind tractor, the height of which should be equal to the plowing depth.
The plowing depth is adjusted using the adjusting wheel. The deeper the support wheel is lowered, the shallower the plowing depth will be and vice versa. The height of the support wheel should be equal to the height of the raised side.
Single-body mounted plow SCOUT PL-130 HYD with scoring disc
The SCOUT PL-130 HYD single-furrow plow is equipped with a scoring disc for more efficient work on turf soil. The unit is connected to mini-tractors and walk-behind tractors with a single-point suspension mechanism. The working part is made of reliable steel.
The angle of attack of the opener is adjusted using turnbuckles. The limit wheel regulates the plowing depth. The trimming disc is designed to trim plant roots during plowing, which increases the productivity and quality of plowing.
To plow heavy soils and virgin lands, it is necessary to install weights on the equipment: 80 kg in front and 60 kg in the rear.
ploughshare
You need a piece of steel about 5 mm wide. A removable opener can be made from a circular saw blade. The working part of the part, which will cut the ground, must be processed on an anvil and then sharpened.
Plow diagram. Diagrams of different plows and their purposes
A standard plow is capable of plowing the ground to a depth of 18-35 cm. There is a smooth method of plowing with plowshare plows, but for better cutting and crushing of the layer, right-hand repellent bodies can be attached to the plow, forming a dump-type plowing.
Then, at the slightest deviation to the side from the given direction, the blade crushes the earth into small pieces. A standard plow (plow diagram) consists of a frame, a knife, a skimmer, a coupling mechanism with a tractor, and a body. The plow may have support wheels. There may be several of them, or one. Depends on the design of a particular plow. The body, in turn, is a combination of a ploughshare, a blade and a field wheel. You can see a diagram of a standard plow below:
So here is a complete diagram of the plow:
- - skimmer,
- - plow body,
- - frame,
- - plow knife,
- - support wheel,
- - support wheel adjustment screw,
- — tractor clutch mechanism.
Let us determine the principle of coupling a plow to a tractor. Based on this criterion, mounted, semi-mounted and trailed plows can be classified.
Plows based on the hitch principle
Mounted plows are characterized by the fact that the plow is attached to the tractor by attaching the plow's hinged mechanism to the same mechanism on the tractor.
Trailed plows are attached to the tractor through a trailed eyelet.
The automatic coupling of the plow with the tractor is formed due to the operation of the lock and frame. The lock is securely fastened, and the frame is fixed with a finger to the lower arms of the tractor canopy, and with a cheek to the upper link.
Attaching the plow to the tractor
During operation, both the frame and the lock are supported by a pawl, which is connected to the driver’s cabin through a cable. This way the tractor driver can release the clutch directly from the cab. The hitch includes two counter posts and a brace. They are connected to each other with one bolt.
The posts are attached to the brackets. The brackets are attached to the plow frame with bolts. Trailed plows are characterized by the presence of three wheels in their design.
1. Furrow wheel - front, placed closer to the front body at a distance of 3-4 cm from the wall of the furrow. In this case, the wheel should not interfere with soil rejection.
2. The field wheel is the second wheel, it follows the furrow wheel. The rear one is the very last one. Each wheel accounts for about 30% of the total plow weight. Semi-mounted plows have two wheels. This is a field wheel and a furrow wheel, which is located at the rear.
Plow attachment diagram
- - lock,
- - brace,
- - plow handle,
- - neck,
- - finger,
- - frame,
- - fastening pawl,
- - finger,
- - plow stand,
- - bolt,
- - plow brace,
- - bracket
Three-tier plow
So, let's talk about three-tier plows. They are the most popular among the people, since if desired, a three-tier plow can be easily adapted for two-tier plowing. When we want to leave the top layer of the soil we have processed on top, and mix the second and third layers together, we need to remove the rear body, install an extended blade on the front one, and place the middle body on the main beam behind the first body.
When the top layer of soil is littered, we transfer it to the bottom of the furrow: we put the front body with a cultural dump instead of the rear one, and we put the middle body in place of the outrigger beam. Below you can see a diagram of a three-furrow plow. For you, as an option, the diagram of the PTN 40 plow is shown below:
diagram of the plow PTN 40
- - front body,
- - main middle body,
- - rear body,
- - frame beam (main),
- - beam for harrows,
- - pendant,
- - support wheel,
- - outrigger beam,
- - cutting knife,
- - suspension pin
Diagram of a plow with a hydropneumatic fuse
Previously, we looked at standard plows for cultivating soft soil. The plow for cultivating rocky soil is equipped with a hydropneumatic safety device.
- - hydraulic cylinder,
- - oil line,
- - pressure gauge,
- - hydropneumatic accumulator,
- - gas chamber,
- - fuse piston,
- - valve, 8 - check valve,
- - plow frame,
- - plow support wheel,
- - plow body
This increased resistance to difficult-to-arable soils is explained by the active interaction of the plow's hydropneumatic accumulator with the tractor's hydraulic system.
When the plow hits a rock, the plow body rises, moving the cylinder plunger, and the cylinder, as it moves, pushes oil into the battery, supplying it with energy. Then the body returns to its normal state, and its beam rests against the frame again.
Important Military all-terrain vehicles Volvo Laplander 4x4 and 6x6 with increased cross-country ability
Horse plow diagram
Also, for light soils, the technical bells and whistles of a horse-drawn plow are suitable. You are shown a plow of the PV-23 brand. This is a hanging plow, which means it only has one insignificant support wheel. It practically does not rest on it, so the operator needs to support it with his hands.
- - cutting knife,
- - ploughshare,
- - dump,
- - field board,
- - handle
- - rowdy,
- - plowing depth regulator,
- - coverage width adjuster,
- - harness hook,
- - wheel and supporting stand of the plow.
How to install and adjust a plow for a walk-behind tractor?
In this section we will tell you how to set up a plow on a Neva . The plow and hitch are the most important parts, without which you will not be able to plow the field with a walk-behind tractor. They need to be assembled and adjusted correctly.
Each walk-behind tractor model has its own characteristics. Sometimes preliminary work on its fastening is required. You can learn how to attach the hitch from the instructions for the walk-behind tractor. The original coupling guarantees a reliable connection of the unit with the attachments.
Adjusting the plow also requires certain knowledge and takes place in several stages:
- adjusting the depth into the ground;
- adjustment of the slope of the field board in relation to the nose of the ploughshare;
- adjusting the tilt of the plow blade.
How to plow with a walk-behind tractor and plow
If you have a standard plot of 6 acres of land at your disposal, then it is better to walk it with a walk-behind tractor from the light series. It weighs little and is easy to operate. Such a motor cultivator will cope with the site very quickly. It is customary to use cultivators and cutters as attachments for small areas. The processing technology is as follows: the mini-machine is installed at the edge of the site, starts up and moves forward at maximum speed, turning at the corners of the site. So, gradually the walk-behind tractor moves towards the center.
For large areas it is advisable to use medium and heavy cultivators. In this case, you simply cannot do without a plow:
- Control plowing is performed in two directions.
- During plowing, the position of the plow relative to the ground and the quality of the furrow are assessed.
- If there are no questions, they proceed to complete the full scope of work.
- The speed of the walk-behind tractor is increased, the furrows and the dump of the earth are smooth and neat.
Important How to install air conditioning on GAZelle Business class Next
This is interesting: installing a plow on a Neva walk-behind tractor.
This method is suitable for all types of soil. If work is carried out on hard and rocky soil, it is better to process it in two passes at different depths. At the second stage, in order to prevent the soil from sliding, waves can be made across the previous ones. When passing longitudinally, it is recommended to lay the wave between two old ones so that there is not a large distance between them.
When carrying out work related to plowing the land, it is necessary to adhere to certain instructions and rules:
- To begin with, control plowing is performed and the resulting furrow is analyzed.
- They adjust the plow, the quality of the moldboard and the depth of the strip.
- The furrow ridges should be at an equal distance from each other.
- The possibility of superimposing a new soil dump on the old one is excluded.
Knowledge about setting up a plow on a walk-behind tractor allows you not only to set up the equipment correctly, but also to perform high-quality plowing in the shortest possible time. Impeccable adjustment is the key to preparatory work on a personal plot.
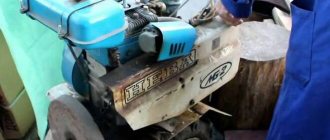
Plow for walk-behind tractor Neva
Every farmer has in his arsenal such equipment as a plow. And every farmer knows how difficult it is to work with such a tool. Walk-behind tractors have appeared on the modern market that can greatly facilitate work on the ground. The Neva walk-behind tractor is one of the most popular and reliable units in our country.
The plow for the Neva walk-behind tractor is an attachment with which you can quickly and without wasting effort cultivate the soil before winter, as well as in the spring before planting.
Trailer for the Neva walk-behind tractor - an effective assistant in work
In the spring, when the earth has already warmed up, gardening work begins. Then the length of the working day depends not only on desire, but also on the tools at hand. Progress and innovative technologies do not stand still; modern devices have reached the very hinterlands. Today, the most popular assistant for a working person is a walk-behind tractor with various types of additional tools and towed devices.
Briefly about trailers for the Neva walk-behind tractor
Among a number of well-known brands and companies, the Neva walk-behind tractor with a trailer requires special attention. The imported and domestic manufacturer took care of the durability of the engine, the quality of performance of various types of work, and a comfortable ride. The equipment of the Neva transport is simple: a body, a cultivator, a plow, a trolley for a walk-behind tractor and, if desired, a lot of other equipment.
Trailers for the Neva walk-behind tractor are made of durable metal. Their carrying capacity depends on the size, ideally it is 250-500 kg. When transporting cargo weighing more than 350 kilograms, the trolley for the Neva walk-behind tractor is equipped with a mechanical brake drive to make it easier to drive.
A trailer that is more in demand in gardening work, tested by more than one farmer, for the Neva MB-2 walk-behind tractor. Thanks to the folding sides, it can be used to transport not only large items, but also bulk substances. It is equipped with a brake drive and will not put a large load on the walk-behind tractor itself, which is undoubtedly a plus in its favor.
Do-it-yourself cart for the Neva walk-behind tractor
If you wish, you can make a trailer for the Neva walk-behind tractor with your own hands no worse than the one from the manufacturer. You will have to try hard for this, but in the end you will get an excellent and budget-friendly self-made trailer for the Neva walk-behind tractor.
The work algorithm is as follows:
- collect all the parts and prepare materials;
- select body type;
- cut parts according to the drawings “Neva walk-behind tractor with trailer”
- connect the parts and tidy up the appearance of the trailer (paint or varnish).
We select materials
For a tow hitch to the Neva walk-behind tractor, both wood and iron are well suited; you can also use materials that remain after construction work. The frame for the device is assembled from two iron pipes and wheels connected by bearings. The body is bolted to the finished frame. For greater reliability, stiffening ribs and corners with metal inserts must be attached to the trailer. If desired, the sides can open on all sides or only on one side, optimally the rear.
You can also make more complex models of trolleys for the Neva walk-behind tractor with your own hands. Opting for a triple hitch and taller wheels results in a completely different model. A little time and desire to make such an assistant yourself will create a unique cart model for the Neva walk-behind tractor.
How to choose the right plow for the Neva walk-behind tractor?
The plow consists of a specially shaped ploughshare and a heel. It is with this design that it is very convenient and easy to plow stale hard soil. This attachment is made of durable steel, as it performs quite complex work with increased load.
There are different types of plows:
- Rotary. Has several active blades. The soil is cultivated only in one direction, so you will have to constantly return to the beginning;
- Negotiable. It has the shape of a feather, which makes the process of plowing very hard and fallow soil very simple and quick. In this case, at the end of the furrow you only need to turn around and continue working;
- Single-hull. It has only one share and is designed to work on light soil types.
There is another type - this is the Zykov plow. It has a special design:
- wheel for support;
- double-sided body with plowshare and blade. This allows you not only to crush the earth, but also to turn it over;
- A field board rests in the furrow. This makes the structure more stable;
- attached to the beam using a stand;
- rotary mechanism with fastening of plow bodies.
Before starting work, you need to install the plow and configure it.
Blade
You will need a pipe with a diameter of 0.5 meters. In this case, the wall thickness should be no more than five millimeters. The part is cut out from a pre-made cardboard blank, also processed on an anvil and sharpened.
After this, the parts are assembled. To begin with, you can do all this using cardboard blanks. And if all the parameters are met, and the plow itself turns out to be correct and reliable, then you can proceed to the metal parts.
READ How to Adjust Valves on a Diesel Motoblock
How to adjust a homemade plow? Exactly the same as the factory one. The only difference is that if the work is incorrect, you can bend and adjust the parts yourself using a hammer.
Do-it-yourself reversible plow for walk-behind tractor, drawings and description
If there is no experience in this type of activity, you should first consult with a specialist to understand the main complexities of the process.
Each type of plow has its own design features. The simplest design has a single-body plow, and this is the best option for beginners who do not have the appropriate skills in this matter. At the top of the reversible plow body there is a curved feather, which allows you to process the overturned layer of earth. Therefore, this product is optimal for processing hard soil.
In the process of manufacturing such a structure, it is very important to follow all instructions and carefully follow the drawing parameters. The slightest inaccuracy will significantly affect the characteristics of the product, and during operation will negatively manifest itself in the results of work.
To make a plow you need to use steel 3-5 mm thick. The ploughshare is made first. It must be removable. The cutting part must be beaten on an anvil and sharpened.
The next thing is to do the dump.
A pipe with a diameter of half a meter and a wall thickness of 5 mm is used as a blank. Using gas welding, the blade blank is cut out according to a template and subjected to grinding with a grinder. After manufacturing these two parts, the plow body is made from steel 2-3 mm thick and the structure is assembled.
Installing a plow on a walk-behind tractor via a hitch
The hitch is what attaches the plow to the tow bar of the walk-behind tractor. They exist in two types: universal and stationary. The universal one is more preferable for work, as it allows you to make some more precise settings.
Tip: to make installation of the plow easier, place the walk-behind tractor on stands, which can be bricks, boards or stones.
Attaching the plow is quite simple - the hitch for the walk-behind tractor takes its place on the towbar and is fixed with one pin.
Many people think that by securely screwing a plow onto a walk-behind tractor , the work will go easier and faster. In fact, it's just the opposite. Due to the fact that during plowing, forces directed perpendicular to the plane of the moldboard act on the plow , there is resistance, which tends to pull the entire unit to the side. With a rigid attachment, the worker has to exert effort, literally pressing the walk-behind tractor into the ground. Therefore, it is necessary to leave a backlash in the horizontal plane of about 5 degrees.
Field board tilt
For those who already have experience plowing the land with a walk-behind tractor, there is no need to explain what and how to do at this stage. Below is information for those who are encountering this activity for the first time.
The inclination of the field board, or as it is also called the angle of attack, is the inclination of the level of the plowing plane relative to the surface. Adjustment occurs via a screw handle.
- Install the walk-behind tractor with the plow on the stands that were mentioned at the beginning of the article.
- Turn the adjustment knob to the maximum until the field board rests completely on the ground, without gaps.
- Start turning the handle in the opposite direction until the back is 2-3 centimeters above the ground.
If you make a mistake here, there will be consequences:
WHY DOES THE PLOW PLOW ITSELF? Features of adjustment and adjustment of the plow when plowing with a walk-behind tractor.
- At a large angle of attack, the plow will turn into an anchor - the walk-behind tractor will constantly slip and move forward with difficulty;
- If the angle is small, the required layer of soil will not be removed.
You can check whether everything is correct at the plowing stage - the walk-behind tractor should not rest against or go too easily.
How to make adjustments
Precise adjustment of the plow for a walk-behind tractor is based on three parameters:
To independently adjust the plow, the width is set at its edges. For better crushing and easy cutting of the soil, its edge should be attached at the same height as the soil hook, focusing on the inner side.
Read here what is better to use a walk-behind tractor or a cultivator at the dacha.
The depth is built up after the walk-behind tractor is placed on the stands. Installed stably, without displacement towards the plow.
The height of the stands should be adjusted depending on the depth to which you plan to plow the soil. If this is plowing before the winter season, then the depth is chosen to be approximately 25 cm. In spring, the depth is up to 20 cm.
After installation and selection of depth, the plow mount is adjusted. The ideal option is when it is adjacent to the soil.
If this is your first experience in plowing the ground with a walk-behind tractor, then use the tension rope as a guide, since the first row should be straight in order to further build on it.
You can also use a support wheel, it is located to the left of the plow, and runs on uncultivated ground, thereby preventing too deep penetration and adjusting the depth.
After installation, the walk-behind tractor is adjusted with special bolts so that the rear part of the plow is parallel to the soil.
The last step in the adjustment is to remove the walk-behind tractor from the stand and adjust the steering wheel to the height of your lower back. This is done to reduce stress on the hands during prolonged work.
Setting up the plow on heavy walk-behind tractors
The article examined the so-called light walk-behind tractors, which are mostly used in dachas. But there are also severe varieties. Their main differences are that the latter are many times more powerful and more bulky. They are also equipped with diesel engines. This choice is due to the fact that, with the same volume at operating speed, a diesel engine has more torque than a gasoline engine.
Installing and setting up a plow for this type of equipment is no different from what was described above. The only thing worth noting is that it is better to set up two workers, because the weight of heavy walk-behind tractors sometimes exceeds 200 kilograms.
Improvement of the chassis
The first thing users of a walk-behind tractor think about is how to make a cart with a seat for it. Using equipment in normal mode using levers requires the application of great physical effort. However, the use of a trailer reduces the stability of the vehicle. This problem can be eliminated by extending the wheelbase. This is done using extensions that are attached to the axle shaft with pins or bolts. Having solved the stability problem, the operator is faced with another issue: the unit is poorly controlled. helps give it good maneuverability. This device is made by analogy with components of passenger cars. Homemade unlockers for walk-behind tractors are made using ordinary household tools - an angle grinder, welding and a sharpening machine.
The low weight of the walk-behind tractor causes poor traction between the wheels and the ground. Slipping is a common occurrence when lifting virgin soil, working on wet ground or driving in snow. To avoid slipping, weights are attached to walk-behind tractors.
These devices are divided into the following categories:
- Wheeled. They are discs that are mounted on wheels or hubs. Disks are made monolithic from metal, concrete or hollow, filled with sand. The weight of wheel weights can be 30-70 kg.
- External. Made from any heavy material (steel, lead, concrete). Attached to the body using hooks or bolts. Some craftsmen weld a frame from a corner to the body. Sandbags, bricks, scrap metal and other heavy objects are placed in it.
You can improve the cross-country ability of a walk-behind tractor by installing lugs. The easiest way to make lugs is to make a rim from a strip of metal and weld blades onto it. The rim diameter should be larger than the rims and smaller than that of the tires. The rim is installed with flat tires. After the lug is installed, the wheel is inflated.
You can improve the transmission by installing a homemade variator on the engine. The system of belts and discs will allow you to smoothly change the speed of the unit, without jerking or vibration.
First furrow and blade angle
Once the previous steps have been completed, it is time for the final adjustment to ensure that subsequent furrow cutting runs smoothly. To do this, the walk-behind tractor is placed at the edge of the plot, the plow is driven into the ground and the first furrow is driven. It is important to keep the line straight at this stage so that subsequent passes will also be level. A thread stretched on pegs or another guide can help here.
At this stage, it is best to check how deep the plow goes into the ground - place a ruler or tape measure in the furrow. If necessary, adjust the plowing depth.
Then, with one wheel , the walk-behind tractor is placed in the furrow and the plow is oriented so that it is perpendicular to the ground; to do this accurately, use a square. If you are not comfortable doing this in the ground, place the walk-behind tractor on a flat surface, placing a stand under one wheel that matches the depth of the furrow. After this, setting up the plow is considered complete and you can proceed to the second and third furrow.
How to make a hitch for a walk-behind tractor yourself
During operation, the device will be subject to heavy loads, so you should adhere to the recommended dimensional and strength characteristics of all assembly elements. In this case, the following coupling qualities will be guaranteed:
- Ensuring reliable fixation with the walk-behind tractor.
- Attachment to attachments.
- Ensuring the declared performance qualities of equipment.
- Affordable price.
- Reliability, long service life.
When choosing a model, you should check the dimensions of the walk-behind tractor towbar and attachments (plow, trailer, harrow, etc.). The task of the master is to ensure full compatibility of elements, ease of operation and the ability to easily configure the equipment for a specific task. The main part of the hitch is a U-shaped bracket. Through the holes on one side, it is attached to the walk-behind tractor using pins; on the other side, the rack of the necessary attachments is fixed to the body of the device.
Required tools and materials
A person engaged in economic activities on land usually has a sufficient set of equipment for making a hitch. To work you will need the following tools:
- Bulgarian.
- Drill, drilling machine.
- Measuring tools: ruler, tape measure, square.
- Welding machine.
- A set of keys.
It is important to accurately select drills according to the diameter of the studs and bolts. No backlash will extend the life of the attachment
The housing can be cut from a metal sheet or a suitable channel can be used.
Preference should be given to a hitch with an adjustment mechanism. In this case, you can use attachments of different classes, from different manufacturers, achieving maximum operational efficiency.
The photo below shows a universal hitch with a threaded adjustment mechanism. A simple but effective device that is easy to make with your own hands:
Working with a drill on metal will be easier and more productive if you make a preliminary hole of a smaller diameter when drilling. For example, a 5 mm drill is used first, and then a 12-16 mm drill according to the size of the bolt.
Making a universal connection
Work must be done on a flat surface. A table of the right size or workbench will do. The operating procedure is as follows:
- Marking. According to the drawing, the contours and dimensions of the elements are indicated.
- Drilling. The operation is performed with a drill or on a machine. The accuracy of the holes is checked with a caliper, as well as a pin or bolt, inserting them into the seat. Both backlash and jamming of parts are eliminated. To make work easier and to avoid injury, the holes are machined with a countersink.
- Welding. It is preferable to use electric welding. The metal heats up only at the junction and does not critically lose its properties. If a suitable channel is not found, then a structure is made from sheet steel of the required quality.
- Assembly. The bracket is attached to the channel with bolts. If an adjustment mechanism is provided, it is also fixed to the structure.
Adjusting and tuning the plow on a walk-behind tractor
Any owner of his own garden knows what it is like to manually plow the beds and pull the weeds. To make plowing easier, a plow is used. But using animal power or a tractor for a small area is costly and unwise. For these purposes, walk-behind tractors are used - mainly Neva , MTZ, Oka, Farmer, Centaur. To put it simply, it is an engine with wheels onto which various attachments are mounted - from carts to plows. Our step-by-step instructions will tell you about the latter, or rather about how the plow is adjusted on a walk-behind tractor.
Plowing depth and how to adjust it
Plowing depth is the distance the plow goes deep into the ground while working. You need to set the depth to the distance that the bayonet of the shovel takes. Otherwise, the following effects may occur:
- If the depth is insufficient, most of the weed roots will remain underground, which will require additional effort to remove them.
- If the depth is greater than necessary, the fertile layer of soil will mix with what is underneath and the plants will not receive proper nutrition.
Therefore, it is necessary to adhere to the golden mean.
The depth is adjusted using bolts that fasten the plow stand and lock together. Accordingly, moving the plow up and down, this adjustment is carried out.
READ How to Plow Properly with a Motoblock With Mills Video
Pay attention to the design of your plow - if it has only one bolt connection and, accordingly, one hole, adjustment is impossible on this model.
Recommendations for use
As practice shows, the Niva is supplied for sale already assembled, but after purchase, before installing attachments, it is necessary to correctly adjust the main components. Proper preparation of equipment allows you to perform full-fledged work with maximum use of characteristics.
For proper engine operation, the valve system must be adjusted. For this purpose, the carburetor is disassembled, as well as all screw connections on the upper and lower housing are unscrewed, followed by cleaning of the elements. The next step is to adjust the valves using adjusting screws.
To ensure that the equipment lasts as long as possible and maintains its functionality, you should adhere to the following operating recommendations:
during the installation of cultivation canopies, it is necessary to control the direction of the knives in the direction of movement of the equipment; if the wheels slip during agricultural work, it is recommended to install additional weights; it is very important to control the quality and purity of the fuel used in the walk-behind tractor; when starting up a cold device, it is necessary to close the air supply using a special valve; after starting, the throttle is set to position XX, and the engine warms up for about three minutes; It is strictly forbidden to set the speed to maximum during the engine warm-up stage; It is especially important to prevent oil from getting onto the surface of the air filter element during operation. Before starting to work with adapters and walk-behind tractors, it is very important to read the instructions supplied by the manufacturer
Before starting to work with adapters and walk-behind tractors, it is very important to read the instructions supplied by the manufacturer
Tips and tricks
The first and most important thing to note is to follow safety precautions.
In general, the design of the walk-behind tractor is clear and simple. But in any case, like any other equipment, it needs care and timely maintenance and replacement of consumables. Use only high-quality spare parts recommended by manufacturers.
To prevent mixing of the fertile layer and what is underneath it, change the direction of plowing every season. In this case, you will reduce the likelihood of crop failure.
If your plow does not have height adjustment, you can drill an additional hole in the stand yourself. But make sure that the structure does not lose its rigidity.
Installing a plow on a Neva walk-behind tractor
Auto mechanic, specializes in agricultural equipment
Today, not only farmers, but also more and more owners of suburban land plots prefer to mechanize soil cultivation using walk-behind tractors. A large number of types of various mounted and trailed equipment allows these units to be indispensable assistants in almost all types of earthworks.
As for the plow, this device is not only in demand, but also necessary when cultivating the soil. In this article we will talk about plows for the Neva walk-behind tractor, which is popular in our country, which is widely used when cultivating small plots of land.
You can install the plow for this walk-behind tractor yourself
“Squeezing out” maximum efficiency
Correctly setting up the plow does not cause any difficulties. However, it is better to read the instructions supplied with the device. Adjustment of the walk-behind tractor plow is carried out with ordinary wrenches. The main thing is to correctly set the angle and inclination of this tool.
Plowing a site using a walk-behind tractor can only be done with lugs, which can be installed instead of wheels. If this is not done, the wheels of the mini-tractor will slip. The replacement procedure is simple. You just need to remove the wheels along with the hubs, and in their place install the lug hubs, and then the devices themselves. They greatly facilitate the process of tillage. If you do not have experience and knowledge, then it is better not to make these devices yourself. Since the cost is low, it is better to purchase them in a specialized store.
Reversible plow
The material for the manufacture of this type of device is durable structural steel, since the use of this device involves high loads on it. The soil cutters of the reversible plow for the walk-behind tractor are multi-directional, so that after completing the furrow it is enough to turn the unit around and continue working without having to return to the beginning, as is the case with a single-furrow plow. The ploughshare and heel have a universal shape, which allows this equipment to be used on any soil, including heavy soil.
Important! The presence of two multi-directional plowshares in the design not only allows you to work in both directions, but also to use the device when harvesting potatoes and other root crops.
Plow structural elements
Making your own manual plow is not a problem today. Moreover, there are many drawings of a wide variety of designs on the Internet.
So, to make a tool for plowing the land you will need the following:
- pipe handle - 2 pcs;
- fixing the stand with an M 10 screw;
- frame;
- mounting fork of the hinge to the frame;
- plow;
- wheel;
- drawbar;
- nylon bushing for bearing;
- hinged axle made of M 10 bolt;
- jumper between handles;
- axis;
- lock-nut;
- spacer washer;
- tee;
- handle for drawbar.
The main thing to be guided by when making a plow is strict adherence to the instructions and adherence to the parameters of the selected drawing. Even a small detail that seems at first glance can have a significant impact on the characteristics of the weapon or subsequently negatively affect its operating parameters.
Assembly
The first is the frame, which can be made of a metal pipe with a cross-section of 40×52 mm and a wall thickness of about 7 mm. To form the fork, the wide walls of the frame are cut off, which are located opposite each other. Then the middle is marked on the frame, where the transverse beam will be installed and the rack-eyes to which the drawbar is attached will be welded. At the beginning of the fork (in the front of the frame) there is a hole that is welded tightly to prevent dirt from entering.
Rack Mount
To secure the plow stand in the wide part of the pipe used to create the frame, 16x31 mm holes are drilled or cut out on both sides. Through holes Ø10.2 mm are also made in the narrow walls of the frame for attaching the handle using M 10 bolts. The handles are made separately from pipe approximately half an inch in diameter. You can use an old water pipe for this purpose, which is flattened on both sides with a sledgehammer. Holes Ø10.2 mm are drilled in the resulting planes and bolted to the frame. For greater rigidity, a crossbar is welded between the handles.
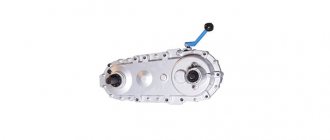
Plow hitch
The hitch is an important element that ensures reliable fastening of the mounted plow to the Neva. The most popular is the U-shaped channel mount, installed under the steering wheel of a walk-behind tractor. When creating the hitch, holes are drilled to attach the mounting pin and bracket. The mounting bracket is located at the top or bottom so that it does not interfere with hanging.
Manufacturing and fastening of working elements
The main elements of a single-hull design are a plowshare and a blade. To make them, you need durable sheet steel 3-5 mm thick. The first is to make a ploughshare, for which an old circular saw blade made of high-strength steel is used. To sharpen the cutting edge of the ploughshare, it is beaten on an anvil. Next, a dump is made from a metal pipe Ø50−60 cm and a wall thickness of about 5 mm. A template is made from cardboard or thick paper, which is applied to the metal and outlined with chalk. Along the resulting lines, a workpiece is cut out using gas welding, which is brought to the required size with a grinder or a hammer and emery.
Final stage
After creating all the metal parts of the plow, the final assembly requires a 50x50 cm metal sheet, as well as an electric welding machine. The elements of the future plow are lightly welded to the sheet, with strict adherence to the angles: the side shield and the ploughshare, to which the blade is fitted. If there are inconsistencies, the blade is brought to the required condition using a hammer and welded to the back of the ploughshare.
If no defects are noticed during inspection, you can proceed to major welding. The metal sheet on which the assembly was carried out is disconnected from the structure with a “grinder” or a hammer and chisel. Next, the weld seams are carefully cleaned, and the plowshare and blade are polished with sandpaper. When the structure is assembled and almost ready for use, it is painted, especially the welded joints. This will add aesthetics and protect the metal from corrosion, which means it will significantly extend the service life of the product.
Since making a plow for a walk-behind tractor with your own hands is not very easy, at least minimal experience with plumbing tools is required. During manufacturing, it is imperative to adhere to the working drawing and all required instructions. Let us add that making a plow yourself will save money, because most of the materials can be found on the farm.
How to choose the right plow for the Neva walk-behind tractor
A plow for the Neva is a device necessary for plowing hard soil. It is made of high-strength steel, since increased load is expected on this equipment. Before we look at how to install and adjust this attachment on the Neva walk-behind tractor, let’s look at how to choose equipment for your unit. The fact is that there are different types of plows:
- rotary - in the design of which there are several operating blades, and processing is carried out only in one direction, which requires the need to return to the place from which work began;
- reversible - the design is made in the shape of a feather, which allows you to easily and quickly plow compacted and hard soil, as well as continue working at the end of the furrow, just by turning the device in the opposite direction;
- single-body - a simplified version, the design of which includes only one ploughshare, which allows cultivating soil on light soil.
In addition to those listed, there is another type of device - the Zykov plow. It is notable for its design, which has a support wheel, a ploughshare and a blade, thanks to which the soil can not only be loosened, but also turned over. The device also has a rotating mechanism.
In this video you will learn how to use a plow on a Neva :
What varieties are there?
Manufacturers offer the following types of agricultural equipment:
- Negotiable. Significantly reduces operating costs. Design features eliminate unnecessary operations. Each subsequent passage through the area is carried out close to the previous furrow.
- Rotary. The main difference is that its rotating working part is connected to the power take-off shaft.
- Turning. It is considered universal, since the work involves two cutting parts, which at the end of the furrow can be turned in the opposite direction.
- Disc plow for walk-behind tractor. The product is equipped with two discs for plowing a personal plot.
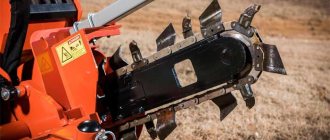
- Rotary. Its main working body is the milling cutter. It penetrates deep into the soil, grinds it up and throws it aside. The cutter can be moved from one plane to another.
- Double-hulled. The main advantage is the significantly greater width of the furrow. Its appearance consists of connected frames. Such a plow is secured to the walk-behind tractor using special threaded connecting elements.
- Universal plow for walk-behind tractor. All that remains is to calculate which one penetrates the soil better and to what depth.
Those who do not want to spend money and are familiar with plumbing can quickly make a plow for a walk-behind tractor with their own hands. The shape of this agricultural tool is not particularly important. Its task is to penetrate the earth and turn its deep layers 180 degrees. To simultaneously loosen the soil, new blade shapes, angles and cutting part sizes are being developed.
Today, the rotary plow is quite in demand. The rotary design provides for the division of this tool into four types:
- screw;
- drum;
- scapular;
- lobed.
Zykov's plow is especially popular. It looks more unusual than similar devices. Tips on its proper operation can be read on the forums. The modernization of the product never ends, which is why more and more new designs appear, and their traction devices are walk-behind tractors.
Attachments do not end with the products in question. There are other attachments. These are hillers, potato planters and potato diggers, mowers, harrows, grousers, etc. The main thing to remember is that a good plow should penetrate the soil easily and deeply. A properly adjusted tool always produces effective results. If it is properly adjusted, then the result will be appropriate.
Installation and adjustment
At first glance, it may seem that to use attachments, it is enough to attach it to the unit and start working. In fact, to get the most out of the device, it is necessary to adjust the plow on the walk-behind tractor. This is not so difficult to do, just follow the tips below:
- After transporting the walk-behind tractor to the site where work will be carried out, it is recommended to replace the wheels with ground hooks. You can make this task easier by placing a stand under the hitch. The lugs are secured in such a way that the narrowing of the tread is located in the direction of movement of the unit.
- It is necessary to secure the plow to the walk-behind tractor. To do this, you need to remove the adjusting screw from the hitch and install the plow. Using special holes located on the stand, adjust the depth of cutting the furrows. This is necessary because if the plowing depth is too shallow, the root systems of weeds will remain below the surface of the earth and will require extra effort to remove them. If the plowing depth is too great, the fertile layer will mix with the lower layer of soil, as a result of which the plants will not receive enough nutrients from the soil. For this reason, the furrow depth should be medium. This is achieved by adjusting the bolts up and down.
- Adjust the plow installed on the unit - place the heel of the plow parallel to the ground surface and secure it with an adjusting bolt. In this case, the steering mechanism must be located in the center of the adjusting bolt. The plow board on the motorized cultivator must be positioned so that it is parallel to the furrow.
As we can see, a plow is not at all difficult. It is important not to neglect this so that all work performed does not require additional effort and is carried out easily and efficiently.
Sources:
https://pro-motobloky.ru/motobloki/neva/navesnoe-oborudovanie/plug.html https://moymotoblok.ru/rabota/regulirovka-i-nastrojka-pluga-na-motobloke/ https://vsemotobloki.com /motobloki/neva/plug-dlja.html
Installation of plowing attachment
There is nothing difficult to install. To do this you will need:
- secure the plow to the coupling device without overtightening the nuts. This is done so that in the future it would be possible to adjust the parameters of the plow;
- the hitch should be secured together with the plow to the shackle with two fastening pins.
This completes the installation and you should move on to the next stage - adjustment.
Adjustment is a very important stage, since the quality of plowing and the amount of effort expended depends on it. If the adjustment is incorrect, the walk-behind tractor will not be able to do its job efficiently and a lot of time will be wasted on simple tasks.