Types of protractors
- Semicircular (180 degrees) are the simplest and most ancient protractors.
- Circular (360 degrees).
- Geodesics, which come in two types: TG-A - for constructing and measuring angles on plans and maps; TG-B - for drawing points on a drawing basis at known angles and distances. The division value of the goniometric scale is 0.5°, the rectilinear scale is 1 millimeter.
- Improved types of protractors, which are necessary for more accurate constructions and measurements. For example, there are special protractors with a transparent ruler with a goniometric vernier, which rotates around the center.
How to make malka
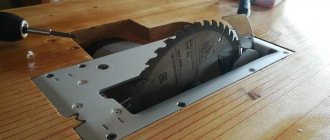
Malka is very easy to make. I remember one time I forgot my fry. There were scraps of door panels 10 mm thick left at work. I cut two strips 300 mm long and 40 mm wide.
Using a jigsaw, I rounded one side on both parts to a radius of 20mm.
I placed both parts of the malka next to each other. I drilled a hole with a diameter of 2 mm. at the center of the radius. I tightened the most ordinary wood screw. The malka was made in ten minutes.
Of course, this small thing was temporary. But we all know that there is nothing more permanent than temporary. This little one helped us out for a long time. Of course the hole can be drilled larger. Connect the parts of the bait with a bolt, recessing the head. Instead of a nut, use a convenient wing. Then the malka will become a full-fledged tool.
Before plastering, the window is covered with film. The corner of the window frame is covered with masking tape and covered with a strip of adhesive tape (adhesive tape is protection against water and solution splashes) to allow the stop to slide over the corner. A film is glued along the edge of the tape. For plastering side window slopes, rules are established for stopping the surface. The rules are established vertically according to a plumb line or level. At one angle inside the slope, taking into account the thickness of the tiles and glue - cement (distance to the hinges and window sash).
How to use a goniometer?
Using a small scale, you can measure an angle from 0 to 180 degrees. This is done as follows:
- To get started, you need to select the angle that you are going to measure.
- The device is fixed with a thumbwheel in the desired position.
- The obtained data can be transferred to a part or paper by simply applying a protractor to it and making marks with a pencil.
- After this, you can cut the part.
This method of working allows you to transfer data to a wooden object much faster and cut it evenly at the desired angle.
Paper ball decoration
The garland can be hung in any position - both horizontal and vertical
To make a garland you will need:
- colored paper;
- compass;
- scissors;
- glue;
- needle with thread.
Work order:
- Draw circles on a piece of paper using a compass.
- Cut out and bend the resulting piece in the middle.
The color design of the garland depends only on the imagination of the master
Connected paper circles are strung on a thread
If you glue a rectangle to each figure from below, you will get baskets with balloons. Then, in the interval between them, you can string clouds cut out of paper onto a garland.
Varieties
At a distance, different types of models allow you to calculate the angles of parts and structures relative to each other. For example, there is a metalworker's mechanical protractor, as well as its carpenter's analogue. They differ in materials of manufacture, strength and durability. Mechanical modifications, as a rule, are more durable and more resistant to external influences. There are also design differences.
The most common design is the optical type. This is an example of the above system of two rulers connected by a single hinge. A more developed example of a protractor is a vernier. In this form, mechanical carpentry angle gauges are usually produced, designed not so much for physical resistance to loads, but for a wide range of tasks performed. The vernier is a half-disk, the surface of which is also marked. This element is attached to the base of the protractor and acts as its auxiliary tool. With its help, for example, you can mark on a plane, as well as measure external and internal angles.
Corrugated lantern-ball
If you want to make a spherical lamp, you need to additionally press its upper and lower edges with an accordion, and then glue them together. In this case, we leave a hole for the lighting element, which we then insert into the structure. Your imagination will tell you how to make a paper lantern with your own hands and decorate it. You can glue an applique of traditional Japanese floral patterns on top. Decorating the interior with such lanterns will create a real oriental atmosphere in the room. If the product is planned to be used as a design element, then you can coat it on top with colorless varnish. You need to apply it layer by layer, allowing it to dry completely each time.
Tool structure
Most often, a goniometer is used in carpentry, but it can also be found in other areas of repair and interior decoration. Externally, the device is similar to a mechanic's test square, but the small tool has a moving part, thanks to which you can conveniently take readings.
The tool in question has the following components:
- Block with slot. This is the main part of the protractor, which allows you to find out the inclination of the angle.
- Movable pen. It is threaded through a groove in the block: this saves space and makes the device more convenient to use.
- A wing that serves to secure the tool.
You can find both metal and wooden devices on sale. The wooden version is safer for surfaces and does not leave scratches.
We make slopes without problems
Most often, a goniometer is used when constructing window and door slopes. Using this tool, you can achieve not only even corners, but also properly plaster the surface.
It is important that the corners have the correct angle of dawn and are symmetrical relative to each other. It is almost impossible to achieve this by eye: the difference between the slopes is immediately noticeable.
How to get even slope angles? First of all, you need to prepare the walls for work. To do this, they are plastered, removing all visible irregularities. Areas of future slopes are cleaned of dirt and dust and primed. If there are traces of polyurethane foam on the window, its protruding parts are cut off.
Then you need to choose the right sunrise angle. To do this, you need to decide at what angle the plaster will be applied. This can be done using a goniometer. Its block must be placed on the edge of the window frame. The angle is determined using a pen; this is done from the side of the walls. After this, the result is recorded, and the remaining angles are checked with a small tool. If there is a discrepancy, another indicator is selected on the device, or excess plaster is knocked out.
In order for the slopes to become identical, their angles need to be aligned. Plasterers usually don't level the plaster near windows and it looks ragged. Before starting work, it is necessary to align these corners. To do this, you can install a leveled rail on the wall. Then the desired angle is set and the solution is applied at this angle.
Before plaster is applied to the slopes, it is necessary to secure the slats to the walls. This can be done using nails or self-tapping screws, depending on what material the walls are made of. After the slats are removed, the holes formed by the fastenings can be filled with putty.
The mixture must be applied in excess to the slope. To ensure that the plaster does not fall off and lies flat, it is applied at an angle; you need to act from the center to the corner. A goniometer will be needed to remove excess plaster from the slopes. Using the same tool, the corner is given the desired direction: to do this, the block must be moved to the window frame. You need to run the block along the frame, directing it from top to bottom. Using a pen, the goniometer leveles the surface and removes excess plaster from it. Sometimes pits appear during the work process. Getting rid of them is not difficult: just put more mixture on the recess. Excess amount can also be removed with malt.
The final stage of slope removal is finishing. For slopes, the normal thickness of the plaster layer is 5 mm. If an inexperienced master worked, the layer may be much thicker. In this situation, you usually want to immediately level the slope, but there is no need to rush into this, since the plaster solution has a large mass and falls off if handled carelessly . In order to avoid having to do all the work again and correct mistakes, it is better to give the plaster the opportunity to set a little in the form that it already exists.
Scheme
- Let's prepare a sheet of paper. It would be great if it was special thick paper, but regular paper would also work;
- Fold the sheet in half lengthwise and cut off half - it will not be useful;
- Fold the remaining piece in half again, then unfold it back;
- Fold the edges towards the center, where the fold line was, smooth it out;
- We bend the resulting narrow strip;
- Fold the end on the fold side into a triangle, pressing the corners to the middle;
- We unfold the workpiece entirely, without straightening one side. Look closely and you will see that the fold lines have formed a diamond shape;
- Make its edges clearer by running your fingernail along them from the outside of the workpiece;
- Turn the paper over vertically so that the folded side is on the right. Connect the top and bottom corners of the diamond to form a triangle;
- If you did everything correctly, you should have a part that bends at a right angle;
- We bend the outer half of the right half, then do the same with the inner edge of the left part and tuck it into the resulting pocket;
- In order for our product to fly better, we are upgrading the blades. We bend the corners of both. We unfold the edge of the first of them, bend the corners towards the center;
- We completely unfold the right corner and bend it inward with a triangle. We unfold the left corner and insert it into the resulting gap. We do the same with the other blade;
- Our flying boomerang is ready.
If you have any difficulties folding, try to track the correct execution of the steps according to the diagram.
DIY cardboard thermometer
The period of senior preschool and primary school age is a favorable time for the formation of ideas about measurement. Children aged 5 to 8 years old learn about the purpose of various measuring instruments and devices (ruler, protractor, clock, scales, thermometer), actively master the techniques of making various measurements, and consciously use concepts denoting units of measurement. Sometimes it is difficult to explain the principle of operation of a particular device, so models that help the child understand how the measuring device works come to the aid of parents and teachers.
We will tell you step by step how to make a thermometer out of cardboard. Such a paper thermometer can be used in classes on familiarization with the environment in kindergarten or in mathematics and natural history lessons in primary school when keeping a weather calendar. You can also hang a hand-made cardboard thermometer on the wall in a child’s room. Thanks to the model, it will be easier for the child to understand what zero is, what negative and positive numbers mean, and to establish a connection between the instrument readings and changes in nature or in bodily sensations.
- light cardboard or semi-cardboard;
- thick threads of red and white;
- needle with a large eye;
- ruler,
- automatic pen or bright felt-tip pen;
- pencil.
- Cut out a strip of cardboard measuring 12x5 cm.
We mark the scale with a pencil from – 35 degrees to +35 degrees Celsius, then trace it with a pen or felt-tip pen. If you have a printer, you can download an image of the scale from the Internet or create it yourself, and then print it on paper and stick the printout onto cardboard for durability. This model will be more aesthetically pleasing.
We tie the ends of the red and white threads together.
After explaining to your child how the device that measures air temperature works, you can play with him a game with moving a two-color thread, “What happens?” The red indicator is at the minus mark - the child can list what is happening in nature: “It’s cold outside, it’s snowing, the puddles are covered with ice, people are wearing warm jackets, hats, mittens,” etc. If the temperature is above zero, the child remembers what happens in nature when it is warm.
For children's role-playing games "Home" and "Hospital", you can make a medical thermometer from cardboard with your own hands.
How to make a thermometer from cardboard?
- On cardboard we draw a shape similar to the shape of a medical thermometer for measuring body temperature. We draw a scale with the corresponding temperature indicators.
In the lower indicator of 35 degrees, insert a red thread, in the upper indicator of 42 degrees, insert a white thread. We also fasten the threads together and cut off the excess.
- When the model of the medical thermometer is ready, it would be good to explain to the child what body temperature is in healthy people, what is in sick people, what “increased”, “high” and “low” temperature means. Now you can measure the temperature of all “sick” dolls, and also use a thermometer in games with girlfriends. Who knows, maybe in the future your little one will want to be a medical worker thanks to children's games?!
It is very good to make such models, which promote the mental development of a child, by involving the children themselves in the production. Crafts made with one’s own hands especially delight little craftsmen and encourage them to treat the object world more responsibly and carefully.
Master class on making crafts “Eternal Flame”
Before you begin, prepare the following materials and tools:
- large sheet of cardboard;
- sheets of thick paper;
- corrugated paper or napkins in red and orange colors;
- scissors;
- gouache and brush;
- PVA glue (you can use a glue gun);
- ruler;
- compass;
- protractor;
- a simple pencil and eraser;
- Double-sided tape.
If you work on making crafts with your children, it would be a good idea to remind your kids about safety precautions when working with scissors and glue.
Making a star model
You can make a star out of paper in different ways. Choose for yourself the most suitable method for making a paper five-pointed base:
1. Paper three-dimensional star with separately made rays
You will need 5 paper (cardboard) squares. Fold the square piece in half, and then move the top corner up. Next, fold the part according to the diagram:
Trim the excess paper with scissors at an acute angle. Make 5 pieces in the same way and then glue them together. For convenience, you can glue bulky blanks onto a round cardboard base.