Lawn mowers are a convenient technique that allows you to maintain the grass in a well-groomed condition in your dacha, garden, or park. Thanks to their use, lawns acquire an attractive appearance with minimal labor and time. Gasoline and electric devices are becoming popular, pushing mechanical models of mowers into the background.
With proper operation, the equipment can operate for more than one year without breakdowns. But over time, parts wear out or an unexpected accident may occur, causing the unit to fail. If the equipment is not under warranty, then it is not necessary to contact the service center for help from specialists. Repair and maintenance of lawn mowers can be done at home. This is due to the fact that many faults are not serious breakdowns; they can be quite easily fixed on your own.
Basic malfunctions of electric and gasoline lawn mowers
Despite the variety of models and manufacturers of lawn mowers, gasoline and electric equipment have similar design components. The difference lies in the types of engines installed and the associated performance systems. Equipment malfunctions are conventionally divided into 2 groups:
- mechanical;
- connected to the drive part.
Failures of the mechanical part of models with gasoline and electric motors are almost the same, but failure of the drive part of the lawn mower can be caused by problems with various parts.
Breakdown of the starter and gearbox
The gearbox transmits torque from the motor shaft to the cutting tool; during operation, its gears must be absolutely clean and always lubricated with a special lubricant.
A starter is necessary to bring the trimmer into working condition; its diagnosis consists of checking the tension of the cord engaged with the teeth of the starter coil, which are often destroyed during a sudden start.
A non-working starter in a lawn mower cannot be repaired; it must be replaced with a working unit as part of a mandatory technical inspection or a set of repair measures.
The cutting elements require special attention and care; they must always be cleaned of dirt and mown grass after use. Regular inspection and thorough preparation of the device for operation will help you avoid expensive and time-consuming repairs, and always be confident in the functionality of the lawn mower.
Source
Mechanical problems
The mechanical system of lawn mowers with different drives consists of the following structural elements and components:
- knife (rotary or cylindrical type) or fishing line;
- transmission mechanism;
- grass catcher and grass ejection device;
- wheels, handles and housing.
Failure of the cutting element
Most often, knives are damaged (for example, bent) or dulled, and the fishing line runs out. This is easily revealed by a simple visual inspection.
The fact that the cutting attachments have become dull is indicated by uneven cutting of grass stems when mowing with a lawn mower.
Over time, the blades may become loose. Their balancing during rotation is disrupted, and vibration, whistling, and rattling appear. If the knives are damaged, then during operation the mechanism will also begin to make uncontrollable, sudden, sharp movements. To troubleshoot this type of problem, the cutting elements are adjusted to the desired position, replaced with new ones or repaired. If possible, the blades are sharpened again.
Sounds and vibration during operation
Uncharacteristic sounds, vibration, and rattling appear during operation of the unit when the fastenings of its structural elements are loosened: the housing, the engine. These phenomena are more common in gasoline models because their engine oscillates more during operation than an electric motor. To eliminate these phenomena, check all connections, tightening the bolts if necessary. It happens that a whistle during operation of the unit occurs due to a foreign object getting inside, which blocks the roller in the aerator. In this case, you just need to take it out so that the sound stops.
Cutting attachments do not rotate
Often, when mowing tall grass or tough grass, the cutting attachments stop rotating due to being clogged with grass. In most cases, this problem (if it does not lead to more significant negative consequences) can be easily solved with your own hands, simply by picking out the plant stems with a stick.
Breakage of structural parts
Damage to the wheels, handle and body is rare. If they are significant, then these structural elements change. Repair methods, if possible, in each case depend on the material of the broken parts - they can be plastic, aluminum, steel.
Belt break
With prolonged use of the mower, the belt wears out, stretches, and then breaks. In this case, the gasoline engine of the device runs, but the knives do not rotate. In self-propelled models, the wheel drive belt can also break: then they stop and do not move. Sometimes the clutch cable simply becomes stretched and needs to be adjusted.
The most common breakdowns
Any equipment fails sooner or later. It is important to know how to repair mowers, because not in all cases you need to contact a service center.
The mower does not cut the grass
Simple sharpening devices can be purchased in stores. Before installing them, it is necessary to disconnect the mower from the mains and adjust the cylinder positions in such a way as to highlight the maximum cutting gap.
In cylinder mowers, the gap between the blade and the cylinder should be less than the thickness of a sheet of paper . Some of the most modern models have built-in knurled adjusters. In other cases, you will have to use wrenches and screwdrivers to make the necessary adjustments. Make sure the gap is uniform along the entire length of the cylinder. To check the adjustment, insert a piece of paper between the cylinder and the blade while slowly rotating the drum by hand. Make gradual adjustments on both sides until the paper begins to cut cleanly at each point on the bedknife.
The mower is difficult to move
The device won't turn on at all
Long, wet grass can easily block the blades .
Unplug the plug and use a wooden object to rotate the cylinder in the opposite direction from the knife until movement becomes free. This technique cannot be used for gasoline mowers. The belt that powers cylinder lawn mowers wears out over time, stretches, and can break. Remove the belt cover and check whether a rupture has occurred or the belt has simply slipped off. Unscrew the mounting screws and move the small drive pulley up to the large cylinder pulley. Place the new belt on the small pulley and slowly rotate the large one, gradually pushing the belt onto it. Move the pulley to the side to tighten the belt, then tighten the screws.
Before installing the cover, be sure to check the belt tension - the degree of deflection should not exceed 4 mm (the indicator may vary slightly depending on the model, detailed information is contained in the user manual).
Break in cord
Each time you use it, you unroll, move, and roll the cord. This may lead to breakage of internal conductors. For many models, the cord is connected to the screw terminals, which makes it possible to quickly check it and replace it. If double insulation, a two-core cord is connected.
Other models use clamp contacts for easy replacement. Turn off the power and remove the plastic cover. When unscrewing the clamping bar, pay attention to the connection of the cord to the switch to maintain the polarity of the connection (wire color).
To disconnect the cord, insert an Allen wrench into each of the holes that house the conductors to release the clamp and conductor. Check where the gap occurred.
If necessary, connect a new cord: twist together all the individual wires of each core, then insert the twisted ends into the appropriate terminals. Pull lightly to check connection. Then reinstall the clamp bar, cord grommet, and switch cover.
Source
Frequent drive system problems
The drive part in electric and gasoline-powered mechanisms is designed differently. In this case, the engine is its main element. Motor-related breakdowns are accompanied by the following problems:
- the lawn mower stops starting;
- after startup, the equipment stalls almost immediately;
- during operation, engine power does not fully develop;
- the appearance of excessive vibrations during operation.
As a result of a collision with a stone, stump or other solid obstacle, the shaft on which the knife is mounted, as well as the associated components, may be damaged. Then more radical repairs will be needed.
In most cases, you will need to contact a service center for help.
Gasoline lawn mowers are equipped with two-stroke or four-stroke internal combustion engines of different designs. For this reason, problems with the motor can be caused by the breakdown of identical parts or different ones. Regardless of the manufacturer, repairs to lawn mowers with the same type of installed drive are carried out in the same way.
Lawn mower repair
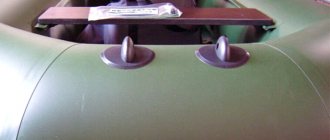
I encountered a partially faulty AL-KO electric lawn mower. When turned on, it worked properly, but as soon as it encountered a small bump or unevenness, it turned off. When I turned it on again, the situation repeated itself. Moreover, the longer the lawn mower worked, the more often it turned off.
Upon inspection, it turned out that to increase the safety of operating the lawn mower, the switch was made with protection. To turn on the lawn mower, you first need to press the button and then pull the red lever to the metal pipe-handle and hold it while cutting the grass. Judging by all the signs, the fault was in the switch assembly.
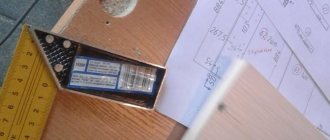
Since it is difficult to carry out high-quality repairs in the field, I decided to remove the switch assembly and figure out the reason for the unstable operation in a workshop. To do this, it was enough to unscrew two screws.
A cable ran from the switch assembly into the mower body. An attempt to disassemble the switch assembly to disconnect it from the cable was unsuccessful. The head of the self-tapping screw had a triangular slot, providing only for its tightening. It is impossible to unscrew it with such a standard screwdriver.
Motor Diagnostic Tools
To identify problems with lawn mowers with different types of drive and eliminate them, you will need the following devices and tools:
- indicator screwdriver;
- multimeter or tester with voltage indication;
- screwdrivers;
- open-end or hex keys (depending on the fasteners used when assembling the equipment);
- pliers;
- wire cutters;
- knife;
- hammer.
Materials may include insulating tape and parts identified during the inspection.
The causes of lawn mower engine failures are related to the following factors:
- overheating or overload of the motor;
- poor contacts or breaks in the electrical circuit (for electric models);
- disruption of fuel or oil supply (for gasoline units).
Therefore, it is necessary to periodically, based on the recommendations set out in the operating instructions, stop during operation and constantly clean the equipment of grass residues.
For internal combustion engines, use the appropriate oil and the grade of gasoline specified in the passport.
How to disassemble and reassemble a trimmer
To disassemble the trimmer yourself, prepare a set of tools:
- set of screwdrivers and wrenches;
- special puller for removing bearings;
- spark plug key;
- hammer.
Each unit of the device is disassembled separately for diagnostics.
Disassembling the electric trimmer
An electric trimmer consists of a main electrical unit and a rod. Let's look at how to disassemble to repair the electrical part:
- Place the electric scythe on a flat surface.
- Unscrew the trimmer housing fixing screws on one side.
- By removing the cover, you can diagnose, repair or replace the electric motor, drive and bearings, brush assembly, start button and other elements.
- The electric trimmer should be assembled sequentially: first install the motor by tightening the mounting screws; connect an electrical circuit; Carefully place the wires in the housing into the appropriate recesses; close the top cover and tighten the screws.
Disassembling the gas trimmer (the video instructions show the Gruntek BS 52X trimmer) for engine repair is performed as follows:
- First you need to remove the gasoline engine from the boom.
- Disconnect the starter by unscrewing the fixing bolts.
- Remove the gas tank protective cover and the tank itself.
- Unscrew the spark plug and remove the outer engine cover.
- Remove the carburetor, pipe, ignition coil and muffler from the engine.
- In order to diagnose and replace faulty engine parts, you first need to disconnect the clutch assembly. To do this, fix the combustion chamber and, using a spanner, unscrew the clutch mounting bolts.
- After the repair, reassemble the lawn mower, performing the same steps in reverse order.
What trimmer do you use at your summer cottage, and do you repair the tool yourself?
Identifying and troubleshooting problems with electric motors
To find out the reason why the electric lawn mower does not start, stops after turning on or during operation, perform the following steps in sequence.
- Check the supply voltage for compliance with the value given in the equipment passport. If it is higher or lower than normal, you will need to use a stabilizer or stop working for a while.
- Visually inspect the cord with the plug (and the fuse in it) for mechanical damage, and if any are detected, change the cable or connect it and re-insulate it.
- Then they move on to the power button: it is disconnected and checked using special tools.
- Inspect the capacitor for swelling or oxidation.
- Then they move on to checking the electric motor of the lawn mower: visually checking the presence of burnt sections of the winding or using a device to check its integrity.
After identifying a breakdown at any stage and eliminating it, the functionality of the equipment as a whole is checked. Instead of a damaged plug, a new one is definitely installed. The integrity of the power cord and the functionality of the on/off button can be easily determined using a multimeter or tester (even an indicator screwdriver).
It is recommended to go straight to checking the phase-shifting capacitor if the following signs occur in the operation of the unit:
- when voltage is applied, the electric motor jerks;
- the electric motor overheats at idle or at low load levels;
- an uncharacteristic hum emanates from the engine;
- the electric motor does not gain speed.
The failed capacitor is replaced with a new part of the appropriate capacity.
Visual signs that the electric motor has burned out are blackening of its windings, melting of their insulation, and fusion of copper. When such phenomena are present, you will need to replace the electric motor yourself or contact a professional. If there are no external signs, and the multimeter shows a break in the winding, then you will also need to change the motor.
For commutator models of electric motors, the brushes are immediately checked: they are cleaned with sandpaper or replaced.
Over many years of use of the mower, the brake pads of the electric motor may wear out. In this case, you need to disassemble the electric motor and remove the covers.
When starting to search for the causes of a breakdown, it should be borne in mind that in equipment equipped with electric motors, problems with starting and operating the motor are mainly associated with poor contacts in the electrical circuit or a violation of the integrity of the electrical wiring. Much less often, the start button, phase-shifting capacitor or electric motor fails (due to overload or overheating). A number of lawn mower models are equipped with thermal engine protection - it can be triggered, but the mechanism will not turn on. To fix the problem, just close the circuit.
All work operations with electric models of lawn mowers are recommended to be carried out with them disconnected from the network, so as not to receive an electric shock. When repairing an electric motor and its control system yourself, you need to have a basic understanding of electrical engineering in order to do the job correctly.
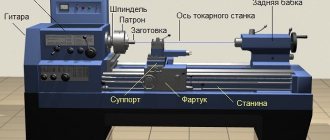
Device
For convenience, the platform itself is equipped with four wheels and a handle with elements attached to it that control the engine. It is designed to push the device forward and control the electric mower.
The wheel fastening can be rigid and swivel. In the first case, you will have to lift two wheels when turning. Rotary ones involve the use of less physical force.
In addition, they “spoil” the lawn less. Therefore, if flowers are planted on the lawn, there are swings, gazebos, etc., then it is recommended to use swivel wheels. Electric lawn mowers with such wheels are convenient for caring for areas under bushes and trees.
The engine is covered with a housing that simultaneously protects the operator working with the electric lawn mower from injury from accidental objects. The material used for its manufacture is often plastic and less often metal. As you can see, the design of an electric lawn mower is quite simple.
Causes of gasoline engine failures
Gasoline (especially four-stroke) internal combustion engines are designed to operate on areas with a slope of no more than 15 degrees. Short-term distortions of 30 degrees are allowed. At large inclinations, the motor may stall. Some mower models have a gas lever: you need to set the ignition on the lawn mower to maximum before starting work.
Repairing an internal combustion engine with your own hands is considered a more difficult task than repairing an electric motor. This is due to the greater complexity of its design. You need to know the structure of two-stroke and four-stroke engines, their design features.
When starting repair work, you should check the movement of the safety bracket (lever) cable. It may need to be adjusted.
Problems with the fuel mixture
The simplest causes of problems with a gasoline unit is the lack of fuel. Its presence is not difficult to check. You should also check the condition and level of the oil on four-stroke engine models. If it is dirty or there is little of it, then you need to fill in new fluid, draining the old one first.
During constant use of the mower, the carburetor becomes contaminated with fuel combustion products or due to the low quality of the gasoline being poured. As a result, the engine speed fluctuates. You can clean the carburetor assembly yourself. To do this, you will need to disassemble it and wash it with a special product. You can try initially blowing with air to remove blockages.
It should be remembered that the carburetor must be adjusted before installation. For the motor to work well, it must be configured correctly.
The fuel hose also becomes clogged with poor quality gasoline. When it does not arrive, the saloon is cleaned with a needle and the fuel filter is replaced. When the air filter becomes clogged, engine power decreases. In such cases, the filter element needs to be cleaned or replaced.
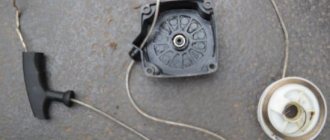
Broken starter cord
Often starting problems are caused by a broken starter cord. In its simplest form, repairing a starter involves tying a rope in a knot. In more complex situations, you will need to disassemble the entire assembly and change the cord.
Spark plug fault
If the gasoline engine does not start at all or stalls immediately, you should check the spark plug . It should produce a spark that is visible even in daylight. To do this, it is unscrewed and inspected. If there is no spark, replace the part. By the appearance of the spark plug you can diagnose a breakdown:
- if it is dry, then this indicates a problem in the fuel supply system;
- when the spark plug is wet, problems are caused by improper operation of the carburetor;
- If there is black carbon deposits on the spark plug, clean it or replace it with a new one.
Other breakdowns
A gasoline engine does not work well when the pistons are partially worn out or burnt out. For repairs, you will need to disassemble the engine and supply complete spare parts. Mechanical failures can also occur, for example, jamming of the crankshaft or piston, or cracks in the carburetor or engine housing. In such situations, you will need to install new parts.
Serious repairs of gasoline engines require professional knowledge and skills. If they are missing, then it is better to contact a specialist service center.
Problems with the carburetor and fuel system
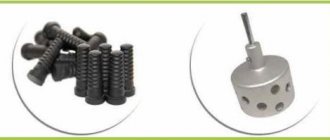
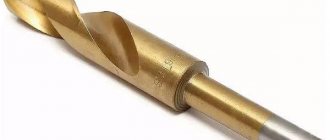
Before you start repairing the lawn mower engine, it is worth checking whether the pistons are stuck. To do this, it is necessary to dismantle the motor. We also remove the carburetor from the structure and carry out a visual inspection for possible defects. Typically, disassembly will require a special TOREX screwdriver with bits.
Combination reversible TOREX screwdriver with bits
We inspect the gaskets to identify ruptures or burnouts. If this is found, then you need to ensure the tightness of the structure by replacing them with new ones. The air damper may contain a layer of carbon deposits, which reduces the quality of the air-fuel mixture. You need to get rid of it by cleaning the carburetor by washing the unit in solvent or kerosene.
Diagnostics of the cutting part
With constant use of a lawn mower, its cutting attachment becomes dull over time. The following signs indicate this:
- the grass cover is cut unevenly;
- plants are uprooted;
- the time spent on work increases;
- fuel or electricity consumption increases.
When these phenomena occur, the cutting part must be inspected and, if necessary, removed, having previously been cleared of grass cuttings. If there are cracks in the metal or deformations that do not allow the blades to be balanced, then the cutting attachment must be replaced. When the wear of parts is insignificant, the knives are sharpened. It can be done relatively easily at home with your own hands.
To remove a rotary or cylindrical type knife, and then sharpen it or install a new one, perform the following preparatory measures:
- drain the oil;
- electric lawn mowers are disconnected from the power supply, and on gasoline units a button is pressed to block their activation;
- gasoline-powered units are drained of fuel or completely exhausted, and the spark plug is unscrewed;
- Place the mechanism on supports, allowing free access to the cutting attachment.
The latter is only necessary if the tool has an internal combustion engine. You can also tilt this equipment towards the handles by first removing the grass catcher from it. Models with an electric motor can be repaired in any convenient position.
If there are no special means to block the shaft, then this must be done in another suitable way.
Before working, it is recommended to wear thick gloves to protect your hands from possible cuts from the blades.
You can adjust the carburetor of a lawn mower yourself
The carburetor from a lawn mower is a component in the power system. In it, like any carburetors, the process of mixing air and fuel (gasoline) takes place for further supply to the engine cylinders.
In this process, the main thing is the correct proportion of fuel and air, for which the carburetor is adjusted.
Removing and installing the knife
Rotary-type cutting attachments on most models are attached to the drive shaft with a bolt. It is located in the center of the part. Replacing the blade on a lawn mower in this case is done as follows:
- if there are grass fragments, remove them with a broom or brush;
- unscrew the fastening bolt with a wrench of a suitable size (usually number 19);
- place the knife (the same length as the one removed) in the correct position, tightening the fastening bolt with a wrench with the force required according to the instructions;
- check the uniform rotation of the nozzle by turning it by hand: the distance from the deck should always be the same;
- Place the unit in working position.
When a bolt cannot be unscrewed with a wrench, you can lightly tap it with a hammer. If this does not help, then you should pour kerosene or brake fluid on the fasteners. Use extra levers with a wrench with caution because the top of the bolt can be stripped. Heating the fastener will also help it unwind.
There are rotary type knives with two short attachments. In this case, the replacement work is performed in a similar way. You can change the cylindrical knife using the same scheme. The difference lies in the design features of fastening the nozzle of this type.
You need to remove the cutting attachment carefully so as not to lose parts. At the same time, you should remember its position so that the new blades are installed correctly.
Breakdown of the starter and gearbox
The gearbox transmits torque from the motor shaft to the cutting tool; during operation, its gears must be absolutely clean and always lubricated with a special lubricant.
A starter is necessary to bring the trimmer into working condition; its diagnosis consists of checking the tension of the cord engaged with the teeth of the starter coil, which are often destroyed during a sudden start.
A non-working starter in a lawn mower cannot be repaired; it must be replaced with a working unit as part of a mandatory technical inspection or a set of repair measures.
The cutting elements require special attention and care; they must always be cleaned of dirt and mown grass after use. Regular inspection and thorough preparation of the device for operation will help you avoid expensive and time-consuming repairs, and always be confident in the functionality of the lawn mower.
Sharpening blades at home
You can sharpen lawn mower blades yourself using the following tools and devices:
- Bulgarians;
- grinding machine;
- file;
- sandpaper;
- whetstone (bar) or abrasive stone.
You should wear gloves before sharpening. If the work will be performed on a sharpening machine or using an angle grinder, then you need to use a mask or goggles to protect your eyes from abrasive or metal particles.
Before sharpening a knife, it is inspected for deformations and the degree of wear. Existing bends are leveled on an anvil or a piece of rail with a hammer.
When working on a sharpening machine, the cutting attachment is brought to a rotating circle and the blade is leaned against the sandpaper at a certain angle. To level the edge, a coarse-grained circle is initially placed. Finishing and grinding are performed on a fine-grained wheel. If possible, grind the part with a felt wheel - it is intended for polishing. Some machines are equipped with devices that allow you to secure the parts being processed - this makes the sharpening process easier.
It is recommended to sharpen knife blades using hand tools or a grinder, after first clamping the attachment in a bench vice. If the cutting edge of the working nozzle is severely damaged, it can be cut off, but only on both sides at once. In all cases, strong efforts should not be made. As a result, the blades should be sharpened at an angle of 30 degrees.
After turning, check the blades for balancing. To do this, insert, for example, a screwdriver into the bolt hole. Then they raise it to a vertical position: the knife should remain in the horizontal plane. When imbalance occurs, the imbalance must be restored. This is done by simply grinding off the metal from the heavier (overweight) side of the nozzle. Removal of layers of material is carried out little by little, checking balance.
How to make the adjustment correctly
Before you start adjusting the trimmer carburetor, you must do the following:
It is also necessary to install a cord of a suitable diameter in the trimmer reel or install knives - this is done so that during the tuning process the engine has at least some load. After installing the cutting tool and starting the gasoline engine, let it warm up for 10 minutes.
If at idle engine speed you notice that the cutting tool is rotating, then you need to reduce engine speed. This is done using the lower idle speed control, often marked with the letter “T”. The picture below shows the placement of the controls on a Husqvarna trimmer.
But, for example, on a Stihl trimmer this screw may be marked “LA”.
So, turn the idle speed control to the left until the trimmer head comes to a complete stop.
To adjust the carburetor, 3 regulators (screws) are used.
Important! If the engine is allowed to operate at full speed for more than 10 seconds, it may fail.
To eliminate this nuisance, adjustment will be required. With the engine running, give full throttle, then turn the “H” control to the right until the speed begins to decrease. After this, the “H” regulator must be slowly turned to the left until you hear uneven engine operation. Then turn the “H” control to the right until you hear the motor running smoothly.
Replacing fishing line in a lawn mower
In addition to knives, a fishing line can be installed on the lawn mower. This attachment is a reel on which a nylon thread is wound. Reels installed on mowers come in two varieties:
- with 1 antenna;
- with two protruding ends of a nylon thread.
The structure of the nozzle is simple: the reel has two sections, between them there is a partition in which there is a recess. The thread is wound on these tracks. Special holes are provided for its removal from the coil.
Different models of lawn mowers use cutting attachments with different line thicknesses. This parameter lies in the range of 1.2-4 mm.
In addition, polyethylene thread differs in the shape of its cross-section. This determines the area of use (purpose) of the material. According to these criteria, fishing line can be of various types:
- round, which is the most durable variety used for mowing grass;
- curly, used for mowing plants with soft stems;
- twisted, suitable only for thin grass.
There is a professional type cord. But this type is not suitable for use on all equipment models.
The nozzle itself is rarely damaged, it only wears out and the nylon thread runs out. To resume work, you need to rewind the fishing line. It is worth buying a cutting thread suitable for the reel installed on the lawn mower.
Procedure for replacing line in a reel with one tendril
To change the line on a reel with one tendril extended, proceed as follows:
- turn off the lawn mower, while disconnecting the electric one from the network;
- remove the cutting attachment, having previously stopped the shaft from turning, for example, using a screwdriver;
- disassemble the case, usually removing its cover by pressing the latches;
- carefully lay out all the parts;
- cut off from two to four meters of fishing line with the diameter specified in the instructions for the nozzle used;
- fold the piece in half to divide it into two equal pieces;
- one end of the cord is threaded into the eye located inside the reel;
- wind the thread counterclockwise (in the direction opposite to the rotation of the nozzle during operation);
- leave a small end of the thread, which is exposed through the hole, having first secured it in a special groove so that it does not unwind;
- assemble the coil;
- install the attachment on the lawn mower.
When a cutting attachment with automatic or semi-automatic cord feeding is installed, there is a spring inside it. Therefore, when disassembling the case, it is necessary to ensure that it does not fly out or get lost.
The groove securing the fishing line may be missing. In this case, hold it with your hand while assembling the nozzle so that it does not unwind.
Replacing line in other types of reels
To properly wind the fishing line into a reel with two protruding ends of the cord, it is necessary to disassemble it. There are two recesses inside. In this case, the ends of the fishing line are laid out separately along these grooves. Winding is also performed in the direction opposite to the rotation of the nozzle.
There are coil models that have a different design. In such cases, it is often not necessary to disassemble the nozzle to insert the cord. The thread is inserted into a special through eye located inside the spool. The line is reeled in by pressing a button. It is located directly on the body of the cutting attachment and is designed so that when the cord wears out, new ends can be released without disassembling the reels.
It is recommended to carry out work on replacing fishing line on gasoline mowers with the power lock button pressed.
Before winding the fishing line, you can pre-soak it briefly in water - this will increase the strength and elasticity of the inserted thread. It is prohibited to wind metal cables. The cord must correspond to the diameter specified in the instructions.
You should begin repairing lawn mowers only after first reading the operating instructions. It discusses the design of the model and the rules for its use. To minimize the likelihood of breakdowns, it is necessary to comply with the requirements for regular maintenance. You need to use only high-quality fuels and lubricants.
Before you start mowing the grass, it is recommended to inspect the pre-processed area for stones, stumps and other obstacles. This will help avoid accidental collisions and unexpected accidents. It should also be taken into account that it is recommended to work with a lawn mower on dry grass, because it clogs the blades and other parts of the mechanism more slowly.
Determining the causes of the malfunction
If the trimmer engine does not start or stalls immediately after starting, if the gearbox overheats or during operation of the device, extraneous noise is heard and vibration is clearly felt, it is important to carry out a visual inspection and identify the non-working unit
To optimize preparatory measures before repair, you should carry out simple diagnostics and check step by step:
- presence of fuel in the tank and lubricant in the main components;
- the serviceability of the spark plug and its performance;
- cleanliness of the brush cutter's fuel and air filters;
- clogging of the exhaust channel and breather of the device;
- quality of the fuels and lubricants used.
To determine the functional performance of the ignition of a lawn mower, you should determine whether the spark plug works by testing the appearance of a spark when it comes into contact with the body of the functional device.
The spark plug itself can be replaced with a new one by first drying the spark plug channel; if necessary, the old element is also dried, cleaned with special devices and returned to its place.