Many car owners, having the appropriate knowledge and skills, are ready to begin repairing the car engine on their own. To do this, the machine engine should be pulled out of the hood and installed back at the end of the work. It’s difficult to do this, and it’s impossible without a special lifting device . But you can find a way out of every situation. And if you have a garage, you can take advantage of the experience of many craftsmen and make a car lift for the garage with your own hands.
Choosing a design
So, you have decided to rely on your own skillful hands and make a homemade lift for your car garage , rather than purchasing it at a special equipment shopping center.
This is an understandable desire: the cost of such equipment may not be much less than the price of your car, and it will be used extremely rarely (only if you do not intend to open a service station in a garage). The idea and desire have appeared, now it’s time to select the system for the device being created. To do this, you need to focus on industrial lifts demonstrated on the special equipment market, “peek” at their design and imagine whether you can do something like that .
Most likely, the first thing you will come across is a two-post lift, which can be found in almost any auto repair shop. This type of device can be equipped with an electromechanical or electrohydraulic drive .
In the first case, inside any rack there is a threaded shaft rotated by an electric motor with a gearbox.
The threaded shaft contains a bearing nut that moves along it and, accordingly, raises and lowers the “legs” on which the car rests .
In a two-post electro-hydraulic lift, the axle is replaced by a drive, the pressure in which is generated by an electric motor. There are other types of similar systems, but with one, three or 4 racks.
Another type of lift is a scissor lift, where the platform has a system of levers (called “scissors”), rises and lowers with the support of hydraulic drives driven by electric motors.
When creating similar systems, you can encounter a large number of problems and difficulties that need to be solved. First of all, this is work safety - no one wants to get seriously injured or damaged due to a broken lift at one not very fortunate moment.
Therefore, it is necessary to select materials and the device system in such a way that it can withstand the weight of the machine with a significant reserve . It is also worth taking care of the production of locking elements that allow you to keep the car on the site in case of emergency situations with the lift. And in order to prevent the latter, you should constantly inspect them. For an electric drive, it is necessary to check the wear of the shaft thread and the bearing nut; for an electrohydraulic drive, it is necessary to monitor the integrity of the hoses and cylinders.
And the main problem faced by those who want to make a two-post or scissor lift with their own hands is the complexity of production and the high cost of the elements. At home, it is almost impossible to form a threaded shaft; selecting cylinders and hydraulic hoses is not an easy task and is not cheap.
But there is a simpler type of car lift , which turns the car on its side at an angle of 45°-60° and is called a tipper. Let's take a closer look at it and take a look at where and how it can be done.
Advantages and disadvantages
Lifting structures for garages have both pros and cons in approximately equal numbers.
Speaking about the advantages, it is worth noting the following characteristics:
- Compact size. The door leaf itself does not require additional space to open in front of the garage, unlike swing gates, for example. Additional space is needed under the ceiling, but even there it is small. As a rule, the gap allocated for the canvas does not exceed 20 cm.
- Easy assembly. Any beginner can assemble the structure, rather than mount it, without any problems. For direct installation you need to have certain skills and experience.
- Possibility to equip the gate with remote control. We are talking about both opening using a mobile remote control and controlling it with a button or remote control mounted in the wall.
- Ease of Management. Opening and closing vertical gates is much easier than horizontal structures. This is achieved through the use of a special mechanism consisting of springs and levers.
- Silence. During lifting or lowering, a properly mounted device does not make any extraneous sounds.
- High degree of protection. Some types of gates are characterized by the fact that they are almost impossible to break into. The only way to get into such a garage from the street is to cut through the canvas.
- Long service life. If the gates are not homemade, but factory-assembled, then manufacturers, as a rule, give them a ten-year guarantee of uninterrupted service.
- Ease of care. The material used in the manufacture of the sash itself is treated with special compounds that reliably protect it from corrosion and other adverse factors. Thus, all that is required is to lubricate the mechanisms from time to time to make their operation smoother.
- Variability of use. The lifting structure can be used both outdoor and indoor. It is also suitable for installation in both single and double garages.
The disadvantages are not so numerous, however, they exist.
The following important characteristics should be taken into account:
- Limited form. Roller garage doors can only be installed in rectangular or square openings. This is due to the operating characteristics of the lifting device.
- Impossibility of repairing the canvas. If we are talking about cases where the gate leaf is made as a single leaf, and not sectional, then it will not be possible to repair any separate section of it if it breaks. It will be necessary to buy a new monolithic canvas, replacing the entire option. This feature does not apply to the mechanism responsible for the lifting process - it can be repaired.
- Difficult to install. As mentioned above, the installation itself requires certain knowledge and it is better to entrust it to professionals.
Simple lift
For several decades now, the most common and durable method of lifting a car has been turning it on its side. In fact, it is not only the engine that needs repair from time to time, but also other components that can only be reached using a test pit .
But not everyone has such a pit, and folk craftsmen have constructed an elementary, if not primitive, system. At least 3 people are required for this lift. This method can hardly be considered ideal, because not a single person wants to tempt fate by scratching a car on a concrete flooring. However, if there is no other way out, then such a lift can help you out. His system is as simple as possible, and the production method is clear even from photographs.
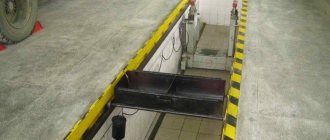
An alternative to a lift can be an inspection hole (of course, if the garage system makes it possible to dig it). If you make a hole as tall as you are, you can easily examine the bottom of the car. If it is not possible to properly equip the inspection hole, then you can limit yourself to an overpass (but it will require the presence of quite significant ceilings in the room).
Instructions:
- 1. For the base, embed metal corners into the side walls of the room so that the car hood is located just under them. Next, install a centimeter plate on the corner racks and secure it with eight “M8” bolts. It will not merge with the corners, so in the future you will be able to change its placement above the car engine.
- Fix the worm adjuster on the plate. Next, take the key, put it on the electric drive shaft, and secure it. Then make a 2 cm opening in the tile for the chain, then pass the chain through the finished hole and close it into a ring.
- Place another sprocket on the outgoing shaft, smaller this time, and combine them.
- Make 2 more holes of 3 cm in the slab, pass the chain over the key. The 2nd chain must end with a metal hook capable of supporting the weight of the motor.
How to install
In order to install a lift in the garage, you must perform the following steps:
- Prepare the surface for installation of equipment. The thickness of the concrete platform must be at least 10 cm. It is not recommended to install the device on a freshly poured concrete floor; at least 25 days must pass from the moment of pouring.
- It is prohibited to install the lift near the storage area of flammable materials and substances, as well as near the painting and washing area.
- The area around the equipment must be sufficiently illuminated.
- Before installation, it is necessary to provide for the direction of entry of the vehicle, and also correctly calculate the height of the mechanism so that it does not rest against the ceiling.
- Align the frame to the height of the equipment and secure it with fasteners.
- Insert mounting bolts into the riser holes and tighten the nuts. The length of the bolts must be at least 22 cm.
- Attach the posts to the lifting device support frame.
- Before installing the screw lift, you need to align the height of the posts.
- Before installing hydraulic equipment, it is necessary to stretch a special cable, put on all the chains and check their tension.
- After installing the frame, connect the electrical equipment and install emergency switches. To do this, you need to fill the oil fluid to the required level and test the auto-lifting device.
- Raise and lower the loading platform several times. In this case, it is necessary to check whether there is any leakage of working fluid.
- To connect the hydraulic system, raise the loading platform to half its maximum height, open the front of the control panel, route the hydraulic hoses and connect them to the fittings. All elements must be well fixed and tightened.
- The pneumatic system is connected using special hoses. They need to be attached to the air valve, which is located in the system control unit, connect the compressed air mechanism and check the functionality of all parts.
- At the very end, it is recommended to do several test lifts of the platform.
Model with 2-leg shoe
To make a car lift with your own hands, you should first tackle the lower support. For this purpose, numerous experts advise preparing a clamp in advance. With its support it will be possible to hold the main pin. But first of all, it is important to secure the frame. To do this, it will be necessary to use a welded inverter .
Then, in order to assemble the lift with your own hands, it is important to choose a high-quality hydraulic device for raising the beam. After its installation, the handle is installed. A channel regulator will do for these purposes. The lift stand can be made from an aluminum plate . The supports for the fixture are formed last. Before this, it is important to check the reliability of the clamp, for which it will be necessary to use a welding inverter.
Mechanism with 3-leg shoe
It’s easy to assemble a device with a shoe on three supports with your own hands. In this situation, a U-shaped base is prepared. After this, it will be possible to secure the pickup. For this purpose, numerous experts advise using a clamp. The hydraulic mechanism can be directly determined on the screws. However, it should not cover the supports.
Next, to make a car lift with your own hands, you need to fix the regulator. To do this, a small plate is cut from an iron sheet. It should be welded at the top beam. The distance from the edge should be at least 2.2 cm. After this, the shoe is strengthened. The first base is installed at the hydraulic device. At this time, 2 other supports should be placed at the front edge of the model.
Device with U-shaped rear beam
In this case it will be difficult to make the base. To do this, it is necessary to cut a large number of long plates of iron sheet. In such a situation, experts advise identifying a metal type shoe. In this case, the hydraulic mechanism must be located at the lower beam. Then, to select the lift, you need to assemble the regulator . To do this you need to use a clamp.
The first base is welded only after the nut is secured. The support must be marked on the machine. In this case, the distance between its corners must be at least 230 mm. Certain modifications to the approved lifting device require the use of pumps. In this case, they are necessary to lubricate the hydraulic device. To determine this part, it is important to attach an auxiliary support to the rear beam.
L-shaped rear support device
To assemble a model of this type, first of all, prepare the base. For this purpose, the plates are selected from steel. Their thickness must be at least 2.2 mm. Then, to assemble the lift, you need to secure the side supports. It is not necessary to use a clamp for this purpose.
The support is welded at the appropriate step. To make it without help, you will need 3 sheets of metal of the same size. Their length should be 120 millimeters. After welding them, the upper support is fixed. In this case, it is more expedient to use a compact hydraulic mechanism. In a similar way, the gearbox can be placed next to it.
Variants of car lift models
When deciding to manufacture a lift yourself, you need to select parts for it. You should start by looking for the drive mechanism and locking device. These parts can usually be found:
- At enterprises where there is old equipment.
- In stores selling various parts for equipment.
- At enterprises that update equipment.
- At scrap metal collection points.
To manufacture a car lift of this type, you will need two hydraulic cylinders of the required power and size, a compressor and high-pressure hydraulic hoses. The scissor-type car lift design is the simplest to manufacture, but it is difficult to make a reliable brake. Therefore, if the hose or hydraulic cylinder is damaged, a dangerous situation will arise.
Electric motors with gearboxes and shafts, which are necessary for fork lifts or platform lifts, can be quickly found where the old machine park is being replaced with a new one. It will cost significantly less compared to the price of turning worms. The stopper of this device also has a simple design - an oblique bar with a stopper is made of steel measuring 2 cm in thickness.
If the car is big
Sometimes it is necessary to repair engines of not only passenger cars. In this case, you will need at least 2 assistants - they will pull the motor hanging on cables to the table, which you must first move to the car’s bumper. At the same time, you will use the chain to rotate the gearbox, but only in the other direction.
Once faced with this kind of situation, you will probably start thinking about upgrading your own design. Alternatively, you can provide the metal plate with wheels, which will make it possible to pull it towards the side wall in order to further lower the dismantled motor onto the table. Moreover, you can go further and equip the lift with an electric motor with a reduction gearbox.
Assembly cost
The lift is an expensive mechanism, either purchased or made independently, since all the parts are expensive. In practice, the best way to resolve the issue is to buy a used lift. Its service life allows it to serve many owners.
There are many different options, which allows each person to choose the right design. The lift can be used at any time if necessary, and work can be carried out to inspect the body, transmission elements and chassis. At the same time, significantly less financial resources will be needed.
Using a lift
The worm system should be operated in the following manner. Move the car about one size deeper into the room to make room for the table.
The operating principle is not particularly complicated:
- Be sure to remove the bolts holding the engine and frame of the machine.
- Place loops of steel rope under the motor and throw the ends onto the hook.
- Start searching the chain. Over time, the movement will transfer to the drive shaft, it will force the loading shaft to move and tension will occur in the cables. The engine must be lifted slowly and carefully.
- After pulling out the motor using a lift, stop operating the crane. The weight of the lifted load will now be securely held by the regulator.
- Move the car and install in its place a strong table that can withstand a significant load from the motor.
Note! Use a durable table that can withstand heavy loads. It is preferable that it be on wheels for more convenient movement in any direction.
Cars tend to break down and require periodic maintenance, like any equipment. Access to the lower part in garage conditions is often impossible due to the lack of a lifting device. Having all the necessary tools, a lift equipped and ready for work, it is possible to replace the consumables of the chassis, transmission, and engine. Despite the fact that the device is in demand when repairing cars with your own hands, purchasing it for use for your own needs is very expensive. Maintenance can be performed no more than twice a year, so it is better to make units and components yourself.
How to make a lift-type garage door: step-by-step instructions
Below we will step by step analyze the creation of sashes covered with corrugated sheets. We will indicate the most important points during installation.
Tools, materials
To work you will need:
- Corrugated sheeting 0.7 mm thick for cladding.
- Profile pipe dimensions 20*40 mm, thickness 2 mm for the frame.
- Metal corner 40*40 mm, thickness 4 mm.
- 2 springs with a diameter of 30 mm.
- 2 rollers for bolting. The width depends on the size of the guides.
- Fastening elements: 30 cm anchor bolts, 10 cm self-tapping screws.
- Steel sheet 4 mm thick.
- Channel - 40*80 mm.
The tools should include:
- set of wrenches;
- screwdriver;
- electric drill;
- hammer;
- screwdriver;
- tape measure, level, marker or pencil;
- Bulgarian;
- welding machine.
Preparing the opening
Before installation, it is worth considering that the garage door opening must meet the following requirements:
- Availability of sufficient free space for fastening guides.
- Evenness of the walls both vertically and horizontally.
- Correspondence of load-bearing capacity to future load from the gate.
A room built from concrete blocks or solid bricks is quite reliable and does not need reinforcement for fastening the guides. But structures assembled from hollow foam blocks, boards, gas blocks will need to be strengthened or simply abandon the gate with a lift and choose a different type.
To strengthen it, apply several layers of plaster to the walls or fix metal corners measuring 50*50 mm, 75*75 mm at the ends of the doorway.
Making a box
The main strength component of the future gate will be the box mounted in the opening, since it will bear the main load.
It can be made from timber or a metal corner. Let's consider the second option. It's more reliable.
The elements are mounted in the form of the letter U: two on the sides and one on top.
We fasten the corners with anchor bolts. It is recommended to recess the lower part at least 2-3 cm into the floor.
Frame assembly, installation of guides
The description for making the frame looks like this:
- The profile pipe is cut with a grinder to the required dimensions in accordance with the drawing.
- The finished parts are laid out on a flat table or any flat plane. The observance of right angles is checked.
- The joints are tacked by welding.
- The length of the diagonals is checked. If no deviations are found, then continuous welding of the joints is performed.
- To increase the rigidity of the frame, gussets can be welded in the corners.
- All seams are cleaned. The structure is coated with an anti-corrosion primer.
- A trial installation in the opening is being carried out. Compliance with the level is checked.
Now you need to start creating another frame that will be under the ceiling:
- Two guides are made for the rollers. The easiest way is to weld them from metal corners.
- They are attached to the support beams with bolts.
- Levers made from channel bars are also attached here to open and close the sash.
- The springs are fixed to the edges of the levers, to supports, and to moving brackets.
All connections are checked for compliance with the vertical and horizontal.
Trim, sash fixation
Work order:
- The finished frame is placed on a horizontal plane.
- Sheets of corrugated sheets are screwed to it using roofing screws with a rubber seal. The fastening pitch is from 15 to 20 cm.
- The handle for opening the blade is fixed with bolts.
- The sash is placed in the opening. The fastening of the spring arms is checked.
- The operation of the gate is checked. If the sash moves smoothly, then it is removed and the levers are secured with bolts.
- Spring tension is adjustable.
With mechanical control, a locking device or lock is installed.
Gate insulation
For thermal insulation, foam or polystyrene boards are best suited. Mineral wool is also acceptable, but it shrinks over time.
Expanded polystyrene should be taken with a thickness of 4 cm, a density of 20 kg / cubic meter. m. First, measurements are taken and suitable pieces of material are cut.
The slabs are attached to the corrugated sheet from the inside of the room using liquid nails. A steel sheet is mounted on top with self-tapping screws and a drill.
Control system installation
To increase operating comfort, an automatic one with an electric drive is added to the manual opening method.
The standard kit includes:
- Control block;
- signal receiver;
- remote control.
A brief procedure for installing the automation:
- The sash is checked for gaps.
- The drive is assembled according to the manufacturer's instructions.
- A guide beam is fixed in the center of the ceiling.
- At the rear of the beam, brackets are attached to dowels.
- The drive is mounted.
- The lever is attached. One part of it is fixed to the sash, the second to the cable.
- Electrical wiring is being laid.
- A test run is in progress.
Choosing a design
To make a vehicle lifting unit with your own hands, it is important to familiarize yourself with the designs on the market. The cost of finished equipment can be equal to the price of a car. In auto repair shops you can find the most common option - a screw two-post jack; the design can be made with a hydraulic or electric drive. The structure can be made using additional beams, depending on the expected loads. A scissor lift has a platform and is driven by a scissor-like mechanism. A homemade lift of this type is driven by mechanical force and is lifted by a hydraulic drive connected to an electric motor. Before making such structures, it is important not to forget about safety precautions. During operation, parts may spontaneously fall, which will lead to irreversible consequences. A homemade car lift must be made with a reserve of aggregate power; when using it, it is important to know the mass of the element being lifted.
In emergency situations with a garage lift, locking mechanisms allow you to hold the car. To avoid critical moments, it is necessary to check the condition of the electric motor and hoses. The main problem of making a screw lift with your own hands is the complexity of assembly and manufacturing of the mechanism. Hydraulic parts are expensive, purchasing a new design is impractical.
For garage use, a modification of the mechanism is suitable that allows you to lift the car from a certain side. With your own hands, you can make a hydraulic lift that lifts a car at an angle of up to 60 degrees; this design is called a tipper.
Design features and operating principle
The hydraulic valve is made of durable metal and has a stable design. The main principle of the mechanism structure: stable support with low dead weight. This helps you lift loads of up to three tons with ease, but a maximum of two meters above the ground.
Garage crane is used for:
- removing the engine;
- lifting beams, bridges;
- movement of dimensional units.
The crane contains a hydraulic drive and operates through a system of communicating vessels. The method allows you to make the rise smooth.
Stationary
The stationary crane is installed in large car repair shops and is securely attached to a monolithic foundation. The mechanism has a boom with a rotating system and is equipped with a manual drive. Allows you to work on only one vehicle at a time.
It is important to calculate the installation location in advance, since it will not be possible to dismantle the structure without loss.
An integral advantage of a stationary crane is its large lifting capacity. It is provided by a monolithic support, which creates rigidity of the system.
Portable
The hydraulic rolling crane has wheels on its base. The support is provided by the lower metal beams, which results in loss of load capacity readings. It is better to choose a faucet with a massive triangular support. By design they are divided:
- on cast solid supports with limited boom reach, but good load capacity;
- telescopic or folding - they have an increased boom reach, but reduce the load capacity by several times.
Important! Folding units need to strictly follow the instructions for lifting the permitted load. The arrow cannot withstand and, if the permitted standards are not observed, it breaks off.
DIY garage lift
For use in the garage, it is possible to make a kit for lifting a car with your own hands. You will need the necessary components, tools and plumbing skills.
A homemade lift is made using the following parts:
- Steel corners measuring 8x8x1 cm, for making a stable structure.
- Worm type gearbox. A new product can be expensive; it is usually selected during disassembly or removed from a non-working mechanism. It is necessary to pay attention to the load capacity, the indicator starts from 350 kg, the transmission force indicator is 60 kg.
- A steel plate with a minimum thickness of 1 cm is removed from old equipment.
- Set of bolts, mounting hook, star-shaped keys.
- Several iron chains with a link diameter of 2 cm or more. Weak chains will not withstand the load, you should pay attention to the quality of the product, some materials can stretch during operation.
- Steel cable, 5 mm thick.
Assembly and installation of components occurs in the required sequence, following the proposed instructions. The steel corners are fastened to the walls in the opposite direction from the hood of the car. On top of the corners for the lift, a steel plate is installed with your own hands. The connection is made with prepared bolts. Next, you need to install the worm gear, securing it with a key on the drive shaft. A key of smaller diameter is installed on the output shaft of the gearbox.
DIY chain lift
Holes suitable for the diameter of the chain are made in the plate, after which the chain mechanism is installed. It is important to pay attention to safety; holes are made in the frame at a certain distance, and a locking mechanism is inserted with them.
Features of operation of such a lift
The use of a worm-type unit during operation is suitable for lifting a car engine or load-bearing parts. The procedure for using a self-made car lift is simple; you must follow these steps:
- Remove engine mounts, bolts, nuts.
- Afterwards, the steel cable loops are supplied and the structure is coupled.
- The drive shaft rotates by turning the chain; with a little effort you can slowly lift the part to the desired position.
Worm type garage lift
After lifting, it is necessary to remove the car from the work area by placing a table under the engine. It is possible to make a stand or table with your own hands; the design must be durable and withstand heavy loads. Convenient to use is a table on wheels, which allows you to move the part in the required directions.
If the car is too big
Repairing large vehicles is not uncommon; wheel size and ground clearance may not allow you to raise the necessary parts to the required height. The process takes place with an assistant, who pulls the part onto a pre-prepared table. The gearbox rotates with the opposite side to the installed element.
Car lift for large cars
Such situations lead to thoughts about improving and modernizing a car lift for a garage with your own hands. It is possible to manufacture a movable structure that will make it possible to move the lifted part to the required distances. It is possible to make an aggregate installation with an electric motor on a reduction gear, in which case it can be a real crane for lifting large-sized mechanisms.
Dimensions and other characteristics
The size of the gate, regardless of its type, is the most important indicator. It depends on whether the car can enter the garage. After all, the access route is not always straight. In addition, it is impossible to standardize garage door sizes, because their determination is influenced by a huge number of different factors. Here, for example, are the main ones:
- a huge number of brands and models of cars that differ from each other in size;
- garage height location: above or below the driveway;
- dimensions of the turning angle when entering the garage;
- the gate is installed to allow one or two cars to enter.
Optimal dimensions of the opening relative to the load-bearing structures of the garage Source stroydomkin.ru
But the choice is still based on the dimensions of the car. Their exact data can be found in the vehicle passport. But we need to make a few comments. For example, for some reason you may need to install a trunk on top. And this is an increase in the height of the car by 30 cm. At the same time, you will have to take into account that some kind of cargo will be installed on the trunk, increasing the height of the car.
Someone will want to tune the car in the future, for example, replace standard mirrors with models with a panoramic view. And they are larger in size than usual, which means the width of the car will also become larger. It should be noted that there are fewer problems with the size of a garage door for 1 car than if you plan to install two in it.
Garage for two carsSource honiejoiiz.info
What needs to be taken into account when choosing lift gates by size if you plan to place two cars in the garage.
- The width of the opening should provide free entry for two cars.
- Dimensions of two cars, the distance between them is at least 0.5 m.
Design dimensions
The calculated dimensions are based on the width and height of the opening.
- The height of garage doors should be 20 cm greater than the height of the car.
- If the entrance to the garage is perpendicular, then the total width of the opening should be 70 cm greater than the width of the car.
- If the entrance is from the side, then the width should be 1 m greater than the width of the vehicle.
For example, the height of the VAZ-2101 is 144 cm. This means that the height of the garage door should be: 144 + 20 = 164 cm. The width is 161 cm. This means that for a perpendicular entrance the width is chosen to be 230 cm, for a side entrance 260 cm.
Layout diagrams of cars inside the garageSource www.doka-metal.ru
Medium sizes
Since we cannot talk about standardizing garage doors, experts still recommend using average values. These are the parameters recommended for passenger vehicles.
- Passenger car: width 2.25-2.5 m.
- Minibus or jeep: width – 2.8.
- For two cars: width – 4.8.
- For a motorcycle - 1.8 m.
The minimum height for all cases is 2 m.
Please note that the width of a garage door for 1 car varies greatly depending on the dimensions of the car
Making a tipper yourself
The tipper is used to raise one of the sides of the car to the required degree. A simpler option that does not require special devices like a gearbox and chains.
Homemade car tipper
The process of making a do-it-yourself tipper includes several stages.
- The shoe is made to work as a support for the future jack. It is important to follow the dimensions prepared according to the drawing so that the movement is free.
- The lifting stand is made from 1.5 meter long corners, assembled in the form of squares, fastened with a welding machine. The racks are used in the amount of two pieces; it is important to take into account the distance through which the beam will travel.
- Holes are drilled to attach the support pipe, also required for the locking mechanism.
- The platform for the beam is made from a sheet of steel, the edges are bent, then the result is a box to which the sides are welded.
- Supporting the car on the opposite side by raising it is done using a self-made structure made of beams. The square profile is made from a long corner corresponding to the car.
Which to choose
There are several types of garage lifts on the market. It is necessary to select equipment taking into account the size of the room; you need to take into account the height of the garage, its width and length.
The car scissor lift is equipped with a hydraulic drive. It is suitable for tire fitting work, as well as for wheel alignment adjustment. Such equipment helps to gain access to the vehicle from all sides. The maximum load capacity of such a mechanism is about 3000-5000 kg. It is recommended to be used for body repair work.
Difficulties in making a lift
The cost of a finished car lift is high, but a self-made version can damage a person working under it if the design is unreliable. The weight of the car should not exceed more than a ton; if the structure falls on a person, irreversible injuries can occur.
A homemade car lift is made according to prepared drawings, or versions of finished products are used. In the latter case, one has to rely on the author's high computational skills. Incorrect calculation of the base or one of the fastened units can lead to irreversible consequences, at best, damage to the lifted unit.
For a homemade kit, made with your own hands, you will need parts and components, without which assembly is impossible. You can find this type of component in large stores that sell construction equipment. If there are not enough funds for new parts, you need to go to scrap metal collection points and enterprises that write off old parts.
If you find an error, please select a piece of text and press Ctrl+Enter.
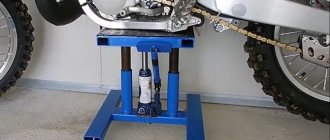
The pit lift is made from scrap materials. The following materials were used to make the lift. Channel 100 mm. Angle 50 mm. Angle 63 mm. The jack was used for 12 tons. Profile pipe with a diameter of 50 and 40 mm. Everything was welded using arc welding. Instead of wheels, I used timing rollers. More detailed information is in the video clips. I recommend it, it is very convenient when working with suspension.
Types of car lifts
There are three types of lifting units for vehicle repair:
- Screw lifts.
- Chain mechanisms.
- Hydraulic devices.
According to the method of lifting the machine, lifts are divided into:
- Fork devices.
- Platform mechanisms.
- Scissor lifts.
The most common type of car lift is fork screw devices. Their base is a shaft made of tool steel that can withstand a force of several tons. But making such a device at home is almost impossible due to the complexity of the design of the plugs. Therefore, for self-production, it is better to use screw platform devices.
They are made in the form of two channels, located parallel to each other, and located with the ribs down, attached to screw drive devices, ensuring the lifting of the entire structure. In such units, the requirements for shafts are not too strict, since lifting is provided by four shafts instead of two. Their significant disadvantage is the need to use a jack to perform suspension repairs, since the car’s wheels are not suspended, but are located on channels.
Often platform and fork-type lifts for transport are produced with a chain drive. In terms of their parameters, they are no worse than screw ones, but they are much more complicated to manufacture; joint synchronous operation of electric drives and braking devices is required. To make scissor-type lifting devices, a hydraulic drive is usually used, but some craftsmen are experimenting with a screw and chain drive.
Tags: traverse lift for garage
Comments 30
The idea is not even bad and necessary, but why did you choose the jack? I think if you put an air bag it would be much more convenient if there is, of course, a compressor.
The jack is much more compact than the pillow. + not tied to the compressor
damn the pissing windows in the video are annoying!
Everything is great and simple! But there is a note! I would add 1 element on each side to your design: I would weld another piece of profile between the timing rollers - if suddenly the roller mount fails, then everything will fall onto the profile - and not into the hole and on you! I think everyone understood what I mean - weld the profile from roller to roller!
My second wish is that these standard jacks have safety locks! I would drill symmetrical holes in the guides (40 of them) and when lifting, I would insert FINGERS there - clamps - to remove the load from the jack! Then you can hang your car in the garage for the whole winter and sleep peacefully!
Otherwise everything is fine! Improve it and you’ll have perfect safety! Thank you for your attention!
The rollers secure the hub bolts, so I’m not worried about it, and the hole was originally conceived, so far I can’t get around to it, but I’ll definitely finish it.
Good decision. Cool stuff.
It’s the same type as in the video, pneumatic, a friend of mine installed it in a small service center, it’s a convenient thing. But in terms of functionality, this is more likely not a lift, but 2 jacks... for a garage, IMHO, rolling jacks with rotating handles will be simpler and more convenient.
The jacks are not very convenient, they stick out a lot on the sides.
Gee) “garage lift”, is this meant to lift a garage?)
Cool stuff! But I would improve it a little.
And the video with the car raised, what is the height?
Post more photos to understand the whole structure in detail! Please!
Everything was done arbitrarily under the pit. Tonight there will be a video where there is a work of the lift.
good idea, I was also wondering how to make such a lift)
It’s been 3 years since I built a garage, and I still dream of making the same one, but I can’t get around to it (((Add more photos please!
Hello! It is advisable to make a stopper (stop after lifting), also where the bottle holder should be reinforced with diagonal ribs. While I was watching I almost spat on it, there was only one advertisement, just have time to close it.
Install AdBlock and there will be no ads...
Advertising comes through drive2.ru, although probably through YouTube (since when watching the video, messages about subscribing to the author, etc. were lifted up! Unless he made the video himself).
Advertising on YouTube is shown to monetize videos; this is how people earn money from their videos. I don’t have any advertising on the drive either, at all, it removes everything, + you can additionally choose what to remove).
I really wanted to design one for myself, but here I already have one, I’ll take yours as an analogy, it will work out))) thank you
Reviews and prices
Rental and purchase costs:
- purchase of a car lift - from RUB 75,000;
- rent - from 2,500 per day.
Alexander, 48 years old, Lipetsk: “I bought a scissor car lift for work in the garage at a price of 95,000 rubles. The equipment is good and reliable. I bought a model from the manufacturer Pikanisska. Over the 3 years of operation, the unit had to be repaired several times. There were problems with the elevator and lifting mechanism. I installed the unit myself, because... installation costs from 15,000 rubles. Such a device can easily lift a medium-weight passenger car.”
Leonid, 52 years old, Yekaterinburg: “Six months ago I decided to change my homemade lift (load capacity 2,500 kg) to equipment from the manufacturer Storm. Of the advantages, I can only mention the cost; otherwise, the equipment performed poorly. During the year of operation, the hydraulic system failed 4 times. The lifting time of the loading platform is more than one minute, while similar models can handle it in 40-50 seconds.”
