Do you have a dent on your car body and need to get rid of it as quickly as possible? If the problem area is small, you can try to straighten it yourself in a garage.
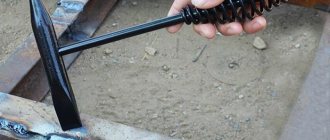
To do this, we will use a special device - a reverse hammer.
Of course, the car owner carries out such procedures at his own peril and risk, because the result is difficult to predict. But if you do everything correctly, you can still remove a small dent.
In today's article we will tell you how to make a reverse hammer with your own hands.
Moreover, we will consider different options for the design of a homemade product. After all, the device can be used not only for straightening a car body, but also when performing finishing work indoors - for example, when laying laminate flooring and ceramic tiles.
If necessary, drawings indicating the dimensions of the parts can be found on the Internet, but you can do without them.
Design and principle of operation
This tool has a specific device; it consists of a metal pin, the size of the reverse hammer is about half a meter. On one side of the pin there is a massive handle, and on the other there is a fastening device with which it is fixed to the surface being processed. In front of the fastening device there is a special moving weight.
How does it work? To work, you need to attach the tool to the required surface, hold the handle with one hand, and the weight with the other. Then, with a sharp movement, bring the weight to the handle, due to which a pulling force is generated. With this movement, you can feel a blow that moves the metal surface towards the handle. The effect itself is similar to the blow of a regular hammer, but from the opposite side.
There are several ways to attach it to a surface. This is most often done using a vacuum, but can also be attached using glue or by welding. In some cases, when there is a fastening point on the surface being processed, a hook or clamps can be used.
The principle of operation of a suction cup for a reverse vacuum hammer is similar to the principle of operation of a plumbing vacuum.
Different models can be equipped with different accessories, including weights of different weights, to create a wide range of forces, but the operating principle is the same. The manufacturer may also provide a mounting kit. This allows you to effectively use the tool for repairs of varying complexity and in a variety of situations.
It is very important to correctly arrange the tool based on the characteristics of the metal being processed. If it is too thin, a hammer with a large weight may not level the surface, but create a hump.
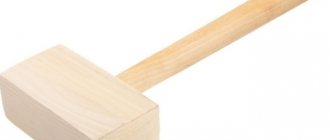
They need to work very carefully, since the slightest deviation from the required effort will not bring the desired result. It is recommended to use this tool only in cases where there is no access from the back of the body. In all other cases, it is better to use a rubber mallet.
If fixation to the body is carried out by welding, it is important that the fastening cools down. Otherwise, it will not be the dent that will stretch, but the heated metal.
Hammers, smoothers and supports (counter supports) for repairing dents
Hammers, trowels and supports have been used in auto body repair to straighten dents for a long time. They are also used for paintless dent repair, but they differ from conventional tools for body repair. Supports and smoothers for paintless dent repair have a perfectly smooth, polished surface or contain a softening coating so as not to leave any marks or damage on the paintwork when exposed to the panel.
- Paintless repair hammers are used to lower high spots. They can have replaceable attachments to change the characteristics of the striker.
- Supports (or counter supports) are auxiliary tools used to support the metal on the back of a panel when straightening with a hammer or float. There are many different shapes and sizes of counter supports. Selecting the correct shaped support is critical to the outcome of the repair. It is selected taking into account the bend of the panel being repaired. The counter support provides support for the panel and prevents undamaged areas from being crushed. An example of using support would be leveling (tapping) hills around dents from large hail. Such dents can be about 10 cm in diameter. To eliminate the bulk of the damage, it is necessary to remove the high spots around these dents. This is where supports and special hammers come into play.
Smooth with a soft pad to soften the impact.
- A smoothing iron is a hand tool with a smooth spring steel surface that is great for smoothing corrugated metal. The trowel controls more impact surface than any hammer. At the same time, it is easy to use. The float is used with support when lifting metal and can be used without support to lower elevated areas. The smoother may have a leather pad on the front side to soften the impact.
Varieties
There are four types of reverse hammer for body repair:
- The vacuum reverse hammer is the most versatile, at the same time the most expensive. It is attached to the metal using a suction cup, the vacuum in which is created by a compressor. To work with dents of various sizes, manufacturers equip the tool with suction cups of several sizes. The quality of vacuum fixation is not inferior to that of other types of fasteners. This model can be attached to various surfaces, regardless of curvature, the presence of paint or any contamination.
- On a glued suction cup – they are made with a rubber suction cup, which is attached to the surface with glue. After the glue has dried, the pin is glued to the nozzle with a threaded fastener. The dent is then pulled out in the usual manner. Then the pin is unscrewed, and the attachments are removed by heating the glue with a hair dryer. Residues of glue are removed with solvent. The disadvantage of this type is that it is almost impossible to work with it in winter, since the glue does not set. Please note that the solvent is designed specifically for this type of glue and will not affect the car’s painting.
- With welding fixation - this type used to be the most common, but due to a large number of disadvantages and limitations, such hammers are used much less frequently. To use it, you need to weld a nut to the body into which the tool pin is screwed. The work surface must first be cleared of primer paint so that exposed metal is accessible. The nut is welded using spot welding. After straightening, the nut is cut off, the welding area is cleaned and painted. Due to its great complexity, this type of instrument is used only in very complex cases.
- Mechanical hammer - has a classic design, differs only in the type of fastener. Usually hooks and clips are used. It is used only in cases where there is a mounting point on the body. In some cases, a hole may be made in the housing, which is welded after the work is completed. Very often, mechanical hammers are used to dismantle bearings when there is no access to their reverse side. In this case, the bearing remains intact.
Adhesive system
The PDR adhesive system is designed for pulling out dents from the face of a panel and includes a glue gun with special glue sticks, special pull-out clips, pull-out devices and a tool for removing glue from panels and clips.
- Glue guns come in electric (corded or battery-powered) or gas. Glue sticks, as a rule, differ from the usual ones sold in hardware stores, have better adhesion, and are more durable. The rods come in different colors, which marks their characteristics. They mainly differ in the temperature at which the repair will be carried out, as well as the strength of the bond.
- PDR Pull Clips come in different sizes, shapes, designs and colors. They can also vary in strength. As a rule, the shape of the clip is selected to match the structure of the damage. Now there are special reinforced long strips that replace several clips and make it easier to pull out complex dents.
- Pulling devices. Once you have the clip glued to the dent, you will need a puller to pull one or more of the clips. For pulling, a sliding hammer, a mini-lift, a large lifting device, or a lever-type device is used. Different devices must be selected depending on the damage. Don't expect a blowback hammer or mini lift to pull out a dent in a panel and return the metal to factory condition with minimal effort. It is more correct to perceive these devices as one of many tools that you may need to achieve results. You may need to do several repeated stretches. You may also need to tap the high spots around the dent with a special punch and use PDR hand tools to finish the bumps.
- Glue remover. Sometimes the adhesive is not easy to remove from the panel or clip, in which case you will need a tool to make the adhesive easier to remove. There are special formulations, and you can also use alcohol.
For professional use, harder types of clips are most often used, while softer clips provide less precise control over tension.
“Glue Pull Repair” (GPR), used without or in combination with PDR tools, has become a very powerful system thanks to its wide range of different types of glue, clips (or pull bars) and many pull devices. A modern adhesive system with all accessories and additional tools allows you to replace the use of a spotter and many other straightening tools.
Using a Reverse Hammer
When studying information on how to use a reverse hammer, it is worth considering the type of tool and the degree of deformation of the body. In almost all cases, the recommendations for use are the same. Only small details differ. In some cases, the necessary work can be done without treating the surface, sometimes it needs to be degreased, and sometimes completely cleaned of the paint coating.
Working with a reverse hammer requires some skill. If you don’t have enough experience in using it, it’s better to practice on some sheet of metal of similar thickness and strength to a car body. If the damage to the housing is too complex, it is better to entrust its removal to an experienced specialist.
PDR Tools
The first teams of PDR specialists began to form in the quality control departments of auto giants. They needed to create the necessary tools to successfully straighten out the small dents that were sometimes created during the manufacturing and assembly of automobiles. Initially these instruments were homemade. They were converted from existing tools of “tinsmiths”, and also invented new unique devices and improved them over time. You can read in more detail about the emergence of paintless dent repair technology in the article “history of the emergence of PDR technology.”
Homemade paintless dent repair tools were used many years ago by the early PDR technicians.
PDR technology has improved significantly over the past 15 years. Nowadays, qualified PDR technicians can straighten quite complex dents without painting. This is possible thanks to the range of modern tools, as well as the elasticity of modern paint coatings.
There are now many manufacturers that provide a wide range of paintless dent repair tools and accessories.
PDR tools can be classified by design and by application (intended purpose).
By design, instruments can differ in bend (single, double, triple bend, or more complex shapes), tip shape, length, tool diameter, shape and configuration of the handle.
By application, tools can be classified depending on which body panels they are used on or what action they perform. For example, classic hooks (or rods, from the English rod) are designed to work in open, fairly accessible places, such as fenders, roofs, trunks, hoods. They work by applying pressure to the back of the dent. Another example is the whale tail tool. This tool, in contrast to classic hooks, is used in hard-to-reach narrow places and works due to the twisting action. Additionally, PDR technicians use special reflective panels to accurately “read” dents, LED lights, and an adhesive system to pull out dents. Correcting different dents may require the use of multiple tools. The more tools you have at your disposal, the more freedom and flexibility you will have to repair a specific dent.
Next, we will look in order at the various tools that are used for paintless dent repair, as well as the necessary accessories.
Advantages and disadvantages
The reverse action hammer has many advantages over tools of a similar nature. It allows you to quickly perform straightening without significant structural changes to the car. Work with this tool can be done in places that are inaccessible to work with a conventional tool. Also, the cost of such a tool is relatively small; almost any car enthusiast can purchase such a tool for his garage. Also, in most cases, you can do without destroying the factory paint.
The only disadvantage of this tool is that complex damage cannot always be corrected. Also, in some cases, a person without experience can only cause more damage to the car body.
Overall, this is a great tool to have in your toolbox as it can quickly correct mistakes made by the driver or those around you.
If you find an error, please select a piece of text and press Ctrl+Enter.
From the author: hello, masters! This type of auto repair, like body straightening, is a rather difficult operation that requires experience, knowledge, tools and special devices. A reverse action hammer is essential for repairs. The design of this tool is quite simple, you can easily make it yourself. Below we will introduce you to how to make a reverse hammer with your own hands from available materials and use it for its intended purpose.
Punchers (cores, cue balls)
A punch (also called a core or cue ball, English knockdown tool) is an essential PDR tool. You will use it regularly. Most high-quality craftsmen can boast that they limit the use of a punch, but there is not a single craftsman who could do without it.
With paintless repair, dents are not just sharply straightened out from the impact on them, they are slowly and methodically squeezed out with hundreds of tiny pressures. Sometimes the pressure on the metal is past where it should be. This can be accidental, and sometimes even on purpose. This creates hills that need to be removed with a punch. The tip of the punch is located directly at the high point and lowers it down by hitting the PDR punch with a hammer or other light object.
On some dents, it is necessary to tap the raised areas around their perimeter to relieve stress and soften the metal before straightening the metal begins.
Punchers can be made of different materials and also differ in the shape of the tip. They can be blunt, sharp, rounded, or mushroom-shaped. The sharpness of the tip depends on the size and shape of the hills. Tapping with a heavier punch (such as steel) with a soft, rounded tip will take much less time to move the same amount of metal than tapping with a lighter nylon punch. A lighter punch requires much more hammering or striking force to create the same impact as a heavier punch.
The type and material of the hammer used to strike the punch does not matter much; what is important is its weight, which will affect the force of the blow. In addition to the hammer, you can use other objects if it is more convenient for the master.
It is recommended to purchase one punch with replaceable tips.
In general, to tap high spots during dent repair, either a punch or a special hammer without using a punch can be used. So-called blending hammers are best used for larger, softer high points. Punchers are generally best suited for sharper elevations.
Design and operating principle
A straightening hammer is a hand-held device that is used to produce pulling force. If a regular hammer is most often used to bend the surfaces of various materials “pull away” or for driving in nails, etc., then a reverse action tool pulls the steel “pull towards itself”. Thanks to this feature, it has found wide application in leveling car bodies; it is used to remove CV joints or tighten bearings when it is impossible to hit them from the opposite side.
Reverse hammers are used to carry out narrow-profile tasks. Such a unit can be seen today at service stations, among drivers who periodically have to carry out body repairs of varying complexity. As for the device, reverse action hammers are a steel rod with a diameter of 25 mm and a length of 45–55 cm, with a comfortable handle located at the back. It contains a freely movable weight, made in the shape of a thick tube, the length of which is sufficient to fit comfortably in the hand.
The front end of the device is attached to the surface being leveled in various ways. To carry out the work, the hammer is grasped with one hand on a heavy weight, and with the other on the handle. To create a pulling effect, the hand with the weight is pulled to the side at the handle with sharp, quick movements, which creates a mechanical shock, from which the rod moves in the opposite direction, dragging the deformed surface with it. A similar effect can be created if you hit with a regular hammer from the opposite side of the flaw.
PDR lighting
Lighting and reflection is one of the most important components of a PDR repair. PDR lamps are used indoors and allow a specialist to see dents on car body panels in more detail. There are two types of lighting currently in use: fluorescent and LED. With the introduction of LED lighting, things have definitely changed. LEDs allow you to have more compact, lightweight and very durable lamps. LED panels can change the light intensity, and even color. This is necessary for cars of different colors. For example, light-colored panels may be difficult to repair without painting using a standard white light PDR lamp.
Lamps for PDR repair may contain a special light diffuser. Usually these are parallel lines or the so-called fog board. The color and design used on the face of the lamp is the personal preference of the artist. Such diffusers or screens can be purchased separately and placed on the lamp or replaced with an existing diffuser. They help achieve high detail defects.
Reflective screens (reflective screens/panels) are a panel with a specific pattern (usually parallel lines). They, unlike a special lamp with lines, do not produce their own light, but reflect existing light (for example, sunlight) and cast lines onto the panel being repaired, helping to better see the damage.
So the purpose of the PDR light (or reflective screen) is to allow the technician to see the damage pattern that is happening inside the dent. By reading shadows and distorted reflections, a specialist can determine where the metal is high and where it is low. The craftsman also uses reflection to guide the tip of the tool exactly where it should be. Further, the reflection helps to monitor the repair process, allows you to develop precise force and stop pressing in time. After manipulating with the PDR tools, once the distorted lines become parallel in the panel reflection, the dent will be successfully corrected.
PDR lamps come in different sizes and variations. In general, they can be divided into stationary lamps for workshops and portable ones.
- Stationary lamps are mounted on collapsible tripods, allowing you to work with large volumes of damage. They can rotate and can be installed at any angle. These lamps are useful for repairing hail damage and can illuminate the entire roof or other panels.
- Portable PDR lamps usually range from 25 cm to 50 cm in length. They are easy to move and are usually mounted on the car using a suction cup. Mobile lamps are designed to work both in stationary conditions and on the road. They allow you to work with minor damage and damage of medium complexity.
When choosing a PDR lamp, consider the following factors:
- Size
- Ease of installation and setup
- Personalization (can you change the light intensity, color)
- Battery life (in the case of a portable lamp)
- Durability
How to use the device correctly
Let us immediately note that you should work with a hammer extremely carefully. After all, if you hit a deformed surface hard, other defects will form during correction. Professional craftsmen do not recommend using a reverse hammer to level out large dents that are on the body or roof of the car, since these parts are easily accessible and, if necessary, you can remove the inner lining to level the metal - that is, apply the necessary pressure on the opposite side of the parts. If the side part of the car is deformed (including the threshold), then you definitely cannot do without a hammer with reverse action.
To perform high-precision straightening of a concavity, the rod of the device should be strengthened at its beginning. It is forbidden to fix the hammer in the central part of the flaw, since when pulling, the steel will close and sharp corners will form. In the absence of kinks, straightening is quite simple; it is possible to completely restore the original geometry of the part, and the previous defect becomes completely invisible. After this, there will be no need to perform puttying or painting work.
Complex and large-area deformations require slow, smooth adjustment. First you need to pull back the rim on the dent, which will reduce the depth and diameter. At the very end, the central part is also leveled. When a hammer is attached to a curved surface by spot welding, then after each stretch it is necessary to cut off the place of fixation and sand the seam.
In this case, it is important to ensure that no weld remains on the surface of the metal, because after hardening it becomes an additional stiffening rib and interferes with the fixation of the hammer at other points. The use of such a tool is a rather lengthy process, requiring a careful, responsible approach without unnecessary haste.
When using a reverse hammer with electric welding, the steel should be allowed to cool after each welding, since the hot area is easily deformed and carries the cold dent with it. Particular attention should be paid to the cleanliness of the surface being treated - the presence of paint chips, small debris, dust and other types of deposits is unacceptable.
Pneumatic suction cup puller
The pneumatic suction cup is sold in a set with several suction cups of different sizes (usually three). Depending on the size, it can create different pulling forces.
It is attached to the rods of a sliding reverse action hammer. The suction cup is made of rubber and plastic. The suction cup can work with both metal panels and plastic bumpers.
This tool can remove large dents very quickly. Used at the initial stage of repair, to eliminate the bulk of dents.
Types of Reverse Hammers
These tools differ from each other in the way they are attached to a deformed surface. They are:
- pneumatic;
- with suction cup;
- welded;
- mechanical.
Let's look at each type in more detail.
Pneumatic
This is a fairly expensive but very effective device, usually used for injectors that need to be removed from the cylinder head of an internal combustion engine. Its tip looks like a regular home plunger used to clear a clogged drain. There is a small rubber plate at the end of the pneumatic hammer; this is what is applied to the deformed area. The tool is connected to a compressor, which pumps out the air between the plate and the body, and the suction cup is securely attached to the metal surface. After which the master sharply pulls the weight back, a reverse thrust is formed, which pulls out the dent.
As a rule, this type of hammer comes with three rubber attachments of different diameters as standard. The largest of them allows you to level out wide deformations, and the smallest one allows you to level out small defects. The pneumatic hammer, when connected to the compressor, produces high clamping power. The rubber plate can be applied to absolutely flat or inclined surfaces, for example, to streamlined bodies. This tool is very convenient to use and weighs no more than one and a half kilograms.
The main advantage of a pneumatic hammer is the ability to level defects without removing the paint layer. When a car has received a minor flaw, it can be quickly corrected without significant time and material costs, or the need to apply putty, a layer of paint and varnish.
With adhesive suction cup
These are devices that are attached to the car body using special glue. After setting, the reverse hammer pin is screwed into the threaded hole on the nozzle. Next, the curved surface is leveled with sharp movements of the weight. When the work is done, the pin is unscrewed and the suction cup is detached using a hair dryer.
When heated, the adhesive layer becomes soft and the overlay is simply removed. A chemical solvent is used to remove adhesive residue from the metal surface. The disadvantages of a hammer with a suction cup include the inability to set the adhesive in the cold. Because of this, in winter the correction can only be performed in a warm room.
This method allows you to correct problem areas of the car body without removing paintwork - the suction cups are attached directly to the paint, do not dissolve or destroy it. Since the adhesive composition has a different chemical component from the paint, the solvent does not react with it, which prevents the color from blurring when removing residual fixing agent from the metal surface.
With welding fixation
The most popular and common among Russian car enthusiasts are reverse hammers for spotters, in which the fixation with a metal surface is carried out using an inverter. A steel nut is welded to the surface, the tip of the tool is screwed into it, after which the dent is leveled. This device has some disadvantages. This is, first of all, the need to have a welded inverter to perform the work.
Also, for arc welding, the surface of the metal being processed must be completely free of paint. It is possible to spot weld a nut only on shiny steel. After pulling out, the element is carefully removed with a grinder, and the cut area is carefully sanded. Then the nut is moved to the next point on the surface to be leveled, and the steps are repeated.
Note that after each welding, the place where the nut is attached needs to be puttied, primed, painted and varnished; only in this way can the corrected defect be made uniform with the rest of the surface of the machine. A hammer with a welded fastening is used in cases where it is necessary to correct a large area of curvature. Since the nut is fixed using spot welding, this type of hammer is effective even at sub-zero ambient temperatures, unlike self-adhesive suction cups.
Mechanical
By design, this is the same welded device, with the only significant difference - its accessories are clamps and hooks. With its help, it is impossible to level the central part of the deformed surface, since hooks can only be attached to the edges of the body.
Craftsmen who only have such a device at hand, to correct the defect, cut small holes in the metal surface, and hook onto them. After which the slots are carefully welded, sanded, coated with paint and varnish. Due to the fact that the hooks are twisted, nuts of any diameter can be welded to the metal.
Mechanical hammers are usually used to remove CV joints; repairing the undercarriage of a car is indispensable without them, when it is impossible to approach the back side of the bearings to strike them. Often the standard equipment also includes clamps that allow you to grasp the hinge bracket at several points simultaneously and completely disassemble the chassis without breaking the metal bearing.
PDR Tool Kits
Tools for paintless dent repair can be purchased individually or in kits. Kit sizes range from simple starter kits to complex professional kits. Before purchasing, it is better to study different tools so that you have an idea of what is offered to you.
It is better to buy tools not in sets, but separately. The kit may not include hooks, but may not include the tools you need. In any case, you need to study the assortment before purchasing.
Making a hammer
The reverse hammer has a fairly simple and understandable design; if necessary, it can be made by hand in a small workshop. The device includes the following parts:
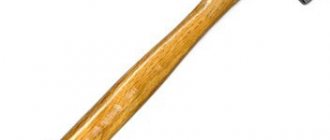
- handle 45–52 centimeters long;
- two nuts with washers;
- hooks, weights of different weights, other equipment, depending on the purpose of use.
The device operates on a simple principle. A weight attached to a steel pin hits the nut with each translational movement, as a result of which it exerts a force on the attached hook, which straightens out flaws and dents on a curved metal surface.
Required materials and tools
How to make a reverse hammer on your own, using the tools and materials at hand? The execution process will require the following items:
- steel pin with a cross section of 10–15 millimeters, a length of 40–45 centimeters;
- adhesive or insulating tape;
- metal pin d-15 mm;
- several large metal washers and nuts;
- devices for cutting external threads;
- welding machine;
- vice for fastening.
Step-by-step instruction
Tool production should begin with the preparation of the necessary materials. The handle will be a steel pin 45–50 centimeters long and 10–15 millimeters thick. Further work is performed as follows.
- The movable weight is made of a metal pin with a cross section of 15 mm. It needs to be cut with a grinder into five equal parts from 10 to 14 cm. The rods are secured to the handle using adhesive (insulating) tape, after which they are welded with an arc current.
- The thread is cut on the top of the handle for the nut. This procedure is carried out taking into account all angles; the reliability and durability of the straightening device will depend on this.
- The creation of hooks used to correct a curved surface in different places is done on a personal basis and depends on the needs of the craftsman. For bending, a stop or a hand sledgehammer is used.
- Cutting the external thread of the hooks is necessary for connecting with nuts several fasteners used to correct a flaw. Performed strictly at an angle of 90 degrees. This is necessary so that the connected elements do not have any distortion, otherwise the hook may break off the thread during the work process.
- Installation of lock washers on the handle. To obtain a high-quality hammer, you need to create reliable, strong bolts. They bear the main mechanical load when performing sharp impacts, which is why their installation must be carried out taking into account the angles. A nut and washer are screwed onto the handle with an external thread. Before attaching the washer, you need to replace the rubber handle made from a hose or electrical tape.
- Monitoring the performance of the assembled reverse hammer. It should function easily, without failures, and all working elements should move smoothly. The threads on the nut and hooks must be well lubricated; this will extend the service life of the unit mechanism and prevent its premature wear. How to make a reverse hammer with your own hands is described in more detail in the video:
PDR hooks (PDR rods)
PDR hooks are the staple tools that fill a craftsman's toolbox. Various in shape and size, they are used on every panel of the car. Most craftsmen use a rigid hook (or rod) 120 cm long for all open, fairly accessible places, such as roofs, hoods, trunk lids, fenders. Shorter versions of the same hooks are used for doors. Hooks can provide consistent and very controlled pressure to lift metal.
Hooks differ in length (from 40 cm to 2 m), bends, diameter and tip shape. It is better to have a set of different hooks, from which over time you can choose the ones that are most preferable for the job.
Some PDR tool companies create ratchet handle pdr tools. This is a great addition because the technician can use one tool for different positions and apply different amounts of force on the lever. Hooks are available with interchangeable tips, making one tool more versatile and saving space in your toolbox or bag.
Door hooks PDR (PDR door hooks)
Door hooks are used to work with door damage through the gap between the door glass and the panel, allowing you to straighten dents without having to remove the trim. Door hooks have different bending angles (from 90 to 180 degrees) and different lengths, with a narrow tip for better maneuverability. For ease of operation and increased functionality, door hooks can have a rotary handle.
These hooks are mainly used on the top of doors.
Brace tool (eng. brace - bracket, spacer)
Tools for use under panel reinforcements. There are versions for left and right hands. Designed to maximize reach and minimize ridges from tool use. This tool is often used to repair hail dents.
Dent Reaper
This type of hook is quite new. Dent Reapers provide strong pressure, do not bend, and have sharp tips for finishing.
Sickle/scythe hooks work well in doors and can also be used on other panels. They are “powerful” and precise in application. Increases work efficiency. Excellent for working with aluminum panels.
Knife-shaped/knife “shaved” hooks ( SHAVED TOOLS )
Knife/knife-shaped or “shaved” (from English shaved) hooks are designed to work in areas of difficult access, in narrow cavities, under amplifiers.
This tool is a hook with the barrel cut at an angle from the base to the working part. Shaved hooks come in different sizes. What they all have in common is slim design and flexibility. In terms of capabilities, these hooks are close to the “whale tail” tool, but they have a different principle of influencing the dent. Used to repair hail dents, especially under hood, roof and trunk reinforcements. Well suited for work in the rear fenders, where two metals are pressed closely together. Also good as an auxiliary tool, helping with finishing work in the final stages.
Due to the thin barrel, “shaved” hooks are not used on hard places, curves, or dense metal.
Whale tail
Whale tail instruments are named after the shape of their tip. They provide leverage at the edges of the tip. Whale tails come in different lengths from 10 cm to 150 cm with tips of different widths (from 1 cm to 10 cm - ultra-thin, thin, standard, wide and extra wide). The tips are completely rounded at the top.
They are used to work under panel reinforcements. Whale tail tools are not the easiest to learn. They work by twisting rather than pushing/pressing like regular hooks.
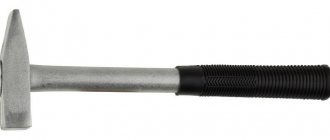
Other types of straightening hammers
In addition to the reverse hammer, other types of hammers are also used for straightening work, for example, “shrink” or “pick”. They all have some similarities, namely: the strikers are made of elastic or rubber material, which ensures a soft impact of the tool on the deformed surface during the leveling process. This design feature allows defects to be eliminated very carefully and without any damage to the metal.
Such devices are additionally equipped with handles that flare towards the end and have a rubberized lining, which provides a strong grip and reliable hold during intensive use. Most advanced models are equipped with attachments made of different materials, which can be changed during the work process using the external threads on the handle.
As you can see, making your own reverse hammer does not take much time if you prepare all the necessary tools and materials in advance. Its use greatly facilitates car body repairs, allows you to carefully remove injectors, CV joints and perform many other repair and restoration work.
In accordance with applicable law, the Administration disclaims any representations and warranties that may otherwise be implied and disclaims liability in relation to the Site, the Content and its use. More details: https://seberemont.ru/info/otkaz.html
Was the article helpful?
Tell your friends
Auto repair shops that practice body repair always have a special set of tools and special equipment for repairing dents without straightening and painting the metal. And although damage of a serious nature, and even located over a large area, cannot be corrected without the use of powerful bench stands, it is quite possible to pull out dents in small areas with difficult access. To do this, you just need to use a special small-sized auto tool called a reverse hammer.
Content:
Using a reverse hammer
A reverse hammer can be called one of the best tools for car body repair. It is also often used to repair arches, sills or pillars where access from the inside of the part is impossible. The device is very simple, and operation does not require great skills.
There are the following types of hammers - pneumatic reverse tools and reverse spotter hammers. There are also hammers with two and three weights, thanks to which you can adjust the force of impact. In addition to the standard option, there is vacuum equipment that also removes dents. The advantage of this reverse hammer is that it has a suction cup. It acts as a grip on equipment and does not damage the paintwork of the body.
Carrying out straightening involves a number of tools, in addition to the basic ones - a straightening hammer, a file, a machine tool, a saw, a stand and spacers, an electric reverse hammer, a reverse action hammer. Often a reverse hammer is used in conjunction with other resistance welding tools. As a rule, the back hammer is included in the straightening kit, which is usually included with the welding machine.
A back hammer is often included in bearing removal kits. They are intended for use in automotive workshops for the purpose of removing various parts by gripping their internal location using a reverse hammer. Grips of a special design fit tightly to the bearings, allowing you to remove the bearings without damage and evenly, as well as turning the handle clockwise. Thus, the purpose of the hammer may differ, but the price of the reverse hammer remains the same.
Reverse hammer design
The design of this tool is very simple - it has a steel rod with a diameter of 20 millimeters and a length of 500 millimeters (base) and weights mounted on it that are loosely mounted on it, as well as a hook and a washer. On the base there is a weight or several weights, which may differ in weight. On one side of the rod there is a hook, and on the other there is a washer, which does not allow the weight to fly out and transfers the force of the impact of the reverse hammer to the rod.
Auxiliary accessories
Accessories for working with doors through a window opening (window protector PDR and wedge)
To repair door dents, PDR tools are typically positioned between the door panel and the door glass. To prevent damage to the glass, a window protector with a special wedge is used. All you need to do is lower the glass down, insert the wedge and protective protector, creating space for the tool to work. Also, instead of a wedge, an air cushion is used, which easily increases the gap between the glass and the panel, providing better access for the tool.
There are different types of protectors on the market, but the most common is a plastic or metal sheet with a right angle at the edge.
Before you start working with doors, you need to consider the type of glass installed in them. Typically, side windows are made of stalinite (tempered glass), but some modern cars may now have laminated side windows. For this type of glass, the pressure that can be applied to them during repairs (even through a plastic protector) is critical.
Before repairing, it is better to always check the glass of the door on which the dent will be repaired. Laminated glass can be recognized by its 2-layer structure, which can be seen at the top of the glass. If the glass looks like 2 layers glued together, this is a sign of laminated glass. In contrast, the layering will not be visible along the edge of a piece of tempered glass. It will look like a completely smooth, solid piece. Also in the corner of the glass there may be the designation “laminated” or “tempered”.
If the glass is laminated, it is better to follow the following recommendations to minimize the likelihood of damage to the glass.
- Remove the molding at the top edge of the doorway.
- Lower the glass so that it protrudes about 7–8 cm from the opening.
- Use an air cushion to create space between the glass and the panel. Do not use a wedge for this as the pressure on laminated glass is dangerous.
- Always use a metal glass protector for laminated glass.
Removing the molding from the top of the door allows more clearance to insert the tool between the glass and the door panel. This will provide enough space for the tool. By leaving 7-8 cm of glass raised, you can apply more even pressure to the center of the glass with the air cushion, rather than concentrating all the pressure on the top edge. The metal protector also helps dissipate the pressure you will apply to the glass with the tool.
Since laminated glass is easier to damage than tempered glass during PDR door dent repair, sometimes if the car is expensive, the safest way is to remove the door inner trim and glass.
Hood stand _ _
The bench is typically used to repair dents on the hood when they cannot be repaired on the car. The stand simplifies the work. The panel is firmly fixed on the stand and the master can easily access the back side at any point.
Modern stands have adjustments, which allows them to be used for hoods of different sizes, as well as for trunk lids. The stand folds easily for compact storage.
Stops, clamps, hangers
To repair dents on a car body, in addition to special tools, stops and clamps are required. It is important to fix the movable panel being repaired (hood, trunk lid or door) in a convenient position. For this purpose, special stops and clamps are used.
The hangers are designed to provide support and proper leverage for the hooks when repairing dents. Usually attached to the technological holes of the body. They come in different shapes and sizes. Carbines are also used for these purposes. They hold larger instruments while removing extensive damage.
Knives for cutting sealant
Knives for cutting sealant are necessary when repairing dents under reinforcements. The knife allows you to carefully cut off the sealant without scratching the paintwork. These knives are sharp and flexible. They can have different lengths and different handles.
Brands of PDR tools
Now there are many different companies producing PDR tools and accessories. It is better not to buy cheap analogues from unknown companies or even kits without a name. Tools from well-known, proven brands are thoroughly tested and tested by experienced paintless repair specialists. Specialists from PDR tool manufacturing companies maintain feedback with craftsmen and also take into account requests for the necessary modification of some tools.
The highest quality and most proven instruments are from American companies, such as Dentcraft Tools, A‑1 Tools , PDR Finesse Tools, Ultra Dent Tools and others. Also worth mentioning are KECO and Blackplague PDR, which sell innovative tools and adhesive system materials for pulling out complex deformations.
How to make a device yourself?
- To make this device with your own hands, you will need an iron, or even better, a steel (stainless) rod with a length of 50 centimeters and a cross-section of 10-20 millimeters, as well as a steel bushing (weight), a hook and an ebonite handle.
- You can either purchase a ready-made hook or make it yourself from steel having a thickness of 4 millimeters.
- To make a vacuum type of reverse hammer, you can use a suction cup from a tool, such as a regular plunger, instead of a gripper.
- After assembling the device, carefully process all its elements, first with a file and then with emery cloth in order to remove all nicks and burrs.
- After that, try the new tool on some unnecessary car part.
- Design and use of a reverse hammer, making a tool with your own hands
- What is a reverse hammer for body repair?
- Purpose and types of reverse hammers
- How to use a reverse hammer
- We manufacture our own reverse hammer
Many drivers, when faced with the concept of “reverse hammer,” do not understand what it is. Although, if you have never had to do body repair yourself, there is a high probability that you have never seen such a tool. But if you still have to repair the body, you cannot do without a reverse hammer. In this regard, the purpose of the article below is to tell not only what a reverse hammer is, but also how to make a reverse hammer for body repair with your own hands.
What is a reverse hammer for body repair?
In the process of working with a car body, the hardest and most important part is straightening, that is, leveling the surface of the body. To perform this task, even specialists need to have professional equipment on hand, which includes a reverse hammer.
In addition to this, many reverse hammers also have hooks, with which the device can grab staples welded to the body, and thereby be securely held on it during straightening.
Purpose and types of reverse hammers
Often, a back hammer is used to remove small dents on metal parts of a car body that either cannot be accessed directly or need to be leveled from the reverse side. Using a reverse hammer is very convenient for working with car sills, wheel arches and pillars.
There is a classification of reverse hammers for body repair, which includes:
• With weights (two and three are used).
• Reverse hammers operating thanks to a pneumatic mechanism.
The specificity of straightening work depends on the type of reverse hammer. To level the surface of the body of a new car, it is better to use a vacuum return hammer, since only it allows you to perform such complex work without first removing the paintwork. In the same case, if you are going to use one of the remaining types of hammers, the part of the body where the dent is located will first need to be thoroughly cleaned with sandpaper. Otherwise, the paintwork will still be damaged by the reverse hammer.
How to use a reverse hammer
The entire process of straightening dents on a car body using a reverse hammer should be performed in the following order:
1. Rinse the entire work surface with water to remove all contaminants, and be sure to treat the entire surface with a degreaser.
2. If necessary, remove the paint coating from the work surface. To do this, it is more practical to use a grinding machine.
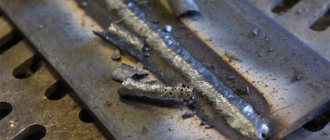
3. Weld round repair washers to the area with the dent.
4. Attach a special hook to the reverse end of the hammer, which should come with the tool.
5. Hook the hook onto the washer.
Read also: How to attach a bracket to a shelf
6. While holding the tool by the handle with one hand, grab the weight with the other hand and point it towards the handle. In this case, your movement should be as sharp as possible.
Due to the fact that the reverse hammer is tightly coupled to the body surface, with each of your movements with the weight, the reverse dent is leveled. At the same time, the harder you hit the weights, the faster the process of straightening the car body will go.
You must be extremely careful when working with a reverse hammer. Do not rush under any circumstances and after each impact evaluate how the dent has changed. This will help you avoid creating new dents at the edge of an existing defect. But if you work slowly and follow all the instructions correctly, you can remove a small dent in just a few minutes.
It is often impossible to repair a car body without a reverse hammer, although each time it is necessary to soberly assess the situation, and if the work area is too large, resort to using other tools. As for the reverse hammer, fortunately, such a tool for body work can be made with your own hands.
We manufacture our own reverse hammer
Today, reverse hammers can be purchased at any auto store. It is worth noting that they can be sold either as a separate unit or as part of a set of tools specifically designed for body repair. But since there are no complicated mechanisms in the reverse hammer, it can be made at home.
To make your own body repair tool, you will need to prepare some materials:
• The pin is made of durable steel, 50 cm long and 2 cm in diameter.
• A handle or attachment that can be placed on a steel pin. The handle should be made of ebonite or rubber.
• Welding machine and protective equipment for it (gloves, mask).
• Steel hook no more than 0.5 mm thick.
• A 16cm weight is about 6cm thick.
• Steel washers in the amount of 2 pieces (a diameter of 2.5-3 mm is suitable).
We recommend doing all other work on making a reverse hammer for body repair with your own hands in the following sequence:
1. If necessary, we clean the metal pin from rust by grinding and treat the perfectly flat surface with any degreaser.
2. A hook must be attached to one end of the pin. If the hook has a thread on one side, it can also be threaded on the pin, creating a removable connection. Otherwise, you will have to use welding to attach the hook.
3. It is necessary to place a washer at the base of the hook, which will prevent the weight from moving to the working surface and accidentally damaging it.
4. To put a weight on a metal pin, you need to make a hole in it, the diameter of which should be 1 millimeter larger than the diameter of the pin. Thanks to this, the weight will be able to move freely, and you will be able to give it any possible acceleration.
5. The weight is placed on a pin, and steel sheets are attached on top of it, which will allow it to be grasped as securely as possible to strike the body. It is also worth putting and welding another washer on top of it so that the weight does not hit the handle.
6. Proceed to fix the handle. Please note that it should sit on the pin as securely as possible, so if possible it should be welded to the base of the pin.
This completes the process of making a reverse hammer. As you can see, if you prepare materials and tools in advance, all work will take no more than 40 minutes. With your own hands, you can even make a reverse hammer with a vacuum suction cup, which will greatly simplify the performance of repair work on the body. To do this, instead of a hook with which the tool is attached to the working surface, it is necessary to use special suction cups that can provide the same reliability of fastening.
Subscribe to our feeds on social networks such as Facebook, Vkontakte, Instagram, Twitter and Telegram: all the most interesting automotive events collected in one place.
Which tool should I choose to repair a specific dent?
Tools come in different lengths, shapes and sizes. Each tool is uniquely designed for a specific purpose, and a PDR technician has a variety of tools to access even the most difficult to reach areas of the vehicle.
How do you know which tool to use for a certain dent? There are two main things to consider, one is “reach” and the other is “leverage”. That is, whether you can reach the back of the dent and whether you can influence it. This will help narrow down your choices among the available tools.
It really doesn't matter what tool you use, the main thing is to get the result. There may be more than one way to repair the same damage. In addition to the classic PDR hand tools, do not forget about the capabilities of the adhesive system. With its improvement, the possibilities of paintless dent repair have expanded significantly.
What is he?
The design of the reverse hammer is quite simple. Its base is a metal rod, the diameter of which is 10-20 mm, and the length is about 50 cm. A steel sleeve (weight) is put on the rod.
At one end, the rod has the shape of a hook, at the other, a washer is welded so that the weight does not fly off, and the impact force of the device is transferred to the rod. Industrial hammers often come with several hooks of different shapes, which are needed to grab staples welded to the area being repaired. There are also reverse hammers on sale that have two or three bushings. This makes it possible to adjust the impact force when leveling out dents.
How to use a reverse hammer?
- First, you need to inspect the area of the car being repaired in order to select a hook based on the shape of the dent and calculate the degree of force applied.
- After this, the area of the body surface that needs to be repaired must be cleaned from paint and primer to metal.
- Next, special repair washers (brackets) must be welded to the dent.
- Then the hook of the tool is hooked onto the staples.
- Then, with light and careful blows, you need to begin to pull out the dent.
- This process must be continued until the damage is corrected.
- In order to remove elongated edges and dents, it is necessary to weld several staples, and then, by inserting a hammer rod through their holes, remove the defect.
- After this, the straightened area can be primed and re-coated with paint that matches the body color.
Among the disadvantages of this device, it should be noted that the paint has to be removed from the dent, even if it was not damaged. In addition, it cannot repair major damage.
Read also: Tumbling filler otec
It is highly not recommended to use conventional reverse hammers for large dents when repairing the central areas of the hood and roof, as well as the trunk lid of a car. The result of welding staples can be severe deformation of the metal and its stretching. As a result, the part will have to be replaced completely.
There is a special type of the described device - a vacuum-type reverse hammer. Its distinctive feature is that with its help it is possible to repair a large area of the car body. In addition, there is no need to remove the paint before working with it.