How to properly sharpen scissors at home: preparation
Drawing a parallel with skates, the blades of scissors should have a similar sharpness.
The main principle is that uniformity and linearity must be strictly observed during processing. The angle for sharpening is selected taking into account the hardness of the material from which the cutting device is made. The lower the indicator of this mechanical characteristic, the smaller the angle should be. If the scissors cannot cope even with cutting ordinary paper or thin fabric, it is necessary to diagnose the cutting edge and other elements of the tool:
- Checking the hinge assembly. Weak fastening of the cutting edges practically negates the correct functioning of the tool. If the scissors are screw-type, then the threaded connection should be tightened. If they are riveted, they crimp the rivet. In scissors connected in the classical way, you need to check for play from time to time.
- Geometry assessment. Looking at the blades from top to bottom, on working scissors you can observe a negative bend angle. There should be close contact at the point where the cutting edges meet. Separated blades, even with a slight play between them, will never fully cut the material, even if their edges are perfectly sharp. If you need to bend the blades a little, you can do this yourself, observing safety precautions.
- Checking the condition of the cutting edges. Before you start sharpening the scissors, you need to carefully inspect them. There may be nicks or rust on the metal frame. It often happens that perfectly sharpened blades begin to cut poorly due to some small chip that does not ensure complete mating of the edges. It is enough to eliminate it, and the scissors will be suitable for cutting.
- Cleaning the surface of cutting edges. You often have to use office scissors to cut adhesive tape. The adhesive sticks to the sharp halves, followed by particles of dust and dirt. The remaining pieces of tape block the cutting edges and stick to the material being processed. You can use alcohol or solvent to remove foreign objects and glue.
Typical defects
Any scissors can work poorly for two reasons:
- the blades came apart;
- the cutting edge of the supply has become dull.
How does a gap occur?
If the scissors are made of soft alloy steel, then when large loads are placed on the blade, the latter may become deformed and move away from the cutting plane. In this case, they will further bend the material rather than cut it.
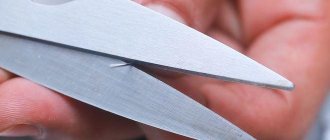
Such a defect is easy to detect if you look at the gap between the shifted blades.
Sharpening methods depending on the type of scissors
There are various types of scissors used in the household, which have different blade shapes and differ in size. This includes not only household, stationery, hairdressing and tailor's scissors, but also their home varieties such as garden and manicure scissors.
Some of them have specific cutting edge angles, many are non-separable, some household scissors are made of hard carbon steel, while others are made of ordinary structural steel. In order to sharpen them correctly at home, you must follow the following rules:
- rigid fixation of the blade being sharpened to ensure uniform geometry along its entire length;
- exact following of the inclination of the sharpening tool to the angle of the cutting edge;
- performing home sharpening from the handle to the end of the blade;
- movement of the sharpening tool in only one direction (most often away from you).
The following are brief descriptions of the sharpening features of the smallest and largest representative of the household scissors family.
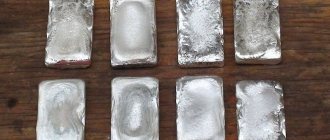
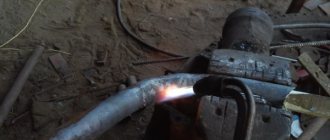
Reinforcement
For reinforcement, I clean a 1.5 sq. piece of copper wire.
and heat up an electric soldering iron with a thin tip.
Then I gradually solder the veins in a circle, taking short breaks for the plastic to harden.
It turns out, of course, not ideally, but the strength increases.
After soldering the wires, the handle looks like this - photo 4.
At the very end, I break off the wire and press its edges with a soldering iron.
The hardest part is to bury the wire in the handle.
, since in the soldered area, due to heating, the veins pop out again, because they do not sit so deep.
I do everything slowly.
Also, after reinforcement and hardening of the plastic, I go over the handle with fine sandpaper and end up with a handle of this type - photo 5
. It’s clear that it’s not like new, but it still seems okay.
Procedure and sharpening angle
To ensure that the scissors do not become dull ahead of time, and the quality of the cut is high, it is necessary to set the correct sharpening angle. It is selected depending on the hardness of the material used.
The harder the material, the greater the angle
The harder the material, the larger the angle. If you plan to use the device in domestic conditions, then it is enough to make a cutting angle of 60 degrees. For hard materials – 70-75 degrees. Work on factory sharpening takes place strictly at the same angle.
Important! The blade quickly wears out and breaks if you sharpen it back and forth. This is exactly the mistake many people make. The quality of the cut of such a tool deteriorates, and it becomes impossible to use it for fine work.
Sequencing:
- Movements that are carried out in a direction towards yourself, starting from the tips of the scissors to the rings, are considered correct.
- To consolidate the result, the blades are ground with fine-grained sandpaper. This process will remove unnecessary irregularities, thereby improving the quality of the cut.
- At the end of the work, the tool is checked to see how correctly the sharpening was carried out.
How not to sharpen
The most important condition when sharpening is that you cannot change the factory angle of inclination. All beginners make this mistake. Such manipulation will affect the quality of sharpening and the ability of the tool to continue working. Often they try to sharpen the inner plane of the blade with a file. The effect in this case will be the opposite. File only the cutting edges of the tool.
- For garden shears, sharpening using foil, a needle, or sandpaper will not work. A grinding wheel or whetstone should be used;
- It is not recommended to use a gypsy needle for tailor's scissors. But, in addition to foil and sandpaper, you can use plastic bottles, which are also cut into small pieces;
- Nail scissors and stationery scissors are easily sharpened with a needle, and a sharpening wheel can quickly put them out of use, so it is not suitable.
Another common mistake is when scissors are taken apart. This cannot be done for all types of products; for example, if the blades are connected by a spring or rivet, then they should not be separated. Any inaccurate movement will cause the cutting surface to become distorted. The result of such work is that the tool will be unsuitable for use.
The nuances of sharpening special-purpose scissors
As mentioned at the very beginning, there are a large number of variations of scissors for professional use. Editing such a tool in most cases has its own technological features.
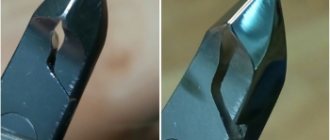
Manicure
High-quality manicure scissors are quite difficult to sharpen at home. To do this, you need to know how to properly tighten the connecting element and what the sharpening angle should be. The blades are processed with a special diamond needle file from base to tip.
Kitchen
At home, it is best to sharpen kitchen scissors in a way that does not require disassembling them. Foil, sandpaper or metal sponge work well. However, such sharpening will not provide long-term results. For better processing, contact professionals.
Hairdressers
Hair cutting scissors are made from high-quality materials, as they are designed for a long service life. Properly sharpening blades at home is very difficult and risky. Entrust sharpening to a professional who uses special laser equipment for the job.
Garden
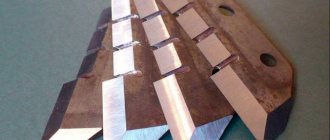
These scissors, on the other hand, require larger tools. They use a vice, a large file and sandpaper. In this case, there are two options - sharpening the whole or “dismembered” device. It is still more convenient to process the halves. Therefore, the first step is to unscrew the nut and remove the screw.
The edges are brought out, starting the movement from the handle. All attention is paid to the correct position of the file. As a rule, scissors are sharpened away from themselves. Then the burrs are removed from the blades by grinding the surfaces with sandpaper. The best, most convenient option is processing using a sheet lying on the desktop.
Metal scissors
To process metal scissors, be sure to maintain a sharpening angle of approximately 75 degrees. In preparation, separate the blades by unscrewing the connecting bolt. You can sharpen knives with a file or sandpaper. After the procedure, treat the parts with an anti-corrosion agent to extend their service life.
Sheep
Such scissors require maximum sharpness, so processing with foil or sandpaper will not work. Blades must be sharpened using a machine with an abrasive wheel. Process each blade separately, opening the halves as wide as possible.
Sewing or tailoring
The tool for cutting fabrics must be very sharp, but it is quite possible to sharpen it yourself. However, usually such sharpening does not last long and the procedure will have to be repeated often. For work, it is best to use foil or fine-grained sandpaper, as described above for stationery scissors.
What professional equipment is used for sharpening manicure tools?
Where can you sharpen nail scissors, tweezers, and cutters if you have given up on home experiments and decided to entrust the tools to a professional? There are special workshops that carry out maintenance of manicure equipment.
On average, the cost of such a procedure starts from 300 rubles, and varies depending on the city and country of residence. Many craftsmen in big cities complain that the cost of the service is almost comparable to the purchase of new tools, but this is only if you compare inventory of low and medium price categories. If you are working with high quality products, it is better not to take risks and contact a workshop.
There are two types of professional sharpening machines:
- Mechanical
- Laser
The first ones are equipped with a diamond-coated metal grinding wheel, which, when rotated, grinds down the edges of the tools, giving them the desired sharpness. The method keeps the tool durable and does not shorten the service life.
A laser machine is easier to use, but it wears down the metal faster, making it more fragile. Where to sharpen manicure tools after this? Of course, where the craftsman does it with a high level of quality, regardless of what machine is used.
How to sharpen nail scissors
Most girls know how to do their own manicure. They use different tools: files, tweezers, and special scissors. Of course, each device requires some care. Scissors, for example, need to be sharpened periodically - a non-sharp tool will not do anything good. Is it possible to sharpen it yourself? We invite you to learn more about this.
How and with what to check the sharpening level
Even a professional manicure cannot be done with a blunt instrument. That is why regular maintenance of tongs, scissors, and tweezers is necessary. With a large flow of clients in the salon, maintenance of scissors and cutters may be required once every two to three weeks. With a lower flow - much less often.
To understand when it's time to sharpen your manicure tools, there are a number of simple tests. They will require the following materials to choose from:
- Thin plastic bag
- Stretch film
- Dried wet wipe made of non-woven material
- Elastic vinyl, latex or nitrile gloves
These same tests will allow you to check the quality of the work performed by the master. In the workshop, these tests are used to check each of the processing stages of blades and cutting edges.
Methods and instructions on how to check the quality and level of sharpening:
- We fix the thin plastic bag so that the edge is even. Unclench the scissors, tongs or wire cutters, place the edge of the bag between them, and close along the entire length. The blades should not tear, snag or pull the polyethylene.
- Stretch film is the most demanding material for checking the level of sharpening. The principle is the same - we fix the film and close the blades along its entire length. The cut should be smooth.
- A napkin made of non-woven material demonstrates well the presence of burrs on metal. With high-quality processing, the cut is smooth, without snagging on the blade.
- Vinyl or nitrile gloves should be secured between the thumb and forefinger, the cutting edges should be completely opened and closed, placing the glove sheet between the blades, and then pulled down slightly towards you. Often scissors or tongs cut well at the base, but the closed edge pulls the glove and tears it. This means it's time to sharpen the blades again.
Basic Rules
Experts recommend sharpening scissors once every 6 months. If the instrument begins to “deteriorate” earlier, do not delay this procedure. The main sign that indicates the need for sharpening is the appearance of dark spots. Just keep in mind that before the process itself, the scissors need to be prepared a little.
Preparing the scissors
- When the scissors close, both handles should come together. Check if this happens. Also, the blades should not have protrusions or other irregularities.
- Check whether the bolt that connects the two parts of the scissors needs to be tightened.
- Treat the instrument by wiping it with an antibacterial agent.
- If the scissors have scratches, rust or other defects, try to fix them or contact a professional.
- Some people boil them to disinfect scissors. This is not necessary, as the procedure leads to rust.
- Choose the sharpening method that is most convenient for you.
Important nuances
Experts recommend sharpening manicure tools every six months. There are several ways to process them. To determine whether this procedure is necessary, you should examine the appearance of the devices. If they are inconvenient to use, and there are dark spots on the edge, then sharpening is required.
The procedure must be performed immediately after these signs are detected. The larger the stain, the longer and more difficult the preparation is required. Before this, you will need to process the scissors, otherwise the result will be minimal. Sometimes he doesn't follow at all.
Care of scissors
Any instrument needs care. And the more often we take care of it, the better it works. The same applies to nail scissors. If you handle them carefully, you will need to sharpen them less often. Remember a few rules that will help you always do a manicure and maintain the beauty of your nails.
- Clean the tool after each use. This is necessary in order to promptly remove particles remaining after a manicure. In this case, the tool will retain its quality longer, and rust will not bother you.
- Don't forget about the protective caps. Most often they are sold together with tools. The main purpose is to protect the blades.
- If the scissors are intended for the cuticle, then you should not use them for other parts. It is very important not to “overload” the instrument.
- To prevent corrosion and strengthen the tool, oil your scissors regularly.
Is it difficult to sharpen nail scissors at home? We think not. It is important during the process to choose a method that is suitable specifically for your scissors. Keep testing until the blades are sharp enough. We wish you success!
Video: how to sharpen nail scissors at home
Rules for working at home
Regardless of what tool is used, you need to know how to sharpen metal scissors at home correctly to get a good result
It is important to know 4 rules:
- It is necessary to take into account the factory sharpening angle. Self-sharpening of manicure or other scissors is carried out only at the established angle. If you break the rule, you can permanently damage the tool for manicure and cuticle trimming.
- The tool sharpens towards itself. Movements must be constantly controlled; you cannot sharpen the side cutter using back and forth movements. Tools can be sharpened from the nose to the rings.
- Fighting burrs. If there are burrs after sharpening, they are removed with a fine-grained abrasive. The only exception is hairdressing equipment; it cannot be made too sharp.
- Checking the work. It is made according to the material for which the tool is intended. For example, if tailor scissors have been sharpened, they need to be checked on the fabric. A thin piece of fabric is taken, hung and cut. If the cut is smooth and pieces of fabric are not caught, it means the job was done correctly.
If the design of the scissors allows, then it is better to disassemble them to simplify the task of how to sharpen nail clippers at home. The blades are sharpened separately, so it is more comfortable to work, and the result is better.
Preparatory stage
You can sharpen scissors at home in the shortest possible time. In order to improve the quality of the result obtained and eliminate the possibility of complications of the process, attention should be paid to the preparatory stage:
- All contaminants must be removed from the metal surface being treated. To do this, simply moisten cotton wool in alcohol and wipe the surface. In some cases, more serious contamination occurs, for example, paint. You can get rid of them by combining mechanical and chemical surface treatment methods.
- The tool is checked for the presence or absence of defects. Many people decide to sharpen their scissors because they are not cutting well. In some cases, the problem may be that there is a large gap between the two halves. If the ends do not meet, then the problem is with the mounting screw.
If the connection of the two halves is loose, you can tighten the connecting mechanism using a screwdriver and pliers, as well as a hammer. Both a screw and a rivet can be used as a connecting element. When performing such work, the following points should be taken into account:
- The mechanism should be tightened carefully, as if the clamp is too strong, the scissors may become stuck and will have to be thrown away.
- It is recommended to turn the screw no more than 0.5 mm.
- In the case of a rivet, the scissors are placed on the anvil and fixed; with a few blows, the plug can be flattened.
- Some models have a kind of limiter that prevents the two halves from meeting. In order to reduce the gap, the limiter is filed down.
After eliminating the defects, you should check whether sharpening is required. Very often the cutting edge is in good condition, but due to the large gap, the scissors cannot cut materials.
Proper care of scissors in the future
Your scissors will not require sharpening or repair for a long time if you follow the basic conditions of proper storage and use. The special tool should only be used for its intended purpose. Cutting blades should be cleaned regularly with cleaning agents and disinfectants.
At least twice a year, the fastening and connecting mechanism should be lubricated with machine oil. After each use, be sure to wipe the blades with a dry, clean cloth. Professional tools should be stored in a protective case and should not be exposed to moisture, dust or contamination.
Sources
- https://sdelai-lestnicu.ru/obustrojstvo/kak-natocit-noznicy-v-domasnih-usloviah-7-effektivnyh-sposobov
- https://WikiMetall.ru/metalloobrabotka/kak-natochit-nozhnitsyi-v-domashnih-usloviyah.html
- https://instrument16.ru/zatochka/kak-potochit-manikyurnye-nozhnitsy-v-domashnih-usloviyah.html
- https://ubirai.ru/raznoe/kak-natocit-noznicy-v-domasnih-usloviah-manikurnye-i-parikmaherskie.html
- https://baltija.eu/2021/05/08/kak-natochit-nojnicy-vozmojnye-sposoby-borby-s-typostu-instrymentov/
- https://heaclub.ru/kak-i-chem-natochit-nozhnicy-domashnie-manikyurnye-parikmaherskie-filirovochnye-portnovskie-sadovye-po-metallu-ovechi-prosto-bystro-i-dostupno-v-domashnih-usloviyah- kak-natochit-nozhnicy-igol
- https://hoznauka.ru/poleznye-sovety/kak-natochit-nozhnicy.html
- https://1000sovetov.ru/article_krasota-v-vashikh-rukakh-kak-zatochit-manikyurnye-nozhnicy
- https://math-nttt.ru/stanki/kak-zatochit-shchipchiki-dlya-nogtej.html
- https://janet.ru/404972a-kak-zatochit-manikyurnyie-nojnitsyi-v-domashnih-usloviyah-zatochka-manikyurnyih-instrumentov
- https://heaclub.ru/prichiny-pochemu-nozhnicy-mogut-ploho-rezat-kak-natochit-nozhnicy-samostoyatelno-osnovnye-pravila-kak-zatochit-nozhnicy-v-domashnih-usloviyah-oselkom-bruskom-tochilnym- kamnem-nazhdachnoj-bumag
- https://DomZastroika.ru/byt/kak-zatochit-nozhnitsy-v-domashnih-usloviyah.html