Marking for loop
An important part of the correct installation of any furniture hinges is, of course, the most accurate markings. If it is done poorly, it will certainly affect the functionality of the door.
The correct markings for furniture hinges will help you find the right center to make the recesses.
You need to “move away” 7-12 centimeters from the edge. The number of hinges is standard two, but it can vary depending on the type of furniture. It is necessary to maintain a specific distance between the loops. It is equal to fifty centimeters. The door parameters depend specifically on the number of canopies.
When you have finally decided on the quantity and all the necessary dimensions of furniture hinges have been installed, you can mark the central holes in relation to the width of the door. The distance from the side should be approximately two centimeters. It is also impossible not to take into account that the fastening should not be placed where the shelves in the closet or cabinet should be.
After taking all the necessary measurements, make notes. Remembering to respect the width spacing, mark the placement point. At the intersection of these marks, you need to make a “hole” with a nail or a self-tapping screw. If the facade is higher than a meter, make notes every half meter.
For more precise marking, you can use a special template called.
Design features and purpose of the tool
A bar with a set of holes allows you to use the drill with maximum precision. The conductor sleeves play the role of guides. They also determine the diameter of the drill.
In industrial production models, the bushings are made of tool steel. This material is characterized by its resistance to stress and low degree of mechanical wear, which extends the service life of the tool.
Most often the device has a rectangular shape. The templates are placed linearly, with a gradual increase in the hole pitch.
The main difference is the location of the drilling axis. There are two types of conductors:
- The hole is directed perpendicular to the working plane.
- The drilling axis is located at an acute or obtuse angle to the surface.
A variety of models allows the device to be used in various industries:
- Mechanical engineering. The device is used in the process of assembling mechanisms and equipment, the design of which is subject to increased precision requirements. Assembly production cannot do without conductors, which have long taken their place as one of the types of machine tools. Some models allow you to drill several holes at the same time, which increases productivity.
- Construction. Conductors are actively used for drilling holes in metal structural elements. In addition, the equipment is used for pipe processing. Design features allow you to maintain the required angle during the work.
- Woodworking. Modern assembly production of furniture products cannot do without conductors. They are used to make holes for fasteners. Particle boards, which are the main manufacturing material, do not tolerate careless handling: drilling at the wrong angle can lead to rejection of the element due to a mismatch.
This is not the entire list of industries in which precision drilling is in demand. Any mass production requires unification of basic elements. The use of templates allows you to maintain the exact diameter and angle of the holes.
In everyday life, conductors are used in the process of carrying out repair work. Many procedures require drilling holes. The device is useful where increased demands are placed on accuracy.
Adjustment
Adjustment (or adjustment) is the final stage of installation of furniture hinges. It must be performed in several planes at once - vertically, horizontally, and in relation to depth:
- Adjusting the depth will help press the door closer to the body, or ease the pressure. You need to tighten the oval hole.
- On the vertical side - it will help to move the facade. This is done by twisting oval-shaped holes.
- On the horizontal side - ensures free movement of the door back and forth and back. The purpose of this adjustment is to avoid gaps between the cabinet and the door. The method is great for rooms with uneven floors or walls.
Now you know how to secure furniture hinges. As you can see, this is not so difficult to do. You don't need to have any special skills or abilities. Doing this kind of work with your own hands will be another reason for a little pride.
Conductor for cylindrical blanks or pipes
For cylindrical surfaces, rotary or universal types are most suitable, since when drilling a pipe or any other object that has a spherical shape, the drill can move, causing the hole to be of irregular shape.
Conductor for cylindrical blanks or pipes
Such templates allow you to maintain perpendicularity between the pipe or sphere and the drill itself. It is very important.
Other types of loops
So, all types of loops can be classified in different ways. Thus, there are different types according to design, purpose, method of fixation and application. In general, there are several dozen types of furniture hinges, some are more common, some are less common, but almost all find application in various types of furniture designs. In addition to four-hinged hinges, let's look at a few more variations of hinges that may be encountered by furniture assemblers or people who have bought new interior items and decided to assemble them themselves.
Card loop
Card loops are considered the oldest. Their ancestor is a forged hinged hinge with a long overlay. Outwardly, they resemble an ordinary door hinge, only slightly smaller in size. The design consists of two metal strips connected in parallel using a thin rod that acts as a hinge. Nowadays they are rarely used, but are indispensable in the manufacture of retro-style furniture.
Butterfly door hinges
Pendulum type hinges or bar hinges make it possible to open the door 180 degrees. What happens is something similar to how the doors open at the entrance to a saloon in old westerns.
Bar loop
Mezzanine hinge structures are designed to attach horizontally oriented doors that will open upward. The hinges have a spring mechanism and also allow you to fix the door when open. They resemble ordinary overhead variations of loops.
Mezzanine hinge MK01
Ombre structures are used for so-called hinged doors. They will be mounted on both ends of the cabinet and do not require insertion, but may require minor milling (up to 2 mm). Then the sash can be opened 180 degrees. This is an ideal hinge for a folding table.
Hinge for folding elements
Secretory structures are similar to the card ones described above; they have an axial hinge and plates. They make it possible to open the façade downwards and keep it in a horizontal position. They can be accompanied by a special bracket that provides a supporting function. Usually installed in those cabinets where a bar is provided.
Secretory loops
Blind hinges, otherwise called adit hinges, are used for doors on the side of the cabinet that is adjacent to the wall. They can be used to attach the door to the false panel.
Gallery hinges
Heel products are extremely rarely used because they are designed only for lightweight doors. But they can be installed on facades with any type of opening. Installation is carried out in the lower and upper parts of the sash.
Heel loops for furniture
There are special hinges for glass sashes. They also come in different types, but their advantage is that they can withstand significant loads, and they look very beautiful.
Glass hinge
And relatively recently, hinges with 8 hinges, eight-hinged, appeared on sale. To install them, you do not need to resort to milling or cutting. This is an improved variation of the usual four-joint hinge. True, they are more difficult to install, and therefore, despite the absence of the need to carry out any preparation, such loops are rarely used.
8-joint hinge
Homemade conductor devices
A DIY jig for drilling holes is an excellent alternative to store-bought options. Because the store does not always have exactly the option that is required at the moment. You can assemble it yourself at home.
Let's consider a more popular and standardized option, suitable for more frequently performed work, such as furniture assembly.
Diagram for assembling the conductor
Diagram of a conductor device for drilling holes
Reinforcement with a diameter of 10 mm or more will be required. Using a cutting tool, such as a grinder, cut into pieces of the required length. Clean the workpieces with sandpaper. According to the standard, all drilled holes have a distance of 32 cm from each other. Make marks and drill holes. The next stage involves creating reference points for our blanks. A plate made of any metal is perfect for these purposes. Thickness from 1 mm. It is unwise to use a thicker plate, since it only increases the weight of the entire device. They are connected together and then places for threaded fastening are outlined. They are connected and secured to each other. That's all, the device is ready to use.
The main purpose of the jig, which is also the most important thing, is to simplify the work with the drill and reduce the time of assembling furniture. The difference between a purchased device and a home-made device is its adjustment to the specific needs of the master.
Making your own template
Making a template for furniture hinges with your own hands follows a clear plan
It is important to follow the sequence of steps. If you follow all the rules, then there will be no difficulties in the process.
Stages of developing a template for loops:
- Selection and preparation of materials;
- Preparation of necessary tools;
- Development of template details;
- Final assembly of all elements.
Paper template for download
- To create a template yourself, you need to print a sample.
- According to its dimensions, make a blank from solid material, plastic or wood
- Attach the paper template to the workpiece
This is what should happen
To create a workpiece you will need to take a drill, router, hammer, jigsaw. You will also need tools for drawing markings. First you need to make a base. The optimal dimensions are 19x38 cm. A hole measuring 13.5x7 cm should be made in the center. The edges should be smooth. A router will help with this.
Bolts need to be placed on the workpiece
It is important to maintain symmetry relative to the width of the base. The bolts must be deepened into the structure so that they do not interfere with further manipulations
The hole is made wider than the connecting elements and additionally driven in using a hammer.
It is necessary to retreat 7 mm from the 13.5x7 cm holes and make small notches. Around an element with dimensions of 37.5x7 cm, notches are made on one side at a distance of 30 cm from each other.
A homemade template requires a holder measuring 2x5 cm and a length of 5.8 cm. You will need to install a limiter on one of the sides, which looks like a small block. This element will not allow the distance to shift when installing the facade.
Then all parts of the template are attached. Washers are installed under the bolts and nuts. This element increases the durability of the template. The manufacturing process does not require special skills or knowledge. It is enough to familiarize yourself in detail with the template development scheme.
Selection of materials for work
For the template, you can use plywood, chipboard or MDF. More durable structures are made of plexiglass and metal. You can take several materials for one template. So you can use chipboard for the base, and make the guides from a more durable material. It is easier to work with wood, as it is easier to process than glass and metal.
Required connecting elements:
- Bolts. You will need 6 pieces with a thickness of 6 mm and a length of 30 mm. To fix the connecting element, you need to have a 10 key.
- Nuts. Need 6 pieces. The main requirement for the element is convenient adjustment. Wing nuts are most often used.
- Washers. Their diameter should be 6 mm.
- Self-tapping screws. They are selected depending on the thickness of the remaining connecting parts.
Classification of tools
Based on functionality and design functionality, drilling jigs are divided into types:
- invoices. The name comes from their functional way of working, that is, they are applied to the workpiece or the surface being processed, attached to it with special clamps or held by hand. This device is suitable for drilling flat surfaces, such as boards, MDF boards and chipboards. It is called a furniture jig for drilling holes. Thanks to the use of a jig, the holes themselves are very neat and precise;
- rotary. Such templates are ideal for drilling round or cylindrical surfaces. Thanks to this design, the axis occupies a horizontal, vertical and inclined position to the surface. This is possible thanks to bushings that can guide the drilling line;
- universal. Products of this design are widely popular in small industrial production, where quick adjustment to the existing surface plays an important role. Due to their uniqueness, they are also in demand in the household, when it is necessary to work with different materials, planes and surfaces; tipping. In terms of functionality they are somewhat reminiscent of universal ones. They are necessary when you need to make a hole in different planes and at different slopes. This is very convenient for carrying out some repair work when you need to drill a hole in the wall without a lot of time and at a specific angle;
- sliding. According to its name, such a conductor does not have to be attached to the surface where it is supposed to be applied. It should be noted that such a conductor is inconvenient to use, since it requires constant hand holding;
- fixed. Unlike sliding jigs, they are attached to the place where they are intended to be used. They are much easier to attach, but due to their design they limit the scope of human work. This can be clearly seen when working on walls or vertical planes with only one spindle.
Jig for drilling overhead holes
Universal drilling jig
Jig for drilling holes, fixed
Rotary hole drilling jig
Description
A furniture jig is a special template tool that is often used by specialists in small and large enterprises to mark drilling points on products and, in some cases, also ensures that the drill fits straight into the material. Depending on the needs of the master, conductors can be either factory-made or self-made. Most often they take the form of a metal template with sleeves for the hole and marking the distance between them. The main advantage of using a furniture jig is that specialists spend less time taking measurements and making markings for drilling.
Using it, you can quickly mark the necessary points on the product blanks, and then make their high-quality connection using different fastening methods. The scope of its application is quite wide, but most often it is used for quick insertion of standard furniture hinges. The device may vary in appearance and markings on the template depending on its intended purpose and operating conditions. For example, a jig for furniture hinges in the production of doors will differ significantly in appearance from a jig that is used to fasten massive furniture doors.
Manufacturers of furniture conductors
The following brands of conductors are widely used in the domestic market and have proven themselves well.
Assistant
The furniture jig system of this company is designed for the production of cabinet furniture based on a 32 mm assembly system, suitable for all European fittings. The customer selects the complete set of the system individually for himself, which allows him to save money by choosing only the essentials. The Assistant jig contains modules for marking and drilling holes for guides (roller and ball), tandems, hinges, lifting mechanisms, confirmat, eccentrics, dowels, handles and other holes using the 32 mm system.
Dubel-Profi from KWB
German jig for drilling holes for dowels. The mechanism of the device allows for perfectly accurate positioning of holes with a diameter of 3 to 12 mm. The jig is equipped with a depth gauge and a special stop, which helps to drill at right and oblique angles. Thanks to the rubber pad, the device is convenient to use on smooth and polished surfaces.
Condor
The Condor furniture template is a portable device that is convenient to take with you directly to furniture installation. Thanks to replaceable bushings, the distance between the holes can be adjusted. The tool allows you to make holes for a dowel or confirmat. Milling grooves are installed at distances of 16 or 18 mm, which allows you to work with various materials.
A furniture jig is an indispensable assistant in any furniture production. This inexpensive device will help not only reduce labor costs, but also significantly improve the quality of your products.
Drilling holes
Installation is carried out with all the rules:
The depth of the hole for the furniture hinge should be about thirteen millimeters. If possible, the insertion of furniture hinges should not be deeper, otherwise the front side of the canvas may crack; The diameter of the hole depends strictly on the cup of the loop
Tools must be completely aligned with their axis to prevent damage to the surface; A sharpened cutter will help protect the blade from damage and chips; Do not rush while drilling, otherwise there is a risk of doing it sloppily; It is worth paying attention to the dimensions of the cups and their dimensions when installing furniture hinges;
Having drilled one hole, proceed to the next and so on until all the holes for laying the hinges are prepared.
What tools should I use for this?
The bowl must be secured to the facade, and the bar to the body of the bedside table. The furniture hinge must be inserted into the hole, which must be made in advance. The shoulder of the loop becomes a kind of bridge, now connecting both parts. To make holes for such loops, you need to prepare the following tools:
- screwdriver or drill;
- special drill-mill;
The diameter of the cutter for the hole for a furniture hinge is 35 millimeters or 25-26mm. It is selected depending on the size of the loop cups. To create holes for such hinges, you can also use a simple drill.
A multifunctional drill, with attachments that are easy to replace, is quite suitable for such work.
The middle spike must be installed in the center of the circle, outlined using a specially prepared caliber. Automatic calibration is used on the corresponding machines, but at home the master cannot do without a specialized electric tool.
During installation, hinges require a high level of care and precision. The chance to complete exactly the required niche is the most important advantage of the so-called Forstner drill. It can provide a stop that will prevent you from penetrating further than required. And the teeth of the drill do not allow it to deviate from the intended “course”. The end result is an almost perfect hole. And due to this, the cup fits into the recess quite tightly.
But the above-mentioned drill also has one significant drawback, which manifests itself when working with a solid piece of wood. This is low quality, which is to be expected if the instrument was not made in a factory. This is why you should choose tools exclusively from official companies. And, of course, don’t forget about warranty cards.
Depending on the type of panel you are working with, the cutter can get quite hot. Due to this, it can burn the edges and wood that is removed from the recess. That is why, when working with such a foundation, you should not forget about breaks in work. So that the drills have time to cool down at least a little. Working in three to four sets will be ideal.
Particular attention should be paid to breaks when working with MDF sheets. If the activity is carried out with chipboard sheets, parts made of strong alloys will be able to make recesses for hinges really quickly and without much stress
A small device that solves a big problem. Conductor for furniture
Precise drilling. Even without markings. Even with the wrong drill. And even a drill with chuck beating. And all this quickly. I drilled about 200 holes, and not one of them turned out to be a hole. How is this possible? I'll tell you now.
I once bought a cabinet from Ikea. As the Swedes love, it was sold in a cardboard box, in the form of a stack of boards and a bag of accessories. Having quickly assembled it, I decided that these boards were not much different from furniture panels from Leroy Merlin, only they were cut to the required size and holes were drilled for fasteners - and the price was several times higher. At the same time, you can cut sheet material in the same Leroy, almost thank you.
Then we made repairs and for a long time could not decide where to install the washing machine. She didn’t have enough space in the bathroom, she wanted to free up the kitchen for more important things, she didn’t look right in the hallway... Now, if I hid it in a cabinet, that would solve the problem. But where can I get a cabinet with an internal size of 60 cm? It’s not sold ready-made anywhere, so I decided to make it myself. That first experience was not entirely successful. The cabinet was assembled using eccentric ties and confirmats (these are screws for chipboard). For an eccentric coupler, you need to drill two holes in perpendicular planes with intersecting axes. I missed the drilling a couple of times, the holes had to be drilled out so that everything would line up, and therefore there were backlashes. One hole came out completely through, almost drilling through the floor. Of course, I assembled the cabinet, but I realized that not everything is so simple. And when the machine spins, the cabinet bounces and rattles.
And then a new renovation broke out. This time it was necessary to build a mega-cabinet. It should be wide (more than 2 m), deep (76 cm deep), made of 21mm birch plywood, and most importantly, the lower part should not have a base. The idea is to roll cabinets on wheels into the bottom section of the cabinet. This greatly simplifies loading things into such a deep closet. Allows you to quickly roll out, say, a cabinet with tools and roll it to the repair site. Or a cabinet with books for a desk. And don’t run to the closet for every little thing. This is roughly what it should look like:
(doors and drawers/shelves are not drawn, but they will be there)
Of course, such legs will instantly move apart without being attached to a single base, and the cabinet will collapse. To prevent this from happening, the cabinet is mounted on the load-bearing wall of the house, and it bears the entire load. This removes the issue of the back wall. This will allow you to replace the flooring if necessary without removing the cabinet from the room. We simply roll out the cabinets, remove the lower part of the partitions, and the rest of the cabinet continues to hang on the wall.
All these wishes of mine, all together and each separately, scared off potential cabinet manufacturers. There are plenty of companies that make furniture, but almost all of them make cabinets from 16 mm chipboard, 600 deep, all according to more or less standard drawings, and the customer is only allowed to choose the color of the chipboard and the pattern on the door. So it became clear that I had to do all the work myself. But the old injury with the washing machine was making itself felt, and this time I decided not to leave myself any chance of making a mistake. The basic fastening elements of the entire structure are a double eccentric coupler and a screw with a barrel-shaped nut. This means that you will have to drill a lot and you need to drill accurately. Therefore, the hero of my review was purchased: a jig for drilling for an eccentric coupler.
There are many jigs for drilling the end of a board. There is a parallelogram type, there is a slingshot type (it takes a long time to explain, I don’t have my own photo, and they don’t allow someone else to attach it to the review, so you can find it on the Internet if necessary), in general there is a large choice. But I found only this jig that would allow me to drill two holes at once specifically for the screed. Let's see what they sent me:
Hard plastic case, foam lining inside and tools in bags.
Two wood drills for 8 and 10 mm, one forstner drill for 15 mm, limit sleeves for them, several dowels, a wrench for nuts, a hex key for fixing the limit sleeves, and the device itself.
Here he is. The thing is quite weighty, made of cast metal, most likely cast iron. Fixed on the board with a screw clamp. With cheap clamps, the plate is held in place by the flaring of the screw; over time, it falls off or is pressed through, and the screw begins to scratch the board. That won't happen here. The plate is made of thick steel, it is smooth and even, and is fixed with a screw. Time has shown that it can even clamp a painted soft wood board without leaving any marks.
The maximum thickness of the clamped board is about 50 mm.
Two bushings are moved in the slots of the housing and secured with nuts. One for drilling 8 mm, from the end of the board.
The minimum distance between the axis of the drilled hole and the surface of the board is 5 mm.
Maximum - 37 mm.
The scale on the frame is engraved, i.e. will not be erased over time.
The end of the bushings is slightly recessed into the conductor body, literally by a fraction of a millimeter. This makes it possible to move the sleeve even when the clamp is clamping the board. Of course, to do this you need to loosen the fixing nut.
On the other plane of the jig there is exactly the same slot for a bushing for drilling 15 mm.
The minimum distance from the end of the board to the drilling axis is 21 mm. You can do less by simply installing the clamp not close to the edge of the board.
The maximum distance is 39 mm.
Well, let's start testing the device. First of all, let's try installing a double eccentric coupler. It allows you to join plywood almost imperceptibly. In addition, you can use them to make cross-shaped joints of plywood sheets. This is what the screed looks like:
We insert the eccentrics into the holes on the surface of the board, insert the pin into the hole at the end, connect end to end, turn the eccentrics so that they capture the ends of the pins, tighten, done!
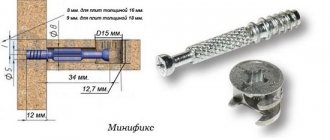
Barrel screws - for T-joints. We drill 10 mm on one board, 7 mm from its end and on the surface of the other, insert a barrel into one hole, a screw into the other, connect, tighten, that’s all.
Yes, but how to drill 7mm? The sleeve fits perfectly with the 8mm drill, the 7mm drill hangs in it. I had an adapter for cutters from 1/4 inch to 8 mm on hand. And 1/4 inch is 6.35 mm. Already something. This is the adapter.
Adapter 6.35 - 8 mm for Ali.
Costs 100-something rubles.
It is made of hardened steel, fits tightly into an 8 mm sleeve and a 6.45 mm drill fits into it with virtually no gap. This is a drill bit for drilling holes for M8 threads.
Well, then drilling out 6.45 to 7 is a matter of technique. If you don’t lean on the drill at all, the hole will be drilled exactly along the axis of the previous one.
This is the combination I started using. Of course, it would have been easier to drill at 8. But I didn’t want to add extra play. For the sake of ease of partial disassembly of the cabinet, I had to abandon the dowels, and these pins, which, generally speaking, should only work in tension, will also be loaded with shear.
To get the hang of it, I started with scraps of plywood. I tried to connect three pieces with the letter T.
First, we drill with a forstner drill from the surface, so that later it is easier to remove chips from the deeper end hole.
Then we drill from the end.
We repeat the same thing with the second plank.
Here's what happened:
Quite coaxial.
Finally, we drill through the central plank. We collect:
As you can see, I only succeeded the second time. From the first I made a mistake with the size and drilled the holes for the eccentrics too close. Even when tightened the tightest, they did not provide sufficient compression of the boards.
The edges of all holes are neat. Now I have already made more than 60 holes with this forstner drill.
The drill is worn out, of course, but even now it doesn’t tear the wood fibers.
Here is one of the last holes:
I also drilled into already painted plywood, the edges were smooth.
The holes at the end are also excellent. Here you can see the installed eccentric in the depths.
The most important thing is that the holes are always coaxial. I inserted the drill and attached the GOST corner:
On another plane:
And this is what happened as a result:
I think this is the most critical jig for cabinet making. It will help not only make holes for eccentric fasteners, but also for barrels, confirmations, dowels, i.e. all the work for which, generally speaking, a self-centering jig is intended. But this one has more functionality due to drilling a second hole. So if you are not a professional and do not work in production line, this conductor is for you. Everything else that I need - cutting out holes for hinges and handles - can, in principle, be done without a jig at all.
Link to conductor
Now it costs something like 2000.
Fastening rules
Most often, no preparation is needed to connect parts made of wood using self-tapping screws - the screws can be screwed into the part without drilling a hole. For these purposes, use a Phillips screwdriver or screwdriver. You need to act smoothly and carefully, especially when working with oxidized screws (they are considered the most brittle).
The tool should be kept strictly in line with the screwing hardware. You should not try to screw the fastener into the knot - despite the fact that these are the densest areas, such fastening will be considered ineffective. If you plan to screw screws into high-density natural wood, it is recommended to pre-lubricate the hardware with laundry soap. It will act as a lubricant and ensure easier insertion of the fastener into the material.
It is worth considering that the screw should not go through the 2 structures being connected.
Before drilling, you need to apply markings, and then make a hole in the main part measuring 0.8 times the diameter of the screw. The depth of the hole must correspond to the screw-in base of the hardware. If the fasteners are thin, you can use an awl.
When drilling soft lumber, it is also possible to make holes by hand. To work with hard materials, drill a hole that matches the profile of the screw-in fastener. To make a recess you need a drill and a drill. It is best to use a countersink.
After the preparatory work, the screw is inserted into the hole. It must be strengthened in the material by twisting it clockwise with a screwdriver. In this case, the correct selection of hand tools is important. If you take a screwdriver that does not match the size, there is a high risk of damaging the slot on the head - in this case, it will be impossible to tighten the fastener. You can also fasten screws using electric or pneumatic screwdrivers. Their use makes work easier and speeds up the assembly process.
The final stage is installing stickers or plugs on the fastener heads. Such accessories are sold in a wide range of colors. Their main task is to camouflage fasteners. Thanks to the use of stickers, you can increase the aesthetics of finished furniture.
For more information on screws and self-tapping screws, see below.
Dowel hole jig
The jig for drilling holes for dowels is one of the simplest templates in its design. However, you should know that such templates should simplify the work of the master, and not complicate it when he is forced to use complex instruments.
Dowel hole jig
Used for assembling furniture. Should allow simultaneous drilling of holes without changing the device. For manufacturing, different materials are used that have different strength characteristics. The most durable unit can be considered a steel unit.

