What are the reasons why an angle grinder fails?
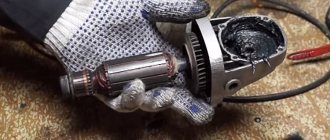
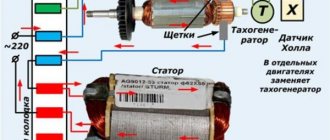
The grinder has a mechanism that bears the heaviest load - the rotor. It is also called an anchor. The damage it suffers is varied. These include temperature loads, electromagnetic, and, of course, mechanical problems.
As a result, do not be surprised that the angle grinder does not work precisely because the rotor is faulty. The armature winding overheats and burns out, this will cause a short circuit. So many owners of this tool often carry out all repair work themselves.
A worn commutator causes increased vibration in parts such as brushes. They burn, causing the mechanism to spark strongly. The main function of such brushes is to transmit current to the commutator.
The bearings in the rotor wear out very often. If you do not carry out timely diagnostics and prevention of bearings, they are completely destroyed. If during operation of the angle grinder you hear a noise that was not there before, be sure to check the condition of the bearings.
The stator is a stationary component in an electric motor; it contains a winding. The angle grinder very rarely breaks directly because of the stator.
The gearbox is responsible for rotating the gear . It needs to be cleaned and lubricated on time.
Most often, brushes are changed in a grinding machine, because the basis for their manufacture is graphite. Replacing these parts is not difficult.
Angle grinder device
Any grinder consists of the following parts:
- rotor - part of the electric motor that rotates during operation and is controlled in speed, also called an armature;
- collector - the place on the rotor where the control winding wires are located;
- brushes - parts that serve as current conductors from the cable to the commutator winding;
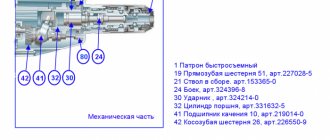
- gearbox - a mechanism that acts as a drive from a rotating rotor to a spinning disk, consists of a spindle, a bearing, and two gears (a large gear and a shaft gear);
- stator – part of the electric motor in which the rotor operates;
- grinder cooling impeller;
- start button;
- electrically driven network cable;
- protection casing;
- grinder body;
- additional handle.
All these details can be divided into two parts:
The most common breakdowns
Grinder malfunctions happen quite often. Everyone who works with this tool knows about this. What goes wrong most often?
How to disassemble an angle grinder and remove bearings. Step by step steps
After disassembling this device, you can replace broken bearings, re-lubricate all parts, dismantle damaged brushes and install new ones.
In order to separate the rotor and stator housings, it is necessary to first remove the handle housing in the machine. This is done so that it is possible to remove the carbon brushes. They hold the rotary manifold.
The second step is to unscrew the four screws that secure both housings - rotor and stator.
Take out the gearbox along with the starter and start disassembling it. There are also screws on the gearbox that need to be removed. There are four of them in total. This procedure will require some effort on your part, since the factory assembly involves the use of sealant.
Grinders of different models have different types of gears. In low-power models, spur gears are used. With a power of more than a thousand watts - the use of helical gears.
Once you remove the gear cover, you will be able to remove the assembly that houses the helical gear. To remove it, use a press or puller.
To do this, you will have to use special thin tubes. For this reason, it will be inconvenient to use the puller.
Before removing the gear, it is necessary to check the play in the gear connection. Also check that all teeth are intact. And the contact patch is checked.
If you have identified the following signs in a bearing that is located on the spindle shaft:
Replacing the bearing in a HITACHI G 13SS2 angle grinder
- when you scroll it, a characteristic noise is heard;
- noticed the appearance of backlash;
- no lubrication.
If all these signs are present, it is necessary to replace the old part with a new one. To do this, the bearing must be removed. How to do it?
First of all, remove the gear along with the retaining ring. After this, you can easily remove the worn element. When you remove the rotor shaft assembly, the bearing may remain in the gearbox, inside the housing. In this case, use a hammer with a soft tip on top.
To remove the drive gear in an angle grinder, do the following:
- clamp the rotor, unscrew the nut with an open-end wrench;
- the washer is removed;
- Now take out the gear itself.
After checking the appearance of the gear, decide whether this part needs to be replaced. Keep in mind that both gears need to be changed at the same time.
Low-power angle grinders are equipped with a needle bearing, which serves as a support bearing.
Dismantle this part only when it is completely destroyed. There is a proven way to remove a destroyed clip.
1.Choose a tap diameter larger than the inner diameter of the cage.
2.Place and secure it into the screwdriver chuck. Gradually, at low speeds, tighten it into the cage. When the tap hits the housing bottom in the gearbox, the cage will rise.
The rotor shaft has two more bearings, in addition to needle bearings. To remove them from the rotor, I would recommend using a puller.
The bearing attached to the manifold is quite easy to remove. The impeller is also equipped with a bearing, which will take a little more time and skill to remove. Both bearings are covered for protection with special rubber caps.
To remove and replace these parts, the nuts are unscrewed, the spur gear is removed, as well as the plastic protection. You can now freely remove the bearing from the rotor shaft using a puller.
If you don't have a puller in your tool kit, there is one method, take note of it. Remove the bearing with a vice along with two metal strips and a hammer with a special metal attachment.
Prevention, maintenance, diagnostics
Carrying out preventive maintenance for angle grinders significantly reduces the likelihood of sudden failure of a power tool . Ultimately, the costs of repair work are reduced, and the grinder’s resource indicators increase. to carry out the following maintenance work regularly, approximately once a year (depending on the intensity of use of the grinder)
1.Perform disassembly.
- brush assembly;
- remove the gear housing cover;
- disconnect the gearbox housing together with the rotor from the electrical part of the angle grinder;
- Remove the rotor shaft from the gear housing bearing after removing the drive gear.
2. Clean all internal and external surfaces.
3. Check the wear of the graphite brushes . If necessary, replace them following the following procedure:
- clean the brush holders;
- clean the collector lamellas;
- install new brushes.
The brush assembly located on the body of the Makita GA9020 angle grinder provides convenient replacement of brushes. Photo VseInstruments.ru
4. Determination of gearbox defects.
- visually check the wear of the tooth profile and the presence of chips;
- checking the shaft for play in the plain bearing or needle bearing;
- checking the remaining ball bearings for play and presence of lubricant;
- on shafts and gears with keyed connections, check the wear of the keys and grooves under them;
- if necessary, replace the sliding bushing, bearings, and lubricant.
5. Inspection of rotor parts.
- carry out an external inspection of the rotor and stator windings for the presence of darkened areas and damage to the varnish coating, which indirectly indicates the presence of an interturn short circuit and overheating;
- check the rotor bearings for play and presence of lubricant;
- Inspect the commutator surface for wear and other damage.
6. Inspect the wiring for insulation damage. Check the status of the contacts.
7. Reassemble in reverse order.
8. Check for a few minutes at idle speed.
Maintenance work on the angle grinder will not take much time; timely preventative maintenance will delay costly repairs.
Assembling the tool with new parts
After disassembling the instrument and necessary replacement of all damaged parts, we will reassemble it. Make sure you have all the tools, lubricants, and clean rags on hand for finishing touches.
First of all, you need to assemble the rotor. You need to press in the bearings and install the impeller. Before doing this, carefully lubricate the bearings. Using a wooden tool, press them onto the top of the shaft.
Cover the collector bearing with rubber protection. This is the same diagram of how to assemble a rotor shaft.
Next, we reassemble the gearbox . We begin this process by installing the gearbox on the rotor shaft housing. When the shaft is already inside the housing, place the drive gear on it, then the washer and fixing nut.
Now install the gear housing, together with the shaft located in it, inside the stator housing. It is necessary to press both housings after the commutator bearing is already in the seat. Next, check whether the rotor rotates easily on the bearings.
The final step is to place the lid back where it was. Check how the spindle shaft rotates. If you determine that the rotation is easy even with the movement of your hands, you can start tightening the screws. They secure the cover to the body. Before doing this, lubricate all screws using sealant.
READ How to Cut a Hole in a Tile with a Grinder
Main modules used
- Housing, usually made of special impact-resistant plastic.
- Powerful electric motor.
- High quality gearbox.
- Smooth start.
- Electric motor switch.
- SJS system. The presence of accounting software (software) allows the tool to work smoothly without jumps. Today, like oil, it turns off the grinder for which the disc jamming design is intended, reduces vibration as much as possible. Like oil, it saves the operator from serious injury.
- Protective cover.
- Additional handle. With its help, of course, you can hold the grinder while doing the work. This handle can of course be installed in different positions, which gives the tool versatility.
Tools necessary for repairing and replacing defective parts
For high-quality and effective repair of an angle grinder, you will need the simplest tools that almost every thrifty owner has.
Having a screwdriver will make disassembling the angle grinder much easier. But, in its absence, you can easily get by with just different screwdrivers. It is desirable that they have a ratcheting mechanism.
To remove the nut that secures the drive helical gear, you will need a wrench called an open-end wrench.
To dismantle the bearing, you cannot do without a special puller.
Perform diagnostics of the electrical component of the device being repaired using a tester. There is also a special device that detects short circuit of turns. This device is very convenient, since you can diagnose a breakdown in the stator or rotor without having to remove the unit.
Be sure to have a diagram of the grinding machine. Knowing the location of the main components will greatly facilitate the disassembly of the mechanism, repair, or replacement of unusable parts.
How to remove a spindle: tips
The spindle axis works together with the main gear, which includes:
To disassemble the spindle housing, you must first remove the main gear, for which special tools are used.
After removing the gear, the housing is placed in a vice
Applying a wooden block and hitting it with a hammer, carefully remove the spindle on which the bearing is mounted. Removing the bearing is done as described above
How to remove
In the next video, the Interskol model grinder has a lot of spindle play. The author describes in detail the method of removing the sleeve bearing. Why is a tap with a diameter suitable for cutting threads in the inner sleeve installed in a screwdriver? Next, the tap performs a mechanical operation of cutting the thread and after it meets the stop on the gearbox housing, the sleeve will rise along the cutting part of the tap until it completely exits the mounting hole.
The author does not recommend using pullers to press out parts that are seated with a large interference, in order to preserve their integrity. It is advisable to perform this operation using pressing equipment.
The plain bearing can be easily replaced with a needle bearing. The main thing is to choose it in accordance with the outer and inner diameter of the sleeve. The following describes how to carry out repair work on an angle grinder, the design of which uses a needle bearing.
Trimmer gear lubrication
Lubrication of gears must be carried out regularly in accordance with the recommendations set out in the operating instructions for the model used. This should also be done if:
- new gears were installed;
- atypical sounds come from the gearbox when the trimmer is operating;
- The knives are difficult to rotate.
In addition to the gearbox, the trimmer shaft also needs to be lubricated regularly. This is the norm for proper care of the device.
With constant use of the trimmer, its transmission mechanism experiences stress from grass, dirt adhering to the blades, or due to changes in torque. You need to choose a high-quality lubricant to extend the life of the gearbox.
Sources:
https://kovka-svarka.net/kuznechnoe-delo/zamena-podshipnika-reduktora-ushm/ https://schemy.ru/info/zamena-statora-na-bolgarke/ https://kovka-svarka.net/ kuznechnoe-delo/kak-razobrat-reduktor-bolgarki/ https://tehnika.expert/dlya-sada/trimmer/remont-i-smazka-reduktora.html
How to remove/remove a needle bearing in an angle grinder
Pressing in a new needle bearing is not difficult, but removal requires the use of an original puller. In the following video, the author describes the manufacture of such a device and shows its practical operation.
Replacing the bearing in a HITACHI G 13SS2 angle grinder
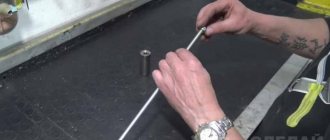
The puller is an expanding collet with collars at the ends of the movable petals. The dimensions of the collet are made on a lathe, and the central hole is drilled for a rod that spreads the petals. The puller is inserted inside the bearing and the collars, after the rod moves along the hole, rise up and rest against the end of the ring with their side surface. With the help of not very impressive-looking, but reliable levers made of reinforcement with sharpened edges, resting on an inserted washer, the bearing can be removed from the housing.
Important: a needle bearing has a service life significantly longer than a plain bearing. However, during operation, the spindle shaft wears out, which also needs to be replaced. In the described video, the author found a replacement option. However, in most cases this can create additional problems.
Bosch
The following video describes replacing the gearbox bearings on one of the Bosch models, which has a lot of play on the spindle. Here, the main executive body that creates the pressing/pressing forces is a conventional bench vise. The use of various extensions in the form of correspondingly sized pipes and other similar parts allows you to transfer forces to the desired place in the structure using the movement of the vice jaws. Some operations are performed using extensions and light hammer blows.
Do-it-yourself Hitachi grinder gearbox repair.
A design feature is a flange filled with plastic. To press out/press in the flange bearing, the author used a knife and a torch to remove the plastic that interfered with this process. Perhaps, if you have the skills of a turner, you can simply cut this material on a machine.
Hitachi
Some designs of bearing assemblies at first glance exclude the possibility of replacing the bearing itself included in such an assembly. However, the author of the following video found a way to do this in one of the Hitachi models and thereby save a decent amount of money using the proposed method.
To secure the bearing assembly in the drill, a wood bit was used, into the inner surface of which one of its outer diameters fits tightly. With the drill running, a sharp object is used to remove plastic material up to the size of the outer ring of the bearing. Thus, nothing prevents you from removing the bearing using a hammer and an extension.
Next, when assembling a new bearing, a ring is inserted instead of the ground plastic (in the video it is most likely made of caprolon or other similar material). Since the ring in the video has a wall thickness that does not allow the gear to be assembled according to the technical requirements, its internal diameter is modified to the required size using a chisel.
Compliance with the following recommendations will help you successfully carry out repair work on bearing units.
- It is necessary to know the design of the operated angle grinder. You should study the technical documentation included with the grinder. Knowing the location of components and parts will help you correctly disassemble and reassemble the angle grinder during repairs.
- Having the required tools for this will help to carry out the work of replacing bearings efficiently. This tool is not complicated and is almost always available in the arsenal of home craftsmen: screwdrivers, wrenches, hammers, a set of pullers or other hand tools (vises, extensions, drifts of various designs) for fixing and removing bearings.
- When repairing grinders, there is a certain procedure for carrying out work. You should adhere to it, taking into account some differences associated with the features of one or another model.
- Bearings should be replaced if there is even slight shaft runout, since a damaged bearing can completely damage the entire power tool.
- Before carrying out repair work, make sure that the power tool is unplugged from the power outlet.
Open bearing for Hammer grinder. Photo 220Volt
The tool used must be in good condition:
- the structural elements of the pullers (claws, rods, stops, screw devices) comply with the technical documentation;
- screwdrivers have smooth side edges, a straight shaft is securely fixed in the handle;
- the jaws of the wrenches are parallel and have no cracks or nicks;
- The hammers are securely mounted on the handles.
Compliance with these recommendations will allow you to correctly and safely disassemble the angle grinder, replace defective bearings, re-lubricate all parts and reassemble the angle grinder for its further operation.
Replacing bevel gears in Hitachi angle grinders
In Hitachi , failed bevel gears are replaced in pairs. Replacement of gears results in tooth wear, licking, and destruction of several teeth.
Pressing in the planetary gear
The pressing process is almost the reverse of unpressing.
- The thrust ball is transferred to the opposite end of the spindle (from the thread side)
- Everything is pre-prepared for pressing (the support bearing of the spindle shaft in the flange has been replaced - because we personally change it in 99% of cases during an interference fit, which generally agrees with the regulations and logic. We also recommend installing the bearings well in advance heated aluminum body - this way you can install it almost with your fingers, eliminating damage)
Almost any cylinder can now act as a working guide (huge tolerances between the internal diameter and the ring gear of the planetary gear)
The removed planetary gear heats up as much as possible. 80-140° (a technical hair dryer and 2-3 minutes of time are more than enough). The more the planetary heater is heated, the less tension (C° = Ø mm), accordingly it is easier to press and the parts are more intact. Don't forget to use personal protective equipment!
Electrical faults of the Hitachi angle grinder
Hitachi grinders suffer from failure of switches, carbon brushes, and broken wires of the stator windings. As with all electric tools, the appearance of faults in the electrical part largely depends on the condition of the carbon brushes. Hitachi angle grinders are equipped with carbon brushes with a built-in device, popularly called a “shot”. The purpose of such a device is to prevent Hitachi angle grinders from turning on when there is a high degree of wear on the carbon brushes. The weak point in the design of the electrical part of Hitachi angle grinders is the place where the power cable is inserted. This is where the cable most often breaks, breaks, or becomes exposed.
READ Replacement Trimmer Crankshaft Bearing
Most common faults
Gear set for INTERSKOL UShM-2300Wt; DWT-230 (74x15x49 teeth, 21x10x12 teeth) ACECA. Photo 220Volt
The main reasons why grinders fail due to gearbox failure are as follows.
- During prolonged use, gears wear out . In this case, a “rustling” noise appears, and the bevel gears may slip relative to each other. Poor quality lubrication or insufficient lubrication accelerates wear of the conical pair.
- Bearings also have a limited service life . If they are not replaced in a timely manner, complete destruction of the structural integrity of the bearing assembly may occur. The reason for checking it is increased noise and vibration during operation of the angle grinder, and strong heating of the gearbox housing.
- Bearing seats are worn . Here you can radically solve the problem by replacing the gearbox housing.
- It is possible that the fixing elements of the gearbox structure may break: nuts, screws, keys, retaining rings and other similar parts.
Hitachi angle grinder repair tool
It is impossible to repair a Hitachi angle grinder without tools. You must prepare a set of screwdrivers, a device for monitoring short-circuited turns in the windings, a tester, pliers, and open-end wrenches. You cannot do without available tools if you want to repair a Hitachi angle grinder yourself.
It’s good if you have a screwdriver and replaceable screwdriver bits that are correctly matched to the slots of the screws being unscrewed.
The equipment you will need is a bearing puller, a press, a vice, and soft metal attachments.
Pullers will be needed to remove gears and bearings. It is convenient to clamp individual units of the grinder in a vice. Use open-end wrenches to unscrew the drive gear fixation nuts.
When carrying out repairs, you cannot do without lubricants, removers, and paint.
To wipe, you will need rags or pieces of clean material.
Don't forget to properly equip your workplace. It should be well lit. All Hitachi angle grinder faults can be divided into two types: electrical faults and mechanical faults.
Electrical diagram of the angle grinder Hitachi G13SB3 angle grinder 125
Power via cable pos. 52 is supplied to terminals pos. 53, connected to switch pos. 42. At the entrance to the angle grinder body, the cable is fixed with a clamp pos. 55. The noise suppressor pos. 46 and the wires to the carbon brushes pos. 39 are connected to the switch. Hitachi angle grinders use self-stop carbon brushes. The size of the carbon brushes in the Hitachi G13SR3 angle grinder is 6.5×7.5 mm. Carbon brushes are installed in the brush holder pos. 38. The Hitachi angle grinder is turned on by moving the switch button pos. 36.
The most common malfunctions in Hitachi angle grinders occur when the power cable fails at the entry point, wear of the carbon brushes pos. 39, or failure of the switch pos. 42.
This kind of malfunction is eliminated by replacing the failed part or piece of wire.
Checking the serviceability of the angle grinder motor stator
It should immediately be noted that similar manipulations to check the serviceability of the two main parts of the electric motors of electric tools can be carried out for drills, rotary hammers, jigsaws and other units. Battery-type grinders also have motors, but only DC. The difference between alternating and direct electric motors on power tools is stators.
If on variable motors the stator consists of a winding, and the current flowing through it creates polarity, then on “constant” motors this function is performed by a pair of magnets, which push the rotor, setting it in motion.
The algorithm for checking the stator of an electric motor for angle grinders is as follows:
- The presence of resistance between the stator winding and the core is measured. The presence of resistance indicates that the insulation of the copper wire is broken, and therefore a breakdown occurs. To change the presence of a breakdown on the housing, you need to touch the winding terminal with one probe, and the core with the second. There should be no resistance, since in normal mode the copper wire is not connected to the core
- Now we check for the presence of resistance in the winding. To do this, we touch the output contacts with probes. The resistance value in both windings should be approximately the same. If the device does not show anything during measurement, it means that the copper winding is damaged. If the resistance is high, it means that insulation failure is appropriate.
- Carry out a visual inspection of the stator. The presence of carbon deposits on the wire is the main sign that the device needs repair. The stator, like the rotor, can be rewound, but provided that the integrity of the steel plates is not compromised. Rewinding the stator is cheaper than the rotor, however, in any case, if the motor already has a long service life, then it is better to replace it or the component parts that have failed - the armature or the stator
If you decide to replace the engine, then instead of the old motor you need to install a new one with similar power parameters and torque. After replacement, you can begin further use of the tool.
Design features of Hitachi angle grinders
Even by its appearance you can immediately tell that this is a Hitachi . The upper plastic body of the Hitachi angle grinder consists of two parts of different colors and has original shaped linings.
The external contours of the parts of the angle grinder body, a special bright green-black color, an additional handle with mandatory model marking, and a bright white inscription - these are the main differences in the appearance of the Hitachi angle grinder.
Several models of grinders are produced under the Hitachi brand. We will highlight the most popular: G13SE2, G13SR3, G23SEY, G23SRU.
The numbers in the designation indicate the maximum diameter of the cutting wheel used. Hitachi grinders, marked with the number 13, have a power of up to 1000 W. Grinders with numbers 13 are designed for small work with a circle of 125. Grinders with numbers 23 have a power of more than 1000 W. Grinders with the designation 23 use 230 discs and can perform more complex work. The design feature of Hitachi angle grinders is the presence of overheating protection and an improved cooling system. All Hitachi angle grinders are equipped with an additional handle. Structurally, the angle grinders of the Hitachi family are no different from each other. Although minor changes may occur.
A few words about fakes
On the Russian tool market, there are often counterfeits of Makita angle grinders. A popular and well-promoted brand is popular not only among users, but also among various types of scammers.
Most often, powerful grinders from Makita are counterfeited. For example, Makita 9069.
When choosing a Makita angle grinder, pay attention to the following details:
- quality of molded plastic parts;
- quality of manufacture of the additional handle;
- the low price should alert you;
- carefully study the plate, you can find a lot of inaccuracies on it;
- Makita angle grinders must have a serial number;
- on the bodies of Makita angle grinders there is a mandatory inscription, which you will not find on fakes;
- The carbon brushes of the original Makita have standard numbers;
- As a rule, hex head screws are used in the assembly; on counterfeits, Philips screws are used;
- The armature and stator windings of the fakes are covered with homemade varnish.
By being careful when choosing a Makita angle grinder, you will not run into a fake and will purchase a real tool from Japanese manufacturers.
Mechanical malfunctions of the Hitachi angle grinder
In Hitachi angle grinders, the reliability of the gearboxes is admirable. But this is with proper use.
Grinder Hitachi G13SR3. Dismantling the spindle, replacing the bearing. bearing replacement
If the tool overheats or periodically jams, if dust gets in, or if the carbon brushes are not replaced in a timely manner, no angle grinder will last long.
The large driven gear in Hitachi angle grinders with a disc up to 125 mm is secured using a keyed connection. For angle grinders with a disc up to 230 mm, the gear is pressed onto the spindle shaft. The small drive gear in any Hitachi angle grinder design is secured with a key and secured with a nut.
How to remove gears
Grinders up to 1000 W use spur gears, while angle grinders use helical gears.
Gears are attached differently in different angle grinders. The drive gear is mounted on the rotor shaft with a keyed connection or mounted on a thread. The driven gear is secured to the spindle shaft by an interference fit or a keyed connection. Details on how to remove gears and bearings from the shaft.
Gear repair consists of replacing them, and only in pairs.
Long-term and uninterrupted operation of the gearbox depends on the presence of a sufficient amount of lubricant and its timely replacement.
Repair Ushma Fiolenta
Recently, Bulgarians Fiolent have become very popular. This attracts not only the affordable price, but also the reliability of the tool.
It is recommended to start repairing the Bulgarian Fiolent with your own hands by studying the malfunctions that arise. If you need to disassemble the Bulgarian Fiolent, then in order to remove the driven gear, pos. 11, it must be squeezed out of the spindle shaft, pos. 8.
To remove the spindle shaft bearing, you first need to remove the large helical gear. This is a minor inconvenience.
Replacing rotor bearings involves the need to dismantle a small screw gear, pos. 22.
DIY repair instructions for angle grinders
Angle grinders (angle grinders), popularly called grinders, are a popular and reliable tool. But everything breaks down someday. Repairing an angle grinder with your own hands is not difficult if you have instructions in front of you that tell you the step-by-step procedure for repairing an angle grinder. Below you will find answers to any questions about repairing the gearbox, rotor, stator, and carbon brushes of angle grinders.
Angle grinders are especially popular among home craftsmen. The possibility of changing the working parts allows for cutting, grinding, and polishing operations.
The presence of a soft start device makes the operation of the tool safe and convenient. Repairing an angle grinder is simple and can be done independently. For those who decide to repair an angle grinder on their own, you will need a diagram of an angle grinder of the required type, tools, lubricants and these instructions.
Any repair of an angle grinder with your own hands begins with an investigation of emerging faults. The device of the grinder is quite simple. The rotating rotor transmits torque through a helical gear to the shaft (spindle) of the working body. The required working tool is installed on the spindle, be it a cutting stone, a grinding or polishing wheel, and the required technological operation is performed.
By the way, about the shape of the tooth. On low-power grinders, spur gears are installed. Helical gears are used in grinders with a power of over 1000 W.
Angle grinders, like any tool, break over time. The reasons for malfunctions of the angle grinder can be different. They appear not only from improper use of the tool, but also from untimely replacement of carbon brushes and lubricants.
Regardless of the angle grinder model, faults appear in the same units for all. Malfunctions of grinders are conventionally divided into mechanical and electrical. For novice repairmen, faults are divided into simple and complex.
Angle grinder rotor repair
Failure of the rotor in an angle grinder is caused by improper use of the tool, frequent overheating, untimely replacement of carbon brushes, and abrasive particles and dust getting on the collector slats.
First, the length of the spark at the collector increases, then a burning smell appears and, at the last stage, smoke. The operation of a faulty gearbox is accompanied by knocking and humming.
The destruction of even a couple of teeth leads to improper operation of the tool.
You can extend the life of the rotor by preventing dust from getting inside the tool, preventing the tool from overheating, timely changing carbon brushes and lubricants, and using only those working tools and diameters recommended by the power tool manufacturer.
READ Workwear When Working with a Grinder
The rotor is a complex assembly that requires repair at service centers. But DIY enthusiasts can repair the rotor themselves.
What most often breaks on angle grinders of different brands?
It makes virtually no difference whether your tool is DeWalt or Intertool. Sooner or later there will be a need to start repairing the angle grinder, which can be done easily and quickly if the breakdown is correctly identified. The main reason why angle grinders break down is not the quality of this tool, but the fact that most craftsmen use them incorrectly. How can you use an angle grinder incorrectly?
According to their purpose, there are two types of angle grinders:
- Household - a category of power tools, the main purpose of which is to use them around the house. They are not suitable for constant and prolonged loads, since the parts are made of low-strength materials. You can operate household angle grinders for no more than 10 minutes continuously, after which you need to pause for a similar period of time to allow the engine and other components to cool. Naturally, no one records the time how long he works with the unit. When the need arises, we pick up a tool and carry out the task to the end. The duration of operation of the unit can range from 10 minutes to 1 hour, which results in breakdowns of the angle grinder. Household grinders can last much longer than professional ones, provided they are used correctly. If you need to repair a household grinder yourself, then experts recommend it’s better to immediately buy a new tool
- Professional - a special type of power tool, the main purpose of which is the duration of operation of the device. Their components are made from durable and high-quality materials, so they are durable and resistant to prolonged loads. You can work with professional angle grinders continuously for 40-50 minutes, and not worry about the engine overheating. They are designed for this, so if you are faced with a situation where your household unit often breaks down, then you need to switch to professional models. This is especially true for craftsmen who, in order to save money, buy household models, but at the same time work with them on construction sites, using them for 8-10 hours a day
Knowing the difference between household and professional models makes it easier to choose a power tool. The choice of power tool and its use determines how often you will need to repair grinders yourself.
Let’s look at the question of what most often breaks on grinders. The most common symptoms of malfunctions are:
- The device does not turn on - the next time you need to use an angle grinder, it turns out that it does not work. The causes of such a malfunction may be the following factors: lack of power in the outlet, damaged power cord, loose contacts, broken button or worn out brushes. Often, as practice shows, on angle grinders the place where the power cable enters the housing structure wears out. This is where you need to look for the place where the contact is damaged
- Current flows into the device, but the motor does not work - this means that the button is most likely faulty. The buttons on grinders cannot be repaired, so after a short check, you should simply replace them
- Sparking of the unit during operation and the appearance of a burning smell means that it is time to replace the graphite brushes. They have an appropriate resource, so signs of sparking in the area where the brushes are located means that they are worn out and the quality of contact is low
- The appearance of extraneous sounds after starting the engine - crackling and ringing sounds are signs of wear on the bearings or gears. To find out the exact cause of the instrument's hum, you will need to disassemble it and inspect the mechanical parts.
These are the main types of faults that even a beginner can identify. Bearings and brushes belong to the category of consumable parts, so do not be surprised if after six months of operation of the unit there is a need to replace them. With simple types of breakdowns on angle grinders, everything is clear, but it often happens that everything seems to be checked, but the tool does not work. What to do in such a difficult situation? To do this, you need to delve into the topic of repairing angle grinders and try to understand what is the reason. Often in such cases the “poke method” helps, but we will not rely on it so as not to get hurt. Let's consider all types of defects and breakdowns on grinders, as well as the features of their identification and elimination.
Electrical malfunctions of the angle grinder
The electrical circuit of the main part of the grinders is almost the same. The rotor transmits torque through a gearbox to the working tool. The rotor rotates in the stator field. The control circuits consist of a button that regulates speed and smoothly starts the tool, and carbon brushes that transmit alternating voltage to the commutator lamellas. Power is supplied to the instrument via the connecting cable.
The main electrical malfunctions of an angle grinder include:
- break of the power cable at the entrance to the instrument;
- destruction or wear of carbon brushes;
- failure of the power button;
- stator break or short circuit;
- rotor break or short circuit;
- peeling or deterioration of collector lamellas.
Electrical malfunctions of an angle grinder are best determined with a tester or other device. A homemade device, popularly called an “arkashka,” is also suitable for these purposes.
The grinder scheme is quite simple and does not require special knowledge. You just need to be careful and safe when performing repair work and have a high school level knowledge of electrical engineering.
Grinder gearbox repair
The degree of wear of the grinder gears is checked for the contact patch. The gearbox first completely cleaned of old grease. A special blue is applied to the small gear of the gearbox, and the gearbox rotates. Next you need to remove the driven large helical gear and look through a magnifying glass at the contact patch. It should occupy a total of at least 50% of the tooth surface.
Otherwise, the gears must be replaced or the tooth profile adjusted. Correcting the tooth profile has been described more than once on the pages of this site.
But such a malfunction can only be eliminated by an experienced technician. Most often, licked, cut or destroyed gears are replaced entirely, and in pairs.
Finding a broken power wire
One of the most common breakdowns of an angle grinder is the inability to turn on the tool or spontaneous stopping during operation. The cause of malfunctions of this kind is a break in the power cable, pos. 27, at the entry point. The malfunction is eliminated by replacing the cable or discarding the failed section. The fault can be easily found using a tester.
If you don’t have a tester at hand, but have a screwdriver with a neon indicator light, then the fault can be found by connecting the power wires to the phase one by one.
Main malfunctions, their causes and diagnostics
Main breakdowns and causes:
- It burns, sparks and twitches. Reasons: violation of armature winding insulation, wear of brushes, commutator, clogging of brush holders. Even after replacing the brushes, the angle grinder sparks and jerks if the brush holders are clogged.
- Popping sound. Brushes or interturn short circuit of any of the windings.
- Crunchy sound. The reason is the bearings.
- Mechanical hum and strong tapping. Gearbox malfunction.
- The grinder stopped working and won't turn on. If the disc spins manually is difficult or does not spin, the reason is in the gearbox. If it turns easily, check the electrical circuits. If the chains work, check the motor and brushes.
- The spindle lock button is broken. The reason is pressing it while the disk is rotating or the disk is jammed.
- The angle grinder works in fits and starts. Check the motor for interturn short circuit.
- Vibrates. The reason is mechanical. Check bearings, rotor shaft and gearbox.
- It's getting warm. If it heats up in the engine area, then the reason is worn brushes or a short circuit in the winding turns. If the gearbox housing heats up, the lubricant has dried out or the gears have worn out.
- Does not pick up speed or loses power. The reason is the electronics or the motor. Check the soft start control board and speed controller, brushes and commutator.
- Smokes. The reason is the tool overheating. Check the motor windings for insulation melting.
- It hums and doesn't rotate. Check motor bearings and gearbox.
How to pull out an anchor
To repair a gearbox, it is often necessary to completely disassemble it and remove it from the rotor. In some types of grinder models this is not so easy to do. The following videos provide recommendations on how to use the inertial properties of the rotor for this purpose.
In the first video, the base for performing the work is a bench vice, and in the second, a small device is made from a square pipe of appropriate size. After lightly tapping the gearbox housing on the edges of a vice or pipe, the rotor is released from the gearbox. Which method is better is up to the user to choose.
Lepse
The video shows a very reliable angle grinder from Lepse, which broke down after ten years of use. During disassembly, a defect was discovered that is quite rare. The reason for the breakage of the bolt securing the drive gear remains unclear to the author. Perhaps these are fatigue stresses from periodic loads. The repair method using a drill and sprocket is worthy of attention.
Fiolent
In the following video, disassembling the gearbox helped to identify the cause of the malfunction of the Fiolent angle grinder. After carefully unscrewing the fasteners on the gearbox housing, a large spindle play was visible in the bearing assembly support. Particles of the bearing race confirmed the direction of repair work to replace the collapsed support unit.
Hitachi
The following video describes in detail the process of disassembling the gearbox spindle of an angle grinder of one of the Hitachi models. This is caused by replacing a stuck bearing located in the gear housing cover. In order to get to it, you must remove the driven gear pressed onto the shaft. Due to the small distance between the gear and the gearbox cover, the puller jaws are modified by grinding their surface to the required thickness in order to fit into this gap. Important: before pressing out the gear, you must remove the retaining ring that secures it.
Bosch
An overview of one of the household models of an angle grinder from Bosch is presented in the following video. It disassembles the gearbox, after which a visual inspection of the bevel gear is possible. The presence and condition of the lubricant is determined. It is possible to determine the degree of gear wear. In this case, since the angle grinder is new, you can only make sure that there is one support on the spindle in the form of a plain bearing and a bevel gear - it is spur geared. The author classifies these design features of this Bosch angle grinder model as disadvantages. Indeed, the service life of such an angle grinder and the noise level will not be good.
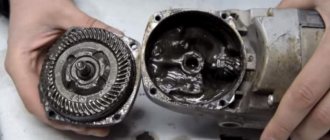
In the following video, after disassembling the gearbox of another model of a Bosch angle grinder, significant contamination of the lubricant with abrasive particles is observed. Conclusion: the internal cavity of the gearbox should be inspected regularly to avoid early failure of the power tool.
DeWALT
A design feature of the angle grinder of one of the DeWALT models is the design of the gearbox housing. The lid here does not have any additional functions other than protection against the ingress of abrasive particles. The flange where the bearing unit is located is made as a single unit together with the housing.
Usually, when replacing a structural element (in this case brushes), in most cases the lubricant in the gearbox is replaced. To do this, the DeWALT angle grinder is completely disassembled with the rotor removed, so that it is convenient to rinse and clean the gearbox cavity from old grease.
Another feature of the DeWALT angle grinder is the design of the large driven gear. A conical insert inside the gear housing prevents operation under overloads. The preload force of the conical insert is adjusted to operate under permissible loads. With increased effort, the gear will slip along the conical surface.
For convenience, when changing the oil, the author uses a measuring syringe. Here it is easy to control the amount of lubricant required for refilling.
Trimmer gearbox device
gearbox is a unit that transmits the rotational movement of the motor shaft to a knife or fishing line. It is located at the lower end of the brush cutter rod. The transmission unit is also designed to reduce the trimmer engine speed.
Depending on the model of the brush cutter, the mechanism consists of several gears rotating at high speed. As a result, they heat up due to strong friction. If there is not enough lubrication, or there is none at all, then the process leads to severe overheating and failure of parts, and, accordingly, the need to carry out complex repairs. To prevent this from happening, the transmission unit should be lubricated in a timely manner. The disassembled gearbox is shown in the photo below.
Gearboxes of modern trimmers of different models from different manufacturers differ from each other in design and seat size. It happens:
- round;
- in the form of an asterisk;
- square.
The most common diameters of round seats are 24, 25.5 and 26 mm.
Brush cutters are equipped with gearboxes with different types of gears:
- conical;
- worm;
- spiroid;
- cylindrical;
- planetary;
- wave;
- combined.
Do-it-yourself Hitachi grinder gearbox repair.
The drive shaft and gearbox are heavily loaded trimmer components that are highly susceptible to wear. Between them, motion is transmitted due to the interlocking of gear teeth located at different angles to each other. Gear transmission works effectively only if there are no mechanical damages. In this case, the mechanism should not overheat, otherwise it may jam.
How to disassemble an angle grinder gearbox correctly, video
There are many companies specializing in the production of angle grinders. The basic design principles of angle grinders for all companies are practically the same. However, there are some features that should be taken into account when repairing angle grinders of a certain brand. The experience of such repairs is presented by craftsmen in video formats, it is presented below.
Makita
The following video shows a preventive inspection of the gearbox of one of the models of Makita angle grinders. After a certain operating time, the grinder was completely disassembled and the rotor was removed. Wear on the teeth of both gears is visually visible, and there are chips. The author, unfortunately, did not analyze the reasons for their appearance. Replacing worn gears with new ones does not guarantee their long-term operation.
Sources:
https://kovka-svarka.net/kuznechnoe-delo/zamena-podshipnika-reduktora-ushm/ https://sdelalremont.ru/instrukciya-po-remontu-bolgarki-hitachi.html https://sdelalremont.ru/instrukciya -po-remontu-ugloshlifovalnyx-mashinok-svoimi-rukami.html https://kovka-svarka.net/kuznechnoe-delo/kak-razobrat-reduktor-bolgarki/
Assembly of an angle grinder Makita 9565
Before assembling the Makita angle grinder, check the integrity of all parts and their cleanliness. Assembly begins by installing the bearing and driven gear on the spindle.
Spindle assembly
The spindle, pos. 50, is fitted with a boot, pos. 51, a housing cover, pos. 53, and a bearing housing, pos. 54. Insert a pre-lubricated 6201LLB bearing into the bearing housing. Press in the driven gear pos.56. on the spindle. The spindle is assembled.
