10/27/2021 Author: VT-METALL
From this material you will learn:
- Concept of metals and alloys
- Definition and types of technological properties of metals and alloys
- Changing technological properties using steel as an example
- Technological testing of metals and alloys
The technological properties of metals and alloys determine the suitability of the material for a particular type of processing and, in general, the possibility of its use in a particular production cycle. Adding third-party elements to a metal or alloy directly affects their main characteristics. To determine the technological properties, it is necessary to carry out tests.
In our article we will tell you what these properties are, how impurities manifest themselves, and also give an example of production tests that reveal the suitability of a material for use in production.
Concept of metals and alloys
The technological properties of metals and alloys include:
- high machinability (malleability, stampability, ability to cut, solder, weld, etc.);
- strength;
- hardness;
- impact strength, etc.
All metals are divided into ferrous and non-ferrous.
The technological properties of pure metals often do not allow their use for industrial and technical needs. Therefore, alloys are mainly used.
An alloy consists of two or more solidified molten metals and other substances.
In addition to metals, alloys may contain, for example, carbon, silicon, and other elements.
VT-metall offers services:
Using different combinations of metals and non-metals, it is possible to obtain materials with different technological properties that the components that make up the alloy do not possess.
The technological properties of alloys may differ from the characteristics of their constituent metals. They can be:
- more durable and solid;
- have a higher or, conversely, lower melting point;
- more corrosion-resistant;
- less susceptible to high temperature effects;
- remain the same size when heated or cooled, etc.
To increase the hardness of iron, carbon is added to it. Less than 2% of carbon is contained in steel, more than 2% in cast iron. To give metals and alloys such technological properties as corrosion resistance, chromium is added to them, hardness is achieved by adding tungsten, wear resistance is achieved by adding manganese, and strength is achieved by adding vanadium.
What properties are considered physical properties?
Physical properties
substances -
properties
inherent in a substance outside of chemical interaction: melting point, boiling point, viscosity, density, dielectric constant, heat capacity, thermal conductivity, electrical conductivity, sorption, color, concentration, emission, fluidity, hardness, plasticity, ...
Interesting materials:
What is the disadvantage of sea transport? What to transport a large dog in? What to wear to an interview? What are the benefits of reading books? What are the advantages of official marriage? What are the advantages of telegram? What is the cause of the teenage crisis? What is the difference between Aop and Aoop? What is the difference between economy and premium economy? What is the difference between e-learning and distance learning?
Definition and types of technological properties of metals and alloys
The technological properties of metals and alloys determine their ability to change under the influence of hot or cold processing methods. They are based on the physical and mechanical characteristics of materials.
The following technological properties of metals and alloys are distinguished:
- O+processing by cutting;
- susceptibility to deformation due to malleability, stampability, bends, kinks, flanging, etc.;
- weldability;
- foundry properties;
- soldering ability;
- hardening, etc.
It is the technological properties of metals and alloys that determine how the workpiece will behave during processing.
Let us dwell in more detail on the main technological properties.
Weldability.
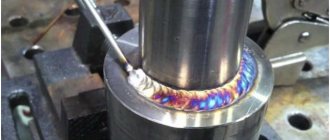
This is a technological property of metals and alloys, due to which they form strong compounds with each other. The workpieces are joined by melting the material and its subsequent cooling. Depending on the source of heating of parts, welding is divided into gas, arc, electric contact, ultrasonic, etc.
Deformability.
This technological property is understood as the ability of metals and alloys to change under the influence of plastic deforming operations, such as bending, forging, stamping, rolling, pressing, etc. In this case, the integrity of the workpieces is not compromised. This property of materials is influenced by their chemical composition, mechanical properties, deformation rate, temperature at which operations are performed, etc. The deformation method is selected after performing technological tests, during which the deformability of various alloys and metals is assessed.
Holidays and aging
Tempering is a heat treatment process in which hardened steel is heated below the annealing temperature, held at that temperature, and then cooled. During the tempering process, internal stresses are reduced or eliminated, the toughness and ductility of the steel increases, its hardness decreases, and the structure improves.
Depending on the heating temperature, three types of tempering are distinguished:
- low-temperature (low) tempering is carried out with heating to 150–200°C. This tempering reduces internal stresses in the steel while maintaining high hardness (58–63 HRC). It is used primarily for tools made of carbon and low-alloy steels, as well as for parts subjected to surface hardening, carburization and nitrocarburization, which have high requirements for hardness and wear resistance;
- medium temperature (medium) tempering is carried out at temperatures of 350–500°C. The purpose of this tempering is to obtain the structure of the trostite. In this case, the hardness of hardened steel decreases to 40–50 HRC, and the elastic limit reaches its maximum value. Springs and springs are subjected to medium tempering;
- high-temperature (high) tempering is carried out at temperatures of 550–680°C. In this case, the steel acquires the structure of sorbitol (tempered sorbitol). The hardness of hardened steel is reduced to 250–350 HB, strength is reduced by 1.5–2 times, ductility and toughness increase several times, internal stresses are completely relieved. Hardening with high tempering is called improvement. Improved steel, compared to annealed or normalized steel, has higher strength, ductility and toughness. The tempering temperature is determined by the tarnish colors.
Aging is a change in the properties of steel over time without a noticeable change in the microstructure. As a result of aging, strength and hardness increase, ductility and toughness decrease. Aging leads to changes in size and warping of products. If aging occurs at room temperature, it is called natural; if at elevated temperatures, it is called artificial. Aging is subjected to machine beds, plungers, gauges, staples and other products, the dimensions and geometric shape of which should not change during their operation.
Two types of aging are known: thermal and deformation (mechanical).
Thermal aging occurs as a result of changes in the solubility of carbon in iron depending on temperature. Strain aging occurs in an alloy subjected to plastic deformation at a temperature below the recrystallization temperature. The process of this aging lasts 15 days or more at room temperature and only a few minutes at temperatures of 200–350 ° C.
Artificial aging of products hardened and tempered at low temperatures is carried out after preliminary mechanical treatment at 100–180 ° C with exposure for 18–35 hours and slow cooling. Natural aging is carried out outdoors under a canopy, where the products are exposed to changes in temperature, humidity and air pressure. It lasts from 3 months to 2 years. The beds of precision machines, cabinet parts for very important purposes, and the frames of grand pianos and pianos are subjected to natural aging. Its result is a reduction in internal stress, stabilization of the dimensions and geometric shape of products.
Changing technological properties using steel as an example
The most common material is steel. The technological properties of steel alloys are affected by their chemical composition - the impurities included in it can increase or decrease certain characteristics of the material:
- The higher the carbon content in the alloy, the higher its hardenability and the lower its susceptibility to forging. Forging and rolling are possible for metals and alloys that contain no more than 1.4% of this chemical element.
- Manganese reduces the thermal conductivity of metals and alloys and, as a result, the possibility of their welding. However, when heated evenly and slowly, such materials are excellent for forging.
- Nickel has a positive effect on the plastic technological properties of metals and alloys; materials in which it is present are easily forged. However, when heated, nickel promotes the formation of scale. It is not destroyed during forging, penetrates into the metal and reduces the quality of the finished product.
- Chromium helps to increase the strength of metals and alloys; therefore, workpieces containing it should not be processed by forging or rolling, as there is a high probability of cracks.
- The high content of molybdenum in the composition of metals and alloys reduces their technological property such as thermal conductivity. This point is important to consider when choosing a processing temperature; heating and cooling must be carried out in strict compliance with the requirements prescribed by the technology. Forging is possible with the use of more powerful equipment
- Vanadium, on the contrary, improves the quality of forging and increases the resistance of steels to overheating.
The technological properties of metals and alloys are negatively affected by the presence of sulfur and phosphorus in their composition. Their high content causes red brittleness (brittleness when heated) and cold brittleness (brittleness when cooled) of the workpieces. Despite the fact that it is impossible to completely purify alloys from the presence of these chemical elements, production strives to reduce their content in the composition as much as possible.
The technological properties of metals and alloys directly depend on their chemical composition, therefore, before choosing one or another processing method, the composition of the material to be processed is carefully analyzed in production. If this is not done, problems are likely to arise both during the processing process and during the further use of finished products.
What is Fundamentals of Materials Science?
The basis of materials science is the study of the relationship between the structure of materials, the processing methods used to produce that material, and the resulting properties of the material. The complex combination of all these aspects ensures the performance of a material in a particular application.
Interesting materials:
Where is Leonid Brezhnev buried? Where was Abdulmanap Nurmagomedov buried? Where to get an apostille for a diploma? Where can I get Form 9 in the Vyborg region? Where to get MoneyGram in Russia? Where can I receive a Western Union transfer in Gomel? Where can I get a psychiatric examination? Where can I obtain registration at my place of residence? Where can I get a certificate of Pre-retirement status? Where can I see my work record data?
Technological testing of metals and alloys
Process tests include tests for bending, upsetting, flattening, beading, folding, etc. Many samples and tests are carried out in accordance with developed and approved standards.
Depending on the results of technological tests, a decision is made on the possibility of manufacturing parts and structures of appropriate quality from the available material using one or another operation performed in this production.
The bending test is carried out in accordance with the requirements of GOST 14019-80. It is used to determine whether metals and alloys are able to withstand bending without destruction. The sample is placed under a press and bent to the required angle. If the bending angle is 180°, then the material can withstand extreme deformation. The absence of cracks, tears, delaminations and other defects indicates that the sample has passed the test.
Mechanical properties of metals. Materials Science: Lecture Notes [litres]
2. Mechanical properties of metals
The mechanical properties of metals are determined by the following characteristics: elastic limit ?T, yield strength ?E, tensile strength relative elongation ?, relative contraction ? and elastic modulus E, impact strength, endurance limit, wear resistance.
Hardness, determined by simple non-destructive methods, depends mainly on the carbon content and heat treatment conditions of the steel. For a rough estimate of strength, you can use the following relationship: ?B = HB/3.
During operation, all metal parts of machines are exposed to various external loads, which can be applied smoothly, gradually (statically) or instantly (dynamically). By acting on parts, external loads change their shape, i.e. they deform. The property of materials made of metal and alloys to take their original shape after the cessation of external forces is called elasticity, and deformation that disappears after the load is removed is called elastic. If great forces are applied to a metal part and after the cessation of their action it does not take its original shape, but remains deformed, then such deformation is called plastic. The ability of metal materials and parts to deform under the influence of external loads without collapsing, and to maintain a changed shape after the force ceases, is called plasticity. Metal materials that are not capable of plastic deformation are called brittle.
An important property of materials and parts made of metals, along with elasticity and plasticity, is strength. Depending on the operating conditions, metal parts or tools must have certain mechanical properties - strength, elasticity, ductility.
During long-term operation, metal parts of machines are subjected to repeated variable loads (tension - compression). At stresses less than the yield strength or elastic limit, they can suddenly fail. This phenomenon is called metal fatigue. The endurance (fatigue) limit is the maximum stress that materials and metal parts can withstand without breaking, under a sufficiently large number of repeatedly alternating loads (cycles).
For steel samples, this characteristic is set at 10 million cycles, for non-ferrous metals - at 100 million cycles. Is the limit of endurance indicated by a Greek letter? –1 and measured in Pa.
During operation, many machine parts heat up to high temperatures, reaching 1000 °C or more. For such parts, an important characteristic is heat resistance - the ability of materials made of metals and alloys to maintain the necessary strength at high temperatures. In metals and alloys that operate for a long time under load at high temperatures, the phenomenon of creep is observed, i.e., continuous plastic deformation under the influence of a constant load (the metal “creeps”).
Share on the page
Next chapter >
tech.wikireading.ru
Lecture 7
Mechanical properties (continued). Technological and operational properties
- Mechanical properties and methods for determining their quantitative characteristics: hardness, viscosity, fatigue strength.
- Brinell hardness (GOST 9012)
- Rockwell method GOST 9013
- Vickers method.
- Scratching method.
- Dynamic method (according to Shore).
- Effect of temperature.
- Methods for assessing viscosity.
- Estimation of viscosity by type of fracture.
- Main characteristics:
- Technological properties.
- Operational properties.
Mechanical properties and methods for determining their quantitative characteristics: hardness, viscosity, fatigue strength.
Hardness
is the resistance of a material to penetration into its surface by a standard body (indenter) that does not deform during testing.
Widespread use is explained by the fact that special samples are not required.
This is a non-destructive testing method. The main method for assessing the quality of heat treatment of a product. Hardness is judged either by the depth of penetration of the indenter (Rockwell method) or by the size of the indentation mark (Brinell, Vickers, microhardness methods).
In all cases, plastic deformation of the material occurs. The greater the material's resistance to plastic deformation, the higher the hardness.
The most widely used methods are Brinell, Rockwell, Vickers and microhardness. The test circuits are shown in Fig. 7.1.
Rice. 7.1. Hardness determination schemes: a
– according to Brinell
;
b – according to Rockwell;
c
– according to Vickers
Brinell hardness (GOST 9012).
The test is carried out on a Brinell hardness tester (Fig. 7.1 a)
A hardened steel ball with a diameter of D 2.5 is used as an indenter; 5; 10 mm, depending on the thickness of the product.
Load P, depending on the diameter of the ball and the measured hardness: for heat-treated steel and cast iron - , cast bronze and brass - , aluminum and other very soft metals - .
Holding time: for steel and cast iron – 10 s, for brass and bronze – 30 s.
The resulting print is measured in two directions using a Brinell magnifying glass.
Hardness is defined as the ratio of the applied load P to the spherical surface of the indentation F:
Standard conditions are D = 10 mm; P = 3000 kgf; = 10 s. In this case, Brinell hardness is designated HB 250, in other cases the conditions are indicated: HB D / P /, HB 5/ 250 / 30 – 80.
Rockwell method GOST 9013
Based on pressing into the surface of the tip under a certain load (Fig. 7.1 b)
The indenter for soft materials (up to HB 230) is a steel ball with a diameter of 1/16” (1.6 mm), for harder materials – a diamond cone.
Loading is carried out in two stages. First, a preload (10 kf) is applied to bring the tip into close contact with the sample. Then the main load P1 is applied, and the total working load P acts for some time. After the main load is removed, the hardness value is determined by the depth of residual indentation of the tip h under load.
Depending on the nature of the material, three hardness scales are used (Table 7.1)
Table 7.1. Scales for determining Rockwell hardness
Vickers method.
Hardness is determined by the size of the imprint (Fig. 7.1 c).
A diamond tetrahedral pyramid with an apex angle of 136o is used as an indenter.
Hardness is calculated as the ratio of the applied load P to the surface area of the indentation F:
Load P is 5…100 kgf. Imprint diagonal d
measured using a microscope mounted on the device.
The advantage of this method is that it is possible to measure the hardness of any materials, thin products, surface layers. The method is highly accurate and sensitive.
Microhardness method
– to determine the hardness of individual structural components and phases of the alloy, very thin surface layers (hundredths of a millimeter).
Similar to the Vickers method. The indenter is a pyramid of smaller dimensions, the indentation loads P are 5...500 gf
Scratching method.
A diamond cone, pyramid or ball makes a scratch, which is a measure. By making scratches on other materials and comparing them with a standard, the hardness of the material is judged.
A scratch of 10 mm width can be applied under a certain load. Observe the magnitude of the load that gives this width.
Dynamic method (according to Shore).
A ball is thrown onto a surface from a given height, it bounces a certain amount. The greater the rebound value, the harder the material.
As a result of dynamic impact bending tests of special notched samples (GOST 9454), the toughness of materials is assessed and their tendency to transition from a ductile to a brittle state is established.
Viscosity is the ability of a material to absorb mechanical energy from external forces due to plastic deformation.
It is an energy characteristic of a material, expressed in units of work. The viscosity of metals and alloys is determined by their chemical composition, heat treatment and other internal factors.
Viscosity also depends on the conditions under which the metal operates (temperature, loading speed, presence of stress concentrators).
Effect of temperature.
With increasing temperature, viscosity increases (see Fig. 7.2).
Yield strength St
changes significantly with temperature, and the peel resistance
Sot
does not depend on temperature
.
At temperatures above
Tv,
the yield strength is less than the peel strength. When loaded, plastic deformation first occurs, and then destruction occurs. The metal is in a viscous state.
At temperature below Tn
peel strength is less than the yield strength. In this case, the metal is destroyed without preliminary deformation, that is, it is in a brittle state. The transition from a viscous to a brittle state occurs in the temperature range
Cold brittleness
is called the tendency of a metal to transition to a brittle state with decreasing temperature.
Cold brittle are iron, tungsten, zinc and other metals that have a body-centered cubic and hexagonal close-packed crystal lattice.
Rice. 7.2. The influence of temperature on the ductile and brittle state
Methods for assessing viscosity.
Impact strength characterizes the reliability of a material, its ability to resist brittle fracture
The test is carried out on samples with cuts of a certain shape and size. The sample is installed on the supports of the pile driver with a cut in the direction opposite to the impact of the pendulum knife, which is raised to a certain height (Fig. 7.3)
Fig.7.3. Impact test scheme: a
– diagram of a pendulum pile driver;
b
– standard sample with a notch;
c
– types of stress concentrators
;
d – dependence of viscosity on temperature
The work required to destroy the sample is:
where: P is the weight of the pendulum, H is the height of the pendulum before impact, h is the height of the pendulum after impact.
The viscosity characteristic is impact strength (an),
— specific work of destruction.
where: F0
- cross-sectional area at the incision site.
GOST 9454 – 78 impact strength is denoted by KCV. KCU. KCT. KC – impact strength symbol, the third symbol shows the type of cut: sharp (V), with a radius of curvature (U), crack (T) (Fig. 7.3 c)
Serial tests to assess the susceptibility of a metal to cold brittleness and determine the critical thresholds of cold brittleness.
Test a series of samples at different temperatures and construct impact strength-temperature curves ( an-T)
(Fig. 7.3 d), determining the thresholds of cold brittleness.
The cold brittleness threshold—the temperature range of changes in the nature of destruction—is an important parameter of structural strength. The lower the cold brittleness threshold, the less sensitive the metal is to stress concentrators (sharp transitions, holes, scratches) and to the rate of deformation.
Estimation of viscosity by type of fracture.
When the metal is in a viscous state, more than 90% of the fibers are fractured, beyond the upper threshold of cold brittleness TV
the temperature that ensures this condition is accepted.
When the metal is in a brittle state and 10% of the fibers are fractured,
the temperature ensuring this state is taken Tn In technology, the cold brittleness threshold is taken to be the temperature at which the fracture contains 50% of the viscous component. Moreover, this temperature must be at least 40oC lower than the operating temperature of the products.
Endurance tests (GOST 2860) provide fatigue strength characteristics.
Fatigue
— destruction of the material under repeated alternating stresses, the magnitude of which does not exceed the yield strength.
Fatigue strength
– the ability of a material to resist fatigue.
The fatigue process consists of three stages, the zones in the fracture corresponding to these stages are shown in Fig. 7.4.
1 – formation of a crack in the most loaded part of the section, which was subjected to microdeformations and received maximum hardening
2 – gradual spread of tretzina, smooth ground surface
3 – final destruction, the “broken” zone, the living cross-section decreases, and the true stress increases until brittle or ductile failure occurs
Figure 7.4. Scheme of crack initiation and development during alternating bending of a round sample
Fatigue strength characteristics are determined by cyclic “rotational bending” tests. The diagram is shown in Fig. 7.5.
Rice. 7.5. Fatigue tests (a), fatigue curve (b)
Main characteristics:
Endurance limit
( – with a symmetrical change in load, – with an asymmetrical change in load) – the maximum stress withstood by the material for an arbitrarily large number of loading cycles N.
Limited endurance limit
– the maximum stress that a material can withstand for a certain number of loading cycles or time.
Vitality
– the difference between the number of cycles until complete destruction and the number of cycles before the appearance of a fatigue crack.
Technological properties.
Technological properties
characterize the ability of a material to be subjected to various methods of cold and hot processing.
1. Foundry properties.
Characterize the ability of a material to produce high-quality castings from it.
Fluidity
– characterizes the ability of molten metal to fill a casting mold.
Shrinkage (linear and volumetric)
– characterizes the ability of a material to change its linear dimensions and volume during the process of solidification and cooling. To prevent linear shrinkage when creating models, non-standard meters are used.
Segregation
– heterogeneity of the chemical composition by volume.
2. The ability of the material to be processed by pressure.
This is the ability of a material to change size and shape under the influence of external loads without collapsing.
It is controlled as a result of technological tests carried out under conditions as close as possible to production ones.
The sheet material is tested for bending and stretching of the spherical dimple. The wire is tested for bending, twisting, and winding. Pipes are tested for expansion, flattening to a certain height and bending.
The criterion for the suitability of a material is the absence of defects after testing.
3. Weldability.
This is the ability of a material to form permanent connections of the required quality. Evaluated by the quality of the weld.
4. Cutting ability.
Characterizes the ability of a material to be processed by various cutting tools. It is assessed by tool life and the quality of the surface layer.
Operational properties.
Performance properties characterize the ability of a material to work under specific conditions.
- Wear resistance
– the ability of a material to resist surface destruction under the influence of external friction.
- Corrosion resistance
– the ability of the material to resist the action of aggressive acidic and alkaline environments.
- Heat resistance
is the ability of a material to resist oxidation in a gas environment at high temperatures.
- Heat resistance
is the ability of a material to retain its properties at high temperatures.
- Cold resistance
– the ability of a material to maintain plastic properties at subzero temperatures.
- Anti-friction
– the ability of a material to be worn into another material.
These properties are determined by special tests depending on the operating conditions of the products.
When choosing a material to create a structure, it is necessary to fully take into account the mechanical, technological and operational properties.
nwpi-fsap.narod.ru

