Most builders are faced with volumetric screed on large areas - such coverage is most often needed outdoors, although sometimes these can be large premises such as warehouses or some kind of sports complexes. I will say right away that work on such a scale is most often undertaken not by private contractors, but by construction companies, for which a homemade vibrating screed is simply not needed, since all power tools are purchased from top manufacturers.
Source ligotex.com.ua
Another thing is for single builders or small teams working privately, or even just a person building his own house - for such people it is not entirely profitable to purchase expensive power tools of this type. The fact is that they are needed extremely rarely in relation to other cycles of work, if we talk about premises, because the main labor costs are pouring the foundation, laying walls and their cladding, installing a roof, ceiling, electrical communications, plumbing, heating, etc. . But for landscaping a personal plot, concreting of various blind areas, paths, platforms and entrances may be provided. In this case, you should think about how to make a vibrating screed for concrete with your own hands.
Electric motor installation
Metal corners will securely fix the engine. It is better to place it in the center of the profile. This will help distribute the vibrations along the entire length of the rack. The engine is secured in two main ways. The first involves installing a special mount directly on the electric motor, then the resulting structure is attached to the profile itself. In the second case, it is necessary to secure the corners to a metal beam and only then install the engine on the structure. To fix the electric motor on the profile, use self-tapping screws or welding. Both methods are equally effective, but a welding machine, unlike a screwdriver, is not accessible to everyone.
Making pens
In order to make a homemade vibrating screed, you need to have some knowledge of electricity and how to operate a welding machine.
If you don’t have such skills, you can recruit friends who know how to work with such tools. The design of a vibrating screed always begins with the handles, which must consist of reinforcement. They should be bent a little, giving them an arched shape. Using welding, the made handles are connected to the profile; in order for the part to be fixed more securely, it should be additionally secured with bolts. Assembly is carried out on a workbench or an ordinary flat table, because it is necessary to maintain maximum evenness, and this is difficult to achieve on a raised surface.
To ensure safety, it is recommended to insulate the handles with a rubber coating. The rubber must have a decent thickness, because when working with a vibrating screed, a lot of vibration is created, which is transferred to the handles, which, in turn, makes using the tool inconvenient. There are cases when the device is made with one handle - this is not practical. Experts advise making one pair, this makes it easier to manipulate the vibrating screed.
Adviсe
After assembling the vibrating screed, you can turn it on and begin leveling the concrete surface. Before operation, you need to install special guides with which the device will move. Then the solution is poured. It is necessary that the thickness of the layer exceeds the marks of special guides by about a couple of centimeters. After this, they begin to compact the concrete . This process does not need to be rushed. Only through careful work is a uniform coating obtained. Beginners in the construction industry are not recommended to fill large areas on their own. Experts advise starting with a small area. Only by adapting to such activity can a novice builder pour more mortar. The compaction process should be carried out carefully.
Prices for vibrating screeds
The table shows the cost of some popular vibrating screed models:
| Brand | Nutrition | power, kWt | Weight, kg | Price, rubles |
| Impulse M35 | Gasoline 0.71 l/hour | 1,3 | 18 | 38 500 |
| TSS-MSD | Gasoline 0.73 l/hour | 1,2 | 13 | 69 400 |
| Masalta MSD4 | Petrol | 1,5 | 12,7 | 54 300 |
| RUSA VMAX (telescopic 4-7 m) | Petrol | 3,9 | 106 | 82 700 |
| TCC BP 2 (2 m) | 380 V | 0,34 | 39 | 13 500 |
| TCC BP 6 (6 m) | 220 V | 0,34 | 61 | 26 500 |
| TCC BP (telescopic) | 220 V | 0,34 | 48 |
READ DIY Brake Drum Band Saw
What is better: a ready-made solution or one made independently?
By assembling the vibrator yourself, you can save a lot of money. Of course, many hardware stores offer a wide range of similar tools, but it is much cheaper and more interesting to make a concrete vibrator with your own hands.
Of course, everyone makes their own choice, but one thing is certain: a DIY construction vibrator is much cheaper. In addition, if necessary, it can be easily dismantled. Before assembling such a device, you should understand the principle of its operation and understand how it works. During operation of the vibrator, air bubbles are removed from the mixture due to powerful high-frequency vibrations.
The device includes a special motor with a flexible shaft and a vibrating tip with a fairly powerful vibration mechanism. The presented type of device is used to effectively compact cement mortar, which is subsequently placed in various forms.
A building mixture exposed to a construction vibrator hardens much faster. This is achieved by releasing air and excess moisture from the concrete. The solution becomes more homogeneous, its volumetric and quality characteristics change. The concrete mixture becomes much more fluid, so it easily fills all forms.
Without a concrete vibrator, the process is delayed, and the quality of future concrete products will be much worse. We can safely say that hand-held vibrators not only significantly reduce the time required to complete work, but also ensure the reliability, strength and durability of concrete products.
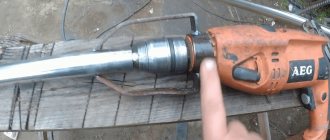
Construction vibrator based on drill
As mentioned earlier, any professional 220V vibrator includes a motor with a shaft and a vibrating tip. If you need to create a vibrator for concrete yourself, then a drill or hammer drill is perfect as a driving force. The main components for creating a construction vibrator based on a drill:
- drill;
- metal drill;
- welding machine;
- steel 45-55 mm tube with a diameter of 40 mm;
- hacksaw for metal;
- bearings;
- rectangular rod;
- sleeve;
- steel rod with a diameter of 15 mm;
- protective cover for the tip;
- speedometer cable or flexible inner rod for the tube;
- a special tube made of dense rubber or flexible and flexible plastic.
It is recommended to use any drill capable of transforming rotational movements into clear oscillatory ones as the driving force of each vibrator.
Assembling the unit will not take much time. A professional will handle the task in a matter of minutes. In this case, the price of the designed tool will be directly proportional to the cost of its components. Thus, the more expensive the drill (or hammer drill) and other elements for creating a construction vibrator, the more expensive the entire finished unit will cost.
Construction vibrator for 220V based on a hammer drill
To assemble the finished device you will need:
- hammer drill with a power of at least 1.5 kW;
- steel washer;
- peak.
The hammer drill must be used in the “release” mode. A peak, which should rest on the formwork, is perfect as an attachment for a homemade vibrator. For a higher-quality connection of the peaks with the formwork, a steel washer can be used. When using the presented vibrator, the concrete mixture spreads as evenly as possible.
When planning to use a vibrator at great depths, it is recommended to use the “bayonet” method. In this case, a nozzle is welded to the end of the peak, the size of which will allow you to remove the device from the concrete without much effort.
Operating principle and structure of the rack
- Rigid, durable frame. Consists of two parallel slats or wide strips made of high-quality alloy steel or thick aluminum. Lightweight aluminum does not corrode, is easier to maintain and lasts a long time. Steel planks are cheaper.
- Vibration system. A gasoline or electric engine drives the frame into asynchronous motion.
The device moves along the plane manually. When the motor starts, a rotational motion is transmitted, causing translational vibrations of the rack. The vibration of the frame compacts the solution, releasing air from the voids. A vibration screed with a gasoline engine is more powerful and efficient than an electric one. But a gasoline-powered unit emits harmful waste products into the environment, so it is recommended to compact concrete indoors using an electrically driven device.
The length of the planks reaches 10 meters, which allows the structure to be used for leveling surfaces of any size. On large areas it is more convenient to compact with an autonomous gasoline engine. The marks left behind are removed with a grinding machine while the cement screed hardens.
- Floating, non-retractable. The simplest ones, intended for private use. Their power does not exceed 1.2 kW. The area of the compacted surface is limited by the length (no more than 3 meters) of the floating rigidly fixed strip.
- Telescopic, sliding. The devices are practical and versatile, allowing you to compact concrete screeds of any size. When extending, the slats increase the length to 10 meters. The leveling frame of such units consists of two bars. Designed for use by professional builders. Structurally more complex, they cost more than floating models.
- Sectional. The working part is increased by adding additional triangular frames to the rule. Functional, with convenient adjustment.
- Before starting, the tool is carefully checked: the bar must be clean, the fasteners are securely tightened;
- the operating engine must not be touched;
- after turning off the device, the rack is washed with water;
- if necessary, work with a gasoline model indoors, ensure good ventilation;
- The electric motor must be grounded.
Classification
All vibrating screeds differ in design and type of drive. Each type of instrument has both its advantages and disadvantages.
By design
The tools have differences in design. They differ in technical characteristics, as well as purpose.
Floating vibration screed
The name indicates the nature of the tool's movement along the concrete surface. They are sometimes called vibrating mops. Designed for finishing surface treatment, removing unevenness, protrusions and roughness.
Main characteristics:
- weight 15-25 kg;
- compaction depth - up to 20 cm;
- work on the surface without immersion in concrete;
- profile length - 1.5-4 m;
- electric or petrol drive;
- engine power - 1-1.2 kW;
- controlled by one operator.
The device is installed on the concrete surface and moved using a handle. A variation is the reversible vibrating screed. By turning the handle, the operator unfolds the profile and compacts the area away from himself.
Sectional vibrating screed
They are used in the construction of large-sized objects, platforms, airfields, bridge spans, and tunnels. Areas up to 30 m wide are compacted and leveled, and the structure is assembled from modules.
Characteristics of sectional slats:
- vibration depth - 30-35 cm;
- profile in the form of a steel truss, eliminating deflection;
- section length - 1-3 m;
- bolted assembly;
- electric, petrol or pneumatic drive;
- engine power - 3 kW.
Telescopic vibration screed
In sliding slats, the width of the profile located on the guide beams is adjusted. The design has great rigidity. The tool is universal - it is used to perform various types of work.
Technical data:
- profile length - 2-8 m;
- drive petrol, electric;
- compaction depth - 15-18 cm;
- engine power - 0.25-3.6 kW;
- weight - 45-115 kg.
Vibrating screed with guides
The tool processes concrete to a depth of 30 cm. Platform vibrators are used as a source of vibration. Before processing concrete, guides are set, and the device is moved along them during work.
Profile length 1.5-9 m. Effectively used for deep compaction and large concreting areas.
By drive type
Vibrating screeds are equipped with three types of motors:
Petrol. Advantages: maneuverability (no cable), autonomous power supply, electrical safety. Gasoline devices are used outdoors or in ventilated areas. They have high productivity and are used in the construction of large facilities and for private purposes.
Electric. Advantages: environmental friendliness, ease of operation, wear resistance, efficiency. Vibrating screeds with electric drive are lighter and more compact than gasoline ones. For indoor concrete work, this is the most suitable option; you need to take into account access to the electrical network and cable length. Power supply: 220V and 380V.
Pneumatic. The compressor forces air into the main pipeline, driving the vibrator shafts. They are evenly spaced along the structure of the sectional vibrating screed. Used for concreting large areas.
How to make a vibrating screed for laying concrete mortar
The reliability of a concrete coating depends not only on high-quality building materials and the correct proportions of the mixture. Maximum strength and durability of the screed is given by thorough compaction. Air cavities and voids in the frozen mass will reduce the quality and shorten the period of use.
When pouring a small platform or formwork for an outbuilding, air is released by piercing the cement mass with a pin (for example, a piece of rebar). But when installing a floor in a room, laying a road surface, concreting a parking lot or other similar areas, using the manual method is problematic and the high quality of the foundation is not guaranteed. A special bar with a small amplitude of intense vibrations helps to compact the surface on your own faster and easier.
Structures of any power and complexity are effective if concrete in a layer of up to 20 cm. Screed of greater thickness is compacted layer by layer.
Assembling a basic vibration screed with your own hands
To compact a concrete surface in a small room in 30 minutes, a disposable device is assembled from scrap materials. For production you will need:
- A smooth, strong board 3-3.5 cm wide, 25-28 cm long, 50-60 cm long.
- Handle made of a block or pole up to 1.5 m long.
- Drill with button lock.
- Aluminum mounting plates.
The tool is assembled in the following order:
- The surface of the board must be smooth; for this it is cleaned and sanded.
- The drill is fixed with aluminum plates and self-tapping screws on a wooden plank in the middle so that the axis of rotation of the chuck and the center of the board coincide.
- The handle is filed at an angle and similarly secured to the board with an oblique cut.
- A rod with a shifted center of gravity is installed in the drill chuck: a piece of reinforcement, a crooked drill bit, or a clamping key to the chuck.
The button of the drill connected to the network is clamped and fixed. The vibration created by the displaced center of gravity of an object inserted into the chuck is transmitted to the board.
The metal profile is more even and smooth than the board. And the weight and power of the units sold make it possible to use long slats and cover a large area, but for a single use such a vibrating screed will do.
READ How to Cut Plastic Pipes
Working tricks. Do-it-yourself vibration screed. Subtleties of working with screed. Beacon screed
For many craftsmen, the main difficulty is the lack of a welding machine and skills in handling it. In this case, welding of parts is replaced by a bolted connection.
- steel channel, profile pipe or aluminum rail of the required length (1.5-2 meters or more);
- 2 corners 4x4 20x25 cm or channel sections;
- 2 pieces of pipe or fittings for handles of a convenient length;
- vibration motor, electric motor or internal combustion engine (for example, from a chain saw or walk-behind tractor, together with a clutch).
- Corners are welded on top of the center of the channel across the strip. The distance between them is determined by the size of the engine. Holes for mounting the motor are drilled and it is installed. The fasteners are tightened thoroughly so that the vibration is transferred to the frame and the motor does not come loose.
- Handles made of the selected material are welded on both sides of the engine. When working with an electrical device, they are isolated and the motor is grounded. Having the appropriate knowledge in electrical engineering, a speed controller is installed on the handle.
Differences by engine type
Rack and pinion vibration compactors are distinguished by the type of drive, which can be gasoline or electric.
A gasoline vibrating screed is more productive than an electric one. Independence from the power grid makes the device completely autonomous and indispensable for working in large areas.
In closed or residential areas, vibrating screed , which does not emit exhaust gases and has a low noise level when the engine is running.
The electric motor is significantly lighter than a gasoline motor, which has a positive effect on the maneuverability of the unit. In addition, vibrating screed is economical to operate.
Manufacturing options for basic elements
The design of the vibrating plate is quite simple. It consists of four main nodes:
- engine;
- slabs;
- frames;
- vibrator.
Engine
The following can be used as a drive for a homemade vibrating tool:
- electric motor;
- gasoline or diesel internal combustion engine (ICE).
It is recommended to choose an electric motor for the vibrating plate that you plan to assemble with a power of 1.5 to 2 kW. In this case, the rotation speed should be from 4000 to 5000 rpm. If the power of the electric motor is less than the specified value, then this will affect the performance of the created unit in the direction of its reduction.
The electric motor is the most expensive part of a homemade installation. For home use, it is better to buy single-phase modifications of electric motors, for example, as part of IV-99E or IV-98E vibrators, operating at a voltage of 220 V. The electric motor can also be removed from old unused equipment, for example, from a drilling machine. It is only necessary that it matches the power and speed.
If you equip homemade equipment with an electric motor, then to increase the safety of the work, it is recommended to install separate protection, for example, a differential circuit breaker or a residual current device (RCD).
The automatic device, in addition to preventing electric shock to the operator, also turns off the equipment in case of overload or short circuit in the circuit.
A homemade vibrating plate can also be equipped with an internal combustion engine. If you buy it, it is recommended to give preference to single-cylinder three-stroke engines from Honda. An internal combustion engine from a chainsaw or walk-behind tractor is also suitable.
Plate and frame
From the engine, movement is transmitted to the vibrator by a belt - it is mounted on pulleys. By changing the dimensions of the latter (diameter), you can set the required speed of the vibrator. A car belt is suitable for a belt drive. The plate is made of steel or cast iron sheet with a thickness of 8-10 mm. The rest of the structure is located above it. To make the frame, use metal corners 5 by 5 cm or larger.
Vibrator
A vibrator for a vibrating plate can be purchased factory-made or made independently in various ways. One of the options for a homemade vibration unit will be discussed in the next paragraph.
Additional structural elements
Light (up to 75 kg), universal (75-90 kg) and medium-heavy (from 90 to 140 kg in weight) models of equipment without remote control are equipped with handles made of metal pipes. With their help, the operator sets the direction of movement.
For ease of transportation, the units are also equipped with wheels. They can be removed if necessary. To move a homemade stove, you can take wheels, for example, from an old wheelbarrow.
How to make a vibrating screed with your own hands
A tool made independently from available instruments and materials allows you to solve the necessary problems and at the same time save on the purchase of expensive equipment.
As a rule, vibrating screed . However, in home-made units there are also gasoline engines (most often from broken chainsaws).
To make a vibrating screed for concrete with your own hands you will need:
- Basis for the working frame: aluminum or steel profile pipes of square section or channel 2-3 m long.
- Two corners with a cross section of 40x40 mm and a length of about 20 cm.
- Two pipes for handles (their length is determined by the height of the worker).
- Motor with vibration mechanism (for surface compaction 20 cm deep, a motor power of 1.5 kW is sufficient).
- Bolts for fastenings.
- Rubber for insulating handles.
- Three-phase wire.
- Drill and screwdriver.
- Welding equipment.
- Starting device.
Note! It is possible to carry out work without a welding machine, since a vibrating screed can be made using bolted fasteners.
If you have minimal skill, you can assemble a vibrating screed with your own hands quite quickly in a few steps:
- Corners are welded in the center of the profile at a certain distance from each other (in accordance with the engine dimensions). During the welding process, the ends of the profiles and corner joints of the structure are welded tightly, preventing the formation of gaps. Otherwise, during operation, the solution will fall into the holes, increasing the weight of the unit.
- Handles are formed from pipes or fittings, bending them at your discretion for convenience. They are welded to the profile (or bolted) on both sides of the engine.
- The engine is mounted strictly in the center of the frame. With its minimal deviation from the central position, the structure, during operation, will be pulled to the side, which will make it difficult to move in the desired direction. It is better to secure the engine with bolts: this way it will be available for replacement or repair at any time.
- A starting device is mounted on the handle or engine.
- Connect the power cable. The engine is grounded, and the handles are wrapped with vibration and current insulating material.
Preparatory process before assembling the vibrating screed
Those developers who have previously had experience working with concrete should take on the task of assembling a vibrating screed. It is impossible to create a unit without an idea of how the solution behaves during pouring and what difficulties arise in the absence of compaction of poured concrete. In addition, to perform the installation you will need skills in using a welding machine. Therefore, novice builders are recommended to acquire a factory-made device or rent one.
Before starting assembly, it is important to decide what type of structure is needed for the job. There are several of them:
• vibrating screed for concrete – the device is large in size, this makes it possible to exert the necessary force on heavy mortar;
• vibrating screed – performs the function of a rule, the model is lightweight, it is very easy to work with;
• vibrating mop – a lightweight installation used to level a thin layer of cement mortar over a working surface.
Types and principle of operation of vibrating laths for laying concrete
High-quality pouring of concrete structures implies mandatory compaction and leveling of the working mixture. For these purposes, vibrating screeds are used for laying concrete. Given the simplicity of their design, many developers consider the prices for industrial equipment to be overpriced. , a vibrating screed for laying concrete with your own hands is most suitable .
READ Converting a Screwdriver to a Lithium Ion Battery
Application of Vibrating Slats for Concrete
The tool is often used during industrial-scale work.
Vibrating screed for laying concrete is used in private and industrial construction. The main area of its application, of course, remains concreting surfaces. The mechanism compacts huge masses of mortar and, by removing water from the concrete, gives it strength. The equipment also removes air from the viscous mass, resulting in a durable and high-quality structure. The industrial and civil engineering sectors include its use for laying industrial concrete floors in warehouses, shopping centers with heavy traffic or pedestrian traffic, as well as when performing road work and tunneling. In addition, it is used in road construction.
What is a rack vibratory compactor
In fact, a vibrating screed for concrete is a standard rule on which a three-phase asynchronous motor with eccentrics is attached. When the shaft rotates, the displaced center of gravity of the eccentrics causes mechanical vibrations that are transmitted to the rule in the form of vibrations of various frequencies. As a rule, a metal frame made of interconnected hollow profiles is used. To control the structure, handles with a vibration-insulating coating are provided, and for carrying, transport handles are provided.
Vibration treatment of the concrete mixture prevents the formation of voids in the hardened mortar and cracks on its surface, thereby improving its performance properties.
Rack seals are also used when working with dry screeds (at a humidity level of 20%). With the help of vibrating slats, you can quickly and efficiently lay paving slabs.
Do-it-yourself vibration screed for concrete floors
Classification by type of construction
The configuration of the units determines their functionality and cost. Taking into account the design features, the following types of rack and pinion vibration equipment are distinguished:
- Floating vibration screed (finishing) - lightweight structures for thin-layer (up to 15-20 cm deep) finishing leveling. They work without guides.
- The aluminum profile ensures low weight of the unit and better glide over the surface, which is why screed is also called a vibrating mop.
- Surface reversible. Equipped with a reversible forward motion mechanism and a profile with rounded edges. The installation can move in forward and reverse directions. The profile is rotated in the opposite direction by rotating the handle.
- Vibrating screeds with a fixed length. They work along guides and provide a compaction depth of up to 30 cm.
- Double telescopic (sliding). vibrating screed is compact when folded, which is important when transporting equipment to a construction site. The length of the tool increases due to the retractable structure and can range from 2.5 to 4.5 m. The sliding vibrating screed is made from steel or aluminum profiles. vibrating screed is heavy and works only along guides.
- Sectional. They are assembled from separate fragments and can reach a length of 20-30 m. Increasing the length of the slats allows you to process a larger area in one pass. By making the structure heavier, the effective compaction depth increases. These are universal devices for large-scale construction.
Vibrating plate assembly algorithm
To make your own vibrating plate for soil compaction, you will need the following materials and parts:
- steel sheet measuring 50 by 80 cm with a thickness of at least 8 mm;
- an area vibrator with an electric motor, for example, IV-98E;
- 2 pieces of channel 45 cm long;
- fastening: M10 and M12 bolts with nuts, washers;
- shock absorbers;
- 1.5 m metal pipe (diameter 20-25 mm).
Tools you will need:
- welding machine;
- hammer;
- grinder with cutting wheels;
- electric drill with a set of metal drills;
- spanners;
- tape measure, marker or chalk.
It is recommended to carry out the work of assembling homemade equipment while protecting your eyes with goggles and your hands with gloves.
A homemade vibrating plate with an electric motor is assembled in the following sequence.
- Using a grinder, make cuts about 5 mm deep (so that the metal can be bent) at both ends of the steel sheet. 10 cm depart from the front edge, and 5 cm from the rear edge.
- The edges are bent at an angle of approximately 20-30 degrees with a hammer, after which the bend is welded.
- Two channels are welded parallel to the curved edges at a distance of approximately 5-10 cm from the center line of the workpiece made.
- A vibrator is installed in the center, along the legs of which marks are made for fasteners.
- Drill holes in the channels using an electric drill.
- Mount the vibrator, attaching it with bolts, nuts and washers.
- Shock-absorbing cushions are attached to the slab.
- Bend the tube into a U-shape to make a handle.
- Holes are drilled at the edges for bolt fastening.
- The handle is attached to the sole through metal corners and shock absorbers.
- Connect the power cable and install the start-up protection equipment.
- Check the functionality of the created unit.
The mass of the assembled vibrating plate will be approximately 60 kg. To make it convenient to transport, a piece of pipe is welded to the plate, which will serve as an axle for the wheels.
A more complex option for creating a vibrating plate involves using a separate engine, for example, from a walk-behind tractor. In this case, to assemble vibration equipment, you will need a homemade or factory vibrator. The rotation of the motor will be transmitted to it using a belt placed on pulleys.
The diameter of the latter must be selected so that the vibrator eccentric rotates at a frequency of approximately 180 rpm.
The entire process of assembling the vibrating plate is shown in the photo below.
After painting, the final mechanism will look like the photo below.
If necessary, you can increase the mass of a homemade vibrating plate. This is done by additional welding of metal sheets or reinforcement rods. A vibrating tool created with your own hands is quite capable of competing with factory-made analogues.
Features of operation of vibrating slats
Vibrating screeds are easy to use, but working with them has its own characteristics.
Rules for working with rack and pinion vibration compactors:
- Before starting, the serviceability of the equipment is checked. Rubber boots and gloves are worn to protect against possible electric shock.
- The floating vibrating screed should slide over the surface of the solution. Heavier equipment that operates along guides is installed before the concrete mixture is supplied and should be located slightly below its level.
- The guides for the vibrating screed are set strictly horizontally at the zero mark, which corresponds to the final level of the finished floor covering.
- After supplying the solution, the vibration installation is started and, using cables, it is pulled along the guides. Areas where the mixture subsides below a given level are filled with small portions of the solution until leveled at the required level.
- After finishing the work, thoroughly clean the frame from the solution. Particular attention is paid to the frame bolts that were in contact with the wet concrete mixture.
- Minor defects on the hardened surface can be easily removed with a grinder.
Diamond drills and other devices
Types of diamond drill bits for drills.
Concrete rods have soldering along the entire length, which gives special strength. Even when working with hard materials, they retain their technical properties.
Externally, they are also different, which prevents them from being confused with others:
- a blunt end made of soldered pobedite, which is almost as hard as diamond;
- products are white, in contrast to black for metal and light for wood;
- the tip is wider than the shaft.
Drill bits are relatively small, with cylindrical or polyhedron-shaped shanks. For rotary hammers - large ones, marked SDS; they are more often called not drills, but drills.
By design they are distinguished:
- screw - for drilling deep holes;
- spiral - for large diameter holes;
- flat - they make small holes.
The drills have a thickened shank and are snapped into the chuck.
The cross section of the nozzles is 35-120 mm. A special demand for crowns with a diameter of 68 mm is the size of the socket boxes. Drill to a maximum depth of 150 mm, if more is required, extend it. The bits for hammer drills have soldered teeth, while those intended for drills have carbide coating instead.
This has some advantages: such a nozzle drills concrete and tile equally well, and highly specialized nozzles for a hammer drill have to be changed. The bit can be used with an electric drill with a power of more than 1 kW.
Various types of attachments are suitable for drilling:
- Impact bits with soldered teeth.
- Diamond - for hammerless drilling without a hammer drill. They have an abrasive on the edge; they work faster than impact hammers.
- KS crowns - with spraying on the edges.
High-quality products are offered by Bosh, Makita, Metabo, among domestic ones - Interskol, Zubr. Chinese products can also be of high quality if their price is high.
Design and characteristics
Based on the principle of impact on building materials, vibrators are distinguished:
- Deep. They are used to compact the foundation of a building made from a mixture of concrete, crushed stone and sand poured into a wooden frame. External. They combine the characteristics of a press and a vibrator when compacting the formwork of reinforced concrete vertical structures. Surface. Vibropresses level the surface of indoor floors and act as a compact press for squeezing out air bubbles on the surface.
A mechanical deep vibrator is an electrical device consisting of:
drive (electric motor, gasoline engine); flexible shaft with an eccentric (steel cable enclosed in a plastic sheath); vibrating tip (vibrating needle, mace).
Depending on the purpose of the work, the tips are made in the form of a bayonet, shovel or rod. By design, there are clubs with internal and external rolling.
Among the models of deep-depth devices, high-frequency ones are distinguished separately. The drive in such devices is located directly in the vibrating needle, which allows achieving the best results when compacting concrete.
Devices by area of application are:
- Home and semi-professional (with a capacity of up to 2 kW, weighing less than 20-25 kg). Professional (with a power of up to 4 kW, weight reaches 1 c).
The main characteristics for a productive concrete vibrator are as follows:
the length of the flexible shaft (the depth of the foundation that can be worked depends on this indicator); vibration frequency (direct impact on the speed of work); the shape of the vibrating head; the diameter of the concrete solution compaction.
Operating principle of the device
When the foundation of a building or structure is filled with concrete (especially if it is not sufficiently moist), the composition inevitably becomes saturated with air. In dried concrete, these air layers (their volume sometimes reaches up to 50% of the total poured area) create voids that reduce the strength and stability of the entire building.
To remove air bubbles from the poured base and compact the crushed stone included in the solution, “bayonet” the concrete surface using screws or pieces of reinforcement. The pressing method for layer-by-layer filling is also used.
However, vibration remains the most effective method, thanks to which high quality and density of building materials are achieved. The operating principle of the electrical device is to create oscillations by a rotating eccentric.
Mechanical small-amplitude movements lead to disruption of adhesion between solution molecules. After working with a deep vibrator, the concrete becomes:
homogeneous; flowing; frost-resistant; waterproof; plastic; thick.
In this case, the use of a vibrator contributes to:
improving the quality of adhesion of concrete to reinforcing bars; reducing the risk of corrosion on iron elements; giving additional strength to erected structures.
Surface preparation
Before drilling into concrete with a drill, you should prepare its surface. First, you should make sure that there are no pipes or electrical cables laid inside the concrete wall at the point where the hole will be made. In addition, there is often reinforcement in the walls and floors.
If possible, it should be bypassed, because Contact of the drill with such elements may cause its breakage. To determine the location of cables, fittings and pipes, it is best to use a metal detector.
The place where the hole will need to be drilled is first marked with a marker. After this, a small indentation should be made at this point with any sharp object. Alternatively, a recessed mark can be made with an impact drill. This is necessary so that the tool does not slip when starting work.
It should be taken into account that the surface decorative layer is porous, so you can quickly make a hole in it with a drill. After the tool enters the concrete, there is an increase in resistance, so the work is harder.
Vibrating table
Homemade vibrating table
Let's consider assembling the third type of apparatus for compacting concrete mixtures by vibration - a vibrating table. As mentioned above, it is intended for the manufacture of products in molds. It is a platform with a vibration exciter installed on the frame through shock absorbers.
In this section I will not give very detailed instructions; I think whoever understood the first sections will understand this one.
To make a vibrating table we will need:
- Materials for the manufacture of the frame (bed), any suitable rolled metal - angle, channel, etc. The main thing, do not forget that this is not an ordinary workbench, the loads due to constant vibration are greater, so the size must be chosen larger.
- A sheet directly for the table itself, preferably at least 3 millimeters thick.
- Shock absorbers - any suitable springs with a diameter of 15 millimeters, for example: from a car suspension. Rubber cushions, also from automotive equipment, are also sometimes used, but they limit the range of movement of the table.
Rubber pads are also suitable, but springs are better
- Fasteners
- Electric motor, wiring and starting fittings for it.
- Bearings and cuffs of appropriate sizes.
- Blanks for unbalance housings, bearing housings and sheet steel for their covers.
- Tinplate for protective fences.
- Wires and starting fittings for connecting the motor to the network.
You can make a vibrating table with a vibration exciter similar to the one used for the vibrating screed. But we will complicate the design a little, increasing its reliability. Therefore, we will need additional ones.
- Round timber for vibration exciter shafts.
- Pulleys - double-strand for the motor and single-strand for vibration exciters. Moreover, it is advisable to choose a larger diameter for the engine, and a smaller one for the exciters, this way you can achieve a higher oscillation frequency.
Assembling a vibrating table
- First of all, we weld the bed frame.
- Then we weld the table frame and attach the sheet itself to it, forming the table.
- We connect both parts through the springs (or cushions) of the shock absorbers.
- We have two vibration exciters. Their design and technology are almost the same, with the difference that instead of the electric motor shaft we use our own, on which a pulley is mounted on the side of one unbalance.
- We install the electric motor, attach it not directly to the table, but to the frame. This will save you from unnecessary vibrations and increase the resource.
- We place a pulley on the motor shaft, which we connect with belts to the pulleys on the vibration exciter shafts.
- We connect the motor electrically.
- We are conducting tests. It is possible that the entire structure will swing with increasing scope - this means that the vibration exciters have entered into resonance with the table. It’s okay, we adjust the system by changing the mass of the unbalances or changing the rotation speed (changing the diameter of the pulleys).
- If everything is successful, we paint our vibrating table and begin to use it.
We tried to tell you in detail about a homemade vibrator for concrete and its manufacture. We will be glad if we helped you with assembling this structure, or at least enriched your theoretical knowledge.
