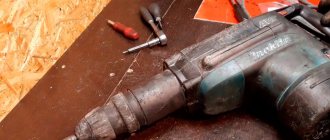
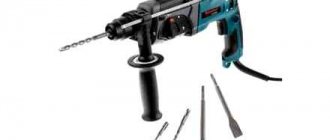
A hammer drill is a tool used to perform a variety of construction work. The item has earned popularity due to its power and great functionality. However, it is worth remembering that the hammer drill operates under constant load, so some parts may fail. Before removing the chuck from the hammer drill, it is recommended to study all the features of the process.
The design of rotary hammers of different brands differs
How does a hammer drill chuck work?
Almost every tool is versatile. There are many unique heads, attachments and adapters for rotary hammers on sale, but the chuck is considered the most important for the main work.
Experts recommend always having an additional part in stock. In addition, it is believed that for each type of activity it is worth selecting a specific cartridge.
The main types are:
- Quick-clamping. It is better to choose for work when a quick change of attachments is required.
- Key. A good option for large diameter drills.
Before disassembling the hammer drill chuck, it is recommended to consider its design. In older versions, the drills were connected using special cams. Modern models use fixation using guide wedges and locking balls. Additional elements may also be present:
- speed controller,
- electronic and brush reverse,
- quick change system,
- various indicators,
- friction clutch,
- anti-vibration system,
- immobilizer and others.
Important! The complete set mainly depends on the hammer drill model. Models from well-known manufacturers are equipped better.
There are several types of cartridges
What is SDS
SDS (SDS) is an acronym made up of the first letters of the words Steck, Dreh, Sitzt, which translated from German mean “insert, turn, secured.” It is on this simple, but at the same time ingenious principle that the SDS cartridge, developed by Bosch engineers in the 80s of the last century, works. Today, 90% of all manufactured rotary hammers are equipped with these easy-to-use devices, which ensure high reliability of fixing the working tool.
SDS chucks are often called quick-release chucks, but they should not be confused with devices in which clamping is achieved by rotating the couplings. Unlike traditional quick-release chucks, the SDS clamp does not need to be rotated to secure the tool; you just need to hold it with your hand.
To understand the design of a hammer drill chuck of this type, as well as the principle of its operation, just look at the tool shank, which is designed to be fixed in such a device, or the SDS adapter. This shank has 4 grooves, two of which are open at the end of the shank, and the other two are closed. Open grooves act as guides; they ensure the correct position of the tool when it enters the chuck. The closed grooves, in turn, ensure the fixation of the shank in the hammer drill chuck.
Scheme of the impact mechanism of a rotary hammer
In the inner part of the SDS cartridge there are special balls that perform two functions simultaneously. At the moment when the tool is just inserted into the hammer drill, the balls along which the guide grooves move ensure its correct position. After the tool is inserted all the way, such balls fix it, for which it is necessary to turn it a little until the balls enter the closed grooves of the shank. To make using the SDS chuck even easier, it is recommended that the tool shank not only be thoroughly cleaned after each use, but also lubricated.
It should be borne in mind that due to the design features of SDS chucks, the tool that is fixed in them is subject to slight radial runout at idle, which does not in any way affect the accuracy of the processing performed. Meanwhile, the presence of a small play between the shank and the inner surface of the chuck protects the latter from the impact to which drills are exposed during the operation of the hammer drill.
To protect against contamination, all hammer drill chucks are equipped with rubber boots.
What types of chucks for rotary hammers are there?
There are different types of hammer drill chucks, each option has some differences.
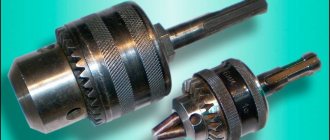
- SDS. A part of this type appeared relatively recently, but is considered the most optimal option for tools of this type. It is supplied with five types of clamping devices - regular, top, quick, plus, max.
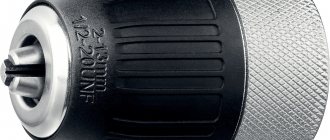
- Gear-crown key. Classic version of the cartridge. To use, you will need a special key to help fix the working attachment. With its help, the fastening mechanism is compressed and unclenched. Considered very reliable.
- Quick-clamping. They are easy to use. You just need to clamp the mechanism of the product and you can start working.
- Clamping with one coupling. Such cartridges are installed only on rotary hammer models that have automatic blocking of the working shaft. As a result, the shank of the nozzle is clamped using manual rotation of a special sleeve.
- Transitional. A rotary hammer is often used with different attachments, so special adapters are needed. Thanks to such elements, the tool can be used in various fields.
The procedure is carried out with special care so as not to lose details
The structure of the entire mechanism
Regardless of the design of the device and the functions of its implementation, all models (Bosch, Makita , Stern, Energomash, Interskol) have similar components.
The hammer drill consists of the following parts:
- cartridge;
- impact mechanism;
- gearbox;
- motor;
- network button;
- connecting cord.
Unlike a conventional drill, a hammer drill has an increased impact function, which is a very important advantage when applying mechanical impact to the material being processed. This type of work is achieved by its mechanism for creating a push of the working device, which frees the operator from the use of physical effort when chiseling or drilling stone, brick or concrete.
The rotational movement of the electronic motor is converted into translational vibration of the impact tool due to the creation of compression between the working pistons. This movement is intensively transmitted to impact devices (chisel, drill or blade). Having examined the structure of the hammer drill, it is much easier and more effective to repair defects that appear.
READ Is it possible to mix the solution with a hammer drill?
How to remove a chuck from a hammer drill
Before removing the attachment from the hammer drill, you need to accurately determine its type. After this, the tool is disassembled and elements begin to be changed.
Attention! It is best to carry out the procedure on a table so as not to lose important details.
During disassembly, the elements are laid out in the order in which they were removed - then it will be easier to assemble the instrument.
The process includes several stages:
- Remove the rubber tip from the end.
- Use a screwdriver to remove the first retaining ring.
- Pull the plastic clutch cover down.
- Remove the second retaining ring.
- Remove the clutch cover.
- Remove the springs, retaining plates and balls.
The parsing process is complete. If you need to change the chuck on a Bosch, Makita, Decker or, for example, Elitech hammer drill, you will need to remove the remaining part of the bushing. A new part is installed in its place.
To understand what kind of device the hammer drill mechanism has, you need to inspect the tail part of the nozzle. It has several recessed areas called grooves. The nozzle that will be installed in SDS-plus cartridges is distinguished by the presence of 4 notches - 2 closed and 2 open.
We disassemble the gearbox
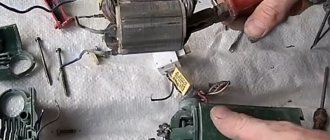
To get to the mechanical part, you will need to remove the plastic case.
The procedure for disassembling the mechanical part of a Makita hammer drill First, remove the dark-colored protective plastic case. The case is removed after you remove the four screws securing the case from the end. By pressing on the end of the shaft you will squeeze the gearbox out of the housing.
After removing the housing, you need to separate the rotor from the gearbox. The gearbox is the general mechanical part. The rotor is separated from the mechanical part (gearbox) simply. You need to clamp the gearbox with your right hand, and clamp the rotor with your left hand. While rocking, pull both parts in the opposite direction. The rotor is held in the gearbox by friction of helical gears. The main malfunctions of the Makita rotary hammer occur in the mechanical part of the tool.
Makita 2450 rotary hammer does not hold the drill in the chuck, the reason and how to fix it.
The most relevant fault for the mechanical part is failure of the impact mechanism.
Disassembling the impact mechanism The impact mechanism is assembled on the inner housing and consists of a gearbox shaft and an intermediate shaft. The rotational motion is transmitted through helical gears to the intermediate shaft.
The gearbox shaft is a hollow shaft in which the cylinder moves freely.
A small spur gear mounted on the intermediate shaft transmits rotation to a huge spur gear of the gearbox shaft, in which the impact mechanism is mounted. And translational movements are immediately transmitted to the gearbox shaft of the impact mechanism due to transmission from the rolling bearing of the intermediate shaft to the cylinder moving in the gearbox barrel.
Let's move on to disassembling the intermediate shaft.
Dismantling the intermediate shaft
The shaft pos.40 is fitted with a helical gear pos.42, to which rotation is transmitted from the rotor gear, and a rolling bearing 608zz pos.41, which transmits translational motion to the hinge pos.34 of the piston pos.32. On the other side of the shaft, a clutch coupling is installed, pos. 39, spur gear 10, pos. 80, compression spring, pos. 38, retaining ring S-7, pos. 37, bearing 606zz, pos. 36. Particular attention should be paid to the condition of the rolling bearings. The rotary hammer is equipped with bearings imported from other countries. Installation of Russian bearings is allowed. The 606zz bearing can be replaced with 80016, the 609zz bearing can be changed to 80019.
Let's move on to disassembling the impact mechanic's shaft
Disassembling the hammer shaft Disassembling the barrel of a Makita 2470 hammer drill is a common process if you use the Makita hammer drill design diagram. The shaft is a barrel, position 21, in which the impact mechanism is assembled. A gear, pos. 19, is attached to the barrel, which is pressed by a spring, pos. 18, through a washer, pos. 17, and secured with a retaining ring, pos. 16. The cylinder pos. 32 moves in the barrel, acting on the firing pin pos. 24. On the reverse side of the striker there is an iron ring, position 27, which transmits the blow to the drill. When is it necessary to replace the hammer drill barrel?
In most cases, the iron ring fails. Striker Cylinder with striker
We've sorted out the disassembly. We replace the parts with serviceable ones and get ready to assemble. Learn more about lubrication and assembly of the hammer drill.
How to disassemble a hammer drill chuck
In some cases, it becomes necessary to disassemble the cartridge itself, for example, for cleaning, lubricating or changing some parts. In order to carry out the process correctly, it is recommended to know the brand of the manufacturer, because the main process depends on this. For example, more modern brands (Dewalt, Metabo, Sturm, Caliber) are very similar in design to their foreign counterparts and are disassembled using the same schemes.
Analysis diagram based on the Bosch brand (products of this brand are the most popular):
- Unscrew the plastic part and remove the rubber seal.
- Using a screwdriver, carefully remove the ring securing the structure and the washer.
- Remove the next retaining ring.
- The SDS clamp is disassembled according to a certain scheme - first remove the ball, then the washer, and lastly the spring.
Important! It is imperative to follow the described sequence so as not to break the product or interfere with its operation.
After assembly, all fasteners must be checked
Impact mechanism repair
The design of impact devices differs from the type of hammer drill. Therefore, eliminating the cause of the malfunction has its own small differences.
In a barrel unit, the impact block operates on the basis of a crank mechanism. The main malfunction of such a device is considered to be wear of bearings and rotating parts. Repairing them consists of installing new parts, and in all this it is necessary to take into account the serious compliance of the brand of the element for a given model.
In a unit with a horizontal motor, the piston of the impact mechanism is driven by a swinging (intoxicated) bearing. In most cases, damage to this unit occurs due to wear of the bearing. When replacing it, special attention must be paid to cleaning the gearbox from possible small fragments of the damaged element and then lubricating the installed parts.
Also, a reason that the unit does not hit can be a broken striker, which also needs to be replaced with a new element.
After carrying out all the repair work, it is important to correctly and carefully assemble the hammer drill, because the tightness of the installation of many of its parts requires clear articulation during assembly.
How to insert a chuck on a hammer drill
In order to insert the cartridge into the hammer drill and assemble the device, you will need to perform the following steps:
- Screw the drill onto the product (the procedure is done until it stops).
- Place the screw in the slot.
- Tighten completely using a screwdriver.
It is recommended to choose the most suitable chuck option and not skimp on parts to avoid tool breakdowns in the future. Experts recommend taking a hammer drill with you and selecting the element right away in the store.
Let's repair together. Makita HR 2450. Beginning.
The device consists of an LED or flashlight bulb, a AA battery and two pieces of wire. The entire electrical circuit of the control device consists of parts connected in series. Connect the battery to one end of the LED or light bulb, and attach wires to the free ends of the LED and battery. You will get a universal device for checking the integrity of electrical circuits.
Typical malfunctions of the Makita 2450 and 2470 rotary hammers Common malfunctions in the electrical part of the Makita 2450 and Makita 2470 rotary hammers:
- fracture of the supply cable at the point of entry into the hammer drill ;
- failure of the switch button TG813TLB-1, art. 650508-0, pos. 68.;
- wear of electric carbon brushes SV-419, art. 191962-4, pos. 65;
- wear of reverse switch contacts;
- wear of rotor bearings: bearing 609LLU, art. 210060-6, pos. 51; bearing 607LLU, art. 211021-9, pos. 56;
- rotor short circuit 220-240 V, art. 515668-8, pos. 54;
- failure of the stator winding 220-240 V for HR2450, art. 633488-5, pos. 59.
The TG813TLB-1 switch, art. 650508-0, is used as a start button; pos. 68.
The brushes are replaced when they are completely worn out or have poor contact. This malfunction is detected by strong heating of the points where the electric brushes are installed.
Failure to turn on the hammer drill may be caused by abrasion of the contacts on the reverse switch. This type of problem can be fixed very simply.
Features of chuck removal and repair for different hammer drill manufacturers
Different hammer drill models have a specific design, so the process for changing the chuck is different. There are some peculiarities, but basically all elements are removed in the same way.
- Makita. Disassembly is carried out similarly to Bosch rotary hammers. In order for the device to last longer, it is recommended to allow the device to cool down during operation, as well as to carry out regular maintenance of the item.
- Bison A popular brand, similar in design to its foreign counterparts.
- Interskol. As with any other model, the main requirement in the procedure is care and consistency.
- Bosch. Disassembly and assembly is carried out according to the schemes described above.
- IE4729e. Drills were previously produced under similar numbers. In most cases, the cartridges on them were with conical nozzles (Morse taper 12), so the disassembly sequence is carried out using technology suitable specifically for this type.
Depending on the model, the process may differ.
Removing the cartridge from the hammer drill is quite simple. Almost all models can be disassembled in the same way, and all you need is a high-quality screwdriver to work. If you plan to replace the part with a new one, then it is better to go to the store with the device to choose the most suitable option, otherwise you may damage the tool. It is recommended to remember that on devices manufactured a long time ago, the pattern for removing the cartridge may differ, so if you are not confident in doing the repair yourself, it is better to seek help from a specialist.
Procedure for identifying electrical faults
Determining the integrity of the electrical part of a Makita rotary hammer. In order to repair a Makita 2450 or Makita 2470 rotary hammer with your own hands, you need to arm yourself with devices and tools. Any tester, a set of screwdrivers, keys, a hammer, or a wooden adapter will do. It's good to have a screwdriver with a built-in phase indicator.
How to repair a Makita hammer drill, Makita HR 2470 does not turn, the cartridge is leaking, the oil seal is leaking, Repair
You need to take the tester, connect to the ends of the hammer drill plug and press the hammer drill switch. If the tester shows some resistance, then the power supply circuit of the hammer drill is intact.
If the tester shows infinity, then the integrity of the circuit is broken and it is necessary to remove the back cover to check the connecting cable and electric brushes of the hammer drill.
The back cover (usually black) of the hammer drill can be easily removed; you just need to unscrew three screws using a screwdriver or screwdriver.
Remove the cover and use a screwdriver to disconnect the ends of the wires from the electric brushes. Using a tester or a homemade device, popularly called an “arkashka,” determine the integrity of the supply wires and the correct operation of the switch.
A few words about a simple control device called “arkashka”.
Repairing the contact between the stator and the reverse switch
To remove the stator, you need to disconnect the gear housing (black) from the stator housing (green).
Remember! In the mechanical part of the rotor, the bearing is pressed with a special ring. Don't lose it when disassembling.
The green housing houses the stator. Looking into the middle, you will see two self-tapping screws 4x60, art. 266334-3, pos. 57, securing the stator to the housing. Unscrew them, remove the plastic stator protection for HR2450, art. 419201-3, pos. 58., free the stator. When you remove the stator, you will see the contacts on the stator and the reverse switch panel.
Thoroughly clean the contacts with sandpaper and treat with solvent or alcohol. Before assembly, bend the contacts so that they fit tightly into each other. Lubricate the contacts with a thin layer of technical Vaseline.
Reassembling the electrical part of the hammer drill is carried out in the reverse order.
It often happens that the machine stops rotating the drum. One reason for this may be wear on the brush. This article will tell you how to change brushes for electric motors of washing machines with your own hands. If the automation works normally and at the same time regularly fills water, but the drum does not work properly or rotates very weakly and makes strange sounds, then in this case, you can be one hundred percent sure that the problem lies in the wear of the carbon brushes. An error code may also appear on the display, which indicates that the motor is not operating properly, as well as the need for an electric brush.
To perform the replacement, you only need a Phillips screwdriver and a set of new brushes. Particular attention should be paid to the fact that it is best to use the original kit for installation, since such brushes will work well without damaging the motor and other parts. In addition, they do not have to be sharpened or filed to fit the size of a specific engine. The carbon or graphite brushes themselves can simply wear out or peel off.

