Main reasons
Tin-lead (the most common) solder melts at a temperature of 250-300 ℃, and this temperature is quite sufficient for work.
If at some point the tip gets hotter, then the solder and flux on it can simply burn out, leaving unsightly traces of their presence.
In addition, the copper from which the tip is made will begin to oxidize due to overheating and a thin film of copper oxide will appear on the surface. Because of it, the solder does not stick, and the “slag” remaining on the tip does not add “stickiness” at all.
So, there are two main reasons why solder does not stick or hold. The first is contamination of the tip, the second is oxidation. If you eliminate them, the work will go like clockwork.
Easy sponge cleaning
The easiest way is to clean the tip with a metal sponge. Small metal shavings clean the tip from carbon deposits without damaging the coating. Such sponges are sold in any smartphone spare parts store, as well as in radio stores and online stores (AliExpress, etc.). A kitchen one can also work, but you need something dense and softer. In addition, it will be worse to clean.
Proper preparation for work
Direct preparation of the tool for soldering involves tinning. After all, it is to untinned metal that the soldering material does not stick.
Tinning is the process of covering a surface with a thin layer of tin.
By the way, parts are prepared for soldering in the same way. How to tin the soldering iron? Yes, very simple. Only it is not the entire instrument that needs to be tinned, but only its tip.
First you need to clean it mechanically. A file or sandpaper is suitable for this. You need to clean thoroughly, without leaving grooves or scratches in which an oxide film could remain. Of course, the soldering iron must be cold.
After thorough cleaning, you need to cover the working surface with a layer of flux. If a liquid composition is used, then immediately after cleaning it is applied with a brush; if solid rosin is used, then the soldering iron must be immersed in it as the tip heats up.
There is no need to wait for the soldering iron to heat up, because an oxide film will inevitably form in the air, which will again prevent the solder from sticking. Overheating is the reason that the copper tip does not tin.
After the soldering iron has warmed up to the desired temperature, touch the solder with the tip and rub it. You can grind the solder using a sliver of hard wood - birch or oak. In this case, do not allow the soldering iron to overheat.
The solder sticks perfectly to a properly tinned soldering iron and does not lie on it in lumps or drops. It evenly coats the copper tip and leaves it quietly when needed.
What to do?
Most problems with tin retention on soldering tool tips or metal parts can be easily resolved by stripping. The accumulated plaque is removed from the copper tip manually or chemically. Almost any abrasive materials are suitable for the job - from sandpaper to files.
Carbon deposits can be removed mechanically by wiping the tip with paper, cotton wool, unnecessary rags, or a foam sponge. To make the tip better tinned, as well as to prevent problems with solder sticking, the copper tip is periodically removed from oxides. You can use the product "Oksidal" , in which a heated tip is placed.
In case of nickel plating
Soldering irons with a so-called “eternal tip” coated with a thin layer of nickel are often used for soldering. For some reason it is believed that it does not tin. In fact, who would think of sanding off a nickel coating?
However, the time comes and it becomes noticeable that the solder does not hold! At best, it sticks in small drops. So what should we do? The answer is the same - cheat!
The reason is often that the sting is dirty. First, you should still make sure that the nickel plating is not damaged.
After this you need to remove the deposits. This can be done on a slightly heated soldering iron with a damp cloth folded in several layers.
Next steps are:
- immediately after removing carbon deposits, the tip must be lowered into a jar of rosin, in which a piece of solder was previously placed;
- with a soldering iron you need to melt the rosin around the solder so that it sinks;
- under a layer of liquid hot rosin, touch the solder. It will immediately cover the entire working surface of the tip.
The best way to avoid solder not sticking is to avoid overheating the tip.
Prevention has always been the most effective remedy. If it is not possible to purchase a tool with temperature control, you can purchase a dimmable voltage regulator or make one yourself. If you monitor the heating temperature, you will have to tin the soldering iron much less often.
Source: https://svaring.com/soldering/praktika/pochemu-ne-lipnet-pripoj
Main reasons
The most common type of solder is tin-lead. The melting point of such an alloy is about 270 degrees Celsius. If the soldering iron heats up to 300 degrees, this should be enough for work, but if the tip overheats and its temperature significantly exceeds the melting point of the solder, then soot from consumables remains on the surface. It not only spoils the appearance of the tool, but also interferes with further work.
Contamination and oxidation prevent solder from sticking to the soldering iron tip.
Soldering iron tips are most often made of copper. When severely overheated, this metal is more susceptible to oxidation, which leads to the appearance of a film of oxides on its surface. A thin layer of copper oxide may be invisible to the eye, but it is precisely because of its presence that solder does not stick to the soldering iron tip. If we consider the immediate reasons that lead to the fact that the molten solder does not remain on the tip, but simply flows off it, then there are only three of them:
- contamination of the surface of the tip, which occurs from soot and other reasons;
- oxide formation, which even with a visually clean surface does not allow the molten material to adhere to it;
- high temperature of the tip, which does not allow the solder to remain in the desired working condition.
How to properly prepare tools for work
If the tin does not stick to the soldering iron tip, it is quite possible that the preparatory operations were carried out incorrectly, or they were not carried out at all. First of all, when preparing the instrument, you need to tin it. Without this procedure, even in the absence of oxide and contamination, solder will still not stick to the metal during soldering. Tinning involves coating the surface of the tip with tin. The same procedure should be carried out with the parts being soldered, this will improve the quality of the connection. The process is extremely simple: you need to dip a hot tip into tin, which will cover its surface.
If there is carbon deposits or an oxidizing film on the tip, they must be removed before tinning. The same procedure is recommended for new instruments. The surface is cleaned mechanically, for which sandpaper or a fine-grained file is suitable. The surface must be cleaned thoroughly, without leaving deep scratches and grooves on the metal surface. If there are depressions and scratches, it is in them that an oxidizing film will form and dirt will accumulate, which will then be difficult to clean.
Important! The soldering iron should be cleaned only after it has cooled down. This process is best done before soldering rather than after it.
How to solder correctly
Rules for the design of electrical installations PUE Rules for the technical operation of electrical installations of consumers. Interindustry rules on labor protection during the operation of electrical installations. Users Search the forum Feedback Mobile version. Electrical circuits Electric drive Electrical wiring Electrical lighting Electricity metering Electrical devices Electrical supply Operational maintenance. EU Electrical safety Online calculations Electrical engineering in theory Electrical measurements Catalog of companies The most popular documentation: Rules for the design of electrical installations PUE-7 Rules for the technical operation of consumer electrical installations Interindustry rules for labor protection during the operation of electrical installations.
Forum section for discussion of various consumables used in electrical installation work. Tin does not stick Aug 20, Soldering Experts! Help please! I thought about soldering the twists in the box. I bought soldering iron, rosin, solder. I stripped the wires in the box and spent tinning on it, and I couldn’t even tin it, let alone solder it. I won’t say that I’m a great solder specialist, but I have experience working with a soldering iron, including having to solder twists, but I’ve never encountered anything like this.
But there’s no way: the tin doesn’t stick even to the tip of a 40W soldering iron - it melts normally. I tinned it just right. I tried to immediately apply solder to the rosin-coated wire - the same result.
I went and bought a bottle of “solder acid” and the same thing. Here is a photo: an ordinary soldering iron from China, ordinary rosin, and solder. Maybe the solder is the left one, huh? Friends, help me with advice!
Re: Tin doesn't stick Aug 20, Sorry, but maybe you're in a hurry, you're not heating the copper properly? Just don’t think that I doubt your mental abilities, for God’s sake. But tin just doesn’t “stick” well to cold copper. Everything should be warmed up well. And, by the way, soldering outside in a strong wind is also awkward for the same reason. Re: Tin does not stick Aug 20, No way! I know about the wind, yes I swam. But also no. Firstly, 40 W didn’t take a hundred square meters well!
This, of course, is just my imagination and speculation, but if you extend the tip to its entire length, then the temperature is less than it should be. In short, it’s neither this way nor that. Tomorrow I will buy “human” tin - which is in coils. I read somewhere that in such cuts all the bullshit is drained. I'll try it and write back how it goes. Re: Tin does not stick Aug 21, I think that the soldering iron is in perfect order. And rosin is unlikely to be counterfeit - why counterfeit it - it already costs a penny.
But solder - yes. It may be completely left-handed, so I advise, of course, to try it with a different solder, with “human” solder, as you say. Re: Tin does not stick Aug 21, I bought tin today in the form of a wire, but not very thin - about 2. It sticks and tins with a bang. The seller said that most likely they handed me a pos or a pos at all, or even something unknown. Mosh is filthy lead. You can’t tell the difference visually, but only once you start soldering Re: Tin doesn’t stick Aug 22, Yeah, solder made from pure lead is a real joke.
I didn't even think that this could happen. Now I know where the waste batteries go and what profit is made from them. Thank God, I haven’t come across such happiness yet. Re: Tin does not stick Aug 22, Ivan wrote: Today I bought tin in the form of a wire, but not very thin - about 2.
Electrotechnical site. Re: Tin does not stick Aug 25, The stump is clear! For now, tin is more expensive than lead, that’s all the arithmetic is. It would have been the other way around instead of pos30 pos60 61 they pushed. And in the photo the solder is kind of quite dark in appearance Re: Tin does not stick Aug 26, Acid would be fine, we somehow soldered thick wires with it. But it really eats copper, and this is clearly not good, especially for thin conductors.
Possible reasons
Joining metals by soldering in some cases replaces spot welding and helps ensure that parts are firmly attached to each other. But the process does not always go smoothly. When solder does not stick to the soldering iron, the cause of the problem should almost always be sought not in the material being worked with, but in a violation of the work technology. Poor care of the device leads to the fact that the tip turns black, becomes covered with oxidation products and does not melt the tin.
In addition, the working conditions may be violated - in the wind, in the open air, the material is not soldered much more often than in an equipped home workshop.
It is worth talking in more detail about what reasons lead to the fact that tin does not stick to the wire, and it is impossible to fix the connection on the board. For example, if the solder does not stick to the tip when in contact with it, the problem may be the low power of the soldering iron or its insufficient heating. Tin also does not sting for more prosaic reasons: when contamination gets into the contact zone. Its source could even be rosin - it’s worth checking all the materials if suddenly solder does not stick to the soldering iron.
Other common and common sources of such problems include the following.
- A metal alloy that is difficult to solder. Such products have to be tinned before applying solder.
- The working part of the soldering iron is heated to too high a temperature. This prevents her from heating the tin properly.
- Poor quality solder . Also, contrary to popular belief, it occurs quite often.
- Refusal to use flux . In this capacity there are substances that remove traces of oxidation from surfaces. On many alloys, solder simply will not hold without flux. However, when using it, you can also simply take an insufficient additional component.
- The soldering iron is not powerful enough . He simply cannot heat the metal to the desired state.
- Unsuitable or poor quality materials are used
- The metal is not heated. When working with electrical steels of increased hardness, this quite expectedly leads to problems.
- Accidental sticking of polymer materials to the tip. If work is carried out in inappropriate conditions, this may well happen.
- Formation of carbon deposits or a film on the metal surface resulting from oxidation. They prevent tin retention.
- Low flux concentration. When preparing the composition yourself, this happens quite often.
Source: https://stroy-podskazka.ru/pripoj/ne-lipnet/
Tinning the eternal soldering iron tip
Why doesn't solder stick to the soldering iron?
The main and main reason for this problem is very strong carbon deposits on the soldering iron tip. The fact is that if there is no solder or flux residue on the soldering iron for a long time when it is turned on, then a dense layer of soot forms on the surface of the tip due to oxidation, which can no longer be cleaned off with a desoldering sponge. This is why solder rolls off the soldering iron tip.
Recommendations
For preventive treatment of a copper tip after work, you can use a special activator. It contains no halogens or lead, but contains components that protect the surface, extend the service life of the tool, and restore contact ability when wetted with solder. On a tip treated in this way, less carbon accumulates and harmful oxides appear less frequently.
If the amount of lead in the solder is artificially increased, its correct proportion is violated, it will not stick to the soldering iron. If there is no carbon deposits on the tip, you should try replacing the solder.
Upon completion of the work, it is imperative to prepare the soldering iron for further use . The tip must be cleaned and tinned before being sent for storage. This will allow you to receive a tool ready for use at any time.
For information on how to tin a soldering iron, see below.
An even more affordable recovery option
By soldering you can remove a layer of carbon deposits. We make a small bath of solder. You will need a solder rod and flux. Preferably activated (for example, LTI - 120). You can even use regular alcohol rosin. This is in the case of “light” soot, of small size.
Now we divide the solder bar into small pieces and pour a little rosin or flux (even if you have solder containing rosin, this is not enough for this case).
Preheating and temperature selection
If you want to know how to solder correctly with a soldering iron, you need to learn how to determine whether the soldering area is hot enough. If you use a regular soldering iron, you can navigate by the behavior of rosin or flux. At a sufficient level of heating, they actively boil, release steam, but do not burn. If you lift the tip, drops of boiling rosin remain on the tip of the tip.
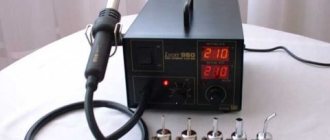
When using a soldering station, proceed from the following rules:
- The heating temperature of the parts should be 40-80°C higher than the melting temperature of the solder (indicated on the packaging).
- The temperature of the soldering iron tip should be 20-40°C higher than the heating temperature of the parts.
That is, at the station we set it 60-120°C higher than the melting temperature of the solder. As you can see, the temperature gap is large. How to choose? Depends on the thermal conductivity of the metals being soldered. The better it removes heat, the higher the temperature should be.
Incorrect soldering with a soldering iron - 10 stupid mistakes and bad advice.
When connecting an LED strip, repairing LED light bulbs, microcontrollers and radio components, you cannot do without such a useful skill as soldering.
It is high-quality soldering that ensures a reliable and durable contact connection.
However, in this simple matter there are a lot of nuances that can ruin once and for all not only the part being repaired, but also the soldering iron itself. And sometimes even lead to serious injury.
Even experienced craftsmen, who have absorbed what is called rosin vapor with mother's milk, no, no, and forget the basic rules of soldering. How to properly solder an LED strip can be found in a separate article.
Let’s take a closer look at the question of how you can’t solder, and what such errors lead to.
Soldering can be compared to some extent to the process of gluing. Only here molten metal is used to connect parts. Solder acts as such.
It has a fairly low melting point. Moreover, it is lower than the melting temperature of the part itself.
For example, for copper this figure reaches 1050C. While for tin-lead solder POS-61 it is only 190C.
That is, by heating or dripping such metal onto a part, it is problematic to damage it.
So, what stupid mistakes should you not make when soldering?
No matter how expensive the floor covering is to you, the reflexive movement to catch a fallen tool will not lead to anything good.
At the same time, never forget the main rule of a repairman - a hot soldering iron looks the same as a cold one.
Don’t even think about tapping a modern soldering iron on the table. If the impact is strong enough, the ceramic element inside can crack and shatter.
Also, do not shake off the melted solder from the soldering iron. Not only can it get into your eyes, but your children can also be harmed.
A beautiful drop will imperceptibly fall somewhere on the floor, and a young child will subsequently find it and eat it.
When soldering, remember that you are dealing with molten metal. And if a drop of tin falling on the hand can scare few people, then a spring-loaded hot leg from a radio component that accidentally gets into the eye leads to sad consequences.
Soldering overhead or near the ceiling is especially dangerous. In this case, the wires may jump out of their place and the tin will “bullet” into your eye.
Therefore, try to always wear and use safety glasses in such cases. And don’t forget about the respiratory system.
At least basic ventilation of the room or a small USB Carlson fan on the desktop will never be superfluous.
Remember, the soldering iron is designed for soldering electrical wiring cores, LED strips, radio components or electronic boards. They cannot melt or remove insulation from PVC wires.
This is not only not aesthetically pleasing, but also spoils the veins themselves. The melted plastic gets between the wires and gets stuck there.
It is no longer possible to tin such veins normally. Although some have a completely different opinion on this matter.
Also, a soldering iron for amateur radio operators should not be used to solder holes in plastic pipes and thus try to eliminate leaks in them.
Use each device for its intended purpose and you will not have any troubles. Although, as the popular saying goes, “If you are tied up, your mouth is sealed with tape and you see a man with a soldering iron in front of you, then this is most likely a sign of trouble.”
It would seem, what kind of fool would solder a part under voltage? However, many people actually do this kind of work. They turn off the built-in microswitch on the body of the device being repaired, while forgetting to turn off the power from the outlet.
This is done intentionally in order to quickly check the functionality of the element immediately after the repair. However, with such buttons you often get confused in what state they are, disabled or enabled.
If there is accidentally voltage on your board and you touch the current-carrying part with the tip, a short circuit will occur and you will go into “spot welding” mode.
By the way, this point applies not only to the 220V network, but also to all elements powered by batteries and built-in batteries. For example, cell phones.
The same applies to power supplies with capacitors.
First make sure that they are discharged and only then climb inside. You can discharge it with a load - a high-resistance resistor, or a light bulb (more clearly).
If you forget to do this or disconnect the battery, then your device may die completely and irrevocably during this repair.
Why can't you solder without flux? The fact is that on any parts or wires there is a so-called oxide film containing microscopic particles of fat, sweat, dirt, etc.
It does not allow the solder to stick normally to the surface.
When treated with flux, the picture changes radically.
Flux not only helps to dissolve this film, it prevents it from forming again during the soldering process. Due to this, tin independently envelops, impregnates and penetrates into all the pores between the veins.
Previously, our grandfathers used aspirin instead of gumboil. It would seem, why not? Rosin is abietic acid, and aspirin is acetylsalicylic acid. What if not acid to clean off oxides?
However, be very careful in this matter.
Some people advise using only soldering acid as a flux. Supposedly the effect is better.
In fact, acid is the same flux, but not simple, but active. This means that along with the film, it perfectly dissolves the components themselves.
This, of course, does not happen immediately, but after a few months the soldering area may turn into jelly. This happens if at least a few microdroplets of acid remain and linger on the surface.
Why does solder not stick to the soldering iron?
Does solder not stick to the soldering iron? This is a problem not only for beginners, but also for experienced professionals. There is no single universal way to overcome this obstacle in work. The reasons for this inconvenience, as well as ways to eliminate it, may be different. We will limit ourselves to a brief listing of them. And if a master finds himself in such a situation, he will independently select a method suitable for his case.
Possible reasons for solder not sticking:
- dirty soldering iron tip;
- dirty rosin;
- overheating or insufficient heating of the working part of the soldering iron;
- poor solder quality;
- no flux during soldering;
- incorrectly selected flux and solder;
- soldering outdoors, in a draft;
- lack of heating of the metal product before soldering;
- accidental contact with a hot tip of any plastic;
- carbon deposits and chemical oxides on the surface of the tip;
- insufficient concentration of self-prepared liquid fluxes;
- low power soldering iron.
For mechanical stripping of copper tips
Any folk remedy will do:
- knife, scalpel;
- file, needle file;
- sandpaper, polishing paper;
- metal brush;
- sewing needle;
- attachment for a drill.
To remove carbon deposits
will fit:
The lists are not complete, you can experiment.
To tin a copper tip well, you need to remove oxides from its surface. This chemical cleaning method works well with Oksidal. The heated tip is simply placed in it and changes its appearance literally before our eyes. After cleaning, wipe the soldering iron with a damp sponge or foam rubber.
Light forging of the removable copper tip is useful. The metal will be denser, which will slow down and reduce the process of burning.
The tip of a working soldering iron is not necessarily made of copper. Increasingly, manufacturers are offering options for soldering irons that use a non-burning “eternal” tip. Cleaning it from dirt, excess solder and carbon deposits eliminates the classic options using a file and sandpaper. Cleaning is possible in two ways:
- a special sponge designed specifically for this purpose;
- brass shavings - the tip becomes perfect after several dips in a container with it.
An economical option involves replacing a special sponge with a dish sponge made of cellulose, and brass shavings with a thick and dense kitchen metal (ideally copper) sponge.
To adjust the power and, accordingly, the temperature of the working part of the tip, the soldering iron is connected through a laboratory autotransformer. Without it, you can experiment with interchangeable tips of different lengths. The longer it is, the lower the temperature at its end. And vice versa.
Sometimes a tip activator helps avoid problems with solder sticking. This lead- and halogen-free mixture claims to protect and prolong the life of the tip, as well as restore its wettability to the solder material. Please note that the activator does not guarantee cleaning of the tip, but protects its surface from the formation of harmful oxides and carbon deposits.
If the manufacturer decided to save money and deliberately increased the percentage of lead, we have a more refractory solder with low fluidity, and perhaps not suitable for soldering.
Having eliminated the obstacle and finished soldering, do not forget that the soldering iron tip must be cleaned and tinned after work. A clean and well-maintained instrument, always ready for use, is the face of a master.
Source: https://svarkagid.com/pochemu-pripoj-ne-lipnet-k-pajalniku/


