How to Record a Song in Adobe Audition
How to learn to solder. I decided to prepare just such a small special lesson, not directly related to the main topic, for those who not only have to solder cords, sockets, plugs, but anything else in general. So, let's begin…
What do we need for soldering?
Of course, a soldering iron (ideally a soldering station), tin solder, rosin, ideally solder wire, which is a long, thin tin tube wound on a reel, similar to a wire, in the cavity of which there is rosin. Those. when soldering, in this case, we do not need, as in the old fashioned way, to lower the tip of the soldering iron, now into the rosin, now into the solder, but all this happens simultaneously at one point. More on this below...
You can purchase all the necessary components at your nearest radio store.
Main reasons
Tin-lead (the most common) solder melts at a temperature of 250-300 ℃, and this temperature is quite sufficient for work.
If at some point the tip gets hotter, then the solder and flux on it can simply burn out, leaving unsightly traces of their presence.
In addition, the copper from which the tip is made will begin to oxidize due to overheating and a thin film of copper oxide will appear on the surface. Because of it, the solder does not stick, and the “slag” remaining on the tip does not add “stickiness” at all.
So, there are two main reasons why solder does not stick or hold. The first is contamination of the tip, the second is oxidation. If you eliminate them, the work will go like clockwork.
Soldering boards
As a rule, on boards, radio components are soldered to current-carrying tracks or special “nickels”. If the tracks are already tin-plated (grey), they do not need to be tinned first.
If they are yellowish in color, they must first be coated with flux and then tinned with a soldering iron, similar to wires. After this, you can solder the parts.
Instructions on how to properly solder parts to the board:
- Using tweezers, bend the leads onto the parts so that they lie flat against the tracks (nickels) or fit into the mounting grooves.
- Fix the part evenly using tweezers.
- Treat the soldering area with flux.
- Take a small amount of solder onto the tip and apply it to the soldering point.
- Wait until the solder is evenly distributed. Do not hold the soldering iron for too long; overheating may cause the part to fail. To prevent the part from moving out of place, it should be held with tweezers.
- After cooling, wash the soldering area to remove flux residues. To do this, it is optimal to use alcohol (ethyl or isopropyl) or Galosh gasoline.
If necessary, the contacts can be coated with protective varnish for circuit boards. This is necessary to protect against wet conditions and prevent the risk of shorting when coming into contact with other surfaces.
Preheating and temperature selection
If you want to know how to solder correctly with a soldering iron, you need to learn how to determine whether the soldering area is hot enough. If you use a regular soldering iron, you can navigate by the behavior of rosin or flux. At a sufficient level of heating, they actively boil, release steam, but do not burn. If you lift the tip, drops of boiling rosin remain on the tip of the tip.
When using a soldering station, proceed from the following rules:
- The heating temperature of the parts should be 40-80°C higher than the melting temperature of the solder (indicated on the packaging).
- The temperature of the soldering iron tip should be 20-40°C higher than the heating temperature of the parts.
That is, at the station we set it 60-120°C higher than the melting temperature of the solder. As you can see, the temperature gap is large. How to choose? Depends on the thermal conductivity of the metals being soldered. The better it removes heat, the higher the temperature should be.
Advantages and disadvantages of soldering wires
Soldering is noticeably superior to most other methods of connecting wires. Among its main advantages are:
- Cheapness. It is enough to purchase a soldering iron and a set of solder with flux once, and you will be able to reliably solder thousands of wires.
- Simplicity. You can learn to use a soldering iron in 1 hour.
- Connection reliability. The contact is inferior in electrical and mechanical properties only to welding. Wago terminals, crimping and, especially, twisting are not capable of providing such high-quality contact as soldering.
- Versatility. It is possible to simultaneously connect cable cores of different sections. Moreover, their number at one point of contact is unlimited.
- Soldering of wires is permitted according to the PUE. The resulting connection is reliable.
- No need for a bulky welding transformer. The soldering iron is much easier to carry.
This connection method also has disadvantages:
- To operate a standard soldering iron, a socket with a mains voltage of 220 V is required. The disadvantage is weak. There are soldering irons that run on a built-in battery or even on gas. The latter do not require electricity at all.
- The connection is inseparable. Wires soldered together can only be separated using a soldering iron and re-melting the solder.
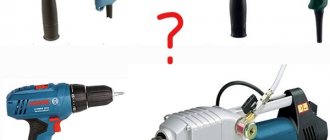
Using a Gas Soldering Iron
Error Working without glasses
When soldering, remember that you are dealing with molten metal. And if a drop of tin falling on the hand can scare few people, then a spring-loaded hot leg from a radio component that accidentally gets into the eye leads to sad consequences.
Soldering overhead or near the ceiling is especially dangerous. In this case, the wires may jump out of their place and the tin will “bullet” into your eye.
How to Tin a Wire Correctly?
Step-by-step instruction
- Prepare the necessary tools: a sharp knife, tweezers or pliers, a soldering iron, solder and flux (in our case, rosin).
- Remove the PVC insulation from the conductor. ...
- Carefully, using the same knife, strip the core to a metallic shine. ...
- Connect the soldering iron to the mains and wait until it warms up.
Interesting materials:
What foods are best not to be stored in the refrigerator? What processes occur during storage? Which potato varieties are best stored in winter? What varieties of onions are good to plant for storage? What were the first means of storing information in computer science, grade 9? What information storage media are used in computer technology? What types of storage devices are there? What types of data can be stored in a database field? What are the requirements for storing special clothing for people working with oils? What are the requirements for storing containers?
Tricks and secrets of working with a soldering iron
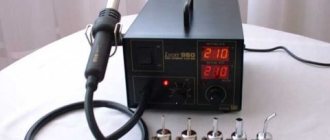
In everyday life, “ordinary” electric soldering irons are used. There are those that operate from 220 V, there are from 380 V, there are from 12 V. The latter are characterized by low power. They are used mainly in enterprises in areas with increased danger. They can also be used for domestic purposes, but they heat up slowly, and the power is not enough...
Almost everyone now uses electric soldering irons. Those whose work involves soldering prefer to have a soldering station, “hobbyists” prefer to make do with ordinary soldering irons without regulators. Having several soldering irons of different power is enough for different types of work.
To figure out how to solder correctly with a soldering iron, you need to have a good understanding of the process in general, then delve into the nuances. Therefore, let's start with a brief description of the sequence of actions.
Soldering involves a sequence of repeated actions. We will talk about soldering wires or radio parts. These are the ones you encounter more often on the farm. The actions are:
- Preparing parts for soldering.
- Flux treatment or tinning.
- Warming up the parts to be soldered to the required temperatures.
- Adding solder to the soldering area.
This completes the soldering. It is necessary to cool the solder and check the quality of the connection. If everything is done correctly, the soldering area will have a bright shine. If the solder appears dull and porous, this is a sign of insufficient temperature during soldering. The soldering itself is called “cold” and does not provide the required electrical contact.
It is easily destroyed - just pull the wires in different directions or even pick it up with something. The soldering area may also be charred - this is a sign of the opposite error - too high a temperature. In the case of wires, this is often accompanied by melting of the insulation. However, electrical parameters are normal. But, if the conductors are soldered when installing the wiring, it is better to redo it.
First, let's talk about how to properly solder wires with a soldering iron. First you need to remove the insulation. The length of the exposed area can be different - if you are going to solder wiring - power wires, expose 10-15 cm. If you need to solder low-current conductors (the same headphones, for example), the length of the exposed area is small - 7-10 mm.
After removing the insulation, the wires must be inspected. If there is varnish or oxide film on them, it must be removed. Freshly stripped wires usually do not have an oxide film, and sometimes varnish is present (copper is not red in color, but brownish). Oxide film and varnish can be removed in several ways:
- Mechanically. Use fine grit sandpaper. It is used to process the exposed part of the wire. This can be done with single-core wires of fairly large diameter. Sanding thin wires is inconvenient. Stranded ones can generally be cut off.
- Chemical method. Oxides are highly soluble in alcohol and solvents. The varnish protective coating is removed using acetylsalicylic acid (regular pharmacy aspirin). The wire is placed on the tablet and heated with a soldering iron. Acid will corrode the varnish.
Proper preparation for work
Direct preparation of the tool for soldering involves tinning. After all, it is to untinned metal that the soldering material does not stick.
Tinning is the process of covering a surface with a thin layer of tin.
By the way, parts are prepared for soldering in the same way. How to tin the soldering iron? Yes, very simple. Only it is not the entire instrument that needs to be tinned, but only its tip.
First you need to clean it mechanically. A file or sandpaper is suitable for this. You need to clean thoroughly, without leaving grooves or scratches in which an oxide film could remain. Of course, the soldering iron must be cold.
After thorough cleaning, you need to cover the working surface with a layer of flux. If a liquid composition is used, then immediately after cleaning it is applied with a brush; if solid rosin is used, then the soldering iron must be immersed in it as the tip heats up.
There is no need to wait for the soldering iron to heat up, because an oxide film will inevitably form in the air, which will again prevent the solder from sticking. Overheating is the reason that the copper tip does not tin.
After the soldering iron has warmed up to the desired temperature, touch the solder with the tip and rub it. You can grind the solder using a sliver of hard wood - birch or oak. In this case, do not allow the soldering iron to overheat.
The solder sticks perfectly to a properly tinned soldering iron and does not lie on it in lumps or drops. It evenly coats the copper tip and leaves it quietly when needed.
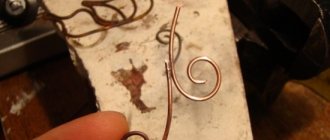
Cover the wire with solder
We touch the rosin with the stripped end of the wire and begin to heat it with a soldering iron, slightly drowning it in the rosin. The rosin melts and covers the surface of the wire.
As soon as the end of the wire is covered with rosin, immediately remove it. Now we take a little solder on the tip of the soldering iron tip and begin to move it along the wire from all sides so that the solder spreads over the surface.
If everything was done correctly, you will immediately see how the solder has covered the entire surface of the wire.
Tinning the eternal soldering iron tip
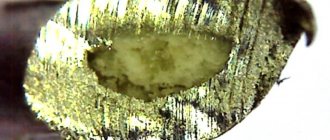
Why doesn't solder stick to the soldering iron?
The main and main reason for this problem is very strong carbon deposits on the soldering iron tip. The fact is that if there is no solder or flux residue on the soldering iron for a long time when it is turned on, then a dense layer of soot forms on the surface of the tip due to oxidation, which can no longer be cleaned off with a desoldering sponge. This is why solder rolls off the soldering iron tip.
Why does solder not stick to the soldering iron?
Does solder not stick to the soldering iron? This is a problem not only for beginners, but also for experienced professionals. There is no single universal way to overcome this obstacle in work. The reasons for this inconvenience, as well as ways to eliminate it, may be different. We will limit ourselves to a brief listing of them. And if a master finds himself in such a situation, he will independently select a method suitable for his case. Possible reasons for solder not sticking:
- dirty soldering iron tip;
- dirty rosin;
- overheating or insufficient heating of the working part of the soldering iron;
- poor solder quality;
- no flux during soldering;
- incorrectly selected flux and solder;
- soldering outdoors, in a draft;
- lack of heating of the metal product before soldering;
- accidental contact with a hot tip of any plastic;
- carbon deposits and chemical oxides on the surface of the tip;
- insufficient concentration of self-prepared liquid fluxes;
- low power soldering iron.
For mechanical stripping of copper tips
In case of nickel plating
Soldering irons with a so-called “eternal tip” coated with a thin layer of nickel are often used for soldering. For some reason it is believed that it does not tin. In fact, who would think of sanding off a nickel coating?
However, the time comes and it becomes noticeable that the solder does not hold! At best, it sticks in small drops. So what should we do? The answer is the same - cheat!
The reason is often that the sting is dirty. First, you should still make sure that the nickel plating is not damaged.
Fluxing or tinning
When soldering, the main thing is to ensure good contact between the parts being soldered. To do this, before starting soldering, the parts to be joined must be tinned or treated with flux. These two processes are interchangeable. Their main purpose is to improve the quality of the connection and facilitate the process itself.
When working with radio components, fluxes that do not contain acid are used. For example, rosin. Bow rosin for lubricating musical instruments is also sold in stores. It can also be used for soldering. But metal utensils are soldered using solder without rosin. To repair it you will need “soldering acid”. This is zinc dissolved in hydrochloric acid. It is also impossible to solder radio components with such solder, since over time it will destroy the soldering.
If you need to solder in hard-to-reach places, you need to have liquid flux. You can make it yourself. Rosin is crushed into powder and poured into acetone or ethyl alcohol. After mixing the solution, you need to add more rosin until you obtain a thick, mushy mass. Such liquid rosin should be applied to soldering areas with a brush or stick.
When working with various fluxes, it is necessary to take into account that those that contain acetone are very toxic. Therefore, when working with them, it is necessary to avoid getting vapors into the respiratory tract. It is better to solder near a window if it is summer, and in winter it is better to ventilate the room in which the work is being carried out. After finishing work, be sure to wash your hands with soap and warm water.
Let's figure out how to solder wires - two methods and recommendations for the soldering process
- 1. Soldering methods
- 2. Recommendations
- 3. Conclusion on the topic
The process of soldering wires may seem simple, and in fact it is. But not everyone succeeds in connecting two wires to each other in a high-quality manner. Why? Because there are certain requirements for the soldering iron itself, as well as for the soldering process. So, let's consider the question of how to solder wires?
Let's start with the tool itself - the soldering iron. Before soldering, you need to prepare the soldering iron. What do I need to do?
- Clean his sting. To do this, you can use a file or sandpaper. It is important to remove any remaining tin and dirt from the file tip, that is, the main thing is to get to the copper from which the soldering iron is made.
- Now we plug the soldering tool into a 220 volt outlet. We begin to heat it up.
- Now we periodically touch the tip of the tip to either rosin or solder. We do this several times. Our task is to uniformly cover the working surface of the tool with solder.
So, the soldering iron is ready, you can move on to the question of how to properly solder wires with a soldering iron.
Soldering methods
Before moving on to the main question of the topic of the article, how to solder two ends together, I would like to give some tips on how to properly carry out soldering.
Firstly, it should be noted that the soldering iron itself only plays the role of a heating element. With its help, the wire is heated, which itself melts the solder. And this is exactly how you need to act, and not the other way around, the solder is heated by the soldering iron and sticks to the wire. This is not true.
Secondly, the solder adheres to the conductors at the molecular level. This is not just a layer of metal stuck under temperature, it is a strong molecular connection that makes two metals one.
Thirdly, apply the soldering iron to the heated element over the entire plane of the tip. This increases the heat transfer of the tool.
Fourthly, the process itself must be carried out quickly.
Attention! If soldering does not work out the first time, you should not start the process right away. You need to let the wires cool down and then try again.
Fifthly, soldering time is determined only experimentally, so to speak, at random. If you carry out the process too quickly, the wire may not warm up. Please note that flux must be applied only before soldering so that it does not evaporate.
Sixth, a high-quality soldering process is visible to the naked eye: the solder layer is shiny, it is laid evenly without bumps or dents.
So, our soldering iron is ready, we now know the requirements, we can move on to the main process. What is its sequence?
- First of all, preparation is necessary. If it is a multi-core cable, then the insulation must be removed from it and twisted so that the small veins become a single whole.
- Next, you need to take a little solder on the tip of the soldering iron, place the wire in rosin and begin to melt it, applying solder evenly to the bare wire. This is called tinning. We do the same with the other end.
- Now everything is simple, you need to lay the two ends of the wire next to each other, press them and solder them, that is, heat them with a soldering iron with solder applied to the tip. Again, please note that the top layer of solder should be shiny and evenly applied.
- There is another way. To do this, the two tinned ends must be twisted together, and after that the connection must be soldered. But it is better to carry out twist soldering in a manner similar to the tinning process. That is, you dip it in rosin, heat the latter with a soldering iron and apply solder inside the rosin.
Recommendations
Some useful tips have already been given, but I would like to highlight some additional recommendations. For example, how much solder is needed for the soldering to work properly. It’s impossible to say for sure here, but if there is not enough solder, then there will not be enough to cover the entire joint. If there is a lot of it, the soldering will end up in the form of a drop, which is also unacceptable, especially in a gasket system (in a bundle).