April 23, 2009
Triacs (symmetrical or bidirectional thyristors - triacs or triac) are semiconductor switches designed to operate in alternating voltage networks, conducting current in both directions and having a symmetrical current-voltage characteristic. In most cases, triacs are used as a key regulator of alternating current, displacing previously used devices for this purpose, consisting of two back-to-back thyristors.
Figure 1 shows the semiconductor structure of the triac and quadrants indicating the voltages on the electrodes for each operating mode.
Rice. 1. Semiconductor structure of a triac and voltage on the electrodes when operating in four quadrants
The triac can be controlled by both positive and negative voltage between the control electrode (gate) and MT1 (Main Terminal 1 - main electrode 1 of the triac). This feature allows the triac to operate in all four sectors. When the triac operates on a load in a 220 V AC network (motor speed controllers, lamp brightness controls or dimmers), the polarities of the gate and the main electrode MT1 always coincide. It follows from this that in such cases the triacs operate in the first and third quadrants. At the same time, the switching parameters of the triacs are almost the same, and the shutter has maximum sensitivity. The current-voltage switching characteristic for this case and the main parameters of the triac are shown in Figure 2.
Rice. 2. Current-voltage characteristics and main parameters of triacs
The holding current characterizes the minimum value of the current through the triac, at which it is still in the open state. If you look at the semiconductor structure of a triac, you can see that this device cannot have ideal symmetry of characteristics and parameters, so manufacturers do not produce triacs for very high currents, which are achievable with thyristors. In addition, triacs may have different control current values for different quadrants (these parameters are given in the manufacturer’s documentation). The main parameters of the most popular triacs from ON Semiconductor are reflected in Tables 1 and 2. The manufacturer lists the names for lead-free components with the ending “G” (from the word Green - green or environmentally friendly, in this case - free of lead and other harmful substances).
Table 1. Basic parameters of ON Semiconductor triacs of low and medium power
| Name | Frame | Imax (A) | Umax (IN) | Ioverload (A) | IGT (gate current), mA (max) | |||
| Q1 | Q2 | Q3 | Q4 | |||||
| MAC97A6 | TO-92 (TO-226AA) | 0,6 | 400 | 8,0 | 5,0 | 5,0 | 5,0 | 7,0 |
| MAC97A8 | 600 | |||||||
| Z0103MA | 1,0 | 600 | 3,0 | 3,0 | 3,0 | 5,0 | ||
| Z0107MA | 5,0 | 5,0 | 5,0 | 7,0 | ||||
| Z0109MA | 10 | 10 | 10 | 10 | ||||
| Z0103MN | SOT-223 | 3,0 | 3,0 | 3,0 | 5,0 | |||
| Z0107MN | 5,0 | 5,0 | 5,0 | 7,0 | ||||
| Z0109MN | 10 | 10 | 10 | 10 | ||||
| T2322B | TO-225AA (TO-126) | 2,5 | 200 | 25 | 10 | 10 | 10 | 10 |
| 2N6073A | 4,0 | 400 | 30 | 5,0 | 5,0 | 5,0 | 10 | |
| 2N6075A | 600 | |||||||
| MAC4DHM | D-PAK (Case 369C) | 40 | 5,0 | 5,0 | 5,0 | 10 | ||
| MAC4DSM | 10 | 10 | 10 | – | ||||
| MAC4DSN | 800 | |||||||
| MAC4DCN | 35 | 35 | 35 | – | ||||
Table 2. Main parameters of ON Semiconductor triacs in TO-220 packages
| Name | Frame | Imax (A) | Umax (IN) | Ioverload (A) | IGT (gate current), mA (max) | |||
| Q1 | Q2 | Q3 | Q4 | |||||
| T2500D | TO-220AB | 6 | 400 | 60 | 25 | 60 | 25 | 60 |
| MAC8N | TO-220AB | 8 | 800 | 80 | 35 | 35 | 35 | – |
| MAC9M | TO-220AB | 600 | 50 | 50 | 50 | – | ||
| MAC9N | TO-220AB | 800 | ||||||
| MAC228A8 | TO-220AB | 600 | 5 | 5 | 5 | 10 | ||
| MAC228A10 | TO-220AB | 800 | ||||||
| BTA08-600CW3G | TO-220AB Isolated* | 600 | 90 | 50 | 50 | 50 | – | |
| BTA08-800CW3G | TO-220AB Isolated | 800 | ||||||
| BTB08-600CW3G | TO-220AB | 600 | ||||||
| BTB08-800CW3G | TO-220AB | 800 | ||||||
| BTA08-600BW3G | TO-220AB Isolated | 600 | 90 | 50 | 50 | – | ||
| BTA08-800BW3G | TO-220AB Isolated | 800 | ||||||
| BTB08-600BW3G | TO-220AB | 600 | ||||||
| BTB08-800BW3G | TO-220AB | 800 | ||||||
| MAC12SM | TO-220AB | 12 | 600 | 5 | 5 | 5 | – | |
| MAC12SN | TO-220AB | 800 | ||||||
| MAC12M | TO-220AB | 600 | 100 | 35 | 35 | 35 | – | |
| MAC12N | TO-220AB | 800 | ||||||
| MAC212A8 | TO-220AB | 600 | 50 | 50 | 50 | 75 | ||
| MAC212A10 | TO-220AB | 800 | ||||||
| BTA12-600CW3G | TO-220AB Isolated | 600 | 105 | 35 | 35 | 35 | – | |
| BTA12-800CW3G | TO-220AB Isolated | 800 | ||||||
| BTB12-600CW3G | TO-220AB | 600 | ||||||
| BTB12-800CW3G | TO-220AB | 800 | ||||||
| BTA12-600BW3G | TO-220AB Isolated | 600 | 120 | 50 | 50 | 50 | – | |
| BTA12-800BW3G | TO-220AB Isolated | 800 | ||||||
| BTB12-600BW3G | TO-220AB | 600 | ||||||
| BTB12-800BW3G | TO-220AB | 800 | ||||||
| MAC15SM | TO-220AB | 15 | 600 | 5,0 | 5,0 | 5,0 | – | |
| MAC15SN | TO-220AB | 800 | ||||||
| MAC15M | TO-220AB | 600 | 150 | 35 | 35 | 35 | – | |
| MAC15N | TO-220AB | 800 | ||||||
| MAC15A6 | TO-220AB | 400 | 50 | 50 | 50 | 75 | ||
| MAC15A8 | TO-220AB | 600 | ||||||
| MAC15A10 | TO-220AB | 800 | ||||||
| MAC16M | TO-220AB | 600 | 50 | 50 | 50 | – | ||
| MAC16N | TO-220AB | 800 | ||||||
| MAC16CM | TO-220AB | 16 | 600 | 35 | 35 | 35 | – | |
| MAC16CN | TO-220AB | 800 | ||||||
| BTA16-600CW3G | TO-220AB Isolated | 600 | 170 | 35 | 35 | 35 | – | |
| BTA16-600CW3G | TO-220AB Isolated | 800 | ||||||
| BTB16-600CW3G | TO-220AB | 600 | ||||||
| BTB16-800CW3G | TO-220AB | 800 | ||||||
| BTA16-600BW3G | TO-220AB Isolated | 600 | 50 | 50 | 50 | – | ||
| BTA16-800BW3G | TO-220AB Isolated | 800 | ||||||
| BTB16-600BW3G | TO-220AB | 600 | ||||||
| BTB16-800BW3G | TO-220AB | 800 | ||||||
| *Isolated – isolated TO-220 case with internal crystal insulation. | ||||||||
The maximum permissible currents of ON Semiconductor triacs are in the range from 0.6 to 16 A. Triacs of the same series most often differ in gate sensitivity. For applications with little power supply noise, devices with low control current are usually selected. To operate under high pulse noise, preference is given to triacs with a high control current (see gate current values in Tables 1 and 2). Triacs are characterized by a high permissible overload current, which is approximately 10 times higher than the maximum permissible average current.
Triacs are conveniently controlled from low-voltage logic outputs. Figures 3 and 4 illustrate the control of a triac from logical levels providing optical isolation.
Rice. 3. Switching on (opening) the triac with a logical zero level, ensuring galvanic isolation
Rice. 4. Switching on (opening) the triac with a logical one level, ensuring galvanic isolation
The minimum permissible supply voltage for the circuits shown in Figures 3 and 4 is limited by the voltage drop across the open transistor and the optocoupler LED. The voltage drop across an open transistor is about 0.1 V; The drop on an open LED ranges from 1 to 1.5 V depending on the type of optocoupler. The voltage drop across the limiting resistor R3 is the difference between the supply voltage of the logical part of the circuit (or microcontroller) and the sum of the voltage drops across the open transistor and the LED. From these relationships, the reader can easily calculate the minimum permissible supply voltage for the logical part of the circuit for reliable opening of the triac. The triac control current will be determined by the output stage of the optocoupler and the current transfer ratio between the input and output of the optocoupler (Current Transfer Ratio or CTR).
Description of the operating principle and device
The main difference between these elements and thyristors is the bidirectional conductivity of electric current. Essentially, these are two SCRs with common control, connected back-to-back (see A in Fig. 1).
Rice. 1. Circuit with two thyristors, as an equivalent of a triac, and its conventional graphic designation
This gave the name to the semiconductor device, as a derivative of the phrase “symmetrical thyristors” and was reflected in its UGO. Let us pay attention to the designations of the terminals, since current can be carried in both directions, the designation of the power terminals as Anode and Cathode does not make sense, therefore they are usually designated as “T1” and “T2” (options TE1 and TE2 or A1 and A2 are possible). The control electrode is usually designated “G” (from the English gate).
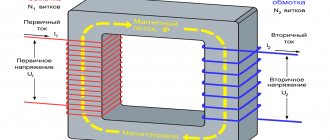
Now consider the structure of the semiconductor (see Fig. 2.) As can be seen from the diagram, there are five junctions in the device, which allows you to organize two structures: p1-n2-p2-n3 and p2-n2-p1-n1, which, in fact, are two counter-current thyristors connected in parallel.
Rice. 2. Block diagram of a triac
When negative polarity is formed at the power terminal T1, the trinistor effect begins to manifest itself in p2-n2-p1-n1, and when it changes, p1-n2-p2-n3.
Concluding the section on the principle of operation, we present the current-voltage characteristics and the main characteristics of the device.
I-V characteristics of the triac
Designation:
- A – closed state.
- B – open state.
- UDRM (UPR) – maximum permissible voltage level for direct connection.
- URRM (UOB) – maximum reverse voltage level.
- IDRM (IPR) – permissible direct current level
- IRRM (IOB) - permissible level of reverse switching current.
- IN (IUD) – holding current values.
Control signals
To achieve the desired result with a triac, not voltage, but current is used. For the device to open, it must be at a certain low level. For each triac, the strength of the control current can be different; it can be found out from the datasheet for a specific element. For example, for the KU208 triac this current must be more than 160 mA, and for KU201 - at least 70 mA.
The polarity of the control signal must match the polarity of the conditional anode. To control a triac, a switch and a current-limiting resistor are often used, if it is controlled by a microcontroller - you may need to additionally install a transistor so as not to burn the MK output, or use a triac optodriver, such as MOC3041 and the like.
Four-quadrant triacs can be unlocked by a signal of any polarity. This advantage also has a disadvantage - increased control current may be required.
If missing, the device is replaced with two thyristors. In this case, it is necessary to correctly select their parameters and redo the control circuit. After all, the signal will be supplied to two control pins.
Peculiarities
To have a complete understanding of symmetrical thyristors, it is necessary to talk about their strengths and weaknesses. The first include the following factors:
- relatively low cost of devices;
- long service life;
- lack of mechanics (that is, moving contacts that are sources of interference).
The disadvantages of the devices include the following features:
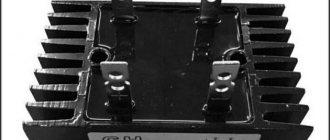
- The need for heat removal is approximately at the rate of 1-1.5 W per 1 A, for example, at a current of 15 A, the power dissipation value will be about 10-22 W, which will require an appropriate radiator. For ease of fastening to it for powerful devices, one of the terminals has a thread for a nut.
Triac with radiator mount
- Devices are subject to transients, noise and interference;
- High switching frequencies are not supported.
The last two points require a little clarification. In the case of high switching speed, there is a high probability of spontaneous activation of the device. Interference in the form of a voltage surge can also lead to this result. To protect against interference, it is recommended to bypass the device with an RC circuit.
RC circuit to protect the triac from interference
In addition, it is recommended to minimize the length of the wires leading to the controlled output, or alternatively use shielded conductors. It is also practiced to install a shunt resistor between the T1 terminal (TE1 or A1) and the control electrode.
Kinds
Speaking about the types of devices, it is necessary to accept the fact that this triac is considered one of the types of thyristors . If there are differences in operation, then the thyristor can be thought of as a kind of triac. The differences lie in the control cathode and in the different operating principles of these thyristors.
Imported devices are widely represented on the Russian market. Their main difference from Russian triacs is that they do not require advance configuration in the circuit itself. This makes it possible to save parts and space on the printed circuit board. As a rule, they begin to work simultaneously after being introduced into the circuit. It is only necessary to accurately select the desired triac according to all the necessary data.
Application
This type of semiconductor elements was originally intended for use in the manufacturing sector, for example, to control electric motors of machine tools or other devices where continuously variable current control is required. Subsequently, when the technical base made it possible to significantly reduce the size of semiconductors, the scope of application of symmetrical thyristors expanded significantly. Today, these devices are used not only in industrial equipment, but also in many household appliances, for example:
- chargers for car batteries;
- household compressor equipment;
- various types of electric heating devices, ranging from electric ovens to microwaves;
- hand-held electric tools (screwdriver, hammer drill, etc.).
And this is not a complete list.
At one time, simple electronic devices were popular that allowed smooth adjustment of lighting levels. Unfortunately, dimmers based on symmetrical thyristors cannot control energy-saving and LED lamps, so these devices are not relevant now.
Technology development
A feature of 4-quadrant symmetrical thyristors is their false switching on, which can cause failure. This requires the use of an additional safety chain containing a variety of components.
Relatively recently, 3-quadrant devices were invented, which have the necessary advantages:
- By reducing the number of required components, the board has become even more compact.
- As a result, there is a reduction in effort losses and a reduction in the cost of the finished product.
- In the absence of a damper and a choke, it became possible to use symmetrical thyristors in circuits with high frequencies.
Simplification of the circuit also allowed the use of a 3-quadrant triac in heating devices: such a system heats up less and does not react to the temperature around it.
How to check the functionality of a triac?
You can find several methods online that describe the testing process using a multimeter; those who described them, apparently, have not tried any of the options themselves. In order not to be misleading, you should immediately note that testing with a multimeter will not be possible, since there is not enough current to open the symmetrical SCR. Therefore, we are left with two options:
- Use a pointer ohmmeter or tester (their current strength will be sufficient to trigger).
- Collect a special circuit.
Algorithm for checking with an ohmmeter:
- We connect the probes of the device to terminals T1 and T2 (A1 and A2).
- Set the multiplicity on the ohmmeter x1.
- We carry out a measurement, a positive result will be infinite resistance, otherwise the part is “broken” and can be gotten rid of.
- We continue testing, to do this we briefly connect pins T2 and G (control). The resistance should drop to about 20-80 ohms.
- Change the polarity and repeat the test from steps 3 to 4.
If during the test the result is the same as described in the algorithm, then with a high probability it can be stated that the device is operational.
Note that the part being tested does not have to be dismantled; it is enough to just turn off the control output (naturally, having first de-energized the equipment where the part that raises doubt is installed).
It should be noted that this method does not always allow reliable testing, with the exception of testing for “breakdown”, so let’s move on to the second option and propose two circuits for testing symmetrical thyristors.
We will not give a circuit with a light bulb and a battery in view of the fact that there are enough such circuits on the network. If you are interested in this option, you can look at it in the publication on testing thyristors. Let's give an example of a more effective device.
Circuit of a simple tester for triacs
Designations:
- Resistor R1 – 51 Ohm.
- Capacitors C1 and C2 – 1000 µF x 16 V.
- Diodes - 1N4007 or equivalent, installation of a diode bridge, for example KTs405, is allowed.
- HL bulb – 12 V, 0.5 A.
You can use any transformer with two independent 12 Volt secondary windings.
Verification algorithm:
- Set the switches to their original position (corresponding to the diagram).
- We press SB1, the device under test opens, as indicated by the light bulb.
- Press SB2, the lamp goes out (the device is closed).
- We change the mode of the SA1 switch and repeat pressing SB1, the lamp should light up again.
- We switch SA2, press SB1, then change the position of SA2 again and press SB1 again. The indicator will turn on when the shutter hits minus.
Now let's look at another scheme, only universal, but also not particularly complicated.
Circuit for testing thyristors and triacs
Designations:
- Resistors: R1, R2 and R4 – 470 Ohm; R3 and R5 – 1 kOhm.
- Capacities: C1 and C2 – 100 µF x 10 V.
- Diodes: VD1, VD2, VD5 and VD6 – 2N4148; VD2 and VD3 – AL307.
A 9V battery, Krona type, is used as a power source.
Testing of SCRs is carried out as follows:
- Switch S3 is moved to the position as shown in the diagram (see Fig. 6).
- Briefly press button S2, the element under test will open, which will be signaled by the VD LED
- We change the polarity by setting switch S3 to the middle position (the power is turned off and the LED goes out), then to the bottom.
- Briefly press S2, the LEDs should not light up.
If the result corresponds to the above, then everything is in order with the tested element.
Now let's look at how to check symmetrical thyristors using the assembled circuit:
- We carry out steps 1-4.
- Press the S1 button - the VD LED lights up
That is, when you press the S1 or S2 buttons, the VD1 or VD4 LEDs will light up, depending on the set polarity (the position of the S3 switch).
Diagnostics in diagrams
In some cases, a radio amateur is faced with checking a triac, but cannot always carry it out correctly. If the triac fails, it is advisable to remove it from the board and check it. A regular digital multimeter will not work for this purpose because its current is too low to open the junction of the part. An ordinary pointer ohmmeter is suitable for this. There are only two options for checking: use a pointer device or assemble a special circuit for this operation. To carry out the check according to the first option, you must be guided by the following algorithm:
- Turn the device into resistance measurement mode.
- Connect the tester probes to the emitter and collector. If the device shows infinite resistance, then the part is working. Other cases indicate its malfunction.
- Connect the base and pin T2. In this case, the resistance will be in the range from 40 to 250 Ohms. If you swap the probes, the device will again show infinity. This indicates the serviceability of the triac.
However, the first diagnostic method in some cases gives not entirely necessary and correct results. Very often a part tested in this way in a circuit does not work. This is due to the fact that the seal of its body is broken. The disadvantage of the method is inaccurate diagnosis. For more accurate diagnostics, you should check the triac in operation (Scheme 1). To do this, you need to use an incandescent lamp and a battery.
Scheme 1. Testing a symmetrical thyristor using an incandescent lamp and a power source
In this circuit, the triac will be tested under load. When you touch the control electrode, the light will light up and will remain on for some time until the power at the anode is lost or the current at the base is low. The disadvantage of the method is the simple design, which is inconvenient to carry out testing, since the wires must be soldered to the triac terminals. After checking, if a part is faulty, it should be replaced.
Thus, triacs are used in controlled devices as electronic switches capable of passing current in two directions. They are easy to check and it is advisable to use a special circuit for this operation.
Total thermal resistance
It makes sense to carry out all calculations for calculating thermal resistance for an already established regime lasting more than 1 s. For pulsed currents or long transients less than 1 s, the heat removal effect is reduced. The temperature is simply dissipated in the volume of the device with very little heat removal achieved. Under such conditions, the heating of the junction depends on the total thermal resistance “junction - device body” Zth j–mb. Therefore, Zth j–mb decreases with decreasing current pulse duration due to less heating of the crystal. When the duration increases to 1 s, Zth j–mb increases to a value corresponding to the steady state Rth j–mb. The characteristic Zth j–mb is given in the documentation for bidirectional and unidirectional electric current in pulses lasting up to 10 s.
Triac mounting methods
For small loads or short pulse load currents (less than 1 s), you can use a triac without a heat sink. In all other cases, its use is necessary.
There are three main methods of attaching a triac to a heatsink—clamping, screwing, and riveting. The first two methods are the most common. Riveting is not recommended in most cases, as it can cause damage or deformation of the crystal, which will lead to failure of the device.
Fixation to the heat sink with a clamp
This is the preferred method with minimal thermal resistance, since the clamp presses the device body tightly against the heatsink. This is equally suitable for both non-insulated (SOT82 and SOT78) and insulated packages (SOT186 F-cases and earlier SOT186A X-cases). SOT78 is also known as TO220AB.
Fixation to the heat sink using a screw
- The SOT78 housing mounting kit includes a rectangular washer that must be installed between the screw head and the contact without force on the plastic housing of the device.
- During installation, the tip of the screwdriver should not impact the plastic housing of the triac (thyristor).
- The surface of the heat sink at the point of contact with the electrode must be processed with a cleanliness of up to 0.02 mm.
- The torque (with washer installed) should be between 0.55–0.8 Nm.
- If possible, the use of self-tapping screws should be avoided, as this reduces the thermal contact between the heat sink and the device.
- The device must be mechanically fixed before soldering leads. This minimizes excessive stress on the pins.
Thermal resistance
Thermal resistance Rth is the resistance between the device body and the heatsink. This parameter is similar to electrical resistance R = V/I, so thermal resistance Rth = T/P, where T is temperature in kelvins and P is energy dissipation in watts.
For a device installed vertically without a radiator, the thermal resistance is given by the thermal resistance “junction - environment” Rth = Rth j–a.
- For the SOT82 package the value is 100 K/W;
- For the SOT78 package the value is 60 K/W;
- For F and X frames the value is 55 K/W.
For non-isolated devices mounted on a heat sink, the thermal resistance is the sum of the junction-to-case, case-to-heatsink, and heatsink-to-ambient resistances.
For insulated cases there is no reference to the thermal resistance Rth j–mb, since Rth mb–h is assumed to be constant and is given taking into account the use of thermal paste. Therefore, the thermal resistance for an insulated case is the sum of the thermal resistances “transition-heatsink” and “heatsink-ambient”.
Rth j–mb or Rth j–h are fixed and are given in the documentation for each device. Rth mb–h are also given in the installation instructions for some insulated and non-insulated mounting options with or without thermal paste. Rth h–a is controlled by the size of the heat sink and the degree of air flow through it. To improve heat transfer, it is always recommended to use thermal paste.
Calculation of thermal resistance
To calculate the thermal resistance of a heat sink for a given triac (thyristor) and a given load current, you must first calculate the energy dissipation in the triac (thyristor) using the following equation:
Vo and Rs are obtained from the “on-state” characteristics of the triac (thyristor). If values are not specified, they can be obtained from the graph by drawing a tangent to VT max. The point on the VT axis where the tangent intersects it gives Vo, while the tangent of the tangent gives Rs.
Using the thermal resistance equation given above, we get:
The maximum permissible junction temperature will be reached when Tj reaches Tj max at the highest ambient temperature. This gives us T.