When studying a welding machine, a beginner may think that now he can easily weld a vertical seam with an inverter. But in practice, everything may seem much sadder: from the inside out, the product turns out to be deformed, and if the current strength is not adjusted correctly, the thin metal will crack.
Don’t get upset ahead of time and quit this useful activity. Our tips will help you learn how to weld a vertical seam using arc welding.
Peculiarities
Vertical seams are performed by welders with a grade of at least 3, since welding this type of seam is not an easy process. It has a number of the following features:
- During the process of making a vertical weld, molten metal flows down under the influence of gravity and forms defects such as sagging and this must be dealt with in a certain way.
- There are several welding techniques, which ones are used and in which cases we will consider below.
- The process is performed at reduced welding current values (10-15%) from the values for the lower position.
- Depending on the direction of vertical welding, the designations B1 are used - the process is carried out “ascending”, starting at the lowest point and going up, and B2 - “descent”, that is, starting at the top point and leading to the bottom.
Welds: general definitions
The technology of welding metals is closely related to the concept of a weld. This is formed during the solidification process of metal melted by electric arc welding.
Depending on the location of the welding, the seam can be positioned horizontally or vertically. In addition, the spatial location of the seam can be bottom, side, or top.
Types of welds: 1 – horizontal in the lower plane; 2 – horizontal in the upper plane (ceiling); 3 – horizontal in the lateral plane; 4 – vertical in the lateral plane
The simplest and easiest to perform is considered to be laying welds in the plane of the lower horizon. Under such conditions, the molten metal is quite easy to control.
A simple weld placed in the lower horizontal plane. This is the lightest type of seam that is found in the practice of welding technology
The remaining options for the location of seams in space (side and top) are recognized as technologically difficult to implement, requiring the study of welding techniques and the development of relevant experience.
A weld is formed as a result of crystallization of molten metal. It is one of the most durable types of connections used in the assembly of metal structures of various purposes and sizes.
Welded joints are classified as non-separable. They have maximum strength, because... produced at the molecular level. However, in the welding zone, the crystal lattice is destroyed and the structure of the metal changes. According to their shape relative to the axis, all welds are divided into convex, flat and concave.
The most durable is the first option, but it requires experience and care when performing. Vertical and horizontal welds are made using butt technology. They vary in penetration depth and thickness. Static loads require convex welds.
Concave ones are considered defective in most cases; flat ones are used in structures for dynamic loads. In welding pipes and rounded structures, butt welds are used, the technology of which is similar to horizontal and vertical ones.
According to the standards, the convexity of horizontal and vertical seams cannot exceed 1 mm if the thickness of the metal being connected is up to 26 mm. If the thickness is more than 26 mm, then the thickness of the seam can be 2 mm, and the corner seam 3 mm. The quality of the seam created is greatly influenced by the speed of its execution.
Don't go too fast or drive the electrode too slowly to get a strong, continuous weld. Examples of a vertical weld. Assembly of metal structures using the welded method. Neat convex weld seam. Wide butt weld. Durable convex spiral seam. Welding a pipe with a horizontal seam. Corner convex seam option. Welding seams at different speeds.
Welding principles and basic requirements
The basic principle when welding vertical seams using manual arc welding (MAW) is that the process must be carried out from the bottom up continuously or with the electrode detached.
It is always more difficult to weld from top to bottom, because the metal will drain more actively and the process will have to be carried out at low current values, which often does not provide the required penetration.
When welding “uphill” from the bottom up, the metal of the weld pool will be supported from leakage by the previously deposited and already crystallized metal. The flow of metal will be especially noticeable after it heats up and becomes more fluid.
Also an important principle when welding vertical seams is the oscillatory movements of the electrode. We'll talk about how to perform the movements below.
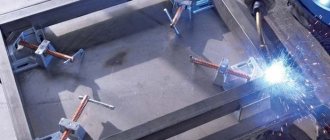
The basic requirements for preparation and welding are as follows:
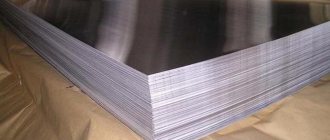
- The workpieces to be welded must be cleaned to a metallic shine using an abrasive tool, file or wire brush.
- Next comes assembly and tack work. A tack is a short-length welding seam performed to secure parts during the welding process. Because due to an increase in temperature, the metal expands and deforms. The size of the tack depends on the thickness of the parts being welded. As a rule, the tack height is 0.5–0.7 times the thickness of the parts. Their length is from 10 to 30 mm. The distance between tacks is 150-250 mm.
- Check dimensions after assembly. The gap between the parts, the angle of the bevel of the edges (if provided for by the type of connection), and the displacement of the parts relative to each other are checked.
Below are the permissible values of the controlled parameters using the example of a C17 butt joint with a V-shaped one-sided groove in accordance with GOST 5264-80.
Differences between direct and reverse polarity when welding with an inverter
In a welding arc, electric current is a flow of electrons moving in plasma from a negative electrode (cathode) to a positive electrode (anode). In this case, approximately one third of the thermal energy is accumulated at the cathode, and two thirds at the anode. For this reason, when welding with an inverter, the polarity directly affects where the greater heat generation will be: on the part being welded or on the electrode. Direct polarity is considered standard, when the electrode is connected to the negative terminal of the inverter, and the workpiece is connected to the positive terminal (see figure below). With this welding mode, deep penetration of the welded metal occurs with the formation of a stable weld pool and slower consumption of the electrode. Most low- and medium-carbon structural steels, as well as cast iron products, are welded using this method.
When welding with reverse polarity, the electrode holder is connected to the positive contact of the inverter, and the ground terminal is connected to the negative terminal. In this case, electrons are separated from the metal of the workpiece, and their flow is directed towards the electrode. As a result, most of the thermal energy is released on it, which allows welding with an inverter with limited heating of the part being welded. This mode is used when welding parts made of thin metal, stainless steels and metals with low resistance to elevated temperatures. In addition, reverse polarity is used when it is necessary to increase the melting rate of the electrode, as well as when parts are welded with an inverter in a gas environment or using fluxes.
Conditions for obtaining a high-quality seam
In order to obtain high-quality connections when making vertical seams using electric welding, several important conditions must be observed:
- The welding current is less (10-15%) than when welding in the lower position. This condition will ensure minimal flow of molten metal and avoid sagging.
- The choice of welding current should be carried out on a test workpiece. Initially, you need to set the recommended, average current values and start cooking. If the electrode often goes out, sticks, and the arc burns poorly and unstably, then you need to add more current. If, during welding, the edges are burned and the metal of the bath seems to fall through, then the values need to be reduced. The setting step is usually 5 A, that is, if you need to increase it, add it by 5 A and try cooking again, and so on until we find the optimal values.
- The welding process should be carried out with a “short” arc. Arc length is the distance between the electrode and the weld pool. A “short” arc is considered to be an arc whose length is 0.5 - 1 electrode diameter, but not more than 1.5 mm. The longer the arc, the stronger the heating of the metal and the higher its pressure. All these factors inevitably lead to defects in the form of pores, burns, sagging and undercuts.
An undercut is a welding defect in the form of a small depression between the weld and the base metal.
Useful article - How to find yourself in the tax register of welders.
Instructions for a beginner welder
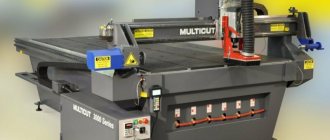
Welding work can only be performed if appropriate equipment is used.
Standard kit contains:
- Jacket, trousers, gloves, shoes made of fireproof, durable, strong materials.
- A headdress that completely covers the back of the head.
- A special protective mask for the face and eyes.
To carry out welding, you should use a working device, the electrical part of which is closed with a reliable housing. The electrical cables included in the device must have complete insulation and comply with the electrical characteristics of the device.
The welder's place must be equipped with a work table, light sources, a grounding bus, means of protection against electric shock and fire-fighting equipment.
And even before starting work, you need to carefully study the rules of electric welding, consider and study methods and options for making connections.
How to cook vertical - methods
As mentioned earlier, there are 3 techniques: bottom-up, top-down and electrode separation welding.
Experienced welders most often use the bottom-up technique, which is designated B2. The process is performed “ascending” from the bottom to the top.
The top-down method is less commonly used - B1. Here the reverse welding situation is performed “downhill” from the top to the bottom.
Beginning welders and amateurs use a method called welding with electrode separation. The process goes from bottom to top “ascending”, at the same time the welding arc is ignited and a small area of the “welding point” is welded, and the arc breaks. Afterwards the process is repeated until the cutting is completely filled.
For the first two methods, it is best to use electrodes with a basic coating, and for pull-off welding with rutile. Because rutile electrodes provide easier ignition of the arc, but it is more difficult to weld long seams with them due to the large amount of slag. During the welding process, the slag spreads greatly and it is difficult for a novice welder to understand where in the weld pool there is metal and where the molten slag is. Because of this, such a defect as seam slagging often occurs.
Let's look at each of these methods in detail below.
Down up
Using this method it is easiest to control the weld pool and weld large thicknesses. The welding seam begins at the lowest point and gradually fills the groove and rises to the top.
The process of welding a vertical seam itself is carried out in several stages: initially, a friend is ignited, the length of which is slightly more than 2-3 times the diameter of the electrode. This is done in order to warm up the metal so that the electrode does not stick. Warming up occurs for 2–3 seconds, after which the length of the others decreases to 0.5–1 the diameter of the electrode.
Next, you can begin the welding process, namely surfacing at the lower point of a small roller (flange). If the metal thickness is more than 3 mm, then welding must be performed in several passes. The first is that the root pass must be cooked without oscillatory movements, simply moving the electrode slowly from bottom to top or making reciprocating movements along the cutting edges.
During subsequent passes (filling and lining), the electrode is slowly moved from one edge to the other.
During the welding process, you need to pay special attention to the speed of the process, since if you weld too slowly, the metal will begin to flow down, forming sagging. At the same time, if welding is carried out too quickly, then there is a risk of not welding the joint. Beginner welders can use this technique here. It is necessary to weld so that the top edge of the weld pool is approximately in line with the top edge of the electrode.
When making vertical seams from bottom to top, the welding electrode is usually held at an angle of about 45–50 degrees.
In cases where it is necessary to ensure deeper penetration, the electrode angle is chosen closer to 90 degrees. And when the metal begins to flow, the electrode is tilted towards the weld pool, holding the molten metal in the weld pool due to arc pressure.
To fill the groove, the welder needs to make oscillatory movements with the electrode. The main types of movement have the form: triangle, crescent, letter Z and others. They will be described in detail below.
Top down
The top-down welding method is used less frequently, since its technique is more complex and requires certain welding electrodes that allow downhill welding. With this method, the weld will have a smaller penetration depth, but a larger width. This is good in cases where you need to weld thin metal so as not to burn through it.
The arc initiation process occurs when the electrode is positioned at an angle of 90 degrees to the surface of the part. After the arc has ignited, the electrode is placed at an angle to the weld pool so that, due to the arc pressure, the molten metal does not flow out.
The process is also performed with oscillatory movements. In this case, Z-shaped movements or crescent-shaped movements are most often used.
This method (B1) is often used in semi-automatic welding, and quite rarely in manual arc welding.
Useful article - Silumin, what kind of metal is it?
How to weld a vertical seam with lift-off arc welding
The undoubted advantage of the pull-off welding method is that even a beginner can weld a vertical with it. Since when used, the metal will have time to cool and will not flow. This greatly simplifies the process, but there is also a disadvantage in the form that the speed of welding is greatly reduced.
The execution process is as follows:
- connect the device to reverse polarity and set the current strength (select the value on test pieces)
- the arc is ignited in the cutting of the edges and we increase its length to 1.5–2 times the diameter of the electrode;
- electrode at an angle of 45–50 degrees.
- we heat the metal at the lowest point for 1-3 seconds by moving the electrode from one part to another;
- the metal cools down changing color from bright red to burgundy at this moment the arc is ignited again;
- the arc is transferred from one part to another, lingering on each of the walls, making, as it were, movements in a spiral, superimposing points on one another.
Electrode melting process
To speed up the time, it is much easier for beginners to learn how to weld a vertical seam with an arc tear. As work progresses, the arc discharge is supported by the cut of the weld pool. The trajectories of conductor movement during the formation of a crater with and without separation are carried out according to the figure below.
Metal welding from top to bottom will become more stable when short electric arcs are produced. You need to confidently guide the conductor strictly perpendicular to the edges. In the process, it is tilted down 45°.
The assembly result directly depends on the equipment and its capacity. Manual welding provides:
- penetration into hard-to-reach welding areas;
- installation in every position;
- use of main types of alloys.
The disadvantages include: low efficiency, dependence of the quality of joints on the qualifications of the worker, harmful fumes and sparks that occur during work, a special welder’s uniform and mask are required.
How to weld a vertical seam - electrode movements
For vertical joints, 3 types of electrode movement are most often used:
- Oscillatory movements across the joint.
- Reciprocating movement along the joint.
- Rectilinear (direct) movement.
Oscillatory movements of the electrode make it possible to obtain seams of large width (up to 3–4 electrode diameters in one pass). This seriously increases productivity, especially in cases where the metal thickness is 20 mm or more.
Reciprocating and straight-line motions are used when welding root pass, also for parts with small thicknesses and on stainless steels. The seam will be more accurate and durable, and during the process you can clearly see where the slag is and where the metal is. With this method it is easier to maintain the same speed and arc length, and therefore it will be easier for beginners.
Do you want to know what MIG MAG welding is and what is the difference? Follow the link.
Reciprocating (for rutile electrodes)
Reciprocating motion when welding vertical seams is most often used when the thickness of the parts to be joined is small (up to 5 mm); welding is performed with rutile electrodes. This method can also be used when welding a root seam (the root seam is the seam that is performed very first in multi-layer welding).
The technique is simple and consists of the following:
- The arc is ignited and a small section of the seam is welded (5-10 mm).
- Next, the electrode returns to 1/3 of the welded area.
- Afterwards, the electrode is moved upward again, welding a new 10-15 mm, and this is repeated until the end of the joint.
The result is a weld bead with a width of 1.3-1.5 electrode diameter.
Herringbone
For vertical connections, this method of movement is performed as follows:
- A small shelf is fused at the bottom, which will prevent metal from leaking out.
- The electrode begins to move up and to the right, after which it returns down.
- Next, the electrode is led up and to the left and then returned down again.
- This process is carried out until the joint is completely welded.
- The process must be introduced evenly (at the same speed) in order to obtain the most accurate seam.
Triangle
This method of movement is most often used when it is necessary to weld large thicknesses, since it allows you to obtain the widest seam up to 4 electrode diameters in one pass. It is very convenient to use for T-joints. The technique is as follows:
- The arc is ignited and the metal is heated.
- In the lower part, you still need to fuse a small shelf on each of the edges.
- We start welding in the center, light the arc and delay a little (up to 0.5 seconds).
- We move the electrode to the right edge and linger on it.
- We move to the left edge and linger on it.
- We move to the center of the joint a little higher and repeat the process until completion, lingering on each of the edges and in the center.
You need to pause at points so that the seam has a smooth transition to the base metal (it is not extremely convex), and also so that an undercut does not form.
Crescent and Z-shaped movements
Z-shaped movements, as well as their complicated version with a crescent, are performed in the following sequence:
- We direct the shelf below.
- We light the arc and warm up the metal a little.
- The electrode moves smoothly and at the same speed from one edge to the other
If you use these methods for cladding, it is better to use an angle close to 90° so that the seam is not excessively convex. When filling, the angle can be made more acute.
How to properly weld a vertical seam using semi-automatic electric welding
Semi-automatic welding of vertical seams is most often performed using wire with a diameter of 0.8 to 1.2 mm. For this welding method, the top-down method is very often used for thicknesses up to 4 mm without oscillatory movements. The angle between the burner and the product should be about 20-35°.
If the thickness is greater, then welding from bottom to top is used. The torch, in the same way as during manual welding, performs oscillatory movements. Most often this is a “triangle” type movement with a delay in the middle. The angle of inclination of the burner to the product is around 75–85 degrees.
The welding arc is oriented towards the leading edge of the bath. This is done in order to reduce the flow of liquid metal due to arc pressure and ensure deep penetration of the root.
Useful article – Semi-automatic welding for beginners with gas
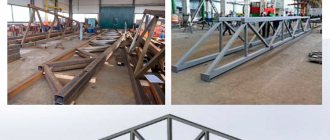
Types of connections
Vertical seams are performed on such types of joints as:
- Overlapping;
- Butt (butt);
- T-bars;
- corner.
Butt-butt
Vertical welding of butt joints is most often used for pipes, sheet structures and profile products. The process can be single-pass or multi-pass, single-sided or double-sided, with or without a lining. The most common butt joint is a double-sided V-groove made without a backing.
Butt welding with a thickness of up to 3.5-4 mm is most often performed without oscillatory movements and without cutting edges in one pass. In cases where the thickness is more than 4 mm, the edges are cut and the process is performed with oscillatory movements of the electrode.
overlap
The lap joint is used when welding sheet structures, as well as welding shaped and profile products. The most common is the H1 connection in accordance with GOST 5264. Lap joints can be up to 60 mm thick according to this GOST. The welding process is carried out by performing Z-shaped oscillatory movements from bottom to top.
How to weld a vertical seam in a T-joint or corner joint
Vertical corner and T-joints are welded from bottom to top with oscillating movements of the electrode in the form of a triangle with a delay at each of the edges and in the center.
Technique for obtaining a good weld joint
When the rollers begin to turn out smooth, you can try to start making connecting seams. This operation can be performed by a fairly experienced trainee who knows how to weld using electric welding.
The electrode is ignited according to the technology described above. The only difference will be the movement of the welder's hand. She will perform oscillatory movements. The melt will seem to move from one surface of the part to another. Movement can occur along several trajectories:
- Zigzag;
- Loop-shaped;
- Herringbone;
- With a sickle.
For training, you can take a small metal blank. Draw a line along the surface with chalk so that it can be seen through the dark glass of the mask. It is along this that you need to move the electrode in order to get a kind of seam, in the form of any of the above paths.
After the seam has cooled, you need to beat off the slag with a hammer and examine the work done.
When you have a little experience, you can begin to make connecting seams, which have several types:
- T-bars;
- Butt;
- Angular;
- Overlapping.
In addition, such seams can be horizontal and vertical, and can be welded in different directions.
Only after numerous trainings can you achieve uniform hand movement. After this you can get beautiful details.
Electric arc length control
When welding a vertical seam, controlling the length of the welding arc is extremely important. An increased arc length leads to the formation of many defects such as:
- surges;
- undercuts;
- craters;
- pores;
- spray;
- seam unevenness;
- metal burns.
Beginning welders need to practice holding the same arc length, especially when moving the electrode.
The following arc lengths are distinguished:
- Short arc (which is 0.5 - 1 electrode diameter, but not more than 1.5-2.0 mm).
- Normal arc – 2.0-3.0 mm.
- Long arc – more than 3.5 mm.
For manual arc welding, it is recommended to use a short arc. Using normal arc length is also acceptable.
Recommendations for vertical seam welding
Proper formation of vertical seams is considered a rather difficult task among welders. To perform it, you need to have a good knowledge of the theoretical foundations of the work and have the skills to work correctly with a vertical seam.
When applying a vertical seam using arc welding, the following rules must be followed:
- When igniting the electrode, it must be perpendicular to the work being welded.
- The shorter the arc, the higher the rate of crystallization of the metal. This allows you to avoid smudges that negatively affect the appearance of the seam.
- The inclination of the electrode protects against dripping when forming a track.
- Metal leakage is eliminated by increasing the width of the seam and the current strength.
- It is better to move from below, otherwise the seam will not be of high quality. You can correct the situation a little by smoothly moving the electrode.
- Before working with thin metal, the plates should be thoroughly cleaned. It is better to carry out spot welding to avoid burning through thin sheets.
When connecting thick products with a vertical seam using arc welding, it is recommended to choose a multi-pass method and do more than one welding layer. When applying subsequent layers, you can increase the diameter of the electrode, if it is more convenient for you. The last layer cannot extend beyond the cutting edges.
Vertical seams are obtained of high quality if the thickness of the parts was taken into account during the preparation for welding and the appropriate method was selected. In such work, much depends on the reliability of the fixation, because the vertical location of the seam implies additional difficulties for the welder.
Welding mode tables
For the most commonly used electrodes of group E50 (for group of materials M01 - carbon and low-alloy “black” steels), the welding modes for vertical joints are given below.
| Electrode diameter, mm | Type of current, polarity | Welding current, A |
| Position – vertical | ||
| 2,5 | D.C. Polarity - reverse | 65-80 |
| 3,0 | 85-100 | |
| 4,0 | 110-140 |