If you love bulbs, then you know how exhausting planting these wonderful plants can be. However, progress does not stand still, and now you can make your work easier by purchasing a special planter.
It is difficult to find an area where there would not be room for a flower bed with bulbous plants. Some limit themselves to a small garden bed, while others create real works of art in their flower beds using dozens of plants. Planters were invented especially for such gardeners.
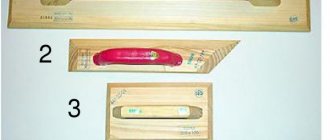
- Planting calendar for bulbous and corm flowers
Table of dates for sowing seeds and planting tubers and flower bulbs.
“Classic” planter for bulbous plants
The most primitive planter for bulbs looks like a cylinder or an inverted truncated cone with a handle. The operation scheme is quite simple: the tool is immersed in the ground to the required depth, then it is rotated around its axis, thus capturing the lump of earth that remains inside.
On the one hand, the simplicity of this device makes it reliable and durable, but on the other hand, it requires additional movements with the hand. This won't cause much inconvenience if you need to plant a few bulbs, but it will be tiring when creating a flower bed with a large number of plants. In addition, there is a risk of not delivering the earthen ball without loss, spilling a good part of the captured soil. However, engineering science does not stand still, and simple designs have been replaced by improved analogues.
Advantages : easy to maintain, durable, does not take up much space.
Disadvantages : work must be done bending over or squatting, it is difficult to pour soil into the hole with the onion, not suitable for preparing holes for small onions.
Planter device
It consists of two quadrangular iron shovels, which are shaped like a truncated cone. Each of the shovels is bent in a semicircle along its length, forming “flaps” or a split chamber-glass. The doors are hingedly connected to each other with bolts.
Rice. 1. Planter design
A nut with a lock nut is screwed onto the end of a small diameter bolt.
In order to obtain a truncated cone from two shovels, it is necessary to have a shovel or iron sheet cut to the shape as shown in the figure. Holes for the bolts are made at the protrusions of both halves of the doors, i.e. in the upper uncut part of the shovel. In this case, the upper curved edges of the shovels must be straightened to make it easier to bend the shovels into a semicircle. The edges of the planter flaps must be sharp. The planter blade is sharpened from the outside of the valves. After the halves of the planter (split chambers or doors) are connected to each other and the cuttings (handles) are inserted into them, the planter is ready for use.
Bulb planter with spring handle
gardenorchid.co.uk
Externally, this planter is very similar to its predecessor: the same shape, the same principle of working with the soil. However, if you look closely, you will notice that its landing cone consists of two parts, and there is a button on the handle. It is she who sets in motion the mechanism that opens the cone to a cylinder. The principle of working with the planter has changed slightly, but it seems so only at first glance. The spring mechanism greatly facilitated the landing process. Now, in order to get a lump of earth, you do not need to rotate the cone around its axis.
A planter with a spring handle is an ideal option for those who plant tulips, hyacinths, hazel grouse, daffodils and other plants with large bulbs on their plot.
Advantages : no need to make unnecessary hand movements, it’s easy to fill the bulbs.
Disadvantages : uncomfortable body position during work, not suitable for planting small diameter bulbs.
Seedling planter drawings.
The figure provides drawings with dimensions for the planter.
A hand planter consists of two shovels, each shovel is bent in the shape of a semicircle, together the shovels form a cone-shaped glass.
Each shovel is attached to a handle, which acts as a lever; the shovels are attached to each other by a hinge joint, which ensures their rotation relative to each other.
To make a planter, you will need sheet metal, from which you need to cut two blanks for shovels.
The shovels need to be bent in the form of halves of a cone; holes need to be drilled in the upper part of each shovel and connected to a hinge. Handles are attached to the shovels; each shovel must be sharpened on the outside.
Planter with two blades
polybull.com
Another variation on the theme of a planter with a spring mechanism. However, this time the place of the cone was taken by two blades, which are driven not by a button, but by pressing a horizontal bar. This tool is good for making shallow holes that are suitable for planting small bulbous plants. It can also be used for replanting many other plants. However, such a planter is not suitable for preparing holes for larger flowers.
Advantages : easy to use, suitable for various types of work.
Disadvantages : the open mechanism requires regular cleaning; you cannot dig deep holes.
Planter-shovel for small bulbs
If you plan to plant crocuses, muscari, galanthus or any other small-bulbous plants on your site, you will need a planter that makes shallow holes with a diameter of no more than 5 cm. A cylinder spatula with a beveled edge is ideal for these purposes.
Advantages : durable, suitable for working with small-diameter planting material, easy to fill the bulbs.
Disadvantages : not at all suitable for planting large and medium-sized bulbs.
Bulb planter with long handle
Planters with a long handle are very convenient because when working with them, a person does not have to bend down every time they need to make a hole with a diameter of about 10 cm. Most of these tools are made on the principle of a shovel with a special foot, by stepping on which you can easily drive the device into land.
Advantages : you can work without bending over, copes with heavy soil.
Disadvantages : takes up a lot of space, is not suitable for small bulbs, there is a risk of the earth ball getting stuck inside the cone.
Planter operation
Making holes for planting seedlings
Making holes with a planter is done as follows. The planter is immersed in the ground in the closed position of the valves, i.e. in a position where they form a truncated cone. To do this, the planter handles are moved apart until its halves are closed. In this position, the planter is immersed in the soil, then it should be sharply turned around its axis half a turn to the right and left to form smooth walls of the hole in order to avoid destruction of the walls when excavating the earth.
Rice. 2. Making holes for planting seedlings
After immersing the manual seedling planter in the soil, its leaves should be further compressed, for which the handles are moved to the sides. This must be done in almost all types of soil, especially in dry, loosely cohesive soil. Otherwise, when you pull the planter out of the ground, the soil crumbles and remains in place. The release of the soil-monolith from the planter is done by opening the doors by bringing the handles closer to each other. The holes are made 10-12 cm deep. This depth is sufficient to completely embed the root system of the seedlings into the soil with a planter. The peat humus pot should be immersed 2-4 cm below the surface of the earth.
The depth of the hole depends on the type and condition of the soil, and on the force with which the planter is immersed. On well-cultivated soil, the planter can be immersed to the desired depth only with manual effort. On somewhat compacted soil, the planter is immersed by applying pressure with the foot. When planting, it is very important to maintain straightness in the rows, this is achieved with the help of a cord.
The photo shows a planter in operation
To maintain the same distance between plants in longitudinal rows (along the cord) and obtain straight transverse rows, when making holes in the first and second longitudinal rows, markings are made with a certain measure to establish a given distance in the rows. For early cabbage, for example, this distance is set between the rows at 50 cm and in the rows also 50 cm. On the third and subsequent longitudinal rows, marks are not necessary, since you can be guided by the plants planted on the two previous longitudinal rows. This way you can get exact squares.
Transplanting plants with a clod of earth
It is very important that a plant being planted in another place has the same soil around its roots where it previously grew. Transplanting plants with soil is easily achieved with the manual planter we recommend, for example, replanting strawberries.
It's done like this. In the place where the plants are to be transplanted, holes are first made with a planter, and at this time, in the area from which the plants are transplanted, a hole is dug with a planter. In this case, the aboveground organs of the transplanted plant are placed between the valves and in this position the planter is immersed in the ground.
Rice. 3. Transplanting plants with a clod of earth
Then, by slightly squeezing the flaps, the planter is turned half a turn to the right and left, and the plant is pulled out along with the ground. Carefully, in order to maintain the shape of the pots, the dug plants are placed in a box and transferred to a new place where the holes have already been made. Otherwise, the process of planting and embedding is no different from planting seedlings in peat pots from greenhouses into open ground.
Planter with beveled edge and long handle
This type of planter was created specifically for digging holes for small bulbs without bending over. It differs from a conventional planter with two handles in the shape of the planting cone (a cylinder beveled at the top) and the presence of only one leg support.
Advantages : comfortable position for work, relatively light weight, it is possible to work with small bulbs.
Disadvantages : not suitable for creating holes for medium and small bulbs.
Bulb planter with two handles
gardensillustrated.com
This tool works on the principle of forceps. At the end there are two curved metal plates, similar to small sharp blades, which, when closed, form a cone. When opened, the device is driven into the ground, rotated several times around its axis, and then carefully removed along with the lump of earth.
These tongs will become an indispensable assistant in a neglected area. After all, with their help you can make holes even in the turf. They will also become indispensable when digging up bulbs after flowering.
Advantages : comfortable body position during planting, versatility, ability to “cut through” the heaviest soil.
Disadvantages : Muscular force is required, the mechanism requires careful handling.
Operating principle of a seedling planter.
You can use a hand planter to make holes for planting seedlings.
To do this, the planter handles need to be spread apart, with the shovels closing into a cone, then the planter needs to be immersed in the soil. If the soil is loose, then this can only be done with the help of your hands; if it is hard, then you may have to additionally step on the shovels with your feet.
Then you need to turn the planter half a turn in different directions and take it out with a lump of earth, the hole is ready.
Planting seedlings with a planter is as follows.
We immerse the planter in the soil with seedlings, turn the planter half a turn to the right and left. We move the planter's handles to the sides and pull out the seedlings with a lump of earth, then we immerse it in a previously prepared hole and bring the handles to the middle, thereby freeing the lump of earth with the sprout.
I recommend watching a video that shows a seedling planter in action.
Popular homemade products on our website
- Do-it-yourself lawn mower: drawings, photos, videos
- Do-it-yourself tricycle: drawings, photos, videos
- Homemade potato planter for walk-behind tractor: drawings,…
- DIY potato planter
- Stove from a 200 liter barrel: diagram, drawings, photos, videos
- Rocket stove from a gas cylinder: drawings, photos, videos
- Making a wattle fence with your own hands: photos, videos
- Do-it-yourself ZIL compressor: photo, description, video
- Do-it-yourself summer shower at the dacha: photo, video
- DIY hovercraft: photo, video
- Do-it-yourself motorized dog: assembly photo, test video
- Do-it-yourself furnace: photo, video and description
- Do-it-yourself chicken coop for 5 chickens: drawings, photos
- DIY folding table: drawings, photos
- DIY chair with backrest drawings, photos
Attachment for a screwdriver or drill
personeriacota.com.co
If time is running out and you need to plant a large number of bulbs in the shortest possible time, then the best solution to the problem is to use special attachments for a drill or screwdriver. Some of them look like smaller copies of an earth drill, others look more like hand-held cone planters.
Advantages : it is possible to choose the diameter of the nozzle depending on the size of the hole to be drilled; does not require much storage space.
Disadvantages : you need an additional tool (screwdriver or drill); while working you have to squat or bend over; there is no earthen ball with which to cover the planted bulb.
Purpose
The universal manual planter is used to perform the following operations:
- Making planting holes in the soil for planting seedlings of cabbage, tomatoes, industrial crops (shag), flowers, grains (corn) and other agricultural crops in nutritious peat-humus pots and without them.
- Transplanting plants with a clod of earth from one place to another (onions, strawberries and other perennial crops).
- Using a planter to make earthen pots from turf for sowing and growing seedlings of cucumbers and other agricultural plants in them, i.e., for taking soil monoliths in the form of turf (earthen pots) in meadows and floodplains.
The planter has the following positive advantages. It is simple in design, so you can make it yourself.
The planter consists of two ordinary quadrangular iron shovels. The dimensions of the holes she makes ensure painless survival of the planted plants. The hand planter is durable, versatile and convenient as a tool, in addition to being easy to work with. Compared to an ordinary shovel or a planting scoop, it provides significant productivity and a great economic effect.
Photo of the planter