Design and use of calipers
The most popular areas of application for calipers are construction, repair of machinery and equipment, processing of metal and wood products. The scope of application has virtually no restrictions - it can be used to determine dimensions with an accuracy of 0.1 or 0.05 mm (depending on the type of tool) in any field of activity - both in everyday life and in the aerospace industry. Application possibilities are limited only by the scale size and accuracy requirements (up to 0.01 mm for electronic calipers).
Read also: CLINICAL PHARMACOLOGY OF LECITHIN
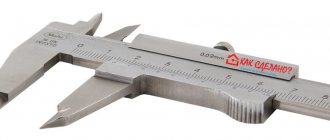
The design of a caliper is quite simple. The main element is a fixed rod with a scale and jaws for external and internal dimensions, to which movable and fixing elements are attached.
- Mobile frame;
- Movable jaws to determine the internal size;
- Movable jaws to determine the outer size;
- Vernier scale;
- Depth gauge rod;
- Screw for fastening the frame.
Some models may have a moving scale at the top with an inch measurement system.
Specifications
The permissible error limits of the caliper at any point in the measurement range at ambient temperature (20±5)°C correspond to the values given in
table 4.
Overall dimensions and weight of calipers are given in tables 5,6,7. Table 4
| Measuring length. mm | Limit of permissible error of calipers (±). mm | |||||||
| At the reading value according to the vernier. mm | With the value of division of the circular scale of the reading device. mm | With discreteness step of a digital readout device. mm | ||||||
| 0.05 | 0.1 for accuracy class | 0.02 | 0.05 | 0.1 for accuracy class | 0.01 | |||
| 1 | 2 | 1 | 2 | |||||
| Up to 100 Over 100 to 200 | 0.05 | 0.05 | 0.10 | 0.03 | 0.04 | 0.05 | 0.08 | 0.03 |
| Over 200 to 300 | 0.04 | 0.04 | ||||||
| Over 300 to 400 | 0.10 | — | — | — | — | |||
| Over 400 to 600 | 0.10 | — | 0.05 | |||||
| Over 600 to 800 | 0.06 | |||||||
| Over 800 to 1000 | 0.07 | |||||||
| Over 1000 to 1100 | — | 0.15 | — | |||||
| Over 1100 to 1200 | 0.16 | |||||||
| Over 1200 to 1300 | 0.17 | |||||||
| Over 1300 to 1400 | 0.18 | |||||||
| Over 1400 to 1500 | 0.19 | |||||||
| Over 1500 to 2000 | 0.20 | |||||||
| № | Modification | Weight, kg, no more | Overall dimensions, mm, no more |
| 1 | ШЦ-1-135-0.05 | 0,2 | 215x75x8 |
| 2 | ШЦ-1-135-0.1 | ||
| 3 | ШЦ-1-160-0.05 | 0,3 | 245x75x8 |
| 4 | ШЦ-1-160-0.1 | ||
| 5 | ШЦ-1-250-0.05 | 0,45 | 365x87x8 |
| 6 | ШЦ-1-250-0.1 | ||
| 7 | ШЦ-11-400-0.05 | 1,05 | 560x180x15 |
| 8 | ШЦ-11-400-0.1 | ||
| 9 | ШЦ-11-500-0.05 | 1,15 | 640x180x15 |
| 10 | ШЦ-11-500-0.1 | ||
| 11 | ШЦ-11-250-630-0.05 | 1,7 | 800x265x15 |
| 12 | ШЦ-11-250-630-0.1 | ||
| 13 | ШЦ-11-250-800-0.05 | 2,1 | 1060x265x15 |
| 14 | ШЦ-11-250-800-0.1 | ||
| 15 | ШЦ-11-320-1000-0.05 | 3,2 | 1260x265x15 |
| 16 | ШЦ-11-320-1000-0.1 | ||
| 17 | ШЦ-11-500-1250-0.1 | 4,1 | 1520x385x15 |
| 18 | ШЦ-11-500-1600-0.1 | 4,7 | 1880x385x15 |
| 19 | ШЦ-11-800-2000-0.1 | 5,2 | 2260x385x15 |
| 20 | ШЦ-111-500-1250-0.1 | 4,1 | 1520x300x15 |
| 21 | ШЦ-111-500-1600-0.1 | 5,0 | 1880x300x15 |
| 22 | ШЦ-111-800-2000-0.1 | 6,25 | 2260x300x15 |
Table 6
| № | Modification | Weight, kg, no more | Dimensions, mm, no more |
| 1 | TTTTTK-T-125-0.02 | 0,22 | 205x75x18 |
| 2 | TTTTTK-T-125-0.05 | ||
| 3 | ShTsK-T-125-0.1 | ||
| 4 | ShTsK-T-135-0.02 | 0,25 | 215x75x18 |
| 5 | ShTsK-T-135-0.05 | ||
| 6 | ShTsK-T-135-0.1 | ||
| 7 | ShTsK-T-150-0.02 | 0,3 | 230x75x18 |
| 8 | ShTsK-T-150-0.05 | ||
| 9 | ShTsK-T-150-0.1 | ||
| 10 | ShTsK-T-160-0.02 | 0,32 | 245x75x18 |
| 11 | ShTsK-T-160-0.05 | ||
| 12 | ShTsK-T-160-0.1 | ||
| 13 | ShTsK-T-200-0.02 | 0,4 | 350x85x18 |
| 14 | ShTsK-T-200-0.05 | ||
| 15 | ShTsK-T-200-0.1 | ||
| 16 | ShTsK-T-250-0.02 | 0,5 | 365x85x18 |
| 17 | ShTsK-T-250-0.05 | ||
| 18 | ShTsK-T-250-0.1 | ||
| 19 | ShTsK-T-300-0.02 | 0,55 | 415x110x18 |
| 20 | ShTsK-T-300-0.05 | ||
| 21 | ShTsK-T-300-0.1 |
| № | Modification | Weight, kg, no more | Overall dimensions, mm, no more |
| 1 | TTTTTTTTT-T-125-0.01 | 0,16 | 220x78x25 |
| 2 | TTTTTTTTT-T-135-0.01 | 0,165 | 220x78x25 |
| 3 | TTTTTTTTT-T-150-0.01 | 0,18 | 240x78x25 |
| 4 | TTTTTTTTT-T-160-0.01 | 0,185 | 250x78x25 |
| 5 | TTTTTTTTT-T-200-001 | 0,19 | 260x85x25 |
| 6 | TTTTTTTTT-T-250-001 | 0,22 | 305x85x25 |
| 7 | TTTTTTTTT-T-300-001 | 0,25 | 355x85x25 |
| 8 | TTTTTTTTT-TT-160-001 | 0,2 | 250x75x25 |
| 9 | TTTTTTTTT-TT-200-001 | 0,22 | 260x85x25 |
| 10 | TTTTTTTTT-TT-250-001 | 0,3 | 355x115x25 |
| 11 | TTTTTTTTT-TT-300-001 | 0,4 | 400x130x25 |
| 12 | TTTTTTTTT-TT-400-001 | 1,1 | 480x155x25 |
| 13 | TTTTTTTTT-TT-500-001 | 1,15 | 580x200x30 |
| 14 | TTTTTTTTT-TT-250-630-001 | 1,7 | 710x240x30 |
| 15 | TTTTTTTTT-TT-250-800-001 | 2,15 | 880x240x30 |
| 16 | TTTTTTTTT-TT-320-1000-001 | 3,25 | 1100x240x30 |
| 17 | TTTTTTTTT-TTT-160-001 | 0,18 | 250x50x25 |
| 18 | TTTTTTTTT-TTT-200-001 | 0,185 | 260x63x25 |
| 19 | TTTTTTTTT-TTT-250-001 | 0,2 | 305x80x25 |
| 20 | TTTTTTTTT-TTT-300-001 | 0,22 | 355x100x25 |
| 21 | TTTTTTTTT-TTT-400-001 | 1,05 | 580x140x25 |
| 22 | TTTTTTTTT-TTT-500-001 | 1,1 | 680x160x30 |
| 23 | ShTsTs-TTT-250-630-0.01 | 1,65 | 710x200x30 |
| 24 | ШЦЦ-ТТТ-250-800-0.01 | 2,1 | 880x200x30 |
| 25 | ShTsTs-TTT-320-1000-0.01 | 3,2 | 1100x200x30 |
The division price of the TTTC modification is 0.05 or 0.1 mm.
The division value of the reading circular device of the ШЦК modification: 0.02, 0.05, 0.1 mm. Discrete step of the digital reading device of the TTTTTTS modification: 0.01 mm. Operating conditions:
Operating ambient temperature range from 10 °C to 40 °C;
Relative air humidity no more than 80% at a temperature of 25 °C;
Average service life is at least 3 years.
Training on the use of calipers, learning to read readings
At the initial stage, before measuring manipulations, it is necessary to clarify the accuracy class of the device. Allows you to verify that the specified error value is acceptable. The higher the error value, the lower the instrument’s accuracy class.
To measure the outer diameter of a part, you need to spread the jaws and then tightly align them with the walls of the workpiece being measured. This can be any part, for example, a drill or a piston. When the jaws are in tight contact with the walls of the part, you need to use the clamping screw to fix the movable bar in a stationary position. Next, you can remove the part and begin calculating the values.
- The scale on the fixed bar shows the whole value in millimeters
- To find out the size of the part in millimeters, you should look at the moving scale. The first mark on the moving scale will align with a certain value on the fixed one. This is the corresponding value in mm, for example, it turns out to be 15 mm
- Often such readings are sufficient, for example, when you need to know the diameter of a drill. If you need to find out tenths or even hundredths of millimeters, then we proceed to further calculations
- To do this, look at the vernier scale of the moving frame. You need to find a mark on the vernier that exactly matches the mark on the fixed bar. Moreover, here it is necessary to find out the exact coincidence of the risks
- If it falls on value 5 (vernier scale), then it turns out that the tenth value is 0.5 mm, and we get the part size of 15.5 mm. The value 5.5 on the vernier scale may coincide, which means a value of 15.55 mm. It all depends on the accuracy class of the measuring device used
Measurement order
Now let's talk about how a caliper works. Before you start using it, you need to prepare the device and the part being measured: clean the surface of dirt to ensure maximum accuracy. The jaws need to be brought together tightly and the size of the gap between them needs to be assessed. If the design is working properly, then it will be minimal.
Next, the movable frame must be moved so that its first mark coincides exactly with the zero mark on the rod scale. If this is not taken into account and implemented, the results will not be accurate. If you cannot match these marks, then the caliper is faulty and is not recommended to be used. Only after making sure that the structure is completely prepared can you begin to work.
Measuring external surfaces
When it is necessary to measure a linear dimension or outer diameter, the sequence of using the tool is as follows. First of all, the sponges need to be spread apart by moving the frame. And then press them tightly against the opposite surfaces of the part that needs to be measured, and secure the position of the frame with a screw. If the outer diameter of a cylindrical part is measured, then its axis must be exactly perpendicular to the plane of the frame. If the length of a part or product is measured, then its longitudinal axis should be located exactly parallel to the rod. These conditions must be observed when using a caliper, otherwise it is impossible to obtain accurate results.
Measuring external surfaces with calipers
Measuring internal surfaces
If you need to measure the diameter of the hole, the outer jaws must be set to zero. They must be inserted into the hole that needs to be measured. It is necessary to hold the caliper straight. Next, the jaws need to be spread all the way, so that they are pressed tightly against the inner walls of the part. Secure their position using the locking screw. Then readings are taken and the necessary calculations are made if a vernier caliper was used.
Measuring internal surfaces with calipers
Depth detection
To measure the depth of the hole, you will need to move the frame and extend the depth gauge. Then insert it all the way into the hole so that the end touches the bottom. It must be positioned exactly perpendicular to the surface of the part being measured. Press against the wall. Move the bar to the end also until it stops. Using the locking screw, secure the position and remove the device.
Measuring depth with a caliper
Measuring threaded connections
A caliper can be used to measure threaded connecting parts - screws, bolts, etc. Thread diameters are determined by the protrusions. For this purpose, the screw or bolt to be measured should be installed vertically and clamped with jaws. After this, it is possible to determine the necessary indicators.
If you need to measure the thread pitch using a caliper, this is done in the following sequence. First, the height of the rod and the outer diameter of the part are measured. And then the number of thread turns is counted. By dividing the length of the rod by the number of turns, you can get the thread pitch indicator.
Measuring threaded connections with a caliper
How to take readings using a caliper
Before starting work, it is necessary to check the caliper for accuracy. To do this, you need to completely bring the jaws together and check that the zeros on both scales match. If there is no coincidence, then, depending on the required accuracy, it is necessary to either take another tool or take into account the existing error.
During the measurement process, consider the following recommendations:
- To measure the external size, spread the jaws of the caliper, place the object and connect them.
- Measuring the internal size is carried out by placing the corresponding upper jaws inside the measured area and moving them apart until they stop
- The jaws should rest against the edges of the part. If the surface is hard, then you can squeeze it a little for a tight fixation; for a soft one, this should not be done, as the result can be distorted.
- Check the position of the caliper relative to the part being measured for any distortions. To do this, the jaws must be located at the same distance from the edge of the part.
- Secure the vernier with the mounting screw.
- Determine the whole number of millimeters on the main scale.
- We find the coincidence of the stroke on the vernier with the zero of the main scale and count the number of divisions.
- We multiply the number of divisions of the vernier by the value of the division and sum it with the value of the main scale.
Using a caliper to measure correctly
For precise metal work, when designing various kinds of home-made structures, one cannot do without precise measurements. The most convenient tool for determining linear dimensions with sufficient accuracy is a caliper. They are produced at specialized tool factories (according to GOST 166-89) with careful adherence to technology, and therefore are reliable and easy to use.
Measuring with a caliper
How to correctly measure external surfaces with calipers
To take the external dimensions (thickness), you need to separate the jaws of the caliper, place the object being measured between them, then move the jaws and squeeze them slightly. The measuring edges must be parallel to the surface of the workpiece. The division on the main scale of the caliper, combined with the zero mark of the additional scale, will indicate whole millimeters. The line that coincides on the vernier with the line on the rod determines tenths of a millimeter.
ACCEPTANCE
3.1. To check the compliance of calipers with the requirements of this standard, state tests, acceptance inspection, and periodic tests should be carried out.
(Changed edition, Amendment No. 2).
3.2. State tests - according to GOST 8.383* and GOST 8.001*. ________________ * PR 50.2.009-94** applies on the territory of the Russian Federation. ** The document is not valid on the territory of the Russian Federation. The procedure for testing standard samples or measuring instruments for the purpose of type approval, the Procedure for approving the type of standard samples or the type of measuring instruments, the Procedure for issuing certificates of approval of the type of standard samples or the type of measuring instruments, establishing and changing the validity period of these certificates and the interval between verifications of measuring instruments are in effect. , Requirements for approval marks of the type of standard samples or the type of measuring instruments and the procedure for their application, approved by Order of the Ministry of Industry and Trade of Russia dated November 30, 2009 N 1081. - .
Checking the errors of calipers at a temperature of (20±10) °C is carried out only during state tests.
3.3. During acceptance inspection, each caliper is checked for compliance with the requirements of clause 1.3; 1.4; 1.6; 1.8; 2.3-2.10; 2.12.4; 2.16; 2.18; 2.25; 2.26.
3.4. Periodic tests are carried out at least once every 3 years on at least 3 calipers of each standard size from those that have passed acceptance control for compliance with all the requirements of this standard.
Test results are considered satisfactory if all samples meet all tested requirements.
(Changed edition, Amendment No. 2).
3.5. (Deleted, Amendment No. 2).
Differences between a caliper and a micrometer
Calipers have direct relatives - micrometers. A caliper differs from a micrometer in that it allows you to obtain more accurate measurements. If a caliper can be used to calculate the size of a workpiece down to hundredths of millimeters, then a micrometer allows you to find out the value down to thousandths of millimeters. The main distinguishing features of a caliper from a micrometer are:
- Device design
- Accuracy of obtained values
- The presence of a device that prevents deformation of the part being measured on micrometers. Vernier calipers do not have such a device, which reduces the measurement accuracy class
- The ability to find out the size of thin wire and other similar parts, which is impossible to do with a caliper
If you need to measure the thickness of a brake disc, then to obtain accurate results it is recommended to use a micrometer rather than a caliper. If a micrometer is not available, then you can find out the amount of wear on the brake disc using a caliper, but additionally using measuring probes.
This is interesting! The brake disc has uneven wear around its circumference, so wear deviations can only be determined with high accuracy using a micrometer.
How to properly store a tool
To extend the life of your caliper, it must be stored properly. To do this, you should use a special case. It is recommended to periodically wipe the surface of the device with a soft cloth to remove dirt. If used frequently, it does not require additional protective measures. If you use it rarely, then you need to treat it with machine oil. It is necessary to avoid exposure to moisture and sunlight and mechanical damage - impacts, scratches, etc.
Storing the caliper
A caliper is a tool that is often required by both professional craftsmen and amateurs. If you need to take measurements frequently, you will need to purchase such a device. When choosing the right model, the user should be guided by the specifics of the work, taking into account the design features and cost of such tools.
Taking readings
Measuring with a Vernier Caliper Dial Caliper
Digital caliper
Based on the method of taking readings, calipers are divided into:
- vernier,
- dial - equipped with a dial for convenience and speed of taking readings,
- digital - with digital display for error-free reading.
The order of caliper readings on the rod and vernier scales:
- count the number of whole millimeters, to do this, find on the rod scale the stroke closest to the left to the zero stroke of the vernier, and remember its numerical value;
- They count fractions of a millimeter, to do this, find the stroke on the vernier scale that is closest to the zero division and coincides with the stroke of the rod scale, and add its serial number and the price of the vernier division (the price of the vernier division is calculated by the formula: the price of the main scale division divided by the number of vernier strokes) , for the most common ShTs-1 calipers, the vernier division price is 0.1 mm.
- calculate the full value of the caliper reading by adding up the reading on the main scale (the number of whole millimeters) and the reading on the vernier scale (fractions of a millimeter).
Special calipers
Vivid examples of specialized models:
Marking
With sharpened carbide jaws and a special compass mechanism.
In addition to taking measurements, it allows you to draw arcs directly with sponges on solid material.
Marking calipers are similar to options without a compass mechanism with jaws based on hard alloys.
Price – from 2.5 thousand rubles.
For brake discs (ШЦЦД)
Design with one-sided elongated jaws for external measurements, which have teeth on the working surface to increase the accuracy of measurements.
There are options that allow you to determine the thickness of brake discs on cars and motorcycles without the need to dismantle the wheel.
The cost of the simplest models is about 1 thousand rubles.
Traveler
To measure the parameters of the rail surface.
Price – from 20 thousand rubles.
Analogs of calipers include the following measuring instruments:
Vernier depth gauge
A tool designed to measure depths and heights of blind holes, protrusions, grooves, and grooves.
Shtangenreysmas
A tool that allows you to measure heights without specialized skills and make vertical markings of parts with an accuracy of 0.05 mm.
Another name is height gauge.
Vernier depth gauges
As the name suggests, depth gauges are designed to measure the depth of grooves, recesses and holes. In addition, using depth gauges, you can determine the height of various ledges on the product.
Vernier depth gauges (see Fig. 3) are not fundamentally different from calipers. In essence, a vernier depth gauge is a caliper, structurally adapted for the convenience of linear measurements of hard-to-reach internal dimensions of products. The working surfaces of the rod depth gauges are the end surface of the rod and the measurement base - the lower surface of the base.
Like all vernier tools, vernier depth gauges are manufactured with a bar scale reading (equipped with a vernier), with a dial reading and with a digital readout.
Types of calipers
There are three main types of such devices. Their use for a certain type of work is determined by its characteristics.
- Vernier or analog calipers. Measurements are made on a vernier scale. These power tools are simple and inexpensive. They are the most common.
- Dial or pointer calipers. To measure, instead of a scale, they have a dial that shows the results and does not require calculations. Their cost is higher than analog models. They are easy to use.
- Digital or electronic calipers. These are devices that have liquid crystal digital displays with rechargeable batteries. The use of such devices allows you to obtain the most accurate results. They show data in both millimeters and inches.
In addition to those listed, there are also models of special-purpose calipers. They are used for special jobs. For example, ШЦЦП, which measures parts with protrusions, or ШЦЦП - a design for measuring the tread pattern of tires, etc. These devices are not sold in regular stores; if necessary, they can be purchased on special websites. They are used by professional craftsmen.
All types of calipers have their own designations depending on the specific application.
- Vernier caliperSHTs-1. They measure parts, their external and internal dimensions using two pairs of sponges. It can also be used when measuring the size of a hole using a depth gauge.
- ShTs-1S. Such devices are equipped with arrow heads, making the measurement process simplified.
- Shtsk. Designs with a dial scale with a spring mechanism. It can be used for measurements when perfect accuracy is not required.
- SCT-I. Devices equipped with carbide-coated jaws to prevent surface abrasion. They are resistant to wear and can be used for a long time.
- SHTs-II. In addition to the jaws, such devices also have a mechanism for feeding the frame. Thanks to this, markings can be applied.
- SHTs-III. This device is large in size. The jaws on it are one-sided. Not suitable for depth measurement.
- SCC. A device with a digital scale from which readings are taken.
Each type of caliper is manufactured in accordance with the currently valid GOST 166-89 and is marked accordingly.
Download
Reading results
It is not difficult to read the results obtained using a caliper. On the fixed frame (bar), where the main scale is located, determine the integer number (mm). The vernier scale shows hundredths of a millimeter. You need to find the line of the vernier scale on the caliper you are using that matches a certain number on the main scale. This indicator will be the value of the part size in millimeters.
Vernier scale
It happens that when measuring, a whole indicator is sufficient. If you want to set the value more accurately, you need to inspect the vernier scale. And on it you need to find the point of coincidence of the two marks. The number on the vernier scale will indicate the tenth value. By adding it to an integer, the user will receive the exact size of the part.
Reading the result by vernier
By hourly indicator
When using a dial caliper, the whole number in millimeters can also be seen on the main scale. As on an analog device, it is determined by the coincidence of marks on both scales. The number presented on the dial shows a value from 0.01 to 0.99 mm, this depends on the value of the scale division. A pointer or dial caliper is a more accurate device than a mechanical (analog) one. It should be used when it is necessary to obtain perfectly accurate data.
Reading results on a pointer caliper
By digital display
High-precision (up to hundredths of millimeters) readings of the results obtained when working with a digital caliper are presented on the liquid crystal display of the scoreboard. It is necessary to remember that it has different modes that show measurement results in both millimeters and inches. Such devices are also equipped with a vernier scale. It can be used if, for example, the battery runs out.
Technical condition and verification of calipers
One of the most important requirements for ensuring the accuracy of a tool is its cleanliness. A magnetized layer of metal filings, preservative lubricant, dirt - all this can significantly distort the measurement result. The result is also affected by tool wear, deformation, and settings violations. To avoid this, it is necessary to have the caliper checked annually at a specialized service center with repairs and adjustments. The simplest check for the correctness of the readings is the coincidence of the zero strokes when the jaws are completely closed.
CONTROL AND TEST METHODS
4.1. Verification of calipers - according to GOST 8.113 and MI 1384.
4.2. When determining the influence of transport shaking, an impact stand is used, which creates shaking with an acceleration of 30 m/s at a frequency of 80-120 beats per minute.
The calipers in the package are attached to the stand and tested with a total number of impacts of 15,000. After testing, the error of the calipers should not exceed the values specified in Table 3.
It is allowed to test calipers by transporting them on a truck at a speed of 20-40 km/h over a distance of at least 100 km along a dirt road.
4.3. The impact of environmental climatic factors during transportation is determined in climatic chambers in the following modes: at a temperature of minus (50±3) °C, plus (50±3) °C and at humidity (95±3)%. Exposure in the climatic chamber for each of the three types of tests is 2 hours. After the tests, the error of the calipers should not exceed the values indicated in Table 3.
It is allowed, after holding the calipers in each mode, to keep it under normal conditions for 2 hours.
