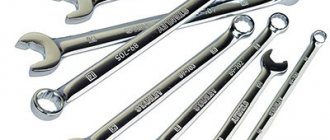
The turn has come to the control calibration log of torque wrenches. Compared to a general work log, or a log of concrete work or welding work, no one knows how to fill out this log. To be honest, most foremen have no idea how to do this correctly. But in today’s article we will try to explain in great detail how to properly design this magazine.
Wood and metal processing
All limit and torque wrenches must be calibrated before work, i.e.
At the limit keys, tighten the spring so that the key turns off exactly at the set torque. For torque wrenches, the arrow readings on the scale must correspond to the actual values of the torques applied to the handles.
There are several calibration methods. Let's look at the simplest of them.
Calibration of keys by applying different weights can be carried out in two ways, having approximately the same degree of accuracy.
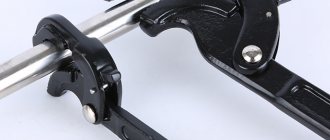
First way. In a parallel vice, you need to clamp the bolt in a horizontal position, put the head of the key to be parried on it, and place a support under the key.
After this, a pipe with a movable load should be put on the wrench knob. Then install the load at such a distance from the center of the key that the product of the length of the arm I (in meters) by the weight of the load G (in Newtons or kgf) is equal to the moment M (in N-m or kgf-m) to which the key should be adjusted , i.e.
To tighten the nuts of the connecting rod bolts of the SMD -60 engine, for example, a torque M = 16 kgf-m is required, i.e. 1-G =16 kgf-m. Then arm I can be 1 m long, and load G can weigh 16 kgf or 1 = 2 m, and G = 8 kgf, etc.
Second way. The torque wrench (Fig. 1, 6) should be installed on a support (bracket), and its head should be placed on the adapter mounted on the pulley axis. After this, gradually changing the load - setting different amounts of weights, apply the required moments to the key (or torque, if the limit key is countered).
The last operation when setting up the key will be to compare the scale readings (for torque wrenches) with the actually applied torques or to adjust the spring tension (for limit keys) of the key so that under the influence of the applied torque of the required value, the key clutch begins to open.
Taring of keys using a device with an elastic rod. The device consists of a body (Fig. 1, c), in which an elastic rod is fixed at one end, and a bolt rests against its free end. First, the device itself is adjusted, for which a bolt is screwed into the hole body with a reference (torque) wrench, and at the same time, the amount of deflection of the rod is determined using the indicator head. Draw up a table and note in it the amount of deflection and the corresponding moments applied to the bolt.
Now, if you need to calibrate any wrench, you should find in the calibration table the required amount of deflection of the rod, corresponding to the moment at which the wrench should turn off, and install the adjusting nut of the wrench so that when this deflection value is reached, the wrench will be turned off.
Taring of keys using a device with a ball. The device consists of a body (Fig. 1, d), an insert, a screw, a steel ball and a polished steel plate.
First, this device, like the one described above, needs to be adjusted with a reference (torque) wrench, i.e. screw in the screw with a specified force corresponding to the end of the tightening of the threaded connection. In this case, the steel ball will be pressed into the tile and leave a hole - an imprint.
Then you need to press the ball a second time in another place, tightening the screw with the key to be calibrated. After this, by measuring the diameters of the two prints, you can judge whether the key is adjusted correctly. The key spring must be tightened so that the resulting prints have the same diameter.
Source: pereosnastka.ru
How to use a torque wrench
Today, a torque wrench is one of the most common devices in the field of repairing various equipment. What is a torque wrench used for? The tool is needed in order to transfer the necessary force to the fastener, which ensures reliable fixation of the fastened parts. Despite the fact that this device has been used for about 100 years in various fields of activity where threaded connections are found, some people have a question about how to use a torque wrench correctly.
Calibration of torque wrenches
09.07.2013, 15:34
| 09.07.2013, 14:55 | #1 |
| #2 |
Equipment for excavation of mine workings, POS, standard control, KR, AR
| 4.26. The bolt tension specified by the design should be ensured by tightening the nut or rotating the bolt head to the calculated tightening torque, or by turning the nut at a certain angle, or in another way that guarantees that the specified tension force is obtained. The tensioning order should prevent the formation of leaks in the bags being tightened. |
4.27. Torque wrenches for tensioning and monitoring the tension of high-strength bolts must be calibrated at least once per shift in the absence of mechanical damage, as well as after each replacement of the control device or repair of the wrench.
4.28. The design torque M required to tension the bolt should be determined by the formula M = KPd, H m (kgf m), (1) where K is the average value of the torque coefficient established for each batch of bolts in the manufacturer’s network certificate or determined at the installation site using control devices; P—calculated bolt tension specified in the working drawings, N (kgf); d—nominal bolt diameter, m.
| E.4 The torque coefficient is determined by measuring the actual torque applied to the nut at the moment the bolt body reaches the specified tension force. The torque coefficient K is determined by the formula K = 1000 M / (N*d) where M is the actual torque applied to the nut, creating a standard tension force in the body of the bolt, Nm; N is the standard bolt tension force, taken according to table E.1, N; d is the outer diameter of the bolt thread, mm. |
The values of standard tensile forces for bolts of various strength classes are given in Table E.1. Table E.1 - Standard bolt tension for determining the torque coefficient.
E.5 For testing, it is allowed to use testing equipment that allows simultaneously recording the torque applied to the nut and the tension force occurring in the body of the bolt, regardless of the principle of operation of the equipment and the method of recording these characteristics. It is allowed to determine the specified characteristics by calculation based on direct measurements of other indicators related to the determined characteristics by scientifically based analytical dependencies.
The error in measurements or determination of characteristics should be no more than: tension force ±1%; torque ±5%.
E.6 When testing, a torque should be applied to the nut. The nut is tightened smoothly, without jerking, at a speed of no more than 10 rpm. When tightening the nut, the bolt head and the washer under the nut should not turn.
There is a difference between SNiP and GOST. In SNiP it is the nominal diameter, and in GOST it is the outer diameter of the thread. I don’t know how to be here yet. This is a big question.
In fact, it is necessary to carry out X number of tests until the specified measurement error is achieved. I am not familiar with the methodology for determining the error based on the number of tests. Or rather, I don’t remember and I’m too lazy to remember. Look for yourself.
I suspect that in most cases the tests are falsified or the appropriate equipment is purchased (it just needs to be sold, although I haven’t looked) for calibrating the keys.
Source: forum.dwg.ru
How to use a click type torque wrench?
This type of wrench is the most common and popular tool among professionals and amateurs. There is no need to control the force values during operation. The principle of operation of a torque wrench is as follows: when a preset force value is reached, the wrench will make a click, which means the work is complete and the tool, while slipping, will not transmit more force to the fastener than was set on the tool’s scales.
In order to correctly use a click-type torque wrench, you need to know how to set the desired value using the main and auxiliary scales.
Snap type torque wrench operation manual:
- Unscrew the lock nut at the bottom of the key handle;
- Set the load value on the main vertical scale using the rotating handle. And if necessary, you need to set the torque value on an additional dial at the bottom of the handle to obtain the required force value. It turns out that the values are added up from both scales, fixing the final effort;
- We tighten the lock nut at the bottom of the key handle to fix the set force;
Now you know how to set the tightening torque on a torque wrench. Depending on the key option, the scales may have certain differences, for example, different division values, the type of scale design, or the designation of force in different measurement systems (N/m, Kg/m or in Foot-pounds lbf/ft). The AIST catalog contains various click limit wrenches.
It is necessary to tighten the threaded connection until the characteristic sound of the key, which notifies that the set force has been reached. When clicked, a special key mechanism lock will be activated, which will prevent more force from being transferred to the fastener than was set on the tool. After completing the work, it is necessary to set the key to the minimum value of the torque range and tighten the key lock.
We suggest watching the video instructions: “How to use a click torque wrench”
Torque wrench repair and calibration
In this article, the author will talk about how he repaired and calibrated his torque wrench that stopped working.
One day the author discovered that his torque wrench no longer “clicked.” The ratchet is broken. He cut the bolt. Since the key was quite cheap at the auto parts store, there was no point in sending it in for “warranty service.” Therefore, the master decided to disassemble it to look at the internal structure and find out how it works and try to repair it. The repair was even easier than he expected, and his key is now fully functional again.
Step 1: Wrench
As you can see, this is a torque wrench. Simply turn the knob to set the required force, which is engraved on the handle. To make sure you don't accidentally lose the adjustment while you're tightening something, there's a knob on the end that screws down to lock the adjustment.
With the switch, the ratchet snaps back like a regular ratchet wrench, but the click only applies in the direction of tightening.
This wrench should work like this: Set the desired force by turning the knob until the engraving on the knob matches your requirements. Turn the knob on the end to lock this adjustment. Then place the socket on the nut and tighten the bolt/nut until the wrench clicks into place.
Since this is a "precision" measuring device, it should only be used to measure force and tighten to the required torque. That is, you must first tighten the nut/bolt by hand, using another tool with a ratchet or a wrench.
The principle of its operation is quite simple: a ratcheting head is connected to a lever, held in place by a bearing resting on a notch in that lever under spring pressure. The higher this pressure, the greater the force required to overcome the resistance coming from the bearing exiting the recess. Once this force is achieved, the lever "breaks free" by "clicking" the other side of the wrench's main body.
Step 2: Disassembly
To disassemble, loosen the locking knob and unscrew the adjusting part of the handle until the spring weakens. Next, remove the calibration locknut that is located at the end of the handle. This is a large nut that screws into the gauge sleeve, which in turn screws into the handle.
Step 3: Disassembly Part 2
Remove the calibration sleeve from the handle. The bushing is a finely threaded metal cylinder with one closed end that connects to a piston that applies pressure to the spring.
By screwing more/less of it into the handle, the key can be calibrated. This works by adjusting the spring tension without adjusting the handle itself. This part also has holes for the pins that work with the locking handle assembly.
To remove the calibration sleeve from the handle, unscrew it by slowly turning the handle to a higher wrench torque setting.
Turning the handle should allow the sleeve to be unscrewed; the locking assembly may prevent this, so we turn the handle. Do not remove this part if there is NO pressure on the spring; otherwise the spring and everything it presses on will fall out.
Step 4: Disassembly Part 3
Now remove the locking handle and the entire adjustment assembly from the wrench body. As you can see in the picture, the locking handle, gauge sleeve and piston are designed to move up and down along a slot in the wrench body. There is a pin that holds the piston in place, keeping it from twisting and pulling out. The handle itself holds the pin in place during normal operation.
To disassemble this, you need to remove the handle. There is a screw in the piston that keeps the locking knob from being completely unscrewed. This also prevents the pins located in the calibration sleeve from falling out.
Once this retaining screw is removed, the locking handle can be completely unscrewed from the piston. Then the handle, calibration sleeve and piston can be separated from each other.
After removing the calibration sleeve, the handle can be completely unscrewed. Once the handle is removed, the pin holding the piston in place is easily removed. The remaining internal parts are then easily removed from the wrench body.
Step 5: Lock Handle and Ratchet
As the locking knob is tightened, it increases the pressure on the washer. This washer pushes 4 pins through the holes in the calibration sleeve to engage the slots inserted into the piston. Once tightened, the pins recess into the grooves, locking the gauge sleeve in place and, if the gauge locknut is in place, also locking the handle in place.
This is useful when calibrating a wrench, as you need to lock the locking handle to push the locknut back into place without turning the calibration sleeve nut (and thus losing the calibration you just set).
Looking at the other parts that have come free, you can see how the adjustment knob is simply putting more and more tension on the large spring. This spring pushes the roller bearing piece down, as well as the serrated end of the lever that extends from the head of the ratchet.
This lever is attached to the main body with a single pin, at the bottom near the head, creating a lever. The force you apply to the handle is transmitted through the spring and bearing to the lever. The more spring tension achieved by adjusting the handle, the greater the force on the bearing assembly, the greater the force required to force the bearing out of its notch and for the lever to “click” on the other side of the housing.
When the force is released, spring pressure pushes the bearing back into place, causing another “click.”
Everything is put together in reverse order. However, the main thing is to ensure that the bearing is installed in the correct orientation. The problem that caused the author to disassemble his wrench was that the spring tension had been released to the point that the bearing could slide freely inside the wrench, and actually turn, so it no longer sat in the groove, but instead just lay.
So the wrench stopped clicking. Before you reassemble the bearing, make sure you clean and re-lubricate it. Insert it so that the main roller bearing is aligned with the groove and the side with the ball bearings is against the inclined surface of the main arm. The slope of the bearing assembly must match the slope of the lever.
Then add the spring, piston, gauge sleeve, locking pins, washers, knob and locking screw, piston locking pin and knob. Do not touch the main locknut until we calibrate the wrench.
Step 7: Calibration
A torque wrench measures how much force is applied perpendicular to a lever at a known distance from the lever's pivot point. When tightening a bolt/nut, this force is the turning point. Measurements are usually in N*M or Ft-Lbs (sometimes Kg-M) or in Lb for smaller forces. To calibrate a torque wrench, you must set a known "torque" and adjust the wrench. It should click when the torque exceeds the known calibration point. Since the moment of force is Newton * meter, we'll just do a little math and adjust the lever and weight.
I used a wrench and locking pliers and 40 lb dumbbells to calibrate it. Locking pliers lock onto the head of a socket wrench and have a handle long enough to produce a known torque using a dumbbell. The dumbbell rests on the handle of pliers with a lock at a known distance from the center of the ratchet head (21 cm). This creates a moment of force 18 *0.21 = 3.78 kg/m = 37.07 N*m.
The entire assembly rests on a rounded head with a ratcheting mechanism, and you can try to lift the weight using a wrench. When the calibration is correct, the key will click right around 37.07 Nm when the weight barely lifts. Please note that this will not be completely accurate and if a specific and precise torque is required, an actual calibration setup should be used. And this method is the fastest and easiest way to get an accurate key in the field.
To do this, tighten the calibration sleeve to the middle of the handle. Set the knob to 37.07 Nm and check the torque. If the key clicks before the weight moves, move the handle away from the spring and retighten the gauge sleeve. If the weight can be lifted without a click, loosen the calibration sleeve. Repeat this process of lifting and adjusting until you can barely lift the weight. Once this setting is found, tighten the locking knob, then reinstall the main locknut and tighten it to lock the gauge sleeve in place. Your key should now return to normal.
Other calibration machines use a long rod attached to a socket that fits a wrench. The bar is horizontal and can be rotated on the ratchet head. The weight is then suspended from the end of the rope rod and a process similar to that described above is followed to set the calibration. More professional and accurate torque wrenches are simply suspended under their own weight and the dial displays the torque when light pressure is applied to the wrench.
Step 8: Ratchet Head
This part has little to do with the torque of a torque wrench. The wrench can be changed from measuring torque when tightening to measuring torque when loosening (or measuring torque for bolts and nuts with left-hand threads).
The ratchet head is held together by two screws that secure the plate to the main body. Once the screws are removed, the plate comes off easily, exposing the inside of the ratchet head. The ratchet operates on two rotating spring-loaded metal bars that interact with splines on the head itself.
A cam attached to the guide arm pushes back one bar to control the direction of rotation of the ratchet. Because a torque wrench only snaps in one direction, only one direction can measure torque. Another option is to use a torque wrench as a regular wrench (not recommended as this may throw it out of calibration).
To change the direction of the torque arm, simply remove the head and flip it over so that the head points to the other side of the wrench. This can be done since the holes in the plate and head are identical.
Source: usamodelkina.ru
How to tighten with a digital torque wrench?
This type of tool is similar to a limit key, but instead of a spring mechanism, a digital key uses an electronic “filling”, thanks to which force is measured. The principle of operation of a torque wrench: the required value is also set in advance, and when it is reached, the key emits a sound signal indicating the completion of the work. The digital display allows you to monitor changes in the applied force at a specific point in time.
The entire range of this tool is a measuring instrument, so the keys require careful storage and must be used strictly for their intended purpose.
Before purchasing a tool, we recommend that you read the material - Recommendations for choosing torque wrenches