grinder button for replacement
The angle grinder is ready for use only after pressing the start button (switch).
If it fails, it will be impossible to perform a certain amount of actions using it. Repair work needs to be carried out . It is usually quite difficult to repair the button itself due to contact burnout. More often than not, a broken button is simply replaced with a new one .
Angle grinder device
The start button is part of the design elements of the angle grinder, each of which performs its own specific task in ensuring the functioning of the power tool. The main ones, of which are the following:
- power cable for connecting the angle grinder to the network;
- stator – a stationary part of the electric drive, consisting of several excitation coils;
- anchor (rotor) – the moving part of the electric drive of the angle grinder;
- collector - part of the rotor, made in the form of insulated copper plates, providing a connection to the stator;
- brushes – provide sliding contact for transmitting current between the moving and stationary parts of the electric drive;
- gearbox - converts the rotation of the rotor created by electromagnetic interaction into spindle ;
- the design is protected from external influences by housings made of impact-resistant plastic for the electrical part and aluminum alloy for the gearbox;
- for ease of use, the grinder is equipped with a removable handle holder ;
- There are buttons on the body: an on/off button and a lock button for replacing the working tool.
Metabo W 750-125 angle grinder body, handle, shutdown and stop buttons (red and black). Photo 220Volt
Some power buttons have a soft start function, which makes the grinder more convenient and durable. There may be a speed regulator on the body, which significantly expands the functionality of the angle grinder with various materials.
Is it possible to do without it?
The latch is located in the front part of the body of the Hammer USM 850A angle grinder. Photo 220Volt
The locking button is a convenient attribute of the grinder for removing and replacing the working tool. It will serve faithfully for a long time if you follow some recommendations.
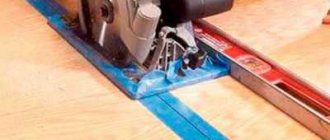
- Insert the working tool correctly. For example, the cutting wheel should be placed on the side facing the pressure washer that is made of the working material of the wheel. The side with the metal ring of the circle should be adjacent to the base surface of the angle grinder. A metal clamping nut will not have a strong grip on the material from which the circle is made; with a metal ring, the grip is much stronger (more theory on proper installation of discs is below in the video).
- Jamming will be greatly reduced by using paper or cardboard spacers under the pressure washer. Usually cardboard ones are supplied complete with an angle grinder. When destroying stocks, there is the option of using thin nylon gaskets. In case of jamming, in order to maintain the integrity of the locking button, it can be easily melted using a blowtorch and the pressure washer can be easily unscrewed.
If an accident does occur and the locking button on the angle grinder breaks, there are ways to remove the work tool without it.
READ How to Replace the Bearing in a Grinder Video
THE LOCKING RETAINER IN THE GRINDER IS BROKEN
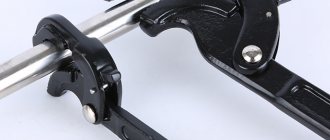
- On the working shaft of the angle grinder behind the base washer there are ground shaft surfaces for fixing the washer. Access to them is limited due to the narrow gap. If you grind down the jaws of a wrench (size 17 is usually suitable), you can get to the flat surfaces of the shaft and prevent it from turning. In some cases, it is recommended to remove the shaft and increase the width of the key planes so as not to damage the key by grinding off the jaws.
Grinder Metabo W 750-125 with black stop button. Photo 220Volt
- You can use a vice in a locksmith shop. To do this, the worn or broken circle is broken off flush to the surfaces of the clamping washers. This gives access to the gearbox cover bolts. They are easily unscrewed, the gear is removed from the gearbox and clamped in a vice with soft jaws. In this position, the clamping washer can be unscrewed with standard plumbing tools.
- Use a thin steel sheet (the thickness should be slightly less than that of the working tool). Remains of working tools are removed to the maximum extent possible. The sheet is clamped in the device and the remaining material is removed against its edge using a switched-on grinder. Thus, the load on the clamping nut is relieved and it can be unscrewed freely.
- The clamping washer can be heated, for example, with a gas torch or blowtorch. When heated, it becomes more pliable during the unscrewing process. However, strong heating of the entire mechanism negatively affects the lubrication of the gears of the gearbox - it becomes very liquefied and loses its properties.
- The method of unscrewing the nut by hitting it with a sharp object or with a hammer drill set to chiseling mode into the hole for the key pin looks less aesthetically pleasing, but allows you to achieve the desired result.
There are quite a lot of other methods that are not listed here, because grinders are used by craftsmen whose creativity knows no bounds.
Launch scheme
The design of the grinder, the energy source of which is electric current, is capable of converting it into mechanical. The interaction of all components of the angle grinder is shown in the schematic diagram for connecting its electric drive.
- Once the power cord is plugged into the outlet and the starter is turned on, electrical current is applied to one of the brushes.
- After passing through the commutator winding, the current appears on another brush , through which the stationary stator windings are supplied .
- The magnetic fields created by the stator and rotor windings interact with each other, causing rotation of the rotor mounted in bearings . Along with it, the torque occurs on the bevel gear mounted on the anchor. Another bevel gear, working in tandem with the first, rotates the spindle with the working tool of the angle grinder.
- Additional taps of the stator or rotor windings allow you to increase the functionality of the power tool by creating various control systems.
- Through the contacts of the commutator plates, signals about the rotor speed are transmitted to the tachogenerator or Hall sensor. With their help, the grinder maintains the required speed.
- To protect the angle grinder from overheating, there is a thermal protection unit. It turns off the tool if the sensor shows the maximum permissible temperature of the control surface of the angle grinder.
Scheme of operation of the grinder. Source here
Understanding the role of each of the elements included in the electrical circuit of the angle grinder allows you to correctly determine the cause of its breakdown. If the cord, button and brushes are in good condition, you should pay attention to the condition of the electric drive.
Where is the spindle lock button located on the angle grinder and how necessary is it?
The latch is a spring-loaded metal rod, on one end of which the button body is placed, and the other can fit into one of the holes in the body of the gearbox bevel gear. From the description it follows that the button should be located on the gearbox housing, not far from the spindle shaft.
By pressing the button and rotating the shaft, the locking rod gets into one of the holes on the gear. Holding the button in this position with one hand, unscrew/tighten the flat threaded washer that clamps the working tool with the other hand. The stationary spindle makes this operation possible.
Typical malfunctions of angle grinders and methods of diagnosis and repair
Do-it-yourself repair of an angle grinder begins with determining the cause of the breakdown. If it is not possible to determine the cause, then you should follow the method of eliminating breakdowns from simple to complex. For self-repair, it is necessary to first identify where the breakdown is located - in the electrical or mechanical part.
- Gearbox malfunction. The helical gear is mounted on the rotor shaft, so if the motor is running, but there is no rotational movement of the working part, then the reason lies precisely in the gear mechanism. In order to see what happened to the gears, it is enough to disassemble the tool body. The cause of gearbox failure is most often the licking of the teeth of the large shank gear. The reasons for this are varied:
- lack of lubricant;
- heavy loads on the tool;
- low quality of components;
- improper operation.
Repairing an angle grinder lock in 5 minutes and getting out of the situation
One way or another, after identifying a malfunction, it should be fixed immediately. This can be done by replacing the faulty gear. Most often, you can find them on sale in a pair with a helical tooth, which is mounted on the shaft. It is recommended to replace two gears in a pair, after which they must be thoroughly lubricated with a special lubricant. Bearing failure. A breakdown can be determined by the characteristic sound that will occur when the product is started. This sound will appear as a rustling sound, which indicates bearing wear. The reason for accelerated wear of bearings is dust getting inside the tool. Most often, the bearing located on the working part of the tool behind the plate gear suffers. How to repair a bearing on an angle grinder? First you need to determine if it is intact, then you can clean it from dirt with kerosene, then lubricate it, and put it back in place. If the bearing has worn out, it should be replaced.
These are the main types of malfunctions of the mechanical part of the tool, the elimination of which does not pose any problems. Now let's pay attention to the more complex part - the electrical one. The following types of breakdowns may occur in the electrical part:
- Damage to the network cable. If the power cable is damaged, the power supply to the power tool is cut off, so the angle grinder will not function. The cable can be damaged for various reasons (squeezing, squeezing, cutting), but it is not difficult to determine the damage. You will need to use a tester to test the wiring. This will require disassembling the tool.
- Control button failure. The design of grinders can have a regular button to start the tool, or they can have a soft start. In a regular button, the contacts most often become oxidized or clogged, which can only be cleaned with sandpaper. In buttons with speed control, the reason is often hidden in damage to the contact plates. The device can be disassembled and then checked for integrity. If a damaged contact plate is found, the starting unit will need to be replaced.
How to change the power button, connection process
The main symptom that the starting device is out of order is the lack of reaction from the angle grinder when the button is brought into working position. This defect can also be caused by critical wear of the commutator brushes and a break in the power cable wire.
Therefore, it is necessary to carry out diagnostics using an electrical multimeter or, in its absence, using an open circuit indicator. To do this, it is imperative to remove the plastic case that protects the electrical part of the angle grinder in order to get to the button contacts, the connection point of the power cable and the ability to check the operation of the brushes.
If the contacts are not called, proceed to replace it. The entire process, including diagnostics, is described in the video below. It should be noted that the button that failed here is being replaced with a similar one in design. In passing, the condition of the brush assembly of the angle grinder is assessed, and recommendations are given on a possible simpler replacement of the brushes.
It shows how the actual button ringing is done using a multimeter (the mode position indicator is in the “on” position when performing work). The button is easily removed after disconnecting the supply wires and the operating mode setting lever from it. Disassembling the button once again confirms its poor repairability (small melted plastic parts cannot be replaced). The new one is installed in the reverse order of the steps taken when removing it.
The following video describes the repair of a Makita model angle grinder with a non-functional power button. Here, after removing the plastic casing, the wear of the brushes is immediately checked by ringing them with a multimeter. Visually, the brushes are worn out, but still working, which is confirmed by the instrument readings.
The author, confident in the integrity of the power cord, selects the starting device as an object for further diagnostics. Checking contacts is performed in the same way as in the previous video. After making sure that the button is not working, it replaces it with a new one of the same type. It should be noted that the author has a good tool for working with wires and terminals. To prevent the work of the grinder, the worn brushes are simultaneously replaced.
In the next video of the Interskol model, the operation of the starting device causes many complaints. In the video, the author makes a bold conclusion about the discrepancy between the design of the button and the declared power characteristics presented in the video of the angle grinder. As a result, the contacts melt and it must be replaced. True, such buttons are available in the store and are very cheap. You can easily replace them yourself without going to a workshop, thereby saving your budget.
In the case when it was not possible to find the same button to replace the burnt one, you can adapt other designs of starting devices in the angle grinder . In the video, the hole for a button of other sizes is modified to new dimensions. This is not difficult to do in a plastic case. The main thing here is to securely fasten it . The design of the button from the video allows you to do this using self-tapping screws.
What most often breaks on angle grinders of different brands?
It makes virtually no difference whether your tool is DeWalt or Intertool. Sooner or later there will be a need to start repairing the angle grinder, which can be done easily and quickly if the breakdown is correctly identified. The main reason why angle grinders break down is not the quality of this tool, but the fact that most craftsmen use them incorrectly. How can you use an angle grinder incorrectly?
According to their purpose, there are two types of angle grinders:
- Household - a category of power tools, the main purpose of which is to use them around the house. They are not suitable for constant and prolonged loads, since the parts are made of low-strength materials. You can operate household angle grinders for no more than 10 minutes continuously, after which you need to pause for a similar period of time to allow the engine and other components to cool. Naturally, no one records the time how long he works with the unit. When the need arises, we pick up a tool and carry out the task to the end. The duration of operation of the unit can range from 10 minutes to 1 hour, which results in breakdowns of the angle grinder. Household grinders can last much longer than professional ones, provided they are used correctly. If you need to repair a household grinder yourself, then experts recommend it’s better to immediately buy a new tool
- Professional - a special type of power tool, the main purpose of which is the duration of operation of the device. Their components are made from durable and high-quality materials, so they are durable and resistant to prolonged loads. You can work with professional angle grinders continuously for 40-50 minutes, and not worry about the engine overheating. They are designed for this, so if you are faced with a situation where your household unit often breaks down, then you need to switch to professional models. This is especially true for craftsmen who, in order to save money, buy household models, but at the same time work with them on construction sites, using them for 8-10 hours a day
Knowing the difference between household and professional models makes it easier to choose a power tool. The choice of power tool and its use determines how often you will need to repair grinders yourself.
Let’s look at the question of what most often breaks on grinders. The most common symptoms of malfunctions are:
- The device does not turn on - the next time you need to use an angle grinder, it turns out that it does not work. The causes of such a malfunction may be the following factors: lack of power in the outlet, damaged power cord, loose contacts, broken button or worn out brushes. Often, as practice shows, on angle grinders the place where the power cable enters the housing structure wears out. This is where you need to look for the place where the contact is damaged
- Current flows into the device, but the motor does not work - this means that the button is most likely faulty. The buttons on grinders cannot be repaired, so after a short check, you should simply replace them
- Sparking of the unit during operation and the appearance of a burning smell means that it is time to replace the graphite brushes. They have an appropriate resource, so signs of sparking in the area where the brushes are located means that they are worn out and the quality of contact is low
- The appearance of extraneous sounds after starting the engine - crackling and ringing sounds are signs of wear on the bearings or gears. To find out the exact cause of the instrument's hum, you will need to disassemble it and inspect the mechanical parts.
These are the main types of faults that even a beginner can identify. Bearings and brushes belong to the category of consumable parts, so do not be surprised if after six months of operation of the unit there is a need to replace them. With simple types of breakdowns on angle grinders, everything is clear, but it often happens that everything seems to be checked, but the tool does not work. What to do in such a difficult situation? To do this, you need to delve into the topic of repairing angle grinders and try to understand what is the reason. Often in such cases the “poke method” helps, but we will not rely on it so as not to get hurt. Let's consider all types of defects and breakdowns on grinders, as well as the features of their identification and elimination.
How to connect directly without a button
If an urgent need arises when leaving the start button, you can supply power directly to the two network wires extending from it into the angle grinder. In this case, the capacitor, which has the main function as a spark arrester when the brushes operate, will also not be involved in the work. And this despite the fact that when the plug is turned on/off from the socket, transient processes will intensify and increase the tendency to form sparks.
an electronic soft start circuit works together with the button , which eliminates a sharp increase in current during startup and makes working with the angle grinder convenient and safe. It is clear that in this mode of operation the angle grinder will quickly fail . It is better to replace or, if possible, repair the start button.
Problem: the locking button is broken
This unit fails quite often. the button itself and the metal rod can break. The worst option is when the gearbox housing is destroyed during a breakdown.
Sources:
https://kovka-svarka.net/kuznechnoe-delo/knopka-stopora-bolgarki/ https://thestroika.com/bolgarka/remont-stopora-na-bolgarke.html
How to replace the retainer
There is another button on the gearbox housing of the angle grinder, with which you can quickly change a worn or broken working tool. Locking the spindle by pressing this device against rotation makes it easy to replace. It also fails due to improper operation of the grinder (pressing a button while the spindle is rotating) or when changing a tightly clamped working tool. You can read in detail how to replace the lock in the description at the link “Bulgarian stopper button”.
Where is the spindle lock button located on the angle grinder and how necessary is it?
The latch is a spring-loaded metal rod, on one end of which the button body is placed, and the other can fit into one of the holes in the body of the gearbox bevel gear. From the description it follows that the button should be located on the gearbox housing, not far from the spindle shaft.
Locking button on the body of the Interskol angle grinder. Photo VseInstruments.ru
By pressing the button and rotating the shaft, the locking rod gets into one of the holes on the gear. Holding the button in this position with one hand, unscrew/tighten the flat threaded washer that clamps the working tool with the other hand. The stationary spindle makes this operation possible.
Switches (buttons)
In power tools, one of the most vulnerable elements to breakdown is the starting switch. This is a mechanical control that allows you to manually close electrical contacts to supply voltage and start the drill, angle grinder, hammer drill and other similar devices.
Ours offers to buy switches for power tools of all types of any brands.
cover for the switch of a Chinese hammer drill
Switch for drill INTERSKOL 1050
Switch 10MM BUE mod. 01 8A (analogue of Pskov)
Switch 125 115B WS-125 is suitable for angle grinders Ferm 125. Switch for angle grinder 125 circle.
Switch 15A new, Switch for screwdriver
Switch 192 for screwdriver
4A switch with lock. Switch for grinder, circular saw.
4A switch without lock. Switch for an angle grinder without a lock.
Switch 8-53 for drill with lock.
Switch 8021 drill China hidden reverse
Switch 8024 for Chinese drill
Switch with reverse and speed controller 8703, suitable for drill REBIR (Rebir) 1305, CHINA COLT
Switch 8711 8750. Switch for drill with reverse and speed control
Features of push-button switches
Closing of contacts in the on-off organ is ensured by moving parts. With each switching they experience mechanical stress. Abrasion of surfaces occurs, a violation of the strength and elastic properties of materials due to fatigue, and destruction from overheating due to poor electrical contact.
Breakdowns are possible due to contamination with dust and solid particles, from impact when the tool is accidentally dropped, or due to vibration during operation. If cracks occur on the button, you should buy switches for the power tool and replace the component. In case of any violation of its function or noticeable defects, repairs are required.
Without reliable operation of the on-off switch, using a tool that drives an electric motor is dangerous or simply impossible. A non-working and unreliable switch must be replaced. Trying to restore its functionality is impractical, since the replacement component is inexpensive. Repairs will not require large expenses if you have a new part of the required design. Our catalog will help you find it.
The button does not hold, the tool turns off
In the following video, while the grinder is working with the same Makita model as in the previous video, the button is triggered by increased vibration and the grinder turns off. The correction method used is extremely simple; even the grinder does not need to be disassembled. A sharp utility knife is sufficient.
The idea is that during operation, plastic growths form on the latch groove due to friction against the “tendril” of the button, which prevent it from being pressed tightly against the surface of the latch groove. By carefully cutting them off with a utility knife, you bring the grinder to the desired state, and it no longer turns off during operation.
Here it is important to remove the build-up; the slightest careless movement will lead to a damaged seating surface and additional costs for repairing the switch
Range of switches
In our company you can buy switches for power tools of different power, powered from the mains or your own battery.
The design of the component depends on the required functions:
- start with automatic return to its original state;
- switching on and fixing in working position;
- reverse;
- smooth start;
- speed adjustment.
To make it easier to find the necessary components, subsections by type of tool are highlighted. The information indicated in the product name will help you select the necessary spare parts: the marking of the switch, the manufacturer and brand of the tool for which it is intended.
To buy switches for power tools, place an order on the website and agree on the terms of purchase by phone. Managers of our company are ready to advise on the selection of spare parts for tools of any brand.
Source: elprotools.ru
Button for grinder Interskol - replacement instructions
Having acquired the Interskol grinder, which is popular on the domestic market, you can solve many household and even industrial problems, such as cleaning welds, cutting metal, etc.
But if one day your button on your grinder breaks , don’t be surprised. Despite the abundance of positive reviews, this is a common problem for all popular brands of angle grinders, such as Bosch, Hitachi, Makita or Mitabo.
The main problem with the failure of the start button of the Interskol angle grinder is a weak contact group.
The plastic moving parts cannot withstand the load and begin to melt, after which the contact stops closing. In such cases, the button needs to be replaced.
Reasons why the lock button fails
The main reasons for the failure of the stop button are as follows.
- Worn button seat and metal rod. Usually the connection is made in the form of a cone on a rod, after putting the button on which it is secured. Wear on the surfaces does not allow the button to remain present on the grinder.
- When you press the stop button while rotating the angle grinder shaft, the metal rod instantly fails. Such a defect occurs mainly due to the inexperience of the person working with power tools or other factors.
- The working tool sometimes gets jammed in the workpiece. In this case, the rotational energy is spent on tightening the clamping nut and great effort is required to loosen it. The load created when unscrewing must be so large that the stopper cannot withstand it and breaks.
In addition to the rod and button, less often, but sometimes they fail, the spring (lost during disassembly) and the stuffing box ring, which prevents abrasive particles from getting inside the gearbox.
Repair - how to remove and connect the grinder button Interskol
The following diagram will help you understand the structure of the angle grinder button:
- The start button itself is located at position 41, which is built into the body (position 47).
- The start button is supplied with voltage from the power cable (pos. 53).
- To control the start button (pos. 41), the angle grinder is equipped with a lever (pos. 46).
- Also connected to it are electric brushes (pos. 55) and special brush holders (pos. 44).
- The electrical part of the angle grinder, which includes the power button, also includes a rotor (pos. 31) and a stator (pos. 42).
From the diagram it becomes clear that you can get to the start button only by removing the handle at the back of the angle grinder body.
To repair the start button of the grinder Interskol we will need:
- Two screwdrivers – Phillips and flathead;
- New power button.
How to properly disassemble an angle grinder gearbox
When repairing the gearbox of any angle grinder, the most difficult task is removing the gears and pressing out the support bearing.
Disassembling the gearbox begins with removing the gearbox cover pos. 1 and disconnecting the stator housing and freeing the rotor pos. 2. The freed rotor is clamped in a vice and the fastening nut pos. 3 of the drive small gear is unscrewed.
The spindle bearing is pressed into the gearbox cover. To remove the bearing, in some angle grinders you must remove the retaining ring that secures the support bearing and remove the bearing.
The destroyed bearing, pos. 1, in the gearbox housing, pos. 2, is easiest to get out by prying it off with a screwdriver.
In other models, a locking ring secures the gear in the spindle.
The driven large gear is mounted on the spindle in several ways:
- The gear is pressed onto the spindle.
- The gear is secured with a key.
The driving small gear is either screwed onto the shaft along the left-hand thread (in some Sparky models, the thread is right-handed), or is fixed with a key connection and clamped with a nut.
How to remove gears
Grinders up to 1000 W use spur gears, while angle grinders use helical gears.
Useful instructions - how to replace the brushes and cord of an angle grinder
Often, Interskol angle grinders stop working due to the cord failing or the brushes wearing out, which is why they can hardly reach the stator and the device does not work at full power.
You already know how to remove the cord from the previous instructions for removing the angle grinder button (from step 1 to step 3). All that remains is to figure out how to get to the brushes and replace them with new ones.
- Using a Phillips screwdriver, unscrew the handle mounting screws on both sides;
- Using the above diagram, we find the brush holders in which the parts we need are located;
- We disconnect the brushes from the single electrical circuit of the angle grinder by prying the tips with a flat screwdriver and simply pulling them out with your hands;
- We insert new brushes in this place. If there are no original brushes in stores, you can take them in slightly larger sizes - you can file them down to a suitable size. It’s not a problem if the new brushes have different tips - we cut off the lead from the worn brushes and screw it onto the new ones;
- Insert and screw the handle cover back.
After disassembling the angle grinder, it is recommended to blow dust out of it using a compressor.
Also check the armature commutator, which may be scratched from worn brushes. Scratches can be cleaned with zero sandpaper.
VIDEO REVIEW » alt=»»> If your angle grinder stops turning on when you press start, do not rush to throw it in the trash and buy a new one. Most likely, the whole point is in the start button, the repair of which does not require special skills and knowledge. Replacing a button for an angle grinder from Interskol and other companies is much cheaper than buying a new angle grinder.
Source: neknopka.ru
Checking the serviceability of the angle grinder motor stator
It should immediately be noted that similar manipulations to check the serviceability of the two main parts of the electric motors of electric tools can be carried out for drills, rotary hammers, jigsaws and other units. Battery-type grinders also have motors, but only DC. The difference between alternating and direct electric motors on power tools is stators.
If on variable motors the stator consists of a winding, and the current flowing through it creates polarity, then on “constant” motors this function is performed by a pair of magnets, which push the rotor, setting it in motion.
The algorithm for checking the stator of an electric motor for angle grinders is as follows:
- The presence of resistance between the stator winding and the core is measured. The presence of resistance indicates that the insulation of the copper wire is broken, and therefore a breakdown occurs. To change the presence of a breakdown on the housing, you need to touch the winding terminal with one probe, and the core with the second. There should be no resistance, since in normal mode the copper wire is not connected to the core
- Now we check for the presence of resistance in the winding. To do this, we touch the output contacts with probes. The resistance value in both windings should be approximately the same. If the device does not show anything during measurement, it means that the copper winding is damaged. If the resistance is high, it means that insulation failure is appropriate.
- Carry out a visual inspection of the stator. The presence of carbon deposits on the wire is the main sign that the device needs repair. The stator, like the rotor, can be rewound, but provided that the integrity of the steel plates is not compromised. Rewinding the stator is cheaper than the rotor, however, in any case, if the motor already has a long service life, then it is better to replace it or the component parts that have failed - the armature or the stator
If you decide to replace the engine, then instead of the old motor you need to install a new one with similar power parameters and torque. After replacement, you can begin further use of the tool.
Start (power) buttons for angle grinders (angle grinders) Select product
The start buttons for angle grinders are a tool control element that ensures comfort and safety of tool operation by interrupting and connecting the motor power supply circuit. Most buttons are equipped with a lock against accidental activation, without interaction with a special button or switch, the start button does not start the angle grinder, mechanically or electrically. Some buttons are designed to lock both positions, which is acceptable to most users, although this is not justified from a safety point of view.
Start button diagnostics
The button performs a simple function - it closes and opens a contact depending on the position of the key. Diagnostics is simple - use a multimeter in testing mode to determine the integrity of the circuit by closing the input and output contacts. Each button is necessarily marked with a diagram on the case, from which the switching and, accordingly, the purpose of the dialing are clear. Also, a diagnostic technique can be used to connect the motor directly by connecting the motor power directly from the mains cable, bypassing the button, capacitor, soft start controller and other electronics, not forgetting to first CHECK THE NETWORK CABLE! (or when diagnosing, use a known whole one). During operation, dust (including conductive dust) gets into the inside of the button onto the contact pair, which deteriorates the quality of contact, up to its complete cessation. Often, it is enough to disassemble the button and restore the contact by mechanical or chemical cleaning (for example, WD-40 and its analogues, as well as using soft equipment and an engraver, or, in extreme cases, high-grit sandpaper and other methods. IMPORTANT: the contact surface must be well prepared and smooth, without deep scratches, otherwise, repair is a short-term solution! If the contact is silver, work on its restoration is pointless!). Also, mechanical defects in the key and body can cause the button to malfunction, causing the contact to fail to engage during standard operation.
Selecting a button in the catalog
Considering the realities of the modern spare parts market, for most grinders, the cost of a new start button is often more cost-effective than repairing a broken one, taking into account the time spent and the resource of the restored one. For simple, fast, and most importantly accurate selection in Detals Tools, follow the recommendations and maintain the order of actions:
- Remove your starter button that requires replacement.
- Arm yourself with a caliper
- This page displays all the start buttons from our warehouse that are used in angle grinders. Browse through the entire catalog, visually comparing the ones you are looking for by design. If the number in the category is too large, use the filter, sorting by “BLINDER TYPE” your disc diameter.
- Having found a similar one, open the pages of those products in a new tab, leaving the category open.
- Each product is equipped with a drawing (the last miniature in the photo gallery), from which you can quite accurately and quickly compare the physical dimensions of your button and the one you are looking for.
- The characteristics and markings on the case indicate the maximum current for which the button is designed. You can take the original value as a basis, but it is better to use the power of the tool based on I=P/U (I - current strength (A) / P - declared power (W) / U - network voltage (V)). Using an example, it looks like this: divide an angle grinder with a declared power of 1000 W by the network voltage of 220 Volts, respectively, the maximum current strength of this angle grinder (which it will never reach in reality) is 4.6 A (1000/220 = 4.545.). Then we are guided by the principle: “more is not less” and not less than the current strength calculated by the formula.
- Ideally, in the “Applicability” field, in the characteristics, find the model of your LNA. If it is not there, this does not mean incompatibility at all, we just do not have this information at the moment. Please let us know and we will add your model to the compatibility list, which will help other users in the future, thank you)
- We place an order for the button from its page, providing other necessary spare parts and products on the website, making delivery costs more profitable. If you decide to place an order by phone, do so without closing the page of the button you are looking for or write down the ARTICLE!
- If you haven’t found such a button with us, call, first take a photo and send a photo of your button to us on Viber 097-959-08-96 or by email. We will find it to order, if there are any on the territory of Ukraine.
Installation recommendations
A correctly selected button is standardly installed in the angle grinder body.
- In rare cases, there are inconsistencies, the body of the button does not fit into the seat or the key operates with difficulties. In such situations, adjust the button itself, leaving the tool in its original form.
- Wires of the network cable and power supply to the tool in the start button, preferably through a high-quality termination. Equip the contact with a connector or tin it.
- The button will have a longer life if its housing is as sealed as possible. The simplest and most effective way is to apply a thin layer of lubricant; it is elastic, will collect dust on itself, preventing it from getting inside, and the hydrophobic properties have not been canceled.
- Capacitor, usually connected in parallel with the mains cable
- Make sure that the wires, cable seal and all elements inside the angle grinder body are properly laid before assembly
Source: details.tools