Like sawing, using a chisel is an important carpentry skill. It is mostly a manual job and requires some skill which you will get the hang of after some practice. The hand chisel is used for chiseling, cutting, trimming, shaping and especially widely for removing waste when making carpentry joints.
Machine chiselling usually involves the use of a special slotting machine or attachment for a hand-held electric drill, which also makes rectangular sockets in wood. It combines the action of a drill and a chisel. In general, this method is more common in industry, and a slotting machine, of course, is not a necessary tool for an amateur carpenter. It is usually used to make nests.
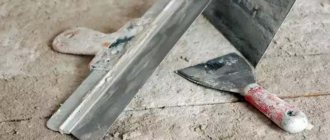
The blades (rods) of chisels and chisels should always be sharpened. There are two sharpening bevels (angles): the main bevel, or bevel (approximately 25 degrees), with which the tool is sold to the consumer, and the finishing bevel (approximately 30 degrees).
The finishing of the sharpening bevel is carried out on an oil-wetted sharpening stone or something similar in your workshop. Chisels with shallower sharpening bevels cut wood more easily than with steeper ones, but in the latter case the tool will be stronger.
There are two main types of straight chisels: the flat chisel (with a flat, chamfered blade) and the regular chisel (with variable blade thickness and square edges). Chisels are designed for gouging out deep holes (they are thicker and can act as a lever when removing waste from sockets and grooves).
Working with a hand chisel or chisel requires some practice, but with skill it will produce excellent results.
Source: wood-petr.ru
Chisel. Types and device. Sharpening and work. Application
A chisel is a carpentry and joinery cutting tool designed for making cuts in wood. Its use is necessary to solve a wide range of problems. Chisels come in carpentry, carving and turning. Joiner's are used to adjust the size of a wooden workpiece, carved for artistic cutting, and turning is used in cases where it is necessary to turn wood on a lathe.
What can you do with a chisel?
This tool is almost universal for woodworking. With it you can:
- Make a sample of the recess.
- Clean the groove.
- Remove the chamfer.
- Apply relief or contour carving.
The capabilities of a chisel largely depend on the shape of the cutting edge of the working blade. According to the principle of operation, the tool is of manual and impact type. A hand chisel cuts into the wood from the pressure exerted on the handle by the master's hand. The impact type is immersed in the tree as a result of striking the handle, carried out using a mallet, mallet or rubber mallet.
Tool design
The chisel consists of two main elements - the blade and the handle. The blade itself has a sharp blade at the end, which cuts into the wood. The shank of the blade is pointed and looks like a nail. It is pressed directly onto the handle. The handle itself is made of wood or plastic.
In the classic wooden version, a metal cap is installed at the area where it connects to the canvas, preventing the end from being destroyed as a result of strong pressure. If the tool is intended for impact processing of workpieces, then on the back of the handle there is a metal headband in the form of a ring that prevents cracking.
Form and its purpose
There are several dozen popular forms of chisels, which differ in the ease of use of the handles, the size, width and curvature of the cutting blade, as well as the sharpness of the edge. The most common forms include:
Straight
The chisel has a flat cutting edge profile. Such a cutter can have different widths. Its purpose is to provide an even, neat cut to achieve a perfectly flat surface. The tool allows you to make a recess with a straight bottom, as well as remove excess wood surface on the outside of the workpiece.
Working with a straight cutting edge, even with sufficient sharpness, is quite difficult. For this reason, most of the proposed factory tools with such a surface are impact-type, which allows sampling without the use of one’s own muscular strength.
Oblique
The chisel, due to the presence of a beveled angle of attack of the cutting edge, ensures more efficient and easy cutting into wood. As a result, the sampling process is significantly accelerated. Often the tool is used for rough work, after which finishing work will be carried out. In most cases, this type is used to create recesses to
Radius or semicircular
The type is a tool whose cutting edge is curved in the shape of a semicircle. Its use allows for accurate deepening. The vast majority of cutters for figure processing are made in this form. The radius tool effectively penetrates the wood fibers without allowing the workpiece to crack. With the help of such a cutting edge, you can easily carve along an uneven contour without straight or sharp corners.
Bracket or box-shaped
The type of chisel is a straight cutting edge with sides of varying heights. They are used to make a narrow sample along a straight line, preventing cracks from spreading to the side. This tool is used much less frequently than round, oblique or straight blades. The angle between the cutting edge and the side edges is straight.
Corner
The chisel has a specific profile in the form of an angle. Its shape is V-shaped. The angle itself in various designs ranges from 60 to 90 degrees. A similar tool is used to assign a contour for a future sample. It can also be found in relief and contour carving. Sharpening a V-shaped cutting edge requires special skill because uneven chamfering of the profile results in differences in jaw height.
Klukarza
It is the most unusual instrument of this type. It has a longitudinal bend of the blade, located closer to the cutting edge. This type is used for manual removal of wood in recesses when a conventional flat profile is not able to provide sufficient grip for cutting.
Cranberry can have either a flat or rounded cutting edge, which significantly expands the possibilities of application. This type of chisel is necessary for cutting the lock into the door leaf. The beginning of the work is carried out with a conventional straight tool, and when sufficient deepening has already been made, the master switches to cranberries. The angle of attack of the curved profile is more suitable for contact with wood in deep depressions. This prevents the formation of chips on the upper layers of the workpiece, which happens when using a flat blade.
How to sharpen a chisel
In order for the tool to provide a high-quality cut with minimal effort, it is necessary to ensure its correct sharpening. Working with a dull chisel is dangerous because it significantly increases the risk of injury.
For comfortable work, the sharpening angle should be in the range from 20 to 35 degrees. A regular tool is usually sharpened at 25 degrees, while a cleaning tool is sharpened at 20 degrees. To achieve a high-quality result, it is important to use an even stone. A whetstone worn down over the years is of little use and will not allow you to achieve razor sharpness.
In order to achieve razor sharpness, you must use at least three types of whetstones. First, the work should be done on a coarse-grained stone, after which you will need to switch to a medium one, and it is better to finish on a velvet block with minimal grain size. This sequence allows you to achieve a mirror surface.
Hand sharpening gives a much better result than sanding. The use of an emery machine is acceptable only in cases where it is necessary to remove existing nicks on the blade in order to align its cutting edge, before directly starting manual editing.
While sharpening, you need to move the blade back and forth. In this case, it is advisable to lubricate the stone with special oil, or soak it in plain water for several minutes. The duration of sharpening depends on the quality of the chisel steel and the hardness of the stone. A regular sharpening stone will complete the task in 10-20 minutes, while a diamond one will do the job several times faster.
An excellent result can be achieved by using a special fixing machine, which allows you to fix the chisel profile at the correct angle. This eliminates the possibility of surface wobbling. Each reciprocating motion will ensure that the metal filings are removed correctly to achieve the desired sharpness.
Classification
Chisels can be classified according to the method of advancement, handle shape, size and other parameters. The main classification of chisels is based on their shape, longitudinal or transverse. Moreover, a chisel is often determined by these two parameters at once.
Transverse shape: depending on the shape of the transverse, that is, end, profile of the chisel blade, the following types of chisels are distinguished.
Radius ones are 95% of all incisors, which appear in various publications under the names: semicircular, sloping, semi-flat. In the classification proposed by Shamil Sasykov, a radius chisel is a chisel with a profile that has part of a circle in cross section. For example, for a chisel numbered 20/2-1, the width of the blade is half a circle with a diameter of 20 mm (designation 20/2), and the last number - 1 - is a characteristic of the thickness of the cutter of 1 mm. Another example: a chisel numbered 20/5-0.5 is a chisel with a blade width of 1/5 of a circle with a diameter of 20 mm and a cutter thickness of 0.5 mm.
Flat - chisels that have a straight, flat transverse profile. Cutters vary in the width and thickness of the blade and the shape of the cutting edge of the blade, which can be oblique or straight.
Box or bracket - flat, straight chisels with sides of different heights.
Angle cutters - with a profile in the form of an angle, the Latin letter V. The size of such cutters is determined by the height of the side of the corner of the tool, as well as the size of the angle in degrees between the sides. In most cases this is an angle of 60-90 degrees.
Longitudinal shape: depending on the shape of the longitudinal, that is, lateral, profile of the blade, the following types of chisels can be distinguished.
Straight - chisels with a straight blade, like a ruler, without any bends.
Klukarzy are chisels that have a fairly steep longitudinal bend of the blade, which begins closer to the end of the blade.
Curved - chisels that have a longitudinal bend in the blade. But, unlike cranberries, most of the canvas bends.
The proposed classification allows us to identify the main types of chisels based on simple and understandable parameters, which is important for a novice carver. But it is worth remembering that there are other types of chisels, distinguished by other characteristics. We will talk about them as needed. For example, this list can be expanded dramatically by highlighting chisels sharpened on the reverse side, which are usually called reverse chisels or reverse chisels.
Another important criterion for classifying chisels is the operating principle.
Type 1 Chisels are advanced by striking the handle with a hammer, mallet, mallet or electric tool (electric chisel), as a result of which the wood is cut. Such chisels are usually used when carving hard rocks, when a lot of force is required, or soft ones, when you need to cut a lot of material at once.
These chisels look large, long, and sometimes simply huge. They are held with one hand and hit the handle with a hammer with the other. The handle of such chisels is usually looped so that it does not fall apart. But sooner or later they still fall apart, and therefore it is preferable to use a rubber or polyurethane hammer to make the tool last longer.
Type 2 There are chisels, sometimes as long as in type 1, but their cutting part is somewhat narrower. They work with both hands, pressing and pushing using the efforts of the hands. It is clear that this is possible mainly on soft wood. The head of the pen is round, smooth, and comfortable to fit in the hand. You can use a mallet to a limited extent, or better yet, a rubber mallet: a handle, even a birch one, can withstand many years.
Type 3 And finally, chisels, which are used to cut by moving them only with your hands. They are, of course, much smaller in size than those described above, even the metal part is thinner and sometimes harder. They can be used on any wood, it all depends on the sharpening angle of the blade and the size of the object. They are convenient for cutting out small things like netsuke: from juniper, cypress, apple tree, cherry.
How to use a wood chisel correctly
A carpenter's chisel is used for working with wood. Used for shaping wood, smoothing edges or thinly cutting the surface of wood.
Due to the similar operating principle of the tool, a chisel is often confused with a chisel. But the chisel is distinguished by a different sharpening angle of the blade, and the very size of the cutting part. The bit has a larger area.
Chisel models are divided according to the direction of work, how they move along the surface of the material, the type of handle and the size of the tool.
The processing of the material with a tool occurs as follows: the cutting edge rests against a wooden workpiece, and then with a special hammer - a mallet, methodical tapping is performed on the handle of the chisel. With each blow, the tool goes deeper into the wood and knocks out a groove in it.
A few words about the structure of the chisel
Where the metal part of the chisel enters the handle, a reinforcing metal ring is sometimes installed. This is done so that the metal part does not get driven into the handle over time and does not split it. This detail applies more to chisels with a wooden handle, and newer models do without a ring.
One of the tool models is designed for working with hard wood. It has a longer cutter and handle. For durable material, an electric chisel is also used.
When the cutter, on the contrary, is shortened and a long handle is used, the tool is optimized for soft wood. You can remove material using only your hands, sometimes resorting to a hammer with a rubber striker.
There is the most delicate area of chisel work associated with inlay and decorative carving. These instruments are made thin and short. Working with them involves solely hand movements, without the use of mallets.
Selecting material for work
Each type of wood has its own advantages and disadvantages. Soft woods such as linden, birch and aspen are easy to cut, but crafts made from them are more easily rejected by clumsy cutting or excessive pressure.
The hard woods of beech, oak, mahogany and boxwood are more difficult to process and there is a risk of breaking the tool if pressed too hard or causing injury for the same reasons. Be that as it may, when choosing wood, you need to take into account many factors, including the size of the craft, its color, shape, etc.
Birch
This wood is very light and lends itself well to cutting along and across the grain. It is also easy to drill and you can create good crafts from it. It is not recommended to use glued birch bars when cutting, since the directions of the fibers in this case are different and the craft will not have a solid appearance. Birch wood also darkens and warps over time.
Coniferous trees
These rocks are suitable for slotted and contour carving. The large distance between the annual rings and the soft structure make it possible to easily create even large ornaments. Among the disadvantages of spruce and pine, as well as other conifers, is that when carving across growth rings, the knife or chisel will jump slightly. This is due to the uneven distribution of material density in the rings.
Linden and aspen
Carving masters most often use these materials. Their wood is soft and can be cut well in any direction. Aspen is more durable and easier to obtain, although it contains more knots.
We recommend that beginners try themselves in this skill with conifers such as pine, spruce and juniper. You can also use linden, birch, pear or aspen.
https://youtube.com/watch?v=T48w3io74bQ
Choosing chisels
Before purchasing, decide what the chisel will be used for. For rare use as a tool for primary wood processing, it will be enough to buy a basic set of inexpensive chisels. This option is suitable if, for example, you are planning to repair windows or install a door lock. By the way, an electric chisel is also used for similar purposes.
As your first chisel, we can recommend a tool from the VIRA line. This is the option when the tool has a sufficient margin of safety and is adapted for use at home.
- the range allows you to choose a chisel in the range from 6 to 32 mm
- two-component handle: a base made of impact-resistant plastic + a dense rubber coating that provides a secure grip. Such a handle, unlike a wooden one, does not dry out, does not get wet, and will not crack from blows from a mallet or hammer.
- Diamond sharpening of the cutting edge is achieved using a diamond-coated abrasive. the edge remains stronger and more wear-resistant compared to other analogues
- The handle ends with a special palm rest. this makes working with the tool safer.
In addition to a mallet, you will need a mallet for work - VIRA also has a well-designed one. The tool combines strength, light weight and low impact impact.
- fiberglass handle with rubber coating - strength comparable to metal, yet light as wood
- rubber coating improves the grip of the tool and dampens unpleasant feedback in the hand
- striker made of dense rubber: clear blows, while the chisel handle does not experience damage.
- the shape of the striker is semicircular, because it is more convenient to hit the handle of the chisel
In addition to working with wood, the mallet can be used for work on correcting warped sheet metal. The white rubber of the mallet does not leave any marks on it from impacts, which cannot be said about black rubber.
Another situation is when you are engaged in professional carpentry or perform artistic tasks. In this case, it is worth delving deeper into the chisel production technology itself.
So, here are the methods for making a chisel:
- forging method
- tools made using this method have a thickened working part and are intended for processing hard wood; - cutting method
- chisels are designed for delicate processing on soft wood. - stamping method
We recommend the length of chisels in the range from 11 to 16 cm. After all, the longer the tool, the less load it can withstand.
Many people prefer wooden handles for work. Despite the fact that they appeared a very long time ago. The material fits snugly in the palm, it is pleasant and relatively light, but it can hardly be called very durable. Of course, this also depends on the method of use: a varnished handle in a workshop will not be damaged for many years, but in difficult conditions it can dry out and crack.
Plastic definitely wins in terms of durability: it does not dry out, does not rot, and can withstand significant impacts, but it may not be suitable for some for reasons of personal comfort.
Features of sculptural carving
People learned to carve figures from wood many thousands of years ago. Today this art is as popular as it was at the dawn of human history. Sculptural carving has many fans around the world. What are its advantages over making sculptures from other materials, such as stone? This type of art:
- does not require a large room for work;
- allows you to easily find the material you need;
- makes it possible to buy it inexpensively;
- does not take much time from the master.
In addition, tools for work can be found without problems, and, if necessary, made with your own hands.
Sculpture Carving Tool Set
In addition, wood as a material is more versatile than stone, plastic or metal. From it a master can create not only a work of art, but also beautiful household items. A carved chair, a decorative shelf, or a watch case intricately carved from a beautiful piece of wood will become a decoration for your home or cottage. Or a wonderful gift, the value of which is that it is made by hand by a master.
A craftsman who has mastered carving skills can start decorating a home. Window trim, shutters, roof ridges, or intricate decorations on porches and verandas - everything can be done by a carver.
Another advantage of wood as a material for carving is that it is very plastic and easy to process.
The process of making a wood sculpture
You can carve abstract sculptures and classical images from it, and even create compositions in which treated and untreated wood are mixed.
Quality check
We determine the quality of a chisel by the duration of its service and the level of processing of the material. In fact, in addition to the handle, the main thing here is the hardness of the metal itself for the working part of the tool and its hardening.
The first step in choosing a good chisel is determining the appropriate type of steel.
The following types of materials are available on the market (sometimes only processing methods are indicated):
- forged
- drop forged; - CrV
– made from chrome vanadium - CS
– tool steel
We offer a way to determine the type of steel of a tool if for some reason it is not indicated on the chisel.
Try sharpening a chisel on a stone. The point is that on well-hardened steel, burrs appear from sharpening; they are then easy to remove. Steel that does not produce burrs is overheated and too hard. There is a possibility that the steel will split during operation. This may cause injury. And the third case - the steel produces burrs, but they cannot be removed. This indicates that the steel is too soft. When cutting into wood, steel will crumple.
Tools and material
The following tools are suitable for this carving master class: a penknife, a jamb knife and a chisel. But for subsequent, more complex ones, you need to use a jigsaw. For more advanced work, you can purchase modern tools. We suggest looking at photos of working materials to know which ones are best to choose:
A jamb knife is typically used to cut small sections of wood. The penknife carving tool is ideal for beginners because it is comfortable to work with.
When choosing a tool, consider these rules:
1) The knife for work should always be sharp!
2) If you don't have a sharp knife, don't try to use a dull knife. He'll ruin the job.
In addition to a penknife and a jamb knife, you will need chisels for the job. In the photo you can see what they are suitable for.
Wood is the key to success in work. With the right choice of material, you can be sure of an ideal product. Craftsmen advise using soft wood. For example, fir, pine, spruce or linden. The ideal option is considered to be linden, on which notches do not appear during operation. You can use birch, but it will be more difficult to work with due to the harder surface. Carvings on furniture look beautiful and modern. Since ancient times, handmade products have been quite expensive.
What methods of using the instrument exist?
Working with a wood chisel is distinguished by different positions of the tool towards the plane being processed.
There are the following methods of processing wood with a chisel:
- The cutting method involves moving in the direction of the wood grain, the working surface without sharpening is facing the ceiling, you hold the handle and at the same time hold the blade, with your thumb facing the handle. This method of work gives good control over the work process, while movements are performed accurately.
- Cutting with the side edge of the blade - for this, tools with a flat blade section are used. In this case, the cutting edge is not necessarily straight; it can also be beveled. In any case, the model has only one sharpened side. Instances with a cutting edge in the shape of a half circle are used for circular cuts.
- Perpendicular cutting
How to hold a chisel correctly when working: the handle is held with one hand, the blade is held with the other hand, using the thumb and index finger.. You make small cutting movements, gradually selecting thin layers of wood. The method requires the greatest endurance and, accordingly, time.
Chisel techniques do not allow cutting thick layers of wood in one go. The layers of wood are removed gradually, one after another, following their own markings on the workpiece. If you remove a lot of material, you can start the work again, not to mention the fact that such an attitude ruins the instrument.
When working, use reinforcement with your hands and with a mallet/hammer. Impact tools are used for quick work and knocking out recesses and holes of various shapes. Of course, doing this manually would take a long time and would not be effective.
For decoration, only controlled manual effort is used; it eliminates strong impacts and haste.
We hope that this text will be useful to you and now it will be easier for you to navigate the variety of chisels.
Source: viratools.ru
Features of material selection
In addition to the device for work, you will need a base on which you will cut out the pattern. Wood for this purpose can be different: soft, hard and very hard. The first type includes linden, aspen and alder. These materials are suitable for your first steps in mastering artistic carving. The fact is that they are very easy to work with and you don’t need to use a lot of force to hollow out this or that element. That is, such blanks are usually given to beginners.
Hardwoods - pear, birch, oak, maple, beech - are used by experienced craftsmen who have good skills. The remaining breeds are used quite rarely. At first, fake blanks are enough for you.
In addition to the hardness of the rock, the shade of its surface is of great importance. Naturally, after completing the work, you will open the product with colorless varnish. However, there is nothing better than the original shade. It will highlight all the natural beauty of your masterpiece.
How to properly use a chisel on wood?
A wood chisel is a special tool for manual woodworking, which is also used in working with other materials - leather, metal or plastic. Using a chisel, you can remove wood from hard-to-reach areas, trim the edges of wooden objects (such as furniture), or grind down an overly sharp edge.
The main difference between a chisel and a similar chisel is the different angle of the sharpened cutter and the size of the metal part itself - in a chisel it is much larger. A chisel is a hand-held tool for working wood.
The difference between a chisel and a chisel
The chisel is in demand where it is necessary to gouge out deep grooves and sockets. The device looks like an elongated metal bar mounted on a handle. The end of the chisel handle is looped with a crimping piece that protects the handle from splitting.
Cutting techniques with a chisel: a, b, c - trimming and cleaning tenons, sockets, grooves, d - cutting grooves, e, f - chamfering, g, h, i - processing curved surfaces.
The chisel, which is a hand-held device for woodworking, is represented by a sharpened plate-like steel element with a handle. In other words, the design of a chisel is a sharpened blade with a handle (wooden or metal).
A chisel with a chisel is distinguished by the angle of the sharpened cutter and the absence of a 2-sided chamfer in the length of the working element relative to the side being sharpened. Another difference is the significant d of the metal rod of the bit. Therefore, it is completely unrealistic to confuse these two carpenter’s tools.
What types of chisels are there?
Chisels are divided according to purpose, method of movement on a wood surface, handle shape and dimensions.
By purpose they are distinguished:
- carpentry - perform the function of correcting the shape of an object or its parts;
- for cutting - used to obtain decorative elements of an object or to create three-dimensional wood sculptures;
- turning - needed when working with wood on lathes.
Principles and rules for working with chisels
The impact of the tool on the wood material is carried out by quickly tapping the handle of a hammer or mallet - impact devices that help the chisel move through the thickness of even the most durable wood.
At the junction of the handle and the blade, many chisels have a metal ring that prevents the iron rod from being driven into it.
An electric or manual woodworking tool with an elongated cutter and handle is used when working with durable wood species. This shape is convenient for tapping it with your hand or with a hammer (polyurethane or rubber).
Chisel models with a short cutter and a long handle are used for cutting soft wood. The handle with smooth contours fits well in a clenched hand, and if necessary, you can still resort to using a rubber hammer.
For completely manual inlay or carving work, types of chisels are produced that are much thinner and shorter than the above models. The convenience of their movement along the surface of the wood depends on the sharpening angle of the cutter and the processing area.
There are also such varieties of chisels as an electric chisel, a video about which will help to clearly show the advantages of working with it.
Features and Specifications
Comparing solutions presented in stores from various manufacturers, for example, products from Bosch and the Skil 7720 model, you can find that they all have a similar design, in which the following components can be distinguished:
- Frame. Made of durable plastic and has a comfortable handle.
- Tool start button and speed control.
- An informative indicator that helps you find out about the tool blocking and the operating speed set at any given moment.
- A special socket allows you to quickly change and install the working tool.
It’s not hard to guess why an electric wood chisel is often called a multi-cutter. After all, this device has the capabilities of various types of working tools. For example, the equipment of one of the most popular multifunctional models among domestic consumers, Skil 7720, includes:
- steel violin blades for universal use, 35 mm wide - 5 pieces;
- steel flat cutters with a blade width of 15 mm - 2 pieces;
- steel spatulas 60 mm wide - 3 pieces;
- steel knives 60 mm wide - 5 pieces.
Having such a large set of working tools at hand, any home craftsman will be able to solve a wide variety of tasks using an electric chisel.
To get a more complete picture of the device’s capabilities, let’s return to the aforementioned multifunctional electric chisel Skil 7720 and get acquainted with its technical characteristics:
- vibration level - 12.7 m/s2;
- acoustic power level - 92 dB;
- acoustic pressure level - 81 dB;
- three operating speeds with an oscillation frequency of 6500/8500/i9500 rpm;
- platform working stroke - 2.2 mm;
- operating power indicator - 250 W;
- weight - 1.2 kg.
However, not only the above operating parameters make the Skil 7720 model a convenient and effective tool in the hands of a home craftsman. This is also facilitated by the presence of a special device in the design, with which you can quickly and without the help of additional solutions change the working tool. In this electric chisel, the manufacturer provides the possibility of additional feed of the tool forward, which also has a positive effect on the convenience and efficiency of its use.
How to choose a good chisel?
Before choosing chisels, check what you need them for. If you plan to use them once or twice and then put them away in a drawer, an inexpensive set of basic jig models will do the job. As a rule, this is how you buy a set of chisels or an electric wood chisel for repairing windows and similar simple tasks.
If you are engaged in wood carving and are going to continue your favorite activity in the future, it is better not to save money and choose the highest quality tools possible. Based on the production method, there are three types of models:
- forged - with the thickest blade, due to which they can easily interact with hard wood;
- cutting - convenient for precise and fine work on soft and medium-soft types of wood;
- stamped - when working with them, you will need to install a thrust washer so that the impact of the mallet does not deform the device.
The best length for chisels is 10-15 cm. When the size is larger, the steel blade can withstand less load. The handle material can be wood, but according to many users, plastic is more durable and better able to withstand impacts.
Carver's workplace
Wood carving involves working with sharp objects, so it must be done at a workbench that meets the necessary requirements for stability and strength. If you don't have a workbench, you can use a tabletop of any size. At the same time, its height should not exceed the level of the carver’s belt. During operation, nicks often form and must be removed. The board on which the ornament is cut must be firmly secured with clamps.
Lighting is also important. For a lot of natural light, the table should be placed near a window. When there is only one light source, dull dark shadows are observed, making it difficult to make a clean carving. Professionals advise installing 2-3 more lamps above the table. They need to be installed in such a way that they illuminate the table from different sides. Light sources should be located above the carver's eyes. Comfort and safety are the result of high-quality lighting.
How to check the quality of a tool?
The quality of the chisel determines its service life and quality of work. And the quality of the device is determined by the quality of the hardening of the metal part. Tool metals that are characterized by increased strength and durability are best suited for chisels. Typically these types of steels are designated by markings:
Please ensure that the manufacturer is indicated on the label. If there is no such mark, and the price of the set is surprisingly low, this is a Chinese fake.
If the type of steel is not specified, you can check its actual quality on a sharpening stone. On properly hardened steel, sharpening produces burrs that can be easily removed. If they are not there, then the steel is overheated, and a chisel with such steel is traumatically dangerous when working. If burrs appear, but it is impossible to remove them, the steel is too soft and will not withstand sharpening, and the sharpened edge will be deformed even with little effort.
Study in advance the most popular manufacturers and customer reviews of tools of different brands. A sign of a bona fide manufacturer is the presence of markings, a guarantee and an address where this chisel or wood chisel was created.
Selection and purchase
A novice carver naturally has a question: where to get a carving tool. Nowadays this is not a problem. The industry offers chisels and knives of all types and modifications. You can purchase several knives and one or two chisels, or you can buy a set of tools, guided by your own taste and financial capabilities.
Oddly enough, the wide range of carving tools makes the choice much more difficult. It's difficult to navigate and buy a really good thing. It is not difficult to become the owner of a “disposable” tool that will last for several hours of work.
Before purchasing a tool, you should definitely ask:
- grade of steel from which the tool is made;
- manufacturer;
- country of manufacture.
An instrument is an individual thing. When choosing a knife or chisel, the right thing to do is to hold it in your hands, check how convenient it is to use, and only then buy it. It would also be useful to communicate on thematic forums, where experts share their own experiences; they will be happy to give practical advice.
Basic wood carving techniques with a chisel
Techniques for using a chisel are characterized by different positions of the device in relation to the wooden surface.
There are three main ways to work on wood with a chisel:
- Trimming - work is carried out along the side along the fibers; The tool is placed with the unsharpened side of the blade up, holding the handle with one hand and the blade with the other so that the thumb is pointed at the handle. Thanks to this method of holding the chisel, it is easier for the craftsman to set precise forces in order to ultimately obtain the most even and smooth surface of the wood product.
- Side cutting or groove cutting - chisels with a flat blade section are used to produce rectangular grooves. The sharp edge can be oblique or straight. Typically, such a model has a sharpened edge on only one side. Models with a semicircular sharp edge (in the form of a quarter or half a circle) of the blade are used for cutting grooves in a circular manner.
- Perpendicular cutting - the chisel is held by the handle with one hand, and the blade is held with the thumb and forefinger of the other hand. This method involves making single thin cuts of wood chips and will require the most effort compared to the others.
When working manually with this tool, it is better not to cut off a large layer of wood in one fell swoop, but to remove its excess gradually, adhering to the line planned in advance. Working on wood with a chisel requires precision and very precise distribution of effort - if you remove too much material, you will have to start all over again.
A distinction is made between manual strengthening and strengthening using an additional device - a mallet or hammer. They resort to percussion instruments made of wood or rubber in cases where they need to quickly make a depression or hole. But decorative parts with graceful contours require a lot of work and are cut out carefully, slowly, with a precisely calibrated calculation of each effort. After all, it is possible to make aesthetically pleasing and easy-to-use things from wood that will serve the owner for a long time and reliably.
From the history of terminology
The word "chisel" is borrowed from the German - Stemmeisen. The German word Stemmen translates to “chiseling, chiseling, gouging.” This term in German is used to refer specifically to a chisel, but a thin one, pushed forward by hand without using a mallet. To designate this particular type of cutters, it was borrowed by Russian craftsmen.
This term most likely came into use by craftsmen during the era of the reforms of Peter I. Interestingly, a chisel most often meant a flat hand tool, which today is called a chisel. Here is a fragment from A. A. Pchelnikov’s book “Conversations with Children” (1858): “With this flat one, which is called a chisel, sawn spikes or hollowed out holes, etc. are cut out and cleaned. With a semicircular chisel, semicircular recesses are removed and cleaned. Using slotting tetrahedral chisels, wide and narrow, they gouge out holes, take out grooves for inserting thin planks into frames, etc.” And in the Dictionary of Church Slavonic and Russian Languages (volume 4, 1847) a chisel is defined as “... a kind of chisel. Carpentry chisel, flat and tenon.” A more detailed definition is given by the authors of the Desktop Dictionary for reference in all branches of knowledge (volume 3, 1864): “A chisel, a carpentry tool, is used for gouging out holes and replacing a chisel. It is made of steel, 4 inches long, up to one inch wide” (1 inch = 4.45 cm).
It is not known exactly when the term “chisel” began to be used to refer to semicircular incisors. But in the publications we found before the end of the 19th century, this term is used specifically to designate a chisel, while the word “chisel” refers to cutters of various shapes, including semicircular ones. In the 30s of the XX century. Several editions have been published in which the chisel comes in different shapes, including a semicircular one. In the current linguistic tradition, including in the professional vocabulary of woodworking masters, a chisel is a common name for cutters of a similar design (most often semicircular), and a chisel is a straight cutter with a profile in the form of a hexagon or trapezoid, intended for creating grooves and splitting material and other operations.
Read about the types of chisel handles, recommendations for choosing chisels and other features of working with this type of hand tool in other specialized articles on our website.
Content:
- 1. Master's hands and direction of wood fibers
- 2. If you take a hammer to help
Professional carpenters and carvers, as well as those for whom working with wood is more of a hobby, use chisels according to the same pattern. First, a pencil drawing is applied to a wooden blank or part—drawing. Then the outline is deepened using a wood carving knife. Only after all the contours have been cut, are clearly visible and are not erased, do they begin to work with a chisel.
The method of using the tool is chosen depending on what kind of processing needs to be performed. There are two most common:
- Pressure by hand, when the tool is set in motion only by the force applied by a person, for example, as when trimming the edge of a piece of wood.
- With a mallet blow when additional force is needed to gouge grooves or holes in wood.
It is worth noting that for all its apparent simplicity, this is a rather complex and time-consuming matter. Largely because you need to use the tools very carefully and with extreme precision. After all, in some places you don’t put enough pressure on the chisel, and in others you squeeze it too hard, it’s very easy to ruin the part. One awkward hand movement or a not-so-successful blow with a mallet - and all the work will go down the drain. We'll have to start everything from scratch.
If you want to avoid such failures, we recommend reading this article. Here you will find some useful tips for working with chisels and mallets.
If you take a hammer to help
Both chisels and mallets are usually used for chopping and gouging. For both of these operations, the mallet is taken in one hand, and the chisel is held perpendicularly with the other hand. When a chisel is struck with a hammer, it is simultaneously rotated. How to ensure that the end of the tool is always in the right place.
There are special tools designed specifically for gouging, they are called chisels. On our website you can purchase a flat chisel MATRIX 24262 or KIRSCHEN KR-1001012 and many others. The entire range of these carpentry tools is presented in the “Flat chisels” section. The handles of such a tool must be shockproof and very durable, because they will be hit with a hammer very often.
If with the gouging operation everything is quite simple and clear - take a chisel, take a mallet and use them to make holes and recesses of a rectangular or semicircular shape - then the chopping process can cause some difficulties. You can use a chisel to cut out, in particular, recesses for door hinges. Almost any modern door between layers of natural wood has a layer of MDF or hardboard; it helps to avoid warping (change in shape). But if the wood is not dried well enough, then even this will not protect against deformation. The door hinges will need to be adjusted a little. To set the depth of planting of the loops, the material is chopped along the grain, hitting the chisel with a mallet. Each master chooses the direction of cutting for himself and works as it is more convenient for him - towards himself or away from himself. In this case, you need to use the chisel with extreme precision and care so as not to damage the material and not to injure yourself. When approaching the marked line, the chisel needs to spring back after impact. To do this, blows with a mallet are applied with a drawbar. When choosing wood along the edges of the markings, it is better not to use a hammer, but to do everything manually, applying a little more effort to remove excess material.
Note. If the wood has flaws, for example, knots or places with curling (where the fibers are arranged randomly or tortuously), then to make it easier to pass through them, you need to make shallow notches in these places.
You can always buy a good wood chisel in our online store. In addition to high-quality tools from domestic and foreign manufacturers, including such well-known ones as KIRSCHEN, we also have excellent kits for cleaning chisels and all the accessories a master needs. It’s very easy to place an order in the VseInstrumenty.ru online store! To do this, add the product you like to your cart or call our managers at 8-800-333-83-28.
Master's hands and direction of wood fibers
The correct position of the tool and the carving technique used by the master will depend on whether the wood fibers are cut along, across or along the wood fibers with a chisel. When a chisel is used along the grain, this is called trimming, at an angle to the surface - side threading, and across the grain - cutting ends. Let's look at this in more detail.
- Trimming . When the need arises to quickly get rid of the uneven edge of a wooden part or workpiece, take a chisel. The tool is held with the unsharpened side up - it is controlled with both hands and if you grab the sharp edge, you can get serious injury. When performing trimming, one hand rests on the handle, and the other one grasps the tool blade so that the thumb is directed towards the handle. This hand position provides better control over the movements of the tool and allows you to apply more force. There is a little secret to the craft: to ensure that after processing the surface is perfectly flat and smooth, when the wood is cut along the grain, the chisel is slightly turned so that the flat side always points in the direction of the master’s movements.
- Side thread . One of its varieties is the selection of grooves. To create a rectangular groove, use flat chisels. Their blade is straight with a flattened cross-section. A sharpened cutting edge can be either straight or oblique. Typically, flat chisels are sharpened on only one side, but it is said that a properly sharpened chisel blade should resemble a razor blade. To select round grooves, semicircular chisels are used. Their canvas has a cross section in the form of half or one of the segments of a circle. But no matter what kind of chisel you use for cutting grooves, you need to work with it across the wood fibers. Hold the chisel in the same way as when trimming. In this case, the cutting edge of the tool should be at an angle to the surface, so several cuts are made. After this, the groove is completely selected using the cuts. These steps can be repeated several times, gradually increasing the depth to the desired level.
- Trimming ends or perpendicular threads requires a different hand position on the tool. The handle is grasped with one hand, and the chisel blade is clamped between the thumb and index finger of the other hand. This is necessary to enhance control over the movement of the tool and to give greater precision to each movement of the chisel. In this case, the part of the blade closest to the master will serve as a guide. Trimming the ends of a wooden part or workpiece begins from the far corner. In this case, the tool is directed so that it goes forward and down. If you press down on the chisel blade with your thumb and at the same time lower it down by the handle, you will get a very smooth sliding cut. This work requires a lot of force and very thin cuts of wood are made at a time.
Note! When using a chisel by hand, they do not try to remove a lot of material at once. It is necessary to remove excess wood gradually along the marked line.
How to do it yourself
Using available tools, you can make a chisel yourself. In some cases, it is enough to slightly correct the shape and sharpen it, while in others you will have to resort to forging.
Chisel from a milling cutter
Often, a milling cutter is used as a base material for making chisels yourself. The metal of this part is quite durable. It is easy to give it the desired shape. Manufacturing principle:
- Cut out a piece of metal of the required size from the cutter.
- The surface of the workpiece is carefully polished. The workpiece is given the desired shape.
- The next step will be making the handle from wood.
At the end, all the constituent elements are assembled. Usually the handle is made of 2 parts, which are connected by pins.
Metal drill tool
You can make an angular version of the working blade from a drill. How to make a tool from such a base:
- Select a drill with a suitable diameter. Flatten the tip to form the desired thickness and width.
- Using grinding, you can give the knife part the desired shape. A drill can be an excellent base for creating a “nail”.
- The final stage of manufacturing will be the handle. You need to prepare two halves of wood and twist them with a pin.
If you use a drill as a base, you can get a working part of any parameter.
Semicircular chisels
A semicircular chisel for wood carving can be made from a punch that has a similar shape. Algorithm for making a semicircular chisel from a punch:
- Prepare a punch of approximate size.
- Using a grinder, remove the excess part of the radial part.
- While the metal has not cooled down after cutting, you need to immediately sharpen the edges.
- The last step is to sharpen the blade using a grinder.
The tool is ready to use.
We use a file
A file can be an excellent base for making a straight chisel. The working tool is a grinding wheel. But first you need to choose the right file. Take into account the desired parameters of the future device, the type of metal and the grain size of the file.
Using a grinding wheel, all excess is cut off and the desired shape is formed. The next stage will be sharpening and shaping the handle. It is the handle that deserves special attention. Often a standard file tip is used as a base, but it is not suitable for a chisel. You need to flatten the narrow part and only then attach the wooden base.
If you cut the cutters correctly and then perform high-quality sharpening, then you can also get a corner chisel from a file. In this case, you will have to put in more effort.
Files
A needle file is also a good basis for forming homemade woodworking equipment. Manufacturing and processing features:
- The file needs to be heated strongly and evenly. This is necessary in order to perform actions similar to forging.
- After heating, bend the base until the desired shape is obtained.
- The finished workpiece must be immersed in water. This will cool the metal and harden it.
Sharpening the “blade” and attaching the handle will be the final stage in creating the equipment.
Angle chisels
Angle chisels can be obtained from profile tools by heating metal. After heating the workpiece, it is given the desired shape. Then the handle is hardened, sharpened and secured.
A chisel is the main tool in working with wood if you need to create a beautiful pattern, remove excess wood or form a groove. There are many types of this tool, each of which has its own intended use. You can make the device yourself if you use available materials.