Such a concept as “Slip dishes” or “Liquid clay dishes” is familiar to every housewife. A novice ceramist or potter sooner or later begins to master slip casting as one of the varieties of pottery art. The key role in these concepts is played by slip, that is, liquid clay.
Let's consider what it is, when it is advisable to use slip, and also consider the main nuances of slip casting.
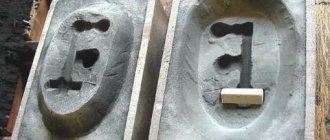
A mold for plaster using the example of a piggy bank
From the very beginning, a novice craftsman faces the question: how to create a mold for casting a piggy bank or other products from plaster? There are different options for making molds for casting. One of the most convenient is the use of silicone.
Steps for making plaster crafts
The video below shows the process of making a hollow plaster figurine. To make the figurine you will need formwork. You can use chipboard and furniture confirmations for it. The internal dimensions of the formwork are slightly larger than the master model. With this gap we determine the thickness of the walls of the created form. The master model we have chosen has holes that need to be closed. This can be done with paper and glue. The coin hole also needs to be sealed. Then we will install the sealed patch in its place. At the next stage, we cut out four centimeter cylinders from the hot-melt adhesive cartridge. Glue the cylinders onto the piggy's hooves and to the bottom of the formwork. The height of the studs will determine the thickness of the form walls on the leg side, approximately 1 cm. The prepared formwork has holes in the center of the side panels. We will fix the bolts in the holes. Their purpose will become clear later. To make the upper half of the mold, you need to close the lower part of the model. We use simple candle paraffin, which we fill half of the formwork with. After hardening, the paraffin will prevent silicone from getting into the lower part of the mold. We are preparing silicone for pouring for making Elastolux molds. To 100 parts by weight of silicone add 2.5 parts of catalyst. Mix so that the stirrer is completely immersed in the silicone. This will prevent the silicone mass for the mold from collecting air bubbles. To ensure that all the air comes out of the cavities of the model, slowly pour the silicone into the mold. After 8 hours Elastolux will harden. Let's start making the second half of the mold. We open the formwork to remove the paraffin. Elastolux does not stick to chipboard panels in the same way as paraffin. The formwork can be disassembled without effort. To facilitate the subsequent separation of the halves of the mold, we treat the silicone with a release agent to create molds. We repeat exactly the procedure described earlier. The collapsible mold for casting is ready.
Let's start making a plaster piggy bank.
We assemble the formwork and put half of the mold into it. In the place where there is a risk of the figurine breaking when pulling the product, we make a cut. In our case, this is the tail area. We dilute gypsum in water. Since coins cannot be inserted into an all-plaster piggy bank, we will make a hollow figurine. Therefore, we calculate the volume of infused gypsum as a quarter of the total volume of the pig. We put the second part of the form and close it all with the top. We add a simple tripod to our design and rotate the shape. The rotation time of the formwork depends on the speed of setting of the gypsum. In our case, 4 minutes. After 4 hours we removed the model from the mold. A cut in the mold made in advance makes it possible to remove the pig's tail without breaking. At the junction of the mold halves there are beads of plaster, which can be easily separated from the model with a knife. The final touch is to press a thin layer of plaster to cover the coin hole. All that remains is to cover your product with gold or other paint!
https://youtube.com/watch?v=rQI3Bk9Wzxg
Read here about working with aluminum for casting various crafts. Another method on the topic of the article.
Slip casting in plaster mold
Slip casting is the shaping of a paraffin-wax slip in a liquid phase based on ceramic powder. The shaping of the blanks is carried out in molds. Let's look at two examples of slip casting molds.
The design of a mold for casting tubular blanks, including piezoceramic elements (PE) (Fig. 5), should provide, along with precise shaping, the possibility of removing the casting from the mold cavity. Therefore, the mold matrix is made as a team, consisting of two semi-matrices 4 with a vertical parting plane. The semi-matrices are closed by two rings 1 with base collars. On the lower ring there is a sprue hole that interacts with the feed tube of the injection molding machine, and on the upper ring there is a precise hole - an auxiliary base for installing rod 3, which forms the hole of the tubular PE. To simplify the assembly and disassembly of the mold, a cap washer 2 is installed between the rod and the upper ring.
Slip casting of spherical PE is carried out using a mold of multiple design (Fig. 6), which has a horizontal parting plane. The cavities for castings are formed by a combination of the surfaces of precise recesses in the matrix 1 and rods 2.
The equipment for implementing the slip casting operation is an injection molding machine (Fig. 7).
The frame of 1 injection molding machine is made of angle steel and covered with steel sheet 1.5 mm thick. A steel plate 9 is attached to the frame, on which the main assembly units are mounted: a slip tank 2, a mold clamping mechanism 6, a guard 7, an electromagnetic valve 4, a contact thermometer 3, a mechanical stirrer 5 with an electric motor, an electrical control unit (in Fig. 7 it is not shown).
The slip tank consists of the slip loading tank itself, feeder 12, a casing and a lid with a stirrer built into it. There is a hole in the tank lid for the feeder. For additional heating of the slip, an additional heater 11 made of nichrome wire is installed at the outlet of the tubular feeder.
The slip tank is installed in the slot of the cover plate and sealed using vacuum rubber with three eccentric clamps. To ensure uniform heating of the slip, the space between the slip tank and the casing is filled with liquid (glycerin), which is heated by a 2 kW tubular heater 13 installed under the slip tank.
The mold clamping mechanism consists of two vertical posts on which a lifting clamp plate 8 is installed. The guard, which is a shield made of plexiglass, serves to protect the operator from burns from the hot mass in the event of its splashing.
The electrical control unit is mounted on the chassis and serves to regulate the supply of compressed air through an electromagnetic valve, to maintain a certain temperature of the slip using an automatic control system, the sensor of which is a contact thermometer, as well as to power the electric motor and electric heater.
For evacuation, a slip tank with molten slip is connected to a vacuum pump. For 1.5...2 hours, air is pumped out of the tank, while a mechanical stirrer operates. At the end of evacuation, the vacuum hose is closed, and the working cycle begins by opening the access of compressed air through the solenoid valve to the slip tank and into the cavity of the membrane pneumatic chamber of the mold clamping mechanism. Compressed air entering the cavity of the slip tank squeezes the heated liquid slip out of the tank through the feeder into mold 10. When the solenoid valve is turned off, the access of air from the network to the valve stops, and the air pressure in the slip tank and the pneumatic chamber of the mold clamping mechanism drops, since the air from the slip tank escapes into the atmosphere. This ends the working cycle.
Centrifugal casting
Centrifugal casting, a method of casting into a rapidly rotating metal mold. The molten metal, under the action of centrifugal forces, is thrown towards the walls of the mold and solidifies, forming a hollow casting (tube, sleeve, ring) without a rod. There are centrifugal castings with different axes of rotation; poured molds - sand, metal, lost wax, shell.
The outer surface of the casting is shaped under the influence of centrifugal force at V=3-8 m/s. Under the influence of centrifugal force, directional solidification of the metal occurs and displacement of gas and shrinkage porosity occurs. The quality of parts can be greatly affected due to the formation of shrinkage cavities. The metal cast into a mold begins to harden from the outer layers, and for some time the surface of the casting is like a solid crust, under which there is liquid metal. It (the crust) is separated from the still molten metal located in the depths of the cuvette, which, decreasing in volume, does not completely fill the entire space of the mold.
Freeze casting
v The essence of the process is that the liquid metal from the pouring ladle through the metal pipeline 1
and the connecting glass
2
is fed into the water-cooled crystallizer
3
.
The resulting pipe casting 5
is cyclically removed upward using the moving part of the mold
4
. A distinctive feature of this scheme is the siphon supply of metal to the mold, the absence of a rod and the removal of castings upward.
v Scope of application
Ø Production of solid and hollow cylindrical billets from gray cast iron, nodular cast iron and white high-chromium cast iron.
Making molds for casting from gypsum
The most used materials are plaster itself and silicone.
Gypsum forms are traditional and familiar to many generations of craftsmen. They are more demanding in terms of craftsmanship in manufacturing. In recent decades, they have been increasingly replaced by silicone molds.
Molds made of silicone are distinguished by high accuracy, the ability to work out small details, and ease of production and removal from the casting. The original composition is somewhat more expensive, but this is compensated by increased manufacturability and durability.
When designing and manufacturing a mold, it is important to pay attention to:
- Careful attention to detail.
- Method of connecting mold halves and their subsequent disassembly
- Method of fixing the halves relative to each other
- Location of casting holes. It should allow the liquid plaster to penetrate into all corners of the mold and completely fill it.
- The configuration of the flask should allow air bubbles to escape freely.
To fix the parts of the flask relative to each other, rubber bands are usually used. Rubber bands for money are suitable for small products; for larger ones they are cut from bicycle or car inner tubes.
Methodological development “Slip casting technology. Making souvenirs"
SCHEME OF THE CLASS METHODOLOGY
1. Introductory conversation about the material with which to work. Report the topic of the lesson.
2. Materials and tools.
3. Preparing material for work:
a) modeling toys from plasticine; b) making a plaster mold for casting; c) preparation of slip; d) casting of figures; e) drying, firing; e) painting of the finished work.
4. The practical part lasts several lessons. The teacher monitors the children’s work, monitors the correctness of casting techniques, helps those who have difficulties in their work, and promotes friendly relationships between children.
1. OPENING CONVERSATION
Since time immemorial, people have sculpted from clay objects necessary for everyday life, primarily dishes.
In the hands of talented craftsmen, the most ordinary things turned into true works of decorative and applied art. (Picture 1).
In a word, clay is not only an ancient, but also a modern material, without which it is impossible to do without either in the present or in the future.
Among the methods of molding ceramic products, casting occupies a special place. It makes it possible to produce with greater precision many souvenirs, completely identical thin-walled vessels, having a complex shape of small sculptures with fine detailing.
2. Materials and tools
3. SLIP CASTING TECHNOLOGY BASIC OPERATING METHODS
3.1. Preparation of slip.
To prepare the slip you need:
a) at the rate of 1/1 (part water, part clay);
b) grind each lump to liquid sour cream;
c) office glue is diluted 1/1 with water and added to the clay solution from 5 to 8 drops (to liquefy the slip);
d) the slip is filtered and poured into a clean container.
Example: only warm water is used in the work; the slip is prepared in a warm room, preferably on a warm table.
3.2 MOLDING A FIGURE UNDER A GYPSUM MOLD
1) The theme of the future figurine is selected and a sketch is drawn (front, side, back views). If the side does not repeat the other, two are drawn. Figuratively, the drawing should appear three-dimensional. The completion is the sculpting of the selected figure.
2) The figurine should be molded from one piece of plasticine. To avoid locks during casting, it should be compact (streamlined), there should be no sharp corners (for example: the bend of the neck, a raised arm, an ear and other bends of parts of the figurine). The final stage of work is smoothing the figure with water and fingers.
Equipment and materials for casting
For casting, a slip of a specific consistency is used. It should feel oily to the touch. The composition of the slip, in addition to clay and water, includes various additives that change the consistency and other properties of the suspension. Used as additives
Slip for the upcoming product
- Other types of clay
- Sand
- Chamotte
- Electrolytes
- Dyes
The most important equipment is the casting molds. The quality of the final product depends on the thoughtfulness of the design and quality of workmanship. Slip casting uses plaster molds. In most cases, the mandrel is made of 2 parts. For the exact combination of two parts, protrusions are provided on one of them, and the depressions they need according to the profile are provided on the other. In artistic casting, characterized by small series, parts of the mold are held together with rubber bands. A gypsum mold for slip casting has a limited working life, and when planning the production of large batches (for example, tiles), it is necessary to calculate the production of several mandrels for any product.
Slip casting molds
Important! The form must be made exclusively from very high-quality sculptural plaster. The plaster must be fluffy and free from foreign inclusions and lumps.
Mandrels made from very high quality gypsum can withstand over a hundred castings. If the gypsum is of low quality, then after a dozen castings the walls begin to crumble and crumble.
Molds that have become unusable can be crushed with a hammer, sifted through a small sieve and added to the gypsum solution for casting new mandrels in a ratio of no more than 1:10.
Slip composition
The base of the slip is clay with additives, diluted with water. It is usually diluted to the consistency of sour cream or thick cream.
Casting slip composition
The slip is prepared on the basis of one or several types of clay, adding sand, fireclay, electrolytes and dyes. For different types of products, choose the most suitable composition for them.
Making a mold from Elastolux Platinum silicone
For such a large and simple figure, you can cast a single (solid) mold and then cut it on one side to pull it out. Elastolux turns and bends very well. Here Elastoform breaks. And a release agent (vaseline) is not necessary in this case. I don’t smear it because the products are painted after casting and I don’t want to constantly degrease them.
A certificate is required for the commercial production of chocolate products, sweets, lollipops, etc. If you make chocolate yourself for yourself, your wife, or your child, you can simply use food-grade silicone. When treating your neighbors with a hammer drill, you need to prepare forms from technical silicone.
How to make a mold for silicone baits from plaster
Avid fishermen can also be frugal. Why buy new baits when you can melt down old ones? In this case, plaster molds will again come to the rescue. How to do it? This job will be easier.
As a rule, a container is taken, again lubricated, and filled with plaster. As soon as the solution has set a little, bait is pressed into it. After drying, the artificial fish are removed from captivity. The form is ready.
Now it needs to be thoroughly dried and coated with epoxy resin.
Attention! If new lures are cast by melting down old ones, be careful. Observe safety precautions when working with hot silicone
Conditions of education
We teach artistic ceramics in Moscow 6 days a week from Monday to Saturday according to the selected schedule
You can apply for training at any convenient time on our website, but first pay attention to the conditions:
- Upon registration, you must pay 50% of the tuition fee. The remaining amount is due during the first two weeks of training.
- The duration of the basic course is 72 academic hours
. - Cost 48,000 rubles.
- Group size – up to 4 people
. - The document issued after successful completion of the basic course is a Certificate of profession “Manufacturer of ceramic art products”
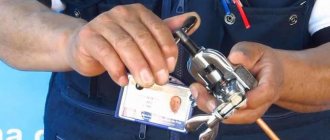
with the assignment of 2-3 categories. - To register, have with you: passport, photograph 3x4 cm.
Classes take place in a workshop using pottery equipment and tools, and modern kilns. The training course for ceramic potters includes theoretical and practical parts, which are included in the plan of each lesson. During the course, each student will create decorative items, ceramic tiles and tableware using different techniques for working with clay. Mentors will pay maximum attention to technologies that are of most interest to a particular group. All work, except the thesis, will remain with the student. One of the works completed by the student during the course will be presented for defense as a thesis. Based on the results of the defense, we will issue a qualification document. For those who want to learn how to professionally manufacture a specific type of product, we organize individual and group courses at an advanced level.
Apply for training now! We will contact you, answer your questions, and sign you up for a course with a suitable training mode.
Find out the start dates of courses
Course leader and teachers
Pimenov Sergey Viktorovich
Teacher of the course “Art Ceramics”
Pimenov Sergey Viktorovich
Artist, ceramist-potter. Studied at MGHPA named after. Stroganov at the faculty of monumental and decorative painting. For 15 years he was engaged in applied design (art forging, casting, mosaic, stained glass, furniture, staircase, interior design). He worked in the production of stove tiles and wall tiles. Since 2021 she has been working with clay - pottery, modeling, decor. Teaches at the school-studio of Sergei Akentyev from (the village of Gzhel brick factory). Member of the Creative Union of Potters Alexandra Poverina.
Zvyagina Veronika Yurievna
Teacher of the course "Pottery"
Zvyagina Veronika Yurievna
Ceramic artist, potter, participant in creative exhibitions and ceramic festivals. More than 10 years of experience working with clay. 10 years teaching experience. Head of the creative project “Making” Teacher of the course “Pottery” at the Russian Academy of Crafts.
Sirbu Alexandra Nikolaevna
Teacher of the distance course "Ceramics and pottery"
Sirbu Alexandra Nikolaevna
Education: — AHPK im. V.M. Vasnetsov, majoring in decorative and applied arts, Moscow State Academy of Arts and Sciences named after. S.G. Stroganov with a degree in artistic ceramics, Institute of Problems of Contemporary Art “New Artistic Strategies”. Since 2014, she has been a regular participant in Russian and international exhibitions, a participant in international biennales, and a laureate of a number of Russian and international competitions. Since 2022, member of the International Federation of Artists and the Creative Union of Artists of Russia. Conducts theoretical and practical classes, long courses, master classes for children and adults. 7 years of teaching experience. 15 years of artistic practice experience.
Slip casting technology
The slip casting process is based on two physical phenomena: the ability of gypsum to absorb water and the ability of clay to release water. It is permissible to produce two classes of castings: thin-walled and thick-walled (solid). Compared to the technology of a pottery wheel or hand sculpting, the process does not look very simple. Using it requires specific abilities and skills. Even professionals will usually have to modify the molds for low tide. All tech. The process from the beginning of developing a sketch to receiving the finished product takes up to a couple of weeks.
https://youtube.com/watch?v=00Wej0ca1Lo
Primary operations
First of all you need to create a sketch
When developing, it is necessary to take into account the requirements of the selected technology, to calculate in the form of sprues of sufficient cross-section and in places that provide the best filling of the mandrel and fit to the model
Example sketch for slip casting
Based on the sketch, we begin making the model. The model is a mirror image of the upcoming product, but stands out from it in a slightly larger size. This is an allowance for inevitable shrinkage during firing.
Slip casting model
Models are made from materials such as plasticine, plaster, wood, ceramics or silicone. Using the model, the specialist makes a collapsible mold from plaster. Other materials available in the workshop are not suitable for mandrels, because only gypsum has the unique property of absorbing water from the slip. The form is disassembled and the model is taken out. The mandrel is being prepared for casting. The slip is diluted and thoroughly mixed just before casting.
The foundry process itself consists of the following stages:
- Pouring slip into mold
- Removing excess solution
- Drying of the casting
- Separation of the casting from the walls of the mold.
https://youtube.com/watch?v=VJ27iL456_U
After drying, separate the parts of the mold and carefully remove the product. The casting is dried, and if necessary, insufficiently worked parts are corrected. After casting, it must be fired in a muffle kiln, just like a product made on a pottery wheel or by hand molding
Products made by slip casting can also be glazed. Glaze slip is applied to the surface. After which the products undergo secondary firing. The glaze elements are sintered to form a thin and smooth glassy layer.
After casting, it must be fired in a muffle kiln, just like a product made on a pottery wheel or by hand. Products made by slip casting can also be glazed. Glaze slip is applied to the surface. After which the products undergo secondary firing. The glaze elements are sintered to form a thin and smooth glassy layer.
When it comes to methods of making dishes and ceramic products in general, most people immediately imagine a pottery wheel. Not everyone even knows about hand sculpting. As for casting, as a rule, they don’t think about it at all. Many people imagine something like metal casting: a fireproof mold of several parts, into which a melt is poured, often under pressure, and then the finished product is removed. With ceramics everything is a little different.
A form is also needed here. Plaster, anything else won't work. The fact is that gypsum is able to absorb water. The ceramist pours slip—clay heavily diluted with water—into this mold and lets it sit for some time. Gypsum absorbs water from the slip, leaving a thickened layer on the walls. After this, the remainder of the slip is poured out, the product is allowed to dry slightly and the mold is disassembled.
Andrey Mamontov is one of the authors of DishWishes, specializing in the manufacture of plaster molds and semi-porcelain casting.
This is a seemingly simple process. It allows you to make things in high detail in large quantities. If a ceramicist has been ordered a set of a couple of dozen identical objects of complex shape, casting is what is needed.
Neroznikova Evgeniya - pours ceramics into molds, specializes in underglaze painting.
In addition, casting can be used to make very thin-walled things that would be difficult to unscrew on a wheel. This is mainly necessary when working with porcelain, which is capable of transmitting light. These are the advantages.
Author: Malakhova Alexandra. Casts the finest peonies and lotuses from porcelain.
Cons - everything else.
Firstly, even in order to cast a simple mug, you need a mold of two parts, or even more. Not everyone can make one on their own the first time. Contacts of master gypsum modelers are passed from hand to hand. Secondly, after casting, the plaster must dry thoroughly. It takes time. Accordingly, in order to make dishes in large batches, you need a lot of molds, and they need to be stored somewhere. Thirdly, it is not so easy to obtain a product with the required wall thickness. I kept the slip in the mold for too long - the product turned out to be thick-walled. I drained the slip too early - the walls turned out to be too thin, and the half-dry product fell apart under its own weight. It is also important to be able to choose the appropriate consistency of the slip, to ensure that it is homogeneous and free of bubbles. But if a ceramist has overcome these difficulties, the broadest prospects open up before him.
The Ceramum workshop casts coral candy bowls and cups with unusual handles that would be difficult to make by hand.
Valentina Fadeeva pours cups, teapots and bowls, and decorates them with slip using the pastillage technique.
All presented ceramics made by slip casting can be purchased at the DishWishes.ru store.
Photo - Potepalova Antonina.
Text - Pavlov Mikhail.
What other forms are there?
- Silicone. The container is made of rigid material, such as chipboard or fiberglass. There are no gaps in the container, all parts of the shell are connected with glue. Next you will need plasticine for sculptures, evenly lay it down to half the container. The plasticine surface should be smooth. And so the model is pressed into the plasticine, holes are made around it using a pencil so that parts of the mold do not move further. Then the volume of material is measured - something loose is poured into the container, and then it is sent to a measuring container. And the surface of the model will need to be lubricated with a release agent.
- Plastic (formoplast). The advantage of such forms is that the rigidity of the matrix is combined with the thinness of the walls; they also repeat the outlines of the fragments. These forms are not difficult to care for and are not afraid of exposure to chemical reagents. Plastic molds for casting are made using hot casting and pressing technology, this is done on professional equipment. At home this is almost impossible.
- Rubber. They are made by hot polymerization, strictly under pressure. These forms are made automatically, that is, professional equipment is required. These forms demonstrate high abrasive resistance, they are durable and are able to convey the texture of natural stone almost perfectly.
- Polyurethane. These molds for modeling are distinguished by elasticity, wear resistance, they also do not require any special care, and demonstrate resistance to alkalis. To obtain a polyurethane form, a modified polymer and a hardener are mixed. Polyurethane is considered the most popular type of mold, which is suitable for casting not only from gypsum, but also from concrete and cement.
How to prepare slip?
The slip has found application not only in pottery, but also in industrial production. However, the greatest interest is that liquid clay from which various ceramic products can be made by casting. The density of the slip mass suspension is approximately 1.7 g/cm3. Powdered slip can be purchased at almost any hardware store. At first glance, it may seem that it will not be possible to obtain this material on your own, since it contains minerals and silicates such as quartz, feldspar or kaolin. But they are all components of ordinary clay, therefore, knowing certain simple technologies, all work can be done at home.
The purchased powder contains additives such as nepheline, liquid glass and soda. In some cases, ceramists supplement it with special glass breakage.
If it is necessary to make colored clay, then additional coloring pigments can be added directly to the powder.
Usually the manufacturer indicates the method for preparing the slip, but if such information is not on the packaging, then the composition is adjusted according to a standard algorithm. The powder should be diluted in soft water. Regular tap water contains salt impurities. This will negatively affect the quality of the slip, as well as the process itself. In hard water, the powder liquefies worse.
In addition, bubbles will form in the suspension, which will subsequently lead to the formation of pores, cracks and even ruptures.
In order not to measure the hardness index (which is extremely difficult to do at home), you can use distilled water. Dilute sucking in the following proportion: 1.7 - 1.9 liters of water per 4 kg of dry powder. With this ratio, the moisture content of the resulting suspension in the final form will be about 32%. The share of soda and liquid glass is not taken into account.
First, 2/3 of the volume of liquid glass is introduced and after thorough mixing, the remainder is added. You can use a special mixer or drill attachment for mixing. The mixing process should take at least 3 minutes. The powder and water should be dosed in parts, and after each dosage the composition should be mixed well.
It is important to achieve uniformity of the material.
The prepared composition is left for 24 hours, after which the suspension is adjusted to the desired degree of fluidity using a dosage of liquid glass. The slip, ready for use, should flow in a continuous thin stream. At the final stage, the suspension is filtered through cheesecloth and the consistency is checked again, but now the solution is made more liquid using water.
If you did everything according to the instructions, then the quality of the slip should be high. However, this does not exclude the occurrence of defects.
The most common of these is the formation of blisters. It's not just about water hardness. If pouring is too fast, bubbles can also form in the slip on soft water, so the technology of casting itself is a separate issue that should also be given attention.
To avoid buying powder, you can make a clay slip. To do this, medium-fat clay is soaked in a fairly large container, stirring it periodically as it soaks. There should be a lot of water. The result is a rare solution, like milk, that can be filtered freely through a sieve.
The straining procedure will get rid of small debris and undissolved particles. The purified solution is left for a day. As a result of the clay settling, the water will become transparent, and a viscous substance will form at the bottom of the vessel. The clear water is drained, and the settled clay is collected and transferred to another container.
The solution settles again, only now you need to wait at least 2 days for this. The newly formed water is drained again. The settled clay can be used as a mother liquor for preparing slip. The required viscosity is achieved by adding water or liquid glass.
It is important to remember that it is not recommended to prepare slip in iron dishes.
If it is possible to carry out work and store the slip in a warm room, then it is advisable to take advantage of these conditions. The clay mixes well in the heat, and the casting will be more uniform.
If your slip has thickened as a result of long-term storage, you can easily make it liquid again. But here it is important to understand that rapid settling of the solution indicates low quality of the raw materials. For example, if the clay settles in 5 - 10 minutes, this means that it was not fat enough to begin with. There is no need to throw away the solution. You can simply add a portion of fatty clay and dilute it with electrolyte (liquid glass).
Necessary equipment and materials
Casting gypsum products does not require highly professional equipment. The process is quite accessible in an amateur home workshop.
Important: preparation, the casting process itself and final operations are associated with the appearance of a large amount of dust. High-quality ventilation and cleaning of the premises must be ensured. You should not do this in residential areas or in houses where allergy sufferers live.
In addition, a mixture of air and dust in a certain concentration is explosive. Avoid using open flames in the workshop
You should not do this in residential areas or in houses where allergy sufferers live. In addition, a mixture of air and dust in a certain concentration is explosive. Avoid using open flames in the workshop.
Gypsum casting molds
The main equipment is a casting mold. To make it, you must first prepare a model of the product. Plasticine, polymer clay, and any plastic material are suitable for this. If a copy is made, then the original itself is the model. It is imperative to mark on the model the line where the halves of the future form meet.
It is important to choose the right material for the flask. If you are preparing a small mold for casting a pendant or parts of a scale model of equipment, hard cardboard will do. For casting large castings, it is better to take multi-layer plywood - it will not be crushed by a large mass of gypsum
For casting large castings, it is better to take multilayer plywood - it will not be crushed by a large mass of gypsum.
Rigid cardboard flask for plaster casting
You will also need:
- Container for mixing gypsum with water.
- A glass with a spout for pouring plaster.
- Elastic bands for tightening parts of the form.
- Lubrication brushes.
- Drill for drilling holes.
- Spatulas and knives.
- Cardboard and tape.
The best plaster for casting should be chosen. Construction alabaster can be used, in extreme cases, it is better to sift it through a 0.2 mm sieve, make sure that it has reached a “fluffy” consistency and does not contain lumps or foreign inclusions.
Lubricating plaster casting molds
You can purchase ready-made lubricant for the mold, or you can make it yourself from grated baby soap, water and sunflower oil.
How it is made is the slip casting method.
Hi all!
People often ask me how my dolls are made. There are no questions with clothes, but with ceramic parts, not everything is clear.
I conscientiously try to explain, tell what a plaster mold is, how molding occurs, I even tried to draw something, but without much success.
I decided to do something like a review article with pictures, but without unnecessary technical details. True, we never got around to photographing the doll parts.
I’ll show it to the Dog on the Bell - the principle is the same.
a model from clay . Here she is:
Then I remove the plaster mold . The form has two halves - front and back. There can be as many parts as you like, but it’s more convenient when there are fewer of them.
From one plaster mold you can remove 30-50 castings without loss of quality. Then the form is worked out, the clay seems to eat it away from the inside, removing microns of gypsum over and over again. And the form has to be thrown away.
But I need more bells! You will have to make a model from which you can remove as many forms as you like. I make the model from construction silicone sealant + starch. The disadvantage of this model is that over time the silicone will shrink. According to my observations - 5-8 percent per year. Since I only need the model for a month of work, that’s okay.
I remove the required number of molds from the finished model. They dry for about a day and the blanks can be cast.
For casting, in addition to a plaster mold, you need a slip - this is a clay solution with a viscosity approximately like that of kefir. Or fermented baked milk - whichever tastes better)))
The operating principle of the mold is based on the ability of gypsum to draw water from the slip. As a result, a denser mass of clay is formed in the immediate vicinity of the mold - a shard . You can clearly see when the required thickness has been reached and the slip can be poured out.
I poured out the slip and left the mold upside down for about five minutes to let the residue pour out. Turned it over and trimmed the edges. I don’t make a sprue - it’s easier for me to add slip once during the casting process, and thereby get a smooth edge.
The casting stood for about an hour - you can take it out. I immediately make a hole with a knitting needle for the rope on which the ball will be attached.
The finished castings dry for a couple of days and are sent for firing (in this case, the only one) firing, which occurs at a temperature of 900 degrees Celsius.
Here are the dry unfired blanks:
And this is what they look like after firing:
I cover the fired blanks with acrylic paints as a background, and all that remains is to paint the nose and eyes. Well, and the outline is an inscription wishing good luck. After the paints have dried, I attach a ceramic ball and that’s it.
My bell is ready. Everything is very easy and simple!
Additive production
For the production of complex shapes in small quantities, additive manufacturing (AM) is an effective approach and has been the subject of significant research and development. Unlike additive manufacturing of polymeric materials, the applications of AM ceramics remain very limited due to material processing challenges. Commercially available equipment for AM ceramics is mainly based on layer-by-layer sintering of powders and is rarely cost-effective. However, the difficulties with machining ceramic products mean that AM methods may be attractive in situations where production volumes are too low to make molds viable for slip casting methods. In particular, the additive manufacturing of ceramics from preceramic polymers using techniques including stereolithography, followed by pyrolysis to produce polymer-derived ceramics, represents a new approach to solving the problem of additive ceramics.
How to make a plaster mold: step-by-step instructions
- Step 1. Prepare a container for filling with plaster or make a box from boards. When making a wooden box for pouring, keep in mind that all joints must be glued. A glue gun is suitable for this. Plaster will easily find any hole or crack, take advantage of the loophole and flow out. You can make formwork - a box without a bottom. In this case, the wooden blank is placed on a sheet of plywood or fiberboard and the bottom is carefully coated with plasticine so that there are no cracks.
- Step 2. Before pouring plaster, the container must be lubricated. For this purpose you will need soap, oil or liquid wax. The best option is liquid soap. You need to smear it generously so that after drying the cast can easily separate from the walls of the container. For this you will need a brush.
- Step 3. Fill the first half of the mold. There are two options. In the first case, a thin layer of gypsum is poured onto the bottom of the container and left until it hardens. Naturally, you will have to prepare a small portion of the solution for this purpose in advance. When the mixture has hardened, place the model on it, thoroughly lubricate it with soap and fill it halfway with fresh plaster. In the second case, instead of a plaster base, a layer of plasticine is used.
Step 4. So, after hardening, the mold is removed and the model is carefully taken out of it. If plasticine was used, the contacting planes will be uneven. You can use a piece of saw blade for leveling. Using teeth you need to carefully remove small layers, then work with sandpaper. At the end of the work, you need to make so-called “locks” on the surface of the mold. Have you seen how Lego pieces fit together? It is according to this principle that both parts of the form will be combined. Indentations are made on the surface in several places - smooth pits.
- Step 5. We make the second part of the mold. Now you need to go over the half-form with a brush, shake off dust and small pieces. Grease the container and place the workpiece in it. Place the model in the mold and grease everything. Pour plaster so that the mixture covers the sample with a layer about two centimeters thick. Once the plaster has hardened, the prototype can be removed.
- Step 6. Cut out a hole for filling on both parts of the mold. Next, you need to let it dry for 24 hours. Then the mold must be rinsed with warm water and dried again. Ready! Now you know how to make a plaster casting mold.
Plaster modeling craft: the process of making a rough mold
I will describe in detail the process of making the so-called rough mold using the example of a conventional doll head. The list of necessary tools and materials for making a gypsum mold for slip casting is described here>>.
So let's begin. I sculpted a certain head out of clay, from which it is necessary to obtain a working mold for casting.
To make a working form, we need a plaster model, but we only have a clay sketch. To obtain a plaster casting and bring it to a state suitable for making a working mold, a rough mold is used.
Why can’t you immediately make a working form using a clay or plasticine model?
Simply because neither clay nor plasticine can be processed as perfectly as a plaster surface. There will always be dents, bumps, and scratches. It is very difficult to achieve a smooth polished surface on clay or plasticine. And the model must be perfect, without defects, otherwise every defect will be printed on the mold and replicated in castings. And on each casting, this defect will have to be eliminated manually, which will take much more time than making a high-quality model once.
The second reason is to get the model in a hard, durable material so that if the mold wears out or gets damaged, it can be restored, and clay and plasticine are not such materials. Therefore, we need a temporary “rough” mold as an intermediate element for making the master model.
Before you begin the molding process, you should carefully review the model to determine how to most efficiently divide the mold into parts. Unlike the working form, the rough form can have a minimum of parts, even if it forms small locks. If necessary, it can then be split.
Having visually assessed the model, I decided to limit myself to making a two-piece mold, despite the minor locks (jams) that form later.
After a visual assessment, we need to clearly determine the most prominent line of our model along which the division of the form will take place. It is quite difficult to accurately determine it by eye, but there is a very simple and accurate way that clearly shows the place of division. To do this, we install the model on a sheet of glass and secure it with pieces of clay, as shown in the photo below.
After the model is firmly installed, take a square or a wide ruler and rub its end with a chemical pencil.
It is advisable to use a wooden square, it rubs better. I didn't have a wooden one, so I took a plastic ruler. Having rubbed its end, we apply it perpendicular to the base surface with the rubbed edge and draw it along the established model.
The ruler will leave a mark on the surface of the model in the most protruding place.
And so on around the entire circumference of the head. We get the exact division line.
Next you need to decide on the overall dimensions of the form. The rough mold can be quite thin, as it is not intended for slip casting. Therefore, we will try to keep the wall thickness to a minimum. And given the fact that subsequently the mold will have to be cut, the extra centimeters of thickness will only complicate the process.
Having estimated the dimensions, we begin the process of formwork formation. We cover it with clay along the protruding line. Precisely with clay, and not with plasticine, as I sometimes saw online. Why clay, I told in the previous article.
We gradually form the base of the formwork around the entire circumference.
We will have a sprue on the side of the neck, so we leave it there without any casing. After the base is ready, you need to install the formwork walls. In flat places we use pieces of glass, and in the rounded part a piece of plastic from a bottle.
All walls are thoroughly fixed with clay.
When the formwork is installed, you can begin pouring gypsum. For the rough form we use construction plaster G-5. Pour 1/3 of the volume of water into the plaster and begin pouring plaster in small portions. Until a tubercle forms above the surface of the water, which will slowly sink into the water.
Stir the gypsum thoroughly until a uniform homogeneous mass without lumps is formed. After stirring, the plaster should sit for about a minute so that bubbles float to the surface. Carefully pour the top layer with bubbles into waste. After this, the plaster is ready for use.
We begin to gradually pour plaster onto the model. The rough form should not be thick, so we do not pour out the entire volume of plaster at once, but build up the form little by little, in small portions.
The optimal thickness of the rough form should be 1-3 cm.
As soon as the gypsum has begun to harden and has set sufficiently to hold its shape without formwork, the walls of the formwork should be removed and the surface of the form should be treated with soft gypsum. The rough form may not be ideal in appearance; it is enough to just slightly align the bumps for ease of work.
As soon as the gypsum has warmed up, which means that the gypsum hardening process is in the active phase, the lower (clay) part of the formwork can be removed.
And immediately clean the joining surface of the mold.
We got two locks on the form on their own, due to the bending of the form, and we cut out the third locking one additionally.
Sweep away all the debris with a brush.
To make the second half of the mold, you must first prepare a soapy lubricant. Take any soap (not liquid soap) or soap and finely chop it into a bowl, fill it with hot water, and place it in a container with boiling water. Stir until the soap is completely dissolved.
When the soap has dissolved, add a little vegetable oil and beat until foamy.
The grease is ready.
Now you can make the other half. We place the model again on the clay platform with the finished half down and stick it on all sides to avoid plaster leaking under the mold. Before installing the side walls, generously coat the mating surface of the mold with soapy grease. While we are installing the walls and securing them, the lubricant will be drawn in by the plaster.
Remove excess grease with a brush.
Fill the second half in the same way as the first.
The plaster has begun to harden, we remove the formwork and process the surface of the mold.
It is convenient to do this with a piece of hacksaw blade, with the toothy side.
That's all. You can open it.
We extract the clay model.
As you can see in the photo, in some places the clay particles came off the model and stuck to the plaster. It's not scary, the clay is easily removed from the plaster. For a rough form, the quality turned out to be quite normal. The requirements for work uniform will be completely different.
Now the form needs to be carefully retouched, all irregularities and bumps must be cleaned, the details corrected and refined. A metal stack with rounded edges, narrow and wide, is best suited for this.
This is what the retouched rough form should look like.
And that could be the end of it. But we have locks (wedges) in the nose area on the front half of the form and just below the ears in the area of the jaw joint on the back half. If we were making castings from slip, then these minor jams would not cause us any difficulties when removing them from the mold. But since we will be casting the model from plaster, and gypsum, as is known, expands when hardening, it will be extremely difficult for us to remove the castings. It will jam tightly in the mold, and it will hardly be possible to remove it without damaging it. Therefore, our form will need to be split into 2 more parts.
To do this, we outline the split lines. They will go through the middle of each part.
And we make cuts along these lines with a hacksaw for metal, approximately ¾ of the thickness of the form.
Now the halves need to be split. This can be done by inserting a wide chisel into the cut and lightly striking the chisel, moving it along the cut. I simply inserted a metal ruler into the cut and tilted it to the side, thus breaking the shape.
As a result, instead of two halves, we now have four.
Now the mold should be dried, polished and varnished. This will be followed by the stage of casting the model from plaster and making a working mold, which differs in many respects from making a rough one and has its own difficulties and nuances. We'll look at these parts of the process in future lessons.
If you have any questions, feel free to ask them in the comments. I will try to answer as much as possible.
To be continued.
Use of slip casting
Clay slip casting is used very widely both in industry and in aesthetic crafts.
Commodity production covers sanitary ceramics, the production of figured components for room cladding, tiles and stove tiles.
Separately, it should be noted the production of high-voltage insulators. Porcelain insulators combine low cost with excellent electrically powered properties, resistance to temperature changes and excellent durability. Their downside is considered to be their great fragility. Nowadays, they have begun to lose their position in the market to products made from today's plastics.
If you find an error, please select a piece of text and press Ctrl+Enter.
Application of slip casting
Slip casting from clay is used quite widely both in industry and in artistic crafts.
Industrial production includes sanitary ceramics, the production of figured elements for interior decoration, tiles and stove tiles.
High voltage insulators
Separately, it is worth noting the production of high-voltage insulators. Porcelain insulators combine an affordable price with excellent electrical characteristics, resistance to temperature changes and excellent durability. Their disadvantage is their high fragility. Recently, they have begun to lose their position in the market to products made from modern plastics.
Slip casting: subtleties, tricks, techniques
Are you starting to cast?
This means that the following will be on the table in front of you.
1. Plex board or modeling board.
2. A jar for porcelain scraps (then we will recycle them back into slip).
3. Clean sponge (wet, wrung out).
4. A set of tools (cutter, spatula, calibrator, awl with ball, special tool for a specific product).
5. Brushes of different sizes.
6. A bucket of warm water.
7. A container of finished slip, mixed and filtered through a fine sieve.
8. And, of course, the form.
The form should be dried, but not too dry. The dry form is warm to the touch, the undried form is cold.
It seems obvious, but many suffer. The amount of casting slip should be proportionate to the task. For casting small items, 0.5 cups with a spout are sufficient. Running out of slip in the glass? Top up from a bucket (do not work with a heavy bucket, lifting it to shoulder height).
Pour quickly in a thin continuous stream (without stopping).
If the mold has a large sprue, then there are no problems. A small sprue (5-8 mm) requires a perfectly thin, thread-like jet so as not to clog the hole. This requires an eye and skill. As an exercise, you can pour the slip from glass to glass.
You need to pour on the bottom of the mold, not on the wall. Otherwise, vertical streaks may appear on the product, which are visible even after firing. Example: if you are pouring the shape of a doll's leg, you need to aim for the heel, otherwise (see above).
Why do you need to pour quickly? When braking and pausing, horizontal stripes remain on the product, which will be visible on the biscuit, no matter how much they are washed out or rubbed.
Slip drain. We advise inexperienced pourers not to pour 2 products at the same time. In other words, they filled the product, drained it, then moved on to the next one.
Porcelain can thicken from simply standing, so before pouring, you need to give activity to the mass poured into the mold, for example, by rotating, shaking slightly, shaking the mold a little.
In molds with a small sprue, before draining, use a thin spatula to clear the drain hole.
Mistake: many people cut out the crater of the sprue, but do not touch the hole itself, for fear of damaging the product. The sprue hole must be free! For this purpose, you can use cocktail straws of different diameters.
Method: insert a piece of tube, preferably a corrugated one, turn it over the drain glass and blow the slip out of the mold. All the slip must flow out; special attention is required for shapes of complex configurations, with corners and undercuts.
When blowing, a funny sound may be heard, but the result is more important.
Drain the slip. Throw the tube into a bucket of water. Without turning the mold over, place it with the sprue down on a plastic table/board.
Typical mistake! After draining the slip, many people turn the mold over and put it in its original position. This cannot be done: such manipulations cause the slip to flow down the walls of the product and leave ugly streaks, as a result of which the thickness of the product inside varies. During firing, due to the difference in thickness, tension may arise, cracks may appear along the streaks, and the product will be rejected.
The same danger is fraught with incomplete drainage of the slip from the mold. Therefore, when draining complex shapes, with corners and undercuts, it is necessary to lightly shake the mold at different angles while draining the slip.
Recommendation. Is this your first time pouring into a mold with a complex configuration? The first casting usually goes to waste, or more precisely, to a scrap bucket. Therefore, do not rush to take it out, let it sit for an hour or more, it will pick up the remaining grease and chips of plaster. Having taken out such a casting, take the time to cut it in different places and examine whether there are any drips or differences in thickness, and based on these observations, adjust further work with this form.
Based on the “first pancake”, an experienced caster can conclude that it is necessary to replace some pieces of the mold!
Enough for today. We will devote a separate material to the nuances of disassembling the mold and working with the casting.
Ceramic consultation - All questions
Terra sigillata (Latin terra sigillata) is a clay coating on the surface of ceramics. It has been used from ancient times to the present day as a decorative agent in artistic ceramics and handmade household ceramics.
Composition : 100% clay, very rarely with the addition of inorganic pigments. The color is determined by the type of clay after firing. The peculiarity of terra sigillata is the extremely small size of the clay particles and the almost complete absence of larger particles. Thanks to this, the coating spreads well, forms a thin, even layer, adheres well to the surface of the product, and does not form peeling or cracks during drying and firing. Polishing a layer of terra sigillata in a hard, almost dry leather state gives a weak shine, characteristic of products of this type, which is preserved during low-temperature firing.
Preparation: The cooking technique is simple; ready-made terra sigillata can be stored for a long time, so you can cook it at any convenient time and for future use. Any clay is used, usually red, since it, compared to white, contains much more finely dispersed fraction. For the same reason, purified quarry clay is preferable rather than a ready-made ceramic mass containing waste and flux—for our case, ballast. 2-3 kg of clay are dissolved in a high container of 8-10 liters, for example, in a bucket or plastic wide-neck bottle completely filled with water. To see the settling process, you can dissolve a smaller amount of clay in a 3-5 liter glass jar for the first time. To facilitate dissolution, add a teaspoon of soda ash or liquid glass, or even two or three spoons, to the water. You need to dissolve it carefully. There should be no small sticky lumps left. The loosened mixture should resemble milk, not heavy cream. You can use a mixer, you can control the dissolution by passing the mixture through a fine sieve - there should be no undissolved lumps. The purpose of dissolution is to create conditions for free settling of clay particles. Now you need to leave the bucket alone for 15-20 hours. That is, for example, from 6 pm until lunch the next day. It is important. During this time, the suspension will stratify: at the very bottom there will be large and small grains of sand, in the lower third there will be clay with large particles that have not yet had time to completely settle. The bottom sediment and the lower third will need to be thrown away, although they contain almost all the dissolved clay! The top third is also not needed, it is too watery. We are interested in the middle third; the particle size in it is approximately 0.1 microns = one ten-thousandth of a millimeter. It needs to be separated, for example, slowly and carefully drained, avoiding mixing with the lower third. Or use a siphon. Look on the Internet how this is done (search for terra sigillata, pictures). The separated liquid can be poured into a wide dish and left to dry. The best consistency for storage is like soft butter, and until this consistency the terra sigillata will dry for a couple of days or a week, after which it can be transferred to a jar with a lid. You can add water at any time for application. The exact proportions of water-clay-soda-liquid glass-sedimentation time will speed up the dissolution process and increase the yield of paste ready for use.
Application: Apply one, two or three very thin layers to a well-compacted surface of an unfired, almost dry product. Each layer is applied after the previous one has dried slightly. Often the coating adheres well to scrap porous shards. The coating is polished with a smooth stone when the layer of terra sigillata dries to a leather-hard state. The polishing technique is important to achieve a uniform effect. If you have terra sigillata of different colors on hand, for example, giving a dark brown and light yellow color when fired, you can try making designs in the style of Greek vases. A “matte” design or inscription can be scratched onto the polished surface.
Firing: Fire as usual, however the gloss may disappear when fired above 1000-1100°C.
Forms from formoplast
Recently, molds made from formoplast
. They are more water-resistant and more elastic than adhesive ones, do not dry out, retain flexibility and elasticity longer, which allows you to make up to 400 or more castings, clearly perceive all the small details of the model and accurately convey them on the castings.
Formoplast molds do not require tanning or lubrication, resulting in shorter casting time and increased mold turnover. But the production of form-plastic molds has one drawback - when heated, form-plastic emits a sharp-smelling and harmful gas.
First, the model is prepared before casting the mold. Some models made of hard materials are cleaned from various grease coatings, paint, varnish using solvent, acetone or paint remover.
Molds can also be made from mold plastic using open or closed methods. Closed mold made of formoplast
It is prepared in two stages, similar to glue. First the casing is made, and then the mold itself is cast. The prepared model is placed on a stand, covered with clay 2 cm thick, a small pipe (5 cm long and up to 2 cm in diameter) is added to the top, “locks” are arranged and a casing 3 cm thick is poured (similar to that described above).
LiveInternetLiveInternet
Quote from message lj_master_klass
Read in full In your quotation book or community!
master class on making molds for ceramics and the subsequent production of such. I will try to tell you a little about how to make models for vases and much more. With the subsequent production of the vases themselves. In this post I made bodies for clay drums (darbuks)
First you need to make a small device - a frame for unscrewing blanks. It should be strong, nothing should be loose, especially the axle. And attach to it a template cut from tin calculated according to the sketch. I usually do this in Photoshop
then I tightly twist the reinforcing wires onto the axis (ordinary aluminum wire can be used)
Then we mix the plaster and dip old rags into it and wrap it between the reinforcing wires, constantly turning the axis so that the rags do not get out of the template
Then, when the gypsum has risen, we begin sequentially, portion by portion, throwing gypsum onto the growing workpiece. Each time waiting for the previous portion to set and all the time scrolling the axis in the same direction towards the template
ъ Soon the excess plaster will begin to be cut off with a template - it can be returned to the model. Gradually, as if by magic, the contours of the future model will begin to appear. We leave those parts that are completely filled
In the beginning, you can use poor grades of gypsum, mix it coarser, and you can also mix in hardened waste. Towards the end, the gypsum should be of higher quality, more liquid. And at the end we have such a product. We finish it over the entire surface with very thin plaster. Let's dry it. Sanding. All. The model is ready!
The axle can be removed with little effort. making a mold from the previously obtained model; the finished model is dried. Making a form
varnish a couple of times (nitro)
put the template back. And we cut out another one. We fill in large irregularities and blemishes with plasticine and cover them with a creamy household solution. soap
dilute and apply plaster. It is advisable to mix the gypsum in the required quantity at once or there will be differences in density at the joints
the first half is ready, cut holes for the locks and grease both the model and the first half of the mold at the junction with soap (carefully)
To be honest, I was afraid. I didn't make such big shapes. The weight of the entire assembled structure is 30 kilograms. But it must be manipulated... UV! latest actions here. In the morning I sculpted the second half of the form.
and then the most dangerous operation (considering the weight) is separating the halves. I had to tinker, but the model jumped out of the halves under its own weight! (with light tapping)
and now - it’s done! Now dry (I put a bottle for scale)
On Saturday I poured slip into the mold. First, I tightly tightened the halves of the mold with rubber and prepared a bucket of slip (clay diluted to the state of liquid sour cream)
And... it started to flood. It leaked a little in one place, but we overcame it by plugging it with our finger... every 10 minutes we had to add clay - the plaster absorbed water.
And an hour later the clay was poured out. The plaster absorbed some of the moisture and a layer of clay remained on the walls of the mold, which will become the product in the future. We are waiting for the results. the clay should dry and shrink - then it can be easily taken out. Now it’s Monday, but it’s still too early to take it out - the clay is still too soft and the product will simply fold under its own weight. And now this giant oyster is open and inside... It worked!
Now let it sit a little longer and let it dry out, then we’ll get it out of the other half. My mistake in the first castings was that I kept the slip in the mold for a long time and when the remaining slip was poured out, the clay that had stuck to the walls of the mold became damp and fell off, well, it came out!
I cut off the bottom because it will be a drum, but no, it would be an excellent vase
The left one is already ready and will soon go into the stove Firing and the finished body And now it’s almost 1000 degrees, these are the stoves we have
the workshop is not at all the place where it should be clean
And here it is, ready and ringing! Hooray! now pack and ship
https://community.livejournal.com/master_klass/185814.html
Characteristics of thin-walled slip casting
If you need to get a thin-walled product, you must remember that after pouring, the gypsum will immediately begin to suck water from the slip. Depending on the time the solution is in the mold, the thickness of the walls of the vessel or figurine changes. Clay is deposited on the walls of the mold at a rate specific to each specific mold and specific composition of the solution. Based on this, the thickness of the shard increases.
Thin-wall slip casting
During the test pouring, the slip is poured into the mandrel to the top. Every 5 minutes, the thickness of the deposited layer is measured with a caliper. Based on the measurement results, the specialist can calculate the time required to obtain the specified wall thickness. When plaster is completely saturated with moisture, it stops absorbing water, but in the case of thin-walled vessels, due to the relatively small volume of the shard, there is no need to be afraid of this.
Making a plaster mold for casting
This master class is for those who want to remove the mold from a model, but don’t know how.
To work you will need:
- master model from whom the uniform will be removed;
- sculpture plasticine or modeling clay (I use clay);
- modeling tools, maybe one;
- plaster or alabaster about 2 kg;
- a glass or container for mixing gypsum with water;
- stick or spatula for stirring plaster;
- sides for creating a drawer (mine is made of tiles);
- rolling pin or roller for leveling the clay surface;
- stationery knife with replaceable blades;
- spoon for pouring plaster;
- soap solution;
- medium-sized soft brush for soap;
- water;
- ruler-angle.
Let's start by marking the size of the form. I drew an even rectangle on the tiles with a gel pen or a marker, with angles of 90 degrees. I placed a thick plastic film on top of the tile so that the outline would not be erased. I filled it along the contour with clay. I used a rolling pin to level the surface. The corners were leveled using a square. The height of the clay should be the height of the model up to the mark that will be immersed in the clay, as much as possible. This is what I got at this stage.
Next, it is important to align the sides of the clay piece at 90 degree angles. This is necessary so that the sides stand exactly at an angle of 90 degrees. Applying the model to the clay surface, we trace along the contour of the model on the clay surface. We remove the model and remove excess clay in the center along the markings.
Using the angle, we align the corners and install the sides.
We wall it up on the model according to the markings on the model.
Place the sides at a 90 degree angle. We cover all the cracks from the bottom and sides with clay. Before pouring plaster IMPORTANT! coat the entire surface with lubricant (I use a soap solution - the best separator). Fill with plaster above 2 cm of the highest point of the model.
After the first part has hardened for about an hour, remove the sides, process the first part with a knife, and level the surface. Using a modeling tool, we cut out the locks in the shape .
Now you can start making the second part. We make a side out of clay. Only three ceramic edges can be used. We install sides on three sides. Cover all the cracks with clay. definitely need to make a sprue where the casting solution will be poured.
Lubricate with separator and pour plaster. My model has a plaster ball inserted into her neck with a hole for casting. It has pre-made locks to prevent it from shifting in shape. The ball is made in the shape of a suitable ball.
After hardening, we also remove all the sides and clay. We process the second part in the same way as the first.
We use the same method to make the third and final part.
All parts are processed with a knife, cutting off the edges. That's basically it.
If you liked the master class or are interested in my work, add me to the news feed.
What will you learn in the art ceramics course?
- Distinguish between types of ceramics, evaluate the possibilities of their manufacture from available materials;
- Select raw materials for creating ceramic products, prepare molding mass and glazes for use, use fluxes and binders;
- Make models for ceramic tiles, molds for slip casting;
- Correctly use the kiln for firing ceramic products;
- Work in 7 different techniques: hand sculpting, plastic technique, circular molding, braiding, kneading into a finished form, slip casting, pottery;
- Working on a potter's wheel; We have 12 academic hours allocated for this; You will master basic skills and, if desired, can study the craft in more depth.
With us you will learn ceramics and pottery, master the basic methods of working with clay under the guidance of professional ceramic artists
. Create with your own hands from clay unique works of art, dazzling unusual jewelry, or simply useful household items. Admire the result of your work and get satisfaction from it. You will spend your time usefully, and if you wish, take a confident step towards opening your own business.
Our masters of artistic ceramics will share the secrets of their craft, find the seeds of talent in each of you and help them grow, turn into a powerful creative force that turns shapeless clay masses into real masterpieces that famous collectors will begin to hunt for.
Of course, we will not ignore the artistic processing of ceramics with different types of glazes
. Let's consider the basic and additional methods of decorating ceramic products.
What is a slip?
The word "Schlicker" came to us from the German language. It has no translation and literally means a mushy porcelain material consisting of quartz, kaolin and feldspar. In ancient times, slip was the name given to colored clay that was mixed with water until liquid and then used in painting ceramics. Slip and engobe should not be confused, since the latter has a more complex composition.
In the modern pottery world, slip is any clay-based liquid suspension suitable for casting ceramics. As a rule, slip is poured into porous gypsum molds. The physical properties of the suspension are directly affected by its humidity.
For porcelain casting it is 30-33%, for earthenware - 37%, suspensions based on red-burning clays have a moisture content exceeding 40%. The lower the humidity level, the less shrinkage of the clay after pouring.
Liquid clay in pottery is used for the following purposes:
- As the main material for casting products;
- As glue.
Slip casting is one of the techniques for making ceramic products, which involves casting slip into plaster molds. Casting completely eliminates hand modeling and working on a potter's wheel. The technique is widely used in the mass production of identical ceramic products, and is also found in the original work of ceramic artists.
The slip mass can be used as glue if it is necessary to make a complex product consisting of several elements.
Despite the plasticity of clay, two parts connected to each other will not form a strong connection. But if you dry them and level the contact surfaces, and introduce a thick slip mass into the joint, then after hardening you can get bonded elements.
The main problems in slip casting
Thickening of the solution in the mold
The solution may thicken just by being in the mandrel. Therefore, before draining, it is better to activate the slip poured into the mold by lightly shaking, rotating or shaking
Hammering the sprue
If you are using a mold with a small sprue, you need to clean the hole with a thin spatula before draining.
Cleaning the hole with a thin spatula
The sprue hole is clogged
Some novice craftsmen cut out the crater of the sprue without touching the hole for fear of harming the casting. To keep the sprue hole free, you can insert scraps of cocktail tubes into them.
The sprue hole is clogged
You need to turn the mold over the drainage container and blow evenly and strongly into the tube
It is important to achieve complete drainage. Particular attention must be paid to complex relief forms. After the slip is drained, the piece of tube must be filled with water.
In the same position, with the sprue down, the mandrel should be placed on a plastic surface
After the slip is drained, the piece of tube must be filled with water. In the same position, with the sprue facing down, the mandrel should be placed on a plastic surface.
Installing the mold after draining the slip to its original position
After draining the solution, the mold must be placed in an inverted position. If you return it to its original state, slip drips form along the walls of the product, and the thickness of the walls changes. Different wall thicknesses will lead to an increase in stress during firing and even the appearance of cracks along the drips. The casting may be hopelessly damaged.
Slip casting
Slip casting is based on the ability of the components of the mass to produce stable suspensions in an aqueous environment, on the rheological properties of slips and on the absorption of water from the slip by the pores of the gypsum mold due to the action of capillary forces with the formation of a solid layer of mass on its surface. The ability of a slip to fill a gypsum mold is due to its fluidity, and to reproduce the configuration of the mold is due to its casting ability. Water as a liquid phase and electrolytes give the slip the required properties.
The mechanism of building up the wall of the product consists in the deposition of the solid phase of the slip on the inner surface of the gypsum mold while simultaneously absorbing the liquid phase into the pores of the mold. The rate at which the product wall builds up depends on the rate of absorption of the liquid phase of the slip by the mold (the permeability of the gypsum mold is 2.5 10-9—6 10-11 l/cm2), the granulometric composition of the solid phase, the ratio of the solid and liquid phases, as well as the speed diffusion of water from the slip by a layer of mass formed on a gypsum mold (permeability of the formed layer (2.4-3) 10-11 l/cm2). This layer grows in proportion to the square root of the time taken to build up the wall of the product. Porosity (42-47%) and average pore size (0.38 ± 0.01 nm) in the resulting layer do not depend on the structure of the gypsum mold. The process of forming a layer of mass on a gypsum mold is provided by capillary pressure, which creates menisci of water in the pores of the gypsum mold.
Rice. 50. Dependence of the rate of mass gain on the average pore size (1) and porosity (2) of the gypsum mold
The filtration process involves pores of the smallest diameter (0.3–0.45 nm), as well as larger pores (up to 1 nm). The rate of sherd accumulation increases (at the same average pore size) with increasing porosity of the gypsum mold (Fig. 50) and is mainly due to the resistance of the resulting layer of mass, since the resistance of the gypsum mold to capillary pressure is insignificant. The rate of formation of a layer of mass with increasing porosity of the mold and the dependence of this speed on the average pore size in the mold reach a maximum at a pore size at which the permeability of the layer becomes equal to the permeability of the mold. The structure of the gypsum mold does not determine the structure of the formed layer of mass. The rate of absorption of the liquid phase of the slip by the porous walls of the mold should be higher than or equal to the speed of its approach to the surface of the mold. When the rate of water absorption by the mold is significantly faster, a more compacted layer is formed on the outside of the casting than in the rest of the casting, which is associated with the occurrence of internal stresses, the possibility of peeling off from the mold wall and the appearance of cracks. When there is a delay in the absorption of water by the mold, it accumulates in its surface layers, which leads to erosion of the mold and sticking of products to it.
The granulometric composition of the solid phase of the slip also affects the rate at which the walls of the products are built up. It will be higher if the surface layer of the product is formed from particles that do not provide dense packing. However, the increased content of large particles contributes to an excessive increase in the rate of wall building, which leads to variations in the thickness of products and makes it difficult to regulate the process of building the walls of the product. With an increased content of finely dispersed fractions in the slip, the rate at which the walls of the product build up sharply decreases and the casting may stick to the mold.
The increase in the strength of the resulting layer of mass in the gypsum form is due to the thixotropic formation of the structure under the influence of flocculation caused by the migration of Ca2+ ions from the gypsum form into the slip, as well as due to the selection of moisture from the pores of the form under the action of capillary forces. Clay particles in the outer part of the casting are arranged so that their large planes are placed parallel to the surface through which filtration occurs, i.e. oriented, and inside the casting - non-oriented. This structure of castings predetermines the anisotropy of shrinkage during drying, which generates internal stresses and often causes warping and cracking of the semi-finished product. The difference in shrinkage stresses in directions is determined by the difference in the thickness of the water films between the edges of the particles adjacent to one another, as well as the tendency of the denser sections of the layer to elastic rather than plastic deformations. The oriented position of clay particles, which arose during the process of building up the wall of the product during casting, is also preserved in the fired product, which is fixed by the oriented position of mullite new formations. This structure reduces the strength of the product.
Partial elimination of the oriented structure of the casting is facilitated by the use of fluid slips with a constant content of the solid phase in them, which is achieved by using appropriate deflocculants (thinners). For the same purpose, the content of lean components in the mass is increased.
As a result of the absorption of slip water by the mold, the resulting layer is compacted, the product shrinks when the humidity drops to 18-20% and separates from the wall, which makes it easier to remove it from the mold.
Heating the molds to 60° C speeds up the formation of the product walls by more than 2 times as a result of an increase in slip fluidity. Under these temperature conditions, the thickness of the mass layer is proportional to the increase in temperature.
As the pressure increases, the rate at which the shard is formed also increases. This is what injection molding is based on. At a pressure of up to 0.5 MPa, the shrinkage of products during drying is reduced, as well as the humidity of cast products by 2-3%, the drying of products is accelerated, and there is no need to dry gypsum molds, since under pressure the process of building up a layer depends not on the suction of water from the mold, but on the pressure value. The moisture content of the slip is reduced by 2-3%.
Vacuuming of gypsum molds also contributes to a significant (2-4 times) reduction in the time of building up the walls of the products.
The use of vibration when casting products (3000-6000 vibrations per minute) and ultrasonic treatment of the slip (oscillation frequency 20 kHz) reduce the viscosity of the slip and the moisture content of the castings by 1-2% and increase their strength by 15-20%. The ultimate shear stress increases by 10-30%, and the ultimate bending strength after drying increases by 20%. Vibration improves the structure of products and reduces the possibility of cavities in castings due to the accelerated growth of product walls. The main range of products made by casting: thin-walled hollow products (service cups), products of large sizes or complex shapes (soup vases, gravy bowls, gravy boats, oval dishes, sculptures, etc.), as well as attached parts (handles, spouts).