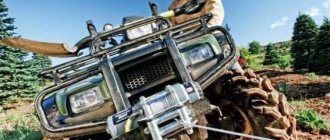
Drivers who are not afraid of off-road conditions often find themselves in situations where the car is loaded or stuck. The best savior in such cases is a car winch.
There are a huge number of all kinds of winches of various types on the market for spare parts and automotive accessories, but real mechanics and craftsmen prefer to make this simple, but very irreplaceable mechanism with their own hands.
Regardless of its type, each winch has a similar design and principle of operation: the traction force is transmitted through a cable from a drum driven by an engine gearbox or the muscular power of the hands.
Electric drive. The power element is electric motors of sufficient power and a high torque value. A car starter converted to an electric motor can also be used. In order to avoid rapid discharge of the car battery, an important condition when selecting a motor for a winch is its moderate consumption of electric current.
A hydraulically driven winch has impressive traction and power, however, due to the large geometric dimensions of the units, the need for oil and a container for it, the use of this type of homemade automobile winch is not always possible.
The manual winch is distinguished from other mechanisms by its simplicity of design, however, this device requires the presence of an operator and directly depends on his physical strength. Quite often, the handle of a hand winch is made in the form of an elongated lever.
You can choose and buy factory-made car winches with efficient, high-quality and reliable mechanisms, but you should not give up the opportunity to make a car winch yourself.
First you will need a drum, ready or partially ready. A steel pipe with an internal base for a bearing and welded jaws is perfect for a homemade winch. Calculate overall dimensions based on your needs.
One of the ends must be equipped with a gear attached to the gearbox or mechanical part of the hand drive. In this case, the optimal choice of mechanism would be a worm gear, since it has a large gear ratio and is equipped with an independent braking system, which has a positive effect on its performance properties.
All components are lubricated and firmly fixed to the frame. To ensure high safety, the gearbox or starter is covered with a metal shield.
The process of installing the starter as a power unit consists of installing the base on a sheet metal platform, fixing the drum stand by welding, installing and fastening the gearbox with the input shaft facing up. Using an adapter, place the flywheel crown on the starter shaft, check the installation strength, close the starter and install the wiring.
A homemade car winch is very easy to use and most effective, although it does not have additional functions for changing the gear ratio, speed and reverse. In combination with a hoist or other devices, it can easily cope with lifting heavy loads to a height and will pull out your car stuck in the mud without any problems.
Source: www.drive2.com
Homemade winches from starters
Before setting off, any car enthusiast must make sure that he has taken everything he needs with him. But, if ordinary drivers do not need to take a lot of equipment, then off-road conquerors gather with special zeal. Any car enthusiast who prefers to drive on the most extreme and difficult sections and roads takes with him the most necessary and necessary equipment that can help and facilitate movement, as well as provide a way out of the most difficult situations.
One piece of equipment that will help the extreme motorist is a winch. An experienced driver who is ready for all the vicissitudes of a road adventure will definitely take this important device with him on the road. In difficult conditions where there is a high probability that the vehicle will end up in a ditch or get stuck in the mud, a winch will help the driver pull his vehicle out of such road obstacles.
Of course, you can purchase such a device already in the form of a ready-made device, which, of course, is good news. But, if a car enthusiast doesn’t really want to go shopping and spend money on this device, and if he has all the necessary components, he can make a winch himself.
Homemade winch “grandmother” to pull the car yourself (old-fashioned way)
There have been cases when sunken cars, both cars and trucks, were raised from the bottom of Lake Baikal. From a depth of more than 100 meters and weighing up to 5 tons!
That’s why such a homemade “grandmother” winch can be stronger than a tank. There's a lot of dope in it!
And now about the homemade product itself.
My grandfather made an original device from scraps in his garage for pulling out a car if it got stuck.
I took a steel pipe and welded a metal “ear” to it on the side. In another piece of pipe, he made 2 holes opposite each other and welded a nut in their place, and a bolt to them - it turned out to be a kind of clamp.
They also need: a steel pin, a sledgehammer and a reliable and strong cable.
This pin is driven into the dense ground, and first, a “hole” is drilled out with a hand-made homemade drill.
He puts his “devices” on the pin. One end of the cable is attached to the machine, and the other to its own device.
And then he inserts the handle of a shovel into the “ear” (he says that those who go hunting or fishing in the forest always take a shovel with them). You can use a crowbar.
And it starts to spin, and at the same time the stuck car itself slowly begins to emerge from the hole. It turns out to be a kind of hand winch.
It is better to use a cable of the “Hercules” type - this is a strong rope - a combination of steel wire and synthetic rope. Well, the car one often copes.
Watch the video where the grandfather explains the design of a homemade “grandmother” winch and shows with an example how to use it yourself:
To be on the safe side, you can modify your grandfather’s homemade product. Weld another ring on top and tie a couple of guy wires to them, which in turn are attached to stakes 5 meters away at an angle of 70-80 degrees. Source
Types of homemade winches
As was written just above, there are only three types of winches. They are useful in different situations and also differ in the energy that powers the mechanism. But they are similar in one thing: the principle of operation. It consists of winding a steel cable around a drum. The drum can rotate thanks to a motor gearbox or through the use of its own forces, manually.
Homemade winches for cars can be:
Hydraulic drive
A hydraulic winch is considered a more complex mechanism, as it has some additional elements, namely: a hydraulic drive, an oil tank and an oil pump. The device itself is quite bulky, so it is more difficult to assemble than other types of devices. But a hydraulic winch has two big advantages : it consumes less electricity, but at the same time has more power than other mechanisms. Typically, winches of this type are mounted on very cool SUVs, as well as on tractors and walk-behind tractors.
Electric drive
As a rule, an electric winch can be found much more often, since it is the most popular option among craftsmen who assemble these devices by hand. Such high popularity can be explained by the high efficiency and simplicity of the entire design. As a drive, you can use either an electric motor or a tractor or car generator. The generator should be connected in such a way that it subsequently works like an engine. If you use a starter in the winch device, the device itself will be more compact.
A very important requirement for an electric drive is that it must have high torque. To prevent the battery from draining too quickly, care must be taken to ensure that the electric drive does not consume too much electricity , but still operates with sufficient power. By the way, this type of homemade winch is easier to build with your own hands.
Mechanical drive
A device with this drive operates on the same operating principle as other design options for this device. The main disadvantage of a mechanical drive is its dimensions - it is quite bulky. By the way, this is the largest drive among other device options.
The main difference between a device using a mechanical drive and other options is that instead of an electric motor, direct physical action is used. That is, to put the mechanism into action, you will have to make some effort. In principle, if you use a winch of this type, then you can note its main advantage, which is that such a winch can always be used in the absence of energy sources.
Homemade winch for UAZ
Technical characteristics allow you to install homemade winches of any type on the UAZ, the most popular option is an electric winch. It allows you to pull out the UAZ even if the engine has stalled. Easy to use and reliable. Cons: short battery life and vulnerability to moisture. When installing a homemade winch on a UAZ, if it is electric, it makes sense to increase the battery power or carry a spare one.
IMPORTANT! It is possible to install a hydraulic winch, but only with a hydraulic booster. Manual and mechanical (shaft) winches are also used.
Product design
In order to make a homemade winch, you should first familiarize yourself with the list of main parts that are used for its manufacture. The main elements of do-it-yourself devices include the following parts:
- drum with cable;
- engine;
- gearbox;
- base (chassis).
Before you start assembling, you should prepare everything for this. To begin with, it is recommended to understand all the necessary drawings and electrical diagrams. In this matter, it is better not to rely on your memory or let all the work take its course. Then you need to prepare a workplace and all the tools that will be needed during the work process.
Features of application
The winch is a highly specialized, but at the same time universal type of traction mechanism, which has become widespread not only for use as a winch. They are used in the following areas:
The list is not limited to these three positions; a good unit will always find application. That is why many people make a homemade winch for a Niva or other domestic SUV with their own hands. In any case, it must be reliable, durable and strong, so its production should be approached with responsibility. At its core, it will be a useful upgrade for your car, which will always find its use. For example, you can pull your own car out of the mud by clinging to a thick tree, or help out your friend.
Assembly technology
If a master assembles the entire structure with his own hands, then he will understand it much better than a purchased device. In addition, many car enthusiasts are inclined to believe that homemade winches are of better quality and more reliable. If you assemble such a device from a starter, then the entire procedure will take about an hour, but provided that everything necessary is prepared ahead of time.
The main working unit of the winch is a drum with a cable. If the user already has one, the work will take much less time. But not everyone is the happy owner of such a useful device. If there is no ready-made drum, you can make it yourself using a thick pipe and sheet metal with a thickness of 3 to 5 mm. The cheeks should simply be welded to the pipe on both sides. The gear is attached to one of them. This gear will subsequently receive force from the gearbox.
By the way, if there is no ready-made drum, then it can also be made from Zhiguli hubs , which have already served their purpose. This is not very difficult to do. You just need to cook them on the thin side. In order to ensure the alignment of the parts, you need to do this on a mandrel.
When choosing a gearbox for a device, many professional craftsmen recommend taking gearboxes that are used in trolleybuses to open and close doors. If the user is able to obtain such a gearbox, then it is recommended to use it. But if there is no such device, then you need to make the winch differently, that is, using a starter. It is recommended to use a special starter equipped with a planetary gearbox. Such a starter is more compact and lighter , which will subsequently be a positive factor.
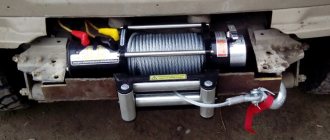
Homemade winches are usually attached to the front bumpers of cars. But car enthusiasts also use portable versions of such devices. They are placed in the trunk and taken out if their use is needed in a certain situation. In principle, in any case, you should make the winch as compact as possible. Bulky devices can cause some inconvenience later on, making them more difficult to use.
Gearbox selection
The next problem is the choice of gearbox. Any 220 V electric winch with your own hands must contain a mechanism that will transmit rotation with a large traction force. There are the following types of gearboxes:
Planetary gearbox, the most common at the moment. It usually consists of 3 satellites, a sun gear, a ring gear and a carrier. They have an increased working life and transmitted power, but are complex in design.
The simplest solution when manufacturing a unit, an electric winch for 220 V, of course, you can always use a converter, especially since ready-made high-power devices are available for sale. An asynchronous motor can be used as a drive motor, but it is better to use a motor from a washing machine. Modern models are quite powerful and productive.
Tips for assembly and operation
- When assembling a homemade winch, you should pay close attention to all the details. This will avoid possible unpleasant consequences that may occur due to poor quality design.
- Under no circumstances should you force the assembly process. As they say, if you hurry, you will make people laugh. It’s better to spend an extra hour to get everything right than to reap the fruits of your haste later.
- You need to pay attention to the switching and installation of electrical wiring. It is recommended to secure the winch control panel away from rotating parts. This will reduce the risk of injury that may subsequently occur due to negligence or hasty actions.
It is believed that homemade winches are less safe than their factory counterparts. In addition, they are in no way suitable for lifting loads. This is due to the fact that such devices do not have a stopper. But one of the main advantages of homemade winches is the fact that if assembled correctly, they can last even longer than factory-assembled winches.
Homemade winches made from starters are more compact, so when choosing an option before assembly, it is better to opt for these devices. The advantages of such winches will be noticed by the user immediately upon use.
Source: stanok.guru
How to make?
A drum with a cable is the key component that makes up any homemade winch. The drawings of this device must be as accurate as possible so that the mechanism works correctly and reliably. It’s good if you have such a drum ready-made, because it’s much more difficult to make it yourself.
How to make your own drum? To do this, you need to take a piece of pipe with thick walls, and using electrodes and a welding machine, attach cheeks 5 millimeters thick to it. The driven gear must be attached to one of the last parts. The pipe itself is equipped with seats for bearings.
You can make a drum for a winch in another way. To do this, you need to have several hubs from any Zhiguli or Volga. They should be machined into a place for welding and the halves should be attached to a mandrel of the required diameter in order to achieve alignment of all parts.
It is best to take a gearbox with a large gear ratio (worm type). The main advantage of such a mechanism is that there is no need to create a drum brake. Most often, motorists purchase a gearbox from trolleybus doors - it is easiest to mount on the site.
If you decide to make a homemade winch driven by a starter, it is best to take a model with a planetary gearbox. This is what early Zhiguli engines were once equipped with.
To create a mechanism with a starter, the first step is to prepare a platform from a metal sheet. It is necessary to weld seats onto it, on which the drum shaft will then be mounted. After this, the gearbox is installed here with the input shaft facing up.
A homemade adapter is mounted to the gearbox on top. We need it in order to install the starter. A gear with a certain tooth module is mounted on the input shaft. Afterwards the starter is finally attached to the structure. At the final stage, wiring is done. That's it, now such a winch can be installed on a car.
Do-it-yourself winch from a starter: drawings, photos of production
Homemade winch from a starter: drawings of an electric winch, photo of making a homemade product with your own hands.
To make a homemade winch, the author used a starter from a VAZ 21015. The engine from a car starter is designed for short-term operation and quickly overheats, but is quite suitable for making an electric winch.
We will also need a reduction gearbox from a hammer drill; you can find a gearbox at a flea market; in this homemade product, the author took a gearbox from an old Soviet-made drill with a gear ratio of 1 x 20.
The motor shaft needs to be connected to the gearbox shaft; this can be done using an adapter coupling and cotter pins, or simply weld them together.
Assembled into a single body.
Now we will make a drum for the winch from a piece of metal tube and sheet metal 3 mm thick.
Electric winches
Often, the operation of these tools uses a car starter or a cargo generator. This homemade winch can also be powered by a separately installed electric motor. In other cases, car enthusiasts modify the starter and generator to operate in engine mode.
However, whatever the origin of this quinoa, it must have a high torque so that the mechanism can pull a 2-ton huge jeep out of a ditch. And since the main energy for operation is absorbed from the battery, car enthusiasts install batteries of higher capacity. However, an electric motor, no matter how powerful it is, should not discharge the battery so much.
Types of winches
Depending on the situation, you can use different types of winches, which differ in the energies driving the mechanism. The principle of operation in this case is the same - the steel cable is wound on a drum, which can be rotated manually or through an engine gearbox. Both factory and homemade winches from the starter can be manual, hydraulic or electric.
- The action of a mechanical or manual winch is based on the force of the motor. In terms of reliability, this option has no equal. However, those who like to relax in off-road conditions are not particularly fond of such a mechanism due to its large dimensions. If such a winch is initially provided in the vehicle, the driver will feel as protected as possible, but will not choose this option when installing the mechanism on his own. Despite the fact that a DIY hand winch will be powerful, it takes up too much space in the car.
- Electric options are the most popular among SUV drivers. The drum is rotated by an electric motor powered by a car battery. When working with such mechanisms, it is important to monitor the battery charge and leave enough battery life to get home. These winches are practical and are designed to lift loads weighing up to 4 tons. It is the electric option that is most often chosen if you do the winching yourself.
- The design of a hydraulic winch is the most complex due to additional elements in the form of an oil pump, an oil tank and a hydraulic drive. Assembling such a mechanism yourself is more difficult than others, and the winch turns out to be too bulky. Nevertheless, this option also has advantages, including minimal energy consumption combined with high power. The feasibility of using hydraulic winches is observed when operating walk-behind tractors, tractors or SUVs.
Wind generator based on starter
The idea of making a wind generator appeared when the early autumn nights arrived. I decided to try using wind energy for household needs. Let the wind charge the battery, which will illuminate the garden toilet standing at the edge of the site.
It’s expensive to run a network cable to this object, you’re tired of changing batteries in a Chinese lantern, and then the free, periodically renewable energy is wasted. Since bright lighting is not required at this facility, reading books and the press is not planned, low powers are sufficient to solve this problem. In practice, this is a generator with a power of several watts and a small-capacity battery. During the day, the battery stores wind energy, and at night releases it as needed. For such wind generators, there is practically no point in performing complex calculations and making special blades. The simplest designs will work just fine. All this greatly simplifies and reduces the cost of the wind generator, making it meaningful to manufacture and use.
For use as a low-power wind generator, you can use a ready-made stepper motor. For maximum efficiency, if there is a choice, it is advisable to use a motor with the minimum possible sticking of the shaft (they have such an unpleasant effect) and with the largest possible number of steps per revolution.
It is possible to convert the electric motor into a generator. Various modification options are described on the Internet.
In our case, we chose the option of remaking the used starter 923.3708 from the legendary Oka.
The use of this starter is due to the following factors:
• small dimensions and weight of the starter; • the starter is excited by permanent magnets; • ease of conversion with no investment for the manufacture of a generator.
The process of converting a starter into a generator
1. Disassemble the starter: Disconnect the power wire and remove the parts of the traction relay. We release and remove the body and shaft of the overrunning clutch and the built-in planetary gearbox.
2. Carefully remove the cover of the brush assembly. At the same time, we monitor the safety of the support ball in the cover bearing. We disassemble and remove the brush assembly. We remove the rotor. Three nodes remain for further use.
3. Using wire cutters and pliers, remove the old starter rotor winding. Mechanically remove the rotor manifold. We clean the shaft and grooves on the rotor plates from any remaining varnish. In the photo, to the right of the new rotor, are the remains of the old winding.
4. Perform mechanical processing of the rotor a. Using a lathe or manually, we remove the splines for connection to the planetary gearbox and obtain the landing diameter for the second plain bearing. b. Between the set of rotor plates and the treated area, half the diameter, we drill a radial hole with a diameter of 4 mm. The hardness of the shaft is insignificant and can be processed with high-speed tools. c. On a lathe or manually with a drill, from the side of the treated area, drill an axial hole with a diameter of 4 mm until it coincides with the radial one. We get a hole for the output of the rotor winding. This output circuit eliminates the need for sliding contacts for current collection and increases the reliability of the generator. For greater clarity, the location of the holes and the winding output are shown on the finished rotor.
5. We wind the coil windings into the slots of the rotor until they are filled. The arrangement of six permanent magnets in the stator with alternating poles determined the arrangement of the winding coils.
The width of each coil (number of slots 5) was determined by the distance between adjacent magnets. The turns of each coil, located oppositely in adjacent slots, when the rotor rotates, simultaneously cross the magnetic field of two magnets with different poles. In this case, the induction current in the coil adds up. Three similar groups (5 coils each), coil - magnets, work simultaneously. All coils are connected in series and complement each other. Changing the pole of the magnet relative to the coil as it rotates produces alternating current. Since the rotor has 31 slots, 1 slot remained free.
To avoid damage to the wire insulation during winding and operation, MGTF stranded wire with a core diameter of 0.30 mm is used. It is possible to use another insulated wire.
6. Due to the absence of a second bearing for the rotor in the used part of the starter (one is located in the cover of the brush assembly, and the second remained in the removed planetary gearbox), we will make a new bronze plain bearing. The outer seat diameter of the bearing is determined by the diameter of the hole in the housing partition (photo below), and the inner diameter of the bearing and the length of the outer steps is determined by the actual diameter and length of the machined section of the rotor shaft (item 4a).
7. We install the manufactured bearing into the housing, and the saved ball at the bottom of the bearing in the cover.
8. We install the machined section of the rotor into the manufactured bearing and assemble the rotor with the housing. Before assembly, lubricate all rubbing parts.
9. Install the brush assembly cover, aligning the second rotor shaft support with the cover bearing and support ball. We align the holes of the body and cover, install the mounting studs from the kit.
10. Assembling the generator. We use the free end of the rotor shaft (with the winding output) to install and secure the generator. We will install a rotor-type wind wheel on the free part of the studs (above the cover).
Stage-by-stage execution of work
Below are detailed instructions on how to make a winch with your own hands using a Zhiguli starter. The choice of this starter is due to the fact that it is as compact as possible and has a high degree of reliability. An additional advantage is the ability to purchase it for almost nothing on any spontaneous automobile market.
- The power contacts of the retractor relay can be left if the load on the winch is significant. The bendix mechanism, in turn, must be removed along with the cone housing.
- Since the mechanism in this case is low-power and compact, there is no need to create a gearbox from a flywheel gear. Just pick up a knot from a large drill. The gearbox must be a reduction gearbox.
- Separate the Bendix housing from the winch and locally mate the gearbox shaft with the corresponding part of the starter motor. This can be done either by creating a transition coupling with cotter pins or by classical electric welding.
- There is no need to install dampers as they will break anyway.
- The use of a planetary gearbox will allow you to increase the gear ratio if necessary.
- Use an appropriately sized pipe to cover the space between the motor and gearbox so that the operator is protected from rotating elements.
- The motor housing and gearbox must be securely connected, but not with simple threaded rods.
- Make a drum from a cut of sheet iron a couple of millimeters thick and a steel pipe with a diameter of 1.2 cm. Weld round jaws to the pipe and drill a coaxial hole for the power shaft in the center of each side part.
- The power shaft must have a standard pair of working gears, otherwise it will be problematic to pair the main sprocket with the output of the gearbox.
- Securely weld all the elements together on the channel frame. Backlashes are unacceptable.
- Make the side walls from sheet iron up to 5 mm thick. Thickness less than 3 mm will not work.
- Using powerful bearings with podiums, secure the drum. This stage is one of the most critical. Weld the podiums to the side walls.
- The gearbox should be fixed on the frame so that its gear clings to the power gear on the drum shaft. Between the walls there should be a leash for the cable - an eyelet.
- Connect the electric motor from the starter to the gearbox and give the winch a presentable appearance - clean the seams, remove rust and cover the surface with paint.
Conversion of ST-117A starter
Page 1 of 2
Hello everyone! Winter has come and I would like to do something new and interesting, in the hope of victory over laziness and scoundrels. I would like to build an electric vehicle for trips to the store and fishing, but if there is a small gap with the batteries (non-calcium starter lead ampere hours are 45-65), then with the engines there is a complete mess. Either too expensive or too weak. In general, I decided to step on the old rake with altering the starter. I know that it’s inappropriate to do this, it’s boring, it’s pointless, it’s annoying, but I’ll try. According to my habit of starting a hundred projects at once, I will spread this out over a five-year period. Although, maybe someone will like the idea, or someone will suggest their own. Anyway, let's go! Experimental Cro. starter ST117A, from the miracle car Kosmich of all models. Exhausted to the limit.
And these are the bolts for tightening the housing when checking. Picked out from construction anchors.
View of the brush holder and excitation shoes:
And now the solution to the terrible secret of the starter’s exorbitant appetite - the gap between the armature and the shoes is 1.5 mm!! In general, 0.75mm if the anchor is in the center. Where does the efficiency come from? At the same time, the armature still manages to rub the stator.
The anchor must be ground into bearings. The rear one will be 6201, and the neck diameter will be 12.5mm. And the front one is either 6202 or 6203, I haven’t decided yet.
I’ll scribble down the dimensions a little later; we also need to calculate the engine power, taking into account the rewinding of the windings, and come up with a transmission. Here the options so far are: 1) Stupidly a 10-teeth sprocket from a cheap one. 2) Gears from a deshnik, 3) Gears from a shavchik. In the last two options, installing an industrial shaft with a freewheel. I'm still thinking. Threat. You need to find somewhere the amount of offset of the Shavchik or Vairas sprocket relative to the axis of the moped (the wheel has the same value).
No, the Bulgarian is in flight. There gears are made of plasticine. And the starter torque will quickly rip their teeth off. I tried on gears from a kid and a mutt. It’s unfortunate, the center line won’t allow you to put a sprocket on the output. You can further separate the shafts only if you apply point 1. As a freewheel, you can use bendex from (whoever you think of) or a piece of assembly from a bicycle hub. Right now I’ll do a literary review and post some links. Yeah, I made preliminary measurements on the armature shaft. Then I'll express my thoughts. I’m a little sick, I’ll still make a center in the machine and an imitation of the driving chuck, otherwise the anchor won’t fit on the bed, I can’t support it with the tailstock.
This feat must be repeated. The bearing looks like 6202. Judging by my measurements, you only need to remove two dozen to get to size 15.0 + a couple of hundredths of interference.
No, at 48 it’s very steep. You will already need 4 batteries, and this is around 80 kg of selected lead. I'm afraid that even if I accelerate, I won't be able to slow down. The parameters of the cosmic starter are here: Starter Moskvich 2140 - ST117A And here I found the jackpot: Course project - Electromechanical calculation of the starter ST117-A Download through the line “You can download this file from fileswat.com without registration." I will now study this Murzilka. I took a screenshot of the main parameters.
Akhtung , I see elements of nonsense. Eight brushes you say? No, I didn't see it.
Here it is more interesting, it turns out that the gap between the armature and the stator is really 0.75 mm.
I tried to calculate the electric motor using “Simplified calculation of a commutator electric motor up to 10 kW.pdf”. It turns out with such hardware parameters, the motor power is rated at 350W. So here it is. Went off to study Murzilka. PS. Recommended reading: Engine starting and pre-starting systems
Last edited by: SUP-2101 (Sat 01 Feb 2014, 19:40), edited 1 time(s) in total
So, in between the sabbaths and attacks of laziness, I made devices for grooving the shaft. Meet homemade non-rotating centers. The workpiece is drills with Morse taper KM1 and KM3.
I cut off all the excess and let’s sharpen it with solid metal alloy. I won’t name the amount of time spent on a large cone, otherwise someone will call the orderlies and they will forbid me to go to the garage.
And this is a small center.
Who said you can't cram in something you can't fit in? But it’s possible!
Let it be for now. Dal1 budE.
So, the New Year has arrived, it’s holidays at work, you can take up the miracle starter. I didn’t find any material for the lids, but what I found I’ll be sharpening until the summer. I had to get smarter. Blank for the lid - three pieces of 40*4 strip welded with semi-automatic cutting:
It's the same, just screwed to the faceplate. The welding was done with a grinder.
Now I make a plane and grow the hole to 30 mm.
Now there is room for the bearing. I cut off a leg from an old chair - it has an internal diameter of 31 mm. I end-faced the sleeve and cut it on the machine. Then I welded it semi-automatically.
Further cultivation on a machine on a faceplate.
Well, the final adjustment of the sleeve hole to bearing 201. Size 32.00. You need to catch hundreds slowly (c).
The front cover is more difficult.
There will be 202 bearings. This means you need a pipe with an internal diameter of 33-34mm. Naturally, there was no such thing. I searched for half a day. I had to do it. For the weak-hearted and impressionable, please get away from the screen.
Starring: a vice, a 30*4 strip, a piece of inch pipe, a hammer and a miracle worker who wants to know Nirvana.
Voila
The bushing is ready for welding. But it’s night outside, and the neighbors don’t like the lights and music. To be continued.
Where did I stop? Oh yes, the front cover. In general, the principle is the same as with the rear.
This is on the other side. Machined for 202 bearings. The green arrow is a shoulder for the bearing stop; on the outside there will be an aluminum washer like on the deshnik. The blue arrow is the marking circle for the cover bolts.
And this is how the lids are secured. Rear - 6 6 bolts M4, front 8 bolts.
Remember the old back cover with the brush holder?
You won't see her again. I decided to circumcise it, leaving only the part that is, in fact, the brush holder.
It turned out OtakE. The yellow arrow shows the rivets of the positive brush holders, which must be deepened relative to the plane by 1 mm, so as not to shorten the ground on the back cover. And to screw it to the lid, I made two holes for M5 threads - the places are shown with crosses. Right under the minus brushes - there is a thick tide there, a lot of body for carving. Akhtung, you need to control the length of the screw so that it does not protrude and jam the brush.
Total, back cover assembly with brush holder:
Now it’s time to sharpen the armature for the bearings, the sprocket, and cut the threads for its fastening. And also a spacer bushing. Another such guinea pig has appeared on the horizon, we must take it (c). While I’m taking a break, the gang has turned up.
I reached the anchor groove. I machined the shaft for the rear bearing. The metal is somehow strange, suspiciously viscous, the cleanliness of processing is poor, both with quick-cutting tools and with carbide. I had to use sandpaper. The adjustment must be made to the old bearing, so there is less chance of mismatching the size. The old bearing doesn't fit very tightly, but I haven't tried to stuff the new one yet, but it won't fit (by hand).
The spacer bushing is still visible there. Width 7mm, internal f=12.2mm. And so the anchor sits in the cover with a brush holder.
Now I will make a screw thread for the front bearing. You can’t use a brushcutter; you’ll have to climb it with a carbide.
And this is an ersatz leash cartridge. Production time - 10 minutes
I'm gathering my thoughts, I need to sharpen the second side.
The cartridge will take up 5 cm of space on the bed. The tailstock will then not install at all. Sharpening in the centers is fun. You can remove the blank to try it on the bearing and put it back without fear that the size will be off or it will clamp crookedly. Then an ambush emerged in another place. I made a second journal for the front bearing in size 14.99, but the first old bearing fit tight by hand, the second old one was hammered a third of the way in - nothing further, but the new one didn’t fit at all. It's a shock
I’ve already loosened the size by three hundred square meters, but it won’t fit, even if it cracks. Okay, I'll continue to fine-tune the bearing using sandpaper. I'll post some photos right now. Hmm, but there's only one photo.
Recommendations for use
The long service life of a homemade winch directly depends on compliance with the following conditions:
- high-quality bearing lubrication;
- reliable fixation of the mechanism on the foundation;
- installation of chain pairs in one plane;
- checking parts before starting;
- monitor the load and do not exceed the permissible limits;
- control the movement of cargo;
- do not touch the cable if it is under load;
- watch the turns as the cable wraps around the drum.
In this article we will talk about how to make an electric winch from a starter with your own hands. A manual winch is much easier to make, but its use is not as effective as an electric one. We select all the necessary parts, study the instructions, and try to repeat everything in our garage. The garage must have a 12 V power source. Because using a car battery will not provide you with constant energy. It is enough for 2-3 minutes of operation of such a winch.
Homemade winch for Niva
In some serious way, assembling and installing a winch on a Chevrolet Niva is no different from the same work on other SUVs. One of the features of the Niva is its light weight, so it is recommended that the winch pull be 3-3.6 tons. Sometimes it is advised to install a mechanism with a 4-ton thrust, but this will pull the front of the car down while driving. If you plan to travel long distances off-road, you need a spare battery (for the electric winch).
The height of the role itself is not important, since the vector of application of the load force depends on the location of the rollers through which the cable passes.
Making a winch from a starter with your own hands
First we need to decide what we want from the winch. It is mainly needed for lifting various loads. If the winch is in the garage, then basically it is the engine, gearbox, various components and assemblies, up to lifting the car itself. Based on this, we will need a suspended, perhaps even movable, structure. Let's try to make a winch with our own hands from scrap materials.
To make such a winch, we will use a gear starter for VAZ family cars. It is worth considering that such a starter is not designed for long-term operation, and may overheat due to such use. The VAZ starter is quite powerful, and is most suitable for making an electric winch. To make a homemade winch from a starter with your own hands, we will need:
- Starter (any VAZ 2101 – 07 starter).
- Reduction gear (in this case, we use a gearbox from an old Soviet hammer drill).
- Transition coupling - needed to connect the starter and gearbox.
- Drum for winding cable.
- Shaft with gear for rotating the drum and bearings.
- Corner for making a spatial box for an electric winch.
- Some sheet metal to create a protective casing.
Our homemade winch from a starter is designed to lift loads up to 300 kg. If you use chain hoists, the load capacity will double. Of course, there are no such heavy loads in the garage, but using a block/pulley hoist will reduce the speed of lifting the load, thereby reducing the load on the starter motor and extending the service life of the brushes in the electric motor.
Types of hand winches
In fact, dividing models into home-made and factory-made, imported and domestic are classifications of winches. They can also be divided according to the type of fastening.
There are devices that are fixed on walls, on the ground, and combined ones. But, the main classification is related to the structure and type of winch mechanism:
No. 1 The lever mechanism can operate without fixation. Accordingly, there is no need to look for a base that, like a winch, can withstand a significant load.
Plus, the free mounting allows you to use the device both horizontally and vertically. The main lever in the design. He triggers a ratchet mechanism that rotates the shaft in only one direction.
The disadvantage of the design is the small winding of the cable on the drum. You won’t find more than 6 meters in models of this class. But the manual lever winch is a record holder for lifting capacity. It is among the devices with levers that there are 10-ton towing ones.
Such winches are large in size and are used in industry and construction sites. Most lever samples are miniature and purchased for household needs.
A subtype of a lever winch is considered to be an assembly-traction winch. It does not have a drum. This makes the models compact and removes restrictions on rope length. There are proposals with 20-25-meter cables.
They are clamped with cams on the body. The clamps are located opposite each other, ensuring an even load on the cable. Ultimately, it lasts longer. In addition, there is a function for locking the cams with a lever.
The latter is protected by a shear pin. The device is more advanced than other lever winches and is gaining popularity.
No. 2 The drum mechanism works only from the support. Designed for horizontal movement of cargo. If you need to move them at an angle of 45 degrees, the manual drum winch is mounted at a height of 15 centimeters from the ground.
It's minimum. If the load has to be moved at a large angle, the device is raised by 65 centimeters. In addition to the support, the handle, gearbox and drum work.
The latter usually has tens of meters of cable. Therefore, the series models are also called cable models. Instead of a lever, the movement is set by a rotating handle.
Through the gearbox, it transmits the impulse to the drum, which sets the traction force. If it is excessive, the stopper is activated. This will protect you in moments of sudden drop of loads. They can weigh from 250 kilos to 5 tons.
The subclassifications of manual cable winch are due to different types of drive. The least reliable is considered:
-Worm. It has a helical gear and a main gear. The latter is mounted on a drum and rotates with a screw. The mechanism has an auto-stop and allows you to move the load in any direction; in other words, it works in reverse motion. The drive strength and the compactness of the mechanism are also pleasing. But the advantages are outweighed by rapid wear due to active friction in the worm pair. Reducing the load, you have to constantly lubricate it. Without lubrication, worm drives often jam.
-Single-speed gear drive consists of a large gear on the drum and a small transmission gear next to it. The design is also called gear. The gear ratio is calculated from the number of teeth on the gears. The leading one is monolithically fastened to the shaft, and the handle is fixed to it.
If her shoulder is long, the pull requires minimal effort. Short handles make you sweat. But the mechanism is reliable and durable, it pulls 2-3 tons horizontally, and several hundredweight vertically.
-Multi-speed gear drive. This one has several pairs of gears. Considering that each increases the force coefficient tens of times, the drive is the most powerful. But the rotation speed of the drum, characteristic of the first pair of gears, is lost.
An acceptable rhythm is gained with heavy loads weighing over a ton. If you plan to lift a bucket of gravel, the process will be protracted. The gear locking feature helps. You can stall certain pairs. Taking this into account, a manual chain winch with a multi-speed drive is the pinnacle of perfection in its class.
As you can see, the scope of its application depends on the nuances of the winch structure. There is even a separate classification based on the purpose of installations. We will consider it in a separate chapter.
Step-by-step instructions for making an electric winch from a starter
When all the necessary parts have been collected, you can start inventing. Of course, no one will reinvent the bicycle, but we have to think a little. And so, we have all the necessary parts, drawings, diagrams, some wires, bolts and the desire - we can start making a winch from a starter with our own hands.
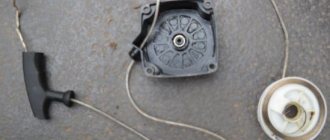
STEP 1: starter . Let's disassemble the starter. To make a winch, you do not need a retractor electromagnetic relay. We remove it immediately and move on to disassembling the engine itself. Remove the starter front cover and the starter drive (Bendix). While the starter is disassembled into parts, it can be serviced. Replace or lubricate bearings and replace brushes. We assemble the starter in the reverse order, only without the front cover and bendix.
STEP 2: gearbox . We prepare a reduction gearbox for a homemade winch with our own hands. It's also worth servicing. We clean and lubricate the entire mechanism. In principle, there is no need to do any other manipulations with it. We leave it alone and go to make an adapter coupling in order to make friends between our gearbox and the starter motor.
STEP 3: connect the gearbox and starter . To make a winch from a starter, you need to “make friends” between the gear shaft of the gearbox and the starter shaft. You can connect two gear shafts using an adapter coupling or simply weld one shaft to the second (which is what we did).
STEP 4: Protective cover . In order to close the space between the gearbox and the starter, we need to make a protective casing. To do this, you need to find a pipe of suitable diameter. Let us recall that the diameter of the starter 2101 is 82.5 mm. We take a pipe (in our case it is a hot-rolled pipe, 83 mm in diameter), cut off the required piece of pipe. Let's try it on the starter and gearbox. The starter motor has a smooth edge, and the edge of the reduction gear has characteristic protrusions. We make corresponding grooves in the pipe. After this, we get a single body of a homemade winch from the starter.
Well, we have made a connection between the gearbox and the starter motor, all that remains is to make a drum for winding the steel cable and a drive from the gearbox to the drum. For this task, we need to select a suitable gear wheel and shaft. We go in search of all this stuff, and again to the garage. After all, an electric winch will not make itself!
Manufacturing process
Having chosen a specific engine for a homemade winch and self-puller, having found a gearbox for it, it is necessary to begin the production of the main structural parts.
The first thing you should ask yourself is what to make a cable winding drum from? It can be made from a cylindrical motor housing or from a steel pipe of suitable diameter. In this case, it is easier to find a piece with a diameter of 100 mm. This is the best option. Next, it is necessary to make flanges for the drum, which are welded to it. A shaft is rigidly inserted into them, which rests on the supporting structure - the winch frame through bearings. The shaft is connected through a coupling to the secondary shaft of the gearbox, the housing of which is rigidly attached to the winch frame. The motor is attached to it .
It should be remembered that planetary and cyclic gearboxes require the use of brake couplings, for which you can use a solenoid and brake brushes that will be pressed against the shaft. The brake is needed in order to more accurately perform any actions with the winch, especially when it is necessary to lift or lower the load as carefully as possible.
It is necessary to attach a cable to the drum, for which a hole is drilled in the pipe, where one end is threaded and mechanically secured in the cylinder. It will pass through the guide eye; for smooth movement, you can use an additional roller. If it is necessary to increase the traction force, a roller system can be used. In this case, the design of the winch will become more complicated and larger.
The winch operation is controlled remotely using a radio frequency control panel or by wire. You can buy ready-made radio modules for receiving/transmitting signals or make them yourself. It’s easier and more reliable to use a wired remote control. You will need to use only 2 buttons: winding the cable and winding it.
If there is a brake, it usually turns on automatically when a button is released and turns off when you press it.
Originally posted 2018-07-04 07:36:32.
Source
A simple option made from scrap materials
Some motorists often drive into a field or forest, which may result in problems negotiating difficult areas - mud and sand.
The car gets stuck, and you have to puzzle over how to get it out. The simplest hand-made homemade winch can be made in the field. Materials:
- Scrap and pipe cuttings.
- Cable.
- A piece of pipe for a lever.
It is unlikely that you will have the materials with you on the road. But everything you need can be found in the nearest village. Instead of a cable, a strong rope will do.
Manufacturing procedure:
- Drive a crowbar or a small diameter tube into the ground to create an axle.
- A larger diameter tube is placed on the axle, to which a cable is attached.
- A lever is slipped under the lower turn of the cable. This could be another tube, a shovel handle, or a pole. The main thing is that the material is durable.
With such a device, which can be assembled in ten minutes, you can move any heavy object, not just a car. The lever is rotated so that the cable is wound around the pipe. Such a manual winch will help to quickly solve the problems of moving heavy loads. This is not a full-fledged device, but it will get the job done.
Manufacturing a system with a universal drive
The manual system is easy to manufacture. Of the special skills the master is required to do, only own a welding machine. Any metal will do the job. The appearance of the device is not so important, the main thing is performance and resistance to heavy loads. The frame should not be deformed.
Materials and tools:
- Rectangular tube for frame.
- Shaft for the drum, you can use a round tube.
- A sheet of metal with a thickness of at least 3 mm for the manufacture of drum disks.
- Threaded rods M10-M12, 24 cm long – 6 pieces, nuts.
- Tube diameter 14 mm - 6 identical pieces of 20 cm.
- Asterisks - large and small. Chain.
- Hubs to secure the drum to the shaft and secure the shaft to the frame.
- Drive lever.
- Cable with carabiner.
- Welding and electrodes.
- Grinder and grinding disc for it.
- Paint and primer.
- Wrenches included in the set.
Some materials are better purchased - for example, tubes for the studs and shaft. The rest can be picked up from old mechanisms - cars or motorcycles. Any metal will do, even used.
Manufacturing procedure:
- They sketch out a drawing, because this will make it easier to navigate during assembly - you won’t have to stand guessing over the half-finished product and think about what to do next.
- Cut out the frame parts from a pipe with a cross-section of 2 by 2 cm. Connect the frame parts together strictly perpendicularly. The cut on the workpieces is made at an angle of 45 degrees.
- Lay the frame blanks on a flat surface. The joints are spot-tightened by welding, after which they check whether everything is installed correctly. The angles of the connections must be strictly 90 degrees. If there is a lack of accuracy, corrections are made and then the parts are welded.
- Scale is removed with a grinder and a grinding wheel. The finished frame is sanded and then coated with a primer. After the latter has dried, the metal is painted with enamel in 2 layers. You can use regular paint. The goal is to protect the metal from corrosion, since operating conditions will be difficult, with dirt and moisture.
- Creating a drum. Take a sheet of metal and cut out 2 circles, their diameter is about 30 cm. On each circle you need to make 7 holes:
- One in the center. The diameter must match the shaft size.
- 6 holes at a distance of 7 cm.
- The discs are fastened together using pins. The pin is inserted into the hole of one disk in a vertical position. Tubes with a diameter of 14 cm are put on the studs, and a second disk is installed on them. The studs must not only be secured with nuts, but also additionally reinforced with locknuts to ensure reliable connections.
- The drum is ready, now the shaft is mounted. It is made from a metal pipe, but you can take a finished product from any mechanism. The latter option is preferable: since the accuracy of the factory part is higher, vibrations of the drum will be small or absent altogether.
- A large diameter sprocket is mounted on the shaft on the outside of the drum. A sprocket from a motorcycle gearbox will do. To secure the drum to the frame, the outer sides of the shaft must have hubs.
- The drum assembly with the shaft is mounted through the hubs on the frame. The structure is secured with bolts. Before installing the drum, you should prepare a platform on the frame. A drive will be installed on it - manual or electric. When using an electric drive, a motor is placed on the platform with a small sprocket attached to its shaft.
- A universal drive is often installed: a handle is placed on the reverse side of the output shaft of the electric motor. In the absence of electricity, the winch can be turned manually.
- It is important to properly tension the chain. It should not sag, but strong tension is also unacceptable - this will cause the sprockets to wear out faster, and the chain may break. Check the chain tension by rotating the drum - the chain should not hinder its rotation when the cable is unwound.
- The end of the cable is secured to the shaft and wound around the drum. A carabiner is hung on the other, free end of the cable.
- A shank is attached to one end of the frame. With its help, the winch is secured to the car frame.