mark_kr
11495 0 2
mark_kr August 9, 2016Specialization: professional in the field of construction and repair (full cycle of finishing work, both internal and external, from sewerage to electrical and finishing work), installation of window structures. Hobbies: see the column “SPECIALIZATION AND SKILLS”
If you have straight arms, bending tin and making pipes out of it is quite simple!
Making a pipe from tin with your own hands is an excellent alternative to buying an expensive drain or ventilation casing. In practice, the savings turn out to be colossal, and if you consider that having mastered the technology, you can literally “stamp” pipes of any (okay, almost any) diameter - then it’s definitely worth reading my tips and at least trying to implement them in practice!
Below I will talk about what we need to form the pipe, and also describe the algorithm by which I have been successfully bending tin products for five years.
How to make the perfect galvanized pipe with your own hands: step-by-step instructions
Good day, dear guest!
The first sheet with galvanic coating came off the assembly line of one of the British factories back in 1867. True, at that time the metal was covered exclusively with gold and silver. But before the First World War, the production of parts with a protective layer of zinc began to be produced, and since then they have been incredibly popular.
This is not surprising - zinc extends the life of iron by 20-30 times. Products made of galvanized steel are durable, do not rust, and behave in everyday life no worse than stainless steel, although they are much cheaper.
In today’s article, I propose to pay more attention to this modest material and tell you how to make a galvanized pipe with your own hands.
Advantages and disadvantages of such a pipe
Galvanization is primarily steel, a material that has many undeniable advantages.
These include:
- Strength;
- Ability to withstand high temperatures;
- Excellent thermal conductivity;
- Low cost compared to other materials.
But without a protective coating, ferrous metal is susceptible to corrosion, quickly rusts and becomes unusable. Galvanizing successfully solved this problem. And, despite the fact that galvanized and steel pipes are the same in shape, the galvanized product has a number of advantages.
Additional advantages of galvanized products:
- Corrosion resistance, the ability to withstand negative environmental influences;
- Increased service life;
- Increased strength;
- Wide operating temperature range;
- High resistance to mechanical stress;
- Galvanized pipe can withstand high internal and external pressure;
- Simplicity and ease of installation;
- High resistance to fire;
- Zinc kills all pathogenic microorganisms;
- Galvanization is practically not inferior in quality to low-alloy stainless steel, but costs an order of magnitude less.
But, like any engineering solution, a galvanized iron pipeline is not ideal.
- Not very attractive design;
- Expensive compared to conventional steel;
- Zinc complicates the welding process;
- Unlike plastic, if there are protrusions on the walls, it is almost impossible to ensure a smooth transition into structures made of galvanized pipes.
Advantages
With the advent of a large number of factory products for assembling galvanized steel chimneys, the need to make pipes with your own hands has decreased. However, homemade pipes allow you to reduce costs and choose the ideal diameter. In addition, they are used to equip drains, so the ability to make pipes with your own hands will be useful in everyday life. Metal chimneys have the following advantages over others:
- A light weight. Smoke exhaust ducts made from homemade galvanized pipes weigh much less than brick or ceramic ones. Therefore, to install this type of chimney, there is no need to equip a foundation, the cost of pouring which exceeds the cost of material and installation work.
- Fire safety. According to building codes, steel chimneys are completely fire safe. High quality metal can withstand heating up to 900 degrees, so it is suitable even for solid fuel stoves and fireplaces.
- Low cost. Chimney pipes made of steel are the most democratic way to organize smoke removal; the cost of installation is several times lower than the installation of brick and ceramic analogues.
- Easy to assemble. You can easily assemble a chimney made of galvanized steel with your own hands according to the instructions, thereby saving money spent on hiring professional workers.
DIY pipes
Important! The effectiveness of smoke removal depends on the correct assembly of the chimney. Experienced craftsmen advise choosing a predominantly vertical configuration with the least number of turns. Each rotating element acts as an obstacle to the smoke, reducing the draft force.
Selection tips and approximate price
As usual, let's start with the price. A finished pipe with a diameter of 100 mm and a length of 3 meters will cost you and me about 500 rubles.
The cost of the material in this case is 150 rubles, the rest is labor costs and the seller’s markup.
What if you plan to organize an entire drainage system? You can see for yourself that you will have to overpay for finished products by 2.5-3 times. Making your own pipes will greatly ease the financial burden.
In addition, factory products have strictly defined dimensions, and sometimes it is difficult to choose the right one for your system. And the thickness of the finished pipe usually does not exceed 1 mm.
You should definitely remember that any factory-made product, unlike a home-made one, undergoes strict quality control control, has a perfectly round surface and a precision weld.
Whether a home master will be able to ensure compliance with all these conditions is far from certain.
Chimney insulation
Many may have a completely appropriate question - why should the chimney be insulated? After all, this is not very cheap.
But, in proper care, insulation plays a very important role. It is a mistake to think that thermal insulation does not change the temperature in the room.
If you compare this work with analogues that are carried out with walls or ceilings, it will be slightly different.
The walls are covered with insulating building material until a protective casing is created that does not allow warm air to escape outside. But in this way the chimney is protected from regular changes in temperature.
Many people know the term dew point. This is the area where condensation occurs. This process is natural and occurs when there is a difference in temperature.
Temperature changes are gradual and less frequent, and this significantly reduces moisture formations.
In the case of chimneys, everything looks completely different. Steel products for combustion exhaust heat up and cool down quickly. As a result, the volume of condensate becomes higher.
Video
Chimney made of 159 pipes /// Cheap chimney /// DIY chimney
And this causes significant damage to nearby elements. This is especially noticeable when the channel operates from a gas boiler, where heating occurs to significant temperatures.
IMPORTANT! You need to know that condensation is not only moisture and steam. This is the concentration of various microelements, acids and other combustion products. If simple condensation dries out in a short time and is not absorbed as quickly, then the moisture on the pipes from the stove quickly performs its detrimental effect.
Because of this influence, the metal chimney begins to become covered with rust. Also, moisture flows into the middle of the boiler, and this should not be allowed.
Insulation options
There are many means that allow you to isolate the furnace channel. Metal chimneys are somewhat reminiscent of asbestos. Therefore, you can perform actions yourself in a short time.
Pipes are often installed at the outlets of a gas heater; this is facilitated by their light weight and mobility. Laying these products with your own hands is not at all difficult. Addition to all this: it’s easy to make a bent terminal out of steel and route it as required by a specific design.
Video
Chimney insulation part 3 (final)
The process itself is easy. The pipe is wrapped in a layer of mineral wool and secured. Then everything is covered with a casing.
If compared with the asbestos version, a steel pipe will require thicker insulation. The methods of attaching the material to the chimney of their steel will also differ.
A few words about safety
There are some requirements for safe use. It is important not only to build such a system with your own hands correctly, but it must also be used according to strict rules:
- Do not use flammable liquids or flammable materials for kindling. In solid fuel heating devices it is not allowed to stack firewood that is longer than the length of the firebox.
- Chimney pipes should not be used for drying clothes and other items of clothing.
- Cleaning by burning off soot is not allowed; this may result in rapid failure.
- Do not use chlorine-containing substances for cleaning.
- Any attempt to douse the flames in the firebox with water can end disastrously.
- It is recommended to clean the chimney at least 2 times every six months.
- It is recommended to perform maintenance at least twice a year.
- To avoid additional problems with the functioning of the smoke exhaust duct, you must strictly adhere to the advice given by the manufacturers. You should not try to use heat-generating devices in any other way.
Video
Typical mistakes when installing stoves and chimneys
IMPORTANT! The influence of the chimney on the level of safety is very large. For these reasons, the correct functioning of the fire control authorities is checked. Without their written permission, a self-assembled steel structure will not be connected to gas networks.
Arguments for self-building
A beautiful and functional homemade chimney can be built easily if you carefully read all the recommendations provided. At the same time, there is an opportunity to save significant money.
Also, a do-it-yourself design, unlike the modular version, allows you to do without a lot of additional work. Indeed, in some cases, the use of a modular chimney can be severely limited.
And if in doubt, you can always turn to professional experts for help. They will give competent advice or provide assistance with competent installation work.
Material characteristics
Thin sheet steel coated with zinc in the factory must comply with GOST 14918-80. Main characteristics that you should pay attention to when choosing:
The most common galvanizing thicknesses are from 0.35 to 3mm. The thinner the sheet, the easier it is to process, which is important for making products at home. But don’t forget – less thickness means less strength.
- Zinc coating thickness
There are 3 classes of material, in accordance with the thickness of the zinc coating layer. Let's summarize the data in a table for convenience.
How to make a pipe from tin - making tin pipes with your own hands
Home builders try to select the most budget-friendly options to solve problems. Therefore, the question of how to make a pipe from tin with your own hands is relevant for many amateur craftsmen. After all, a homemade pipe product made from tin can be compared with gutters or casings that are on the shelves in specialized stores.
Therefore, you need to learn in more detail the process of manufacturing a tin pipe that has characteristics similar to factory products.
Subtleties of handling tin
In order to understand how metal pipes are made and to make your task easier, you should familiarize yourself with some rules for working with this material:
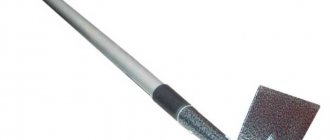
- To form the ideal pipe shape, a sheet of tin must be wrapped around a cylindrical object (for example, metal or wood), using a hammer and pliers. To get an even bend of the metal along the entire length of the product, it is worth performing light frequent tapping with a slight indentation.
- Cutting galvanized iron sheets can only be done with special metal scissors. It will be more convenient to work if you attach a leather loop to their ends. Cutting is done with one hand, putting the loop on the fingers.
- To avoid cutting yourself on a sharp edge, after cutting, the edge of the iron is cleaned with a plane made from an old blade from a hacksaw.
- In some cases, finished galvanized pipes need to be cut to form a curved edge, for example, when installing drainpipes. For these purposes, it is convenient to use a can opener, having previously filed the beginning of the cut with a hacksaw.
- A file is also quite often required when working with tin. However, it deteriorates quite quickly because sawdust gets stuck in its ribs. The instrument can be cleaned using a copper spatula or a soft metal tube bent on one side.
Thus, making tin pipes yourself is not particularly difficult. Guided by the tips given and observing safety precautions, you can make such products quite quickly.
Features of the source material
Before you start making a pipe from a sheet of metal, you should become more familiar with the material from which the pipe will be made and its features. To begin with, it is worth saying that this is a rolling type product, in other words, tin is a sheet of steel that has passed through the rollers of a rolling mill and has a thickness of 0.1-0.7 mm.
In addition to rolling operations, the technology for producing tin plates involves processing the finished rolled products to prevent the formation of corrosive processes. To do this, a layer of material is applied to the steel after rolling, which is not susceptible to corrosion.
The result of the performed actions is a steel sheet, the width of which can vary from 512 to 1000 mm, with a chrome or zinc coating. The finished product is flexible, so tin can be easily processed by hand. At the same time, rolled stiffeners can be compared in strength to steel products. This allows the use of tin in the manufacture of products of complex designs.
Required Tools
The list of tools and devices necessary for making a galvanized chimney pipe with your own hands is determined by the properties of tin, in particular softness and ductility. Processing this type of material does not require the special efforts required to work with sheet materials.
Therefore, when producing tin chimney pipes, the following set of tools is required:
- Scissors for cutting metal. This tool helps to cut sheet material into the required pieces without much difficulty, since the largest thickness of the sheet reaches 0.7 mm.
- Hammer with a soft striker. You can also use a wooden hammer, mallet, or a steel tool with a soft rubber grip. However, the latter option is used very carefully or not at all, since it can cause deformation of a thin sheet of tin and ruin the entire work.
- Pliers. With the help of this tool they solve the problem of how to bend a pipe made of tin, because it is steel, although thin, therefore it is impossible to bend it with your hands.
- Crafting table. This device is necessary when cutting material and when applying markings.
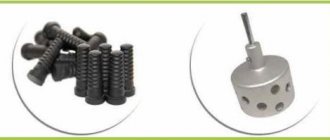
- Calibrating element. This can be a pipe product with a diameter of more than 10 centimeters, as well as a corner with edges of 7.5 centimeters. These elements must be well secured, since the joining seam will be riveted on their surface.
In addition to these tools, you should prepare a ruler or tape measure and a marker, which is a steel rod with a sharp sharpening.
List of tools
Before you begin making sheet metal pipes, you should prepare a list of tools and materials for the job.
- thin roofing galvanized sheet iron 0.5-0.7 mm thick;
- metal strip;
- metal scissors;
- hammer;
- pliers;
- mallet.
It is worth noting that the quality of the material directly affects the final result of the work. That is, to make an ideal tin pipe, the sheet iron must have correctly cut edges, without burrs or torn areas, as well as a smooth surface.
Preparatory stage
First, markings are applied to the sheet of tin, according to which the semi-finished product will be cut. In other words, the necessary part is cut from a certain sheet of tin, from which the contour of the future pipe will be formed. The marking process is carried out as follows: the sheet metal is laid out on a workbench and a segment equal to the length of the pipe is measured from the top edge. A mark is placed here with a marker.
Then, using a square, draw a line along this mark perpendicular to the side edge. Now along this line the circumference of the pipe, the same is done along the upper edge. In this case, about 1.5 cm is added on both edges to form the joining edges. The upper and lower marks are connected and the workpiece is cut out.
To determine the circumference, you can use a tape measure, or you can remember your school geometry course.
How to make a pipe body from tin
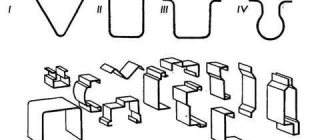
The purpose of this stage is to form the pipe profile. A line is drawn along the length of the workpiece at the bottom and top along which the folds will be folded. In this case, 5 mm are measured on one side, and 10 mm on the other. The folds must be bent at an angle of 90 0. To do this, the workpiece is laid on a steel corner, aligning the fold line with the edge of the corner. Hitting the edge with a mallet, bend it to the perpendicular side of the corner.
It is recommended to bend the product gradually, passing the hammer along the entire length. In this case, you can start bending using pliers.
Now, on the fold, the size of which is 10 mm, another fold of the fold is made to form a kind of letter G. In the process of bending the fold, you need to ensure that the upper bend is parallel to the workpiece, and its length is 5 millimeters. Therefore, when drawing a fold line, measure 0.5 cm once on one side, and 0.5 cm twice on the other side.
Having completed the molding of the folds, you can proceed to the formation of the pipe body. To do this, the workpiece sheet is placed on the calibrating element and begins to be tapped with a mallet or other suitable tool to obtain a profile of a certain shape. The workpiece first takes on a U-shape and then becomes round. In this case, the folds should join together.
Work technology
Step 1. Preparation
Instructions for making a pipe from tin begin with a description of the preparation of the workpiece:
Laying the material on the workbench
- On a workbench or other flat surface we roll out sheet metal, leveling it using mechanical action if necessary.
- We measure the length and width of the pipe by marking the material with chalk, marker or marker. When marking, we take into account that the width of the workpiece should be equal to the circumference of the pipe + 1.5...1.6 cm for forming a seam.
- We control the perpendicularity of the drawn lines using a square.
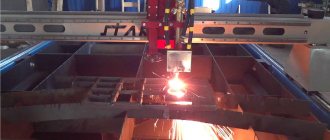
Cut to size
- We take scissors and make first a side and then a longitudinal cut. You need to cut strictly along the lines, trying not to make large indents. If the cut line “walks”, problems may arise at the stage of seam formation.
- Once again we level our workpiece. If necessary, tap the edges to remove waves and process them, removing burrs.
Step 2. Pipe Forming
Now we need to make a round pipe from the blank. And at the first stage we create a profile:
- On one side of the part we draw a fold line at a distance of 0.5 cm from the edge.
- On the other side we draw the same line at a distance of 1 cm.
Folding pattern
- We place the workpiece on a steel corner and bend the folds perpendicular to the plane of the sheet. To bend, use a mallet, adjusting the metal with pliers if necessary.
Bend the folds
- I usually do this: first I grab the metal with pliers, forming a bend about 2-3 cm wide. After the direction of deformation has been set, I change the pliers to a mallet and continue working, using a steel template as a support.
- When working according to a template, we do not apply excessive force, otherwise we risk damaging the material and “scraping off” part of the protective coating,
- Next, we divide the bent fold 1 cm wide in half along the width and repeat the fold. Now we need to bend a strip 0.5 cm wide parallel to the main workpiece.
Arch forming
- Now we form the pipe profile. We place the workpiece on the calibrating surface and tap it, first bending an arc, and then a full circle. The smoother it is, the better - there will be less fiddling around at the final stage of work.
Step 3. Processing the joint
Now we need to form a seam that will turn our workpiece into the actual pipe:
- We combine the folds, bent perpendicular to the main part, pressing them tightly against each other.
Pipe blank with bent seam
- We bend the horizontal part of the long fold so that it wraps around the combined parts.
- We lay the resulting three-layer structure on a workbench and carefully tap it, compacting it thoroughly. At the same time, we make sure that there are no distortions that will negatively affect the strength of the structure.
Strengthening the connection on the blank
- We bend the seam from the folds assembled together towards the pipe wall. We put the product on the calibration blank and tap the joint again. The resulting connection holds perfectly without any fasteners due to the plasticity of the sheet metal.
When producing large-diameter pipes that experience significant loads, the width of the folds can be increased and the joint further strengthened with rivets.
Ready product
Processing the seam joint
The final stage involves processing the joining seam, that is, crimping it. To do this, the upper part of the L-shaped fold is folded down, wrapping the edge of the other fold. The result should be a kind of sandwich located perpendicular to the pipe. To obtain a joining seam, you need to press the sandwich to the product.
For greater reliability, the joining seam is strengthened using rivets. However, do-it-yourself tin pipes using this joining method do not require additional reinforcement.
Types of steel structures
Such structures are divided into the following:
- Chimney with one wall.
- With two walls. In these types, fire-resistant insulation is located between two blanks of different volumes.
- Coaxial. With two walls, but without an insulating layer between them.
The first type of chimney is used in areas with warm climatic conditions. The third type is suitable for gas boilers.
But the second type is considered a popular option, because the insulation reduces condensation, as a result the structure can last a very long time.
How to make a galvanized pipe with your own hands?
You can buy galvanized pipes freely, but the cost of such products can be quite high, so the desire to make a galvanized pipe with your own hands is dictated, first of all, by considerations of economy.
At the same time, the production of galvanized pipes does not require the use of special efforts, special expensive devices and tools and any professional knowledge, so any home craftsman who has a set of standard carpentry tools can cope with this.
How to do the calculations
The diameter, height and wall thickness of the pipe during construction must be determined accurately. It is important not to make any mistakes. After all, the diameter of the chimney must be sufficient to exhaust the processed gas. And at the same time, the thrust should not be very large.
If this is a pipe for a boiler, the primary source when choosing is the instructions from the manufacturers. Provided that this data is not in the passport, then calculations are made taking into account the volume and height of the firebox.
The height of iron pipes is a little more difficult. The greater the height of such a pipe, the greater the thrust. And how much the pipe needs to be extended is a difficult question. When determining the distance from the stove to the tip, specially developed formulas and programs are used.
But one condition for such calculations remains the same - the chimney must be at least 50 cm higher from the roof peak, and in vertical sections its height can be at least five meters.
Video on how to calculate height
How to calculate the height of the chimney!
The wall thickness of the pipes used should be from three to five millimeters. At the exit from the stove, at least 5 or more millimeters. In the upper sections it is allowed to use a pipe of three millimeters or more.
Characteristics of galvanized pipes
Pipes made of galvanized metal are used to equip chimneys; they are popular due to their light weight and, accordingly, ease of installation. Galvanized chimneys do not require the construction of a foundation, and this significantly reduces the cost of chimney equipment.
Such pipes meet fire safety standards, withstanding temperatures up to 900°, so they can even be used for smoke removal from solid fuel heating boilers and furnaces.
Galvanized pipes are also used in home construction to equip drains. Such pipes are already quite affordable in cost, but the process can be made even cheaper by using hand-made products.
Brick chimney
These chimneys have been known for a long time; they were used in the construction of stoves in village houses many years ago. There are 2 ways to make a chimney:
- On the stove - an easy option;
- Placed next to it and connected using an adapter.
The structure of brickwork is:
- working area - located below the ceiling;
- outer part - passing through the ceiling with fluff to the roof;
- neck with a head - a pipe passing through the roof equipped with an “otter”.
Such a chimney is a heavy device, and it is recommended to install it only if you have a brick stove.
To learn more about how to lay a brick chimney with your own hands, see this article.
What you need to make a galvanized pipe
At home, to make a galvanized pipe, you need a sheet of tin; the material does not require much effort due to its softness and ductility.
Tin plates are industrially made from thin sheet steel with a thickness of 0.1 to 0.7 mm on rolling machines, after which they are coated with an anti-corrosion protective layer of chrome, tin or zinc. Finally, the workpieces are cut to standard sizes, ranging from 512 mm to 2000 mm wide.
The strength of such products is in no way inferior to their steel counterparts, especially if the material has additional stiffening ribs, but at the same time it is very plastic and allows the installation of pipelines of complex shapes by hand. Anti-corrosion coating protects the pipe from the effects of the external environment.
The problem with such pipes is insufficient bending strength, therefore, for the manufacture of open parts, stiffeners are added to the structure to strengthen the product.
- The stores offer a wide range of such pipes of various sizes: single-circuit;
- double-circuit (made in the form of a sandwich and consisting of an internal and external pipe);
- corrugated, characterized by increased flexibility.
Note! At home, it is technically possible to make only a single-circuit pipe.
When choosing sheet thickness, the purpose of the pipe should be taken into account. For example, a galvanized pipe for smoke removal from solid fuel stoves and fireplaces must have increased resistance to high temperatures, and at the same time high anti-corrosion properties.
It is important! The higher the temperature of the working environment, the thicker the pipe walls should be.
Tools
To work, you need special tools to bend, correctly measure the bend angle and cut the pipe to the required length.
A set of tools that will be needed for work:
Note! The blades of the scissors should not be dull; the formation of a smooth edge of the product depends on this. When cutting with a blunt instrument, nicks are formed that must be removed. To avoid unnecessary work, it is important to monitor the quality of sharpening.
- a hammer with a rubber pad, a mallet (a carpentry tool made of wood in the form of a hammer);
- bending pliers;
- workbench for cutting and marking;
- a pipe for calibration measuring more than 100 mm and an angle with edges of 75 mm;
- ruler or tape measure;
- marker (sharpened steel rod).
Assembly Rules
To properly assemble a chimney made of galvanized steel, you must first mark out the layout and laying of the pipe. Using this drawing, you should determine how many pipes are required and cut them into sections of the required length. Assembly is performed as follows:
Options for placing chimneys or galvanized steel
- First of all, the chimney pipe is connected to the inlet pipe of the heating device using a special adapter. It is important to ensure complete tightness of the connecting seam.
- After the first segment, a tee with a condensate collector and inspection is connected. Each piece of pipe is inserted into the previous one, and the joint is coated with heat-resistant sealant and secured with a steel clamp.
- Where the pipe passes through obstacles in the form of walls or ceilings, holes are cut out and a fire-resistant box made of galvanized steel or asbestos slabs is installed.
The space between the walls of the pipe and the box is wrapped with basalt fiber or filled with expanded clay. Equipment for the passage of the pipe through the ceiling - A protective umbrella is put on the head, and the junction with the roof is isolated with sealant or elastic rubber penetration. If the roofing material is not fire resistant, a spark arrester is installed.
Note! The smoke exhaust duct is installed on the roof at a distance of 30-50 cm from the ridge. To ensure the level of draft, the height of the chimney should be 50 cm above the ridge. Incorrect placement on the roof can cause backdraft or wind backlash.