An ax is a chopping tool consisting of a wooden handle, usually short, and a blade, which is located longitudinally or perpendicular to the shaft. The latter are called Tesla . They cut out grooves during the construction of huts and ships, princely mansions and churches, hollowed out troughs, boats, cut sculptures, toys and other wooden products.
The secret of the durability of products chopped with an ax is that the fibers of the wood are crushed under the blow of an ax and do not allow moisture to pass through. This does not happen when sawing, when the pores of the wood are left open for rot to enter.
What is a taiga ax
First, of course, we’ll talk about the forged taiga axes we made, and compare them with purchased carpenter’s axes. Then considerations on the recipes for making your own from ready-made axes, which are common on the Internet.
Purpose
A taiga ax is an ax that is convenient to use for hunting, long hikes and work in forest areas. It is intended for collecting firewood, setting up a camp, and, quite often, for cutting up the carcasses of large animals. Therefore, optimal blade hardness, a reliable ax handle, and a convenient case are required.
Buy a taiga ax or make it yourself?
Carpenter's axes are usually on mass sale, but they are not very convenient for working in the forest. A long time ago, skilled people lightened and modified purchased axes for camping use; now a whole industry has emerged for regrinding axes and turning them into “author’s” ones. If everything is done correctly: the shape, the attachment on the ax handle, heat treatment and sharpening, you can get a good tool. But we prefer axes that are completely hand forged and designed specifically for working in the forest. The advantages of such an ax: optimal shape, light weight, more durable blade due to free forging rather than stamping. Therefore, we will first show off our axes, and only at the end of the article will we tell you how to make a taiga ax with your own hands.
Sharpening rules
The device must have a sharpened blade. A blunt object will not cope with difficulties in the forests. The sharpening has a rounded, steep shape, which is less likely to become dull.
Manual method
You can sharpen it yourself. For this:
- They make the workpiece, taking into account the dimensions. Use a piece of tin and determine the required angle.
- The tool is tried on with a ready-made template.
- If deviations are identified, notes are made.
- Often, coarse, fine-grained sandpaper is used. Glue on top of a wooden block, which is used during the season.
- Sharpen while holding the blade away from you.
Mechanical
You can sharpen it quickly and effortlessly on a special machine. Mechanical method algorithm:
- Place the machine on a hard surface.
- Make marks with a marker to change the angle of the blade if necessary.
- Turn on low speed, hold the blade away from you.
- After completion, you need to lubricate the grinding wheel. Finishing paste is suitable for this.
- The object is polished on a grinding wheel.
- Treated with anti-corrosion agent.
Ax sharpening diagram.
Taiga ax shape
Blade thickness
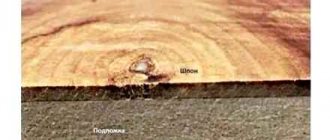
The thickness of the blade of a carpenter's axe. (in the photo “WORK - VACHA” Tiger).
The main difference between a taiga ax and a carpenter's ax is the thickness of the blade. A carpenter's ax has a thin blade. This allows you to work at an acute angle to the wood, carefully trim, removing thin chips and obtaining a flat surface. If you hit hard with such an ax along the fibers (trying to split a more or less thick log), the ax will get stuck with each blow, so the farm uses a cleaver to split logs separately, and to roughly split long logs into blocks, a heavy axe, a wedge and a sledgehammer.
Blade thickness of a taiga ax
The taiga ax has a wedge-shaped profile, which provides the following advantages:
- With a strong blow diagonally across the grain, the ax cuts deeply and breaks off the chips rather than getting stuck in the wood.
- The ax can be used when splitting along the grain; it effectively splits the log and does not get stuck at all.
You can watch the taiga ax in action in the video.
Video of working with a taiga ax
Sometimes it is necessary to cut logs onto blocks when setting up a camp or to split large logs into logs. Our ax, thanks to its wedge-shaped shape, almost never gets stuck, even when driven deep into a tree along the grain; in addition, it is easy to pull it out of the log. Anyone who has tried to chop thick and knotty logs with a regular ax knows how difficult it is to pull out a stuck carpenter's axe. Carrying a separate heavy splitting cleaver or a wedge and a sledgehammer in the forest is inconvenient and often simply impossible.
Shape and size of working edge
Pine 35cm thick. Pay attention to the size of the chips and the cut.
The taiga ax has a large semicircular blade, which makes it possible to penetrate the wood as much as possible with a strong blow. The maximum blade size with low weight is ensured by the beard-shaped shape, which has traditionally been used for all forest axes since ancient times. In addition to the efficient transfer of impact energy, the large size also increases operational safety. It is more difficult to miss when cutting down a branch or chopping in an inconvenient place with an ax with a large blade.
Bearded ax shape
Another important difference is the beard-like shape, which is most noticeable. When trying to make a taiga ax from a carpenter's one, they often start by cutting out part of the blade. Advantages of a beard shape
- The beard-shaped shape of the ax allows you to significantly reduce the weight of the ax while maintaining a large blade length, but reducing weight without losing strength is possible only when using free forging.
- The ax gets stuck less when cutting wood.
- The lower part of the blade is a reliable protection for the upper part of the ax from damage in case of an accidental miss.
Compliance with safety regulations
- do not leave the ax on the ground so that the tool does not rust and the ax handle does not become damp;
- the head of the product should not dangle on the handle;
- when cutting logs, place wood underneath so as not to damage the blade on stone or metal;
- Make sure you have enough space to swing the ax freely.
Taiga ax
An ax handle mounted with a reverse thrust for a taiga ax
The taiga ax requires an ax handle that is very different from a carpenter's axe.
Shape of the ax
The handle of a carpenter's axe, the so-called “Dutch” axe, is strongly curved and makes it possible to deliver precise and accurate blows.
For the taiga ax, a long, almost straight ax is used, which allows you to deliver very strong blows with both hands. Our ax handles are long, the length of the ax is 55-60cm, but, if desired, we can also use a shortened ax handle of 40-45cm. The shape is almost straight, but there are two small bends that allow you to conveniently intercept the ax handle with both hands for chopping from right to left and left to right, and also to hold the ax “under the neck” or, conversely, by the end of the ax handle - when you need to chop off a branch or twig. leaning over. Instead of a fungus, there is a small bend at the end of the ax that prevents the ax from slipping out of the hand. In general, the ax handle is comfortable and safe, allowing you to work in thick gloves in winter. The material is very durable Caucasian ash; we impregnate the ax handles with natural linseed oil for two weeks. The oil polymerizes on top and protects it from moisture, but inside the wood it remains liquid and can melt if you place the ax near the fire, even after a year (There is no need to specifically place the ax near the fire or on a radiator, although an ax with a reverse thrust is very easy to repair if it dries out) .
Reverse ax attachment
A carpenter's ax is mounted on a curved "Dutch" axe-handle with wedging, otherwise it is simply impossible. For fitting a forest ax, a reverse insertion is better than a direct insertion onto a wedge. Being in a damp forest, a dry city apartment, in the cold or near a fire will cause the wood to dry out and can lead to premature drying out of the ax. It is not difficult for a carpenter to repair an ax at any time, but in the forest it is better to have a more reliable tool. If an ax with a reverse thrust becomes dry, it is enough to simply knock it down with a strong blow to hard wood and continue working. Also, such an attachment is more reliable during heavy power work: the ax does not become loose, but only settles more tightly up the ax handle. Hammers, pickaxes, and cleavers are also mounted on the handle with a reverse thrust; in this way, ancient battle and lumberjack axes were mounted - all tools for which impact force and reliability are more important than high accuracy and accuracy.
Sharpening the taiga ax
For a carpenter's ax, the ability to carefully remove thin chips and accurately process the surface is important. Therefore, carpenter's axes are sharpened into a razor, the sharpening angle can be up to 25 degrees. There is always a block in the box with carpentry tools in order to quickly correct the sharpness of the sharpening. The master treats his tool with care, he is afraid not only of the blade getting into the ground, but also of working on wood contaminated with sand, which can damage the sharpening. For a taiga ax, accuracy of work is less important, but efficiency and reliability are important. To maintain the effectiveness of a sharpened ax, but to protect the working edge from accidental damage, a little trick is used: the main blade is forged and forms a single wedge with an angle of 12-15 degrees, and the working edge itself (the first 2-2.5 mm) is brought together at an angle of 30 -35 degrees. This sharpening gives maximum efficiency, but also protects the edge from random pebbles and sand, and does not allow the blade to quickly shrink when working on hard wood and bone.
How to protect against rotting?
The wood from which the ax handle is made, like other similar materials, is susceptible to rotting. Such problems always arise over time or in inappropriate storage conditions for the tool.
It is important to take care of your homemade ax in advance, protecting it from rotting. It is strongly not recommended to use compositions such as varnishes or paints to protect wooden handles
The ban on the use of such compounds is due to the fact that their presence on the handle can lead to it slipping out of the hands during certain work. The reason for this is the glossy smooth texture.
The optimal solution for protecting the ax from rotting would be other suitable impregnations. You can coat the handle with linseed oil or good old linseed oil. There are other highly effective antiseptic agents that will extend the life of natural wood. But we must take into account that they will need to be applied periodically. Don't forget this procedure.
Case for ax
To carry the axe, we made a comfortable case from durable genuine leather 3mm thick. The cover is stitched with double thread so that the sharpened ax blade cannot cut through the seam, and a gasket is made along the seam - the third layer of leather. The most critical places are reinforced with rivets.
Case features
- The case is made of durable leather and is completely closed. This is done so that the owner of the ax avoids injury if he falls on a sharpened ax fastened to his belt.
- The ax is hung on the waist belt with the butt forward with a slight tilt (like a saber). This placement prevents the ax, even with a long axe, from clinging and getting tangled in branches and touching your legs when walking. The ax does not interfere with climbing over forest rubble and squatting.
- The cover of the case closes with a holster clasp through a small strap. This design makes it possible to take out the ax and put it back in with one hand, even if you are wearing thick mittens.
Main components
When making and choosing a weapon, its future owners are often faced with the question of how to calculate the mass of a taiga ax. To do this, you need to focus on its components and compliance with certain proportions between them. On average, the weight of the product does not exceed 1 kg; its main components are a wooden ax handle and a metal head. The main elements are shown in more detail in Figure 2.
Figure 2. Main components of the product
The weight of the taiga ax handle and its length should be proportional to each other. The optimal value for everyone is considered to be equal to the distance from the wrist to the shoulder joint, provided that the shaft is fully grasped by the hand, in order to avoid injuries. 50-55 cm is enough to work for a long time with one hand or chop something with two hands.
A short summary of our taiga axes
If everything suits you, then you can choose and buy a forged ax in our catalog. Many people are interested in how to make a taiga ax with their own hands. We also sharpened, welded, forged and hardened industrial axes a lot, although the video has not been preserved from those long ago. Below is my experience, but other people's sound videos.
Manual method
This method will require a lot of free time, since the matter is quite troublesome. If you approach it with special trepidation, then before sharpening you need to make a special template. To do this you need:
- find a piece of tin;
- choose the optimal and correct sharpening angle;
- make a cutout.
When the template is ready, move on to the main action:
- apply the template to the ax blade;
- see if there is a deviation angle;
- make marks using a marker;
- processing.
If you choose a manual sharpening method, it is better to do it with a medium-grained stone. The final touch can be done in the smallest way. The timber also has its own nuances:
- round shape is preferred;
- material – fine sandstone.
Professionals advise sharpening with the blade facing away from you. It is also noted that if amateurs get down to business, the blade becomes dull, and in some cases the “sharpeners” break.
Making a taiga ax with your own hands
There are quite a lot of videos on the Internet on remaking a purchased ax; sometimes you get very interesting examples that you want to share. Once upon a time we also customized purchased axes to suit ourselves; we will write about some of the nuances. For the most part, it comes down to cutting a unique shape from a carpenter’s axe. Often, authors also harden and fine-tune the sharpening of the ax; much attention is usually paid to finishing.
The production of a sharpened ax takes place in several stages:
- Choosing an ax . As a donor ax, they are trying to select an old ax made in the 1950s-70s; it is believed that at that time the steel was better; axes produced by ZIK, 1st GPP, which have the mark of military acceptance, are especially valued. Watch the video of testing the ax from Sokolov, it will become clear why he used the Bison ax as a donor, and not a carpenter’s one.
- Drawing of a taiga ax . In most cases, a full-size sketch is made on paper, which is then cut out and glued to the axe. You can also simply mark the markings with a marker or soft pencil directly on the axe.
- Making a taiga ax . Using an angle grinder (grinder), the excess is cut out and roughly shaped. Subsequently, finer processing and trimming of the cut line is carried out using a tool that is accessible and more convenient. This can be a grinder with a cutting disc and grinding attachments, if the shape leaves enough access to the area to be processed, and a grinder or grinder belt, in some places it can be processed with an electric sharpener. Finishing a complex shape often takes longer than just rough cutting with a grinder.
- Ax hardening. Domestic axes are made of U7 steel, less commonly U8.
The correct full cycle of heat treatment: annealing (heating to 740-760 with slow cooling to 550 degrees), hardening (heating to 800-830 degrees and quenching a three-centimeter cutting edge in water for a minute and a half) and tempering at a temperature of 270-320 degrees for an hour. Without a lot of experience (it is possible to determine the temperature by color with sufficient accuracy for such work) and equipment (a pyrometer or a muffle furnace with a precisely set temperature is desirable), it is difficult, but doable. If you do it for yourself, then after a few attempts you will get satisfactory hardness without brittleness. You can watch the video on how to harden an ax at home, without a pyrometer and a hardening furnace. A simpler option: water hardening from temperature insensitivity to a magnet and, of course, tempering for 1 hour at 300 degrees can give a good result. Only the blade needs to be hardened (immersed in water) - let the butt cool slowly in the air. It is important to check the hardening and make sure that the ax blade is not overheated.
Operation and care
When working with a taiga ax, you must comply with all safety requirements and proper handling of the tool.
The blades should always be kept closed and dried after use, otherwise they will rust and become dull, which significantly reduces the efficiency of cutting and the life of the ax. Always remember that axes are not a toy
They can be reliable helpers in difficult survival conditions, but if handled carelessly and frivolously, they cause their owners a lot of trouble. The ax is intended for cutting down trees - this means that it should not be used for digging the earth or working with materials that can dull it or simply break it. The ax should not be thrown into the ground, as this will cause the blade to deteriorate and rust. You should not put the tool into the fire - this leads to a deterioration in the technical and operational characteristics of the steel.
It is important to check the sharpness of the blade in advance; there should be no chips or burrs on the plate. You cannot start cutting if there are strangers in the work area, especially children.
You cannot start cutting if there are strangers, especially children, in the work area.
When swinging strongly, hold the ax handle as tightly as possible - otherwise the tool may slip out of your hand.
For more information about the features of taiga axes, see the video below.
Design
Let us dwell in more detail on the design features of the taiga ax. It includes several details.
- The ax handle is quite strikingly different from the carpenter's one. In taiga models it is much longer, since with its help you need to make a strong swing and hit the wood sharply. The standard length is 50 centimeters or more, and it must be light, otherwise you simply will not be able to survive in the taiga.
- The head of the taiga ax is also unlike a carpenter’s; the upper part of the blade is completely absent here. In addition, the head forms a much smaller angle of inclination in relation to the ax handle - 65 degrees compared to 90 degrees for the carpenter's version. Thanks to this feature, the work efficiency increases, and the hands do not get tired, which generally increases the cutting efficiency. The blow is stronger than with a carpenter's tool.
- The blade must be rounded; sharpening has its own characteristics: as a rule, the rear edge is 2.5 times thinner than the front. This is extremely important if you plan to use an ax instead of a cleaver.
- The beard is an element that connects the ax handle to the head. It is designed to protect the wooden part from breaking in the event of strong impacts, since it absorbs up to 60% of the force of physical impact.
- Butt - as you know, in the taiga you need not only an ax, but also a hammer, but many people use a butt instead, which quite easily copes with all the tasks assigned to it.
- Eyelet - thanks to this part, the head is put on the ax handle; in addition, a wooden wedge or a simple nail is driven inside, so the head does not jump off.
- The fungus is another detail aimed at increasing the safety of using the device. You can quite comfortably fix your hands on the fungus so that they do not slip.
Peculiarities
The taiga ax is used to solve various problems.
- Tree felling – this includes firewood collection, sanitary felling, and felling at a sawmill. The taiga ax successfully copes with all these functions.
- Working with large logs - this refers to rough work, for example, removing branches, removing dense bark, making grooves and some other types of work.
- For survival - such a tool can be used by hunters to quickly create bags, as well as traps for wild animals.
- Construction of huts, various decks or “instant” huts - it is obvious that without an ax it is impossible to build a hut. At the same time, using the taiga option allows you to carry out all the necessary work 3-4 times faster than using the carpentry option.
It should be noted that a high-quality ax is needed not only in the taiga. In any other natural and climatic conditions, it will always be useful to lovers of long hiking trips. This is a truly indispensable device for hunters, fishermen, foresters, geologists, as well as ordinary tourists, and all those who are planning to go to the taiga.
Peculiarities
A good strong knife is an indispensable companion for any hunter, huntsman, hiker or forester. But in some cases, its power and size in the forest, and especially in the Taiga, are not enough, or it is not very convenient to use. In this case, an ax comes to the rescue. Here are a few examples of actions where it can definitely come in handy:
- Tree and firewood cutting;
- Processing logs, such as peeling bark. An ax is not suitable for fine woodwork;
- Making hunting traps from wood;
- Installation of huts or simple wooden structures.
As you can see, all rough work with wood can easily be done with a taiga ax. With it you can arrange shelter, light a fire, and get loot.
Useful tips and tricks
Please note that the ax handle should be made so that its cross-section has a characteristic oval shape. Only by observing this condition will you be able to successfully hold it without straining your hand too much. In this case, blows with an ax will be more accurate and easier. It is recommended to make wood blanks for creating an ax handle in late autumn. It is during this period that the movement of sap is reduced to a minimum (almost stops), which means that the tree becomes, as it were, dehydrated.
Many inexperienced craftsmen neglect drying wood to build an axe. As a result, this ends up with the handle changing in size, and the metal part with the butt on it holds very poorly. It is permissible to use undried material only in special situations, when the handle needs to be built urgently, and this spare part is made as a temporary one.
When making a brand new ax handle yourself, you need to draw up a detailed drawing/template of the future tool. If you have a very convenient old ax in your arsenal, then you can remove all parameters from it. This will make it much easier and more convenient. Do not rush to turn the cutting edge of the tool. First you need to make sure the metal is sufficiently hard. If it turns out to be too soft, then it will need to be additionally hardened under the influence of high temperatures.
It is very important to use a ready-made ax (both homemade and store-bought) correctly. Experienced craftsmen strongly do not recommend trying to cut various metal parts with such a device.
Even if you plan to cut wood, it is better to make sure that there are no solid particles inside that could harm the tool.
It is strongly recommended not to throw the finished tool onto hard surfaces, especially from a great height. It is not recommended to leave the ax in the open air. Precipitation or aggressive sunlight can negatively affect the quality of the wooden part. Keep this tool in a dark and dry place. Only under this condition will the ax serve you for many years.
If the ax handle fits into the eye too easily, this may indicate that during the work the master made a serious mistake somewhere (most likely in the calculations). An incorrectly prepared template often leads to this problem. In such a situation, even one more installed wedge will not change anything
This is why it is so important to take your time to do all the calculations and make the template correctly
Do not forget to process the wooden ax handle at the end of all work. Please note that processing of this part must be carried out in several approaches. Each new protective layer should be applied only after the previous one has been completely absorbed. This is the only way to reliably protect wood from rotting and destruction. Stock up on enough wood to make an axe. You don’t need to make just one piece - it’s better to build several pieces. This is necessary because during the work some of them may not work out and be rejected. There should always be at least one more blank in stock.
To make an ax handle, you cannot use a wooden block that has a large number of knots. Because of them, noticeable cracks may form on the material. Over time, the branches begin to dry out, and the entire material loses its strength. Making an ax handle yourself is not at all difficult. If you doubt your abilities, are afraid of making a mistake and translating natural material, then it is better to refuse experiments. Buy a ready-made model or contact an experienced craftsman who will make a good tool for you.
To learn how to make an ax handle with your own hands, see the following video.
Model rating
Unfortunately, domestically produced axes, such as “Taiga”, “Deer” and “Tiger”, cannot boast of high quality. Their axes often do not fit the head and almost immediately begin to slip, which makes working with such a tool very dangerous. According to customer reviews, the blades of the head are so hot that they practically reach the state of cast iron, this leads to their destruction at the first frost - the blades begin to crumble, or pieces simply break off from them, in any case the tool becomes unusable. To protect themselves, buyers are forced to modify the newly purchased tool themselves, and given that such axes are not cheap, the demand for Russian models is low.
High-quality taiga axes were produced in Soviet times during the reign of Stalin, now the technology has been lost, and products from the 50s can only be bought on the Internet, and their cost starts from 4-5 thousand rubles. In those years, U7 grade steel was used.
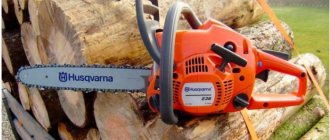
Nowadays, high-quality taiga axes can only be purchased from foreign manufacturers. Products from the brands Gransfors Bruks, Husqvarna, as well as Fiskars and Hultafors are in greatest demand.
Work on blanks
The next step is to work on the template. To do this, a drawing is applied to the cardboard, which can then be transferred to the material. This will be required for more accurate size detailing. For the ax handle you will need a piece of well-dried wood. The workpiece should be cut along the direction of the fibers. The workpiece should be slightly longer than the planned dimensions.
The part that you plan to insert into the eyelet needs to be made slightly wider. A drawing must be attached on both sides of the workpiece. As soon as all the contours can be redrawn, you need to take care of the allowances. To prevent the handle from breaking off during installation, an indentation should be left in the tail part. Once the assembly of the tool has been completed, you will need to get rid of excess material.
Subtleties of choice
The biggest mistake that many people make when going to the taiga is when they take a carpenter's ax with them. Such a tool with a short handle has a massive head and a fairly wide blade, all this significantly weakens the force of the blow, since wide contact with the wood is required only when it is necessary to trim the tree, and not to fell it.
A shortened handle is also not suitable, the blow will be much weaker, but this is only the lesser of two evils. Short axes are becoming the most common cause of injury in logging - you can hit yourself in the shin or knee while working. In the taiga, when there is no opportunity to receive urgent qualified medical care, such situations can end very badly.
Carpentry tools weigh from 2 kg, and the head - 1.4-1.5 kg. The taiga ax has a head weight of no more than 800 g, making it easier to chop with such a tool.
Thus, when choosing a taiga ax, it is important to pay special attention to several basic points.
- The ax must certainly be light - you will have to carry it for several kilometers on your back and in your hands, and swinging a lightweight tool is much more convenient than a carpenter's sledgehammer. In this case, the main mass should be concentrated in the head, that is, in its metal part.
- The minimum length of the ax should be approximately 50 cm, optimally 60-70 cm. Only in this case the swing will allow you to make a more accurate and powerful blow.
- However, a handle that is too long will not make the job easier either. If it is 80-90 cm, then you can get used to such a tool, but the accuracy of the blow will be much less, and making small hems with an elongated handle is not at all convenient.
- The blade must certainly have a rounded shape, this is due to the specifics of working in the taiga area. The blade of the ax should be quite thick so as not to get stuck in the wood tissue when struck, and not wide enough - otherwise it will be difficult for it to penetrate the tree.
- Another point is the ax attachment. Unfortunately, over time, all axes begin to loosen, regardless of their cost and manufacturer brand. Even if you additionally placed them on 3-5 wedges and smeared them with all the superglues at your disposal, they will still fly off, especially if you cut wood for several hours a day.
- The flying ax head turns into a sharp, heavy object that can cause serious injury to others. But even if trouble does not happen, she may simply drown in deep snow. As practice shows, a sharp thin ax penetrates the snow in such a way that it is almost impossible to find it later.
- That is why it is better to give preference to models with a reverse thrust, when the ax is impaled without using a wedge directly from the hand, in this case, with each blow it will impale itself even more strongly.