Wood can be called the most beautiful building material that nature has created. However, wood is not only beautiful, but also capricious. Artificial materials have a uniform structure, but wood has a heterogeneous structure. When working with timber, you need to get used to its heterogeneity and learn to work with it.
Since timber consists of many fibers that are arranged vertically, and a much smaller number of horizontal fibers, the craftsman must learn to think through sawing wood in order to carry out a quality cut. In this article we will talk about longitudinal cutting.
How to do something yourself, with your own hands - home craftsman website
And a little magic
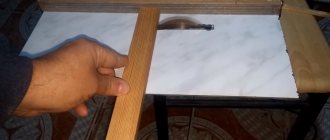
When all verification operations are completed, it is time to begin the project itself. While rummaging through my lumber stash, I found a piece of wood with a fascinating grain pattern that I thought would look amazing as 6mm wide panels on the doors of a jewelry storage cabinet.
I set the guide 8mm from the saw blade (6mm plus 1.5mm for the next sanding) and started loosening. I chose the feeding speed taking into account the density of the workpiece (it was amber wood) and its width (approximately 18 cm). Checking the first sawn piece showed that the saw settings were correct - and I sawed off the second piece. The resulting pair of front panels (photo below) is a good example of how beautiful boards sawn in this manner can be.
After gluing the veneer to the substrate, the front side must be sanded. Multilayer plywood or MDF sheet are perfectly suitable for the substrate, since they are virtually not subject to expansion and contraction when humidity changes.
These freshly sawn pieces still needed to adjust to the humidity level in the workshop, so I stacked them with slats for a day or two to keep them from warping (photo above left). After which I glued them together and planed them to a final thickness of 6 mm.
If I needed to obtain veneer from a blank, my actions would differ in the most insignificant way. I would adjust the guide to cut sheets 3 mm wide, and before each new cut I would plan or sand the workpiece. This technique allows you to get one smooth and even side on each veneer sheet, suitable for gluing. You see, have you ever thought that a band saw is only suitable for cutting curved lines!
TOOLS FOR HOME AND GARDEN, HANDCRAFTS, ETC. PRICES VERY LOW
Take a canvas with a more brutal cut. A blade with 3 teeth per inch and larger grooves between them better removes sawdust, which can cause the cutting blade to bend and twist. Keep the workpiece firmly pressed against the guide and the table. A special pusher transmits the required pressing force to the guide and allows your hands to be at a safe distance from the canvas when it is unraveled.
Once the band saw is perfectly tuned, you need to pay extra attention to the saw blade. Sawing wide boards requires a blade that moderately passes through the entire thickness of the workpiece, while removing a huge amount of sawdust. The wider the blade, the straighter the cut, so try to use the widest blade that will fit your saw.
Place the square 6mm from the saw blade (you may need to lift the guard to position it) and press down on the middle of the blade with your finger. Using medium pressure, the blade should touch the square. In this photo, the saw blade is very much shifted backwards on the upper drive wheel: therefore, the cut deviates towards the guide. If the blade is very much shifted towards the front edge of the wheel, this leads to the opposite result.
Most band saws work very little with 12mm blades, and many with even wider ones. Typically, a wide blade with 3 teeth per inch of length (3 tpi) offers the perfect combination of brutal yet smooth cuts with active sawdust removal, which is what you want when dissolving wood. Finally, let's talk about guides. The workpiece to be cut should be less than twice the height of the guide. So, for example, a 100 mm guide is suitable for cutting a board 200 mm wide. If you require greater height, use homemade additional guides.
Common errors and fixes
Craftsmen are aware of a number of situations that negatively affect the material processing process.
When entering the material, the saw jumps up, but after that it works normally, and at the end the power drops. The reason is often a large sharpening angle of the teeth; it must be reduced by 5 degrees.
Entering the wood, the saw rises, then the craftsmen receive a crooked board. The reason is that the sharpening angle exceeds the norm, and the setting is insufficient. It is necessary to increase the sharpening angle by 4–6 degrees, and slightly increase the spread.
After diving, the saw goes smoothly; the sawyer cites several reasons: dullness of the cutting blade, small sharpening angle. If the tooth shape corresponds to the standard, the sharpening angle must be increased.
The saw goes with constant dives. Small sharpening angle with insufficient setting.
There is a large amount of sawdust on the surface of the boards, and the tooth spacing is increased.
Sawdust is hot and compressed - an underestimated divorce.
The cut is obtained in the form of a wave. If the saw is quite sharp, then the setting is insufficient. Settings that are too small sometimes cause the saw blade to break.
The canvas cracks at its trailing edge. The rear stops of the rollers, where the log lies, are located far from the rear edge. The distance must be set to less than 0.3mm.
Rolling sawdust onto the saw blade. The tooth set is small, the set needs to be increased.
Sawdust rolls onto the inner surface of the tooth; there are no sawdust on the blade. Poor sharpening of teeth (high feed speed, excessive metal removal). Additional reasons: the sharpening angle is large, the saw was used after the blade became dull.
After sharpening, the blade cracks at the tooth cavity. The geometry of the tooth is broken or the sharpening stone is carelessly loaded.
Choosing a Band Saw
DISSOLVING A TREE: TO THE START, ATTENTION, MARCH!
Start by assigning a rectangular shape to your workpiece and cutting wood of a similar size. With it, you can check how flat it lies on the saw table and how tightly it fits into the guide, and also adjust the band saw options. Secure the guide according to the desired cutting thickness and slowly feed the workpiece under the saw blade. At the same time, the saw motor should rotate moderately, without jamming. At the end of the cut, advance the workpiece using a pusher. Then inspect the sawn piece.
Move the guide to the angle required to align the cut. The guide adjusting bolt simplifies this problem. You can also use magnetic guides (for example, Carter Magnafence: carterproducts.com) - they significantly simplify such temporary adjustment.
If it turns out to be thicker at the top or bottom, check that the saw table is set exactly at 90° to the saw blade and adjust it as necessary.
If there is a depression or unevenness in the material, the problem may consist of insufficient saw blade tension. On many saws, the integrated tension controls are not very accurate.
Here is a perfect example of a symmetrical grain pattern. Such panels will make any furniture look even more attractive than two ordinary thick panels made from different boards.
A properly tensioned blade or blade should deviate less than 6 mm when pressed in the center (photo above left).
A very high speed of feeding material under the blade, the use of narrow blades with very frequent teeth or dull blades can also cause similar curvatures when cutting. If one end of the sawn part turns out to be thicker than the other, the problem lies in the displacement of the blade, in other words, the blade deviates from parallel relative to the guide.
If the blade is sharp, the guides are installed correctly, the feed speed is selected correctly, but the problem is still not resolved, try adjusting the tilt of the upper drive wheel so that the saw blade passes exactly in the center of both wheels (photo above right).
If this does not bring the expected result, adjust the position of the guide to compensate for the deviation of the blade. Oh, that's how it's done. Saw a block of wood into a rectangle, similar in thickness and density to the wood that you plan to saw, and draw a line on it with a pencil, parallel to the edge.
To prevent the workpieces from moving (to restore the moisture balance), it is best to lay them with slats. In this case, scraps of plywood were used as slats. They need to be positioned symmetrically, and pressed down with a weight on top to prevent the panels from bending during drying.
Without securing the fence in place, saw the block along the marked mowing line, holding it with your hands. Just before you reach the end of the cut, turn off the saw and, without moving the workpiece, run a pencil along the edge of the cut on the saw table. Set the stop exactly parallel to this mowing line (photo on the left) - as a rule, this allows you to perfectly compensate for the mixing.
In general, every time I change the saw blade, I check everything again and, if necessary, adjust the saw settings again.
READ DIY Reciprocating Saw Blade
Sawing on a sawmill with log rotation 180°
Cutting map with 180° rotation
To form the maximum number of boards, it is recommended to use a technology in which some belt processing processes are rotated 180°. This allows you to achieve the maximum amount of lumber with different types of cuts.
The principle of processing is to make initial cuts along the edges of the log, located at an angle of 90° relative to each other. They will serve as the basis for further tape cutting. The work is carried out on equipment with a vertical arrangement of cutting elements. The diameter of the trunk must be at least 26 centimeters.
Step-by-step order of work.
- Processing the side with the cut-off edge. The result is two boards.
- Rotate the workpiece by 90°. The cut is made from the opposite part. The number of products varies from 3 to 4.
- Repeated turn 90°. The main part of the source material is processed. Depending on what you plan, you may end up with 7-8 pieces.
Despite all its positive qualities, this method has one significant drawback - low production speed. It is recommended to use it on equipment that has a block for automatically changing the position of the log relative to the cutting part of the machine.
WHY DISMISS THE WOOD?
The simplest answer is to get the most out of your workpiece. For example, instead of planing a 25 mm thick board to 10 mm, cutting it apart will allow you to get two boards of the same size from one board. As an added benefit, each of these boards will have nearly the same grain pattern, allowing them to be used on furniture (photo at right). And if you cut a 2-5 mm board of expensive wood into 3 mm thick veneer sheets, this will allow you to profit even more.
How to easily open a wide board along the width
It is not always possible to predict how symmetrical the sawn panels will be in pattern. Basically, any wood grain pattern has the potential to create a beautiful pattern, but choosing a piece with a particularly interesting pattern often produces the best results. Look what was hidden inside the nondescript board I used to test the adjustment of the bandsaw.
Note. Dissolution is the cutting of wood along the grain, parallel to the face.
The first time I saw a cabinet with a symmetrical design on the doors was in a museum, at an exhibition of furniture from the 17th-18th centuries. When I looked at these almost identical panels with a mirror grain pattern, I was blown away by them. Back in the day, I had an old Craftsman bandsaw in my small basement workshop. Its one-size-fits-all blade made acceptable curved cuts, but was not at all suitable for accurately cutting lumber along the grain, which is what I now planned to do. And, frankly, for accurate and stable operation, that saw needed more than just a new blade. I subsequently learned many lessons about how to handle any band saw. To set it up correctly, first of all, you need to set the table strictly perpendicular to the saw blade, get the maximum benefit from the guides and make sure that the cut is in the correct direction.
Features of wood processing
Cutting map for automated wood processingInstructions for processing raw materials and obtaining lumber products consist of a number of technological operations, including longitudinal cutting of logs, trimming lumber and cutting to width, sorting by standard sizes, sorting by quality of workmanship, drying and storage.
Each of the listed stages is important from the point of view of the quality of the finished product. But cutting is the most labor-intensive and critical stage, during which the main characteristics of the finished lumber are formed.
Scheme for cutting common lumber products Drawing up a plan for cutting logs into lumber (choosing a suitable processing method) depends on the type of wood, the size of the raw material, the degree of humidity, the density and hardness and many other factors. Of course, the method of processing raw materials is determined to a large extent based on the level of technical equipment of the enterprise.
Let's consider what equipment is used for industrial sawing of wood and what methods are relevant for each category of this equipment.
[my_custom_ad_shortcode1]
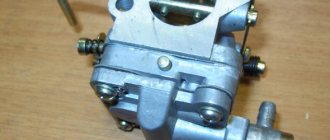
Design of various attachments for longitudinal sawing of logs
Let's start with something simple, with the design of a gas cutter. Visually, it resembles a bearing assembly, complemented by a pulley and a movable shaft (performs rotational movements). This device is driven by a belt drive. The unit is equipped with a special mechanism designed to fix the disks. The latter must be selected from an assortment designed for cutting metal, wood, and stones. With the help of such discs and attachments, transforming a gasoline saw into a multi-tool is not difficult.
An alternative version of the device for longitudinal cutting is a debarker. This is popular not only because of its ability to increase the efficiency of making boards, but also due to its ability to remove bark from logs. In addition, it can be used to cut grooves in the material being processed. These are just a few examples of the purpose for which a debarker is used. Such nozzles are found in two varieties:
They differ from each other mainly in functionality.
There are other devices for longitudinal cutting of logs. Most of them are developed by large companies, but you can also see homemade devices on the Internet. They differ from those manufactured at factories of famous brands mainly in their design features.
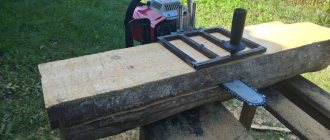
In this regard, homemade nozzles are much simpler. The most common version of these is a manual sawmill. The basis of such a small sawmill is a gasoline chain saw, supplemented not only with guide elements, but also with wheels designed for moving along the log (in order to reduce the resistance indicator). This device has no more than 2 wheels, one on each side of the workpiece.
A manual sawmill is a simple and convenient device. With its help, you can produce a large number of smooth and neat boards without much effort. The only essential condition is the correct installation of the chainsaw. It should be positioned horizontally (unless the operator requires an oblique cut).
Methods for performing cross cutting
None In accordance with the configuration of the equipment and the degree of its automation, several trimming options can be performed:
- Trimming beams and boards in a stack at a given constant length. This option is used in the manufacture of various carpentry products (doors, windows, stairs, etc.), laminated veneer lumber and structural elements for wooden house construction.
- Trimming boards of different lengths. During this technological process, the boards are fed to the working tool, where they are automatically measured. Next, the control unit selects the optimal combination of workpieces that can be cut in one pass in accordance with the given specification.
- Trimming with removal of defects with variable length of finished products. This equipment configuration allows you to minimize the volume of knots, rot, pigment spots and mechanical deformations by cutting off problem areas from the end of the workpiece. This option is widely used in the manufacture of furniture facades, where it is possible to glue lamellas to obtain a solid slab. Choosing this trimming option allows you to reduce the volume of production waste to a minimum and thus reduce the cost of the finished product.
- Trimming with removal of defects with fixed standard sizes of finished products. In this case, all workpieces are cut to the same length according to specification.
Taking into account the peculiarities of the technological process, it should be noted that the products obtained in this way are the most expensive, since a large amount of waste remains.
[my_custom_ad_shortcode5]
How to cut a board with a chainsaw: attachments for cutting logs and methods
Until recently, gasoline chain saws were used exclusively for cross-cutting logs. Other methods of processing the material were simply not available. However, modern operators know how to cut a board with a chainsaw, a common universal tool used not only by professional builders, but also by amateurs, summer residents, and homeowners in the private sector within the city.
In order to get neat boards, just use a special attachment. There are many of these on the market. You've probably heard of at least one of them. The most popular option is a petrol cutter attachment. However, not only with its help you can turn a gasoline chain saw into an angle grinder. Just one addition can radically change the functionality of the device and significantly expand it.
Cutting technology
To cut a log into boards, it is not enough to use one attachment frame. An additional support will be required. You can’t do without it, especially in cases where you need to cut down the upper part of the material, the one that is close to the bark. In other words, a stop is needed to turn a log into a beam. The necessary device is usually made from boards in the amount of 2 pieces.
Each board must be at least 40 mm thick, but not more than 50 mm. They are fastened together by first placing both in a perpendicular plane. Afterwards, the boards are fixed to the log using self-tapping screws. Stops need to be placed on the sides, which requires the same devices made from boards.
Much attention is paid to the fastening procedure. It is extremely important that the top end of the vertical board is in relation to the top edge of the log below. The distance between these two points should correspond to the thickness of the piece of material being cut.
Upon completion of the preparatory stage, the chainsaw is installed directly. Part (only one) of its frame should rest against a board installed across it. It will then be obvious to the operator why the installed plank fixtures are called supports. The base of the frame literally rests on it, on its vertical part.
After that, just start the tool and start making longitudinal cuts, focusing on the gap between the end of the vertical board and the upper edges of the log. An important point is that you don’t need to put a lot of pressure on the gasoline saw with your hands. There is no need to push the device; the cut will be smooth and precise. Upon completion, it is enough to dismantle the device from the boards. After this, the log is turned over (90 degrees), and the supports are reinstalled in the same way as described above.
If we are talking about cutting logs into regular boards, you can do without a wooden stop. But when cutting slabs, it is necessary to install it. Once the material has been converted into timber, the plank fixture can be set aside. By “timber” we mean lumber with a rectangular cross-section (with 4 smooth outer surfaces, which themselves will serve as a support for a gasoline chain saw with an attachment). The technology for working with such a tool (with frame) is simple:
- The frame is pressed against one rectangular section.
- The operating device is advanced along the workpiece, thereby cutting the timber.
In order to change the thickness of the board being cut, it is enough to use a stop element placed perpendicular to the entire structure (it is simply moved across the cut).
Basic methods of longitudinal sawing
None In the modern woodworking industry, the following cutting methods are used:
- “Waddle” is a method of sawing logs in which the cutting planes are parallel to each other. In accordance with the arrangement of lumber in the log, the core board or timber is distinguished; central boards, one of the planes of which runs along the longitudinal axis of the log; side boards.
The photo shows a tree trunk installed in a slitting machine.
Important: This method of processing wood raw materials is considered the simplest and least labor-intensive. But you need to take into account that the finished wooden boards are unedged, and therefore you will additionally have to make a cross-section of the log.
- “With lumber” - this method allows you to get a lumber with two edges. The rest of the log is sawn into unedged side boards and flooring. That is, cutting is performed not in one, but in two passes. Moreover, the type of saws used for the first and second passes differs both in the number of cutting surfaces and in their direction.
Band saw cutting edge The equipment on which the timber is made is called the first row machine, and the equipment by which the timber is cut into individual boards is called the second row machine.
- The “sector” method, during which the log is cut into separate sectors, from which boards are subsequently made.
Sawing using this method is performed in one pass, when the cutting tools are used sequentially or in several passes, when at the initial stage longitudinal sectors are obtained, and at subsequent stages these sectors are divided into lumber. The sector method is relevant for the production of lumber for radial and tangential sawing. In accordance with the diameter of the log and the required dimensions of the workpiece, sawing is performed only into quarters or into quarters, followed by cutting into smaller sectors. The disadvantages of this method include labor intensity, since the log cutting map is drawn up individually. In addition, when processing wood raw materials, a large amount of waste is generated. - The segment method involves sawing the trunk into longitudinal segments, which, in turn, are cut into boards of the required size.
- The segment-breaker method involves the simultaneous production of segments and sawing them into lumber of the required size in one pass
- The segment-beam method, in which the side segments are simultaneously sawed out, while a double-edged beam is obtained from the middle (central) part. The method involves cutting in two passes. During the first pass, the log is divided into beams and side segments. During the second pass, the segments are divided into smaller boards.
- Circular sawing involves processing a log in which the boards are sawn off sequentially. During processing, the workpiece rotates around its axis after the next board is sawn off. Due to the labor intensity and individual approach, circular sawing is practically not used on an industrial scale.
- The aggregate method involves preliminary milling of a wooden log, after which the resulting beam with a square cross-section is cut into the required number of boards. During milling, a large amount of technological chips is formed, which, in turn, is used for the production of particle boards or fibreboards.
[my_custom_ad_shortcode3]
How to cut a log with your own hands
It is not necessary to purchase a device for sawing boards with a chainsaw. You can make it yourself. The simplest option is a device made of metal profiles. Such a nozzle will not only be convenient, but also stable, durable, and reliable. Are you planning to make the most functional frame possible? Use mechanical gearboxes.
With them, the device will turn into a kind of machine for longitudinal cutting of logs. Mechanical gearboxes are necessary to simplify the process of moving the chainsaw along the trunk. There is no need to exert force (pressure on the tool manually) to process the material. All you need to do is turn the gear handle. As for adjusting the thickness of the boards, it is convenient to adjust this indicator by using an attachment made of metal profiles, lifting the workpiece itself, and not moving the gasoline saw in relation to it.
READ How to cut a door into two parts
At home, you can also make a device that will cut a log not in a horizontal, but in a vertical plane. The only significant nuance is that it is more difficult to work with compared to the previous frame (despite the fact that its design is simpler).
The difficulty lies in the fact that the operator has to put effort into moving the tool along the workpiece. In addition to the chainsaw and attachment, you will have to use an addition made of boards and metal. This kind of support is attached to a log.
Important! Only experienced operators should make this kind of attachment and support, since its operation is partly dangerous due to the fact that the board remains unfixed.
An alternative option is a carriage installation. To create such a frame structure, you will need a pair of wheels and a profile pipe. This device differs from others in its mobility (ease of movement along the workpiece). In addition, the wheels will simultaneously serve as stops for the chainsaw, which means that additional devices will not be needed. The only thing that is needed in addition to these parts and a profile pipe is an aluminum ladder (it will play the role of a guide element).
You need to select a ladder taking into account its width, which should coincide with the distance between the wheels of the frame structure, which will be placed directly at its ends. The best option is to attach it to the log being cut using self-tapping screws, clamps or nails. The created device for cutting boards with a chainsaw with your own hands is placed horizontally.
It should lie as flat as possible. You can make sure that it is placed correctly using a building level. It’s easy to level a ladder with a log, using boards (pieces) of different thicknesses. As for the tool itself with the nozzle, it is installed on the ladder, moving the working saw along the workpiece, applying pressure on it with your hands.
Chainsaw sawmill
This type of design is the easiest to manufacture, but it will also require special skills, tools and experience working with them.
This type involves installing the carriage on guides, but is not mandatory. You can use a flat wooden plank as guides, along which the carriage structure will slide easily. It allows you to remove the first layer evenly. The cutting plane on the log is used as subsequent guides.
Attention! The absence of a frame and carriage adds a number of difficulties. The craftsman may have problems holding the log in one position. It is impossible to start work without proper fixation, as this can lead to injury.
You cannot start work without proper fixation, as this can lead to injury.
The step-by-step process for making a carriage for a chainsaw will look like this:
- Let's make the base. To do this, we weld together a pipe measuring 25x25 mm.
- Perpendicular tubes, the size of which is 30x30 mm, are welded to the base on opposite sides. They are necessary for attaching the moving part that holds the saw and sets the thickness of the planks to be cut.
- Nuts are welded into the side parts of the guides. With their help, it will be possible to fix the moving parts at the desired height with bolts.
- We make the moving part. It consists of two pipes with a T-shaped end. The end of the pipes is made in the form of a vice, clamped with bolts and nuts. These clamps will hold the chainsaw blade. Pipe size – 25x25 mm.
- To prevent the saw chain from rubbing against metal parts, two metal plates of the required sizes are welded onto the internal parts of the vice. They completely depend on the thickness and width of the chainsaw blade.
- We assemble the carriage into a single structure, select the desired height and install the saw. The sawmill is ready for use.
The video below fully describes the carriage manufacturing process. In addition, the author of this device notes the main difficulties and some inaccuracies that he made during the assembly of the sawmill. This will allow you to avoid such mistakes and make the device for sawing logs more practical.
Bottom line! This carriage design is suitable for personal use and one-time sawing of wood. It is not suitable for commercial purposes.
Saw the boards
A circular saw is one of the basic woodworking tools. There are three main operations that are performed on a circular saw: Spread the boards into blanks in width, saw off along the length (trimming) and sawing at an angle. The latter method is used if the circular saw is adjustable not only in height, but also in the installation angle. There is another necessary, although intermediate, operation, sawing the board to thickness. For example, you have a block 70 mm thick. and it must be divided into three boards 18-20 mm thick. Or, what I have to do most often, I cut boards 45-50 mm thick into planks 18-20 mm thick, which I use in making furniture.
What you will need for this:
Firstly, it is very desirable that the circular saw has a variable saw height. Materials such as beech, oak, birch can be difficult to immediately cut to the full height of the saw. Therefore, sometimes you have to do this in two or three passes, gradually increasing the height of the cut.
Secondly, you can only work in this way with a planed board. If the workpiece is fairly even, then it is often enough to go through the face and edge of the board on the jointer once.
The third thing that also needs to be paid attention to is that the board should not be too short. If the saw jams and the board plays, you can be left without fingers. This is not a joke, I know similar cases.
We spread the boards into thin strips.
Here, a planed block 50 mm thick unfolds into three slats 12 mm thick. When calculating, do not forget the width of the cut, that is, the thickness of the saw at the extreme points of the cut. Please also note that after sawing, the finished planks will need to be planed on a jointer, or even better, on a planer. Therefore, you need a margin of at least a couple of millimeters in thickness.
In this case, we get approximately the following calculation: Set the saw to 14 mm. from the guide ruler, only three planks will turn out to be 141414 = 42 mm Plus, there are two cutting widths, here the saw spread is 3.5 mm That is, all dimensions are at the limit, so you need to work carefully.
The width of the board is 120 mm, but these dimensions refer specifically to this workpiece. We will cut on both sides on the edges. To cut a board in two passes, the height of the saw should be slightly more than half the width of the board. In this case, the height of the saw from the circular table is 65 mm
One more thing, the guide ruler must be of sufficient height, for example 70-80 mm, so that the board does not fall over when sawing.
We carefully make the first cut, while your hands should always be higher than the saw. Never push the part under the saw from the end with your hands; use wooden pushers.
Then we turn the board over in a vertical plane and make an oncoming cut. The first strip is 14 mm thick. ready.
Next, we place the rest of the board with the planed side facing the guide ruler and make the next cut. We turn the workpiece over again and saw through the depth from the reverse side.
When working, do not relax for a second, listen to the sound of the saw. If it starts to jam, reduce the feed speed. When cutting at the exit, the board may close. If the saw is not sharp enough, or the gap is small, the material will burn. When it doesn't burn very well, the saw overheats and can be driven, and the smell is extremely unpleasant. Article. how to cut plywood.
That’s why I wrote at the beginning of the article that if the material is difficult to move, then it makes sense to go through the part twice in height on each side. And never forget, a circular saw is a dangerous tool. Therefore, use all the protective and clamping devices that are available.
Cutting equipment and features of its use
An example of wood processing with group circular saws. For longitudinal cutting of logs, the following categories of equipment are used:
- Single band saws or circular saws are a traditional solution that has been used for a long time.
- The group of frame saws is a more progressive solution that can significantly increase the productivity of raw material processing without compromising the quality of the finished product.
Let us consider in more detail the features of the application of the listed categories of equipment.
- Custom sawing is a method that uses single saws. In this case, only one cut can be obtained in one saw pass. Therefore, the entire tree trunk can be cut in several passes.
Important: The advantage of individual cutting is the independence of each subsequent cut from the previous one. That is, sawing can be carried out in different planes. As a result, it becomes possible to more rationally use certain properties of different parts of the log.
None At the same time, this method is low-productivity and therefore not suitable for use in large woodworking enterprises.
- Group sawing is a technological process in which a group of frame saws is used.
The advantage of this method is that the log is completely cut in one pass. This saves time and, as a result, reduces the cost of production. But you need to remember that group sawing is performed in one plane. Today, the following categories of equipment for group sawing are most widespread:
- narrow-clearance vertical frames, machines with circular saws, milling saws (diameter of processed raw materials from 14 to 22 cm).
- medium-clearance vertical frames (diameter from 24 to 48 cm)
- wide-clearance vertical frames, double and quadruple bandsaw-type units (diameter of processed raw materials over 50 cm).
[my_custom_ad_shortcode2]
Setting the stop
To accurately guide the board when sawing, we prefer to use a rip fence, which allows us to saw thin sheets of the same thickness over and over again. If your machine was not equipped with such a stop, you can purchase it separately, make it yourself according to the drawings, or simply attach a straight board with a height of at least 75 mm to the saw table with clamps.
By setting the stop parallel to the saw blade and perpendicular to the edge of the saw table, make sure that there is no so-called drift, when the cut deviates to one side or the other from the intended direction. To do this, run a straight line in the middle of the cutting board parallel to the left edge. Pressing the left edge against the longitudinal stop, cut the trim lengthwise , starting to cut along the mowing line.
If the saw blade tends to drift, the fence will need to be adjusted to compensate for the drift, as shown in the pictures below, to achieve clean cuts. Once you adjust the rip fence to compensate for drift, you won't have to do it again until the next saw blade change.
Preparing for work
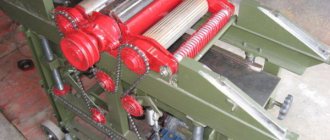
During operation, the sawmill requires adjustment and checking of all its important components. The most significant part of the device is the band saws.
Before starting work you must:
Before starting work, you should make sure that the sawmill is in good working order.
- Check that parts and screw connections are securely fastened.
- Lubricate rubbing surfaces.
- Check the reliability of the grounding.
- Turn on the electric motor at idle speed and check how the belt moves.
- Check the installation of the band saw, adjusting if necessary.
- To reduce the deflection of the saw blade, move the left roller 5–10 cm from the side borders of the tree.
- Raise the band saw above the log and check its reverse motion.
- Check the fastening of the protective covers of the saw, gear transmission, and wedge-repair transmission.
Five Reasons to Dissolve
Release the board. means cutting it along its thickness, cutting along the edge. Mastering this technique opens up many new opportunities for you.
Effective use of boards made from rare or expensive exotic species. You can make more parts for your project from one piece of valuable wood. For example, when making doors from bubingo, birdseye maple, or Karelian birch, instead of making panels entirely from boards, simply saw one board into several thin sheets and glue them onto an inexpensive plywood or MDF backing. The edges of the panels will be hidden in the frame, and nothing will spoil the impression of your work.
READ How to properly cut a ceiling plinth
Less material loss during thicknessing. Let's say your project requires parts that are 6mm thick. Blanks for them cannot be found on sale, and you only have 20 mm boards. Instead of turning more than 2/3 of the material into chips using a planer, simply cut the boards in two and then finish them to 6mm thickness.
Planing knives will last longer. Replacing and sharpening dull or serrated planer knives takes much longer than replacing a worn band saw blade, so it makes sense to reduce wear on expensive knives if possible. Flatten thick workpieces into plates slightly thicker than required, and then calibrate them in one or two passes to the final size on a planer.
Obtaining blanks with a symmetrical pattern. Many panel projects, from cabinet doors to box lids, can be achieved by simply unraveling the board and arranging the two panels to create a symmetrical book-like design (left photo above). In this way, you can cut boards and glue the resulting blanks into panels, which will look great as the side wall of a body or lid.
Curvilinear parts are easier to glue than to bend. Without resorting to steam bending, you can glue them together from several thin strips (usually about 3 mm thick). Such gluing, as a rule, bends less. Cut the board into strips, sharpen or sand them, and then glue them together by pressing them against the template. How this is done is described in the article “Chair with a footrest.”
Purpose of Pilana saws for circular saws:
- Longitudinal sawing of soft wood.
- Longitudinal sawing of hardwood.
- MDF cutting
- Sawing chipboard
- Sawing laminated chipboard
- Manual feed of workpiece
- Mechanical feeding of the workpiece.
- Pilana saws for sawing on circular saws.
- Pilana saws for sawing on saws.
5380-50 FZ
|
| 5380-40 FZ |
5381-26 WZ
|
| 5381-16 WZ |
| 5381-11 WZ |
| 5383-35 LWZ |
| 5383-55 LFZ |
| 5381 WZN |
| Pilana saw | D | d | B/b | Z | Price Euro | |
| Saw Pilana | 300 | 30 | 4,0/2,8 | 18 | FZ | 36 |
| Saw Pilana | 300 | 30 | 3,2/2,2 | 24 | FZ | 33 |
| Saw Pilana | 300 | 30 | 3,2/2,2 | 24 | WZ | 33 |
| Saw Pilana | 300 | 30 | 3,2/2,2 | 36 | WZ | 37 |
| Saw Pilana | 300 | 30 | 3,2/2,2 | 48 | WZ | 45 |
| Saw Pilana | 300 | 30 | 3,2/2,2 | 64 | WZ | 48 |
| Saw Pilana | 300 | 30 | 3,2/2,2 | 72 | TFZ L | 61 |
| Saw Pilana | 300 | 30 | 3,2/2,2 | 72 | WZ | 50 |
| Saw Pilana | 300 | 30 | 3,2/2,2 | 96 | TFZ L HP | 63 |
| Saw Pilana | 300 | 30 | 3,2/2,2 | 96 | TFZ L HP+ | 72 |
| Saw Pilana | 300 | 30 | 3,2/2,2 | 96 | WZ L HP | 63 |
| Saw Pilana | 300 | 50 | 3,2/2,2 | 24 | FZ | 33 |
| Saw Pilana | 300 | 50 | 3,2/2,2 | 24 | WZ | 33 |
| Saw Pilana | 300 | 50 | 3,2/2,2 | 36 | WZ | 37 |
| Saw Pilana | 300 | 50 | 3,2/2,2 | 48 | WZ | 45 |
| Saw Pilana | 300 | 50 | 3,2/2,2 | 64 | WZ | 51 |
| Saw Pilana | 303 | 50 | 3,2/2,2 | 60 | DHZ N | 64 |
| Saw Pilana | 315 | 30 | 3,2/2,2 | 48 | WZ | 51 |
| Saw Pilana | 315 | 50 | 3,2/2,2 | 48 | WZ | 51 |
| Saw Pilana | 350 | 30 | 3,6/2,5 | 28 | FZ | 38 |
| Saw Pilana | 350 | 30 | 3,6/2,5 | 40 | WZ | 49 |
| Saw Pilana | 350 | 30 | 3,6/2,5 | 54 | WZ | 57 |
| Saw Pilana | 350 | 30 | 3,6/2,5 | 72 | WZ | 59 |
| Saw Pilana | 350 | 30 | 3,6/2,5 | 84 | WZ | 62 |
| Saw Pilana | 350 | 30 | 3,6/2,5 | 108 | TFZ L HP | 82 |
| Saw Pilana | 350 | 30 | 3,6/2,5 | 108 | WZ L HP | 79 |
| Saw Pilana | 350 | 50 | 4,0/2,8 | 20 | FZ | 38 |
| Saw Pilana | 350 | 50 | 3,6/2,5 | 28 | FZ | 38 |
| Saw Pilana | 350 | 50 | 3,6/2,5 | 40 | WZ | 46 |
| Saw Pilana | 350 | 50 | 3,6/2,5 | 54 | WZ | 57 |
| Saw Pilana | 350 | 50 | 3,6/2,5 | 72 | WZ | 59 |
| Saw Pilana | 350 | 50 | 3,6/2,5 | 84 | WZ | 62 |
| Saw Pilana | 350 | 50 | 3,6/2,5 | 108 | TFZ L HP | 82 |
| Saw Pilana | 355 | 30 | 3,5/2,5 | 100 | WZ | 67 |
| Saw Pilana | 380 | 60 | 4,4/3,2 | 72 | TFZ L | 121 |
| Saw Pilana | 400 | 30 | 3,6/2,5 | 48 | WZ | 56 |
| Saw Pilana | 400 | 30 | 3,6/2,5 | 64 | WZ | 63 |
| Saw Pilana | 400 | 30 | 3,6/2,5 | 84 | WZ | 70 |
| Saw Pilana | 400 | 30 | 3,6/2,5 | 96 | WZ | 73 |
| Saw Pilana | 400 | 50 | 4,4/3,2 | 24 | FZ | 51 |
| Saw Pilana | 400 | 50 | 3,6/2,5 | 32 | FZ | 45 |
| Saw Pilana | 400 | 50 | 3,6/2,5 | 48 | WZ | 55 |
| Saw Pilana | 400 | 50 | 3,6/2,5 | 64 | WZ | 63 |
| Saw Pilana | 400 | 50 | 3,6/2,5 | 84 | WZ | 70 |
| Saw Pilana | 400 | 50 | 3,6/2,5 | 96 | WZ | 73 |
| Saw Pilana | 400 | 30 | 3,6/2,5 | 120 | TFZ L | 118 |
| Saw Pilana | 400 | 30 | 3,6/2,5 | 120 | WZ | 82 |
| Saw Pilana | 450 | 30 | 4,0/2,8 | 108 | WZ | 124 |
| Saw Pilana | 450 | 30 | 4,0/2,8 | 72 | WZ | 78 |
| Saw Pilana | 450 | 50 | 4,4/3,2 | 28 | FZ | 62 |
| Saw Pilana | 450 | 50 | 4,0/2,8 | 36 | FZ | 59 |
| Saw Pilana | 450 | 50 | 4,0/2,8 | 56 | WZ | 72 |
| Saw Pilana | 450 | 50 | 4,0/2,8 | 72 | WZ | 78 |
To dissolve, you need to set up the machine correctly
To make this operation easy and safe, set up your bandsaw for maximum performance. Here's what it takes.
■ Cleanliness comes first. With the saw blade (and table if necessary) removed, carefully remove any sawdust, dust, or adhered resin particles from the belts, pulleys, and guide assemblies. Any contamination of these machine elements reduces operating efficiency.
■ Install a suitable and sharp saw blade. As a rule, a saw blade with sparser teeth cuts faster, as it better clears the sawdust from the cut. At the same time, it heats up less, and the teeth remain sharp longer. For best results, use the widest three or four teeth per inch (tpi) saw blade suitable for your machine. These blades cut faster, but produce a rougher cut surface than six-tooth-per-inch blades.
For slicing, we prefer Wood Slicer blades from Highland Hardware. They have variable tooth pitch and produce a finer cut than most other saw blades. With these belts, the surface is cleaner and you will have to sand the resulting workpieces less. They also have a drawback. They dull faster than most other tapes we use and cost almost twice as much as standard tapes, so we only use them for unraveling.
■ Adjustment of guide units. Lift the top guide assembly, lightly tension the saw blade to keep it from slipping off the pulleys, and rotate the top pulley. The saw blade should run in the middle of the pulley rim or slightly closer to its front edge. If not, adjust the pulleys as described in your machine manual.
■ Correct saw blade tension. Tension the tape by rotating the tensioning mechanism handwheel (right photo below on p. 62). A weak blade will produce an uneven cut, and you will have to straighten the resulting workpieces longer, losing more material. Excessive tension increases the load on the machine bearings and the saw blade itself.
■ Installation of the saw table at right angles to the blade. To ensure that the cutting plane is parallel to the edges of the board being cut, adjust the position of the table, achieving an angle of 90° with maximum accuracy.
■ Adjustment of guide units. It doesn't matter what the guiding elements are. crackers or bearings. are used in your band saw. Install them directly behind the saw blade teeth as shown in the left photo. Then adjust the rear support bearing so that the gap between it and the rear edge of the belt is minimal.
■ Lower the top guide assembly. Set it up as shown in the right photo.
■ Connect the dust extraction hose. The removal of generated sawdust and dust facilitates the operation of the band saw, improving the cooling of the saw band and extending service life, as well as reducing wear on the guide units and tires on the machine pulleys.
First cut
The worst edge must be cut first; the taper of the log is not taken into account. Taking this feature into account means tilting and lifting the log so that the saw works parallel to the bark. From this part will come short boards and a large amount of slab.
Since taper is not taken into account, from the best edge of the log sawing will proceed parallel to the bark without tilting or lifting, this approach will allow you to get a maximum of long boards of good quality.
Drawing of boards of different cuts
Start by cutting the best edge of the log, but take into account the taper. That is, install the log so that the saw is directed parallel to the bark.
The result will be the same, but in the second method it is easier for the sawyer to choose the best edge, since it is visible. In the first method, the best part is hidden and there may be inaccuracies when installing the log. If the wood being cut is of high quality, both methods work equally well. With lower quality raw materials it is better to use the second method.
You might prefer working with a rod stop
Instead of fiddling with adjusting the rip fence to compensate for drift, some craftsmen prefer to manually guide the boards using a rip fence (top photo). This method saves time by avoiding long setup times, especially when you only need to make one or two cuts. In this case, the surfaces of the boards usually turn out to be rougher, which will require additional work to level them on planing and thicknessing machines.
Some rip fences come with a removable rod attached to the side (bottom photo) or a semicircular trim, but they are not difficult to make yourself. To use the rod stop, install it at a distance from the saw blade equal to the thickness of the future plates and adding another 1.2 mm.
Place a longitudinal line on the workpiece. Pressing the workpiece against the fence, feed it forward, making sure that the cut follows the cutting line, and manually correct the deviations.
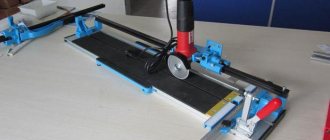
Application
Using the chain carriage included in the mini sawmill, you can cut all types of wood - from hard oak to knotty pine.
The accuracy of setting the sawing parameters is set by the operator, and almost all models of chain saws provide a smooth surface that is easy to process in the future. The removal of sawdust, which is formed during the sawing process of wood, is carried out by a saw chain, and at the end of the process, the boards can be finally cleared of waste. The carriage is adjusted to a distance of 2 meters between logs (for longer logs) or 1 meter for shorter pieces of wood, which is suitable for cutting fruit trees. The mini chain sawmill with carriages model F2 is made of durable aluminum alloy, which has a protective coating. The maximum weight of timber that can be processed using these carriages is 1000 kg, with the longest processed log being 3800 mm. If it is necessary to work with long logs, the frame can be extended with fragments of the same type, which are available upon additional order. Also, several log lifts can be installed on or next to the frame, which allows you to process long logs with high productivity, while maintaining all the accuracy parameters.
Now everything is ready for dissolution
Using a planer and thicknesser, make the sides of the boards parallel and one edge straight and perpendicular. Estimate how many lamella plates you can get from one board, taking into account the width of the cut (1.5-2 mm) and the allowance for removing saw marks (1.5-3 mm). For example, from a 19 mm thick board you can only make two 6 mm plates.
Once you start sawing, press the board firmly against the fence and machine table, trying to maintain a uniform feed rate. Slow down the feed if the board gets stuck or the saw blade starts to move out of the way. If you are going to cut a board into three or more slices, plan the remainder of the board after each pass.
Then each sawn plate will have a flat base surface, necessary for final thickness calibration in a thickness planer. Finally, remove all sawing marks using a thicknesser or drum sander and give all the plates the same thickness.
Machines for longitudinal cutting of lumber. Video materials
Related Links. Additional Information
- Directory of woodworking machines
- Manufacturers of woodworking machines and equipment
- Manufacturers of household woodworking machines
- Manufacturers of chipping machines
- Classification of woodworking machines
- Machines for longitudinal cutting of lumber
- Sawmill frames. Classification
- Lumber. Basic concepts. Terms and Definitions
Cut-off jig for circular saw
A simple template tool helps you accurately cut the boards according to the markings. The movable jaw is securely fixed with a screw so that the device does not move when sawing.
The fixture shown in the picture is made for my circular saw, which has a blade located on the left; The 38 mm dimension to the right of the guide bar indicates the distance from the edge of the power tool sole to the saw blade.
For circular saws with the blade on the right, this distance will be greater. In any case, when making the device, you should leave a small allowance, which is removed during the first pass, after which the sawn edge will begin to act as an anti-splinter pad.
To make a precise right angle cut, simply line up the right edge of the jig with the marking line and run the circular saw along the fence guide.
Sources:
https://101benzopila.ru/kak-raspilit-dosku-benzopiloj-nasadki-dlya-raspila-brevna-i-metody/ https://mastervdome.ru/instrumentyi-i-prisposobleniya/raspilit-doski/ https:// blackseaplus.com/sdelay-sam/111-uchimsya-s-pomoschyu-lentochnoy-pily-raspilivat-doski-na-tonkie-plastiny-i-shpon.html
Sawing map
The sawing map is a calculation of the optimal amount of finished lumber from one log. You can calculate it yourself for each specific log diameter, or you can use a computer program that greatly facilitates the calculation, and the price of which is quite affordable.
Material yield after cutting wood
Or the source could be a regular sawmill reference book. The result is a table that is used as a basis. The sawmill attachment should always be oriented to its data in order to obtain more lumber of any type of wood.