Do-it-yourself liquid rubber at home is prepared from available ingredients, and in terms of performance characteristics it is not inferior to products produced in factories. The composition is one of the simple and affordable materials for waterproofing. With its help, you can protect the foundation, roof, various types of metal structures and many other objects from moisture. The substance has excellent adhesive properties - it sticks to concrete, iron and most other types of building materials. When hardened, it forms a durable polymer film. A preparation with waterproofing properties can be purchased at a hardware store or made independently.
Homemade liquid rubber is enough to perform small-scale work.
How to make raw rubber at home
If you need to make reliable, durable and durable protection against moisture, take advantage of the benefits of liquid rubber. And for this, it doesn’t hurt to know how to melt rubber to a liquid state. After all, it is in this form that it is applied to the desired surface, completely covering it and filling all the depressions and cracks. It adheres well to any coating, and after hardening it turns into a hard and durable protective layer. Liquid rubber can be used in many areas, from construction to insulate buildings from contact with water, to repairing cars and bicycle wheels.
Composition and features
This material contains bitumen emulsion, polymer components, groups of hardeners, as well as stabilizers. Although the finished product is very similar to rubber, its composition is something different. But it was precisely the great similarity that prompted us to come up with such a name.
Rapid hardening of the mass is carried out when the product is applied to the required surface in liquid and cold form, and, having already taken its final form, the material produces high results in terms of adhesiveness and strong adhesion to various building surfaces. The composition itself is sold as a liquid product in 200 liter containers. They are usually represented by barrels.
To quickly achieve the result in the form of a hardened material, the surface to be treated must be coated with a solution of calcium chloride, which helps to accelerate the hardening time of the mass. And after this, the result is exactly like a monolithic rubber coating without seams.
How to melt rubber to liquid state
The process itself is quite simple; the only additional materials you need are a solvent, for example, gasoline.
Pour it into the rubber and wait until it swells. Then add more gasoline to get the desired consistency. To speed up dissolution, you can heat the solution in a water bath. But keep in mind that this can only be done outdoors or in a well-ventilated area. As a result of the chemical reaction, a very unpleasant and hazardous odor is released. It should be understood that it will not be possible to melt any rubber, but only raw rubber. The resulting solution will resemble glue. But old tires are not suitable for this, since they are made of sewn gray rubber. This material does not dissolve in hydrocarbon solvents.
If you are unable to get raw rubber, you can also use soles from old shoes. The only requirement is that they must be made of thermoplastic elastomer (a copolymer of butadiene and styrene) without vulcanization.
Natural rubber
The sap of rubber trees was widely used by the aborigines to make waterproof shoes, cover boats, protect huts from rain and solve other everyday problems. They extract it from rubber plants in a similar way to collecting birch sap in the spring. Polyisoprene, the carbohydrate that makes up most of natural latex, combines with oxygen in heat and becomes brittle over time. After heating, the molecular bonds become stable, and the substance does not react even to acidic solutions.
The value of rubber based on technical characteristics:
- high resistance to abrasion;
- good thermal insulation properties;
- does not dissolve in water and most aggressive liquids;
- plastic;
- elasticity.
The addition of plasticizers and river sand allows you to create a material with the planned qualities and color. Raw rubber is transformed into a product that retains its shape for a long time through vulcanization - heating under pressure to a temperature of 150 degrees.
DIY liquid rubber
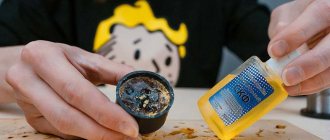
You can make liquid rubber mass at home and this is a more affordable way than looking for raw rubber. You will only need to buy 1 pack of borax and 2 bottles of PVA glue. The preparation itself is as follows:
- Mix borax with 0.5 tbsp. water until the liquid becomes clear.
- Add glue and mix well again.
If necessary, you can paint the rubber in the desired color. To do this, first add dye to the glue and only then mix it with diluted borax.
You can use homemade liquid rubber immediately or put it in the refrigerator. There it can be stored in liquid form for some time without solidifying.
Replacing the cardboard spacer
Installing a cardboard gasket will not take much time, but when carrying out this operation, care and caution are required so as not to damage the fragile internal parts of the carburetor, as well as to eliminate the possibility of dust and dirt getting inside the float chamber. For Solex carburetors you can find, sold separately, cardboard gaskets
In this case, the cost of repairs will be almost invisible to the budget.
For Solex carburetors you can find cardboard gaskets sold separately. In this case, the cost of repairs will be almost invisible to the budget.
After the carburetor is removed, the five bolts that secure the cover are unscrewed. The cover is then removed and the float is removed, which is held in place by a pin.
The pin should be carefully knocked out of the hole using a thin nail and a hammer.
Then we assemble the carburetor and install it in the reverse order of removal.
Tightening the carburetor bolts that hold the top cover must be done evenly and crosswise to prevent misalignment and the possible leakage of air into the carburetor mixing chamber in this case.
Where is silicone used?
This material is used in almost all spheres of human life - in construction, everyday life, medicine and production. Silicone has earned popularity due to its unique and valuable qualities that are absent from analogues of this substance.
Silicone is capable of reducing and increasing the adhesion process , as well as imparting hydrophobic properties to the target object. This universal material is able to maintain its basic parameters at extremely high, low temperatures and in conditions of high humidity. In addition, silicones have dielectric characteristics, bioinertness, a high degree of elasticity, are durable and environmentally friendly.
On an industrial scale, silicone liquids and emulsions based on them are used as anti-adhesive lubricants for large heavy molds, the production of water-repellent liquids, greases, special oils, shock-absorbing, coolants, coolants, sealants and dielectric compounds. Particularly popular are defoamers made on the basis of silicone mixtures.
This material is used to produce silicone alkides and silicone polyesters for various coatings, which must be particularly durable and resistant. It follows that different types of gaskets, bushings, rings, cuffs, plugs and other parts can be used at temperatures from minus 60°C to plus 200°C.
Another property of silicone is resistance to substances such as ozone, radiation, sea water, ultraviolet radiation, boiling water, alcohol, acid solutions, alkalis, mineral oils, various fuels and electrical discharges.
Recycling
Crumb rubber is widely used in various areas of production, sold to the public or used for personal purposes. An excess of worn-out car tires and rubber products ensures the constant availability of consumables.
The cost of crumb rubber depends on the diameter and quality of the granules. Powdered crumbs and granules with a diameter of 2-4 mm are in great demand. The popularity of this size is due to lower production costs and lower consumption of adhesive, the price of which is several times higher than the cost of recycled materials.
Crumb rubber is used to make the following products:
- Roll coverings
- Rubber Shoes
- Paving slabs
- Fuel
- Rubber insulation and seals
- Three-dimensional figures cut from used tires
- Paths for private houses, gardens and summer cottages
- Waterproofing and noise-absorbing coatings for children's and sports grounds
- Rubber technical products
- Asphalt mixtures
- Seamless rubber coatings
Currently, the recycling industry is considered promising for starting your own business due to low competition and growing demand for waste recycling services. Even with a small amount of work performed, the financial investments spent on equipment pay for themselves in a short time. Recycling tires in a crusher is recognized as the most environmentally friendly method of disposal, allowing you to make a profit with a small financial investment.
How to make silicone at home
First way
To prepare silicone rubber (polydiethylsiloxane), you will need liquid glass and ethyl alcohol. Take a plastic container into which the components are poured in equal proportions and carefully mixed with any instrument. When the mixture thickens, you need to knead it into plasticine by kneading it with your hands.
Next, you can sculpt the necessary shapes from the silicone mass, which are left to harden for a while until the product becomes solid.
Second way
- 150 g white spirit;
- 1 drop of acrylic paint;
- 3 drops of liquid glycerin;
- 30 g silicone sealant.
To make silicone, you need to immerse the sealant in a container, add paint, glycerin and white spirit. The solution must be mixed until a homogeneous mass is obtained. You can work with this solution for no more than five hours, since after this time it hardens.
Third way
You need to take equal amounts of silicone sealant and potato starch. Stir the mixture for about 10 minutes until the silicone begins to easily come off your hands, then you can begin making the required shape.
Fourth method
Take gelatin and glycerin in equal proportions and mix thoroughly. Then the solution must be heated in a water bath for about 10 minutes, stirring constantly. It is important to prevent the gelatin from boiling, otherwise a strong unpleasant odor may appear.
Fifth method
It is used to make silicone for DIY molds.
To do this, you need to take a shape slightly larger than the object being copied. A little silicone is poured into the bottom of the mold and left until it hardens - this is the base of the object. The thickness of the base should be one centimeter or more so that the “house rubber” securely wraps the object on all sides. If the mold comes out thin, then it will quickly tear when removing the prototype or will not hold on at all.
The prototype is then dipped into a container of gelatin to get rid of any air bubbles, and then quickly transferred to the bottom of the mold to stick. Then the mold must be completely filled with silicone. Homemade resin from the fourth method, which hardens very quickly, works well. Immediately after cooling, the mold must be disassembled, an incision made and the prototype carefully removed.
At the last stage, you will need to mix and pour epoxy resin into the mold. It will be difficult to remove a frozen casting, so you will need to completely break the silicone.
Recommendations for creating a matrix for casting
Before starting the process of creating silicone, it is worth stocking up on a container or box to work with. Assembly boxes make it easy to remove the part from the case. There should be no gaps in the container design, since elastics tend to leak out.
Before placing the material in a box, it must be covered with a separator - quite greasy or soapy. If you plan to make a matrix for a vertical product, it needs to be secured to the bottom of the container, using plasticine for adhesion. Next, the manufactured compound is poured around the part. The material must be poured in a thin stream until the figurine is completely covered inside the container.
First recipe
Preparation. First you need to prepare all the “tools” - a small container, a spatula for stirring, a container for pouring and a template figure, a copy of which you want to receive as a result. You will also need glycerin and gelatin in equal proportions; they must be melted in one container in a water bath, stirring regularly. Melting occurs within 10 minutes; You can't let the composition boil.
Now you can proceed directly to production. The bottom of the container (cardboard or wooden) is filled with the prepared composition. Next, the figurine needs to be placed in silicone and immediately pulled out, and then promptly transferred to a container. The template souvenir is attached to the bottom; You must immediately pour the hot mixture into it, completely filling the container.
The silicone hardening process occurs in a matter of minutes. After the material has completely hardened, the resulting form is released from the container and its bottom is cut off. Then you can remove the figurine. The empty space of the workpiece can only be filled with epoxy resin.
Disadvantages of the recipe:
The resulting workpiece is unsuitable for further work with gypsum, since it does not repel moisture;
It will also not be possible to make soap - the mass tends to melt;
The product is not designed for long-term use; it quickly loses its appearance and properties.
Second recipe
Preparation. You will need: construction sealant and starch. It is also worth preparing the figurine immediately. The shape you will receive is quite hard and will have a sunken depression, so in this way you can only create a one-sided product.
The process itself takes place in several stages:
The working surface is sprinkled with anti-stick starch;
A little sealant is poured into the center of the table;
The sealant is sprinkled with talcum powder or starch and quickly mixed; the material should not stick in the end;
The material is formed into a small, dense cake, the size corresponding to the future product;
Quickly, while the sealant has not yet set, you need to press the template figure into the mass;
The silicone must cure for at least 24 hours;
Next, you need to release the souvenir from the mass and lubricate the resulting form with talcum powder, and then fill it with plastic clay;
Now the workpiece can be dried in the oven.
Advantages of this method:
Possibility of reusable sample use;
These molds allow you to work with a hot soap base.
Among the disadvantages are the need to work very quickly, since the working mass sets quickly, as well as the strong unpleasant odor of the sealant.
https://liveposts.ru/articles/home-garden/sdelay-sam/kak-sdelat-rezinu-v-domashnih-usloviyah-svoimi-rukamihttps://domsad.guru/sovety/izgotovlenie-silikona-v-domashnih- usloviyah-kak-ego-sdelat.htmlhttps://moreremonta.info/strojka/kak-sdelat-silikon-zhestche/https://usamodelkina.ru/7387-biologicheki-razlozhimyy-silikon-svoimi-rukami.htmlhttps:// polymax10.ru/articles/izgotovlenie-silikona-dlya-form-svoimi-rukami-v-domashnih-usloviyah
Getting rid of silicone on clothes
Silicone sealants are widely used in repairs and construction. But careless handling of this substance can lead to the formation of persistent stains on the fabric, and to get rid of them you will have to use special cleaners or improvised means.
- Acid-silicone sealant has a characteristic smell of vinegar, and its removal is carried out using a 70% acetic acid solution . When removing a stain from such silicone, you need to take precautions: wear glasses, strong rubber gloves and a respirator, since acetic acid negatively affects the eyes, skin of the hand and the respiratory tract. To clean the stain you need to apply it liberally, leave it for 30 minutes and remove the silicone with a rag.
- Alcohol-based silicone neutral sealant can be easily removed using alcohol-containing liquids . You can take medical, technical, denatured alcohol or vodka and apply it to the dirty area, and then remove the stain with a brush.
- Oxime, amine or amide silicone sealant can be removed using white spirit, benzine, acetone or solvent . The liquid is applied to the sponge, then to the stain and left for 30 minutes until the silicone dissolves. If necessary, the treatment can be repeated. Then wash the fabric as usual with washing powder.
There are also special compositions for cleaning the surface of fabrics from silicone. A remover under the trade name “Penta-840” or ANTISIL is ideal. It is necessary to carefully read the attached instructions before using any product.
In addition, the silicone stain can be cleaned mechanically using a plastic scraper. To do this, the fabric is stretched onto a flat surface and the stain is carefully scraped off. Residues can be removed using one of the methods listed above.
Important! You should only work with silicone sealants in thick cotton clothing, since it will not be possible to remove its residues from delicate items without the help of dry cleaning specialists!
Making a vulcanization device
Homemade vulcanizers are divided into electric and gasoline. They are made from parts that have served their useful life. Main nodes:
- fixed table;
- a heating element;
- clamp.
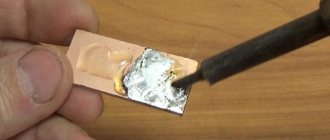
The simplest electric model is made from an old iron that has a working coil. This option has a regulator, which means it is more convenient than others. The working surface is the sole. It is better to remove the handle, turn the iron over, and install it on a bracket made of thick sheet. The item to be repaired is placed on top and clamped with a clamp.
For the gasoline version, it is convenient to use the engine piston. Gasoline is poured into it and set on fire. To control, place paper on the patch. It begins to turn yellow at a temperature critical for rubber.
Where is silicone used?
This material is used in almost all spheres of human life - in construction, everyday life, medicine and production. Silicone has earned popularity due to its unique and valuable qualities that are absent from analogues of this substance.
Silicone is capable of reducing and increasing the adhesion process , as well as imparting hydrophobic properties to the target object. This universal material is able to maintain its basic parameters at extremely high, low temperatures and in conditions of high humidity. In addition, silicones have dielectric characteristics, bioinertness, a high degree of elasticity, are durable and environmentally friendly.
On an industrial scale, silicone liquids and emulsions based on them are used as anti-adhesive lubricants for large heavy molds, the production of water-repellent liquids, greases, special oils, shock-absorbing, coolants, coolants, sealants and dielectric compounds. Particularly popular are defoamers made on the basis of silicone mixtures.
This material is used to produce silicone alkides and silicone polyesters for various coatings, which must be particularly durable and resistant. It follows that different types of gaskets, bushings, rings, cuffs, plugs and other parts can be used at temperatures from minus 60°C to plus 200°C.
Another property of silicone is resistance to substances such as ozone, radiation, sea water, ultraviolet radiation, boiling water, alcohol, acid solutions, alkalis, mineral oils, various fuels and electrical discharges.
Unit design
The design of the shredder is a knife mechanism (shredder), which allows you to process tires, tubes and other rubber elements. With this method of grinding, the material retains its molecular formula and does not lose its elasticity. The performance of equipment depends entirely on its power rating.
Main components of the rubber processing unit:
- Electric motor - ensures the speed of processing rubber waste, recommended engine power is 4-5 kW.
- Box with cutting discs - crushes raw material to the required size.
- Crumb calibration grid - regulates the diameter of the resulting crumb rubber.
- Worm gear – eliminates jamming and jamming of material.
- Unit frame - ensures a stable position of the machine.
- Loading hopper
- Guide tray
Read also: What types of propane cylinders are there?
The entire mechanism of the machine is placed in a housing, on top of which a loading hopper is installed. Before loading the material, foreign metal objects (spikes, nails, etc.) must be removed. Tires are cut into strips, reducing processing time.
Box with cutting discs
The main part of the unit is a shredder unit. The box contains heat-treated steel milling discs of high strength. They are quite wear-resistant and do not require frequent replacement during operation of the machine. Manufacturing the structure requires precise calculation of holes and cutting discs, so the work should be entrusted to the designer.
Grid for calibrating crumbs
A calibrating grid is installed under the box with the milling shafts, which allows you to adjust the diameter of the crumb rubber obtained when shredding tires in a shredder.
Worm gearbox
The mechanical gearbox converts angular velocity using a worm gear and allows you to process rubber material of varying elasticity without winding or freezing. The mechanical transmission of rotational motion is set in the range from 25 to 35 units, ensuring high performance of the unit.
Unit frame
Safe operation is guaranteed by the machine frame, made of profile materials. It ensures a stable position of the unit during the period of crushing and loading of raw material.
Loading hopper
The machine is equipped with a hopper for loading tire raw materials, which for convenience is located on the upper part of the body and a guide tray. They ensure a uniform flow of raw material into the shredder (shredder), preventing the formation of congestion during operation.
Tire cutting device
To cut tires and remove metal cord, a structure of a rack and a supporting frame is used. The housing contains a bar clamping system, which rotates together with the bar during cutting. The rack of the structure is equipped with a wedge-shaped knife that can be adjusted to a specific tire size. This design installation technology saves time on preparing consumables for further grinding in a shredder.
The technological process of grinding involves the following procedure:
- Sorting of tire raw materials and removal of foreign metal (nails, spikes, etc.)
- Removing metal cord
- Cutting tires into strips
- Shredding raw material in a shredder
- Calibration of the resulting crumbs
How to make silicone at home
First way
To prepare silicone rubber (polydiethylsiloxane), you will need liquid glass and ethyl alcohol. Take a plastic container into which the components are poured in equal proportions and carefully mixed with any instrument. When the mixture thickens, you need to knead it into plasticine by kneading it with your hands.
Next, you can sculpt the necessary shapes from the silicone mass, which are left to harden for a while until the product becomes solid.
Second way
- 150 g white spirit;
- 1 drop of acrylic paint;
- 3 drops of liquid glycerin;
- 30 g silicone sealant.
To make silicone, you need to immerse the sealant in a container, add paint, glycerin and white spirit. The solution must be mixed until a homogeneous mass is obtained. You can work with this solution for no more than five hours, since after this time it hardens.
Third way
You need to take equal amounts of silicone sealant and potato starch. Stir the mixture for about 10 minutes until the silicone begins to easily come off your hands, then you can begin making the required shape.
Fourth method
Take gelatin and glycerin in equal proportions and mix thoroughly. Then the solution must be heated in a water bath for about 10 minutes, stirring constantly. It is important to prevent the gelatin from boiling, otherwise a strong unpleasant odor may appear.
Fifth method
It is used to make silicone for DIY molds.
To do this, you need to take a shape slightly larger than the object being copied. A little silicone is poured into the bottom of the mold and left until it hardens - this is the base of the object. The thickness of the base should be one centimeter or more so that the “house rubber” securely wraps the object on all sides. If the mold comes out thin, then it will quickly tear when removing the prototype or will not hold on at all.
The prototype is then dipped into a container of gelatin to get rid of any air bubbles, and then quickly transferred to the bottom of the mold to stick. Then the mold must be completely filled with silicone. Homemade resin from the fourth method, which hardens very quickly, works well. Immediately after cooling, the mold must be disassembled, an incision made and the prototype carefully removed.
At the last stage, you will need to mix and pour epoxy resin into the mold. It will be difficult to remove a frozen casting, so you will need to completely break the silicone.
Product benefits
This material has undeniable advantages that help it gain popularity among consumers. Therefore, waterproofing with liquid rubber often has positive reviews. So, the advantages are as follows:
- the waterproofing ability of the coating is at a fairly high quality level;
- possibility of dense filling of porous formation;
- solidity, adhesiveness to wood, concrete structures and metal surfaces;
- the application method itself is simple, the material hardens quickly in normal weather conditions;
- durability and environmental friendliness;
- safety, does not cause harm upon contact with humans;
- resistance to fire;
- long service life;
- elasticity.
Read also: Thyristor power regulator circuit for 12 volts
In terms of its operational capabilities, especially as waterproofing, liquid rubber leaves other similar materials far behind. Its layer with a thickness of 2 mm is equal to a similar coating of 8 mm if it is a rolled coating in the form of roofing material, and 6 mm if it is a fiberglass membrane. The elastic capacity exceeds any analogues, the ability to operate in temperature conditions makes a significant difference: from -45 degrees to +95. From this follows the conclusion about wide climatic application.
Technical tests of the complete hardening of the composition give the following results: at a temperature of 18-20 degrees above zero, the time for the product to acquire all standard properties, as well as to obtain full elasticity, is 3-4 hours. At a slightly lower temperature (8-12 degrees) - a little longer. The waiting time for results increases to 23 hours. In case of replacement, the material does not need to be removed; the new composition is simply applied over the old one. Thus, obvious advantages include the speed of work itself and drying. It will be possible to walk on the surface in almost half an hour. The service life of the finished coating is also high, which is 25 years. Advantages: contact ability to concrete, wood and metal surfaces, stone and almost any similar objects. High viscosity and stickiness make it possible to create a monolithic connection. High resistance to mechanical damage due to the high viscosity of the product. If problems do arise during operation, repairs are quite quick and simple. Applying a new layer 2 mm thick will save you hassle for a long time. In this regard, a new plus arises - low material consumption.
Getting rid of silicone on clothes
Silicone sealants are widely used in repairs and construction. But careless handling of this substance can lead to the formation of persistent stains on the fabric, and to get rid of them you will have to use special cleaners or improvised means.
- Acid-silicone sealant has a characteristic smell of vinegar, and its removal is carried out using a 70% acetic acid solution . When removing a stain from such silicone, you need to take precautions: wear glasses, strong rubber gloves and a respirator, since acetic acid negatively affects the eyes, skin of the hand and the respiratory tract. To clean the stain you need to apply it liberally, leave it for 30 minutes and remove the silicone with a rag.
- Alcohol-based silicone neutral sealant can be easily removed using alcohol-containing liquids . You can take medical, technical, denatured alcohol or vodka and apply it to the dirty area, and then remove the stain with a brush.
- Oxime, amine or amide silicone sealant can be removed using white spirit, benzine, acetone or solvent . The liquid is applied to the sponge, then to the stain and left for 30 minutes until the silicone dissolves. If necessary, the treatment can be repeated. Then wash the fabric as usual with washing powder.
There are also special compositions for cleaning the surface of fabrics from silicone. A remover under the trade name “Penta-840” or ANTISIL is ideal. It is necessary to carefully read the attached instructions before using any product.
In addition, the silicone stain can be cleaned mechanically using a plastic scraper. To do this, the fabric is stretched onto a flat surface and the stain is carefully scraped off. Residues can be removed using one of the methods listed above.
Important! You should only work with silicone sealants in thick cotton clothing, since it will not be possible to remove its residues from delicate items without the help of dry cleaning specialists!
Types of injector sealing rings
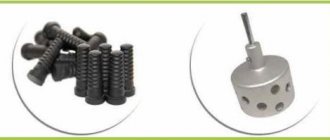
Inlet or upper o-rings are found on both gasoline and diesel injectors. They serve to eliminate air leaks and fuel leakage at the point where the injector is connected to the fuel line. Most often they are made of rubber, because:
- no large mechanical loads;
- the temperature effect is small due to the distance to the hot engine;
- rubber is characterized by high elasticity;
- slow loss of properties under the influence of an aggressive environment.
Rubber inlet seals
The lower seal operates under more severe conditions, so the following options are possible:
- metal ring;
- alloy seal;
- rubber, made of a special composition, capable of withstanding temperature and mechanical stress.
To increase reliability, it is possible to simultaneously use a metal and elastic seal. In this case, the lower ring is made of a resistant material, for example, copper, and serves as a flame arrester. The upper ring is in this case protected from adverse influences. It is made of rubber, which ensures the tightness of the system at the proper level.
Removing silicone from work surfaces
Silicone is a product that helps glue surfaces and seal seams. This substance prevents the penetration of air and moisture. Sealants with antibacterial composition are used in bathrooms, cars, construction, aquarium hobbyists, etc. The sealant is not easy to remove from the surface, but it is possible.
The sealant is made on the basis of solvents, which give this composition a pungent odor. In addition to the smell, solvents give silicone elasticity and help it adhere better to surfaces.
Therefore, chemicals that are sold in stores are often used to remove silicone.
But using traditional methods , you can remove silicone from any surface, for which you use white spirit, rags, blades and detergents.
To remove silicone from the work surface, you must first moisten it with white spirit using a rag. After about 60 seconds, the silicone will have a jelly-like consistency and can be easily cleaned with a blade. Then this area should be washed with detergent and wiped dry with a rag.
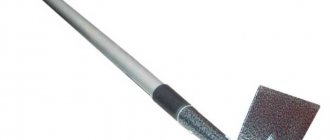
Silicone can also be removed mechanically, using a knife and pumice. But this option is suitable for surfaces that are not susceptible to scratches and chips.
Flaws
The disadvantage of liquid rubber is its low resistance to direct and intense solar radiation. Additional treatment with a water-based paint coating is recommended to increase UV resistance. Also, the disadvantages include the rather high cost of the composition.
Thus, suitable weather conditions are important to obtain a quality coating. Waterproofing with liquid rubber (reviews confirm) is impossible in rainy weather. It is not recommended to apply it to a damp surface. The inability to use at temperatures below +5 degrees makes it difficult to use the composition at low temperatures and its use in some regions. In addition, sometimes it is necessary to purchase special additional equipment for applying liquid rubber, which is quite expensive. The cost starts from 100 thousand rubles and requires separate personnel training. Also, surface preparation requires certain additional work. It must be thoroughly examined, cleaned and washed with detergents. Then complete drying is required.