Somehow I came across a similar idea on how to make a sandblasting gun on YouTube, and I thought that this was not a workable unit at all. Then I decided it was still worth seeing what would come of it. If I fail, I lose almost nothing in money. To my great surprise, hand sandblasting works, and quite well.
The attached video has a little more detail than the article and shows the homemade sandblasting gun in action.
When assembling a sandblasting gun with your own hands, you will need:
- Inexpensive sprayer
- Transition coupling from external to internal thread 1 cm
- Teflon tape
- Empty plastic bottle 0.5 l
- Glue gun
- File or sander
- Air compressor
- Drill with a set of drills
- Sandblasting abrasive (I used glass abrasive)
- Utility knife
Pros and cons of homemade sandblasting
Pros:
- you will save money, since a home-made unit will cost much less than a purchased one;
- get a device more powerful than the factory one.
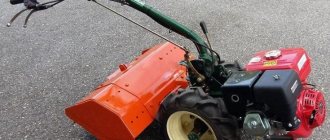
A homemade machine will help you cope with many household chores
Minuses:
- manufacturing the device requires, at a minimum, the ability to use a welding machine;
- if it was not possible to select high-quality components, sandblasting will not last long;
- any mistake in assembly can result in valve rupture and injury.
Think before you get down to business and correctly calculate your capabilities.
Operating principle and purpose of the sandblasting machine
A sandblasting gun or other type of abrasive device purchased at a low price most often does not last long. The main parts of a cheap design quickly deteriorate and wear out, causing the device to become unusable. In order to save on the purchase of a high-quality device, you can use a homemade pistol, which works on the same principle as a magazine pistol.
The abrasive material (most often ordinary fine sand), under the influence of air from the flow created by the compressor, moves through a reinforced hose to the installation opening. It is fed through a nozzle directly onto the surface to be treated. Due to the high pressure, the sand moves, its particles act with high energy and clean off any contaminants. The installation itself is connected to a compressor on one side, and to a separate sand bunker on the other using special hoses.
In addition to cleaning surfaces from dirt, a sandblasting gun performs a number of other tasks:
- removal of old coatings;
- eliminating traces of corrosion;
- glass frosting;
- degreasing surfaces.
When using the machine, it is important to pay attention to the quality of the sand. It should be fine, clean, sifted through a sieve with the smallest mesh. When using contaminated coarse sand, the device nozzle becomes clogged and the gun breaks.
How does a sandblasting machine work?
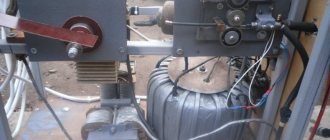
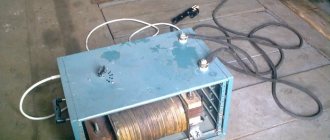
Having taken up the manufacture of a sandblasting machine, you must carefully study the principle of its operation, prepare all the necessary tools and elements of its design. A homemade sandblaster, if assembled correctly, is practically in no way inferior to serial equipment in its capabilities. At the same time, it is possible to manufacture a device that allows you to effectively carry out work on cleaning surfaces made of various materials with minimal financial costs.
Sandblasting machine diagram
A homemade sandblasting machine, like a serial one, works on a principle somewhat reminiscent of the operating principle of a conventional device for spraying paints and varnishes - a spray gun. Meanwhile, there are still differences in the operation of such devices, which does not make it possible to replace them with each other.
The main element of any device for sandblasting is a compressor, which is necessary in order to create an air flow with the required pressure in the installation lines. Passing through the main hose past the hose for collecting abrasive material, the air flow creates a vacuum, which causes the abrasive to begin to be sucked into the main line and mixed with the air stream. The already formed flow of working material, consisting of air and abrasive, enters the nozzle, through the hole of which it is supplied under high pressure to the surface being treated.
The air inlet is made near the place where the condensate is drained, so that the flow loses most of the moisture, hitting the wall of the receiver
Thus, for normal operation of a sandblasting machine, its design must include not only a compressor, but also hoses of the required diameter, electrical cables to provide power to the working unit, connecting fittings, taps and dispensers.
In addition to the compressor, the most important element of a sandblasting installation, which largely affects the efficiency of its operation, is the nozzle, which ensures the formation of an abrasive jet with the required characteristics. At home, you can only make a ceramic nozzle by using old spark plugs from which the metal electrode is removed. Serial nozzles, characterized by increased wear resistance, are made of steel coated with boron carbide or tungsten carbide, less often - of ordinary steel, cast iron and ceramics (such products quickly lose their characteristics under constant exposure to abrasive material).
Homemade metal nozzles turned on a lathe do not last long, but they cost practically nothing
Design features of the sandblasting unit
In order for the technical system to function correctly, it provides the following devices:
- sand nozzle with ceramic or steel tip;
- handle with trigger for controlling the device;
- fittings for connecting hoses necessary for supplying compressed air and sand;
- hoses for incoming abrasive and forced air;
- intake pipe or suction valve;
- a sand container with an outlet (for example, a small metal barrel or bottle).
The ideal option is to use homemade sandblasting not in the open air, but in a special chamber, which will increase work efficiency and reduce abrasive consumption. The chamber can be a box made of metal sheets, which is welded independently. Most factory camera models include the following items:
- glass viewing window for monitoring the material processing process;
- lighting system;
- two holes for gloves, in which the master places his hands;
- a grate at the bottom of the chamber and a chute for pouring waste sand;
- ventilation system to remove dust.
It is better to purchase the nozzle ready-made rather than making it yourself, this way it will last longer. It is almost impossible to make a nozzle of decent quality by hand. You will also have to buy a compressor, or take an old device that is available.
What is it - design and types of devices
Historically, there are several types of abrasive treatments that are performed using different technologies. Thus, devices on the market may differ in their design, operating principle and characteristics. However, most sandblasters are based on the same design principle.
At the heart of every sandblaster there are several key elements:
- container for abrasive material (sand, steel shot, etc.);
- a hose made of friction-resistant material through which abrasive flows from the container;
- a nozzle on the hose that allows you to regulate the supply of sand;
- controls - instrument panel, power supply and automatic control.
The container for the sandblaster can be sealed or not sealed. In the first case, sand is supplied under pressure, which increases work efficiency. Such sandblasting machines are called pressure blasting machines. In the second case (unpressurized), sand or other abrasive is supplied under normal atmospheric pressure. Such devices are cheaper, but in terms of their efficiency they are significantly inferior to sealed ones.
Injection devices are also used in cases where the surface treated with sand may be damaged due to excess power. Containers differ in volume, material of manufacture, and shape.
There are two types of sandblasting hose: for supplying dry sand and for supplying wet sand. All sandblasting machines in Russia are designed to supply wet sand, since dry processing is prohibited by sanitary and epidemiological rules. The same ban exists in some other countries.
The ban is due to the fact that processing with dry sand is dangerous for the worker and the environment due to the fact that a large amount of silicate (dust) is released into the air, which enters the human lungs and settles on surrounding objects. Silica dust can cause respiratory diseases in humans.
The nozzle on the hose is a ceramic or steel structure that delivers sand directly into the gun (outlet). Ceramic materials are more resistant to friction, so their use is preferable.
On the other hand, some of the metal types of nozzles can significantly reduce the amount of abrasive spent on a particular type of work (up to 40%), which in certain conditions can save more money.
Each sandblaster has an instrument panel that allows the worker to operate it. Some of the devices are equipped with special automation, which can automatically control the power of the device or the supply of sand. This makes the sandblaster safer and easier to use.
What type of container is on your sandblasting machine?
SealedNot Sealed
Chamber
Usually, when we talk about sandblasters, we are talking about the design described above. However, chamber devices for sandblasting, which can be conditionally called hermetically sealed, also deserve special mention. This is stationary sandblasting equipment in the form of a metal chamber with a door. Objects that need to be processed can be placed inside the chamber.
Like conventional sandblasting machines, chamber-type equipment is equipped with an abrasive container. The difference from non-stationary devices is that during operation the device emits a minimal amount of dust and sand into the environment, which allows people without protective equipment to be free in the room.
Accessories
In addition to the compressor and nozzle, before making a sandblaster, you need to prepare other necessary materials and tools. Most of them are available in every home workshop, but some will have to be purchased at a hardware or hardware store.
A used gas cylinder made of high-strength metal is suitable as a container for abrasive. The tightness of the cylinder also allows it to be used for storing and supplying sand. To make it more convenient to pour sand, you can weld a small piece of pipe to the top of the cylinder, which will serve as a “neck”. Instead of a cylinder, you can use any barrels or containers.
If buying a ready-made compressor causes financial difficulties, you can build it yourself. The basis will be a compressor head from a MAZ or ZIL pneumatic drive, the power of which is sufficient to create a good sandblast. The head must be equipped with a receiver, although you can work without it - then air will be taken in constantly.
Depending on the complexity of the finished structure, other components may be required:
- Ball Valves;
- rubber hose with reinforced inserts with a diameter of 14 mm or more;
- air hose with a diameter of up to 10 mm;
- fittings for attaching hoses or collet clamps;
- transition coupling;
- FUM tape for sealing and connecting elements;
- empty 0.5 liter plastic bottle;
- glue gun and hot glue;
- grinding machine or file, sandpaper with a block;
- drill with drills;
- sharp knife;
- Bulgarian;
- pliers.
Drawings and diagrams of sandblasting from a fire extinguisher
At home, you can make a sandblasting machine from an old fire extinguisher. The power of such a device will be lower than that of a purchased one, but it will be sufficient for domestic purposes.
Before assembling a homemade structure, you need to familiarize yourself with the drawings and circuit diagrams. They demonstrate that sandblasting is very simple and only requires care when assembling it.
Sandblasting based on a fire extinguisher is capacious enough so that you don’t have to frequently add abrasive
There are different algorithms for self-assembling a device. But the basic diagram remains the same, the main components of the sandblasting unit and their location do not change.
When choosing materials for a sandblasting machine, you need to make sure their integrity and strength
When assembling a sandblasting unit, the tightness of the structure becomes of great importance. All components in the process must be connected so that the abrasive does not spill out at the joints.
Types of sandblasting machines by scope and principle of operation
Sandblasting can be divided into types according to several principles.
By scope:
- Vacuum. During operation, sand ejected through the nozzles is returned to the container using a vacuum and reused. Used for neat and delicate work.
- Pneumatic. Powerful devices that eject sand under strong pressure are used to process large areas.
- Suction. The air in such a device supplies sand to the nozzle and collects it back after use. Such devices are designed for removing paint and matting glass surfaces.
According to the sand supply principle:
- Pressure. The compressor pumps air into the dosing unit and into the installation itself. Thus, the maximum speed of abrasive particles is achieved.
- Injection. The abrasive and air flow move through different sleeves. The speed of sand particles in this case is low, and the apparatus itself is less powerful.
How to choose the right sand for sandblasting
Initially, sandblasters used quartz sand. This is the cheapest consumable material for such installations. Modern manufacturers offer to load other bulk abrasives into the device, the effect of which is significantly different from ordinary sand. It got to the point that some European countries banned the use of simple sand in work, citing the fact that it causes serious health problems for people who are within the radius of work.
The worker himself must wear protective clothing, a respirator and goggles
Proponents of the use of sand, in addition to its main advantage - price, also mention the possibility of reusing the abrasive, including for construction purposes. The average hardness of the particles allows the device to be used by a person with insufficient experience without the risk of damaging the surface being treated. In addition, sand has fractions of different sizes, which allows you to select the optimal mode for cleaning different types of coatings.
What other types of abrasive materials can be used in sandblasting:
- Cooper slag or nickel - waste from nickel and copper production, characterized by high strength and hardness;
- garnet sand – used for cutting metal in powerful sandblasting machines;
- aluminum oxide - electrocorundum - is the hardest abrasive, capable of coping with any task and at the same time retaining its particle shape;
- cast iron and steel shot - not cheap, but has the ability to harden the surface, like forging.
Abrasives for sandblasting machines are sold in packages starting from 20 kg
By what principle is this or that consumable material selected? First of all, you should decide on the purpose of the work: if you need to clean the wall of a house from facade paint, you should not buy an expensive abrasive. If your device is unable to collect and reuse the material, then give preference to quartz sand. It can at least be used in bulk in a sandbox.
To clean a durable hard coating, solid fractions will be required; for quick rough processing, large particles will be required.What tools and materials are needed to make a sandblasting machine with your own hands?
Returning to the issue of making sandblasting with your own hands, let’s consider what is required for the work:
- A compressor that provides pressure for the sandblaster. As we have already said, it is very difficult to make a compressor for sandblasting with your own hands, and the resulting result is unlikely to please you with its power. So you just need to buy this part. You will need a device with a power of at least 3 kW with a forced cooling system and a pair of piston groups.
- Container for abrasive. The main requirement for the tank is the correct slope of the walls, ensuring natural pouring of sand. The walls should be at an angle of 30 to 60°. The container must be made of thick-walled metal. A gas cylinder or fire extinguisher is excellent for this purpose.
Sandblasting can be done not only in open space, but also in a chamber. This option is suitable for processing small parts.
- The sleeve is easy to choose. For this, a rubber hose of the required diameter is sufficient. The hose is secured with metal clamps or ties.
- Nozzle – you can buy a ready-made nozzle or make it yourself from scrap material. To make the device last longer, it is equipped with replaceable ceramic caps with 5-6 mm holes for accurate operation.
To make a homemade sandblaster you will also need nozzles, taps and tees.
Before starting work
Before you start sandblasting, think about your goals. Do-it-yourself devices will be significantly inferior to serial models of equipment. However, even with their help, processing can be carried out quickly and efficiently. In other words, if you want to carry out intensive processing, refuse to save on serial equipment. If you do the work from time to time, our homemade sandblasting will come in handy.
To seal connections, use fum tape - a high-quality fluoroplastic sealing material that is resistant to petrol and oil and is not afraid of corrosion processes.
One of the most important elements of a sandblasting system is the nozzle. We recommend that you purchase it (choose the tungsten material element). If you make it yourself, the length and diameter of the metal rod should be 3 cm and 1 cm, respectively.
How to make a portable sandblaster yourself - step by step diagram
This device may not boast large dimensions, but it can do the same job as its larger counterpart. True, its scale is a little smaller. To make a lightweight model you need to find:
- reinforced hose;
- ceramic nozzle (modified spark plug);
- compressor;
- plastic bottle (1.5 or 2 l);
- spray gun valve;
- plumbing tee;
- ball valve
In addition to a set of wrenches, in this case you will need a drilling and lathe machine to turn the faucet. Based on the diagram, a nozzle is assembled from a mixer, tee, ball valve, bottle and nozzle.
- The gun body is turned on a lathe to fit the size of the nozzle.
- It is connected to a tee mixer, one fitting is connected to the compressor, and a nozzle is mounted on the second. The third is connected to a container containing abrasive.
- They make a channel between the gun and the compressor. The tap is mounted between the bottle and the tee. The latter is connected to the handle of the spray gun.
- The top of the bottle is cut off.
This portable device is not durable, but it can effectively clean surfaces for about half an hour.
Assembly order
To begin with, we empty the cylinder of residual gas, dismantle the tap, drain the condensate and fill the cylinder to the top through a hose with water for 3 days.
It is important to drain used water away from residential premises, as it will have a pungent odor and, in fact, is poison
. Next, we make a hole in the bottom of the cylinder for a two-inch bend. This can be done in two ways. Drill small holes around the circumference of the future hole, cut through the remaining walls, chop or saw through with a hacksaw. Treat uneven edges with a drill attachment.
Another way is to cut a hole using electric or gas welding. Weld a two-inch socket to the hole; use a plug for the battery as a plug. This will be the neck for pouring sand.
The most physically difficult task is to unscrew the gas valve. Previously, on old cylinders they were usually twisted onto tow with paint for tightness. If the tap does not respond to the key, most likely it will have to be heated with a gas burner. We screw a fitting into the freed and cleaned hole to attach a ball valve. We seal all connections with tow or FUM tape.
In the upper part of the cylinder it is necessary to drill a hole and weld a 20 mm external thread to it, and screw on the quick release. Air from the compressor will be pumped here.
If the cylinder does not have protection around the tap, it is important to weld the legs at the bottom for additional stability and the ability to connect the hose from below. Assembling the bottom of the screen fittings
We screw a ball valve onto a pre-welded thread, then a tee, on one side of the tee there is an air supply from the compressor, on the other side there is an outlet of mixed air with sand. The ball valve regulates the automatic supply of sand
Assembling the screen fittings from below. We screw a ball valve onto a pre-welded thread, then a tee, on one side of the tee there is an air supply from the compressor, on the other side there is an outlet of mixed air with sand. The automatic supply of sand is regulated by a ball valve.
Types of sandblasters
There are two types of sandblasters: siphon and pressure sandblasters. Both types of sandblasters use compressed air from a compressor to operate, the difference lies in the way the abrasive is fed into the nozzle before being blown out under pressure. A siphon sandblaster uses an open, leak-proof hopper with two hoses.
One of them is connected to supply air, and the other blows out abrasive material. This difference is more clearly visible in pictures of a sandblasting machine from the Internet.
The principle of operation of the equipment and the sequence of processing
All sandblasting machines have a similar design:
- compressor - the main part that is designed to pump air;
- receiver – accumulates air under pressure;
- the gun delivers an air-abrasive jet;
- a special container into which the abrasive is poured;
- a system that controls the pressure level of the working mixture when it is supplied to the gun;
- control system;
- connecting hoses for air supply;
- cable for connecting to a power source.
The operating principle of the sandblasting machine is simple:
- The compressor creates air pressure.
- Air is supplied to the gun.
- At the same moment, abrasive is supplied there.
- The abrasive is mixed with air and released under pressure.
- Abrasive particles remove dirt from the surface.
At the same time, the surface is polished.
Making a simple sandblasting machine from a plastic bottle and an air gun
Here are step-by-step instructions for making a homemade sandblasting machine that works on the principle of an ejector (spray gun).
Step 1. You need to buy or borrow an air gun rated for pressure up to 4 MPa, a plastic 0.5- or 1-liter bottle, a fitting, hoses and drills. We will mention other materials and tools as they are used at the appropriate step.
Step 2. We twist the cork from the bottle, and cut the remaining band on the neck with a carpenter’s knife and remove it. Screw the lid tightly into place.
Step 3. Using an electric drill and a 5 mm drill, drill the neck of the bottle in diameter on both sides, right under the cap itself.
Step 4. Carefully insert the tube from the kit to the air gun into the drilled holes. We determine on it the place where the bottle with sand will be located. It should be closer to the air gun. This will ensure greater structural reliability, better balancing and ease of operation.
Step 5. We take the tube out of the holes in the bottle and use a marker to mark on the tube the place where an oblong hole will be cut to allow sand to come out of the container.
Step 6. Using a metal file, we make an oblong, narrow hole on the tube, carefully cleaning its edges.
Step 7. We return the tube to its place again, and the hole cut with a file should be directed downwards, and the bottle will be located vertically above it.
Step 8. Fill the places where the tube enters and exits the bottle with suitable glue, firstly, to ensure the strength of the connection, and secondly, for sealing, so that during operation of the sandblasting device the air supplied by the compressor does not escape outside.
After waiting for the glue to completely harden, you can begin testing the sandblasting machine by first pouring dry sand with a particle size of no more than 0.5 mm into a bottle, and connecting the gun with a hose to a compressor that is able to provide a pressure of 4 MPa (bar).
Step 9. We direct the gun tube at the dirt on the garden path, adjusting the air pressure, and therefore the sand flow, using the handle on the tool. The cleaning efficiency is obvious.
Step 10. Let's try to remove rust from pliers that have been lying somewhere for a long time, exposed to water or humid air. By directing a stream of air mixed with sand at the rusty spots of the tool, we achieve its complete cleaning. After this treatment, the metal surface acquires a noble matte shade.
For information: a household air compressor is used as a source of compressed air, on the control panel of which there is an air flow adjustment knob, a flow meter, fittings for connecting hoses and a pressure gauge indicating the pressure in the system. As a cleaning agent, along with fine sand, you can use finely crushed walnut shells.
How to make a siphon sandblaster
Step 1: Drill a hole in the bottom of the cylinder. Weld the control valve at the end.
Step 2: Connect the air supply hose to one end of the control valve and connect the other hose to the siphon nozzle of the gun.
Step 3: When the siphon gun trigger is pulled, the nozzle is activated and the high pressure and volume passing through the venturi arm tube causes air to be sucked through the hoses.
When the compressed air is released from the gun, it draws sand through a hose built into the sand pile at the bottom of the hopper and releases it along with the compressed air. This creates a sandblasting force that is applied to the object it is being used on.
That's all! The DIY mini sandblasting machine is ready.
Although siphon sandblasters are cheap and easy to make, there are some key disadvantages associated with them. Siphon gun nozzles are larger than pressure gun nozzles, so they draw more pressure and also require larger compressors to operate.
a large volume of air, which is necessary to suck the abrasive material from the cylinder. This makes it slower than a regular pressure sandblaster. Additionally, these guns tend to clog easily, making cleaning difficult.
Sandblasting machines, unlike siphon ones, work four times more efficiently. Therefore, they are more suitable for large productions.
Simple sandblasting from an old fire extinguisher
If you're tired of cleaning metal with a brush for an electric drill or grinder, then why not try an alternative cleaning method - using sand? This method may seem a little “exotic” to some, but it is quite effective.
To quickly clean metal from traces of rust, scale or old paint using sand, you will first need to do a simple sandblast. For this, for example, you can use the housing from an old fire extinguisher.
The operating principle of sandblasting is very simple: under the influence of compressed air supplied from the compressor unit, sand from the container enters the hose, after which it is thrown out through the nozzle at great speed.
We make a sandblasting installation from a gas cylinder - what you will need for work
How to make a sandblasting machine with your own hands from a gas cylinder? This will require a lot of parts. Among them:
- empty propane tank;
- pressure regulator;
- rubber hose;
- three pipes with external thread;
- T-connector;
- 4-channel fitting;
- pressure gauge;
- elbow with external thread;
- threaded square;
- water separator;
- tube fitting (baffle connection);
- mixer valve;
- two pressure relief valve fuses;
- “Dead man” nozzle;
- compressor (depending on nozzle size);
- drill;
- powerful hacksaw for metal;
- welding machine.
Pressure sandblasting machine from a cylinder - sequence of operations
Step 1: You need to remove the nozzle of the old propane tank. Make sure that there are no vapors left in the tank that could be harmful. Afterwards, a filling hole is made - a hole is drilled in the upper part and a lifting lid is attached.
Step 2: Now you need to drill a hole in the bottom of the tank and another hole on the top side of the tank. Do the same for the other pipe to create two 3-inch threaded steel pipes. Then weld the pipes to the bottom and sides of the tank.
Step 3: Screw the mixing valve to the end of the down pipe. Screw the T-connector into the bottom of the mixing valve.
Step 4: Attach the 4-way female fitting to the threaded steel pipe on the top side of the tank. Then a pressure gauge is screwed on top, a pressure regulator on the side and a safety valve on the bottom. The water separator is connected to the pressure regulator.
Step 5: Screw on the female threaded fitting from the water separator and the safety valve to regulate the flow of air from the compressor to the other end. The pipe from the air compressor is connected to the safety valve. The pipe from the air compressor is connected to the safety valve.
Step 6: The threaded pipe is screwed to the bottom of the relief valve, which is attached to the 4-way fitting. It is cut right at the base from the propane tank, and then an elbow fitting with internal thread is screwed onto the end. Now measure and cut a small piece of pipe and attach it to the T-connector. The joints are welded.
Step 7: The rubber hose is connected to the other end of the T-connector at the bottom and secures the nozzle at the top using a pipe fitting. The pressure in the tank allows the abrasive medium to mix with air. The medium is now forced into the mixing chamber.
The air from the compressor that enters the mixing chamber is regulated and lowered before entering the nozzle. By adjusting the mixing valve, the amount of abrasive can also be controlled.
What can sandblasting be made from?
To understand how easy it is to make sandblasting with your own hands, it is enough to dwell on the operating features of each structural unit. In this case, the selection of available parts or finished products becomes obvious.
- Mixing unit. Sand for sandblasting and compressed air from the compressor come here from two hoses. The output is a ready-made air-abrasive mixture. In this case, no requirements, for example, the volume of the mixing chamber, are imposed on the unit. On this basis, you can use a regular plumbing tee to make it.
- Control devices. A normal manual sandblaster should be able to adjust the air flow and the intensity of the abrasive material. In this case, no requirements are imposed on the control device. At home, this role is well performed by water ball valves made of steel.
- Connection points. To connect the hoses, conventional fittings are installed on the portable sandblasting machine. They can be equipped with clamps for secure fastening. All these components are easy to buy in stores.
- Receiver. This part of the design is needed to facilitate the operation of the compressor and stabilize the pressure. You will definitely need a receiver if you want to get a powerful sandblast with your own hands. This device can be made from a powder type fire extinguisher with a large housing capacity. Another option is to make a receiver from a gas cylinder.
- Abrasive chamber. The components for its manufacture may differ depending on the type of installation being created. For example, an ejector-type mini sandblasting machine is assembled with a plastic bottle for abrasive. A pressure installation will require a durable container made from a fire extinguisher or a freon cylinder.
Important! The connection diagram for moisture separation and oil collection devices depends on the specific product purchased for this purpose. However, most of the models on the market will only require the manufacture of an outlet from a plumbing tee onto which the hose fittings are mounted.
Option for a sandblaster made from a fire extinguisher
The circuit diagram of a fire extinguisher apparatus is similar to a device assembled with your own hands from a cylinder.
To seal the top of the fire extinguisher on turning equipment, a plug should be made in advance. A sealing rubber ring is put on it, and the part is screwed into the upper neck of the fire-fighting device. The existing hole is intended for filling sand.
At the next stage of manufacturing the sandblasting machine, holes are drilled with your own hands: on the body near the top and in the bottom. The places are pre-cleaned of factory paint, and welded into the holes according to the welding strip. Legs are welded to the bottom of the fire extinguisher, for the manufacture of which you can use a round rod or fittings.
To make tightening and unscrewing easier, a knob is welded to the plug. After assembling and installing the fitting system, the manufactured sandblaster is ready for use.
Making sandblasting with your own hands at home using improvised materials
Sandblasting is a universal device used both in industry and in domestic conditions.
It helps to quickly clean the surface of rust, dirt and old coating. The main disadvantage of sandblasting is its high cost, so many people prefer to make it themselves. It will take some effort, but the results will be worth it.
A method for making a homemade sandblasting machine from a spray gun
Sandblasting can also be done using a spray gun. For assembly you need to prepare:
- a gun that functions as a mixing valve;
- handle with air supply device;
- a plastic bottle that acts as a tank for abrasive;
- tee;
- ball valve for regulating sand supply.
Using an airbrush instead of a spray gun will allow you to apply abrasive at higher pressure due to the smaller thickness of the outlet channel.
Assembly is performed in the following sequence:
- The gun is bored to increase the diameter of the output nozzle.
- The mixing tee is attached to the gun.
- The supply and circulation hoses are installed and attached.
- The abrasive is released after the trigger is pressed. The volume of a small plastic bottle is enough to clean surfaces for 30 minutes.
Other manufacturing options
You can build a sandblasting machine with your own hands and from other components. Thus, very good equipment can be obtained from a car compressor, a high-pressure washer, a receiver and many other devices. Let's consider several schemes for manufacturing sandblasting from similar structures.
From a pressure washer
At home, you can assemble a very high-quality and powerful sandblast from a high-pressure washer. For example, very good equipment is obtained from sinks from the German brand Karcher (“Kärcher”). Such devices, designed for effective car washing, generate very high water pressure, but subject to low water consumption.
To do this you will need the following components:
- ceramic nozzle, made by yourself or purchased in a specialized store;
- reinforced hose;
- mixing block or tee having a suitable fit diameter;
- a unit that regulates the flow, as well as a cylindrical dispenser;
- a tube designed to pick up abrasive; it is equipped with an air supply path into a closed tank with sand or any other abrasive.
The water equipment from the sink can operate on the basis of an ejector circuit. Water, under the influence of high pressure, overcoming the mixing block at rapid speed, forms the necessary vacuum in the path where the abrasive is supplied. Sand can flow in and out with liquid under very high pressure.
Water devices made in-house are very convenient to use and easy to manufacture. Such devices have some features that need to be taken into account.
- The flow power turns out to be very large with a small liquid flow rate. Due to this, a homemade installation can be used, for example, for glass, for matting and other similar work.
- In order to maintain a stable feed, it is necessary to use an abrasive that is characterized by uniform dispersion and a small fraction. So, in domestic operating conditions, sifted river sand would be the ideal solution.
From a blow gun
If you need to assemble a compact and most convenient sandblasting machine, it is permissible to use a regular blow gun as its basis. The result is devices that demonstrate fairly high efficiency indicators.
It must be taken into account that the performance of such homemade products directly depends on the compressor. To assemble a high-quality device, the master will need the following components:
- ready-made pneumatic blowing gun;
- high-quality plumbing tee;
- a ball-type valve, which will be needed to adjust the supply of the abrasive component;
- outlet nozzle together with a clamping nut.
The finished design will not be too complex and intricate in its design. As a reservoir that will be used to place the abrasive, you can take a lightweight cylinder from a small powder-type fire extinguisher. If there is no such component, a container from a bottle will do.
From an electric spray gun
Sandblasting can be assembled very quickly and easily using a regular spray gun. Such a device can be easily built at home in just 10-20 minutes.
Sandblasting can be assembled very quickly and easily using a regular spray gun.
- mixing valve from a simple spray gun;
- a handle containing a mechanism for supplying air masses;
- a bottle containing abrasive mixtures;
- tee;
- ball valve regulator.
The scheme of operation of such a homemade product will be extremely simple and understandable. To assemble a sandblast from a spray gun, you will need to proceed as follows.
- First, you will need to carefully sharpen the spray gun to use a nozzle of the appropriate size.
- Next, you will need to attach a mixing tee to the gun.
- Finally, the master will need to fix the hoses responsible for supply and circulation.
How to make a sandblaster from a pressure washer
You can also use a Karcher sink or a similar unit of another brand as a compressor for sandblasting. The device, whose original purpose is to wash cars, is capable of creating high water pressure with low water consumption. The task comes down to modernizing efficient, dust-free equipment. For Karcher you only need to make a special attachment for the outlet pipe.
The following materials will be required:
- ceramic nozzle, purchased in a store or made by yourself;
- reinforced hose;
- mixing unit (tee with a nozzle of suitable diameter);
- cylindrical dispenser, supply control unit;
- a tube for collecting abrasive with an air supply channel into a sealed tank.
The sandblasting installation from a high-pressure washer operates according to an ejector scheme. The injected liquid, passing through the mixing block at high speed, forms a vacuum in the sand supply channel. It enters the cleaning zone along with water under high pressure.
Other options
A sandblasting gun is also made from other devices. The most common options include upgrading your pressure washer. We are talking, for example, about the K?rcher mini-wash. Such a sink generates very high water pressure with low water consumption, and therefore is an ideal solution for obtaining a sandblasting machine. Here it will be especially important to use fine (calibrated) sand of uniform dispersion.
Another advantage is that there is no need to disassemble the mini-wash itself. It will only be necessary to make a nozzle for the outlet tube of the device.
To do this you will need to purchase:
- ceramic nozzle;
- hoses with reinforcement;
- mixing block in the form of a tee of suitable diameter;
- cylindrical dispenser.
As mentioned above, a feature of this device is that water, rather than air, will be responsible for the supply of sand here. Liquid under pressure will flow through the mixing compartment, forming a vacuum in the hose, which is responsible for supplying the abrasive. Thanks to this, sand will be ejected with great force, which will allow cleaning, grinding and matting the surface.
Another interesting option is to make an anti-gravel device from a regular fire extinguisher.
To do this, you will need to find a fire extinguisher and then create a plug using a lathe to seal the top area. You will need to put a rubber sealing ring on the plug and then screw it into the neck of the device. This hole will be used to fill sand inside.
After this, you will need to drill holes for the housing in the upper part, as well as at the bottom. First you need to clean these areas of the old paint coating. In addition, legs made of fittings or pipes can be welded to the bottom using welding. After installing the tees and supply and output hoses, the sandblaster will be ready for its intended use.
As you can see, there are a large number of options for creating a sandblasting gun: from a sandblasting gun, a spray gun, a fire extinguisher and other devices or improvised means. In principle, this is not difficult, but you should clearly understand what exactly you are doing, and also have the necessary components on hand.
When creating sandblasting with your own hands, you must strictly comply with safety requirements, and all work must be carried out only with special protective equipment and devices.
What else can a nozzle and gun be made from?
Making your own sandblasting gun is not difficult. For assembly, you can use a nozzle for a regular ball valve located at the end of the hose for discharging the air-sand mixture. The nozzle is a nut that clamps the outlet nozzle for the abrasive.
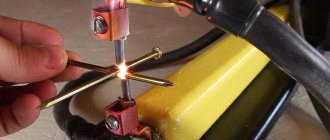
The nozzle, in turn, can be made on a lathe. But it is more rational to use a spark plug. The worn-out part is cut with a grinder, while the durable ceramic rod is separated from the metal parts of the structure, and its length is adjusted.
The process of cutting a candle requires appropriate skills. In addition, when cutting, a large amount of dust is generated, and a not very pleasant smell appears. If you don’t have a separate room and the skills to work with an angle grinder, it’s easier to purchase a suitable nozzle in a store.
DIY designs are often more effective than pistols, a wide range of which are commercially available. Therefore, if you have free time, it is wise to spend it on implementing your technical solution, and spend the saved money on other, no less important goals.
Making sandblasting yourself allows you to reduce the cost of purchasing a serially assembled machine by 3–5 times. Maximum savings can be achieved by using a homemade compressor, but it is very difficult to achieve sufficient power. The best option is do-it-yourself sandblasting in combination with a powerful factory compressor.
Assembling and checking the serviceability of sandblasting equipment
Before starting work, you must check the following components of the unit:
- Fittings must allow air flow.
- The internal diameter of fittings and hoses should be several times larger than the diameter of the nozzle.
Before starting work, it is important to drain the moisture separator, adjust the metering valve, and check the operator’s protective clothing. A small sandblaster is an indispensable device for cleaning metal, wood, and concrete surfaces from corrosion and dirt, as well as for drawing, degreasing and polishing.
Such a device can be purchased at a store or made independently. When working, the most important thing is to follow safety rules so that abrasive does not get into your eyes.
Sandblasting chamber in a home workshop
A sandblasting chamber is a multifunctional device, which is a container for processing small parts. This container can easily be made from various types of materials: be it wood or various metal scraps.
How to assemble a sandblasting chamber at home?
If you often work with small parts, it is recommended to make a sandblasting chamber yourself. For comfortable and safe work with parts in this design, you will need to make protective glass on the top edge of the container.
For greater convenience, you can make it at an angle. Protective glass is extremely important when working with a camera, because consumables flying out under pressure can seriously damage the skin. This is also why you should handle parts strictly wearing safety glasses.
It is impossible to process parts with bare hands in a sandblasting chamber, so gloves are attached to the side edges of the container, and the homemade sandblasting itself, made with your own hands, is carried out and attached inside the chamber.
Gloves and protective glass wear out over time, so it's worth stocking up on them in advance. It is also strongly recommended to choose them from those made from high-quality materials, because this will not only extend their service life and will not distract you during work, but will also protect you from injury.
How to work with a sandblasting chamber.
Another container should be placed on the bottom edge, which will serve to collect used abrasive material.
Make sure that it is removable, otherwise the camera will not serve you for long. There should also be a hole on the top edge or at the top of the side edge through which air will flow.
It should be placed on the side where your working hand is, because in this case the risk of injury from the consumable is minimized. Please note that a sandblasting machine made with your own hands must fit into a container, and for this you need drawings.
To make it convenient to work in a container, it is worthwhile to provide lighting in it. There are no specific requirements for choosing lamps; you can choose the one with which it is most convenient for you to work. Most often, fluorescent lamps are installed in the chamber.
You will also need to make a hole with a flap or door through which you will supply the parts for processing. Remember that not all sizes of parts will fit in this chamber, and if the part is too large and inconvenient to work with in the chamber, you will have to work with it outside using sandblasting machines. To learn how to make a sandblasting machine with your own hands, you can watch the video.
Selecting consumables
Oddly enough, ordinary sand is not suitable for a sandblasting machine, because its particles are different from each other, and this can negatively affect the final result.
Too large particles in regular sand can cause serious scratches. The solution to this issue is an abrasive mixture, which can be found in almost any specialized store. They may differ in particle shape and size. All this affects the intensity and quality of processing, but it is worth considering that not every mixture is suitable for very soft surfaces.
Hand-cleaned coastal sand can also be used as a mixture.
As soon as sandblasting devices appeared, it was customary to use ordinary sand for them, because it is one of the most affordable consumables for purchase.
Currently, it is recommended to move away from previous traditions, because the market offers other, more effective mixtures, and besides, sand is quite dangerous for the human lungs.
In some countries of the European zone, the use of this material is even legally prohibited due to the fact that it can cause harm to humans.
What we must not forget
Important! If the calculations are incorrect or if there are defects in the design, using homemade sandblasting is dangerous. A ruptured abrasive container or a ruptured valve can result in casualties. When working with the device, always cover exposed areas of your body with thick clothing. You should also wear thick rubber gloves on your hands.
Do not work without a helmet with air circulation or a mask and respirator. Otherwise, dust and other contaminants will enter the respiratory tract.
Make sure that the sand dosing valve is always open.
Safety precautions when operating a sandblasting machine
A sandblasting machine is a potentially dangerous unit; when working with it, it is important to follow safety precautions to avoid injury:
- Be sure to use a respirator, safety glasses and gloves. Inhalation of sand dust can lead to severe respiratory illness. Make sure that your family is not near the work.
- Before you start cleaning the surface, check the strength and tightness of all connections of the device. This must be done every time.
- Do not forget to open the sand supply valve before turning on the compressor.
- To achieve the best effect, direct the abrasive stream at an angle of 90° to the surface being treated.
- During operation, make sure that the hoses of the device are not stretched.
- Check the quality of the abrasive and the uniformity of the sand before pouring it into the container. The sand must be dry.
- To avoid accidental shock, ground the device before turning it on.
- To ensure effective work, it is recommended to maintain a right angle when cleaning any surfaces.
Sources
- https://HouseChief.ru/kak-sdelat-peskostrujj-svoimi-rukami.html
- https://kraska.guru/specmaterialy/korroziya/peskostrujnyj-apparat-svoimi-rukami.html
- https://dom-i-remont.info/posts/obshhie-voprosy/peskostruy-svoimi-rukami-shema-printsip-deystviya-sovetyi-i-instruktsiya/
- https://podelki.expert/peskostrujnyj-apparat-svoimi-rukami/
- https://fishki.net/3491572-samyj-prostoj-peskostrujnyj-apparat.html
- https://WikiMetall.ru/oborudovanie/peskostruy-svoimi-rukami.html
- https://svoimirykami.guru/peskostruj-svoimi-rukami/