17.03.2020
- Types of cutting elements
- Milling cutter material
- Cutter tooth geometry
- Application area
- Technical characteristics of the sharpening machine
- Design Features
- Advantages and disadvantages of using the device when sharpening spiral, disk and other cutters for wood and metal
- Process on the machine: how to properly sharpen cutters for wood and metal
- The process of manual sharpening according to the type of cutter
- Sharpening cylindrical cutters
- Work quality control
In the production process, when working with metal or wood workpieces, machines are an important part. They are equipped with cutting elements. There are many varieties of tools - several thousand items, different in purpose, shape, size. And purchasing new equipment every time at the moment when the edge becomes dull is economically unprofitable. And working with a dull cutter means either breaking it completely, or damaging the equipment itself, ruining the sample. Therefore, regular sharpening of cutters for metal or wood is necessary, and we will tell you how to sharpen tools of different types (end, end, conical, disk, etc.) and at what angle in this article.
Types of cutting elements
Milling is a delicate process that requires a special approach, so craftsmen very carefully select equipment, focusing on different needs. Depending on the material being processed, there are:
- for metal;
- on wood;
- for plastics;
- on glass.
The second important feature is the purpose; cutters are distinguished:
- angular (for corners);
- shaped - depending on the part being processed;
- keyed - to create a special groove with the appropriate name;
- for recesses in the material in the shape of the letter “T”;
- cutting machines for dividing the sample into parts, etc.
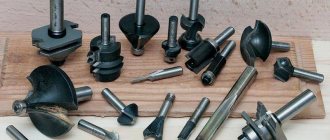
Also, when purchasing products, the first thing that is usually called is the shape of the cutter; it can be:
- cylindrical;
- conical;
- disk;
- terminal;
- worm, etc.
It is difficult to list all the types, since for each milling procedure you can buy or even grind your own tool. There are several tens of thousands of items in total, and their range is constantly growing along with increasing production needs. In each variety, the cutting base is quite large in length, regardless of how it is located. Therefore, it is very difficult to ensure correct and uniform sharpening. Sometimes this requires special tools, in other cases meticulous sanding by hand is more suitable. Lack of experience or work done poorly for other reasons can lead to chips, scratches and cracks on the surface on the cutting edge.
How to achieve high quality end mill sharpening
The rules listed below are aimed at complying with the established standards of permissible runout and obtaining tools without defects.
- The total runout of the machine spindle, mandrel and fixture must be less than the permissible runout of the cutter being sharpened.
- It is necessary to ensure accurate seating of the grinding wheel. Otherwise, vibrations will not only lead to sharpening defects, but will also accelerate wear of the abrasive device.
- Feed mechanisms should not jam.
- The fixed cutter must be moved as smoothly as possible.
- Machine spindles must have sufficient vibration resistance.
- They need to be well lubricated to ensure they rotate as easily as possible.
- Axial and radial runout should not exceed 0.01 mm.
Milling cutter material
Before you start sharpening, be sure to find out what the tool was made from. This may be the following materials:
- Diamond is the strongest mineral of natural or artificial origin, leaves an even cut, is not used so often due to its high cost, and is highly efficient in production with a high class of accuracy.
- Metal ceramics. The advantages include high wear resistance, as well as the fact that the ceramics practically do not heat up (metal with a low melting point does not deform), and also does not actually become clogged with chips.
- Alloys of increased hardness. Their advantage is obvious - they are very hard, so they can process metals with high strength.
- High speed steel. Typically made with high tungsten and/or molybdenum content. The durability grades P9, P12 and P18 are used.
- Carbon instrumental. It is not used very often, since the operation of this type of cutter is possible only at low speeds to prevent deformation.
- Alloyed. It is also allowed infrequently - for shaped cutters that need to process the workpiece at low speeds.
- Hard alloys. They can be used at speeds that are 5-10 times faster than high-speed cutters. At the same time, they do not lose the quality of the cut and can be used even at temperatures above 80 degrees. This can be achieved by titanium, cobalt, tungsten and other elements in the composition. Sharpening of carbide cutters is carried out according to the usual principles; moreover, one tool is enough for a larger amount of work.
Hardness.
Often, when processing wood or plastic, the question arises: if the hardness of the cutter is much higher than the material of the part, then why sharpen the end mill; in theory, it should not become dull.
However, in everyday life we don’t think about why a table knife needs to be sharpened after cutting very soft products, such as bread or sausage. Sharpening occurs quite often, sometimes several times a month. How many times do you sharpen your knife? At the same time, everyone has long known that a sharp knife will cut, and a dull knife will crumble and crush. The same goes for end mills. What materials are hard enough to make cutters? For example, carbon steel or high-speed steel, since their hardness is approximately the same (62-65 HRC for carbon steel, 62-67 HRC for high-speed steel). Carbide is also suitable, because carbide has even higher hardness.
But besides hardness, there are several other characteristics that limit the use of certain materials. For example, end mills are not made from carbon steel. It was discovered that at temperatures above 170 degrees, steel tempering begins. At the same time, the hardness rapidly decreases. For high-speed steel, the critical temperature starts from 490-540 degrees, for hard alloy from more than 900-920 degrees. Therefore, carbide end mills have higher tool life. In science, this phenomenon is called “Red fastness”.
Cutter tooth geometry
Even the most complex metalworking tasks can be solved using a special configuration - this ensures the cutting of end elements of different shapes, for example, the letter “T”.
The geometric solution of the spiral cutter is interesting. The inclination of the teeth can be different, this determines the essence of the operation (finishing or roughing), as well as the cutting step. A small angle is considered to be up to 35 degrees, and a large angle is considered to be more than 35. The standard version is a tilt of 38°.
Sharpening special tools
Sharpening a special tool has its own objective differences associated with additional stages of the regrinding process.
Tool identification and description
The first step in sharpening special tools is to correctly measure and calculate the required tool geometry parameters. Such measurements are only possible with specialized measuring centers such as ZOLLER Genius3 and WALTER Helicheck.
Measuring centers in this segment are powerful universal measuring instruments for all types of cutting tools.
- Five CNC-controlled axes allow complex, precise and fully automatic measurements without human influence
- Fast and highly accurate tool geometry checking
- Detailed report on measurement results
- Data transfer to the grinding machine without operator intervention
Development of a set of drawings and sharpening program
The information obtained as a result of the measurement is processed and transferred to the tool sharpening program development system. Experienced designers perform all necessary calculations and tool modeling using 3D design tools and carry out simulation and test runs of the program on accurate models of the grinding machine.
Sharpening on a CNC grinding machine
Next, the sharpening program is sent to the grinding center where the operator carries out adjustment and grinding.
For sharpening, machines from famous world leaders such as Reinecker, SAACKE, Deckel, ANCA are used. Thanks to timely maintenance and updating, as well as the professionalism of our CNC operators, we guarantee our customers the required precision and quality of grinding.
Coating
Together with our partners, we apply a wear-resistant coating to the tool using the PVD method (ion plasma deposition in a vacuum). The result is increased durability and quality of processing.
Without a doubt, we will help you choose the appropriate coating for your tool; our specialists will select the optimal type of coating for your specific metalworking task and material.
Specify tool coating as an option on your next tool sharpening order and you'll see results in no time.
anaj.ru
Application area
Metalworking and woodworking are such common procedures that there are practically no industries where machines are used to some extent. Now the best equipment is CNC. They are the most accurate, fastest and energy efficient. You can purchase them on the website.
Areas of use of milling:
- equipment production;
- production of pipes and rolled metal products of other packaging;
- aerospace factories;
- furniture and interior items;
- fasteners and hardware;
- auto industry and much more.=
They differ in scope depending on the purpose, look at the image:
Features of sharpening various types of cutters
For metalworking, cutters made of tool or high-speed steel are used. The teeth can be made of carbide materials and secured by soldering. Processing such materials is complex, so sharpening of cutters for metal, especially those with complex cutter shapes, is carried out using specialized equipment. To operate effectively, the machine must rotate and translate the item being sharpened relative to the abrasive wheel and allow the angle of their contact to be changed.
Sharpening of wood cutters (relevant for end cutters) can be done manually with a block or on a regular sharpener at low speeds. The main task is to ensure uniform surface treatment and maintain the original angle. It may not work out at first, but with experience you can achieve good results.
Sharpening spiral cutters is one of the most complex operations and is performed with a cup grinding wheel on a sharpening machine. It is carried out along the back surface of the teeth; a stop is used to ensure a stable angle, otherwise the geometry of the cuts will change and there will be strong runout. The circle is set at a slight angle, the depth of the layer for removal is about 20-40 microns, for cleanliness the pass is carried out 2 times. Sharpening end mills for metal is carried out in a similar way, but an operation with end teeth is added, each of which is set strictly horizontally, the circle moves along at a given angle, while it is important to maintain uniformity of operations for all cutters. Sharpening of hob cutters for metal is carried out depending on the shape of the teeth: for those sharpened along the back, for backed ones at the front.
The service life of cutting tools and the quality of processed surfaces directly depend on the timeliness of sharpening. When working with a dull tool, there is not only an increase in the time required to perform operations, but also a violation of the temperature regime, which in turn leads to deformation of the material being processed and the cutter itself. The process is growing and there may come a time when restoration becomes impossible, and the purchase of new ones will lead to financial costs and possible downtime. The costs of additional sharpening equipment with the active use of a large number of cutters will quickly pay off.
How to properly sharpen a cutter for metal: several ways
The main task is to process a curved surface of great length on both sides. In this case, the cutting tool is an abrasive substance. It should be directed directly along the edge (at the correct angle).
How to sharpen using a machine
Technologically, this process occurs in several stages:
- Securing the tool in the desired position in the moving part of the bed.
- Bringing the cutting element to the rotating abrasive wheel until uniform sparking appears.
- Trimming a metal layer up to 50 microns wide.
In this case, the following recommendations must be followed:
- Each tooth needs individual sharpening.
- The movement should occur from the beginning of the furrow to the outer edge.
- All cycles must be carried out in the same way to achieve complete uniformity in the cutting edge.
How to sharpen cutters using sharpening wheels
This is special equipment, the nozzle of which is made of an abrasive substance and is a closed belt:
The peculiarity of turning lies in the correct choice of material. What abrasives do they sell:
- White or classic electrocorundum. It is most often used for ordinary wood or metal cutters.
- Elbor – processes high-speed steel well.
- Silicon carbide or diamond (natural, synthetic) copes well with carbide products.
Recommendation: use cooling lubricants to reduce the thermal effect of friction force.
Using improvised means
To do this, you need a homemade device or a table for a hand router.
Algorithm of actions:
- Using a special liquid, it is necessary to clean the surface of the tool from carbon deposits. To do this, you need to place the cutter in a container and leave it there to soak for 3 minutes, then clean it with coarse bristles.
- Using a diamond stone, grind the edge at the front to ensure longitudinal movement.
- Wipe the finished equipment with a soft cloth to remove metal dust.
Sharpening and control of cutters after sharpening
Sharpening cutters is the final operation to obtain the specified geometric parameters, as well as to restore cutting properties lost as a result of tooth wear. Correctly performed sharpening increases the durability of the cutter, and therefore reduces the consumption of cutting tools. During operation, cutters should not be brought to wear levels exceeding the established optimal values accepted as the criterion for dullness. Therefore, it is necessary to monitor the condition of the cutting edges and sharpen the cutters in a timely manner, avoiding excessive wear or breakage of the teeth. Sharpening of cutters is carried out on universal sharpening machines or on special sharpening machines. To ensure correct sharpening of cutters, compliance with established standards of permissible runout, ensuring the established quality of surfaces and cutting edges, it is necessary that sharpening machines and devices meet the following requirements: 1. The spindles of machines and devices must have sufficient vibration resistance, be well lubricated and rotate easily, axial and radial runout should not exceed 0.01 mm. 2. Feed mechanisms must operate without jamming in all directions, have minimal clearances and ensure easy and smooth movement of the attached cutter. 3. Replacement spinels and washers for attaching grinding wheels must ensure accurate fit of the grinding wheel or finishing disk on the machine spindle, without causing vibrations during sharpening and uneven wear of the wheel or disk. 4. The total runout of the machine spindle, fixture and mandrel must be less than the permissible runout of the cutter being sharpened. The correct choice of grinding wheel and sharpening modes makes it possible to obtain the specified geometric parameters of the cutting part and the required quality of the sharpened surface, which is associated with an increase in the cutting properties of the cutter. In table 27 shows the characteristics of an abrasive tool and approximate sharpening modes for tools made of tool steels and tools equipped with carbide plates and mineral ceramics. Sharpening cutters made from high-performance high-speed steels - cobalt and vanadium - differs significantly from sharpening cutters made from high-speed steel P18. These steels are characterized by poor grindability and increased susceptibility to burns.
Sharpening of tools with a screw tooth, including cylindrical cutters, is carried out on universal sharpening machines. Cylindrical cutters with pointed teeth are sharpened along the back surface with cup and disk circles (Fig. 265). When sharpening, the cutter is put on a mandrel. The axis of the cup wheel is set relative to the cutter so that the circle touches the cutter being sharpened on only one side. For this purpose, the end plane of the cup circle is tilted at an angle of 1 - 2° to the axis of the cutter (Fig. 265, a). To form a clearance angle, the axis of the cup circle is positioned below the axis of the cutter being sharpened by an amount H (Fig. 265, b), which is determined depending on the diameter of the cutter and clearance angle and according to the formula H = D/2 * sinα. If the axes of the cup wheel and the cutter being sharpened are located in the same horizontal plane, then the rear angle rx after sharpening will be equal to zero (Fig. 265, c). The position of the cutter tooth during sharpening is fixed by a stop, which is installed very close to the cutting edge. Sometimes a special device is used to set the height stop. When sharpening cylindrical cutters with disc wheels, the rear surface of the tooth acquires a slightly concave shape with an increased clearance angle. However, if the diameter of the grinding wheel is chosen correctly, this concavity does not have any harmful effect.
Sharpening end mills
Face mills made of high-speed steel, as well as a number of cutters equipped with carbide plates, are sharpened in assembled form. Sharpening of the main rear surface of end mills is carried out using the end plane of a cup grinding wheel (Fig. 266, a). When sharpening the auxiliary rear surface (Fig. 266, b), the cutter is first installed so that its auxiliary cutting edge is in a horizontal position. Then the cutter axis is rotated in the horizontal plane by the amount of the auxiliary plan angle φ1 and at the same time tilted in the vertical plane by the end clearance angle α1. The front surface of the cutter tooth is sharpened both by the end of the disc grinding wheel and by the periphery of the disk wheel. When sharpening, it is necessary to form the angle values φ, γ, and λ specified according to the drawing.
Sharpening disc cutters
Sharpening disc cutters along the main flank surface is similar to sharpening cylindrical and end mills with a cup wheel. Sharpening along the auxiliary rear surface of the end teeth is carried out in the same way as for end mills. When sharpening end teeth along the front surface, the sharpened teeth are directed upward, and the cutters take a vertical position when the cutter has simple teeth and an inclined position when sharpening cutters with multidirectional teeth. In this case, the angle of inclination of the cutter axis in the vertical plane is equal to the inclination angle of the main cutting edge.
Sharpening end mills
Sharpening of end mills with a helical tooth is also carried out manually on universal sharpening machines. Sharpening end mills along the main back surface is done in the same way as cylindrical cutters with the end surface of a cup wheel, when installing the end mill in the centers. Sharpening along the auxiliary back surface is carried out similarly to end mills with a cup wheel. Currently, a semi-automatic model VZ125 is produced for sharpening end mills with a diameter of 14 - 50 mm of the front and rear surfaces.
Sharpening cutters with backed teeth
Shaped cutters with backed teeth are sharpened only along the front surface. In this case, the value of the rake angle even after sharpening should deviate from the specified value by no more than ±1°, since a change in the rake angle causes distortion of the shaped profile. Cutters with straight grooves are sharpened with the flat side of the cup wheel (Fig. 267, a), and cutters with helical grooves are sharpened with its conical side (Fig. 267, b). In the absence of special sharpening machines, it is recommended to first grind the cutter along the back of the tooth with emphasis on the front surface (Fig. 268, a), and then sharpen the front edge with emphasis on the back of the tooth (Fig. 268, b), to which the cutter is pressed manually. When sharpening For cutters with straight grooves, the stop is installed on the machine table, and when sharpening cutters with helical grooves, the stop is placed on the body of the grinding head.
So that after sharpening the cutting edges have minimal runout, it is recommended to sharpen using a copier that has the same number of teeth as the cutter being sharpened (Fig. 269). Wear of backed cutters on the rear surface is allowed no more than 0.5 - 0.75 mm. If wear is greater, the cutter should be sharpened along the entire profile, which significantly increases the cost of sharpening.
Sharpening of prefabricated cutters (milling heads)
Individual sharpening of the insert cutters of prefabricated cutters can only be done on a sharpener with a tool rest or on a universal sharpening machine with the cutter secured in a three-rotary vice. When securing the cutters in a vice, in order to avoid the formation of cracks in the plates, it is recommended to place a porous rubber gasket between the movable jaw of the vice and the false tooth as a shock absorber. Each insert cutter of an end mill is finally sharpened in one setting. With this method of sharpening, wear of the grinding wheel does not affect the accuracy of sharpening. The rotation of the wheel when sharpening a carbide plate should be directed from the base to the cutter blade to avoid micro-chipping during the sharpening process. In industry, carbide end mills are used, the knives of which are sharpened as an assembly. Multifaceted, non-regrindable inserts used in modern designs of prefabricated end mills are machined along the band and reference plane.
Finishing of cutters
Finishing the working edges of the cutter teeth allows you to reduce the unevenness of the blades and surfaces of the sharpened tool; eliminate blockages of surfaces and give the tool more correct geometry and dimensions; eliminate thin surface layers with burns and cracks that occurred during sharpening. Diamond and abrasive finishing are the most widely used. Diamond finishing is carried out using diamond wheels on a ceramic or bakelite bond; abrasive finishing - with fine-grained wheels of green silicon carbide and boron carbide paste applied to cast iron discs. Lapping is carried out mainly on tools equipped with hard alloy plates and mineral ceramics, as well as cutters made of high-speed vanadium steels on special finishing machines. For example, diamond finishing on a strip of multi-faceted non-sharpening plates is carried out on a special finishing machine model ZV-20 in special cassettes; It is advisable to refine the supporting plane on a surface grinding machine in special cassettes with disc diamond wheels. To improve the quality of tools made from high-speed vanadium steels (R9F5, R14F4, etc.), after abrasive sharpening, it is necessary to use fine sharpening and finishing with diamond wheels on a ceramic or bakelite bond. Diamond grinding cutters made of high-speed steel P18 are recommended to be used only for precision cutters. Finishing of carbide tools with diamond wheels provides a surface roughness of a higher class of cleanliness compared to sharpening with green silicon carbide wheels and finishing with boron carbide. When milling plastic materials with low strength and a strong abrasive effect, diamond finishing can increase the durability by two to five times compared to sharpening only with green silicon carbide wheels. This difference increases with increasing cutting speed. When milling high-strength, hard steels and titanium alloys, especially at low cutting speeds and when using brittle hard alloys, finishing with diamond wheels is either ineffective or leads to a decrease in tool life due to chipping of the cutting edges of the cutters.
Checking cutters after sharpening
Control of cutters after sharpening consists of checking the geometric parameters of the cutting part of the cutter, the runout of the cutter and the cleanliness class of the sharpened or finished surfaces. A number of devices are used to control the geometric parameters of cutters. The main requirement for these devices is ease of operation and the ability to use them directly at the workplace. In Fig. 270 shows diagrams for measuring the front and back angles of a cutter using a protractor. The goniometer consists of an arc 1 with a scale divided into marks corresponding to the number of teeth of the cutter being measured. Sector 2 moves along arc 1 and is fixed in the required position with screw 3. The sector is equipped with degree scales on which the values of the angles are counted: the front ones - on the v scale and the rear ones - on the α scale. A reference ruler 4 is attached to sector 2. The rake angle, as mentioned above, is measured in a plane perpendicular to the main cutting edge of the cutter. Therefore, when measuring, the reference ruler 4 of the protractor is placed in this plane (the main secant plane). In the process of measuring the front angle (Fig. 270, a), the protractor is placed on two adjacent cutter teeth, and the protractor is supported on one of the teeth by the support ruler 4 along the cutting edge of the cutter tooth, and on the other tooth - along the front surface of the tooth by its measuring ruler 1. Ruler 1 in the groove is set in height in accordance with the size of the straight section on the front surface of the tooth. Sector 2 of the protractor is turned until the vertical edge of the measuring ruler 1 (knife side) is aligned with the front edge and in this position is secured with screw 3. The correct installation of the measuring ruler 1 relative to the front surface is determined by light. When installed correctly, there should be no gap between them. The count is made along the right side of the sector with the inscription “front angle” against the stroke with a mark corresponding to the number of teeth of a given cutter (for example, 6, 8, 10, etc.). From Fig. 270, but it can be seen that if, for example, z = 8, then v = 10°, etc. The clearance angle of the cutter is measured in a plane perpendicular to the axis of the cutter. In this regard, the supporting surface of the ruler 4 of the protractor should also be located in this plane. With the support ruler 4, the goniometer rests on the cutting edge of the cutter tooth, and on the other tooth, along the back surface of the horizontal edge of the measuring ruler 1. Sector 2 of the goniometer is rotated until the back surface is “gap-free” aligned with the measuring edge of the ruler, which is also determined by clearance. In this case, the counting is made along the left side of the sector with the inscription “rear corner”, also against the stroke with a mark corresponding to the number of cutter teeth. In the case shown in Fig. 270, b, at z=8, a=27°. The inclinometer error is approximately 1°30′. The runout of cutter teeth is controlled using an indicator in the devices where they are sharpened, in the center heads or in special devices.
When testing, cutters with a hole as a seat are installed on a horizontal or vertical mandrel. During inspection, cutters with a cylindrical or conical shank are installed either in a guide prism or in a device for monitoring the runout of the working part of the end tools. The runout is checked on the cylindrical surface of the teeth, on the end teeth, on the corner edges and on the supporting end. The cutter runout is checked after installing it on the mandrel or spindle of the milling machine. The quality of sharpening or finishing is checked by external inspection using a magnifying glass. The cutting edges of the cutters must be sharp, without nicks or gouges. The presence of cracks on hard alloy plates is determined using a magnifying glass or by wetting the plates with kerosene or blowing sand on them. In this case, if there are cracks, kerosene comes out.
Technical characteristics of the sharpening machine
When purchasing special equipment, you need to carefully consider the following indicators:
- Power supply from 220 V or 360 V.
- Consumption from 200 to 5000 W.
- The spindle rotates without load at speeds from 900 to 3000 per minute.
- Required accuracy class.
- Abrasive wheel feed speed.
- The drive mechanism can be manual or electric.
- What angle can be achieved.
- Are there containers for water or other coolant?
- Availability of a fan.
- The noise level that the machine creates.
- The quality of the protective casing, its strength.
- Floor or tabletop variety.
How to sharpen cutters?
You can sharpen it by hand or using a router bit sharpener.
Rice. 1. Sharpening cutters using a sharpening machine
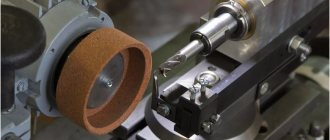
The machine ensures synchronization of different types of movement and fixation of the cutter. For example, to sharpen an end mill, it is necessary to combine translational and rotational movements while maintaining uniform pressure on the tool against the grinding wheel. The speed of rotation, the grain size of the abrasive, and its material are of great importance.
- Abrasive wheels made of electrocorundum are suitable for sharpening cutters for metal and wood (manufactured material is high-speed or tool steel of the “Standard” class).
- High-performance high-speed steel cutters are sharpened with CBN wheels.
- Diamond (PCD) and silicon carbide wheels are used to sharpen the teeth of carbide cutters.
It is important to consider that strong heating reduces the hardness of abrasives and leads to a partial loss of cutting properties. Below is a table of the thermal stability of the main materials used for the production of abrasive wheels
Rice. 2. Table of thermal stability of basic materials
To cool the sharpening tool during operation, water alone will not be enough - the machine will rust. Experts advise adding soap and soda ash, nitrite, sodium silicate, etc. to the water. — electrolytes create a protective film on the surface of the grinding wheel.
There are more than 20 grinding wheel configurations for sharpening milling tools. The back planes of the incisors are ground with disk-shaped or cup-shaped wheels, the front ones - flat or disk-shaped.
Rice. 2.1 Basic forms of grinding tools made from STM in mechanical engineering
Design Features
Classic equipment set:
- drive – electric motor;
- belts and other elements of V-belt transmission, with which you can regulate the rotation speed;
- circle, ring with applied abrasive;
- a shelf or other stand for attaching equipment;
- automatic start box and gear shift.
Types of tools used
Large enterprises use various types of tools:
- Cylindrical - for processing workpieces on machines equipped with a horizontal spindle.
- Face - for milling workpieces on machines with a vertical spindle.
- End - for driving ledges, recesses, contours (curvilinear). Used on installations during vertical milling.
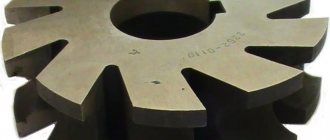
- Disc - for driving grooves and grooves on horizontal machines.
- Keyed - for making grooves on machines with a vertical spindle.
- Angular - for milling planes (inclined), grooves, bevels.
- Shaped - for processing shaped surfaces.
To process workpieces, equipment designed for the following work is used:
- for metal;
- on wood.
Milling cutters with appropriate equipment are produced as sets with mounting dimensions of the fastening part of different diameters. In order for a cutter to be used for a long period, it must always be sharpened, and when carrying out work, a temperature regime is required that does not allow overheating, which reduces their strength characteristics.
Safety regulations
Follow the recommendations:
- work exclusively on well-established equipment;
- ensure good grounding to avoid possible electric shocks;
- think about fire prevention (no flammable objects near the sparks) and fire extinguishing;
- use personal protective measures.
Main characteristics
Since finger cutters are designed for processing any surface, each of them has its own characteristics. These include:
Wood end mill
Milling tools for wood processing are made of steel, which has increased strength and has the exact shape of the pattern of the working part. But it is worth noting that depending on the surface being processed, it is necessary to select the appropriate type of cutter. For example, to work with plywood you will need a cutting part made of harder alloys, which increases the work process.
In addition, they also have several varieties, namely they are solid and prefabricated. The latter have quite a significant advantage, since they have the ability to set the knives to the required size and are very easy to replace if necessary.
One of its advantages is that it can be used to insert door hinges. First of all you need:
- To mark the loop, to do this, you need to attach it to the location and mark it, best with a paint knife. But it is recommended to attach the hinges to several self-tapping screws so that there is no displacement.
- Then you should press two small bars against the door, thereby making a place where the soles of the cutter will rest.
- After this, a slot cutter with a straight attachment is loaded into the tool. In this case, the work must be carried out carefully so as not to go beyond the marked marking lines.
- To establish the required hinge cut on a hand cutter, it is necessary to set the appropriate depth. The correctness can be checked on any wooden block, and only then carry out actions on the surface of the door.
- After cutting out the door hinge, it is necessary to process the made recess with a chisel, if necessary.
- When all the grooves for the hinge are made, you can install the doors.
For PVC and aluminum
This variety is intended for processing these materials and is used for:
- milling drainage surfaces;
- milling a groove for a lock;
- processing of PVC and aluminum profiles;
- cleaning grooves for seals.
As for the milling cutter for aluminum, it has a specific structure, since this material has certain features, namely the adhesion of chips, which complicates the process. Due to its specificity, such a tool eliminates the possibility of inaccuracies or distortions in relation to the specified parameters.
For metal
Basically, such equipment is used in production and is considered simply an indispensable tool. Its main purpose is:
- Milling grooves for locks.
- Cleaning the grooves and special grooves into which the seal will then be placed.
- Creating drainage holes.
- In addition, it is widely used in the automotive industry for work requiring milling.
Diamond cutters
Any work on surface treatment requires compliance with GOST, which, in turn, improves quality
Particular attention is paid to actions related to concrete and stone surfaces, both internal and external.
Therefore, diamond cutters are ideally suited for grinding operations. Thanks to this tool, work with such surfaces is carried out with the highest quality possible, while spending very little time.
Among the varieties of this type, the diamond finger cutter is used for work on granite and marble. This material is quite strong in structure, and with the right selection of tools, you can work not only on granite and marble, but also on other stones. In addition, the diamond cutter is quite durable, which allows you to save money on frequent replacement of the worn-out working part of the tool.
Regardless of the work performed, it is worth considering the fact that for each type of material used, an appropriate cutter is required. The thing is, depending on the structure and hardness of the material, it is necessary to select the appropriate diameter of the tool
In addition, it is very important to take into account the speed of its revolutions. This is due to the fact that the higher the speed, the more the tool heats up.
For example, if steel with a strength of HRC 38-47 is processed, and the metal cutter has a size of 3 or 6 mm, then the speed of rotation should be 25-25 m/min. But if it is necessary to produce on heat-resistant alloys with a strength above HRC 47, and the diameter of the cutter is similar, then the speed must be reduced to 10-15 m/min.
Video: sharpening finger cutters for a hand router.
Process on the machine: how to properly sharpen cutters for wood and metal
Take a close look at both chucks, one is designed to accommodate a two- or four-flute cutter, and the other is designed for a three-flute cutter. When processing, pay attention to accuracy and uniformity; proper operation will ensure an increase in service life.
Sharpening on a ribbon
First, select a collet chuck that matches the diameter of the tool and the required cup socket. The collet should be inserted into it and tightened with a nut.
Then use the screws to adjust the distance of the metalworking strip. The size can be changed by moving the bottom of the nest down. And at the right place just tighten the screw connections.
Next, the cutter is placed in the chuck, and the required sharpening angle is set. Fastening is done using grooves and pins.
After turning on the feed, you can regulate the movement and layer of metal removal.
Sharpening a cut-off cutter along the end
The machine has a special separate socket for these purposes; we place the tool in it. Moreover, the choice of cartridge depends on how hard the material is - the higher the strength, the larger the socket. The element is processed until the noise stops completely. The item is then transferred to another metalworking fixture from the ends and back.
Sharpening prices
The sharpening price includes the following services:
- Trimming and restoring the end of a drill or cutter
- Sharpening the cutting part (ribbon) and flute
- Removing chips from the cutting part
In addition, we offer clients a “Report” for sharpening cutting tools to optimize costs when using cutting tools, both temporary ones when setting up a machining center, and financial ones associated with equipment downtime. Measurement and reporting is a separate option and is paid separately.
You can find prices for services for sharpening cutters and drills in our price list available on the website or download the pdf version.
Prices are for turnkey sharpening, no additional coefficients or increase in final cost
anaj.ru
The process of manual sharpening according to the type of cutter
Now let's briefly talk about the features of the tool depending on its configuration. The main problems are that it is not always easy to ensure uniform processing along the entire length of the cutting edge.
The peculiarity of manual sharpening is that the emphasis is provided not by the vice of the machine, but by a special device.
End
The cutting elements are located at the end and side. This allows you to make grooves along the edges. Processing takes place according to the following algorithm:
- Fastening of the cutter is horizontal in relation to the rotating one.
- Tilt it enough to achieve the required angle.
- The circle rotates with high amplitude.
- During installation, note the position of the cutting part upwards.
Sharpening end (finger) cutters
This is an elongated tool whose shank has a cylindrical or conical shape. Due to its appearance it has also been compared to fingers. Actions:
- Select a diamond stone to place on the edge of the table.
- If the tool has a large enough recess, then it should be secured along the tabletop.
- As you sharpen, the edge will become sharper and the diameter will decrease.
Recommendation: if the package includes a bearing, then it must first be dismantled, and in any case it would not be superfluous to clean the surface with a specialized solvent.
Disk
Essentially, it is a disk with teeth around its circumference that must be directed upward. If it is simple (unidirectional), then the cutter itself should be positioned vertically. And in the case of a versatile direction, the sharpening angle is the same as the angle of the cutting teeth.
Prefabricated
Their design assumes the presence of removable plates. Each one should be sharpened separately. It should be taken into account that they have several elements for processing - these are rear, main and auxiliary corners, as well as a transition edge.
Cutters with backed teeth
Such an instrument has a flat front surface, and the back is made in an Archimedes spiral. In order to sharpen the product, you must use a disc wheel. Each tooth must be ground down along its outer base, and it is also important to ensure that the same layer of metal is constantly removed.
End mill sharpening angles
To properly sharpen an end mill, you first need to study the geometry of the teeth. They are backed and pointed.
Image No. 1: pointed (a) and backed (b) teeth
The back surfaces of the backed teeth are made in Archimedean spirals. Sharpening of such cutters occurs along the front surfaces.
In pointed teeth, parts of the rear surfaces are planes. Most often, such cutters are sharpened along the rear surfaces. The front ones are treated if necessary.
Let's talk about the geometry of the teeth in detail. Each of them has 4 important parameters.
Image #2: tooth geometry
Surfaces and sharpening angles of end mills.
- Site f. It is this that undergoes the main wear and is sharpened when processing the back surface. The size of the pad directly affects the friction force between the tool and the workpiece. Therefore, the width must be maintained within a certain range.
- Auxiliary clearance angle α1. The cutters are sharpened along it at certain levels of wear and a strong increase in the size of the pads f.
- Main relief angle α. This is the angle between the tangent to the flank surface at the point in question on the main cutting edge and the tangent to the circle of rotation of that point. The purpose of this angle is to reduce friction between the tool and the workpiece.
- Main rake angle γ. Located between the axial plane and the tangent to the front surface. For cutters designed for processing viscous materials, the size of this angle varies from 15 to 20°. Mills for processing steels have an angle of 0 to 5°.
Note! The teeth are either straight or helical. The amount of inclination is characterized by the angle λ. It is located between the axis and the deployed screw edges.
Sharpening cylindrical cutters
The cylinder shape is the most commonly used. Cup circular abrasives are used. You need to attach the equipment to the machine in the center. It should be positioned relative to the rotating circle horizontally and slightly below the axis. Be sure to secure the position with a stop.
Carbide
Grinding is used first; microcracks may form during the process. To eliminate them, finishing is used with the task of removing the layer that was damaged. For this, cast iron discs are used that rotate at a speed of 1.5 meters per second. Finely dispersed carbide paste is used as an abrasive.
Finishing of end mills
If, after sharpening, microcracks are found on the surfaces of the end mill, fine-tuning is applied. Its main purpose is to remove the defective layer. The second task is to improve the cleanliness of surfaces. In addition, during finishing, blockages of the tooth surfaces are eliminated.
Such operations are carried out on sharpening and finishing machines with cast iron discs. With their rotation speeds of 1 to 1.5 m/sec, the best results are achieved. For finishing, boron carbide paste is most often used. Grit size - from 170 to 230.
Photo No. 3: sharpening machine
Diamond wheels can also be used for finishing. When using them, productivity increases by 1.5–2 times.
