Electrolytes for galvanizing
There are two types of electrolytes used in electroplating:
- Simple acidic (chlorides, sulfates, hydrofluorides), in which zinc is a hydrated ion.
- Acidic and alkaline complex compounds (zincates, cyanides, pyrophosphates, ammonia), where zinc is present in complex positively or negatively charged ions.
The rate and quality of zinc deposition on the cathode is determined by the composition and origin of the electrolytes. The most popular method of metallization is carried out using simple weakly acidic electrolytes. In this case, a more dense current is used than in the case of complex electrolytes. As a result, coating rates are faster.
Types of electrolytes for galvanizing
The use of this type of electrolytes provides good coverage and appearance of the processed products, and also avoids hydrogenation. However, simple weakly acidic electrolytes also have a drawback - they provide fragile coatings, suitable only for parts with a simple configuration.
When complex electrolytes are used, increased ion dispersion, increased hydrogen evolution and electric current density are observed. The use of such electrolytes makes it possible to obtain uniform and high-quality coatings on parts of any level of complexity.
Pros and cons of cleaning
Electrolysis, as a method of combating rust, is absolutely safe. The electrolyte solution is not poisonous, but should not be ingested.
The gases released are not toxic. The currents used are of low frequency, so they cannot cause harm to health.
Another advantage of the method is that there is no risk of damaging the part. Even if you keep it in the solution, nothing bad will happen; the self-healing process will not reverse because of this.
In comparison with mechanical and chemical methods of rust removal, electrolysis has one very important advantage. This method does not affect “living metal”, that is, one that has not yet undergone changes.
Abrasives, brushes, acids and other aggressive methods inevitably lead to the fact that some part of the undamaged metal will be removed, but this does not happen during electrolysis.
The disadvantage of this method is that it is not always convenient to use in practice. For example, it may be difficult to clean large parts because it is difficult to find suitable containers for them.
In addition, you will have to spend some time not only on preparatory measures, but also on the cleaning itself.
Helpful information
To ensure that the process of removing rust from metal by electrolysis is as successful as possible, you need to take into account the following tips:
The part should only be processed in a plastic container. Metal buckets or basins are not suitable for this purpose. Their use carries the risk of short circuits or holes.- If there is pitting corrosion on the product, you should not try to remove it by electrolysis. The electrolyte is not able to penetrate the thickness of the metal.
- Once processing is complete, no special disposal measures need to be taken. The solution is simply poured into the sewer; this will not cause any harm to the environment.
Essence of the method
The active cathodic protection method is based on the same principle that provokes electrochemical corrosion. Briefly, it is as follows: every metal, like a chemical element, has an electric charge on its surface, formed by the interaction of atoms of its crystalline structure. Depending on the magnitude of this charge and its potential (from plus to minus), metals are arranged in an electrochemical series. Iron occupies an intermediate position in it. To the left of it are zinc and aluminum. To the right - tin, lead, copper, molybdenum, chromium. The former are destroyed upon contact with iron in the presence of an electrolyte, while the latter destroy the iron itself.
Cathodic protection is an electrolytic method of reducing one metal and destroying another upon mechanical contact. To implement it you will need:
- DC source;
- electrolyte;
- metals with different electrochemical activity towards iron.
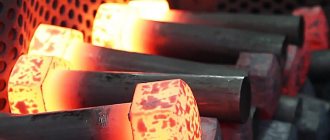
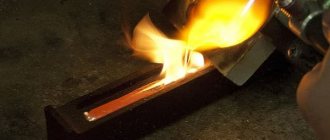
First, the rust is cleaned off in the usual way - with sandpaper, a scraper, a brush. After this, take an electrode that is less chemically active than iron. For example, a strip of stainless steel, usually containing chromium or molybdenum. Connect it to the positive terminal of the car battery or charger. The acid or alkali can be applied to the workpiece or the electrode can be dipped into it. When the electrode approaches the workpiece, seething should begin on the surface of the electrolyte. It occurs due to the release of oxygen during the decomposition of iron hydroxide. The cleaning time is determined experimentally.
To protect the repair site, a layer of more active metal is applied to it. Connect a zinc electrode to the positive terminal and do the same thing, but in the process you can observe how galvanization forms on the surface of the part being repaired.
Wash off the remaining electrolyte, dry, prime and paint.
If you don’t want to bother with finding a suitable electrolyte and electrodes, then use the Zinkor-Auto electrochemical rust removal kit. It has all the necessary ingredients. One package is enough to treat a square meter of body surface.
Removing rust and applying a protective layer of metal to the surface of the body using an electrochemical method will allow you not to think about corrosion for two to three years.
Safety precautions
During cleaning, pieces of rust will fly off the metal.
When using electrolysis, safety precautions must be observed:
- Carry out the procedure in a well-ventilated area, preferably outside;
- It is important to ensure that the entire apparatus is grounded: the utensils must be rubber or plastic, and your hands must be wearing thick rubber gloves;
- The wires should not have random contacts, so as not to disrupt the connection; it is also important not to mix up the terminals;
- If a rusty object has any value, it is better not to use the electrochemical method for cleaning; you should stop at cleaning with a chemical agent, since there is a high probability of not keeping track and ruining it.
Also, we must not forget about safety precautions when working with electricity.
Important! Ready-made Zinkor-Auto rust removal kits are sold, which contain everything necessary to carry out a reaction for 1 square meter. meter of rusty surface.
How to remove rust using electrochemistry
The use of special chemicals allows you to eliminate corrosion without much harm.
Rust can be removed in different ways:
The simplest is mechanical, using a special drill attachment, sandpaper, grinder or file. This method is only suitable for flat and smooth surfaces, since carvings or shaped castings can easily be scratched when removing the top layer. Chemical method using “folk” recipes: citric or hydrochloric acids, apple cider vinegar, Coca-Cola (which contains phosphoric acid). But it is more effective and safe to use special pastes. Under the influence of acid, iron oxides dissolve and turn into salts
However, acids also negatively affect the iron itself, destroying it, and therefore it is important to observe the specified time and thoroughly rinse the parts and dry them. Electrochemical method or electrolysis. The principle of its operation is to pass a weak current through a solution of soda ash, which causes an electrolytic reaction and removal of the affected layer
Iron oxide ions pass from rust into solution and onto a clean electrode - in other words, one chemical element is restored due to the splitting of another upon their contact, the electrolyte acts against rust.
Important! Electrolysis is used in industry and at home
Advantages and disadvantages
The electrochemical method is effective and simple, it can be used at home.
The advantages of the electrolysis method include:
- Safety for the part: the surface of the item will not be scratched by mechanical brushes and will not be damaged when exposed to chemicals;
- Efficiency: this method removes even long-term and multi-layered rust;
- Cheap: despite the apparent complexity, the things necessary for the procedure are inexpensive (for example, you can use any plastic container, draw water from a tap);
- No effort: just connect the wires, turn on the current and check the part regularly. There is no need to make efforts and clean off corrosion with your hands;
- You can clean items from any brand, without restrictions.
An important drawback is the process itself: since you will have to work with electricity and active chemicals, you must follow safety precautions and be extremely careful during the process.
Removing rust using folk remedies
The first remedy is potatoes with salt. The oxalic acid it contains is an invaluable assistant in the fight against rust. To remove a small stain, just cut a potato tuber, sprinkle it with salt, and use it to clean, for example, a rusty knife blade. For greater effect, it doesn’t hurt to hold it on the rust stain for 15 minutes. Then rinse and dry the item.
Salt will successfully replace lemon juice. Squeeze the fruit onto the potato cut and treat the desired areas. Leftover lemon peel is good for wiping the surface instead of using a rag.
The second remedy is vinegar and lemon juice. Mixed in equal parts, they will remove rust from metal in two hours. To do this, apply the mixture to the surface and hold for the specified time. After treatment, rinse and dry the surface.
Vinegar can also be used separately. Pour it into a container and leave the rusty part there for one day. If it is too large and does not fit entirely into the container, apply vinegar using a spray bottle. Once absorbed, remove it with a cloth or brush. Rinse with warm water and leave until dry.
Only regular white vinegar will do. Other types of it can leave stains on the surface of the metal.
The third remedy is baking soda. Not everyone knows that it is good for combating rust stains. The recipe is simple: mix baking soda with water until you get a creamy mixture. Apply to the surface, leave for 15-20 minutes, and then remove with a steel wool. If the rust layer is too large, the procedure will need to be repeated.
The fourth remedy is Coca-Cola. It, like any carbonated drink containing phosphoric acid, can remove rust even on a large surface. There is another “pop” that can cope with rust. These are Alka-Seltzer tablets. With this product, rusty aluminum cookware no longer belongs in the kitchen. Place it in a container filled with water, add 4-6 tablets there. After 5-10 minutes, wash and dry.
The first stage is preparing the device
The initial step that precedes the cleaning of copper and bronze coins by electrolysis is the assembly of a special device. Let's look at this process step by step.
- Preparing the wire from the power supply. The plug is cut off from it.
- The wire is divided into two parts, each of which must be exposed by about 5-7 cm.
- The next step is to identify the cathode and anode, this can be done simply with a glass of water and salt.
- Pour hot or warm water into a plastic glass. This will speed up the electrolysis process.
- Add salt (or soda) and stir thoroughly, since salt water conducts current better.
- Connect the power supply to the electrical network.
- Dip both wires into the liquid and observe the reaction. The one next to which the water begins to bubble slightly (a kind of hissing occurs) is positively charged. The second one is, accordingly, negative.
Having remembered which wire has a positive charge and which has a negative charge, the power supply from the network must be turned off.
Is the method effective?
Electrolysis really helps with rust. It is a mixture of iron oxides and hydroxides, which are formed when the metal comes into contact with water and oxygen.
Without delving into complex chemical processes, we can say that the method allows you to reverse the oxidative reaction and restore previously damaged areas .
Correctly, this method of fighting rust is not called electrolysis, but the electrogalvanic method. It is used not only in everyday life, for personal needs, but also for a more serious purpose, for example, in the restoration of archaeological finds.
Electrolytic plasma polishing
One of the advanced methods of preparing metal products for cars, which allows you to combine several operations in preparation for painting. For example:
- rust removal;
- removal of grease stains (degreasing);
- removal of contaminants;
- surface hardening;
- increased corrosion resistance;
- polishing
This is especially convenient when cleaning areas with complex shapes (for example, car doors), when other options are difficult or do not give the desired effect. Electrolytic plasma polishing is carried out on a special unit, the schematic diagram of which is shown in Fig. 3.
The anode is the car part being processed, to which “+” is connected from the current source, and the cathode, with “-” connected to it, is a metal bath with electrolyte. It is also possible to use a special plate as a cathode; in this case, the material for the bath is usually plastic.Expert opinion
Ilya Vyacheslavovich
Consultant for body repair at krasymavto.ru
Ask a Question
The technology of such polishing consists in the formation around the treated area - the anode - of a vapor-gas shell with a thickness of 50 to 100 microns, in which the electric field strength reaches 105 V/cm. Such a shell, in fact, is the plasma where processes occur.
Due to this, the electric field strength increases near the microprotrusions, and pulsed discharges occur. Microprotrusions are destroyed - the surface is smoothed. Electrolytic plasma polishing occurs at electrolyte temperatures from 70 to 90 °C, voltage 220-350 V.
Devices for electrolytic plasma polishing are produced by industry. They have different power ratings (from 5 to 1000 kW).
The choice depends on the surface area of the part being processed, in our case, on the size of the car part from which rust needs to be removed. The larger the area, the more powerful the installation should be.
What is the best way to clean different surfaces?
How to combat corrosion on non-metal surfaces? Depending on the type of surface on which the rust has formed, the methods for removing it will differ:
- Tile. To clean it, it is better to use improvised means, for example, acetic or citric acid. The composition is applied to the material used to treat the problem area.
- Coins. An ordinary coin can be immersed in Cola by pouring it into a glass. After 12 hours there will be no trace of corrosion left. If the coin is rare, then preference is given to laser cleaning or electrolysis.
- Linoleum. You can remove rust from linoleum using acetic acid. The solution should not be made too concentrated so as not to spoil the floor covering. The maximum processing time is 15 minutes.
- Plastic. You can get rid of rust on plastic using 9% acetic acid. If the stain is deeply ingrained, then the recipe is strengthened with soda.
- Horseshoe. The horseshoe can be soaked in a solution of phosphoric acid for several hours.
- Tools. The heat treatment method is suitable for processing tools. Calcined iron must be cleaned with a wire brush.
- Skates. It is better to clean rusted blades mechanically. In this way, it will be possible not only to remove corrosion, but also to sharpen the skates.
- Cloth. Rust stains from things are removed using improvised means. Preference is given to citric acid. After removing the stain, the clothes are washed. Read about cleaning white clothes here.
- Bath. You can remove rust in the bathroom using household chemicals containing phosphoric acid. An example of such a remedy is Cillit. Another option is to use Coca-Cola.
- Chromium. Chrome surfaces should not be rubbed. To get rid of corrosion, use vinegar, citric acid, or rust converters, for example, WD-40.
- Pan. A cast iron frying pan can be cleaned of rust mechanically using a wire brush.
- Pipe. If corrosion appears on the surface of the product, then resort to mechanical cleaning. When it is inside the pipe, liquid acid-containing compounds or converters are used.
- Knife. The best solution in this case would be sandpaper.
- Cast iron. This metal can be cleaned with baking soda, salt, acetic acid or sandpaper. It is not afraid of contact with acids and harsh abrasives.
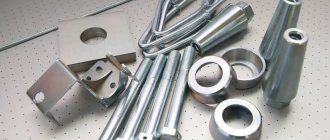
- Automobile. You can get rid of corrosion by electrolysis, or use specialized compounds, such as paint or primer.
Electrolysis cleaning.
We all worry about how to clean iron. And we all do it in our own way. For example, I settled on electrolysis and I think that there is simply no better way. I am sharing with you my method for cleaning iron. Maybe it will be useful to someone. Making a cleaning device takes just a few minutes and is very affordable! I bought myself a universal power supply. I attached two wires to one of the adapters, inserted one inside and, to ensure reliable contact and fall out, inserted a simple match there. I simply wound a wire around the external contact and insulated it. It would be ideal, of course, to solder it, but I’m afraid that the plastic that insulates + and – might melt inside. I put crocodiles on the ends of the wires, it’s up to you to decide which ones you like. The result is a ready-to-use device. Next I give an example of cleaning that I found on the Internet. Of course, I could write it myself, but I’m afraid I won’t be able to write it more clearly than here. How to use it? Elementary! One of the simplest and most accessible methods in a home workshop is described below.
What are the advantages of this method? The advantage over mechanical methods is one, but important! This method does not affect living metal. When you clean with wire brushes, abrasives or acids, some metal is inevitably lost
The electrolytic method removes only rust. What about rusty bolts and studs? Sometimes the method helps in these cases. Wherever the electrolyte penetrates, the process of rust decomposition begins. It is safe? Absolutely! The solution is not toxic (although you should not drink it), the voltages are low, and no toxic or flammable gases are released. The process is self-stopping; overexposure of the workpiece does not pose any danger. What do you need to get started? Plastic bucket, stainless steel or steel electrode (plate), water, washing (soda ash). A teaspoon of soda dissolves in 3 liters of water. How long can the solution be used? A teaspoon for 3 liters? It's easier to pour it out and make a new one. But if you really need it, just add water to 3 liters and continue. What can you say about the electrode? Ideally, the electrode should completely surround the object being cleaned, then the process is very active. It all depends on your capacity. A flat plate will also work. The steel electrode will become thinner over time and will have to be replaced with a new one. A stainless steel electrode lasts much longer. How to connect the charger? Polarity is critical. The electrode must be connected to the positive conductor, indicated by the + symbol. The object being cleaned is a minus. Try to ensure the best possible contact with the object being cleaned. How will I understand that everything worked? Place the electrode in the vessel with the solution. Position the part to be cleaned so that it does not touch or touch the electrode. Turn on the power. If there is an ammeter on the charger, you will see that current is flowing through the system. After some time, bubbles will appear from the surface of the workpiece. How long does the process take? The time depends on the size of the part, the size of the electrode and the amount of corrosion. Remove the part from the solution and inspect it. I take a metal brush and clean the surface under running water. If you are not cleared, continue. Typically, the cleaning process for medium-rusty parts takes 5-6 hours. Very rusty parts can be left overnight. What then to do with the cleaned part? Rinse under running water. Dry the part with a heat gun or place it in the sun. Cover with a thin layer of lubricant. The part is very healthy, can it be cleaned in parts? Yes. What does the part look like after processing? The surface that was corroded will be black; the pitting will not disappear. Pure metal will remain pure. What to do with electrolyte after work? Pour it down the drain. This is not dangerous. Can I use metal containers? Dangerous. Either it will shorten or holes will appear. Better than plastic. What containers can be used? Any you find. Long pieces of iron can be put into a plastic pipe, wide and flat ones - into a trough (but put a film on the bottom so that there is no short circuit. Good luck
Cleaning procedure
To carry out cleaning you will need soda.
The cleaning procedure is not difficult:
- You need to pour water into a container and dissolve soda in it in the proportion of 1 tbsp. spoon of soda per 1 liter of water;
- Clean a small area from the rusty part using sandpaper and connect the negative wire or terminal to it;
- Lower the part into the water so that the part with the connected wire does not go under water;
- Connect the positive wire or terminal to the stainless steel;
- Turn on the current.
After applying current, the reaction will begin. This can be determined by the active release of air bubbles into the water. If there are few bubbles, it means the reaction is weak and it will take a long time to remove corrosion. You can speed up the process by adding more soda.
Important! To speed up the procedure, you can remove the paint and the top loose layer of rust from the rusty part in advance.
The procedure takes place individually – from a few minutes to 10 hours. At times it is necessary to turn off the electricity, remove the part from the water and wash it. When washed, rust flakes will fly off. If the part is clean, it needs to be dried; if not, you can put it back and continue.
Why does corrosion form, why is it dangerous?
Rust is the result of metal oxidation. A chemical reaction is started when iron comes into contact with water. For corrosion to occur, the moisture present in the air is sufficient. The more it is, the more intense this process.
The following factors contribute to its spread:
- Chips in the paintwork. Most metal products are treated with paint to protect them from rust. If any area is exposed, corrosion quickly forms on it.
- Scratches and microcracks on metal. The deeper they are, the more damaged it will be.
- No anti-corrosion treatment. If you do not protect the product, it will rust over time.
There are 4 types of corrosion:
- yellow (appears in a humid environment with oxygen deficiency),
- brown (rare, grows without water),
- black (spreads without water and oxygen, grows slowly),
- red (the most common, occurs due to the influence of oxygen and water on the metal).
The main danger of rust is that it destroys metal. Gradually, the product becomes unusable, rots, and becomes covered with holes.
If corrosion damages mechanical parts, they wear out faster and function worse. Rust also spoils the appearance of any product.
Rust on metal - causes of its occurrence
The first and very important question with which you need to start fighting corrosion involves finding out the cause of its occurrence. Having learned the reasons for the reaction, you can not only choose the optimal method for removing corrosion, but also prevent its reoccurrence.
Why does metal rust? The main reason for the reaction is the composition of the metal. It consists of various compounds such as oxygen, carbon, sulfur and others. It is these components that become the result of the appearance of rust stains on metal parts placed in water or a humid environment.
This is interesting! Pure metals do not rust, and these include gold, silver and platinum.
Metal in contact with air forms oxides, and with moisture - hydroxides. The effect of moisture and oxygen on metal contributes to its destruction, and the thinner the steel, the faster the process of its destruction occurs. This phenomenon is called corrosion, and the result of its occurrence is rust. It is almost impossible to avoid the occurrence of these processes, but various methods and techniques are used to reduce the rate of corrosion development.
Corrosion is a long-term process, so the destruction of metal products requires a long period of time, which directly depends on the thickness of the iron. It follows from this that the main reasons for the appearance of rust on metal are the following factors:
- Exposure of untreated metal to oxygen and moisture. In this case, the part does not necessarily have to be in a damp room. If you store a metal product in a dry and ventilated area, then signs of corrosion will also form after some time.
- Lack of special protective coatings - these include not only varnishes and paints, but also zinc coatings, which provide highly effective protection against the destructive effects of corrosion.
- Type of steel - high-alloy steels are susceptible to rusting with less intensity, which is due to the low percentage of carbon in the composition. However, such steels are quite expensive, so they are used for the manufacture of various high-precision parts or consumables for power tools.
Many people mistakenly believe that a type of steel such as stainless steel does not rust. We will not go into details of the composition of this material, but it is worth noting that even stainless steel is subject to the corrosion process. This is due, first of all, to the fact that the chrome film, which forms upon contact with oxygen, and thereby protects the metal from rust, is damaged, which ultimately leads to the appearance of rust.
To summarize, it should be noted that metal rusting is a normal natural phenomenon, which is a global problem for humans. And we are talking not only about problems with a rusting car body, but also about such global disasters as the sinking of ships, the destruction of bridges, etc., provoked by rusting metal.
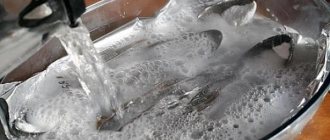
The process itself
Carefully fill the part placed in the bath with the prepared solution, apply current..
..we admire the rising *small* bubbles for a while and leave to do other things. You can come back in an hour to estimate the intensity of the process..
And here is the result, after 4 hours. The current was 7 amperes, 12 volts.
A bracket that was poorly cleaned of rust probably did not make good contact with the wire. What I wrote about above.
This method does not restore the smoothness of the surface; the area eaten by rust will be clearly visible at the end of electrolysis:
A thick layer of rust can remain hanging on the part; just brush it with a metal brush a couple of times - and all these artifacts will fall off without any difficulty, like a cobweb. The part becomes covered with a dark coating, it can be removed either with a metal brush, or by heating the part (if allowed) to 100 degrees. Thin springs because of this coating (I don’t know the details) become fragile and can break. To top it off, there are several links to English-language sites explaining the physics of the process: one, two, three.
That's probably all. Good luck in the fight against rust!
Chemistry plus battery. We chase “bugs” and do galvanic galvanization using garage methods
Our general designer of the “Sierra over 200” project was inspired by another topic - electrochemical cleaning of metal from corrosion and galvanic galvanizing in garage conditions. He has already practiced on his car and is now ready to take on ours. Shall we take a risk?
It must be admitted that the body of our Sierra did not survive this winter in the best way: the rear arches, which had only a couple of “bugs” in the fall, “bloomed” in full force in the spring, and something needs to be done about it. For example, try different ways to eliminate corrosion and further protect against it.
And Sasha offers just this - with the help of a simple set of tools that are available to any car enthusiast. You can learn how to do galvanic galvanization at home/garage from numerous articles and videos on the Internet. Moreover, we note that, in a general sense, such methods differ in detail.
Here is the option Sasha spotted - with its own “zest”: electrochemical cleaning of metal from corrosion and galvanic galvanizing are combined into one process! How does it work - and will it work?
First, Sasha assembles an electrical circuit. He connects another battery to the car’s standard battery using a “lighting” wire. A serial connection (from the “plus” of the base battery to the “minus” of the backup battery) will give a total of 24 volts - supposedly the efficiency of the “installation” will be higher.
Do-it-yourself electrolytic rust removal from metal
You can look at the theory of the process of removing rust from metal on other sites, they will better explain the chemistry of this, but in general terms you create a conductive solution and insert electrodes into it.
You hang a rusty tool in a solution and connect it to the negative power terminal. You apply the positive lead to the electrodes located around it and turn on the power.
The current passes through the solution and in the process, rust flakes are formed - peeling/softening occurs due to the reaction on the surface of good steel, which removes rust from the metal.
Step 1: Gather materials to create a metal rust removal unit
You will need:
This DIY rust removal setup project cost me about $40 because I didn't have access to a small charger. If you have a charger, then for most people, in a decent store full of crap, you can get the rest for next to nothing.
- A clean 5 gallon bucket or other plastic container to suit your size needs,
- 5 pieces of 18″ long 1/2″ steel reinforcement (can be purchased in longer pieces at any hardware store) (DO NOT USE stainless steel),
- 5 feet of insulated copper wire in two colors 12 AWG (diameter 2 mm, cross-section 3 mm2, or so),
- 5 yellow insulating caps,
- Several red insulating caps,
- 5 feet of flexible tying wire (not insulated). See Step 2 - the wire fastening will rust after about a year - you can use something more substantial, or corrosion resistant,
— A box of Na2CO3 washing soda is NOT baking soda,
- Antioxidant (This is not necessary, but I think it helps),
— Small charger or home power supply ($20-$50). It's best if the charger has a 6v option and an internal "kill" switch that cuts off the current if something happens in the circuit,
- Various crocodiles (if the charger is not supplied by decent people...)
— External sockets or extension cords,
— Current leakage protection (this is mandatory, in my opinion - working with electricity and water is stupid if you have protection),
- 5 gallons of water,
— Various clamps/plates,
— Drill with 1/4 drill,
— Tool for cutting and twisting wire,
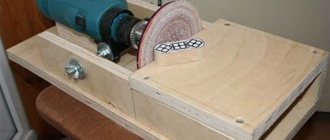
— Wire brush (better if on a grinder or Dremel tool),
— Anti-corrosion spray or light oil.
Step 2: Assemble the container and anodes of the rust remover yourself
NOTE: Do not use stainless steel for electrodes. As a commenter on the inside page noted (thanks!) “Stainless steel chromium will leach out during electrolysis in the form of hexavalent chromium in your electrolyte. It is very harmful to you." That's right—don't even think about using stainless steel for this metal rust removal project.
Step 1: Assemble the tank and electrodes:
1) Distribute the reinforcement evenly around the sides of the bucket (place from top to bottom). Mark the places.
2) Drill two small holes about 1/2 inch apart below the rim for each reinforcement.
3) Insert 5″ of tie wire through the holes, wrap around the rebar, bring the ends of the wire about 1″ out and twist the wire tightly. HELPFUL TIP: Wire knot will eventually rust and fall apart – in less than a year. Consider using something more corrosion resistant - suggestions are welcome. On the other hand, every time electrodes are used to remove rust from metal, they are sacrificial - as is the wiring system that comes into contact with water, etc.
5) Connect the pieces of reinforcement with copper wire to the protruding ends of the binding wire from the outside and close the connections with yellow clips. Do not connect the first and last reinforcement (i.e. XX - XX - XX - XX - XX -)
6) Add 5 tablespoons of baking soda to your DIY rust removal bucket and fill it with clean water to within 2″ of the rim (adding extra baking soda won't help).
Step 3: Setting up hangers and crocodiles to remove rust from metal
Step 2:
1) Find a board (or some non-conductive object) to place on top of the bucket.
2) Attach short copper wires to the alligators so they reach the water. (I simply connected these pieces of wire to a common bus).
3) The large alligator clip should hang low enough to allow it to be connected to a piece on the surface of the water when removing rust from the metal. (The first photo shows three crocodiles - I processed three parts at once).
Cleaning coins and other finds with electrolysis
Hello everyone! Metal detectors come across many different objects made of copper, iron, silver and bronze. And some finds need cleaning. Of course, there are gentle methods, for example, soaking coins in soap, mechanical cleaning, or even boiling in soda. However, there are such advanced cases when the layer of dirt and oxides cannot be overcome by such methods. For example, a coin has been in a fire and neither the denomination nor the year of minting is visible under the hard crust. Or you want to clean rust from a small iron object. Then I can suggest electrolysis as an alternative and quick method.
In general, from the point of view of science, electrolysis is the process of separating the constituent parts of substances on electrodes when an electric current flows through an electrolyte solution. I have heard more than once that it is also called hydrolysis. It is not right. In addition, electrolysis is used in the electroplating of metals with copper or gold. This principle is also used in electroplating - repeating the shape of objects.
And so, before starting the main part of the article, I warn you that you should not clean good real coins, buttons, crosses and other finds with electrolysis. Especially those that cost money and have high historical value. Electrolysis removes the patina and opens cavities. And if the relief of the coin consists entirely of loose oxides, after such cleaning you will end up with a bald round piece!
For electrolysis cleaning, we first need a container into which our electrolyte solution will be poured. Next you need a 9-12 volt power supply. Of course, you can use 5 volts, but the cleaning speed will be lower. To secure coins and finds, it is better to take crocodiles or some kind of improvised clips. By the way, a winding ring from keys and key fobs is suitable for coins. It is better to take a small metal plate as an electrode. To prepare a conductive solution, you can take salt or soda. Salt has one disadvantage - during the reaction, chlorine bubbles are released, which is a dangerous gas. By the way, in the First World War it was used for chemical attacks. So, soda would be safer.
Prepare an electrolyte solution. Pour clean water, preferably distilled, into a glass or plastic container. Put a couple of tablespoons of soda or salt in there and stir. This stage is ready. Now you need to connect the item that needs cleaning and the metal plate. Here we have two options:
- The positive wire clings to the find, and the negative wire to the plate. This way, cleaning will go faster, but there is a risk of overlooking and completely ruining the coin.
- The plus is connected to the plate, and the minus to the find. In this case, the reaction will begin to proceed more slowly and it will become easier to control the cleaning process. Bubbles will actively rise from the object thrown into the solution.
People who often clean something with electrolysis have special jars with contacts and electrodes. I do this process quite rarely and when I need to clean an item, I just take the power supply, clamp, plate and dishes. I connect all this, clean it, and then the whole thing is disassembled again and used for its intended purpose.
This whole thing is connected, the solution begins to bubble and become cloudy. This means everything is fine and cleaning is proceeding as normal. From time to time, remove the object dipped into the electrolyte and check its degree of cleanliness. Also keep an eye on the process so that a short circuit does not occur.
Intermediate result
In this case, I connected a weight found in an abandoned village by simply wrapping the wire around the handle. Simply because the crocodile was not found at home. She soaked in vinegar for a couple of days, but to speed up the process, I decided to use electrolysis, and at the same time write an article about it for the website. In total, it took an hour to clean this find.
Docent86 › Blog › Electrochemical (electrolysis) rust removal. FAQ from Docent86
Good day to all!
The season has begun, more and more people are willing to make new parts out of *Aries, a piece of candy covered with a century-old layer of rust. Well, or almost new;)
It would seem that there are a lot of manuals about this on the Internet, but there are also many pitfalls. Therefore, I decided to tell you about the “rake” that I and not only I have already gone through.
The question is what is the correct name for this method. Hydrolysis or Electrolysis. That's why I prefer to call it electrochemical rust removal.
1) Selection of capacity. Any container is suitable for these purposes. Fuel canister, paint bucket, etc. great fit!
You can even use the pool by lowering the entire body into it))). For large items of a specific shape, you can make a trough from any available material and cover it with film. You can use any metal container (preferably stainless steel). But measures must be taken to ensure that the part does not touch the body.
2) Anode selection. For these purposes, any electrically conductive material can be used. The larger its area, the better! If you need to clean a couple of parts, even a piece of tin will do. But it won't last long. The rust and solution will eat it up in a week or two. Stainless steel turned out to be the most durable. In the photo in the link above you can see that I used a stainless steel plate and bent a frame from it into the shape of a canister. It completely surrounds the part, so the process goes much more vigorously!
If the anode stands on only one side, then the process on this side will be much faster than on the opposite side; you will have to constantly turn the part over.
3) Selecting a power source. I tried a lot, from a power supply for LED strips to a welding machine. The optimal voltage is 12 volts. When decreasing, the process slows down, and when increasing, alas, the acceleration is not noticed. What is more important here is the current strength. The higher it is, the better. But there is a reasonable limit here too! The higher the current, the faster the process proceeds and the faster the temperature of the solution rises. But this does not mean at all that if you take two absolutely identical parts and “cook” them in one container with a voltage of 10 amperes* until the desired effect for 4 hours, and in the second you increase the current to 40, then the part will be ready in an hour. Endurance is also important!