- November 25, 2018
- Equipment
- KaplyaDegtya
For some reason, it is believed that metal bluing cannot be carried out at home, that such an operation is performed only in factories. In fact, this opinion is wrong and at home, using simple improvised means, you can not only protect metal from rust, but also give it a beautiful black or blue color. So, let's look at ways to perform blueing work using a knife as an example.
Features of home technology
It is quite natural that using industrial methods of knife bluing at home is unprofitable from either an economic or technical point of view. In production, steel blueing is achieved by changing the structure of the upper layers of metal using chemicals. Using this method at home is not advisable; there are much simpler, but quite effective ways to blue a knife at home.
Bluening methods
There are three ways to blue steel:
- Cold - when the product undergoing bluing does not experience thermal effects.
- Hot - during the bluing process, the product is subjected to some kind of heat treatment.
- Treatment with an oxidizer is the most difficult method for home use, since it requires not only the use of chemicals, but also heating to high temperatures.
Now let's take a closer look at what techniques for bluing a knife can be used at home. Before using any of the methods, it is necessary to degrease the steel with alcohol and wipe dry with flannel.
Lemon acid
This bluing will protect the metal from corrosion and give it a beautiful black color. The method of bluing steel using citric acid has been used for a long time, but is only suitable for high-carbon metals. In addition, you should know that bluing a knife in citric acid is best done when the knife performs purely decorative functions, since this method of blackening metal is not durable and the entire coating will come off very quickly when sharpened.
In order to blacken a knife using citric acid, you will need:
- citric acid – 1 sachet;
- water heated to 90 - 95 degrees;
- machine oil;
- knife.
Pour hot water into a glass or stainless steel bowl and dissolve citric acid in it in proportions of 1/10, that is, 1 part citric acid to 10 parts water. Place the knife in the water and leave it for about 50 minutes. Move the knife periodically, as the bubbles formed on its surface will impede the access of air and interfere with the bluing process. After 50 minutes, the steel should turn black, which means that the bluing process has come to an end. All that remains is to rinse the knife in clean water, lubricate it with machine oil and wipe dry.
This method of bluing, although it protects the metal from rust, is rather of a decorative nature due to the fact that with the slightest impact, the coating comes off and the procedure for bluing the knife will need to be carried out again.
Coca Cola
Another way to blacken a knife at home is using Coca-Cola. By the way, this drink is very versatile and is most often used not for its intended purpose, but for all kinds of experiments, including with metals. So, to blue a knife in Coca-Cola you will need:
- glass or metal container made of stainless metal;
- Coca Cola;
- knife.
The bluing process is similar to the previous one, but does not require heating. To bluing using this method, you need to place the knife in the drink for a day or two, periodically turning it over and releasing the bubbles. After this time, you need to replace the drink with a new one and re-place the knife there. This procedure must be performed until the knife acquires a beautiful black color, usually within a week, changing the drink every two days. Make sure that the Coca-Cola completely covers the knife by 5 centimeters and do not forget to turn it over periodically, since bubbles accumulating on the surface of the knife will interfere with the blackening process.
After this, you need to rinse the knife well in clean water, possibly with some soap, and lubricate it with machine or gun oil. Without lubrication, rust appears on the metal very quickly; it becomes visible already during the drying process.
This method of bluing is best suited for narrow, flat surfaces; for example, bluing a bayonet in this way will allow you to achieve a more even coating than on any complex surface with many bulges and bends. In addition to Coca-Cola, you can also use Pepsi-Cola. Blackening occurs due to phosphoric acid, which is part of these drinks.
This method of bluing a knife is quite durable. According to reviews, even if small scratches appear during use, the coating does not come off. In addition, the product turns out absolutely smooth, as if it had not been subjected to any influence. The only disadvantage of such bluing is that it takes quite a long time and requires constant contact with the product (it is necessary to turn the knife up to 4-6 times a day), since otherwise the bubbles will result in piebald inclusions on the surface of the knife.
Steel blueing
Hot bluing most often helps achieve a blue color. This happens when heated for a longer time. Initially, the surface acquires white, yellow, purple shades, and the result is a beautiful blue color.
Recipe 1
Burnishing steel at home using this method requires the presence of a forge, ideally with automatic blowing. Birch charcoal should be placed in a metal box, leaving room for the metal that needs to be processed.
This structure is placed in a preheated forge. The metal is smeared with vinegar, wiped and placed in a box when the coal begins to smolder. If a bluish color appears, the part must be pulled out, cooled a little and returned to its place. Such manipulations should be done 3-4 times until the correct shade is obtained.
Recipe 2
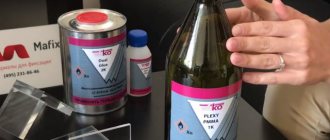
This method of obtaining blue color is carried out without heat treatment. You will need 3 grams of hexacyanoferrate (“red salt” popularly) and iron sesquichloride. For safety reasons, chemical components must be added to water, but not vice versa.
These substances are highly soluble and are strong oxidizing agents. Add them separately to 0.5 liters of water, stir and mix into one substance. We dip the steel into the resulting solution until it acquires the desired color.
Acetic acid
Burnishing a knife in vinegar is practically no different from the two previous methods. The knife must also be placed in vinegar and periodically shaken and turned over to prevent bubbles from settling on the surface of the product.
In addition, if the knife handle is plastic or plastic, then it must be protected from the effects of vinegar, for example, by covering it with paraffin.
Blazing a knife can also be done in heated vinegar, then this method will be more similar not to blackening, but to etching of metal.
You can not completely immerse the knife in vinegar, but wrap the blade in a fleecy cloth well soaked in vinegar, but this method is more labor-intensive, since the cloth must be periodically wetted.
The coating turns out to be quite beautiful, not completely black, but rather dark gray. This kind of bluing of a knife is not particularly durable, so it is best used for decorative knives and other metal interior items.
It should also be said that not any metal can be blackened with vinegar, but only hydrocarbon metal. Therefore, during the first hours, carefully monitor how the steel behaves. If you notice that white inclusions appear on the surface, then this method of bluing, unfortunately, is not suitable for this metal; subsequently the inclusions will not disappear, but will only become more contrasting.
Instructions for liquid etching of a knife
The chemical method is simpler and does not require batteries. A strong aggressive environment is required. It has already been stated that the method is dangerous due to its gaseous emissions. Opening a window or getting a good hood is a must. Safety equipment:
- latex gloves;
- respirator;
- protective glasses;
- smock.
Avoid contact with mucous membranes of the body. Washing with water will not do. A chemical burn is a terrible thing. We've sorted out the equipment, now it's a matter of materials:
- insulating tape;
- nail polish, marker;
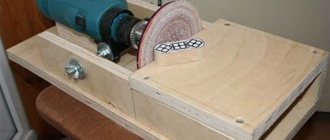
- grinding machine;
- distilled water in a container;
- Plastic container;
- solvent, acetone;
- ferric chloride supply;
- cotton swabs and disks, toothpick;
- sandpaper of various grains.
The knife must be prepared in advance. On a solid product, protect the handle with electrical tape; on a collapsible product, disassemble it and work with the blade separately.
Creating a protective layer
The pattern that needs to be transferred to the product must be outlined with a protective layer. Considering that in the coated area, the reaction will not take place, and the metal will remain light. Initially, make a sketch with a marker and then cover it with nail polish. This is the best option. The varnish can then be adjusted to ensure evenness of the lines and the pattern itself.
Patterns for etching on a knife.
Don’t be shy about fantasizing; the uniqueness of the work performed also depends on the personal qualities of the master. Use varnishes of various shades; they are clearly visible on the surface of the product. Drawings and sketches for etching on knives are freely available on thematic Internet resources, or use the pattern from the picture above.
Preparation of the solution
We make sure to use personal protective equipment. When working with acid, you need to have a solution of soda on hand; it will come in handy if an aggressive substance gets on your skin. The rule of all chemists is to pour acid into water, never in the reverse order:
- The ratio of ferric chloride and water should be 50/50. This is the best option, but to speed up the reaction, other proportions can be used.
- The plastic container should not be filled entirely; be careful when placing the product there. After pouring a little distilled water, pour in the same amount of ferric chloride.
- Label the container with the words "Acid" and be careful with it. A metal container is not suitable; there is a possibility of it reacting with the solution.
Please note that the diluted liquid will serve more than once; you can actually process a dozen blades in it. Once dilution of the solution is complete, proceed to the next step.
Etching process
To obtain a high-quality result, it is recommended to make movements in the liquid when immersing the blade. The process will look like gently rinsing the product in a solution. Touching the blade is strictly prohibited. Leaving it in it for a long time is also not recommended.
The process of etching a knife.
Etching professionals argue that repeated, short-term immersion of the product in an aggressive environment is necessary. It looks like this:
- you should immerse the blade for 20 seconds;
- take it out into the air for the same time as the immersion;
- quick rinsing under water from a tap;
- hold in air for 20 seconds;
- and then again immerse in the solution for the same period of time.
This achieves constant control of the etching; the circular process must be performed several times. The total time of holding the blade in acid should not exceed 10 minutes. It should not be forgotten that all time intervals depend on the steel and the composition of the solution.
At the end of the process, it is necessary to rinse the product well with running water and remove the protective layer with acetone or solvent. Walk the blade with sandpaper starting from coarse grain 400 grit. and ending with 2000 or 2500. A felt wheel on a sanding machine will help bring it to a shine.
Previous
Knife sharpeningVictorinox knife sharpener
Next
Knives DIY knife lanyard
Rusty varnish
Burnishing a knife with rusty varnish has both its advantages and disadvantages. The main advantage of this method is that it is possible to burnish knives that have tin solder on them, since all previous methods are not suitable for these purposes - the tin will either dissolve or will not change its color. In addition, using rusty varnish, you can carry out spot bluing of a knife, that is, blue only certain areas of the blade or handle. The coating layer is quite thick, compared to previous methods, and the steel itself is matte after such bluing.
The disadvantages of blueing a knife in this way are that knives, especially industrial ones, are most often made from various alloys, and rusty varnish is very sensitive to impurities, that is, each metal in the alloy will be painted in its own color and red-brown and brown spots. If you notice such an effect when applying varnish, it is necessary to remove the varnish as quickly as possible, even before oiling the surface, otherwise these stains will not be removed later and the knife will be damaged.
Other significant disadvantages include the fact that this method of bluing a knife is sensitive to various nuances of the process: the quality of degreasing, drying temperature, and bluing time. In addition, the bluing process is quite lengthy and requires your direct presence, since the varnish must be applied several times and each time after drying, steam it, and then rinse under running water. All these procedures must be repeated until you are satisfied with the final result. After that, you need to place the knife in boiling oil for about 5 minutes, and then wait for it to cool completely and only then begin the grinding process with a soft flannel cloth.
Drawing methods
A pattern made from various materials serves as a protective layer; the metal not covered with it will be etched. There is a similarity to a film negative when a photograph is developed. There are plenty of options for protection: electrical tape, stickers, nail polish, vinyl, metal marker and many other polymers.
Nail polish
A popular material among amateurs. But professionals don’t disdain them either. Good resistance to aggressive environments makes it a leader in use. After applying it to the product and letting it dry, it is possible to correct the design with sharp cutting objects. Achieving a clear pattern and smooth lines.
Primer or bitumen varnish
The product is completely covered, then the contours of the design are transferred over the layer with a marker or brush. Having sharpened a thin wire, you need to scratch the sketch down to the metal. The primer is used GF 021 or XB 062. When scratching a sketch, there is a risk of chipping off the dried primer or bitumen varnish. This is a disadvantage of this method.
Glossy paper
It is a good method that is gaining momentum among masters and has many positive aspects. The required sketch is printed in real size on glossy paper using a laser printer. Applying the side with the pattern to the surface of the blade, you need to iron the paper.
After the product has cooled, it is placed in water. Having brought the paper to a soft state, it peels off, and the toner from the printer remains on the product. You just need to treat the surface around the design with nail polish. The method allows you to transfer the smallest details of the image.
Hot bluing method
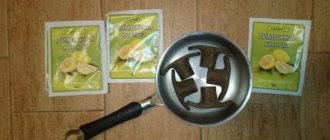
In addition to the above, methods of bluing a knife using calcination are also used at home. Before burying a knife in this way, it must be coated with linseed oil, animal fat or wax. After which the knife must be well heated over fire. Some people do this in a regular kitchen frying pan, but keep in mind that the dishes will be damaged after this.
Before using this method, you can first immerse the knife in a solution of copper sulfate and ammonia: 100 grams of vitriol and 10 grams of ammonia are diluted in one liter of clean distilled or settled water. Dipping and heating the knife must be done several times until you get the desired color of the metal.
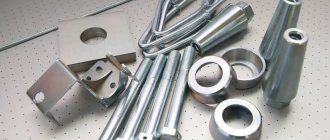
Metal processing methods
Metal blackening occurs in the following ways: alkaline, acid and thermal. Such work can be carried out on an ax, weapon and other metal products.
Alkaline bluing
The most popular method of blackening steel is chemical oxidation with an alkaline composition. The result obtained is quite high quality and durable when the technology is strictly adhered to. The method is based on the ability of the metal to oxidize. The work is carried out at 135-150 degrees, and you should be prepared for the characteristic smell.
Alkaline blackening is best done outside the apartment. This can be done in the yard or garage, in a room with good ventilation.
So, let's begin. The first step is to degrease and thoroughly clean the surface of the metal object. Remember that bluing at home is impossible without preparing a good alkaline composition.
You can do this as follows:
- Pour 100 ml of plain water into a porcelain bowl.
- Add 100 grams of technical soda and 30 grams of sodium nitrate.
- Stir thoroughly and heat the resulting composition to 135-150 degrees.
The solution is ready, now you need to immerse the product that you plan to burnish into it for half an hour. Then the metal is washed with distilled water, dried and lubricated evenly with machine oil.
As a result of alkaline bluing at home, a bright black color with a blue tint should appear. To obtain a thicker oxide film, the percentage of alkali in the solution should be increased.
In the video: do-it-yourself alkaline bluing.
Acid bluing
Before bluing, the product should be thoroughly cleaned with sandpaper. Then you can degrease it by dipping it in kerosene or sodium triphosphate for 10-20 minutes. After this, the part is dried, and at this time you can prepare a solution for blackening.
It is prepared as follows:
- Add 2 grams of tartaric and tannic acid to 1 liter of water.
- The ingredients are thoroughly mixed.
- The solution is heated to 140-150 degrees.
The part should be immersed in the heated mixture for 14-17 minutes, then rinsed with plain or boiling water (for better cleaning of the solution).
The last stage is to immerse the product in machine oil for 60 minutes. Then you need to wipe it, dry it and you can use it.
Thermal bluing
This option appeared first, so it is easier than others to implement, but no less effective. The method is based on heating metal products until oxygen reacts with the metal itself. The heating intensity varies depending on the desired result.
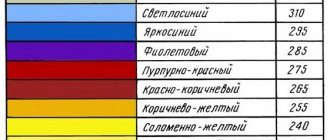
The table shows the resulting color at different temperature conditions.
| Temperature | Color |
| 220-229 | Pale yellow |
| 230-255 | From golden yellow to red yellow |
| 256-280 | Lilac, purple |
| 281-295 | Blue |
| 296-320 | Blue, dark blue |
To implement heat treatment, you will need machine oil (500 ml), a machine oil tray, pliers, a gas hair dryer and dry wipes. Heat treatment should be done on a brick or other non-combustible surface.
Progress:
- The hairdryer must be turned on at maximum temperature and the product held over it.
- The heated part is completely immersed in oil, while holding it with pliers.
- Take out and blot the product with a napkin.
- Repeat the entire procedure 3 more times from the very beginning.
This method will not give the metal a black color. Blackening by this method is necessary to prevent rust; decorative bluing is rarely done using this method.
Chemical bluing
Burnishing a knife in this way can only be carried out under conditions of good exhaust and ventilation, as otherwise it can be hazardous to health!
- Place a knife in a mixture of saltpeter and caustic soda (30 grams of saltpeter and 100 grams of soda) heated to 140 - 160 degrees and keep it there for at least half an hour. With this method of bluing, a beautiful deep black color is obtained, giving off a blue tint.
- Dilute potassium or sodium hydroxide in a high concentration in an alkaline solution and place a knife in this solution. This method will give a bluish film on the surface of the knife.