If you know how to harden metal correctly, then even at home you can increase the hardness of products made from it two to three times. The reasons why there is a need for this can be very different. Such a technological operation is required, in particular, if the metal needs to be given hardness sufficient to enable it to cut glass.
Hardening metal at home
Most often, a cutting tool needs to be hardened, and heat treatment is performed not only when its hardness needs to be increased, but also when this characteristic needs to be reduced. When the hardness of the tool is too low, its cutting part will jam during operation, but if it is high, the metal will crumble under the influence of mechanical loads.
Few people know that there is a simple way to check how well a steel tool is hardened, not only in production or at home, but also in a store when purchasing. In order to perform this test, you will need a regular file. It is passed along the cutting part of the purchased tool. If it is poorly hardened, then the file will seem to stick to its working part, and in the opposite case, it will easily move away from the tool being tested, while the hand in which the file is located will not feel any irregularities on the surface of the product.
Dependence of steel hardness on heat treatment mode
If it turns out that you have at your disposal a tool whose hardening quality does not suit you, there is no need to worry about it. This problem can be solved quite easily: you can harden metal even at home, without using complex equipment and special devices. However, you should know that low-carbon steels cannot be hardened. At the same time, the hardness of carbon and tool steel alloys can be easily increased even at home.
Introduction to Metallurgy
The technology of heat treatment of steels provides for a number of methods of thermal influence. As a result, the grain size changes. This changes the hardness.
The steel contains:
- Ferrite is the main component. Metal grains are easy to see under a microscope. They are usually presented in thin sections as white or light gray.
- Perlite is a eutectoid mechanical compound of iron and carbon. This component is noted for its high hardness and strength.
- Cementite is a limiting compound of iron with carbon Fe₃C. One pure cementite is a rather brittle substance.
- Graphite is a form of carbon. In metals it can be presented in the form of spherical inclusions. Its presence is noted in Damascus steels, which are produced by forging.
- Austenite is one of the forms of alloy. It occurs at temperatures of 727 ⁰C and above. This component represents fluidized metal. It is characterized by high plasticity and pliability. The appearance of austenite upon heating is determined by the absence of magnetic properties.
The accepted classification of the compound is iron-cementite in the following meanings:
- 0.0...2.18% carbon is steel;
- 2.14...6.67% carbon – cast iron.
Steels also have other differences:
- 0.0…0.8 – low-carbon steels;
- 0.8…2.14 – carbon steels.
Diagram Fe – Fe₃C. Depending on the temperature and concentration of iron and carbon, different types of compounds are formed. They determine the mechanical properties of the metal:
At what temperatures does steel harden, which serves as a cooling medium?
Various steels are most often subjected to the hardening process. This is due to the fact that steel is the main material in the manufacture of mechanisms and structures. Each grade of steel has its own optimal indicators at which the hardening process occurs. For grades of high-speed steels we can say that:
- P18 steel is hardened at a temperature of 1270 degrees Celsius, with further cooling in oil;
- R9K5, R9M4K8, R6M5K5 - at 1230 degrees, with cooling in the same cooler;
- Р6М5 – at 1220 degrees with oil cooling;
- R2AM9K5 – at 1200 degrees with the same coolant;
- R12F3 – 1250 degrees.
For grades of tool alloy steels, the indicators are as follows:
- X – temperature within 830-850 degrees, cooling medium – oil;
- HVSGF, 9ХС – 840-860, oil;
- ХВГ, В2Ф – 820-840, for the first – oil, for the second – water;
- 13Х - 760-800, water;
- 11HF – 810-830, oil;
- X12, X12MF – 960-980, oil.
For grades of tool carbon steels, the indicators are as follows:
- U7 – temperature within 800-820 degrees, cooling in water;
- U8 – 780-800, water;
- U10 – 770-800, water;
- U12 – 760-790, water.
Heat treatment
Heat treatment of metal is performed to change the characteristics of the iron-carbon alloy.
Annealing is a heat treatment whose purpose is to reduce the strength properties of steel. It is produced by heating to a temperature above the austenitic state, followed by slow cooling (up to 6...8 hours) in the chamber where the heating took place.
Normalization is a variant of annealing performed to reduce stress inside the metal. Normalization is usually carried out by heating to 727 ⁰C and higher with slow cooling (up to 1...2 hours) with the doors of the heating furnace open.
Hardening is a method of changing grain sizes by rapidly cooling a metal from the austenite state to ambient values.
Tempering is a heat treatment that relieves internal stress in the metal. There are: low, medium and high vacation. Each has its own temperature values.
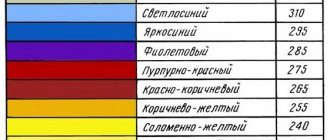
Temperature of metal tarnish colors
The temperature and color of the metal change throughout the heating process of the workpiece. Moreover, each alloy or type of metal has its own temperature for the appearance of tarnish. As a result, technologists use a large number of tables for the relationship between color and temperature of tarnished colors. We present some of them in our article.
Table of colors of tarnish and heat
Temper color chart for carbon steels
Temperature color chart for stainless steels
Rainbow color on stainless steel surface
Hardness test
The hardness of metals is determined by two methods:
- According to Brinell, a metal ball is pressed into the metal.
- According to Rockwell, it consists of pressing a small cone from a strong pyramid (diamond).
When determining Brinell hardness, the size of the mark left by a ball when pressed with a force is measured, the magnitude of which depends on the expected hardness and the ball used. Balls of different diameters (1,...10 mm) are used in the tests. Recalculation of readings is performed according to the formula:
Where F is the force applied on the device, N; D – diameter of the ball used to test hardness, mm; d – imprint diameter. It is measured under a microscope that has a special ruler. Measurement accuracy up to 0.01 mm.
This method is recommended for determining hardness of no more than 300...320 units. If it is necessary to determine harder objects, then use the Rockwell device. On this scale, information is indicated by HRC and numerical value.
Based on numerous studies, it has been established that for knife steel the HRC 55...63 will be quite high. When designing gears and manufacturing gears, hardening of the tooth surface is also performed. Designers set hardness to HRC 52…58. Metal-cutting tools (cutters, drills, cutters, milling cutters) have a hardness of HRC 60...65.
Origin of metal tarnish colors
Metal tarnish colors spread due to the redistribution of light intensity in thin films on the reflection structure. As the film thickness develops, conditions for the extinction of rays from a certain wavelength appear. First, a lilac glow appears from the snow-white, and a yellow glow is detected. As the film grows in thickness, the wavelength of the extinguished rays increases. Green and red glows emerge from the sun's continuous spectrum.
The brightness of the tarnished shades of stainless steel depends on the size of the oxide film and the length of the solar wave that goes to the special material. Some of the brightest shades are found on copper-type materials. The tarnish colors of steel that result from the physical process depend on the metallic composition. If a microelement contains a lot of metal ions, it turns blue. In the presence of chromophores, red tints can be detected - traces of tarnish on the metal.
Artificial color discoloration is visible on the structure at elevated levels. An indispensable condition for the formation of traces of discoloration is the absence of water and other special liquids. During heating, the resulting film structure of the oxide decreases. This is explained by diffusion, that is, mixing of microelements or the introduction of one chemical element into another. In the situation with a metal oxide film, it becomes clear how oxygen atoms interact with the special metal.
Quenching and tempering
Hardening is carried out by heating to a temperature above the production of austenite. For some steels, some overheating is recommended, which is necessary to obtain a fluidized state throughout the entire mass of the metal.
Carbon steels in which the carbon content exceeds 0.8% can be hardened. With a lower value, hardening does not work. Rapid cooling does not form fine metal grains.
The crystal lattice of steel before (a) and after (b) hardening. Obtained by examining sections of steel samples
Hardening is performed in air, water and oil. It is generally easier to quench in oil, the reasons are as follows:
- When immersed in oil, bubbles of boiling liquid do not form on the metal surface, which reduce the cooling rate.
- A circulating fluid flow is formed around the metal object, which activates the process of convective heat transfer.
- Before hardening, the oil can be heated to a temperature of 250…350 ⁰С. Then a two-stage hardening process is carried out (in oil and water, one after the other).
Attention! In some sources you can read that hardening is performed on a gas stove. Only amateurs who have never achieved real results can write something like this.
The temperature is determined using a radiation pyrometer. Measurement accuracy up to 1...3 ⁰С. But the cost of such a device is quite high. Therefore, heating to one or another value is determined visually. For this purpose, special tables are used. Based on the colors, you can try to harden the metal yourself.
Steel heating color chart:
Tempering is carried out to relieve internal stresses in the metal. The part is heated to the desired temperature, and then allowed to slowly cool in air.
There are several types of vacation:
- Low, used for metal-cutting tools.
- Medium, used for woodworking tools.
- High, is used in mechanical engineering for gears or pulleys of V-belt transmissions.
To visually determine the heating temperature, a pyrometer is used. You can approximately set the heating temperature by comparing the type of workpiece during heating with the base table. When heating steel, tarnish colors are observed on the surface; they have different colors.
Colors of tarnish when heating steels:
In addition to carbon steels, heat treatment is performed for alloy alloys. The presence of additional elements in the metal improves the strength characteristics.
The table shows the recommended quenching and tempering modes for different types of steels. All types of materials presented are used for the knife.
| Heat treatment mode and steel hardness | |||||||
| Steel grades according to GOST | Metal heating temperature, ⁰С | Cooling medium | Hardness after hardening, HRC | Tempering mode (⁰С) and the resulting hardness HRC | |||
| 170…210 | 220…350 | 360…420 | 420…550 | ||||
| U7…U7B | 780…830 | oil | 58…62 | 59…63 | 57…60 | 52…54 | 48…53 |
| У8...У8В | 790…835 | oil | 60…64 | 60…65 | 58…60 | 51…55 | 47…50 |
| U9…U9A | 780…840 | oil | 56…63 | 58…62 | 54…59 | 49…53 | 48…53 |
| U10…U10A | 730…800 | oil | 58…62 | 57…64 | 57…64 | 48…53 | 49…52 |
| U12…U12A | 760…810 | oil | 59…64 | 60…65 | 58…60 | 49…52 | 49…52 |
| 40 | 740…820 | oil | 48…53 | 49…55 | 39…45 | 32…40 | 28…31 |
| 40X | 720…830 | oil | 50…54 | 52…57 | 48…50 | 44…49 | 29…32 |
| 35ХГSN | 780…810 | oil | 45..52 | 45..52 | 35..42 | 45..52 | 38…40 |
| 5ХНМ | 790…835 | oil | 45…50 | 46…52 | 40…48 | 46…52 | 36…40 |
| 5ХНВ | 780…840 | oil | 48…52 | 48…52 | 44…47 | 40…48 | 38…40 |
| 65G | 730…810 | water/oil | 59…64 | 59…64 | 55…57 | 51…54 | 46…48 |
| HVG | 760…820 | water/oil | 54…59 | 56…60 | 48…50 | 42…47 | 33…36 |
| HVS | 740…820 | water/oil | 54…58 | 52…56 | 44…47 | 40…44 | 39…42 |
| X12M | 720…830 | water/oil | 50…57 | 48…53 | 55…57 | 53…55 | 36…38 |
| 9ХС | 760…810 | water/oil | 59…64 | 59…64 | 48…50 | 42…47 | 29…34 |
| ShKh15, ShKh15SG | 760…820 | oil | 59…64 | 59…65 | 58…60 | 52…57 | 39…42 |
| 20X | 730…810 | water/oil | 48…52 | 42…50 | 38…41 | 36…38 | 36…38 |
| 45 | 760…820 | water | 41…49 | 34…37 | 32…35 | 30…34 | 29…32 |
| 14C28N | 740…845 | water | 50…57 | 45…49 | 41…44 | 39…42 | 32…34 |
| 8Cr13MoV | 780…860 | water/oil | 59…64 | 60…65 | 55…57 | 55…57 | 48…50 |
| 65Х13 | 760…855 | water/oil | 48…52 | 49…55 | 48…50 | 44…48 | 38…40 |
| 95Х18 | 740…820 | water/oil | 41…49 | 52…57 | 44…47 | 42…45 | 36…40 |
What is meant by hardening
If you take an ordinary nail, hold it in a vice and try to bend it with a hammer, you will easily succeed - the nail is made of ductile steel. But if the same experiment is carried out with a drill, the latter will burst when hit by a hammer. The result suggests that the drill was subjected to some treatment to increase its strength, otherwise it would not be able to drill holes in dense material. What is metal hardening?
Steel hardening
In scientific terms, metal hardening is a technological process in which the crystal lattice of the hardened material acquires a certain structure. This is possible by exposing the product to high temperatures to the point of incandescence and further cooling in an oil or water environment. The process itself involves many nuances of temperature conditions and the duration of metal processing.
It is important to understand that an increase in the hardness of a metal during hardening (polymorphic transformation) leads to an increase in its brittleness. Therefore, mechanical transformations of hardened steels (bending, twisting) can be carried out only after preheating them to a certain temperature.
Step-by-step making of a simple forge
Fireclay bricks are used for production. It differs from ordinary brick in that it contains fireclay clay, which can withstand heating of more than 2500 ⁰C.
It is not difficult to distinguish fireclay bricks from ordinary bricks. On the surface there is an extruded circle with a diameter of 55 mm. The structure itself is noticeably different from the fired product.
To ensure that the bricks maintain a constant shape, they can be held together using a special mortar. But in practice they do things differently. A frame is welded from the corner. It will not allow you to change shape. A cast iron cylinder is installed in the center (used in internal combustion engines). In this case, a cylinder from a V-2M tank engine was used.
To prevent bricks from falling out, support ribs are welded. The load from the main fragments of the forge will be distributed on them.
Having placed the cylinder on the corners, mark the cutouts. They will have to be done using cutting discs and angle grinders.
After marking, the lines left by the scriber are visible.
The necessary cuts have been made. All that remains is to weld the ribs in place.
Holding the parts in place, spot weld the components. After making sure that the parts are located in the right place, the final welding of the forge frame is carried out.
Turning the frame over, they look at how the frame of the forge will look in working position.
Now you need to lay the bricks correctly. It is clear that they have been sampled. A certain ledge is formed, located below the level of the brick surface.
Having laid all the bricks in place, you can see the formation of a recess. Its purpose is to install a grate.
The grate is installed in the center of the forge. It is designed to supply air from below into the combustion zone. Only with air flow can constant combustion of the fuel be guaranteed. But to obtain temperatures above 1300 ⁰C, forced air flow from a fan will be required.
You will need to weld a pipe to the cylinder, which will have:
- centrifugal fan;
- plug for venting combustion products.
The fan is being fitted. To supply it you need an intermediate profile pipe. It is necessary to weld it so that the air flow enters the combustion zone without unnecessary resistance.
A hole is marked in a cylindrical pipe.
After the first cuts, you need to mark the remaining elements.
The parts are ready for assembly. All that remains is to fix the parts and then weld the entire blower structure.
The result was a structure welded to the cylinder. Now we have to install the fan.
The forced air supply system to the forge is ready. It's time to assemble the rest of the small-sized forge structure.
Another view. The quality of welds is checked.
After painting, the forge takes on a professional look. It is mounted on supports. The height is selected according to the height of the master who will work on this forge.
There is a rotary valve on the pipe. It is needed to temporarily block access to the fan. Usually they are closed when there is a need to clean the grates.
There is a lid at the bottom. In the “closed” position it is held by a counterweight. To open the passage for slag and other combustion products, simply turn the counterweight slightly. The hole will open. The slag will leave the furnace.
The bricks take their place. Soon the forge will be ready for use.
To limit heat loss, a screen is installed. This is sheet steel that is installed around the perimeter of the hearth. A handle is mounted on the front. It is needed for hanging auxiliary tools that the blacksmith uses when performing work.
Having laid the fuel (start ignition with ordinary shavings and wood chips), light the fire. Gradually add coal. It is the main fuel for the forge.
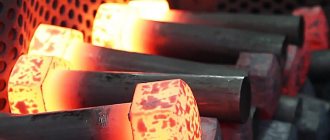
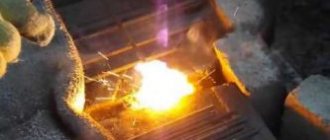
After turning on the fan, the combustion intensity increases. The coals begin to burn not red, but white. The flame temperature increases above 1000 ⁰С. Now you can heat up parts on the forge in order to further forge metal or harden workpieces.
In addition to the forge, blacksmiths use anvils. The main work on forming the desired shape is performed on it. They work with heavy and light hammers. Additionally, streams of different shapes are used.
Hardening using household appliances
For hardening, some craftsmen try to use a regular gas stove. The diameter of the 2.5 kW burner is 130 mm. When burning, a circle with an internal diameter of 85...90 and an external diameter of 130...170 mm is heated. Only the ring gets hot. The metal can be heated to a temperature of 800 ⁰C.
Heating on a gas burner:
To heat the part evenly, you need to set restrictions. A metal square contour is made, inside which the temperature can be equalized. It is advisable to thermally insulate the circuit to limit heat exchange with the environment.
For hardening, containers are used in which waste mineral oil is used.
Using a blowtorch you can get a temperature of 850...1000 ⁰C. At this temperature, it is easier to heat a suitable part to the desired temperature. To limit heat loss, place it in a thick-walled pipe. The flow of fuel combustion products is also directed there.
Heating with a blowtorch:
Attention! High-quality hardening is carried out by heating in a muffle furnace or in a forge, where the entire product is located in the heating zone.
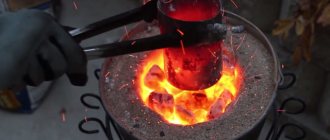
Heating the workpiece in a charcoal forge:
Video: hardening steel at home.
How to harden?
When you have a forge, hardening can be done quite simply:
- First the fire is lit. Small-sized wood (chips, small branches, woodworking shavings and paper) is used for ignition.
- Prepare the containers in which the hardening will be carried out. Mineral oil (from internal combustion engines) is the best cooling for parts. The container must allow the part to be loaded completely. Synthetic and semi-synthetic oils can be used, but keep in mind that some may boil. The cooling rate will decrease. Therefore, the use of such oil is used with caution.
- A water container is needed to rinse parts after hardening.
- You will need coal. Brown and black coals are used. In practice, charcoal obtained after processing birch is often used.
- To pick up the workpiece and move it around inside the forge, you will need pliers. Experienced blacksmiths have several types of pliers.
- After obtaining a stable fire on the grates, you can add coal. It burns slowly at first. When the air supply is turned on, intense heating begins. The coals change color to white.
- It's time to lay down the part that they want to harden. She is put into the fire. Watch the warm-up.
- Need a magnet. It will show whether the required heating has occurred or not. Austenite is not magnetic.
- If a dark cherry-colored glow occurs, you can count on heating to similar temperatures.
- Take out the workpiece and try whether it is magnetized or not. If not, then the temperature has been reached.
- Warming up is required for at least 15...20 minutes. The thermal conductivity of heated metal is low, so incomplete heating may occur inside massive objects. In this case, bends are observed during hardening.
- After removing the part from the fire, it is dipped into oil in several stages. Lower and raise with rhythmic movements. This is how high cooling rates are achieved. Raising and lowering stirs the coolant during the hardening process. A fire may occur. It will go out quickly.
- All that remains is to rinse the part.
- You can check whether hardening has occurred or not with a file. If the file “does not take”, it means that hardening has occurred.
Test the quality of tempering on glass. If it is possible to leave a mark on the glass with a tempered part, then an HRC hardness of more than 55 units is obtained.
Video: how to harden metal with your own hands?
What types of hardenings are there?
To properly harden a metal, you need to know exactly its brand. The temperature regime and the choice of the most suitable coolant - that is, the entire hardening method - depend on this.
If we take steels, then low-carbon ones are generally not amenable to thermal transformation. Non-ferrous metals are hardened differently than ferrous metals - polymorphic transformation does not occur in the internal structure of the former.
To accurately maintain the hardening process, special tables have been developed for each grade of metal. Otherwise, if we take a specific part, then the types of hardening mean:
Types of heat treatment of steel
- Partial heat treatment, where only a certain element of the part is exposed, for example, a knife blade;
- Full heat treatment, when the entire product is placed in an oven, heated, and then cooled to its original state.
Depending on the number of coolers that are used to cool the part, there are hardenings with one and two coolers. In the first case, the process is one-stage, using a certain liquid to cool a workpiece made of carbon or alloy steel. The second process involves two coolers, each of which lowers the temperature of the workpiece in its own mode. At the same time, the metal is released here.
Manufacturing a chamber for hardening metal
The main materials for the manufacture of home furnace bodies for steel hardening are solid refractories in the form of blocks of various sizes and fireclay clay. In such a furnace, a temperature of over 1200 °C is reached, so it is possible to harden products not only from carbon or tool steel, but also from high-alloy steel. When making home stoves from fireclay clay, a cardboard frame is first made according to the shape and size of the working chamber, which is then covered with a layer of fireclay. A heating coil is wound over it, and then the main heat-insulating layer is applied. With this design, the heating area is isolated from the heating element, which is important when it is necessary to harden steel that is sensitive to oxides and carbon burnout.
The most common design of home hardening furnaces are installations whose thermal bodies are made of fireclay bricks or similar refractories. The operating temperature of such materials is more than 1400 °C, so in such furnaces it is possible to harden almost any type of steel and many refractory alloys. Structurally, such a home oven is similar to a conventional wood-burning oven, only it is much smaller in size. The metal in it is heated using an electric spiral placed in grooves along the perimeter of the internal space. If it is necessary to qualitatively harden steel, it must be heated to a precisely specified temperature, so most of these homemade products are equipped with thermostats (they can be freely purchased on Aliexpress).
The video below shows the design of such a home furnace with end loading and a thermostat, which allows you to harden steel with precise temperature conditions. Its thermal body is made of mullite-silica refractory plates ShPT-450.
A detailed description of the design and recommendations for creating a top-loading furnace, in which you can harden products up to 54 cm in length, can be seen in the following video. Here the thermal body of the furnace is made of fireclay bricks (ShB type) and a thermostat is also used. In addition to the top loading, a special feature of this device is a kanthal spiral, which lasts many times longer than traditional nichrome and fechral.
Heat treatment of cast iron
Low Temperature Annealing
To eliminate internal stresses and restore the size of a gray cast iron workpiece, natural aging or annealing at low temperatures is used.
The natural aging method is unpopular because it involves prolonged aging of the metal after final cooling, which can be 3–5 months, and in some cases, several years. This approach is determined when the necessary equipment for annealing is not available.
Nowadays it is almost never practiced; instead, the low-temperature annealing method is used. It consists in the fact that the castings, after complete solidification, are placed in a cooled oven or in an oven heated to 100 - 200 degrees (°C). At the same time, unhurried heating is carried out, gaining 75 - 100 degrees every hour until the temperature reaches 500 - 550 degrees.
After this, the metal is left for 2 - 5 hours, after which it is cooled to 200 degrees with a temperature decrease every hour by 30 - 50 degrees. Then cooling is carried out in the open air.
Graphitizing annealing method
During casting of products, partial bleaching of gray cast iron on their outer part is possible, and sometimes the entire cross-section is affected. To prevent this process and increase the machinability of cast iron, graphitizing annealing is carried out at high temperature, holding it at 900 - 950 degrees for 1 - 4 hours. This is followed by cooling to 250 - 300 degrees in the oven and transferring the cooling process to the open air. This type of annealing allows the cementite in the bleached areas to break down into ferrite and graphite, after which white and cast iron, consisting of a mixture of variable proportions of gray and white, are transformed into gray cast iron.
Strengthening heat treatment of product blanks
Workpieces that have simple shapes with small cross-sections are subjected to this process. Strengthening heat treatment is carried out by maintaining a temperature of 850 - 900 degrees and holding for 1 - 3 hours. This is followed by the process of cooling the products in air. Such temperatures lead to the splitting of carbon and graphite in austenite. As a result of air cooling, the metal base acquires the structure of troostite perlite with slightly greater hardness and improved wear resistance. The hardening process is practically not used for gray cast iron; quenching and tempering are more often used.
Hardening
To increase the strength characteristics of gray cast iron, they resort to hardening, which is done by heating it to 850 - 900 degrees, followed by cooling in water. Pearlitic and ferritic cast irons can be hardened. This process makes it possible to obtain a hardness HB of the order of 450 – 500. The products subsequently acquire a martensite structure with sufficient inclusion of retained austenite and graphite precipitation. An excellent way to increase the strength and wear resistance of gray cast iron is isometric hardening, which is carried out according to the principle of hardening steel.
On high-strength cast irons with nodular graphite, flame and high-frequency surface hardening can be used. Products after this treatment acquire greater surface hardness and a viscous interior, which allows them to withstand significant impacts and abrasions.
Alloy gray cast irons and high strength magnesium cast irons are subject to nitriding from time to time. The surface hardness after this process is HV 600 – 800, resulting in high wear resistance. The process of sulfidation of cast iron is very effective. A piston ring, for example, after this exposure quickly breaks in, does not wear out so quickly, and its service life can increase significantly.
Vacation
To eliminate stresses resulting from hardening, tempering is carried out. Parts that will experience high wear loads in the future are tempered at temperatures of 200 - 250 degrees. On cast iron workpieces that will not be intended to work under significant friction, high tempering is carried out at 500 - 600 degrees. During this process, in cast irons that have previously been quenched, the hardness does not decrease as much as when steels are tempered. This happens due to the fact that the composition of hardened cast iron consists of a large volume of retained austenite. In addition, the presence of a significant proportion of silicon, which enhances the tempering resistance of martensite, has an effect.
To obtain soft cast iron, annealed white cast iron is used with an approximate composition: 2.5 - 3.2% - carbon (C); 0.6 – 0.9% – silicon (Si); 0.3 – 0.4% – manganese (Mn); 0.1 – 0.2% – phosphorus (P); 0.06 – 0.1% – sulfur.
Two methods of annealing for soft cast iron have been developed:
• graphitizing annealing under neutral conditions, which consists of splitting cementite into ferrite and small graphite particles; • decarbonizing annealing, accompanied by oxidative processes, consisting in the combustion of carbon.
Producing soft cast iron by annealing using the second method requires 5–6 days, which is why the graphitization method is mainly used. The blanks, after removing sand and fragments of channels for filling casting molds, are packaged in metal containers or placed on a pallet, after which they are annealed in methodical, stone and other annealing furnaces.
Annealing consists of 2 stages of graphitization. The first consists of evenly heating the castings to 950 - 1000 degrees, followed by holding for 10 - 25 hours, after which the temperature drops to 750 - 720 degrees at 70 - 100 degrees per hour. The second stage consists of holding the workpieces at 750 - 720 degrees for 15 - 30 hours, followed by cooling them in the oven to 500 - 400 degrees. At these temperatures, they are transferred to the air, where final cooling takes place. Thanks to this sequence, cementite splits within 950 – 1000 degrees. After such annealing, the structure of soft cast iron takes the form of ferrite grains with the addition of nests of small graphite particles.
To increase viscosity, pearlitic soft cast iron undergoes spheroidization. To speed up annealing on soft cast iron, white cast iron is hardened, and then graphitized.
Thermal effect on soft cast iron
To enhance the strength characteristics and wear resistance, soft cast iron is normalized or quenched followed by tempering. Strengthening heat treatment involves holding cast iron at 850–900 degrees for 1–1.5 hours, after which it is cooled in the open air. Workpieces with increased hardness are subjected to high tempering at 650 – 680 degrees with 1 – 2 hour holding.
There are cases when it is necessary to harden cast iron to obtain increased strength and wear resistance at the expense of ductility. The temperatures used are the same as in the normalization process; cooling occurs in water or oil. Tempering, based on the needs for hardness, is most often carried out at 650 - 680 degrees. Accelerated cooling is carried out immediately after the first stage of graphitization, when the temperature reaches 850 - 880 degrees, after which high tempering is carried out. For soft cast iron, hardening is carried out using high-frequency currents or an oxygen-acetylene flame. Hardening brake pads using this method consists of heating the parts with high-frequency currents up to 1000 - 1100 degrees and holding them for 1 - 2 minutes, after which accelerated cooling is carried out. The structure of the hardened layer includes martensite and graphite particles HRC 56 – 60.
Soft cast iron is very often used in mechanical engineering, various industries, agriculture and other industries. Machine parts are made from it. This cast iron is preferred due to the fact that it is cheaper than steel, yet it has excellent mechanical characteristics and is very resistant to corrosion and wear.
Tarnish colors in nature
A thin oxide layer appears on the surface of various materials, such as pyrite. In this case, a number of interference colors are observed. They are similar to mineral flowers. A particularly striking effect in the world is noticeable on chalcopyrite with some other copper minerals.
One should take into account the fact that tarnish hides the real mineral shade if it is not looked at immediately, but a little later. It is especially easy to make a mistake with a film of one shade. The same color effects appear on older glass varieties, mostly those that have been lying on the ground for a long time and on ancient coins.
The iridescent discoloration of metal occurs in the presence of a thin film of fat, due to drying on the water surface, which contains minerals.
The colors of tarnish of titanium, copper, and aluminum exist in the natural world, and in the industrial field they serve as a temperature indicator of the heating of iron and steel during heat treatment. Using them, it is easy to judge the temperature of metal heating during sharpening, drilling and cutting. In addition, they are often produced for decorative purposes and for laser marking.
How to cut threads in hardened metal
Tools made from high-speed steels and carbide alloys are also best suited for this operation. Taps are used to cut internal threads, and dies are used for external threads.
Internal threading technology
To cut internal threads of a certain size, three taps are usually used: rough (No. 1), semi-finish (No. 2) and finishing (No. 3).
Proceed according to the following scheme.
- Make the markings.
- Punch the hole.
- Lubricate the future hole and drill.
- Secure the part.
- Install the drill.
- Set the cutting mode. Start processing at low speeds. After the drill is immersed in the metal, the speed can be gradually increased.
- Drill a hole for the thread and countersink. Remove the shavings. Lubricate the #1 tap and the workpiece.
- Install the tool. The axes (its and the holes) must match.
- Make the first pass. After each full turn of the tap, make a half turn in the opposite direction. If necessary, remove chips.
- Make passes using semi-finishing and finishing taps.
External thread cutting technology
For this, dies are used. Process workpieces using this technology.
- Place the tool in a holder of the appropriate size. Secure the die with screws.
- Make a chamfer at the end of the workpiece.
- Apply coolant to the surfaces.
- Place the die on the workpiece. Its plane must be perpendicular to the axis of the workpiece.
- Cut the thread. After one or two turns, return by half a turn.
- Make sure the threads are cut accurately.
