What is porcelain tile and why is it so difficult to process?
Manufacturers of artificial stones are constantly searching for the ideal material that would match the hardness of one, the beauty of another, and the wear resistance of a third. Perhaps they succeeded when porcelain stoneware was invented. This amazing stone is an alloy of quartz, kaolin clay, and feldspar. The result was a product that surpassed the properties of all three components. In this article, we are interested in its strength, because it is precisely this that prevents us from performing the usual actions characteristic of simple ceramics - drilling, cutting.
The Mohs scale places this stone on the same level as corundum, which is one higher than granite. The strength of porcelain stoneware is 7-8. Above it only diamond, sapphire, ruby. Based on this property, scratches, chips, and other mechanical damage are completely excluded.
The modulus of impact elasticity allows you to make floor coverings made of this material quite thin. For comparison, tiles 3 mm thick can withstand a weight of 200 kg.
The bending strength is 3 times higher than granite, which indicates the absence of fragility. The table shows the main physical and chemical characteristics of imported and domestic products that are useful for work. Comparing them with floor and wall ceramics speaks in favor of porcelain stoneware.
Characteristics of porcelain stoneware
Porcelain tile is an artificial material created from a mixture of granite chips and clay by pressing under high pressure and subsequent firing.
Due to its high density and strength, porcelain stoneware is used for flooring in industrial enterprises and public buildings. It is able to withstand increased loads without deformation.
Watch the video, types and types of porcelain tiles:
Porcelain tiles are also used for domestic purposes:
- Stair cladding;
- Pool linings;
- Fencing installations;
- Installation of facades;
- Installation of communications.
Despite its high strength ratings, this material can easily break under a directed impact. Therefore, it must be handled with care.
Features of working with porcelain stoneware
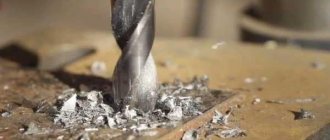
How to drill into porcelain stoneware material? The high density of porcelain stoneware is its advantage, however, working with this material requires highly durable tools. The tiles are cut, and drilled to lay the cord or install fasteners. For holes up to 12 mm in diameter, spear-shaped drills with a diamond tip are used, and for wider holes, diamond bits are used.
Watch the video, dry cutting using a grinder:
How to make a hole in a porcelain stoneware slab? To do this, use a cordless screwdriver, a two-speed drill without impact mode, a drill stand or a machine. Special diamond attachments are installed on the device:
- Crowns (ring drills);
- Diamond drills for vacuum sintered porcelain stoneware;
- Drills with sintered diamonds.
Crowns are rods with cups, the ends of which are coated with diamond crystals. The galvanic method of depositing crystals is characterized by a denser concentration of diamond segments compared to the vacuum method. The main advantage of galvanized diamond core bits for drilling porcelain stoneware slabs is their inexpensive price.
Drilling with diamond tubes:
A functional feature of crowns is the reduction of end pressure during the drilling process. The disadvantage is the small working resource. For example, such a crown will drill an eight-millimeter slab no more than four to five times. Crowns are used for drilling porcelain stoneware slabs for installation of electrical outlets or plumbing fixtures.
All crowns are different from each other:
- Wall thickness;
- Diameter;
- Length;
- Pitch of diamond segments;
- Number of cooling holes.
Vacuum sintered diamond drills for porcelain stoneware are the most durable tool. This drill owes its high wear resistance to the high concentration of diamond crystals firmly sealed into the metal. Diamond drills are characterized by high rotation speed and long working life: they can withstand 70 holes without a drilling machine and 120 - 150 holes using a machine. With the use of coolant, the wear resistance of a diamond drill for porcelain stoneware increases to 350 holes. The tool is developed on the basis of the latest technologies and enjoys exceptional confidence among craftsmen.
Expert advice on how to drill correctly:
Two-millimeter annular diamond drills are also used for drilling porcelain stoneware slabs. However, they create high end pressure, so they are mainly used for concrete slabs. The disadvantage is the low speed of the work process. However, the advantages include high strength: they can withstand up to hundreds of holes.
Work methodology
If you are drilling holes in porcelain stoneware, you should remember that diamond drills can become very hot during use.
In order to prevent the formation of microscopic cracks and destruction of the tiles, they must be cooled. The problem can be solved by applying water to the drill. To prevent heating, it is necessary to operate at medium speed. When porcelain stoneware is cut in an industrial environment, coolant is constantly supplied. At home, the drill can be cooled with water from a bottle. To do this, you need to make small holes in the lid through which water will flow to the drill. Some craftsmen do it even simpler: they cool the heated surface of the drill using a sponge moistened in advance.
How to drill porcelain tiles at home
There is always a choice of drilling equipment, even in a home workshop. Anyone who likes to work with their own hands in a garage or in a box always has several options for tools:
- Manual carpentry drill;
- Drill with hand drive and collet chuck for drill;
- Electric drill with speed controller. If it is not possible to regulate the rotation speed of the chuck, then it is better to leave the electric drill alone;
- Screwdriver with speed controller and drill chuck.
You just need to decide what and how it will be more convenient to drill a hole in porcelain stoneware, taking into account all the circumstances and working conditions. To do this, you need at least a small but successful experience in working with ceramic tiles. The technique is the same, the technology is slightly different.
Hand tool
At first glance, a drill and a hand drill look archaic in an attempt to drill through porcelain tiles. Wrong opportunities. It is clear that it will not be possible to quickly drill porcelain tiles with a hand drill; no one sets such a task. With a hand tool you only need to make a point on the very hard, glass-like surface of the porcelain stoneware.
Without a centering point, the most expensive and powerful diamond bit will “walk” across the surface, scratching and leaving spirals.
For your information!
Sometimes it is easier to make the center with a core and one blow of a wooden hammer than to struggle with a drill. It all depends on the surface texture of the porcelain tiles.
Electric tool
Everything is simpler here. An electric drill or “shurik” must have a large torque, since you will have to drill at relatively low speeds. It is believed that it is best to drill porcelain tiles with a screwdriver; it produces a lower percentage of defects. But for drilling large diameters it is no longer suitable; at least an electric drill with a power of 1 kW or more is required.
Such devices, as a rule, provide a two-handed grip, which greatly simplifies the process, especially if you need to drill porcelain tiles for an outlet in the wall.
How to drill
There are several ways to drill a hole in porcelain tiles. Each has its own advantages and features.
Wet surface
Wet drilling involves regularly wetting the bit and tile surface with water or oil to cool it. When working “wet” with a diamond bit, gently rock the tool from side to side. This is necessary for uniform removal of wet sludge from the drilling area. It is recommended to carry out such manipulations every 5-7 seconds.
Diamond drills tend to heat up during operation and require cooling to increase their service life.
For personal protection, be sure to wear special glasses. Wet waste may fly around. And covering your eyes or regularly dodging will prevent you from making a perfectly straight hole.
Don't pour too much water. A small, thin stream, and sometimes a couple of drops, is enough. With this method of drilling, you need to add moisture as soon as you see the first haze of rising dry dust.
Dry surface
When using this method of drilling, turn on your home vacuum cleaner. It will help remove dust and sludge generated during operation. It is better to perform the dry process with diamond bits, the cavities of which already contain cooling oil. This will help avoid “washing out” the edges and make the final result neat.
It is important that there is enough free space between the nozzle segments for the sludge to escape. Otherwise, the operation of the tool will be blocked.
Dry drilling of porcelain stoneware is used in cases where it is necessary to obtain a large number of holes in a relatively short period of time.
If you don't have a vacuum cleaner, try to stop working and remove fine dust. You will spend more time, but the result will exceed your expectations.
The dry drilling method is used when a large number of holes need to be made in a short time.
On the floor
If the tiles are already laid and glued to the floor and you need to drill a hole to install, for example, partitions, there should not be any difficulties in the work. In this case, the tile surface does not move or vibrate, especially if it is glued on.
The main condition for quality work is to ensure that the drill is placed accurately in the chosen location so that it does not move. To do this, stick some tape and the tool will not slide on the glossy surface. Make sure that there are no voids under the tiles, otherwise cracks will appear. And it is important to bring the drill already plugged in to the floor, and not to apply it while stationary.
Drilling should be carried out strictly perpendicular to the surface being treated.
It is convenient to drill on the floor using the wet method.
On the wall
If, before gluing the tiles to the wall, you drill them from the matte, reverse side, this will lead to destruction of the surface. When working with porcelain stoneware, it is important to maintain the angle of the tool. Then the wall will become your assistant. Work at low or medium speeds, avoid sharp blows and jolts, and apply the same force during work.
As with floor tiles, mark the center of the future work circle and apply a piece of masking tape. This will prevent the tool from slipping.
Vary the diameter of the drill. If possible, create the initial indentation with a small diameter bit first. And then refine it with a larger one. These simple manipulations will help you quickly make a hole of the desired diameter.
Experts recommend using special clamping frames that can hold a drill or other tool in the desired position.
Porcelain stoneware cutting technologies
When doing façade or interior work, it inevitably becomes necessary to cut the surface of the slab. This cannot be avoided, even recognizing that every good manufacturer has adapted elements for this or that case. You'll have to cut it. How and how to do this better, we will describe in more detail.
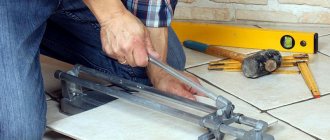
Dry cutting method with tile cutter
Everyone has heard about tile cutters, but many read on forums that it is impossible to halve a capricious stone with this tool. This is not entirely true. Mechanical or manual tile cutters are also different. With the right skill, everything will work out great. We are interested in a tool with a diamond roller.
The work stages will be as follows:
- We inspect the device for suitability for work. We are interested in the diamond roller, which can fail, in other words, wear out. The fastening system may become loose. If there are chips on the edge, the part must be replaced. When you turn it on and try to use it, the roller should not move. Then it is tightened or the entire fixation system is changed. Ignore it, and cutting the tiles will be impossible.
- If your tile cutter is based on bearings, then lubrication will not interfere with them, since even a slight “looseness” will lead to chips.
- Now draw a cutting line with a marker and place the roller at the beginning of the line. When inserting the tile into the device, try not to follow the line with the cutting element.
- Now you need to fix the plate with your hand, lift the handle, lower it until the roller touches the surface, but the paws remain in the air.
- Now comes the most important part. Using gentle pressure, guide the handle to the end of the tile along the marked line. It is important not to press too hard so that the surface remains without chips. It will be superfluous to pass the cutting element ten times. This way you will only achieve an unsightly cut. Once is enough.
- Now raise the foot again and lower it again, but now so that the feet touch the surface on both sides of the cut. Press down and break the material.
If the cut is rough, you can use a grinder.
Cutting with a grinder
The following method has gained the greatest popularity among the people. Buying a tile cutter for a dozen tiles is not profitable. But almost every zealous owner has a grinder. We will need a dry cutter or a special diamond disc for porcelain tiles.
The whole job consists of placing the disc in the grinder and cutting off a part from the tile. It would seem that’s it, but there are some nuances:
- Remember that you need to cut in the direction of rotation of the disk, and not vice versa. This will protect you from fragments that fly in the opposite direction from rotation. And there will be fewer chips.
- The disadvantage of this process is the mandatory formation of chips on the front side. Only skill will help minimize this. Make only one cut. Any subsequent ones will leave unsightly edges.
- Another feature of working with an angle grinder is that you need to cut not along the line itself, but 2 mm from its edge. This will leave you room to sand down the chips.
- A huge advantage of using an angle grinder is the ability to make curly lines, although it is better to practice first.
Wet cutter for tiles
What to do if you have to cut a lot and efficiently? Then an electric tile cutter will help. It is also called a wet cutter due to the peculiarities of the process, but in order.
You need to figure out what kind of wet cutter you got. They differ in the way the work is performed. One is designed so that the disk moves, the table remains stationary. On another tile cutter, the substrate moves, but the cutting element remains motionless. They may differ in the method of cooling and wetting. In one device, a container of water is installed directly under the disk. It must be said right away that the water must be changed frequently, otherwise dirt with large particles will worsen the cutting quality and shorten the service life of the disc. In another instrument, water is supplied from above.
Working with an electrical device is easier than with a mechanical one. Lay the tiles on the table, fix them on both sides with your hands. Press firmly enough to eliminate vibration, which can cause chipping. Now make the cut from start to finish without much effort.
Important! Try to avoid vibration, as the disc may jam in the material, which will lead to unpredictable consequences.
Be sure to clean the disc, because it will probably become clogged with crumbs. To do this, run it along a sand block or brick.
Each of these methods involves developing skill, up to cutting curly lines, but this is difficult to do. It is almost impossible to cut out figures, ornaments and other beautiful decorative elements at home. For this purpose, there are special machines that operate on the basis of waterjet. In production there are special high-precision milling cutters that cut porcelain stoneware surfaces like butter.
Practical tips for drilling holes
During the drilling process of porcelain tiles, a number of problems may arise. To avoid this, you need to take into account some nuances in your work:
Use a backing. To prevent porcelain tiles from sliding off the surface when drilling, you need to place a wooden material
Most often this is a backing made of chipboard or plywood, which will protect property from damage and also provide additional security. Pay attention to the drilling direction. It is recommended to drill any tile from the front side, this way all possible errors will be visible and also minimize damage to the tile
The reverse side of the material does not need visual beauty - all flaws will be hidden by the tile solution. By marking the center with a small-diameter porcelain tile drill, it will be easier for you to install a larger drill when starting work. Drilling depth. You should not drill through the tiles to the very end; it is better to do the work for 2/3 of the part, and then pause. There is no need to press hard on the tool, especially when the drill comes out.
Video:
Drilling methods
There are 2 options for drilling porcelain stoneware:
- Diamond-coated crowns;
- Tubular diamond drills.
In essence, these are the same thing, but it is generally accepted that crowns are for large diameters. There are also differences in drilling methods: wet or dry.
A carbide-tipped drill or ballerina drill quickly becomes dull and is not suitable for this. If you need to drill through natural granite, you can do it in another way - with a hammer drill in the impact mode using a concrete drill. Its tip should be sharply sharpened in the shape of a chisel.
Diamond crowns
Diamond crown
- A porcelain tile cutter requires water to be supplied to the work area for cooling. This can be done by gradually adding water from a rubber bulb or a regular glass.
- It is advisable to start drilling with the jig at a right angle.
- The drill should be in drilling mode without impact, at low speeds. With a diameter of up to 30 mm, the maximum drill should operate at 600-800 rpm, if the diameter is larger - a maximum of 300-400.
Drilling a hole for the toilet with a 6 mm crown through a homemade jig
On sale you can find crowns with a diameter of 5 mm, they cost from 300 rubles and more.
Diamond drills
If diamond core bits are used for wet cutting, then Bosch diamond-coated drill bits must be used dry. Associated with this are some features of their use, the implementation of which will extend their service life.
Inside the drill there is a coolant - olive oil. Other manufacturers do not have it, and you need to use them like regular crowns “on a wet basis.”
- Initially, hold the drill at an angle of approximately 45 degrees. In this case, you need to bring an already working drill to the surface, otherwise, when turned on, the drill on the porcelain stoneware will move away and damage the glaze.
- When you warm up the drill, you need to place the drill perpendicular to the porcelain stoneware and continue drilling with slight circular rocking. There is no need to press hard. The optimal drilling speed is 1500 rpm, without impact. This is done so that part of the diamond coating has time to cool. When the oil inside heats up, it will begin to come out and pick up sludge (dust), helping with cooling.
- After drilling, be careful not to point the tip of the drill at your face - hot oil expands and can shoot.
Start drilling at an angle so that the oil inside warms up and comes out
An important point: once you start drilling porcelain tiles, you cannot stop. The oil and spray will cool down, and you will need to warm it up again, and this reduces the service life. This rule does not apply to ordinary tiles.
The Easy Dry diamond drill bit for porcelain tiles from Bosch can be found for hole diameters from 6 to 14 mm. It is suitable for drills and screwdrivers with a drill shank with a diameter of 13 mm. Cost - from 1100 to 1800 rubles. There are similar models of grinder drills with a diameter from 14 to 70 mm, called Easy Dry Speed.
In practice, it was enough to drill 5 holes in regular tiles, 4 in medium-density porcelain tiles and 1.5 in class 4 hard porcelain tiles from Kerama Marazzi.
There are also cheaper analogues, for example, diamond drills from Hawera can be found for a diameter of 5-14 mm, they cost about 800 rubles apiece.
Straight cut
The need to cut the cladding usually arises in areas adjacent to adjacent walls and communications. Before drilling porcelain tiles, it is necessary to cut them to size, since once a hole appears in it, the strength decreases sharply. This is especially true for products with a superheated middle reinforcing layer. You can make a straight cut using several methods, listed below in order of increasing complexity:
- manual glass cutter - due to the significant thickness of the tiles compared to glass, you should hold the tool and press it to the surface with both hands, so the line is drawn in advance; it is not recommended to cut porcelain tiles using a ruler;
- tile cutter - a budget option - the cut is made once with one touch, so there is no need to rush, you should ensure uniform pressure throughout;
- Angle grinder - it is better to use a diamond wheel, since the equipment for stone or concrete is thicker and less reliable; first, the tile is cut along the entire length by a third, then the inner layer is cut.
Unlike a tile cutter, a glass cutter is not equipped with a device for splitting tiles at the cutting site. Therefore, several options are used:
- the partner presses the tile, previously aligned with the cutting line along the edge of the tabletop, with his own weight to the table, the master breaks off a piece with a sharp downward movement of both hands;
- A steel bar or wooden bead of the smallest possible cross-section is placed under the cutting line, the tiler jumps 10–15 cm, and lands with both feet on opposite sides of the tile.
The last method is suitable when working alone; shoes should have soft soles, and foam material or cardboard should be placed under the edges of the tiles. The first and last options do not provide a perfectly straight cut line. However, in the case of an angle grinder (“grinder”), this defect can be corrected by using a special device for the tool. This is a platform with a slot for a disk, similar to the platform of a hand-held circular saw (“circular saw”), rigidly fixed with a screw or bolt into the threaded hole for the angle grinder handle. Before starting work, the cutting depth is set - in this case, about 2mm. After passing the diamond disc along the entire length, the adjustment changes to the entire thickness of the porcelain stoneware in order to cut through the material. In this case, a side stop is used, fixed to the platform, the cut is smooth, almost like a tile cutter. In any of these options, the curvilinearity of the cut line can be eliminated by grinding on an abrasive wheel. The chamfer on the front surface is made only by hand using a block or round stone.
Attention:
The equipment of a manual glass cutter or tile cutter (roller, diamond) must be sharpened. It is not allowed to repeat the tool along the same line. Such tiles will not crack evenly, and the decorative layer will be damaged in areas adjacent to the cutting line.
Video description
How to properly drill porcelain tiles with a diamond crown is described in the video:
Work resource
Another important criterion for determining what is better for drilling porcelain stoneware is the working resource. To form several holes, it is enough to use a Pobedit drill or drill, or a diamond-coated crown. They are relatively easy to work with and the cost is quite low.
For large-scale work or professional activities, the choice should be made in favor of tubular analogues. Here, drilling takes significantly more time, plus periodic removal of debris and cooling of the equipment. But the performance will be significant without damaging or wearing off the cutting edge.
Drills for porcelain stoneware: features and varieties
Kinds
Processing porcelain stoneware is a complex process that cannot always be accomplished with a conventional drill for concrete. This is due to the monolithic structure of the material, which is not destroyed by such exposure.
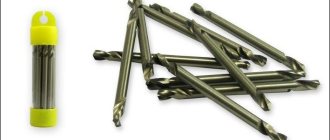
Today, several types of drills can be used to work with porcelain stoneware:
- Feathers. Only tools that are equipped with a pobedite or diamond tip are suitable. However, they are not designed to work with such materials, so after creating a few holes, you will simply throw the product away.
- Annular drills. Outwardly, they resemble small cylinders with diamond chips. With these tools you can make many holes (more than 100-150 pieces).
The working surface of a tubular drill has no slots and is a solid circle. This does not allow for efficient removal of dust that is formed during drilling. This also creates strong pressure on the surface of the tile, which can lead to cracking. For this reason, you should work with tubular drills at low speeds, periodically removing the tool to remove dust.
- Diamond crowns. This is a universal tool that is most often used for working with concrete. It can also process porcelain tiles.
The disadvantage of products with galvanic coating is the minimum service life. The structures fail after 5-6 holes. This disadvantage is compensated by the low cost, which allows you to stock up on products in the required quantities. When working with diamond bits, you should not worry too much about excess pressure, since it is reduced due to special slots at the ends of the tool.
Processing of porcelain tiles is also possible using conventional drills that are tipped with porcelain. However, it should be understood that they are not designed for such materials, so their service life will also be limited to a few drills.
After this, the tool will no longer be able to be used for its intended purpose.
Dimensions
One of the criteria when choosing a drill for porcelain stoneware is the diameter of its cutting area.
Today there are many sizes of such tools on the market, among which there are several popular options:
- 6 mm;
- 8 mm;
- 10 mm;
- 12 mm.
These types are the most popular. If we analyze diamond bits, the diameter of the drill varies from 8 to 150 mm (depending on the manufacturer). The most popular are 20-100 mm cylinders, which are intended for forming holes for water pipes in apartments or private houses.
Please note that the pitch of each drill is standard in most cases. However, there are models in which the diameter is measured not in millimeters, but in inches. This fact is important to consider if the hole dimensions must be accurate.
Briefly about the main thing
Porcelain tiles can be drilled with a Pobedit drill using the dry method, but it will quickly fail.
More holes can be made with diamond-coated tools. If you use coolant during operation, the crowns will last even longer.
The best option is ring or tubular drills. They handle 100-150 holes. But the minus in the duration of the task is largely due to the debris accumulating at the drilling site. It constantly needs to be removed. Also, to avoid cracking of the tiles, work should be done at low speeds.
The impact mode on a rotary hammer or drill is excluded in the case of porcelain stoneware. Because of it, chips appear and the risk of cracking of the decorative material increases.
Ratings 0
Adviсe
When working with the tool, it is worth considering some useful recommendations. In this case, you can achieve wonderful results.
For toilet mount
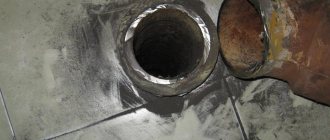
To make a hole for a toilet mount in existing porcelain tiles on the floor, you need to use a diamond core bit. Typically this is a 10 mm diameter crown, which must be used with water.
With such a crown it is necessary to work with a special additional tool - a jig. If there is no conductor, then you can make it yourself by drilling a corresponding hole in the board.
Then you need to make a mark on the porcelain stoneware. Align this mark with the hole in the jig and begin drilling. After some time, it will be possible to remove the conductor and continue working without it. Having drilled through the porcelain slab to the end, the diamond bit can be replaced with an ordinary drill and used to drill a hole for attaching the toilet.
Under the socket
It is recommended to make a hole for the socket box before laying the tiles. Markings are drawn on the front side of the ceramic tile, and a mark is made in the center of the intended hole with a small diameter drill. Then a large diameter diamond bit is taken, which is necessary to install the socket. Then the porcelain stoneware is drilled through.
To prevent the instrument from overheating, you must use water.
Auxiliary Tools
If you constantly drill porcelain stoneware, you can purchase centering templates for convenience. There are attachments for diamond bits and separately for drills.
Centering device (template) and drill cooling cylinder
For one-time work, you can quickly build a jig from a piece of board or plywood by drilling a hole of the appropriate diameter in it. This template will prevent the drill from moving to the side in the first seconds. Additionally, you can apply masking tape to the surface.
Recommendations for drilling holes in porcelain stoneware
In order for drills for porcelain stoneware to last longer, and to make drilling a hole easier and faster, you should follow some rules.
- Porcelain tile is very smooth and slippery, so there is nothing for the crown to catch on and it can come off. How to drill porcelain tiles? If possible, you should use a machine, or you need to secure the drill in a special holder, then the drill will be directed strictly vertically. If this is not possible, or the porcelain tiles have already been laid, drilling should begin by setting the drill at 30-45° to remove the glaze from the tile using rough diamond dusting, gradually leveling the position of the tool to 90°. In this case, you should drill a little (slightly) by rocking the tool;
- Creating a template. Another way to make drilling into porcelain tiles easier is to create a template. A hole of the required diameter is drilled in a wooden block, then the template made is placed on the tile, and a tool is inserted into the already drilled hole. When the glaze is removed and the crown no longer slips off, the template can be removed;
- To make drilling easier, electrical tape and masking tape can be applied to the potential drilling site, and the entry point into the future hole can be marked;
- To keep the crowns from overheating and last longer, constant cooling is necessary during operation. The easiest way to do this is with a continuous supply of water. If a hole is made in the floor, then you can simply pour water on the tile at the drilling site, you can put a wet washcloth on the surface to be drilled, and periodically press it to release the water and cool the drill.
Some bits say that dry use is possible, but if you use cooling, the drill bit will last longer.
- Drilling must be done from the front side to prevent possible chipping when drilling is completed;
- If drilling is done in porcelain stoneware that has not yet been laid, then the porcelain stoneware can be drilled either to the end or not, thereby increasing the service life of the drill. By drilling a hole 2/3 of the way through and then sharply hitting the front side, the drilled material is knocked out of the drilled hole, while part of the tile on the back side breaks off. This does not affect the aesthetic appearance, since the chip forms on the back surface;
- Drilling must be carried out at medium, preferably low, speeds. It is advisable to have a tool with adjustable rotation power;
- Never drill porcelain tiles on a canopy; if you work on a table, protect it with an additional sheet of plywood.
Drilling porcelain tiles may not seem easy, but if you get the right tools, it is possible. If you are doing this work for the first time, it is better to practice first. If you need a large number of holes, you don’t know how to drill, or you have doubts about how to make a hole, then perhaps you should contact specialists or production.
What to consider when dry drilling
When using porcelain stoneware for finishing facades, you have to drill a lot of holes in the porcelain stoneware . In this case, an important factor is to ensure normal operating speed. Therefore, it is often impossible to do without supplying water to the drilling site. However, it is not always possible to supply water to cool the drill and the material being processed. In this case, the only solution is to use special drills capable of dry drilling porcelain stoneware. Similar tools are produced by many companies, so finding such a drill will not be difficult.
It is very easy to use this drill. First, the drill is clamped in the chuck of an electric drill, hammer drill or screwdriver, after which the plastic protective cap is removed from the drill. Next, you can start drilling the material. Drilling can be carried out either at a right angle or at an angle, using the rocking method, similar to drilling with water. It is also important to monitor the color of the sludge; it should be gray and not white. This means that the slurry should be slightly darker than the porcelain tile itself. This will mean that the oil from the drill moves to the drilling site and cools the tool for more efficient drilling. If, while working with such a drill, the sludge begins to lighten, you will need to immediately stop drilling.
What types of drills are there?
The quality of the future hole in porcelain stoneware will depend on which tool you choose. The more economical the drill option, the rougher the work will be. Do not use an impact drill. It will damage the porcelain tile surface and may crack the tiles.
Processing porcelain stoneware is a complex process that cannot always be accomplished with a conventional drill for concrete.
Pobedite drill
Pobedite drill bits can often be found in a home craftsman's repair box. They are bought in large quantities, since the service life of such attachments is short. Drills often break, fail, and do not like high temperatures. The pobedit drill is made of a strong alloy that can work with tiles, concrete and brick.
Pobedit - a special alloy, still developed in the Soviet Union, used in the manufacture of turning tools.
Such drills are not friendly with porcelain stoneware. But, if the master has no other choice, you can try to work with them. Most likely you will need 2-3 pieces until you make a hole of the desired diameter. After which the drills will no longer be suitable for further work.
Diamond Coated Tool
A convenient device when you need to make many holes or recesses of the same diameter. For such similar work, craftsmen purchase a gimlet with a special coating using sintering technology. The surface of porcelain tiles is cut using diamond chips. This coating is maintained due to a special solder, which contains manganese and chromium. This makes the spraying particularly wear-resistant and hard.
The diamond surface tool works great on porcelain tiles, both dry and wet.
Diamond crowns
If you need holes of significant diameter, craftsmen recommend using a special crown. Its edges are covered with diamond chips immersed in a layer of nickel compound. The coating applied by galvanic fastening is short-lived, but quite inexpensive for such work.
After drilling several holes, the abrasive layer of the crown becomes unusable and requires replacement with a new one.
When working with porcelain stoneware tiles, it is recommended to work from the decorative, glazed side. To ensure that the crown lasts as long as possible, start working at an angle, gradually moving the tool to a vertical position. Diamond crowns differ in manufacturing technology:
- sintering method, makes the nozzle more wear-resistant, allows you to drill up to 10 sockets at a time;
- the galvanic method, such a drill is enough for a maximum of 6 socket boxes.
Steel feathers
Feather drills are needed for holes with a diameter greater than 12 mm. You won't be able to get large-diameter holes, but you will be able to make space for a dowel. The drill got its name due to its appearance, reminiscent of a bird's feather sharpened at the base. When using a tool with such a drill, it requires skill and experience. The drill must not be pressed with force; the tool may be damaged. But weak, insufficient pressure will not provide the desired result.
The craftsman needs to get used to slowly moving the steel pen along the structure of the tile.
We advise you to study - Which laser level is better to buy - a comparison of different types and a review of the best models
To drill through a porcelain stoneware surface, it is recommended to use two types of feathers. It is better to start with a diameter of 3 mm and finish with 12 mm. Tape is applied to the intended drilling location. This will help prevent the tile from breaking. A small pen on porcelain stoneware creates a hole, and a larger one expands it to the desired diameter. Do not forget to cool the area of interaction between the drill and porcelain stoneware with water while working.
Ballerina
The circular drill got its name due to the structure rotating around an axis. The short life of the tool in operation can be compensated for by an option with a replaceable cutter. This element is easier and cheaper to replace than to update the entire set. The ballerina cut on porcelain stoneware is perfectly even. You don’t have to draw the pre-planned circle of the hole on the working surface; it will be initially set by the dimensions of the nozzle. It is enough to outline the central point of the work and concentrate on it.
The tile ballerina looks like a drill, which is located in the very heart of the instrument and performs the function of centering the future hole.
Diamond sharpens granite
The price of such a tool is much higher, but the service life, especially with proper use, is longer. On average, a crown is enough for six to eight holes. The drill, depending on the type and manufacturer, can be used up to hundreds of times.
The drilling technology is the same in all cases, only crowns and drills with a diamond edge will cope with the task easier and faster than Pobedit. Crowns are usually chosen for larger hole diameters, drills for smaller ones. My advice is that if you use a crown, give preference to one with a drill in the center. This will help secure the crown at the point you need.
With diamond tools, you can no longer do without cooling; it will extend its service life. If you don’t have enough hands, place a sponge very heavily moistened with cold water next to the future hole so that it leaks.
Then the same sequence: hold the tool and bit vertically, go through the top layer at low speeds, then accelerate and get the finished hole.
With diamond tubular drills, exactly the same technology.
There is one “but” when laying porcelain tiles
More than once I have come across the position: as soon as the conversation turns to porcelain stoneware, the tilers say, of course, I will lay it, but I won’t drill, it will crack, I don’t want to re-lay it. And this moment worried me a lot at first. After all, in the same bathroom, cabinets, hooks, and holders need to be hung, and one or two holes will definitely have to be drilled for each one. But it turned out that rumors about the difficulties and dangers of drilling this material were greatly exaggerated. If the arms grow from the shoulders, any man can cope with such a task. Although there are, of course, certain tricks. So now I always drill porcelain stoneware myself and now I’ll tell you how to do it. There are several ways, the choice depends on the number of holes you have to make. The main thing you need to understand is that the top layer of porcelain tiles is especially durable, and then everything is the same as in ordinary tiles.
How and with what to drill porcelain tiles
Porcelain tiles have good consumer qualities, which is why they are constantly used in the decoration of modern apartments and houses. It is not surprising that the need to process such cladding arises quite often. For this, different technologies and devices are used. We'll tell you how to drill porcelain tiles on the floor or wall.