A neighbor came to see me the other day and casually shared what he thought was a “strange” problem. He decided to replace the lock on the gate (there was no hole for the round “tongue” in the old model), and not a single metal drill could cope with its intended task. This circumstance seemed interesting to me, and I suggested that we work together to find something to drill into cast iron. My heating pipes with radiators are made of the same metal, so I decided that searching might prove useful later.
Source prom.st
How to drill cast iron at home and with professional equipment
Industrial development leads to the emergence of new materials with properties in demand for modern products and assemblies.
Despite this fact, cast iron, in all its diversity, remains an iron-carbon alloy, without which it is difficult to imagine any sector of everyday life, communications system or production equipment. Fittings, shut-off valves, pipes, bathtubs, heating radiators, fastening elements for railway tracks and brake pads for cars, cast parts replacing steel ones. These are the components of a list that can be continued for a long time. The processing of this material deserves special attention for large enterprises and home craftsmen. One of the main aspects is how to drill a hole in cast iron.
Mortise using an overlay
This is done without removing the riser segment. To do this, you need to accurately determine the insertion point, drilling or
cut a hole and install an adapter with an elbow of the required size. The cover can be installed on pipes of different diameters. The size of the hole made will depend on their size, which should not exceed half the diameter of the pipe.
You can buy the cover in a store or make it yourself. To do this, take accessories with the necessary socket
cut and cut, leaving part of the product wall. This is necessary to seal the installation site. To ensure sufficient density, the pipe is cleaned, burrs and casting defects are removed. The installation site of the lining is lubricated with sealant. The device is fixed with clamps. Excess paste is removed.
The product adapter is installed in the same way, only it is secured with bolts. Sealing of the area is ensured by rubber sealing rings. Welding connections on cast iron pipes are not carried out, since it is impossible to achieve the required tightness.
How to drill cast iron
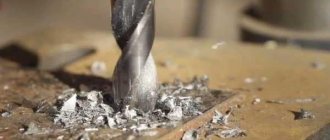
Before starting work on drilling cast iron, pay attention to surface preparation. Removing burrs and cleaning the surface with sandpaper and degreasing it allows you to achieve a smooth hole in the right place without any unpleasant surprises. This preparation will allow the heat that is generated during mechanical processing of metal products to be removed. The structure of cast iron, regardless of the form in which the graphite is in it, is prone to whitening when areas heated to critical temperatures are sharply cooled. At the same time, cast iron becomes brittle and prone to destruction at the slightest mechanical load. Before you start working, you need to understand how to drill through cast iron - with what tool and what consumables are needed.
Metal Features
After my neighbor’s story, I first decided to find out whether it was possible to drill cast iron outside the factory workshops with special equipment. As it turned out, this problem is solvable. But caution and unsuitable drills “did a good service” to the home craftsman. The fact is that cast iron is an iron-based alloy with a carbon content in the range of 2-4%. This is enough for graphite, due to weak bonds with the base component, to contribute to a decrease in the strength of the metal. And with sudden heating or cooling, the material becomes brittle. That is, drilling is permissible, but here it is necessary to approach the event correctly.
Cast iron has one more feature. Casting of blanks is carried out at a temperature of about +1200 degrees Celsius. In such conditions, it is difficult to monitor voids, as is the case with concrete mortar. Since metal is inherently brittle, there is a risk of cracks due to pressure. If the drill comes off during operation, then, according to statistics, the tool breaks in 95% of cases and the cast iron workpiece bursts. Both options are unacceptable for us, so I continued searching for a solution.
Source kanalizaciya-stroy.ru
Safety features when performing work
Installation work is closely related to the implementation of safety precautions. Following the rules will help avoid injury and equipment damage. Since a lot of unpleasant odors appear when working with sewerage, it is necessary to ensure the installation site has good ventilation. Working with power tools on wet equipment requires special attention and the use of protective equipment against electric shock.
To prevent the tool or dismantled parts from falling into the shaft, they must be secured and removed from the installation area after cutting. When working with electric cutting tools, be sure to wear a protective mask or goggles. Work should only be carried out with gloves. This will protect your hands from damage and infection.
Following the simplest rules will reduce the risk of injury and improve the quality of work.
Situations often arise in everyday life when you have to work in extreme conditions. One of the most difficult jobs is drilling cast iron, because... it belongs to abrasive materials. There can be many reasons: from remodeling the bathtub to personal technical ideas.
Moments of disassembling cast iron
If you completely replace the structure with a plastic one, you don’t have to do any extra work and just break everything with a hammer. This is quite easy to do, because cast iron is considered a brittle material. However, if only part of the pipeline needs to be dismantled, the work must be done more carefully.
Before dismantling a cast iron sewer system, it is necessary to inspect the entire system to determine the area that will be repaired. Then the water supply must be turned off to prevent waste from entering the sewer system. Further disassembly is carried out in stages:
- The part of the pipe located below the connection is cut off.
- The pipe is disconnected from the socket. Chasing methods will be discussed in more detail.
- If you can’t easily remove the connection, use a blowtorch or make surrounding cuts 20 mm long.
When carrying out procedures, it is imperative to use all protective equipment due to the risk of injury of this work.
Caulking of a pipeline with a sulfur compound
Regardless of how the cast iron sewer was connected, before replacement it is necessary to carry out some standard preparatory work:
- turn off the water;
- disconnect the hose leading to the toilet;
- remove the toilet itself by unscrewing the bolts;
- clear the bathroom of appliances and furniture.
To determine whether sulfur was actually used when joining the pipes, you need to bring a blowtorch to the seam. When exposed to high temperatures, sulfur melts, accompanied by an unpleasant odor.
When dismantling cast iron sewer pipes, work begins from the farthest corner. The element must be broken with a hammer. It is better to use a tool with a plastic or polymer base, because metal nozzles can clog the sewer. Having found the cross leading to the riser, you need to loosen it as much as possible.
Then you need to prepare a blowtorch or gas burner. Warming up connections should be carried out by at least two people. While one heats and melts the sulfur, the other must loosen the structure. In this case, be sure to use gloves and other protective equipment.
When the connecting substance is completely melted, the crosspiece can be removed from the riser. In this case, you should be very careful, you must remember to remove the remaining sulfur, and then let the riser cool thoroughly. If the cast iron structure turns out to be too strong, you can always make a few cuts near the pipe that needs to be removed. This will make the extraction process easier.
Caulking of a pipeline with a cement connection
Dismantling cast iron pipes that have been connected with cement is practically no different from the above-mentioned option with sulfur, but is much safer. This is because when sulfur melts, a lot of carbon monoxide is released. To begin dismantling, you need to cut off part of the pipe. In this case, it is worth retreating at least 30 cm from the junction. Hardened cement is removed with a hammer, which must be used to hit a screwdriver or chisel inserted into the hole. All procedures should be performed as carefully as possible so as not to damage the bell.
When the joints are freed from cement, you need to try to loosen the main pipe. In order not to treat the sewer with a blowtorch or torch, you need to remove the cable, but if this cannot be done without, you need to heat it very much or use a specialized wrench. For example, for a 50 mm pipe, use tools Nos. 3 and 4.
The crosspiece is located below on the main riser. To remove it, you can simply use a hammer and screwdriver. In this case, for some time you need to lightly tap on the tee itself in order to form a small gap between it and the pipe. Then you need to penetrate this opening, pry off the tee and remove it. Carrying out these manipulations will take a lot of time, in addition, this method can be ineffective.
The next option is to use a blowtorch or torch. Dismantling occurs much faster, but the price for this is an unpleasant odor that takes a long time to disappear. First of all, you need to cut off the bell of the cross. Then a heating device is placed into the pipe. A metal shield is placed on the top of the pipe to be able to regulate the draft inside the riser. When heating, you need to start rocking the pipe and, as soon as the opportunity arises, remove the dismantled tee.
Drill selection
An ordinary metal drill is able to cope with the task. The only condition in this situation will be the correct degree of sharpening of the cutting tool. Without theoretical justification, drill manufacturers, together with representatives of machining enterprises, found that the optimal sharpening angle range would be a run-up of 116-118 degrees. The use of drills tipped from special steels and alloys is also justified if it is necessary to make holes in large quantities and large diameters. The most commonly used is will win. The design of the drill must correspond to the metal processing. At enterprises, toolmakers got out of sticky situations by sharpening Pobedit drills for concrete with a diamond wheel. However, such manipulations require certain skills and may be unsafe when drilling. Selecting a drill for cast iron is an important step.
Carrying out work
When performing drilling processing, the following recommendations must be observed:
- Constant control over the force on the tool. As the load increases, defects in the form of cracks and cavities may appear on the metal. If the drill breaks, the technician may be injured.
- Overheating is not allowed during processing. Increasing the temperature of the workpiece will change the structure of the metal, causing it to become brittle.
- Before drilling, the surface of the part is prepared and the drilling site is cored.
- If the hole diameter exceeds 10 mm, then a tool kit must be used. They start with a small diameter and gradually achieve the desired one.
As a result of following the technology of machining cast iron parts, a master can achieve high precision holes.
Source
Drilling cast iron pipe
It is not always possible to drill a hole of the required diameter in a cast iron sewer pipe. This is due to the diameter of the drills available. The size of the drill chuck rarely exceeds 10-12 mm. To make a hole with a diameter of more than 10 mm, it is perforated in a circle and cut out using a hacksaw blade.
This work requires care and patience. To make drilling easier, it is necessary to remove the top hardened layer of metal. The work is performed with a low-speed drill. The holes are made in several stages, using drills from smaller to larger diameters. The sharpening angle of the cutting edge should be within 110-115°. Periodically, the drill must be cooled, preferably in machine oil. When drilling a hole, you need to apply minimal force to the drill.
Pipes and fittings are made from gray cast iron. If you come across white products, they cannot be processed at home, but their service life is disproportionately longer.
Drilling holes in metal of large and small diameter: how to do it correctly? — Construction
We will learn all the intricacies and methods of drilling metal - choosing a tool, sharpening and cutting modes.
Drilling a hole in metal - what could be easier? There are, however, quite a few subtleties in this metalworking operation regarding the correct choice of tool, sharpening and cutting modes.
How to drill a hole in metal
- Types of metal drills and sharpening techniques
- How to drill metal correctly
To make holes in metal, drills are used - mechanical rods made of an alloy that is harder than the workpiece. Metal drills are made from high-speed steel grades P6M5, P9, P18 under the general designation HSS, or from hard alloys: VK, T5K10, intended for processing hardened and carbide workpieces.
The drill consists of three elements:
- The edges cut into the bottom of the hole and remove thin chips from it.
- Spiral cutting forces the chips out of the hole.
- The shank is designed to secure the drill in the tool chuck.
It is worth talking about cutting edges in more detail. These are two bevels on the sharp end of the drill that meet at the apex - the most protruding point of the front part, forming a bridge. The angle at which the edges meet is called the principal angle at the apex; its value is standardized for various materials and processing modes:
- Hard steel and stainless steel: 135–140°
- Structural steel: 135°
- Aluminum, bronze, brass: 115–120°
- Copper: 100°
- Cast iron: 120° clearance angle and 90° edge sharpening angle
Each edge also has its own sharpening angle of about 20–35°, which determines its sharpness. This angle, called the back angle, ensures that the drill touches the metal only along the edges, while leaving free space behind them.
This shape is necessary for easier removal and ejection of chips. Some drills have an edge sharpened at a more obtuse angle, even straight.
These cutting edges work well on brittle metals such as cast iron, brass and bronze.
The spiral part includes several grooves for removing chips, at the top of which there are additional edges, the plane of which is parallel to the axis of the drill. This is the so-called ribbon, which, when the drill is immersed, cleans the walls of the hole and promotes better alignment.
Tool selection
In factories and enterprises where the processing of cast iron workpieces is carried out on a wide stream, drilling machines are equipped with an emulsion supply to the point of contact of the drill. This technological move allows you to avoid phase transformations in the treated area. A special requirement for drilling machines is the increased requirement for the ability to control and smoothly change the speed of rotation of the cutting tool and the feed into the workpiece. Specially developed substances are often used as emulsions. These are mainly sulfonated and chlorinated oils. For gray cast iron, kerosene can be used. If there is no need to speed up the process, gray cast iron can be drilled without the use of a cooling lubricant.
At home, a drill with adjustable speed and quite powerful is used for drilling if it is necessary to drill a hole of significant diameter. If possible, be sure to use a device that locks the drill in relation to the workpiece. This will extend the life of the cutting tool. The main reason for its failure is misalignment, deviation from the vertical drilling axis.
Interesting information. After drilling the hole, treat its edges and cavity with sealant or epoxy glue. This way you can get additional protection against corrosion.
Detailed instructions for drilling cast iron
Tools and materials required for work:
- ruler;
- marker;
- wooden block;
- Bulgarian;
- kerosene solution.
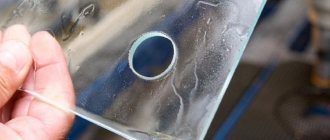
Before drilling a hole in cast iron, you need to clearly define your goals and objectives in advance, because... you need to see the final result accurately. When drilling holes in a bathtub without prior experience, mistakes are made. The three most common are hole slipping, enamel chipping, and even drill bits breaking.
Before you start doing anything, you need to make sure that there really is cast iron in front of you. The easiest way is to try to lift the product. If it does not rise due to the enormous mass, then no error has occurred. Otherwise it's just plain steel.
The most important aspect that should not be forgotten throughout the work is the lack of haste. Even if it’s really necessary and deadlines are pressing, you need to drill cast iron at cruising speed, because... The material is not only very hard, but also very fragile, which is why you can inadvertently say goodbye to a cast iron product.
Now you can begin the preparatory work. At the very beginning of preparation, you need to set all the necessary marks on the surface using a black or red thick marker. The points are placed small so that during work the drill does not accidentally move away from the selected positions.
The drill must be made of carbide steel, and its sharpening must be impeccable. The drill should be for metal with an angle of 116-118 degrees, so as not to scratch the surface, but rather to dig into it. If this point is not taken into account, then with a very high probability the enamel will not be cut off in a careful circle, but will crack, creating cracks around itself.
If you want to play it safe, you can use a wooden block. A hole is made in it that is 2 mm larger than the drill used, so that no difficulties arise during professional activities. This block should be, if possible, 2-2.5 cm thick so that the drill does not move even if the hand shakes. When working, the block will be applied to the surface in such a way that a pre-marked point can be seen in the center. It will need to be pressed with 1 hand while the entire work process is organized with the other.
Often, beginners forget or deliberately ignore drill cooling, which is why the work process is much slower and the drill itself wears out faster. In order to avoid this, you need to use a kerosene solution. Its consumption is small enough to make the drills more expensive.
There is another way not to harm the enamel and at the same time do everything with the utmost quality - use a grinder. Instead of the usual cutting disc, you need to string a grinding disc, which will safely clear the patch of enamel, and only then carry out the steps described above. This approach not only minimizes risks, but also significantly speeds up the process. Usually an additional 2 mm to the diameter is tacked, because in this case, the result will be without flaw.
Most people who use a cast-iron bathtub one day come up with the idea of introducing some innovations into their water procedures. Often, modifications concern the installation of a mixer directly on one of the sides of the product or the installation of hydromassage equipment.
Whatever the owners are up to, this process can lead to chipped enamel and damage to the bathtub in the absence of sufficient experience and knowledge on how to drill a cast-iron bathtub.
The drilling procedure should be carried out without haste, because the base in which the hole will be located has a high level of fragility.
How to tap into a cast iron pipe?
Tapping into a sewer pipe can be done in several ways. It depends on the size of the pipes. Most often, products with an internal diameter of 100 mm and a wall thickness of 7.5 to 9 mm are used. To cut a pipe of a smaller diameter into a larger one, no special skills are required and such work will not be difficult, especially on a horizontal section.
If it is necessary to install a tee or connect products made of different materials, then installation may cause some difficulties. Before doing this, you need to accurately calculate the insertion location. It should not interfere with the movement of the main flow and lead to a narrowing of the flow area. On a horizontal section of the system, it is possible to install the pipe vertically or at an angle of 45°.
Due to the fact that plastic and cast iron pipes are manufactured according to different specifications, their outer diameters differ from each other. In order to join such products, rubber-metal couplings of the UR-12 type are most often used. In this case, tightness is achieved using a rubber sealing ring, which is squeezed out when the structure is tightened. At the same time, this device ensures a tight connection with a deviation from the axis of 8°. The use of a coupling guarantees tightness at wastewater temperatures up to +70°C.
SOME FEATURES OF USING AN IMPACT DRILL AND A PERFORATOR
- Using such tools, you can make holes in the structures of various materials (brick, wood, concrete, etc.).
- Using certain attachments, and without using high speeds, you can easily and quickly tighten (unscrew) screws, screws and self-tapping screws.
- Greater power of the drill allows you to make a hole faster, only with its increase the impact drill becomes heavier.
- If you buy certain devices, an impact drill or hammer drill can replace an angle grinder.
- With proper use of any of these tools, the service life will be very long.
Correct use means:
- interruption during operation (after 35-40 seconds);
- use only high-quality sharp drills;
- take into account working conditions.
The operating principle of an impact drill is based on the translational movement of two ratchets, which repel each other while the motor spindle rotates.
Today, almost any, even minor, home repairs cannot be done without an impact drill or a more advanced design called a hammer drill. The main purpose of an electric drill is to drill holes in various materials, except stone and concrete. For drilling holes in materials such as stone and concrete, Modern electric drills are now equipped with an impact mechanism.
The impact mechanism built into an electric drill is notable for its imperfect design and very low performance when drilling in concrete. Things are better when drilling holes in a brick wall, but when the electric drill operates intensively and frequently in this mode, the impact mechanism wears out very quickly. When worn out The impact mechanism further reduces the drilling performance in concrete and brick, and in addition, there is a large load on the electric motor, causing it to heat up sharply.
Therefore, professional builders use hammer drills to drill holes in concrete and stone walls, equipped with a more advanced impact mechanism (read hammer drill device). Impact drills are (in my opinion) popular among ordinary owners of houses and apartments who have nothing to do with professional construction .
But since the price of a good hammer drill is much higher than the price of an impact drill, people began to willingly buy such a tool. But I repeat, the impact mechanism of an impact drill is of little interest to a professional builder. In order to more easily understand the principle of operation of an impact drill, I suggest you familiarize yourself first with an impact drill device. To restore the functionality of the worn-out mechanism of an electric drill, you need to repair the drill yourself,
in which worn parts are completely replaced.
Subtleties of working with cast iron
Following simple rules will allow you to achieve the desired result, leaving the drills, tools, and hands intact:
- Control the load applied to the drill or machine without causing the drill to break. Cast iron products are mainly produced by casting. Shrinkage cavities and voids may appear. If a drill falls into such a void, it breaks in 95% of cases. There is a risk of injury or a broken drill bit in an unfinished hole.
- Do not allow the drill to overheat. Take a break from work. This will prevent the metal from softening and will extend its service life.
- To drill into a cast iron bathtub, use a pre-diamond tile and glass drill bit. This is a simple move to prevent cracking of the enamel.
- If the diameter exceeds 11mm, then the optimal solution would be to use a drill of a smaller diameter, and then the required size.
Preparatory stage and necessary tools
Immediately before starting work, it is necessary to prepare the surface of the workpiece on which the hole will be made. In this case, burrs are removed from the part; in this case, sandpaper is used, as well as oily and greasy stains. As a result, the master will achieve normal heat removal from the drilling site.
With a sharp cooling of heated areas, the metal bleaches; this phenomenon occurs as a result of the structural structure of the material. The bleached area is characterized by low strength as well as brittleness. Mechanical loads can lead to defects in the metal workpiece.
Large industrial enterprises use emulsions to cool workpieces and tools. They contain sulfonated and chlorinated oils; in some cases, a kerosene solution is used. Thanks to this liquid, it is possible to avoid changes in the structure of the metal. For machine tools, one of the conditions is a smooth change in the spindle speed, as well as a smooth lowering of the drill into the workpiece.
In a private workshop, electric drills with the ability to adjust rotation are used. Drive motors must be selected with high power, and the master will receive holes of large diameters. To prevent drill breakage, as well as maintain processing accuracy, a mechanism for securing the workpiece and the machine is used.
Drilling tool
Preparation
Before drilling cast iron, you need to prepare the drill. You can use the same drills as for drilling steel, but it is advisable to change their sharpening angle. It should be 116-118 degrees.
In addition to changing the sharpening angle, you also need to trim the edges of the drill tip, as shown in the figure below. If this is not done, the surface of the hole may be uneven or even destroyed.
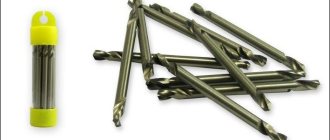
Conventional metal drills are marked P6M5 (or HSS). You can drill with them, but to do it even more confidently, you can get drills with the addition of cobalt - they are more durable. Their marking looks like this: Р6М5К5 (or HSS-CO).
Where to start Some features of use
You may need the following tools:
Connection of cast iron pipes. SMU (both ends of the pipe are smooth); SME (one end of the pipe is smooth, the other has a detachable connection)
- electric drill or brace;
- drills with pobedite bits;
- grinder and metal wheels;
- marker for making marks.
There are two types of cast iron pipes:
- SMU (both ends of the pipe are smooth);
- and SME (one end of the pipe is smooth, the other has a detachable connection).
Before you start using pipes, you need to make sure that the location chosen for them does not contradict building codes. It is desirable that there are no turns or slopes. Cast iron pipes are prohibited from being processed; only pipe cutting is permitted. Today, this metal is simply irreplaceable in some types of industry, which is why cutting and drilling cast iron is so important.
LLC DESIGN PRESTIGE
Drilling process
When drilling, you need to follow a number of simple rules.
- You need to drill at minimum speed - no more than 400 rpm. It makes sense to even think about drilling not with an electric drill, but with a mechanical one or a brace. Low speeds are needed so as not to overheat the drill and dull it.
- There is no need to put strong pressure on the drill. If the pressure is too high, it will overheat again. But it happens that cast iron turns out to be very hard, so you have to press hard. In this case, the revolutions need to be made even less.
- For cooling, you can add water to the drilling site, but it is better to use special coolants that contain lubricant. Some people prefer to cool with kerosene.
- When drilling cast iron, it is not chips that are formed, but crumbs. Not all of it is removed along the grooves of the drill, so you should periodically clean the drilling site from it.
These are the rules for drilling cast iron. We hope these tips will help you get the job done!
Source
Drilling on an industrial scale
In industrial production conditions, if it is necessary to solve the problem of how to drill cast iron, appropriate machines with working tools that have special working surfaces of appropriate sharpening are used. A supply of coolant is required to ensure the specified operating temperature.
In addition to the question of how to drill cast iron, it is imperative to ask the question of safety during such work. The possibility of cavities, voids and similar defects in the mass of processed material should be taken into account. This is often due to the large amount of carbon in the cast iron and a variety of other components.
These sudden defects also lead to the release of large amounts of fine chips and dust during metal processing. Processing methods depend on the type of cast iron, but there are general rules and safety requirements.
As a result, generally accepted protective measures must be taken during the execution of work. Respiratory organs must be protected. Why is it necessary, in addition to equipping the work site with a ventilated hood, to use a respirator or a cotton-gauze “petal” for personal protection.
You should also protect your eyes. Safety requirements require the presence of protective screens and the use of safety glasses with closed side edges. You should work in special work clothes, gloves and a hat.
To avoid problems when drilling a cast iron pipe, you need to know the properties of the material and the rules for handling it.
Cast iron pipes are used in pipelines designed to drain waste liquids and create main collectors. Among the advantages of cast iron are fire resistance and low noise levels. However, this metal requires more careful handling than PVC pipes. We also note that cast iron pipes, as a rule, are coated with an anti-corrosion compound inside and outside.
To work with cast iron pipes, you need to prepare the following tools:
- brace/electric drill;
- drills and bits from Pobedit;
- a marker that will be used to mark the pipes.
Reasons for the tie-in
There can be many reasons for crashing into a sewer. Here are just some of them:
- Connecting a new plumbing fixture.
- Transfer of devices to a new location, in case of redevelopment, etc.
- Connecting the house to the central sewer system.
In the first option, there is a connection to the in-house system, so there should be no complications as such. In the second case, if there is a need to cut into the central riser of an apartment building, there is a risk of being flooded with drains from the upper floors. Therefore, it is better to agree in advance with neighbors about the time of work and limiting the use of sewerage.
When connecting a house to a centralized sewer system, it is necessary to negotiate with utility services so that the water supply is shut off at a certain time. In this case, housing and communal services have the right to issue you an invoice for certain work.
Video: How to install a tee into a sewer riser