Gasoline and kerosene
A blowtorch running on kerosene, like a gasoline one, consists of a tank in which the fuel is compressed to several atmospheres, and a burner. During compression, the fuel is partially mixed with air.
Reservoir and pump
The reservoir has a volume of 1-2 liters. Its body has a built-in filler plug, a pump to create pressure and a tube that connects the body to the burner, providing fuel to the latter.
To use the maximum amount of fuel from the tank and reduce the number of refills, the free “receiving” end of the tube is located almost at the bottom. All parts are built into the tank in such a way as to ensure tightness.
The simplest pump design is a cylinder with a piston. At the lower end of the cylinder there is a simple check valve that prevents air from escaping from the reservoir.
The piston is a cup-shaped cuff that compresses air when moving towards the cylinder valve, and when moving in the opposite direction, it allows air to flow, filling the cylinder.
How to make an alcohol burner in a few minutes
To create a simple alcohol burner, we need two 0.33 liter jars. We mark the lower parts of two cans.
Let's cut it off.
Various portable gas burners or electric hair dryers have not found widespread use in the household, because... Such industrial devices are difficult to use. For this reason, a device such as a blowtorch is used for rapid heating. It was invented by Carl Rickard Nyberg (Sweden) in 1881. Today you can buy a blowtorch in specialized online stores with delivery by mail, but first you need to understand the structure of the device and become familiar with its varieties.
The principle of operation of a blowtorch
The blowtorch can run on kerosene and gasoline.
After refueling the device, air is pumped into the tank using a pump, which creates increased pressure inside the fuel cylinder. Excessive air pressure forces fuel into the burner, where it burns and forms a flame. To ignite the burner and ensure stable operation, it must be preheated to a certain level. To carry out heating, a fuel cup is used, which is mounted under the burner. The capacity of one cup is usually enough to heat the burner to the desired temperature.
When a certain burner heating temperature is reached, the fuel supplied from the reservoir to the burner evaporates in the evaporator. Gaseous fuel enters the combustion area and forms a flame through a special nozzle. During the combustion of evaporated fuel, oxygen is sucked into the combustion area and the process is maintained.
During the process of heating the burner, air is not pumped into the tank for safety reasons, and the shut-off valve must be closed at this moment. The shut-off valve opens only after the burner and evaporator have warmed up. After opening the shut-off valve, the flame strength is adjusted. After finishing work with the device, turn it off by screwing in the shut-off valve.
How to make a soldering station at home?
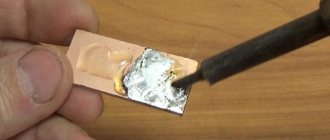
Not only novice radio technicians, but also experienced solders face certain difficulties when soldering radio-electronic elements. When buying inexpensive soldering irons in a store, you may encounter such a phenomenon as overheating of the device, which leads to the formation of carbon deposits on the tip and, as a result, to poor thermal contact with the tin on the board and the leg of the element. Or the board will overheat and the tracks will peel off. In this article we will look at how to make a soldering station with your own hands, providing all the necessary assembly diagrams, photo and video examples.
Step 1 - Making a Contact Soldering Iron
This option can be called the simplest and quite budget-friendly. This design regulates the voltage on the soldering iron, accordingly changing the temperature of the tip. By trial and error, you need to find out the position of the regulator and the performance of the heater. You can customize the soldering process for yourself and for a specific moment in production.
We recommend using a chandelier dimmer (dimmer) as a voltage regulator. The only drawback of this idea of assembling a homemade soldering station is the small range for setting the output temperatures. That is, for soldering we are interested in making the voltage range from 200 to 220 volts, and not from 0 to maximum.
Most likely, you will have to slightly alter the circuit, adding a “fine-tuning” resistor in addition to the main one.
Scheme for assembling a soldering station at home:
This circuit uses a rectifier bridge, which will allow us to raise our homemade soldering station from the standard 220 volts at the input to 310 volts at the output. This will be important to do for those home craftsmen whose electrical voltage in the house is low, which is why the soldering iron does not heat up to operating temperature. If you don’t have a dimmer available, you can assemble it yourself; we discussed how to do this and what is needed for this in our article about a homemade dimmer.
Step 2 - Assembling the air soldering iron
Sometimes when soldering, it becomes necessary to replace SMD elements and the soldering iron with the tip is too large for this. An air type device is used specifically for these purposes. The principle of its operation is similar to a home hair dryer - an air flow is forced through a heated element and transferred to the soldering site, heating the solder contactlessly and evenly.
To make an air soldering iron (pictured below), you can use this recommendation. It can be made from a working old device, insert a tube from the antenna instead of the tip, according to the size of the old tip. Prepare the soldering iron so that it is sealed.
Forced air supply occurs using an aquarium compressor through dropper tubes.
instructions for assembling a hot air gun for a soldering station:
To adjust the temperature of the air flow, you can use a voltage regulator. The ideal option is if you don’t have an extra, working soldering iron, you can take a non-working one and rewind it to a low voltage of 8-12 volts. This method is preferred for electrical safety reasons. In this case, nichrome for the heater can be a piece of wire, a 0.8 mm spiral from an electric stove, wound neatly, without overlaps. Approximately 30 turns in place of the old one. An important point is the requirement for the transformer; it must be powerful, at least 150 watts.
A more expensive method of regulating the temperature at the hot end of the soldering iron is to maintain the temperature on the tip. For this, a thermocouple is additionally installed; in one of our articles we told you how to make a thermostat with your own hands.
By combining our homemade products you can make a universal soldering station with your own hands. In this case, the homemade product will have a voltage regulator, with which you can adjust the input to the transformer, thereby changing the power of the heater.
If you need to desolder a large microcircuit and for this you need to warm it up well and evenly, use a homemade hot air gun with a temperature controller. Another option is to make an infrared soldering station from a ceramic lamp socket and a nichrome coil connected to a step-down transformer. The same thermostat is used to control the temperature on the surface of the parts.
You can see how to work with an infrared soldering station in the video below, and you can also learn the nuances of the work there:
Handling old lamps
Old blowtorches that have not been used for a long time should first be inspected from the outside. During inspection, you need to check how easily all the valves and the tank lid open. The adjustment valve should turn easily. After this, you need to check the housing for leaks. To do this, use a pump to pump air into a lamp that is not filled with fuel. Then, using a brush, apply a thick soap solution to all threaded connections and the faucet. You need to check it closed and open.
If all connections are tight and the pump is properly creating pressure in the housing, the tap performs its functions by opening and closing the burner, the lamp can be refilled and started.
Strong burner
In this video tutorial we will tell you how to make a powerful alcohol burner for decorative firing of wooden products; it has proven itself excellent in desoldering circuit boards for amateur radio purposes.
In order to make an alcohol burner, we need alcohol, some kind of plastic bottle, for example a glue bottle. You will also need two metal tubes. The first tube should have an internal diameter of about 4-5 millimeters, the second 2 millimeters. In addition, you need epoxy resin and a small cord that can be inserted into the first tube.
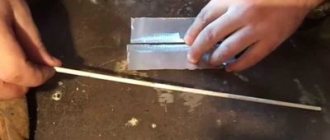
First, we take a 4 mm metal tube and thread a cord through it. After that, mix a little epoxy resin, unscrew the dispenser and glue the tubes. After the resin has hardened, bend a thin metal tube.
All that remains is to pour alcohol into the bottle, insert the cord and close the lid. Once the cord is soaked in alcohol, you can set the cord on fire. Now you can use the alcohol burner for its intended purpose. To do this, you just need to click on the jar. As you can clearly see in the video, parts can be soldered in a matter of seconds.
Design of a gasoline blowtorch
In the design of a gasoline blowtorch, there are two main structural parts - a tank for storing fuel reserves and a burner.
An ejector is a device in which kinetic energy is transferred from one medium moving at a higher speed to another.
The burner is called an ejector. The ejector has a design that promotes the flow of air and decaying combustion products during the combustion process. The operating principle of this device is based on creating thrust due to fuel combustion.
A supply of fuel is poured into the tank, after which it is closed with a tight lid with a seal. The lid with a seal prevents fuel leakage during storage of the device, as well as during its operation. The tank for storing a supply of gasoline is equipped with a pumping device that allows air to be pumped into the tank to create excess pressure in it. Excess pressure contributes to the transportation of gasoline from the tank to the burner during operation of the device.
A typical device contains the following structural elements:
- fuel tank;
- handle for holding the device during operation;
- hermetically sealed fuel filler neck;
- pump with valve - to create excess pressure in the tank;
- siphon tube providing fuel supply to the evaporator;
- a needle valve used to regulate the fuel supply;
- evaporator;
- nozzle;
- ejector;
- nozzle cleaning device.
The fuel filled into the device tank is a consumable item. The smokiness of the flame and the clogging of the nozzle depend on the quality of the fuel used; in addition, the degree of explosion hazard that occurs during the use of the device depends on the quality of the fuel. For normal operation of gasoline devices, it is necessary to use special gasoline or gasoline with an octane rating of at least 80. If low-quality fuel is used, the device may require repairs.
How to use
Blowtorches are considered fire hazards, so it is important to take precautions when using them. Such devices are rightfully considered explosive, because in the tank, which constantly heats up during operation, there is a mixture of fuel vapor and air under high pressure. To light the device, read the instructions for using the gasoline device:
- Fill the tank with fuel in a volume not exceeding 3/4 of the entire tank. The empty part is needed so that the necessary pressure is generated during operation.
- You can get excess pressure after 6–10 manual pumping, which should be done not with sudden, but with smooth movements.
- Then pour fuel into the burner tray - you can use the same gasoline that you filled the tank with. The ideal option is ethyl alcohol, which does not leave soot during combustion.
- The filled fuel is set on fire to initially warm up the evaporator. A condition must be met: when setting fire to gasoline in a bath, the lamp must be installed so that it is not exposed to wind or drafts.
- As soon as the gasoline in the tank stops burning, open the shut-off needle. Look at the condition: if there is a jet of steam produced during heating, then light the torch. If after warming up you observe liquid, then it should be repeated. With experience, you can learn to accurately time the opening of the locking needle.
- Gasoline supply can be increased over time as needed. Be guided by warming up the evaporator. To speed up the process of heating the fuel, the device can be installed next to a metal object with the nozzle facing the surface - the distance between them should be 2-3 cm.
- The size of the torch can be adjusted using the locking needle. If you notice that the torch goes out, it works unevenly, or there are some other shortcomings, then stop operating the device. After this, carefully clean the nozzle with a needle specifically designed for cleaning.
- You need to shut down the lamp by extinguishing it by closing the needle. Allow the device to cool, then open the reservoir to release the pressure.
A common cause of device explosion is opening the lid of a fuel container when the lamp has not yet cooled down. Gasoline vapor comes into contact with a burner heated to 500–600 degrees and ignites. Remember that when a gasoline device is ignited, the evaporator is filled with gasoline, and if at this stage the fuel supply valve is closed, the remaining fuel in the evaporator will begin to leave it through the nozzle in a liquid state. In case of large heating, gasoline leaves the container in the form of a gas or gas-liquid stream. Security measures:
- always try to ensure the tightness of the connections and valves of the pump;
- do not allow the fuel tank to heat up to a temperature above 50 degrees;
- Do not open the lid of the fuel container or refill the lamp if it has not yet cooled down or continues to work;
- Do not under any circumstances create excess pressure in the device;
- do not use gasoline in a kerosene lamp - any soldering lamp requires the use of only a specific established type of fuel;
- during storage and transportation, make sure that there is no fuel residue or excess pressure in the tank;
- Do not operate the device if the safety valve is faulty;
- if a fuel leak or vapors generated during combustion is detected, it is prohibited to use the device further;
- Do not operate the lamp in a room without proper ventilation to remove toxic, strong-smelling and carcinogenic combustion products.
Making a gasoline burner with your own hands
Not everyone can purchase a new burner that runs on gas or a fuel-air mixture, which is due to the relative high cost of the device . And the purchased model does not always cope with the assigned tasks, especially if it has already been used. This may be due to the presence of hidden defects or breakdowns.
To avoid becoming a victim of such an unwise purchase, many men prefer homemade solutions, which are particularly affordable and easy to assemble. As mentioned earlier, even the most inexperienced welder can easily install such a device using improvised means, saving himself from high costs.
If a homemade gasoline burner is made taking into account the basic rules and recommendations, it should produce fire immediately after a lit match is brought to it. In this case, stable and steady combustion of the fuel-air mixture will be noticeable for another 3-7 minutes. During the combustion process, it is possible to reach temperatures up to 1000 degrees Celsius. Using such a device, you can successfully melt all kinds of solder, including hard solder, as well as metals and glass. In addition, the burner easily solves the problem of heat treatment of small-sized products.
To make a device with your own hands, it is enough to use a number of materials. Among them:
- Frame.
- Pen.
- Sleeve.
- Hook.
- Emphasis.
- A tube.
- Balloon.
- Ring.
- Rubber bulb.
- Filler.
By the way, it is not necessary to create such elements with your own hands - they are present in many other tools that are available in the home workshop. For example: instead of a rubber bulb, you can use a spray bottle .
Step-by-step instruction
A lathe is used to turn the body of the future device. Products from different manufacturers are used as steel. In this case, the body of such an important part is made composite so that one end remains open and the other is closed with a plug.
The latter case involves making a hole 0.1 millimeters larger than the outer diameter. This nuance will allow the body to move tightly within the tube, maintaining the necessary tightness.
- A ring is fixed in the inner part of the body, which is made of slag wool or durable metal mesh.
- At the next stage, the stop and bushing with a hook are manufactured, which involves the use of a durable steel sheet. Then a handle for a gasoline burner is cut out of oak or beech.
- Then all that remains is to prepare the tube by very carefully drilling two holes so that they are parallel to each other. The finished product is processed using special sandpaper, covered with colorless varnish in three to four layers.
- The last manufacturing step is to prepare the tube. The end of the element is passed through the middle of the body, which allows the formation of a nozzle. Using hard solder PMC-54, the end of the tube is soldered, and then a hole with a diameter of 0.2 millimeters is made along its axis.
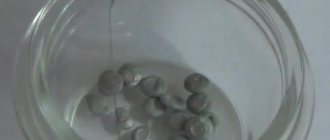
Solder is optionally made from copper or zinc . In the first case, copper wire is used, which is fired and cut into several pieces using scissors. When choosing the second option, use a glass from a regular electric battery, which is first cleared of its contents and hardened by fire. After this, the glass is placed in a container with cold water and a weak solution of hydrochloric acid, cut into small pieces after such treatment.
Next, you need to combine pieces of zinc and copper in equal proportions, placing them in a crucible and sprinkling with borax. The fusion of metals is carried out on a burner. As a result, the block is cooled, secured in a vice and leveled using a file. The collected sawdust is collected and mixed with borax.
Other features and creation methods
It is not always possible to buy a ready-made burner that runs on a fuel-air mixture or gas, which is due to many reasons. Sometimes this is explained by the too high cost of the equipment, and sometimes by a simple lack of time to visit the store. Therefore, more and more people are becoming interested in making a burner with their own hands. By the way, homemade solutions look no worse than purchased ones. Their productivity is quite high, and there are practically no .
As mentioned above, if you bring a lighter or a lit match to a homemade burner, a fire will immediately break out from the corresponding window, which will burn for about 5-7 minutes, reaching a temperature of over 1000 degrees Celsius.
Due to these features, the device can be used for productive melting of hard solders, heat treatment of small tools, melting of all kinds of metals, solders, and sometimes even glass.
Most of the parts of a homemade burner are created using improvised materials, since they can be borrowed from other unnecessary things.
The burner device itself includes:
- Frame.
- Sleeve with hook.
- Emphasis.
- Handle.
- Rubber ring.
- Balloon.
- Pear (can be taken from a spray bottle).
- Filler.
№
If we talk about this method of making a gasoline burner, then it may be familiar even to those people who have never before asked the question of creating such a device . When completing this task, you need to take two aluminum cans, which must be empty. Cans of beer, condensed milk, Coca-Cola and other products are suitable.
- After thoroughly washing and drying the container, you can begin work. Four punctures are made in the central part of the bottom of the first jar. You can use a nail for this. Similar holes are made around the perimeter of the rim of the can. As a result, it is possible to produce a base part that will supply the flames.
- After this, you need to cut off the part that was made earlier from the rest of the container. The length of the side is three to four centimeters. If you cannot cut the product using ordinary scissors, you will have to use any other sharp object.
- The next step is to prepare a second jar, the bottom of which is simply cut off. Try to perform this step with extreme caution to prevent nicks from occurring. If there are nicks, it is enough to sand them off with sandpaper.
- In the end, all that remains is to connect the two resulting parts. By the way, at this stage, novice welders often have difficulties, because the cans have the same diameter and this significantly complicates the work. To solve the problem, it is enough to make a small cut in the side of one of the cans, wrapping the entire structure with aluminum tape to increase the tightness.
In order for the gasoline burner to be ready for use, all that remains is to fill it with gasoline and then heat the area with a lighter. It is better to thoroughly warm up the burner for 5-10 seconds, after which it will be able to maintain the optimal level without your help.
Now you see that creating such an indispensable device with your own hands is very simple.
№
Another method is used to make burners. It is significantly more complex than the previous one, but allows you to achieve higher reliability, strength and operational durability. Therefore, if you place emphasis on such features, then it is better to make the burner using the second method. True, this will require a lot of effort, patience and time.
So, to successfully manufacture the structure you should take:
- Compressor. You can use an old car inner tube that is constantly inflated, or a basic compressor from an unused refrigerator (if you have one).
- Receiver. Here you can use a regular plastic canister with a volume of up to 10 liters. You also need to find a dense translucent cork.
- Fuel tank. It uses a two-liter metal barrel that will store the fuel mixture.
- Burner. This element is created with your own hands or purchased at the appropriate store.
If all the necessary parts have been collected, all that remains is to follow the instructions and assemble the future device. If you strictly follow the basic rules and follow the step-by-step guide, the end result will exceed all your expectations and you will be pleasantly surprised by the quality of the homemade burner. The main thing is to be ready to devote several hours of time and patience to the upcoming event.
DIY IR soldering station v2
Radio technicians and amateurs often encounter various breakdowns of radio equipment. For repairs, a regular soldering iron with a copper tip can be used, but with the advancement of technology, very small parts are installed in some devices.
It is inconvenient or completely impossible to work with such devices with a regular soldering iron; for example, SMD elements must be soldered by heating the common soldering area. To carry out such processes, there are various soldering stations and hair dryers.
Bottom heating of circuit boards (thermal tables)
Heating tables of different sizes in an assortment for lower uniform heating of printed circuit boards for the repair and production of printed circuit boards, as well as for reflow soldering along a thermal profile.
The holder is equipped with four rotating and retractable fastening tabs with a large tooth, as well as four tabs with a fine tooth.
Using a frame increases the convenience of working with small circuit boards, which are firmly fixed above the heater with an adjustable gap.
They can also be used for reflow soldering of solder paste along a thermal profile for single or small-scale production of printed circuit assemblies. In practice, sometimes it is necessary to solve very complex problems of heating printed circuit assemblies without room for error.
Group soldering of a thermoconductive thin-layer printed circuit board with SMD along a thermal profile using a heat table. Sometimes, to improve thermal conductivity, it is necessary to solder components with pressure under vacuum.
Most enterprises of the military-industrial complex and service centers in Russia have appreciated the functionality and high technical characteristics of TERMOPRO brand heating tables. Thermal tables of our brand have more than 15 years of proven history of production and operation.
During this time, the technology for heating and soldering boards has been honed to perfection.
Thermal tables for industrial use - durable steel case, effective thermal insulation, control unit in a separate housing, stable technical characteristics - all this is evidence of the reliability of the product, designed for a service life of more than 8 years. Additional temperature sensor - provides control of the actual temperature of the printed circuit board.
The built-in measuring channel with digital filtering increases the accuracy of temperature measurement and maintenance. Soldering and bottom heating along a thermal profile - thermal tables provide automatic soldering of printed circuit boards by reflowing solder paste along a thermal profile with the formation of a cooling zone.
Soldering is carried out by contact method with the board placed directly on the working surface of the heating table.
Feedback during the soldering process is provided by a thermal sensor installed on the printed circuit board and a special algorithm that automatically adjusts the temperature in accordance with the thermal profile.
This function is very convenient for the production of complex prototypes and small-scale soldering of printed circuit boards, significantly saving time and ensuring soldering quality at the level of conveyor reflow ovens.
Normalized uniformity of the heater's temperature field ensures heating with minimal deformation of both thin and massive printed circuit boards. High power density and effective thermal protection provide targeted heating of the boards and quick access to operating temperature. Built-in hardware and software automation ensure safe operation of the equipment.
Indispensable equipment for the repair of televisions, laptops, computers, is just as often used as equipment for the repair of automobile units, CNC machines, and, of course, wide-format bottom heating is widely used as equipment for repairing electronics. Fix Apple -The Kardi Lab. Bottom heating for smartphone boards, tablets, repair of RAM strips. Boards from SSD drives.
Drying small circuit boards and chips. RAM reball. Easy, fast and safe chip replacement. This is a prototype model, produced upon special request. The heating table of this model is produced upon prior request in batches of at least 5 sets. Adjustable frame holder of printed circuit boards RD Provides fixation and movement of a printed circuit board of any shape above the heater of thermal tables.
The air gap between the board and the heater is adjustable. FC Air Cooler Provides controlled cooling for the PCB. When soldering on a thermal profile, it ensures automatic formation of a thermal profile cooling zone by connecting to a computer via USB.
Heat screens K, K, K Closes the heater turning the thermotable into a tabletop chamber oven. Increases heating efficiency, reducing the influence of external factors on the thermal process. Hinged clamp of the PDSh thermal sensor Provides quick installation and correct orientation of the thermal sensor on the board in one movement.
Significantly speeds up the process of installing a thermal sensor, eliminating the need for the operator to glue the sensor to the board using Kapton tape.
Universal magnetic PCB holders. Magnetic printed circuit board holders are quickly installed on any NP series heating tables and provide convenient and quick fixation of printed circuit boards above the heating surface.
Provide convenient installation of the printed circuit board directly onto the flat heater. The use of these racks does not restrain the free thermal expansion of the board, preventing its deformation. The height of the racks and the air gap are selected so as to prevent spontaneous desoldering of components from the bottom side when the board heats up.
Of course, you can make a heating table with your own hands. Don't become a victim of scammers! Contact the manufacturer for spare parts! To do this, it is recommended to do the following before purchasing:.
Find out who was the first owner of the equipment, in what city and the year of manufacture of the equipment. Ask the seller for serial numbers; they are pasted on the bottom of the thermostats.
Before paying, be sure to connect the thermostats to your computer and use the Thermopro-Center application to check the pasted serial numbers; they are sometimes re-glued with electronic ones; for this, contact TERMOPRO and we will tell you how to do this.
In this case, no error messages or other warnings should appear either on the equipment display or on the computer screen.
Only then agree to pay for the purchase. Equipment directly from the Russian manufacturer. Dear Colleagues! Submit a request for equipment Order from the manufacturer directly or ask questions about equipment and cost.
Thermal table for bottom heating of miniature boards. Thermopro NP Review of bottom heating. JustNote Bottom heating for smartphones, tablets, repair of RAM strips.
Thermal table for bottom heating of boards with 6 infrared emitters Elstein - Germany.
Adjustable frame holder of printed circuit boards RD Provides fixation and movement of a printed circuit board of any shape above the heater of thermal tables. FC Air Cooler Provides controlled cooling for the PCB.
Heat screens K, K, K Closes the heater turning the thermotable into a tabletop chamber oven. Hinged clamp of the PDSh thermal sensor Provides quick installation and correct orientation of the thermal sensor on the board in one movement.
Universal magnetic printed circuit board holders Magnetic printed circuit board holders are quickly installed on any NP series heating tables and provide convenient and quick fixation of printed circuit boards above the heating surface.
Locked equipment disassembled for spare parts may also be offered. How to avoid becoming a victim of scammers? To do this, it is recommended to do the following before purchasing: 1.
TERMOPRO prevented several cases of purchase of encumbered equipment, fortunately not many people who followed our recommendations. Fundamentally excellent service. Back call.
Name of organization Dear colleagues! By clicking on the Send button you consent to the processing of your personal data.
Thermal tables of our brand have 13 years of proven history of production and operation. To speed up, prototypes and small series of complex assemblies can be soldered on hot benches.
Soldering of aluminum printed circuit assemblies for small-scale production of LED products on thermal tables of the NP series.
Preheating of printed circuit assemblies on thermostats during manual soldering and SMD repair using soldering irons and mini-hair dryers.
Professional installation and repair of complex printed circuit assemblies containing BGA chips and microcircuits with small lead pitches, as well as restoration of ball pins of BGA reball BGA chips.
Thermal tables of the NP series also include: Heating of circuit boards on radiators; Heating of ceramic components before soldering; Replacement of touch panels on smartphones and tablets; Heating of solar photocells and silicon wafers; Thermal curing of adhesives; Recycling of printed circuit boards.
On request we produce radio assembler tables with built-in bottom heating of printed circuit boards.
Price 27 rub. Price 29 rub. Price 33 rub. Price 31 rub. Price 34 rub. Price 36 rub. Price 35 rub. Price 37 rub. Price 41 rub. Price 44 rub. Price 45 rub.
Price 46 rub. Price 50 rub. Price 62 rub. Price 64 rub. Fast-acting temperature controllers.
Making an infrared soldering iron
Soldering stations operating on infrared radiation, with rare exceptions, are used to warm up a soldered processor, bridge or processor on a video card. As is known, processors do not tolerate overheating very well, and often, under intense load and poor heat dissipation, the low-temperature solder contacts are soldered away from the pad.
One of the barbaric ways to restore contact is to warm up the “body” of the processor with dosed thermal radiation. This can be done with a regular hairdryer or even an iron, but after such procedures a positive effect is achieved in one out of three cases. Therefore, DIY specialists prefer to build infrared heating soldering stations.
Manufacturing of housing and heating elements
Structurally, the soldering station consists of four main elements:
- Bottom heating block;
- Upper heating block;
- Tripod and heater control unit.
The computer motherboard is placed between the upper and lower cases so that the infrared flux from the upper heating system is directed primarily at the target - the processor case. The rest of the board is protected from heat by an aluminum plate or foil with a cut-out window for the processor.
The lower housing of the soldering station is used to create a heat shield, in other words, for additional heating of the board in order to reduce heat loss due to air convection.
Important! The whole trick of the soldering station is to make the heating not only efficient, but also controllable, that is, the case cannot be allowed to overheat, so the design uses a thermocouple and a halogen control interface.
How to build a relationship with an old lamp
If you get your hands on a rare old instrument, you should not rush to put it into operation. The same should apply to a tool that has simply not been used for a long time. It is useful to start by cleaning the outside of the lamp and inspecting it carefully. You should make sure that the control valve rotates without problems, the container lid opens and seals securely.
Before using the pump, it is useful to disassemble it and lubricate the cuff with lithol. Now we assemble the pump and check its operation, as well as the tightness of the tank. We pump air into the container without fuel. We apply a solution of water and soap with a brush to all connections and seals: air should not pass anywhere.
Before refilling an old lamp, it is useful to rinse the inside of the tank with gasoline, thus removing possible rust products. If all the pressure is maintained and the tap is working, fill the tool and get to work. Good luck to everyone and may the following video serve as a clear illustration of the above.
Reviews
Ignat, 32 years old I recently decided to order a lamp with piezo ignition Kemper 770. The device runs on gas (propane-butane), produces a flame with a temperature of up to 1750 degrees, and consumes fuel on average 140 g/h. The case is durable, made of metal. There is a comfortable two-component handle. I note the presence of gas preheating. However, the cylinder is not included in the kit.
Alexey, 29 years old For 800 rubles I bought a soldering device Caliber LP-1.5 00000022133, running on gasoline. The advantages include a large fuel tank, operating time, heating temperature up to 1100 degrees and the presence of a flame level regulator. The device weighs only 1.3 kg (packaged). Not suitable for everyday use, because... Frequent cleaning is required.
Nikita, 41 years old I spent a long time looking for a suitable soldering device for heating various objects, and in the end I bought it for 1 thousand rubles. model SPARTA 91443 with a 1.5-liter tank. The design is durable, relatively inexpensive, and suitable for almost all brands of gasoline, in addition to leaded. At the same time, it is difficult to adjust the required pressure and the cylinder is not included in the kit.
Tags
make a blowtorch blowtorch blowtorch pump blowtorch pump the whole blowtorch. used blowtorches operation of a blowtorch use a blowtorch. with a blowtorch the blowtorch its own blowtorch appear in the lamp can in the lamp rinse the lamp clean the blowtorch consists of the blowtorch will use the lamp very blowtorch. old lamps screwdriver you will need it If you need to use it needs to be washed and inspected need to check this needs to be checked Need to be checked in
gasesgastimepipeoilhealing or valvemiglooworkingbabingtonforge