How to install rivets using semi-automatic welding - Metalworker's Handbook
Electric rivets are spot welds that are made with a welding arc using a consumable or non-consumable electrode. Welding in this way is widely used in industry; it is highly productive and convenient in assembling large-sized structures, for example, when covering passenger cars.
Application
Electric rivet welding is used to:
- connect thin-sheet sheathing to frames made of rolled profiles. Since, due to the large dimensions of the structure, it is impossible to use the contact method of spot welding.
- a connection was formed from a package of elements.
- weld the studs.
How is welding done?
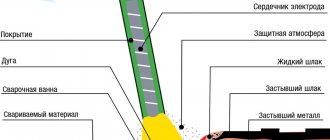
Developed by S.A. Egorov , welding with electric rivets is usually organized using a consumable steel electrode under a layer of flux. It is done in two ways.
- In the first case, the upper part is melted by a welding arc. Used when the metal sheet is thin (less than 2 mm).
- The second method is based on a pre-prepared hole, made by drilling or piercing.
The first method turned out to be more economical, when welding metal with electric rivets occurs without a hole in the upper part .
Also, welding with electric rivets can be carried out using a submerged steel electrode without pre-drilling a hole in the top sheet up to 12 mm thick. This becomes possible thanks to the use of a welding current of 4590 - 5000 A and the use of electrode wire with a diameter of 14 - 16 mm.
But still, welding parts with a thickness of more than 2 mm without a prepared hole is usually impractical. After all, then large welding currents and electrodes of large diameters are used, which ends in the formation of a very large electric rivet head, while the diameter of its rod is small.
If the elements
are more than 2 mm thick , then the need to drill or pierce a hole leads to a limitation in the scope of application of electric riveted seams.
The use of a non-consumable electrode when welding with electric rivets allows you to create seams without reinforcement, which results in a greater depth of metal penetration compared to the use of a consumable electrode.
Sheets with a thickness of 6 mm or more can be welded with a non-consumable graphite electrode using direct current, which is used in the range from 400 - 700 A. Graphite mass of grade A, produced by the Moscow Electrode Plant, is used as an electrode material.
To protect the seam during welding, you can use flux or a variety of shielding gases.
Welding technique and modes
Electric rivets are placed with or without welding wire feeding. In the first case, the wire is directed into the welding zone, the process is completed after a given amount of wire has melted.
This occurs using a time relay or mechanical interrupter. Without wire, the process is carried out as follows: during the burning of the arc, it is not supplied, since it is fixed in the current-carrying mouthpiece.
The arc continues to burn until it naturally breaks, because its length and voltage change.
The holes are melted using an electric riveter without flux, when the current is 1800 - 2000 A.
To start the process, you need to install the electric riveter in such a way that the welding wire forms an angle of 15-20 degrees , and the end of the welding wire corresponds to the center of the future point.
The result of a short burning of the arc will be the splashing of molten metal by its blow onto the edge of the hole. Excess metal is removed using a chisel and hammer.
Engineer I.I. Kakhovsky made the connection using electric rivets with manual wire feeding. In order for the wire to fall smoothly as it melts, you need to guide it and at the same time quickly turn it in both directions, making movements around its axis. Its diameter can be the same and does not depend on the diameter of the hole in the upper part.
To choose a welding mode and technique, you need to consider the following points:
- Depending on the brand of flux used, its consumption and penetration depth are determined.
- Electric rivets can come in different sizes, which is affected by the wire feed speed.
- If the flux layer is small, the electric rivets swell.
- Porosity forms in electric rivets, which can be caused by rust, scale or wet flux.
Hose semi-automatic machines are useful for efficient work , because then to penetrate the top layer you will need a significantly lower amount of welding current.
When they are used, the most important parameter of the welding mode is the arc burning time, which determines the quality of electric rivets.
Therefore, the electrical circuit of a semi-automatic device must be based on a relay in order to dose the current flow time.
If the welding mode and technique are not followed, this can lead to defects in electric riveted joints.
The reasons for their formation are:
- When welding without wire direction, unwelded edges are obtained if the hole diameter is 1-3 mm larger than the wire diameter.
- If the lower element is not welded, then this is possible at low current, if the diameter of the wire is small, with insufficient compression of the elements being connected, or weakening of the circuit contacts.
- The upper part is burned through in the event of strong compression of the welding elements or when the current is increased.
- If the welded surfaces are poorly compressed, then cracks appear in the core of the electric rivet.
- Pores form on the surface and in the cross-section of the electric rivet from the connection of elements that are not cleaned of rust, moisture, dirt, and also if wet or contaminated flux is used.
- A splash of metal on the surface or on the edges of the electric rivet occurs when flux clogged with slag crust is used or when the end of the wire or the current-carrying nozzle is clogged.
- If an insufficient amount of flux is poured into the welding zone, then swelling of the head of the electric rivet occurs.
- An electric rivet in which insufficient head height is formed is the result of a gap between the surfaces being connected.
- An electric rivet height that is too high occurs when the flux contains many small particles, as well as when the current is insufficient for a particular wire diameter.
High performance of electric riveted joints is observed under shock and alternating loads , compared to continuous seams. On thin metal, quality control can be carried out by appearance on both sides.
- Fedor Ilyich Artyomov
How to cook a semi-automatic machine correctly
- Date: 07/30/2015
- 795
- : 41
Welding with a semi-automatic welding machine is a good way to connect machine parts.
Scheme of an inverter semi-automatic welding machine.
Its advantage is that this equipment can weld both parts up to 1 mm and more than 4 mm.
How to weld a semi-automatic machine, welding methods
There are several methods:
- butt method
- overlap welding
- "electric rivet".
“Butt” technology is a type of welding in which the parts used (pipes, metal plates, etc.) are welded at all points of contact. Work occurs at high temperatures. This technology is used when only part of a part needs to be welded, for example, part of a wing.
The method has a big disadvantage for a beginner. Its essence lies in the fact that the parts must be adjusted very precisely when welding, that is, if possible, do not leave any gaps or leave only very small ones.
If the gaps are large enough, a large hole can be found at the seam site.
Among the advantages of this method are the strength of the seam (sometimes it is even stronger than the part itself) and the presence of simplifying materials (wire, electrodes). However, it will be better if the work is carried out by an experienced professional. If you need to gain experience in this type of welding, then it is better to take metal with a thickness of 2 mm. It forgives most errors and poor fit.
Semi-automatic welding panel.
In auto mechanics, it is better to use this method for working with external parts or in cases where high professional training is needed.
If you do not have enough professionalism for butt welding, then you can use the simplest method - overlap welding. In this case, the metals are completely and partially superimposed on each other and welded. The method should not cause problems for a beginner. This method is used when working with power elements or when soldering boards.
The technique of the “Electro-rivet” method is similar to spot welding, which is used in factories. The method is a variation of overlap welding, and therefore welding is also understandable to beginners.
This welding method is used in various situations - when welding sills, wings, etc.
Types of welding seams
There are several types of welding seams:
- continuous interrupted seam;
- continuous seam;
- spot stitch.
A continuous intermittent seam consists of alternating seams of the same (sometimes different) lengths and spaces between them. The length of the seams and gaps can be chosen arbitrarily (depending on the task at hand).
About rivets and welding. History of technology.
Imagine a world without welding.
Metal ships, boilers, and tanks are already being built. Yes, a lot of metal stuff. But welding does not exist. How were metal sheets fastened to each other? They riveted them together. Now imagine what kind of hemorrhoids it was (or a headache - whichever is closer). First you need to drill or punch holes in sheets of metal (a special punch was invented for this purpose). And so that they coincide micron to micron with each other. After all, the rivet must completely fill the hole. Already a task, right? This problem was also solved in a very troublesome way - first, holes of a smaller diameter than necessary were punched, then the sheets were tightened with bolts and the holes were drilled to the required diameter. Each.
Then you need to hammer rivets into these holes. First, a special person in a special brazier heats them to the required temperature (you can neither overheat nor underheat). Then the rivet is quickly pushed into the hole until it has cooled down and riveted. EVERYONE! Expensive, long, difficult. Like that.
This is how they riveted, for example, the Titanic. We spent more than three million rivets. How do you like the numbers? This is how it was built.
And this is what happened.
And now about welding.
1802 - V.V. Petrov discovered the phenomenon of a voltaic electric arc and pointed out that the appearing “white light or flame, from which these coals ignite faster or more slowly, and from which the dark peace can be quite clearly illuminated.”
1803 - V.V. Petrov published the book “News about galvanic-voltage experiments...”, where he described methods for making a voltaic column, the phenomenon of an electric arc and the possibility of its use for electric lighting, electric welding and electric soldering of metals.
1882 - N. N. Benardos invented electric welding using carbon electrodes, which he patented in Germany, France, Russia, Italy, England, the USA and other countries, calling his method “electrohephaestus”.
1888 - N. G. Slavyanov was the first in the world to put into practice arc welding with a metal (consumable) electrode under a layer of flux. In the presence of a state commission, he welded the crankshaft of a steam engine.
1893 - At the World Exhibition in Chicago, N. G. Slavyanov received a gold medal for the method of electric welding under a layer of crushed glass.
1905 - V.F. Mitkevich was the first in the world to propose the use of a three-phase arc for welding metals.
1932 - K.K. Khrenov was the first in the world in the Soviet Union to carry out arc welding under water [2].
1939 - E. O. Paton developed the technology of automatic submerged arc welding, welding fluxes and heads for automatic welding, electric welded tank turrets, and an electric welded bridge.
Can you imagine how large-scale a revolution these people made in industry?
Despite a couple of exotic names, they are all Russian engineers. Damn, I was glad to know about this!
And they used electric welding for the first time in the world, also in Russia at the Kuvaevskaya manufactory. Actually, this enterprise sold textiles. But in 1886, electric welding, invented by N. N. Benardos, was used for the first time for industrial purposes in the manufacture of cooking cubes from sheet iron.
Of course, electric welding did not immediately solve all the problems. For example, even during World War II, tank corps and turrets were cast or riveted. Here you go, the American M3 tank.
And, to round off the topic - about gas welding.
The ancestor of the gas welding machine is the Bunsen burner. It was first described in the publications of Robert Bunsen in collaboration with the English chemist Henry Roscoe in 1857. In his autobiography, Roscoe states that the burner was based on a prototype used at the Royal College of Chemistry[en] and brought by him from England to Germany[1].
However, this thing produced a low-temperature flame and its small flame was used by jewelers, doctors, chemists, etc. It had no industrial value. And only half a century later they figured out how to use a small torch to fan the furious flame of a gas welder capable of cutting and welding iron and steel.
The first oxygen-acetylene welding torch was designed by French engineers Edmond Fouché and Charles Picard, who received a German patent for it in 1903. The designs of gas welding torches they proposed have remained essentially unchanged to this day.
Industrial enterprises began using oxygen-acetylene welding in 1906, when fairly reliable designs of acetylene generators appeared.
Well, well done guys too! But ours were the first. )))
However, rivets are not forgotten now. But this is another story, connected with the peculiarities of the conditions for using riveted products. However, in most cases, welding has successfully replaced riveting and has significantly simplified and reduced the cost of manufacturing many, many metal products.
The material is taken mainly from Wikipedia. Well, and here and there some little things.
Duplicates found
Compared to welding, a riveted connection is a highly durable and durable connection. You can also get a resource for welding. Using, for example, only certain joints - avoid T-shaped and especially L-shaped seams, replacing them with overlapping joints. The bodies of construction equipment are so loved to be boiled. Take a look and you will see.
The rivet seam itself is more durable. When the seam is loosened, the rivets begin to spin in the hole, which causes aluminum dirt to appear on the aircraft skin, and it is clearly visible. Then the jumpers begin to burst, one, two, and this is also visible. You can tighten the rivets, you can replace them, you can replace them and at the same time rivet the reinforcing plate.
Seam welding
Welded metal joints are among the main methods of fastening structures used in everyday life and production. This is a very reliable method of obtaining a single design, which is also relatively cheap.
Bonds of this type are formed by melting the metal in the joint area and then crystallizing it as it cools. Their quality depends on the correct choice of operating mode of the electric welding machine, electrode, and seam penetration. This is regulated by current regulations and standards. They indicate all types of welds, as well as types of joints and their characteristics.
Numerous metals have their own welding characteristics, different work conditions, and requirements for fastening. For them, appropriate types of electric welded connections are used. When welding metal elements, the main types of electric welding fasteners are used, which are discussed below.
Classification
Welding joints are divided into several varieties, depending on their characteristics. The classification of welds covers the entire range of their uses. According to external parameters they are:
- convex type (with reinforcement);
- concave (weakened design);
- flat type (normal).
According to the type of execution, they are found in one-sided, as well as double-sided, according to the number of passes with the electrode: single-pass, double-pass. In addition, there are single-layer and double-layer welding methods.
According to their length, suture fastenings are:
- unilateral with intermittent pitch;
- solid one-sided;
- spot (with contact electric welding);
- chain double-sided;
- double-sided checkerboard pattern.
Separation by spatial location:
- horizontal, lower;
- vertical, ceiling;
- into a boat;
- semi-horizontal design;
- semi-ceiling type;
- semi-vertical.
According to the force vector:
- longitudinal (flank) – the force has a vector parallel to the penetration;
- transverse - the force acts perpendicularly;
- combined - a type of frontal, as well as flank;
- oblique - the impact occurs at an angle.
According to their purpose and function, electric welding penetrations can be durable, as well as durable and tight, hermetically sealed. Based on their width, they are distinguished into thread type, which does not exceed the diameter of the electric welding electrode rod, and widened, performed using oscillatory movements when welding in the transverse direction.
To simplify the understanding of the classification and application of certain varieties, a special table has been compiled.
All types of seams have strict designations according to GOST. The drawings use special icons that contain complete information about the type of fastening and its method of execution. For those who are thinking of seriously engaging in welding work at a professional level, they should additionally study the drawing symbols of welded fasteners.
Types of welds
Depending on the material used, thickness, and design features, different types of welds are used. To do this, you need to undergo the necessary theoretical training.
This will allow you to better understand the specifics of welding parts and avoid defects in work.
Novice welders often do not sufficiently weld the joint areas, which affects the weak mechanical resistance of the joints.
By choosing the right operating modes and types of welding, you can obtain welding seams of sufficient strength and quality. Welder training consists not only of practical training, but also of theoretical training with the study of requirements, norms and rules, as well as including the types of welding joints and equipment used.
Knowledge of the principles of using certain electric welding fasteners, the techniques for producing them, the joints will be very strong and durable.
Butt
This connection option is the most used among other types of welding seams. This butt welding is used on end sections, pipes or sheet metal structures.
To obtain it, a minimum amount of time, material and effort is spent. These butt joints have some seam features. On thin sheet metal, welding is carried out without bevel of edges.
Products with large thickness of joint sections require preliminary preparation of joints, which consists of bevelling them to increase the depth of welding penetration.
This is necessary when the thickness of metal products is over 8 mm and up to 12 mm. Thicker sections must be joined by double-sided welding with preliminary bevel of the edges.
Butt welding is most often performed on products in a horizontal plane.
T-bar
These types of electric welding connections are made like a regular letter “T”. They connect objects of the same or different thickness, which determines the width of the weld seam. In addition, these types are used single- or double-sided, which is influenced by the characteristics of the fastening.
When working with metal elements of varying thickness, the electrode is held in an inclined position at an angle of about 60 degrees. The welding process can be greatly simplified by using tacks, as well as boat welding. This method significantly reduces the occurrence of undercuts. The T-weld is applied in one welding pass.
In addition to manual arc welding, automatic electric welding machines are widely used for this type.
Overlapping
This method is used for welding sheet metal with a thickness of up to 12 mm. The areas to be joined are overlapped and welded along the joints on both sides. Do not allow moisture to enter the interior of the structure being welded. To strengthen the bond, full welding is performed around the perimeter.
With this welding, the formation of a connecting joint occurs between the end of one product and the surface of another. With this type of welding seams and connections, the consumption of materials increases, which must be taken into account in advance. Before starting work, you should align the sheet structures and ensure that they are pressed well together.
Corner
These connections include fastenings of elements made at a certain angle to each other. They are characterized by the use of preliminary bevels to ensure the best weld penetration.
This will increase the depth of the welding joint, which will increase the reliability of the structure. To enhance strength, double-sided welding of metal products is used, while gaps in the joined edges are not allowed.
Installation of an electric rivet with hole preparation
An inexperienced welder should first make electric rivets by drilling a hole in the top sheet. When welding steel 3 mm thick, its diameter should be 6-9 mm.
The electrode is applied to the bottom workpiece through a hole in the top sheet. If thin steel is used, then it should start igniting from the center, then slowly move and continue fusing the metal at the edge, moving upward in a circle. On thick metal with a large hole, you need to ignite the electrode at the edge, and when moving in a circle, sometimes move towards the center.
To get a reliable rivet, you need to follow several rules:
- To quickly heat up the lower workpiece, it is better to set the current to 110A on the welding machine.
- Place at least 2 rivets to prevent the parts being connected from being twisted out.
- Press thin workpieces tightly together to prevent burning of the top metal;
- The higher the cross-section of the metal, the larger the diameter of the hole for installing the rivet is needed.
- The rivet is installed in one go without pause. Thanks to this, all the slag will collect on top and it can be knocked down, creating a neat fungus.
Electric rivet or through-hole welding
Electric rivets are spot welds that are made with a welding arc using a consumable or non-consumable electrode. Welding in this way is widely used in industry; it is highly productive and convenient in assembling large-sized structures, for example, when covering passenger cars.
Welding body metal (part 2)
In the previous article, in which we described the choice of welding equipment and its configuration for carrying out body work, we promised that after that we would look at the methods of the main methods of welding bodywork and talk about the most popular options for joining metal by welding in this process. And this will be discussed in our article today.
Types of welds
To begin with, let's define some types of welds that are formed during welding, regardless of the method of joining the metal.
- Solid
- Continuous intermittent
- Spot
So, a continuous welding seam is here; it will be immediately clear from the name that this seam will be performed without gaps along the length. Therefore, continuous welds are not used in the car body.
This can be explained by the fact that the car body must have some "elasticity" in order to reduce the likelihood of fatigue cavities and cracks forming during its operation.
Electric rivet
Electric rivet welding is usually performed in lap, tee, and corner joints. The main difficulty in welding such joints is ensuring a tight fit of the surfaces of the parts being welded. To prevent leakage of molten flux and metal, the gap should not exceed 1 mm. Welding can be accompanied by the supply of an electrode during the welding process or without its supply until the arc naturally breaks. In the first case, conventional semi-automatic submerged arc welding machines are used, in the second case, special electric riveters are used. [46]
Welding with electric rivets occurs due to through penetration of the top sheet with a small thickness and partial penetration (to a depth of 1 5 - 2 5 mm) of the bottom sheet or flange of the frame element. To obtain a high-strength welded joint, it is necessary to have a tight fit of the surfaces of the welded elements in the places where electric rivets are installed. In addition, the surface at the welding site must be thoroughly cleaned of paint, rust, moisture and dirt. The method of fusion of the top sheet easily welds joints in which the top sheet has a thickness of up to 3 mm. For thicker top sheets, holes are pre-made at the location where electric rivets are installed. [48]
Welding with submerged arc rivets is carried out in two ways: by melting the upper part with an arc (for thin-sheet structures) and through holes pre-drilled or punched in the upper part. Here, welding with electric rivets with a consumable electrode in a COa environment is more acceptable, which provides greater penetration depths and arc stability compared to submerged arc welding, and allows for welding thicker metal. [49]
Welding with electric rivets has a number of advantages. These include, first of all, the simplicity of welding equipment. Electric riveters can be manufactured by factories that use electric rivet welding. Increased productivity when welding with electric rivets can be achieved through the use of multi-electrode installations. When welding with electric rivets, the amount of deformation of the elements being welded is sharply reduced. This in most cases eliminates the subsequent labor-intensive operation - straightening after welding. Electric rivets are more ductile than spot welds made by resistance welding. [50]
Welding with electric rivets makes it possible to connect elements of considerable thickness without requiring powerful and expensive welding machines. Due to their sufficiently high strength and ductility, electric riveted joints can successfully compete with riveted joints in many critical structures. [51]
Connections with electric rivets made with thin wire are quite strong. For example, the breaking load on a shear connection between parts 1 5 mm thick is 300 – 350 kg. [52]
Connections with electric rivets are rational when the thickness of the top sheet is no more than 5 mm. [53]
Welding with electric rivets involves the fact that the welding arc burns under a layer of flux between a stationary electrode and the product, melts the top sheet and welds it to the bottom. The arc burns to a natural break. Using this method, sheets up to 8 mm thick can be welded, and for larger thicknesses, welding is performed through a hole in the top sheet. The diameter of the hole must exceed the diameter of the electrode by at least 2–6 mm. [54]
Welding with electric rivets and spots is used to make overlapped T-, corner and butt joints on metal with a thickness of more than 0 5 mm with seams located in all spatial positions. In some cases, when welding thick metal, wire up to 0 4 mm is used in the lower position. [55]
Connections with electric rivets (Fig. 38, j) are used in lap and T-joints. Using electric rivets, strong but not tight connections are obtained. When the thickness of the top sheet is up to 6 mm, it can not be pre-drilled, but melted with an arc burning under a submerged arc or in a protective gas; in this case, non-consumable electrodes can also be used. [57]
Welding with electric rivets is used to connect thin-sheet sheathing with frames made of rolled profiles, where the large size of the structure makes it difficult to use resistance spot welding; to form connections from a package of elements; for welding studs. [59]
Welding with electric rivets with a non-consumable electrode allows you to obtain seams without reinforcement and with a greater depth of metal penetration than welding with a consumable electrode. [60]
How to install rivets using semi-automatic welding - Machine tools, welding, metalworking
Electric rivets are spot welds that are made with a welding arc using a consumable or non-consumable electrode. Welding in this way is widely used in industry; it is highly productive and convenient in assembling large-sized structures, for example, when covering passenger cars.
How to cook semi-automatically - video, features
Semi-automatic welding (MIG) is a kind of evolution of manual arc welding (MMA). Even despite the availability of MMA inverters, it is better to use MIG welding for home use. But to fully appreciate its advantages, you need to know how to cook with a semi-automatic device. In fact, there is nothing complicated about it.
Semi-automatic welding
For semi-automatic welding of metal, special wire and shielding gas are used. Gas is supplied to the torch through the welding sleeve along with the wire, protecting the weld pool from the external environment.
Electrode wire is produced in reels. Its thickness:
- 0.6 mm;
- 0.8 mm;
- 1 mm;
- 1.2 mm.
For metals thinner than 4 mm, wire 0.6-0.8 mm is used, thicker - 1-1.2 mm.
The shielding gas is carbon dioxide or a mixture of CO2 and argon. Pure carbon dioxide is cheaper - but the weld is worse and welding produces more splashes than when using a mixture with argon.
Features of semi-automatic welding:
- automatic feeding of welding wire – increases the speed and quality of welding;
- welds thin metal - the thickness of the workpiece starts from 0.5 mm;
- versatility - a semi-automatic machine welds steel, stainless steel, cast iron and non-ferrous metals;
- there is no slag on the finished welding joint;
- There is virtually no smoke during welding.
On the other hand, the semi-automatic is bulky due to the gas cylinder. In addition, in a strong wind it will not be possible to cook in a gas environment - the wind will blow carbon dioxide out from under the burner.
What you need to know about semi-automatic welding
Before cooking, you need to take into account the intricacies of the welding machine.
How to cook with a semi-automatic machine:
- the positive terminal is connected to the burner, the negative terminal to the workpiece;
- For each type of metal, a special wire is used (for aluminum, stainless steel).
- Amperage and wire feed speed are mutually related settings. The higher the current, the higher the speed and vice versa;
- The current collecting tip used on the torch must match the diameter of the wire. This part is a consumable item and therefore requires periodic replacement;
- the quality of the seam depends on the settings of the wire feeding mechanism;
- the hose feeding the wire must be rigid - otherwise it may bend and the wire feeding will stop;
- It is better to weld metal thinner than 1 mm in spots if you do not need to get a sealed seam. This way the workpiece will not overheat and burn out;
- if the network voltage is lower than rated, for example 190 rather than 220 volts, it is better to use wire of a smaller diameter. For example, instead of 0.8, take 0.6 - the machine will cope with it much easier, and the seam will turn out to be of high quality.
- For semi-automatic welding without gas, a special wire is used, and the positive terminal is connected to the workpiece.
Electric rivet
Electric rivet welding is usually performed in lap, tee, and corner joints. The main difficulty in welding such joints is ensuring a tight fit of the surfaces of the parts being welded. To prevent leakage of molten flux and metal, the gap should not exceed 1 mm. Welding can be accompanied by the supply of an electrode during the welding process or without its supply until the arc naturally breaks. In the first case, conventional semi-automatic submerged arc welding machines are used, in the second case, special electric riveters are used. [46]
Welding with electric rivets occurs due to through penetration of the top sheet with a small thickness and partial penetration (to a depth of 1 5 - 2 5 mm) of the bottom sheet or flange of the frame element. To obtain a high-strength welded joint, it is necessary to have a tight fit of the surfaces of the welded elements in the places where electric rivets are placed. In addition, the surface at the welding site must be thoroughly cleaned of paint, rust, moisture and dirt. The method of fusion of the top sheet easily welds joints in which the top sheet has a thickness of up to 3 mm. For thicker top sheets, holes are pre-made at the location where electric rivets are installed. [48]
Welding with submerged arc rivets is carried out in two ways: by melting the upper part with an arc (for thin-sheet structures) and through holes pre-drilled or punched in the upper part. Here, welding with electric rivets with a consumable electrode in a COa environment is more acceptable, which provides greater penetration depths and arc stability compared to submerged arc welding, and allows for welding thicker metal. [49]
Welding with electric rivets has a number of advantages. These include, first of all, the simplicity of welding equipment. Electric riveters can be manufactured by factories that use electric rivet welding. Increased productivity when welding with electric rivets can be achieved through the use of multi-electrode installations. When welding with electric rivets, the amount of deformation of the elements being welded is sharply reduced. In most cases, this eliminates the subsequent labor-intensive operation - straightening after welding. Electric rivets are more ductile than spot welds made by resistance welding. [50]
Welding with electric rivets makes it possible to connect elements of considerable thickness without requiring powerful and expensive welding machines. Due to their sufficiently high strength and ductility, electric riveted joints can successfully compete with riveted joints in many critical structures. [51]
Connections with electric rivets made with thin wire are quite strong. For example, the breaking load on a shear connection between parts with a thickness of 1 5 mm is 300 - 350 kg. [52]
Connections with electric rivets are rational when the thickness of the top sheet is no more than 5 mm. [53]
Welding with electric rivets involves the fact that the welding arc burns under a layer of flux between a stationary electrode and the product, melts the top sheet and welds it to the bottom. The arc burns to a natural break. Using this method, sheets up to 8 mm thick can be welded, and for larger thicknesses, welding is performed through a hole in the top sheet. The diameter of the hole must exceed the diameter of the electrode by at least 2 - 6 mm. [54]
Welding with electric rivets and spots is used to make overlapped T-, corner and butt joints on metal with a thickness of more than 0 5 mm with seams located in all spatial positions. In some cases, when welding thick metal, wire up to 0 4 mm is used in the lower position. [55]
Connections with electric rivets (Fig. 38, j) are used in lap and T-joints. Using electric rivets, strong but not tight connections are obtained. When the thickness of the top sheet is up to 6 mm, it can not be pre-drilled, but melted with an arc burning under a submerged arc or in a protective gas; in this case, non-consumable electrodes can also be used. [57]
Welding with electric rivets is used to connect thin-sheet sheathing with frames made of rolled profiles, where the large size of the structure makes it difficult to use resistance spot welding; to form connections from a package of elements; for welding studs. [59]
Welding with electric rivets with a non-consumable electrode allows you to obtain seams without reinforcement and with a greater depth of metal penetration than welding with a consumable electrode. [60]
Welding of this type is used to make lap T-, corner and butt joints on metal with a thickness of >0.5 mm with seams located in all spatial positions. When welding at currents up to 350 A, it is advisable to use wires Ø 0.8-1.4 mm; at high currents - wires Ø 1.6-2 mm. In some cases, when welding thick metal, wire up to Ø 4 mm is used in the lower position.
When welding metal with electric rivets with a thickness of >1.5 mm in the vertical and ceiling positions and a thickness of >6 mm in the bottom position, it is recommended to make holes in the top sheet. In other cases, holes are not made in the top sheet. The assembly quality requirements are usually the same as when welding long seams. The stability of the start of the process has a great influence on the quality of spot and electric rivet welding. When welding with wires up to Ø 1.6 mm, the process begins by feeding the electrode wire under voltage to the product. To improve the start of welding, the process should be started with a small electrode extension.
— When welding with spots and electric rivets, special arc ignition techniques should be used. For example, in automatic welding, it is advisable to start the process at a reduced feed speed of the electrode wire and an increased rate of current rise in the welding circuit, and after ignition of the arc, switch to the operating mode. It is important that the transition to the welding operating mode occurs after the arc is ignited. To do this, paired voltage and current sensors are inserted into the welding equipment, which send a signal to switch the welding mode.
— The depth of penetration of a point is most effectively influenced by the welding current. As it increases, the diameter and strengthening of the point increase. Welding should be performed at the maximum current allowed for a given metal thickness. Arc voltage affects the shape of the point. With insufficient tension, a depression is formed in the center of the point, and with too much tension, a tubercle is formed. The optimal voltage depends on the welding current and the diameter of the electrode. When spot welding, the penetration depth increases during the first period of arc burning. Subsequently, the penetration depth increases slightly. only the gain increases.
Welding of metal up to 2 mm thick is usually performed without changing the current during the spot welding process. In this case, by selecting the voltage, it is possible to obtain a good formation of a point with sufficient depth and width of penetration. For larger metal thicknesses, it is recommended to weld by changing the welding current. After starting point welding, the current is increased, and at the end it is decreased and at the same time the voltage is increased. This ensures deep penetration, good shape of the electric rivet and allows you to adjust the thermal cycle during welding. To increase the penetration cross-section and the strength of the electric rivet, it is recommended to perform welding with a circular movement of the electrode, and sometimes to make holes in the top sheet.
The strength of an individual point depends on the thickness of the metal and the cross-section of the electric rivet. The performance of electric riveted and point joints under alternating and shock loads is in some cases higher than joints made with continuous seams. Quality control of electric rivets on thin metal is carried out by their appearance on both sides. If the gas protection is violated, the gaps in the connection are exceeded, the sheets are heavily contaminated and rusty wire is used, pores form in electric rivets. Cracks in electric rivets and points appear mainly when welding high-carbon steels and under elevated welding conditions.
Volchenko V.N. Welding and welded materials. volume 2
Welding body metal (part 2). Welding methods | Tiberis
In the previous article, in which we described the choice of welding equipment and its configuration for carrying out body work, we promised that after that we would look at the methods of the main methods of welding bodywork and talk about the most popular options for joining metal by welding in this process. And this will be discussed in our article today.
Overlap welding
This type of welding is one of the most common and simplest methods of joining metal. In lap welding, one layer (piece) of metal is placed on top of another. It is best to use this type of welding when replacing or repairing power elements of the body - amplifiers, sills, side members.
Electric rivet or through-hole welding
This method is one of the varieties of overlap joint. It is very reminiscent of the well-known spot welding, which is used (most often) in factories or at service stations when assembling a body. This method is the easiest way to connect wings, new sills and various types of power elements.
Welding with electric rivets at home
Welding with electric rivets is usually used in production to join parts made of thin sheet metal. At home, this method is rarely used due to its complexity; more often a weld is made. Spot welding may become necessary when repairing a car body, when sheathing various structures with sheets of metal, etc. There are important tricks that you need to know when welding with electric rivets at home.
Problems associated with the incorrect choice of operating modes of a semi-automatic welding machine
These include:
Incorrect choice of welding current. If the welding current is too high, burn-through of the metal being welded is possible. Other signs of excessive welding current are the formation of a large drop of metal at the end of the wire electrode coming out of the copper tip of the welding torch.
Sometimes this drop is tightly welded to the copper tip, forming a single whole with it. When you try to start the welding machine, the wire “stands” and sometimes breaks at the outlet of the feeder, before entering the hose. Welding becomes impossible.
In this case, you need to do a number of things:
Remove the gas nozzle and file the end of the copper tip with a flat file with a medium cut. Filing is done until the wire is completely freed from the “stick” to the copper tip. Sometimes you have to cut off a significant part of the tip in order to free the wire from “captivity”.
If you don't want to waste time filing, you can unscrew the tip without paying attention to the resistance of the twisted wire. If the wire at the output of the feeder is not broken, then after replacing the tip you can continue working.
If the wire breaks, forming a loop at the entrance to the supply hose, then we proceed further: - Remove the pressure roller and use wire cutters to cut the welding wire to the entrance to the feeder. — We pull out a piece of welding wire from the hose, working in the direction from the welding torch to the reel. — Next, we insert the wire into the feed channel (how this is done is already written in previous articles), and continue working.
Incorrect adjustment of the wire pressure in the feeder As noted above, when the welding wire “sticks” in the copper tip, it breaks at the outlet of the feeder. This means that the pressure of the welding wire in the feeder is too high.
The clamp must be adjusted so that when stuck, the wire slips but does not break. The other extreme is that the pressure is too small. In these cases, it is also possible for the welding wire to get stuck in the tip, although the welding current is selected correctly. This happens because the wire feeds slower than it melts due to slippage.
Low gas consumption Welding is porous. The solution to this problem is to increase gas consumption by adjusting the reducer. It is believed that for welding wire with a diameter of 0.8 mm, the optimal gas flow rate is 8-10 liters per minute. The instructions for using household carbon dioxide semi-automatic devices may indicate other figures - for example, 2-3 liters of gas per minute. As practice has shown, such an expense is clearly not enough.

