"Drawing on foil." Non-traditional drawing techniques in kindergarten
Galina Karpova
"Drawing on foil." Non-traditional drawing techniques in kindergarten
Dear colleagues, I want to bring to your attention an unusual technique of drawing on foil .
For the lesson I needed (for each child)
:
1. A4 sheet for sketch:
2. A simple pencil, not sharpened;
3. Glue, hot from a hot-melt gun, or very thick PVA in a bottle with a “spout”
;
5. Foil (I have it for baking, size larger than A4, so that you can tuck it.
Step by step drawing steps on foil .
First we need to draw a sketch of our future picture. The children and I are working on a series of drawings under the general theme “Spring is red with flowers”
.
Therefore, without thinking for a long time, I drew tulips and daffodils .
Hand stamping technique on foil
It happens that they immediately begin to extrude a pattern without drawing up a sketch.
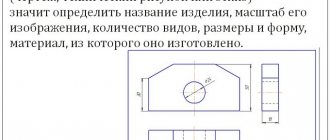
But the best thing is to first think through all the details of the drawing, sketch the future composition on a sheet of paper according to the actual dimensions. This way it will be more convenient to work out the slightest nuances and make the necessary changes to the sketch. Operating procedure:
- Prepare a patterned drawing.
- Place foil on the cloth material of the working board.
- Apply the drawing and use a pencil or fountain pen to outline the outline of the sketch. Achieve a clear drawing of the pattern on the foil. A drawing on the reverse side of the workpiece is allowed. You need to know that the convexity of the image is a mirror manifestation of what concerns the original drawing. In order to avoid this, you need to sketch on tracing paper, then turn the front side down and trace along the contour, squeezing the image onto the foil.
After this, start embossing. Before starting work, it is better to place hard rubber on which it will be more convenient to perform squeezing techniques.
- Take a ballpoint pen with a refill.
- Press grooves into the workpiece using small strokes.
- Then use an awl with a rounded end to align the grooves and connect them into a single line.
- Finish the operation and turn the workpiece over to the front side. If you look at the result obtained, you can see that the convex pattern still does not have clear contours and has not been finalized. That's why it will require separate processing.
The subsequent embossing step is performed on the front side of the form. Here it is necessary to push through the background, which will enhance the relief and give the miniature clear outlines.
- To work out the relief image, you need to take the appropriate crusher.
- Increase the pressure little by little.
- The desired embossing depth must be achieved. It is worth considering that the processing of the relief image is carried out due to stretching, and therefore thinning of the foil. It is necessary to pay attention to the fact that too thin a layer of sheet may tear.
- As you work, there is a constant need to turn the sheet over, working on both sides. Because in order for the bulge to appear from the front of the work, you need to press from the back. And, conversely, the indentation in the picture comes out if you press from the front side.
- The elaboration begins with large details and moves on to small elements.
- The processing ends with the application of the smallest strokes of the picture and the subsequent picturesque design of the background.
- Most often, it is customary to grain the background, putting a lot of pinpoint dents on it. This gives the picture a pronounced contrast.
How to organize a seamstress's workplace
The finished relief miniature, for the most part, receives one or another rigidity. But sometimes this is not enough. Sometimes, for example, it is used as a decorative cover on the cover of a book or album. This frame is very easy to crumple. To avoid bitter disappointment from wasted efforts and spoil the masterpiece, it needs to be strengthened. There are several proven recipes for this purpose.
First:
- prepare an aqueous solution of casein glue,
- add chalk or tooth powder there,
- constantly adding chalk and stirring, bring the mixture to the consistency of sour cream,
- add drying oil or oil paint.
Second:
- put paraffin and rosin in a metal bowl in a ratio of 2 parts to one,
- heat over heat until melted and stir.
Stir the prepared mixtures thoroughly before use. Pour the finished craft from the wrong side. When the solution has hardened, the picture should be fixed to the base.
Master class on the non-traditional technique of painting with foil “Autumn Tree” in an early age group
Elena Svyatoshenko
Master class on the non-traditional technique of painting with foil “Autumn Tree” in an early age group
Dear colleagues, I want to bring to your attention an unusual technique of drawing with foil .
All children love to draw . Have you ever tried drawing with foil with your children ? Try it, it’s not that difficult, and every child will get quick and beautiful results. Children perceive the whole process as magic, an exciting game with the magical effect of a picture appearing.
A wad of foil gives a beautiful, ragged texture to the print. This is suitable for drawing the crown of autumn trees .
Also, when working with this technique, fine motor skills develop. This is why we chose the imprint technique .
• Arouse interest in the drawing , which produces results.
•Introduce children to materials: paper, foil , paint. Learn to use them correctly.
• Teach children to put paint on a wad of foil (in specially prepared paint plates)
and then attach it to the Whatman paper and press it.
• Teach children to navigate on a sheet of paper.
•Teach children to distinguish colors: yellow, red, green.
• Continue to teach children to hear and listen to the teacher.
To work we will need:
3. Painting tape wide and thin (to form the outline of a tree )
.
4. Gouache (red, green, yellow)
5. 3 paint trays
6. Foil.
Cut the A1 sheet of paper in half.
Using scissors, you can adjust the tips of the branches to make them narrower. If desired, the tree can be made more branchy by adding more thin branches.
Next, prepare the paint: for each paint, take a separate plate and dilute it a little with water (if you add more water, the paint will leave an indistinct, blurry print).
We prepare foil according to the number of children, size at least 2022, so that the lumps are not too small and not too large for their small palms.
Embossing Methods
Embossing is often used by interior designers to style antique furniture. This method of decorating various items is adopted by printing companies, using expensive equipment. But if you do foiling at home, you can use available means at hand and make exclusive handmade items without any special expenses.
There are several technologies depending on the material on which the embossing is performed.
On a paper surface
Embossing on paper is not particularly difficult. It can be done in several ways:
Using a laminator is a small device that can be used at home. Industrial laminators are powerful and designed for a large flow of paper; home laminators work slower, but the quality of prints is not inferior to industrial laminators. The lamination procedure itself consists of covering the finished pattern or design with foil and another sheet of paper and carefully passing it through the laminator.- Using a household iron, if it is not possible to purchase a laminator. To do this, you need to place the sheet with the matte side facing the picture and iron it thoroughly for 2 minutes over medium heat.
Both options for foil stamping at home on paper only work if the picture was printed on a laser printer, i.e., powder paint was used to apply the image.
On metal and wood
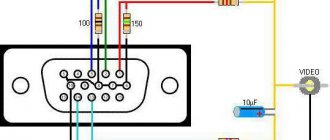
Embossing on metal and wood is a more complex procedure, which requires the preliminary production of a matrix with a finished pattern. A sheet of foil is placed on the surface to be treated, and on top of it is a lead plate for punching. The master, striking the design through the lead lining with a special tool, knocks out the desired ornament.
DIY foil painting. Master Class
How to make a picture from foil with your own hands step by step with photos
Topic: DIY gifts. Master classes DIY foil painting Master class with step-by-step photos on the topic: “Lilies” Author of the work: Lyudmila Sergeevna Kochenova, additional education teacher at the Northern Yenisei Children and Youth Center, Krasnoyarsk Territory, Severo-Yenisei State Enterprise. Description: the master class is designed for children of primary school age, as well as teachers and parents. Purpose: this work will be a wonderful gift and decoration for your home. Goal: create a decorative painting from foil with your own hands. Objectives: - introduce the technique of painting from foil; - develop imagination and creativity; — cultivate accuracy in work, striving for better results.
We will need materials and tools: - thick cardboard (preferably a box) - a sheet of A4 paper, foil - PVA glue (thick), pencil - shoe polish (shoe polish, thick so that it is not greasy), sponge. - a simple pencil, cotton swabs, hot glue, decorative braid.
Progress of the master class: We begin work by drawing a sketch on a sheet of paper. Those interested can print out a sample ready for themselves. We glue our sheet onto the base, that is, cardboard:
Then we apply PVA glue along the contour of the image, trying to ensure that the glue lines are the same thickness:
We wait until the PVA glue dries (about 20-30 minutes, depending on the composition of the glue). After the PVA glue has dried, we lubricate the entire work with regular glue (pencil):
Cover with foil. We outline the outline of our drawing with our fingers, after which we carefully press the outline of our work with cotton swabs:
After we have outlined all the boundaries of our work, using a sponge and shoe polish we shade out all the work (depending on your imagination, in some places it can be more, in others it can be lighter):
The final stage of the work will be highlighting the boundaries of our picture. We draw a cotton swab along the entire contour of the design, adding volume. Excess cream can be removed with a napkin, blotting along the image:
Our work on the painting is complete. As the cream dries, the picture can be placed in a frame or decorated with decorative braid using hot glue:
This is the picture we got:
Thank you for your attention!
We recommend watching:
DIY foil painting DIY sheep applique made from foil. Master class with photo Foil spider for children. Master class with step-by-step photos
Similar articles:
DIY foil crafts. Master class flowers