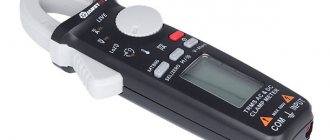
Choosing and purchasing a used car is not an easy undertaking. To prevent the buyer from being deceived, he needs to independently or with the help of specialists perform a comprehensive check of the vehicle. One of the most important conditions of the inspection is to make sure that the car was not involved in an accident. Body parts are the basis of the vehicle, and if any element was deformed, it was either replaced or restored using putty. How to use a thickness gauge when checking a car body? This is the most common question among beginners who have acquired electronic devices and intend to carry out testing activities on their own.
What is a thickness gauge
A thickness gauge is a type of electronic device whose main purpose is to measure the thickness of the paintwork on a car body. This procedure allows you to look inside under the paint and determine the depth of the metal. Devices of this type are presented in a wide variety on the modern market. They vary in size, shape, temperature range, and even the types of surfaces they can be used on.
Thickness gauges are classified according to the quality of work into budget and professional. It is recommended to choose models related to professional devices that have high accuracy, but their main drawback is their high price. Not everyone can afford such devices, so they are usually used by specialists who resell or expertly assess the quality of cars.
This is interesting! If you plan to buy a used car, and at the same time you are going to independently assess the quality of body parts, then it is better to use a professional device for assessing the thickness of the paintwork. To save on the device, it is recommended to rent it. It will cost much less than buying a professional device.
Which thickness gauge is better to choose?
A good paint thickness gauge is one that produces repeatable, consistent results and does not require frequent calibration. What is repeatability of results? What we mean is that if we place the thickness gauge in the same spot multiple times, it SHOULD give the same result EVERY TIME! That is, in no case should the resulting values “jump”.
Regarding calibration, as we said, there are devices that require calibration, while more expensive devices do not need to be calibrated for several years.
If we talk about calibration thickness gauges, then there are devices that need to be calibrated before each new measurement. More expensive ones require calibration less often. In addition, calibration thickness gauges require accuracy from the person taking the measurements. For example, the measuring sensor in such devices must be leaned against the body very carefully, otherwise the measurement result will be incorrect.
But there are models with manual calibration that will not show the measurement result if you place the sensor on the paintwork incorrectly. Needless to say, the latter type of devices is much more convenient and better.
Electronic thickness gauges also differ in the way they display the result: one device may have a display that gives the result in micrometers, while a cheaper one gives the result using just a few LEDs.
Unfortunately, we did not find any customer reviews on the websites of thickness gauge manufacturers. Therefore, before purchasing, you should read reviews about the device you choose.
Purpose of thickness gauges
A thickness gauge is the main tool of a master or expert who checks a used car when purchasing it. With its help, it is determined whether the car or its individual parts have been repainted, which is possible when carrying out body repairs after an accident. Based on the analysis, it is possible to find out which parts of the vehicle body were damaged, repainted or changed. As a result, the buyer decides whether to purchase such a car.
When the car body is damaged in an accident, after its restoration it is almost impossible to visually determine the type of defects. That is why devices are used - thickness gauges, which make it possible to determine not only the vehicle’s susceptibility to repainting, but also the nature of the damage, based on the thickness of the paint coating.
The use of devices is rational, since damage to the body cannot be eliminated without leaving a trace. It is almost impossible to apply a thin layer of paintwork to the body, as is done at the factory in paint shops. In addition to the lack of necessary equipment, the total layer of materials on the body increases when applying various components: putty and primer. With the help of paint, defective areas are smoothed and leveled, which helps to increase its layer. That is why, when checking the body for damage, devices such as thickness gauges are used to determine the thickness of the paint layer.
Purpose and principle of operation
The thickness gauge is designed for high-precision measurement of the thickness of magnetic and non-magnetic materials, as well as a separate layer of any non-metallic compound covering the metal.
If we talk about domestic use, the tool is actively used to measure the coating of a car body, which makes it possible to determine the places that have been repaired.
In this case, the thickness of the paint coating either does not correspond to the factory values, or is even applied to the putty.
In other words, anyone with a suitable thickness gauge can independently check the operational condition of the car body and find local places that have been repaired, which is especially important when buying a used car.
The device allows you to determine whether the car is damaged, and also to predict the degree of possible damage in the past, which may well affect the geometry of the body, which ultimately reduces the safety of the driver and passengers in the event of an accident.
In the professional sphere, control of paint work using thickness gauges is carried out by estimators, painters, polishers and body mechanics in car repair shops.
In the construction industry, thickness gauges are used to determine the thickness of coatings on metal structures, concrete, and pipeline elements.
The scope of its use completely depends on the operating principle of the thickness gauge:
- Electromagnetic models that measure the magnetic field density are used to determine the thickness of the coating; they are suitable for working with ferrous metals; they use the Hall effect and magnetic induction.
- Ultrasonic devices - work using ultrasonic waves, allow you to determine the thickness of most materials, especially in cases where there is access to only one side of the object being examined. Most often used for the analysis of non-metallic coatings without sectioning and cutting. Operation is based on extremely precise measurement of the time it takes for a sound pulse to pass through the part being examined. The tool is used for measurements on ceramics, steel, plastic, in principle, any material, with the exception of paper, wood, and foam.
- Eddy current options - the work uses a generated magnetic field that creates eddy currents upon contact with a conductive surface. They are used to determine the thickness of non-conductive coatings on highly conductive materials, including non-ferrous metals. The greatest accuracy is shown when measuring the coating of aluminum and copper.
- Magnetic thickness gauges use the properties of magnets and are designed to measure the thickness of powder, paint, plastic and other hard non-magnetic coatings. During the measurement process, the force of influence on the magnetic base of the permanent magnet is assessed.
To measure the thickness of paper and cardboard, and other sheet materials, such as fabric and plastic film, special stationary mechanical thickness gauges are used, which are similar in principle to dial and digital micrometers.
Control of the thickness of the wet coating, for example, when applied to parts, is carried out using special non-contact thickness gauges.
Their work is based on the active thermal shift method, which allows measurements to be taken at a distance of up to 50 cm from the surface of the coating.
Used to control the thickness of thermal spray coatings, as well as powder, polymer, organic and paint coatings.
Why you need to use a thickness gauge or the dangers of buying a car after an accident
The desire to avoid getting hit by a damaged car leads to the need to use devices such as thickness gauges. Why is it so dangerous to buy a vehicle that has been involved in an accident? There are several reasons for this:
- The body of a car that has been restored after an accident will make itself felt after some time. At the site of damage, the layer of putty often initially peels off. How quickly this happens depends on the quality of the work performed.
- At the site where the deformation is eliminated, problems also arise in the form of the formation of saffron milk caps, which are the main signs that the process of metal corrosion has begun.
- The biggest danger of buying a used car is that the nature of the damage is unknown. In case of minor accidents, deformation of body parts occurs, which, in extreme cases, can be replaced (if the putty peels off or the element rusts). If the vehicle has been in a more serious accident, then the possibility of deformation of the body geometry cannot be ruled out. It is impossible to correct the geometry of the body, and the main danger of this type of damage is that the level of safety of the car is reduced. In addition to the fact that it is unknown how the car will behave in an accident, there is also a high probability that damage to load-bearing parts may occur at any time.
Realizing the importance of the serviceability of the body on a purchased used car, almost no purchase on the secondary market is complete without the use of thickness gauges. This can be said to be a magic wand that allows the buyer to determine not only the need to purchase such a vehicle, but also its cost.
This is interesting! In 80% of cases, cars that have been in an accident are sold on the secondary market in Russia and Ukraine. If any other breakdowns of the engine, braking system or suspension can be eliminated, then the body parts must be replaced if they are deformed, and the damaged geometry of the body indicates that the car must be sent for recycling. Resellers take advantage of the fact that car repair shops can externally restore the body to ideal condition, which allows them to sell the car at its market value.
Types of thickness gauges
The following types of thickness gauges are distinguished according to design parameters:
- magnetic;
- ultrasonic;
- electromagnetic;
- eddy current
Each of them has its own characteristics, so let’s find out them in order to decide on the right choice of device.
The magnetic thickness gauge has the simplest design, and therefore is one of the most affordable devices.
It works like this:
- There is a magnet inside, the field of which varies depending on the thickness of the paint layer.
- The corresponding readings are displayed by a pointer pointer (or displayed), which deviates by the corresponding angle, occupying a position at the corresponding value of the graduated scale.
The main advantage of the device is its low price, and in addition, the devices operate without batteries (not all), which is also important. There is only one drawback - the high error of readings, so today the devices are used extremely rarely.
The electromagnetic device, unlike the previous one, is much more expensive, which is due to its higher accuracy.
One of the most important disadvantages of electromagnetic thickness gauges is that they can only be used with metal magnetic parts, i.e. It will not be possible to determine the thickness of the paint layer on plastic, wood, aluminum or other types of material.
Eddy current - unlike electromagnetic, can be used to determine the thickness of paintwork on the surfaces of non-ferrous metals.
They are characterized by high accuracy and are more expensive than the previous type of device. One of the most important disadvantages of such devices is their direct dependence on the conductive properties of the material. This means that eddy current thickness gauges accurately indicate the thickness of paintwork on aluminum, copper and other surfaces, but have a large error when working with metals.
Ultrasonic thickness gauges - they are the most accurate, but also universal, that is, they are suitable for working with various materials.
However, such features impose a major disadvantage on the devices - their high price. Such devices are usually used by specialists and craftsmen at branded service stations.
As for the cost of devices, it varies in the range from 2 to 30 thousand rubles. However, there are devices that are more expensive, but they are used exclusively by professionals in their field. If you are considering a thickness gauge for yourself, then you should not buy the most expensive models. If you don’t plan to buy the device at all, but still want to check the quality of the body parts, then you can rent the device at a price of 500 rubles per day. However, the possibility of renting a tool does not exclude the need to learn how to use it.
This is interesting! A thickness gauge is a device that belongs to the category of measuring instruments.
Having found out what types of thickness gauges there are, let’s consider the operating principle of each of them.
See all metals
Nowadays, most thickness gauges use two basic measurement principles: electromagnetic and eddy current. We won’t go into the physics of the process, but let’s just say that each of them has its own disadvantages. Electromagnetic thickness gauges are capable of assessing only the thickness of the paintwork, under which there is a ferromagnetic surface. Such a device will easily show very accurate data on steel elements, but will be powerless if the hood or wings are made of aluminum.
Eddy current devices, on the contrary, work perfectly on elements made of non-ferrous metals, but when measuring on ferrous metals, a significant error appears in the results. Of course, with the help of such a thickness gauge you can easily see the putty on a steel fender, but it’s not always possible to understand whether the paint is factory or secondary, especially if the body is completely repainted, it was done well and there is no difference in the readings on different elements.
Since modern cars regularly need to measure the thickness of paintwork on both ferrous and non-ferrous metals, engineers took a simple path and placed two types of sensors in one device: electromagnetic and eddy current. The result was a combined thickness gauge. If you see that the device is capable of taking measurements on both steel and aluminum, you can be sure that it is a combined device. But it's better to check with the seller.
Of course, there are also cheap magnetic thickness gauges on sale, the operating principle of which is based on recording the force that is required to lift the magnet from the surface. These are extremely simple devices with very limited accuracy. You will most likely see a kilogram of putty with their help, but secondary cosmetic coloring is unlikely.
In addition, there are ultrasonic devices that are extremely accurate and capable of measuring large coating thicknesses, but they are expensive and their use when choosing a car is impractical.
Therefore, the optimal choice is a combined thickness gauge. But if you choose a car from a segment in which no one has ever used and will not use non-ferrous metals in the near future, then you can save a little and purchase an electromagnetic device.
How does a thickness gauge work or what you need to know about the principle of its operation
Having understood the importance of such a device as a thickness gauge, we will pay attention to the question of the principle of its operation. Why do you need to know how the device works? A user who decides to use the device for the first time is not interested in the features of its functioning. The main thing for him is to learn how to use the device correctly in order to determine the involvement of car body parts in deformations.
If you have purchased a professional thickness gauge and are engaged in pre-sale inspection of used cars, then learning how the thickness gauge works is not only necessary, but will also be interesting. Knowing the features of its operation, it will not be difficult for a specialist to determine the presence of defects in body parts, as well as to repair the instrument.
If you are one of these craftsmen who purchased a thickness gauge and want to learn how to use it, then let’s begin to understand this issue by finding out how the device operates. To begin with, it should be noted that thickness gauges are divided into three main types based on such criteria as types of materials. For cars, devices are used that are designed to work with metal surfaces. This is the most common group of thickness gauges. In addition to them, there are also devices that allow you to determine the thickness of paintwork on alloys of non-ferrous metals, as well as on wood, plastic, etc. The need to use the second and third types arises to determine the quality of the work performed. Let us consider in detail the operating principle of each type of thickness gauge.
This is interesting! Thickness gauges come not only with a built-in working part, but also with an external one, but they are quite rare. Used for measuring in hard-to-reach places.
The best thickness gauges in price/quality ratio
The presented devices are equipped with a modern technological base that ensures fairly high measurement accuracy.
Rating of the TOP 3 best thickness gauges in terms of price and quality ratio.
CarSys DPM-816E Lite (Fe/nFe)
The CarSys DPM-816E Lite (Fe/nFe) model is a lightweight version of the popular thickness gauge with the Pro prefix; the device uses a combined measuring principle and provides high accuracy of readings.
The device has a low error and is stable when taking measurements at one point.
The device can be used at low temperatures. Its response speed does not exceed 1 second, and there is stabilization of the sensor clamping force.
The thickness gauge provides coating measurements from 0 to 2 mm.
The option to automatically detect the moment of measurement allows you to avoid false alarms. The device is equipped with an auto power off system and has two operating modes.
Specifications:
- measurement principle - combined;
- testing accuracy - 2%;
- maximum thickness - 2000 microns;
- device calibration is automatic;
- power supply - AAA batteries;
- overall dimensions - 104x43x29 mm;
- device weight - 50 g;
- Features: Auto power off, sound signal.
Advantages
- ease of use;
- affordable price;
- good accuracy;
- compact sizes.
Flaws
- lack of backlight;
- not rich equipment;
- long response.
CarSys DPM-816 PRO (Fe/nFe)
Thickness gauge CarSys DPM-816 PRO (Fe/nFe) is a professional, low-temperature-resistant model for accurate and stable measurement of metal thickness.
The device has a low response speed - the value does not exceed 1 second.
The device is equipped with a soft display backlight. Its measurement range is 0-3mm.
The device can operate at temperatures from -25 to 40 degrees.
The presented thickness gauge can automatically detect the base, recognizes galvanized surfaces, is provided with an audible signal and stabilizes the clamping force of the sensor.
Specifications:
- measurement principle - combined;
- testing accuracy - 1%;
- maximum thickness - 3000 microns;
- device calibration is automatic;
- power supply - AAA batteries;
- overall dimensions - 104x43x29 mm;
- device weight - 50 g;
- Features: Auto power off, sound signal.
Advantages
- compactness;
- affordable price;
- fast measurement;
- light weight.
Flaws
- not an ergonomic model;
- no cover included;
- rapid battery drain.
MEGEON 19200
The compact device MEGEON 19200, operating using the principle of magnetic induction, will provide fast and accurate measurement of coating thickness on ferrous or non-ferrous metal surfaces.
The equipment is equipped with an informative LCD display with current data output, and an ergonomic housing made of high-quality plastic.
The thickness gauge has a fast response time - the value is only 0.15 seconds.
The device is characterized by a wide measurement range from 0 to 1.8 mm.
The product is equipped with screen backlighting, AAA batteries and calibration films.
Specifications:
- measurement principle - magnetic-inductive;
- testing accuracy - 1%;
- maximum thickness - 1800 microns;
- device calibration - manual;
- power supply - AAA batteries;
- overall dimensions - 62×105×31 mm;
- device weight - 64 g;
- Features: continuous metering, auto power off, display backlight.
Advantages
- fast response;
- informative sound indication;
- affordable price tag;
- possibility of continuous measurement.
Flaws
- not ideal build quality;
- requires manual calibration;
- sensitive to temperature and humidity.
Operating principle of magnetic thickness gauge
Magnetic and electromagnetic devices are used to work with metals. Let's consider the operating features of electromagnetic thickness gauges, which are most in demand when working with cars.
The operating principle of electromagnetic devices is based on the creation of a magnetic field. To understand the features of this phenomenon, consider an example:
- Imagine that there is a metal sheet that is coated with paint.
- A magnet with a conductor is installed inside the device. It is the presence of a conductor in the device that separates electromagnetic devices from magnetic devices that use a dial indicator.
- The conductor is located between the magnet and the object whose paintwork thickness needs to be determined.
- At the ends of the conductor, due to the electromagnetic field, a current will be induced and a potential difference will be created. The voltage value is taken into account by a microprocessor, which recalculates it and displays the thickness of the paintwork in numbers on the display.
- To understand the operating principle of such a device, you need to know that the greater the density of paintwork on a metal plate, the less the magnitude of the created magnetic field between the conductor and the steel plate. This means that a smaller amount of electromotive force will be induced in the conductor.
- Based on the EMF value, the microprocessor will display the corresponding thickness value in microns or millimeters.
The operating principle of electromagnetic devices is not difficult to understand even for those who are not familiar with the basics of electrical engineering. It is due to the simplicity of the design that the meters are characterized by affordability, sufficient accuracy and efficiency of use.
This is interesting! An electromagnetic thickness gauge will be quite sufficient to determine the quality of paintwork on used cars.
Thickness gauge calibration
Thickness gauge calibration is the process of establishing equality between the device’s performance and the actual coating thickness, taking into account the permissible error. It is carried out before the first measurement and then at least once every 3-4 months. It is important to know that the settings may be lost more often if the device is rarely used or stored in an unheated room in winter or, conversely, at high ambient temperatures (above +28°C).
To calibrate the device, two plates are used: one is plastic, playing the role of paintwork, the second is a zero sample made of metal suitable for measurements for each specific thickness gauge.
The process looks like this:
- turn on the device;
- lay the metal plate horizontally;
- press the button intended for calibration;
- install the device on the plate, firmly, but without force, pressing the sensor to the sample;
- reset the received readings;
- place a plastic sample on a metal plate;
- take a measurement;
- Compare the obtained result with the reference value indicated on the plastic sample.
If you receive erroneous data, perform the calibration again. If the result is incorrect data or the error exceeds the standard established by the manufacturer, you should contact a store or service center for help.
Operating principle of eddy current thickness gauges for working with non-ferrous metals
If you have to work not only with metal parts, but also with surfaces made of aluminum, copper or other materials that are not magnetic, then it will not be possible to determine the thickness of the paint layer using electromagnetic devices. For this purpose, devices are used that operate on the principle of creating eddy currents, which is why they are called eddy current devices.
Let us similarly consider the operating principle of eddy current thickness gauges using the example of an aluminum plate coated with paint:
- There is an aluminum sheet, the thickness of which needs to be determined.
- To do this, the device contains two inductive coils instead of a magnet.
- The first coil is used to create vortex flows, and the second is used to record the magnitude of the magnetic field.
- Using the first coil, to which a certain amount of voltage is applied, a magnetic field is created on the surface of the plate. It is formed due to the influence of an electric field on the part.
- Eddy currents are formed on the surface of the plate due to the creation of a magnetic field.
- These currents create another magnetic field, which is detected using the second coil of the device.
Scheme of operation of eddy current thickness gauges - The greater the coating layer on the part, the lower the current output from the second coil. Due to the difference in current values on the first and second coils, the thickness of the paintwork on parts made of materials that are not magnetized is determined.
Having an idea of how vortex thickness gauges work, it will not be difficult to repair the device in the event of a malfunction.
Be careful with AliExpress
For non-professional use, you definitely don’t need a Qnix 4500 for $700-800, but it’s also not worth buying devices for $30 - more on that below.
In Belarusian stores, prices for good combined thickness gauges start at $120-130. They cost about the same on the Russian Ozon.
Most of the devices, of course, are made in China. Structurally, the same models are ordered by different suppliers and sold under their own brands. Visually identical Etari, rDevice, Profiline, etc. with different indexes can be completely identical internally. But their prices are usually the same, plus or minus. If the device looks similar, but costs three times less, it’s worth considering, because we all know that the Chinese price corresponds to the filling. Paid more and got better components, paid little and got cheaper ones.
What if you look for analogues on AliExpress? It's a good idea, you'll probably be able to find them. But you need to carefully read the characteristics and read reviews. After all, you are unlikely to like it if you receive a high-quality and accurate device, but it will show values in microinches (mils) and nothing more.
It’s not worth buying very cheap thickness gauges from Alika. Many of them are capable of displaying results only in those same microinches or fractions of a millimeter. The usual 150 microns are much clearer than 0.15 mm. And some even round up only to tenths. In the end, go figure, 0.2 mm is 155 microns or 240.
In addition, cheap devices have a large error; often they can only be used to reliably establish the presence of putty.
Cheap thickness gauge from AliExpress
In general, there is no point in chasing cheapness. If you don’t want to buy a device for $100 or more, you can rent it – there are plenty of such offers today.
Operating principle of ultrasonic thickness gauges
If it is necessary to work with different materials, then in this case preference should be given to devices whose operating principle is based on ultrasonic radiation.
Let's look at how they work below.
- The operation of such devices is based on ultrasonic sensors.
- The sensor emits signals that pass through the paintwork and reach the material itself. It can be not only wood or plastic, but also metal.
- Determination of the thickness of the paintwork is carried out due to the time difference when sending a signal and returning it back. The higher this value, the correspondingly thicker the coating layer.
Through the use of ultrasonic radiation, the thickness of the paintwork is determined with maximum accuracy. The complexity of the design negatively affects the cost of the devices.
You can learn more about the operating principle of different types of thickness gauges by watching the video below.
Now that we know what a thickness gauge is, what types of devices there are, and how they work, we can move on to consider the question of how to use this measuring tool. This is a question that all novice craftsmen ask, and thanks to the instructions below, everyone will be able to determine whether the car they are considering purchasing has been in an accident.
Device and characteristics
A modern thickness gauge is a compact electronic device consisting of a measuring unit and a sensor, which can be built-in or remote.
The latter allows you to take measurements in confined spaces or inconvenient points.
The measuring unit is housed in a housing that has both a classic rectangular shape and a shape with smooth curves, increasing ergonomics.
Also, portable devices with a built-in sensor are often pistol-shaped.
Power is supplied via a built-in battery or replaceable batteries.
On the front side of the device there is a display showing the measurement results, as well as information about the settings.
Control is carried out by buttons, usually located below the display.
In addition to portable thickness gauges, there are also stationary desktop instruments, usually used to control films and sheet materials within the laboratory.
Material
The body of the thickness gauge is usually made of impact-resistant plastic, which is often equipped with rubberized inserts that prevent the device from slipping out of your hands.
Some models are equipped with removable rubber covers that provide additional protection against accidental falls and impacts.
Mechanical models are made of metal, and probe tips are made of carbide or ceramic.
Dimensions and weight
Most portable thickness gauges are compact in size.
Their length is about 100 - 370 mm, width is about 50 - 250 mm, and similar models weigh from 60 to 500 grams, and can have horizontal and vertical display positioning.
The weight of some devices can exceed 1.5 kg, depending on the size and functionality.
As for mechanical manual versions, their length is 225 - 425 mm.
Measuring range
The measurement range of a thickness gauge directly depends on its type, the material being tested, and can vary greatly from model to model.
The units of measurement for this parameter in this case are micrometers, which are a thousandth of a millimeter, that is, 1 µm = 0.001 mm.
For portable digital models, the maximum measurable thickness does not exceed 3000 microns, which is quite enough for checking, for example, car paintwork.
As for hand-held mechanical instruments for pipes and sheet materials, their measuring range is often 0 – 10,000 µm (sometimes up to 20,000 µm).
An ultrasonic instrument can have a maximum range of up to 300,000 microns, while the minimum range is 0.1 - 1000 microns.
Measurement time in single mode is usually 3 – 5 seconds.
Accuracy, accuracy and calibration
Accuracy is one of the main parameters that you need to pay attention to when choosing a thickness gauge; it depends primarily on the type of tool.
For high-quality ultrasonic devices this value does not exceed 1%, for other types – up to 3%, depending on the measurement range.
The permissible measurement deviation for mechanical manual models averages 0.018 - 0.022 mm.
Calibration of thickness gauges is usually performed before each use.
Information on exactly how to calibrate a particular device is in the instructions, and the procedure includes 2 stages:
- Setting the value to zero.
- Correction of the accuracy of the measured parameter.
The tool often comes with calibration washers of known thickness, simulating materials that the thickness gauge supports.
These can be both non-ferrous and ferrous metals, as well as options with imitation of the paint layer of a car.
Modern professional models have automatic self-calibration.
Additional functions
Many thickness gauges are equipped with additional functionality that can expand the capabilities of the device and simplify the work with it.
The following additions are widely used:
- Built-in backlight – allows you to take measurements in low light conditions. It is often an LED flashlight to illuminate the place of contact of the built-in sensor with the material being tested.
- Large LCD display – displays clearly visible numbers, which allows you to significantly speed up your work. Ideally, it has its own backlight. It should be noted that some of the simplest models for checking a car’s paintwork have three multi-colored indicators instead of a display, which indicate the range of the paint layer thickness.
- Automatic shutdown – conserves battery power by turning off the device when it is not used for a certain period of time.
- USB port – allows you to exchange data with a PC. Some models support charging via USB.
- Memory card – significantly expands the built-in memory of the device.
- Automatic detection of base material.
- Self-calibration.
- Various auxiliary software - allows you to synchronize the thickness gauge with a PC, perform statistical processing, graphically display information, convert data into appropriate computer programs, such as Microsoft Excel.
Depending on the model, the device may be equipped with an additional sound alert, a multilingual interface, and several sensor options for working with different materials.
How to use a thickness gauge: what the calibration process is
You should start using a thickness gauge by performing a mandatory procedure called calibration. Usually, when purchasing, unscrupulous sellers assure the buyer that the device is already configured and ready for use. However, this is not always the case, and there will be nothing terrible if you do the calibration yourself before work.
To calibrate the thickness gauge, you will need to use special samples in the form of plates, which are called reference (the set contains metal and aluminum plates with a film simulating a layer of paint). Usually they are supplied with the device, but it all depends on the cost of the latter. Cheap Chinese tools may come without gauge plates. Calibration is carried out in the following cases:
- before first use;
- if the instrument is damaged;
- when the standard changes.
If you lean the device against a bare surface without paintwork, the device will show a zero value or close to it. After this, we move on to measuring the thickness of the plate with the film. If the thickness gauge shows different values (different from the reference value for the plate), then its system needs to be adjusted. In this case, you will need to perform calibration. To do this, perform the following steps:
- The calibration plate is leaned against the surface of the device with its bare surface, as shown in the photo above.
- Next, you need to click on “0”.
- Place the device against the plate with the reference film.
- After this, you should click on the button called “target”. Press and hold until the word calibration flashes on the display.
- Now, using the up and down arrows, you need to adjust the device to the appropriate values equal to the reference film.
- After this, click on the “target” again, thereby turning off the calibration mode.
- We check the correctness of the device readings.
- There is another faster way to calibrate. It is recommended to use it when the device begins to “glitch”. This method is called resetting the thickness gauge system to factory settings. In most models, to do this you need to press and hold the number “0”. This function must be indicated in the instructions for each model.
- Next, the instrument scales are installed and the reference film is checked.
This is interesting! If the device is supplied without reference plates, then you should use improvised means or order them.
Each device has a corresponding amount of error that must be taken into account. It is not recommended to purchase instruments if the error exceeds more than 15 microns. After preparing the device for operation, you can proceed to the appropriate manipulations.
GOST
For indicator wall gauges and thickness gauges with division values of 0.01 and 0.1 mm, the technical conditions are regulated by the current GOST 11358-89, for ultrasonic options GOST 28702-90 was introduced, and for radioisotope devices - GOST 18061-90.
Some thickness gauges are included in the State Register of Measuring Instruments and have appropriate metrological certificates.
This means that metrological verification rules and official technical standards have been established for such devices.
Registration in the State Register actually confirms the legality of using the instrument on the territory of the Russian Federation.
NOTE:
For coating thickness gauges included in the State Register of SI, verification is carried out once a year.
How to use a thickness gauge: a detailed description of the process
It is recommended to start checking the car body from the roof. Why is that? After all, the roof is in most cases less susceptible to damage. Having measured the thickness of the paintwork on the roof, you can take the resulting value as a reference. It is recommended to record all indicators in order to be able to compare them. At least three measurements should be taken on each part (ideally 5-8), and then the arithmetic average should be calculated. Next we move on to the measurement procedure itself:
- We turn on the device and proceed to the measurement process. Most appliances turn on and off automatically.
- To do this, you do not need to do anything except apply the device with the corresponding part to the car body.
- In this case, it is very important that there is no contamination on the surface that comes into contact with the body. The car body must also be clean, otherwise the readings will be incorrect.
The difficulty of working with a thickness gauge is that you need to determine on your own whether the body has been subjected to straightening work, as well as repainting, etc. To do this, it is important to know the following:
- When factory painted, the thickness of the paintwork ranges from 90 to 160 microns. In millimeters, this value varies from 0.09 to 0.16 mm.
- Not only does this value differ for different car models, but also for the same brand.
- If the thickness of the paintwork on a car body part exceeds the upper limit of more than 160 microns, then there is a high probability that this area or element has been straightened.
- How to find the paint standard for a specific car? To do this, we take measurements on the roof. 9 measurements are taken at different points, and if all values are approximately the same, then this paintwork layer is the reference one.
Paint thickness table for different makes and models of cars
If the paint layer on the roof is, for example, 0.1 microns, then on other parts this value should be with minor differences. During the measurement process, various signs and features may be detected, indicating the following:
- If the paint layer on a body element exceeds 50 microns, the part was most likely simply touched up due to a small scratch. There is no need to worry in this case, but it is necessary to think about the fact that there are more serious defects somewhere else. This type of car needs to be checked more thoroughly.
- Exceeding the norm by 300 microns or more indicates that the car is 100% likely to have been in an accident. Such a large discrepancy indicates the presence of a layer of putty and primer.
- If the indicators are over 1000 microns, then such a car should definitely be avoided. The reason for this is his involvement in a serious accident, in which it is possible that the geometry of the body was altered.
It is necessary to check the car body with a thickness gauge carefully, carefully and slowly. After all, it depends on how long the body of the used car you buy will last, and how safe the vehicle will be. Lack of confidence that you can do everything right can lead to purchasing a vehicle after an accident. If possible, have your vehicle inspected by a professional so you can learn how to perform this procedure later. Below is a video with instructions on how to use a thickness gauge, what you need to know about it during operation and a lot of other useful information for novice auto experts.
How to measure micron?
Micrometer (Russian designation: micron, international: µm; from the Greek μικρός “small” + μέτρον “measure, measurement”) is a submultiple unit of measurement of length in the International System of Units (SI). Equal to one millionth of a meter (10−6 meters or 10−3 millimeters): 1 µm = 0.001 mm = 0.0001 cm = 0.000001 m.
Interesting materials:
Why is the Age of Enlightenment called this? Why is BTS Fandom called ARMY? Why is the movie Boomer called that? Why is Krivoy Rog called that? Why is the St. George's ribbon called the St. George's ribbon? Why is hydra called that? Why is the hippopotamus called that? Why did Gorky leave the name at the bottom? Why does the city of Arkhangelsk have this name? Why is the city of Yoshkar Ola called that?
Popular models of thickness gauges or what to look for when choosing a device
If you plan to purchase a thickness gauge, then below is a rating of the best models that are worth paying attention to:
- ET-11P is an easy-to-use device with an error of no more than 3%. Supplied with calibration plates and 102 micron film, simulating the reference thickness of paintwork. Convenience is based on the fact that the device is designed like a pistol. The estimated price is about 9 thousand rubles.
- RGK TM-17 is a multifunctional device that comes in a convenient case. The kit includes two calibration plates and a film. The accuracy of the device is 0.1 micron in the measurement range up to 100 microns, and 1 micron in the range from 100 to 1700 microns. Allows you to take measurements not only pointwise, but also continuously. It can also be adjusted to the permissible amount of deviation. Estimated price - 9-10 thousand rubles.
- The Etari ET 600 is a compact instrument with an accuracy of up to 1.8% up to 500 microns, and 2.2% when measuring from 500 to 1500 microns. The device is equipped with 4 different plates and films for more accurate calibration. Supplied in a case, and the estimated price is 10,000 rubles.
When choosing a tool, you need to pay attention not only to functionality and capabilities, but also ease of use. The following models of thickness gauges are no less popular:
- EM-2271;
- ET-555;
- GM200.
All devices have the same methods of use, which were described in detail in the material. In conclusion, it is worth summing up and noting that such a high-precision measuring device requires proper storage. All devices are manufactured on the basis of microprocessors, so they must be stored in dry and warm rooms, avoiding exposure to moisture and other influences. Only in this case will the device serve for a long time and give correct measurement results.
Criteria for choosing a thickness gauge
Modern equipment for measuring material thickness has a built-in/remote sensor, a digital display, and autonomous power supply.
When choosing a thickness gauge, you should pay attention to a number of important parameters:
- Principle of measurement. There are several types of devices with different operating principles. Electromagnetic thickness gauges only work with magnetic metal surfaces. Eddy current devices are capable of determining the thickness of any (including non-ferrous) metal. Ultrasonic devices can measure virtually all materials, including metal, plastic and wood.
- Accuracy of readings. This parameter determines the amount of error with which the measurement is made. An error of 1-2 percent ensures sufficient measurement accuracy. Coarser instruments are used to roughly estimate the thickness of a material or coating.
- Measuring range. Modern electronic equipment allows you to work with materials up to 1800-3000 microns thick. This is enough to measure, for example, the paintwork of a car. The higher the value, the more versatile the device can be used.
- Calibration method. Devices with auto-calibration are easy to use; the user is not required to perform any complex actions. Manual calibration is in demand by professionals - it is a fairly long process using special films and entering the exact values of the measured surfaces.
- Power supply. Modern portable thickness gauges can be powered by batteries or rechargeable batteries; some models support connection with mobile devices. Rechargeable devices require periodic recharging, equipment with batteries require replacement of dead energy sources.
- Additional features. Various useful options increase the functionality of the device. This includes automatic shutdown to preserve battery charge, waterproof design to protect electronics from moisture, built-in memory to save measurement results, real-time coverage scanning and other features.
